Buenas noches a todos los que visitan mi Blog.
Bienvenidos.
Para ello vas a necesitar:

| Foami de colores y escarchado | Cartulina doble faz |
|---|---|
| Pinturas y pinceles | Tijera |
| Compás y regla | Lápiz |
| Silicón | Cuchilla |
| Dibujo o impresión | Palitos de madera |
| Plancha eléctrica |
Comencemos:
Paso 1:
Transferir el dibujo.
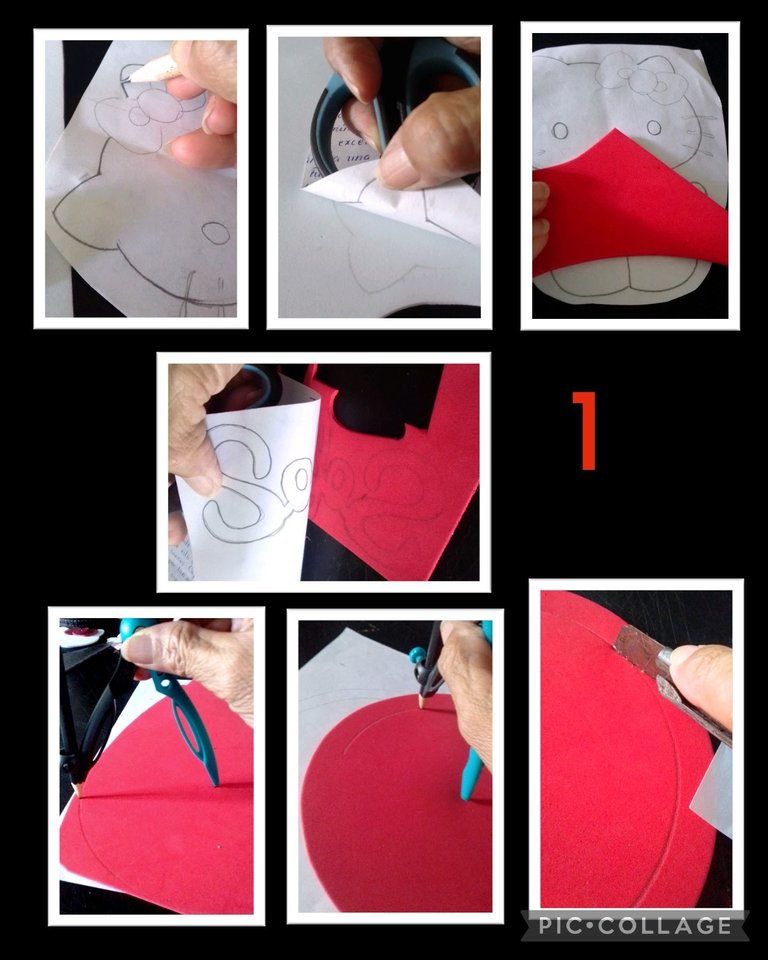
- Remarca el dibujo usando un lápiz de mina blanda, luego coloca el dibujo sobre el foami y para transferir, frota el papel con la ayuda de la tijera, esto lo harás con cada una de las piezas y en el color respectivo.
- Ahora marca con un compás un círculo del tamaño que necesites, luego recorta por todo el borde y después saca el centro haciendo un corte con la cuchilla, también puedes recortar con la tijera.
Paso 2:
Recortar y Pintar.
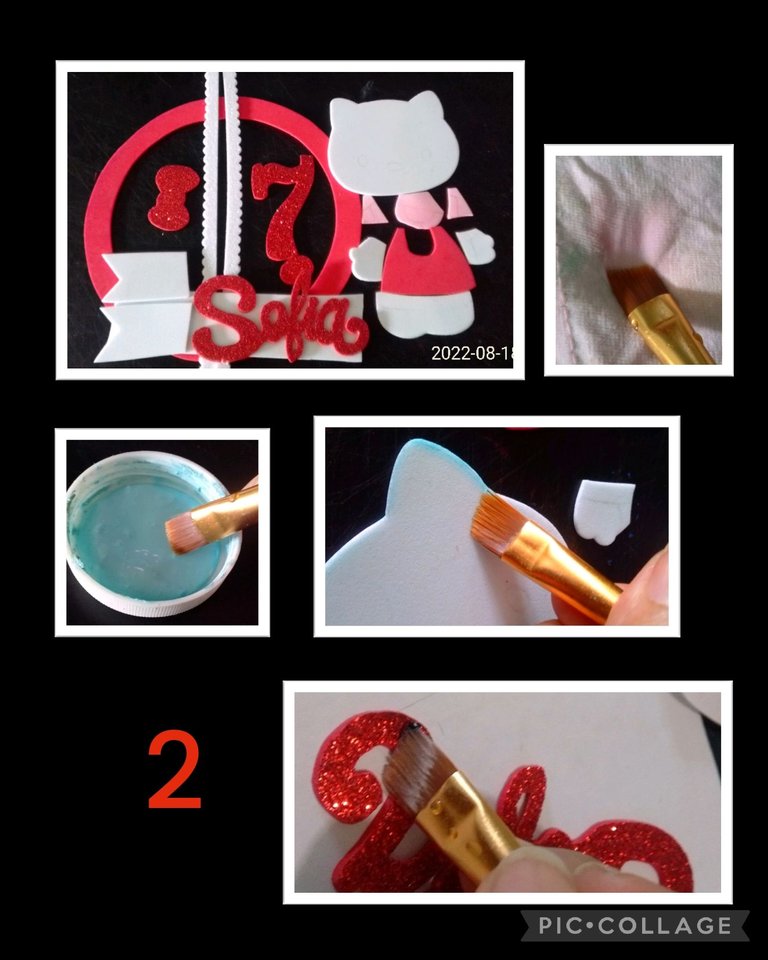
- Recorta todas las piezas y después procede a pintar, para ello vas a mojar el pincel angular en agua, pasa por un pañito para quitar el exceso, moja solo la punta del pincel en pintura y comienza a pintar por todo el contorno de las piezas. Repite el procedimiento con cada cada color.
Paso 3:
Comenzar a armar figura.
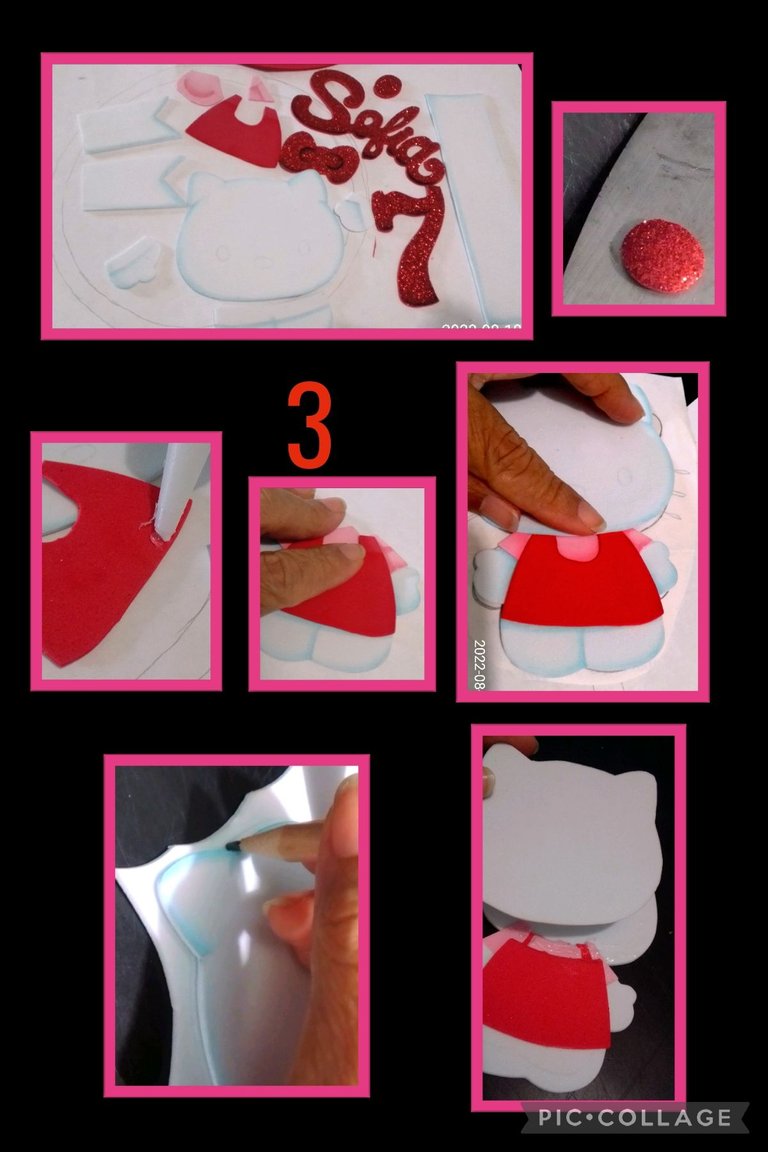
- Sombreadas o pintadas las piezas deja secar, calienta la plancha y coloca las piezas de foami que quieras termoformar o dar volumen.
- Ahora aplica silicón y comienza a pegar y armar la kitty, después que seque coloca sobre foami blanco y marca el borde y de la misma forma marca el vestido en color rojo, recorta y pega la cabeza dejando un pedacito en el centro para meter el hilo
Paso 4:
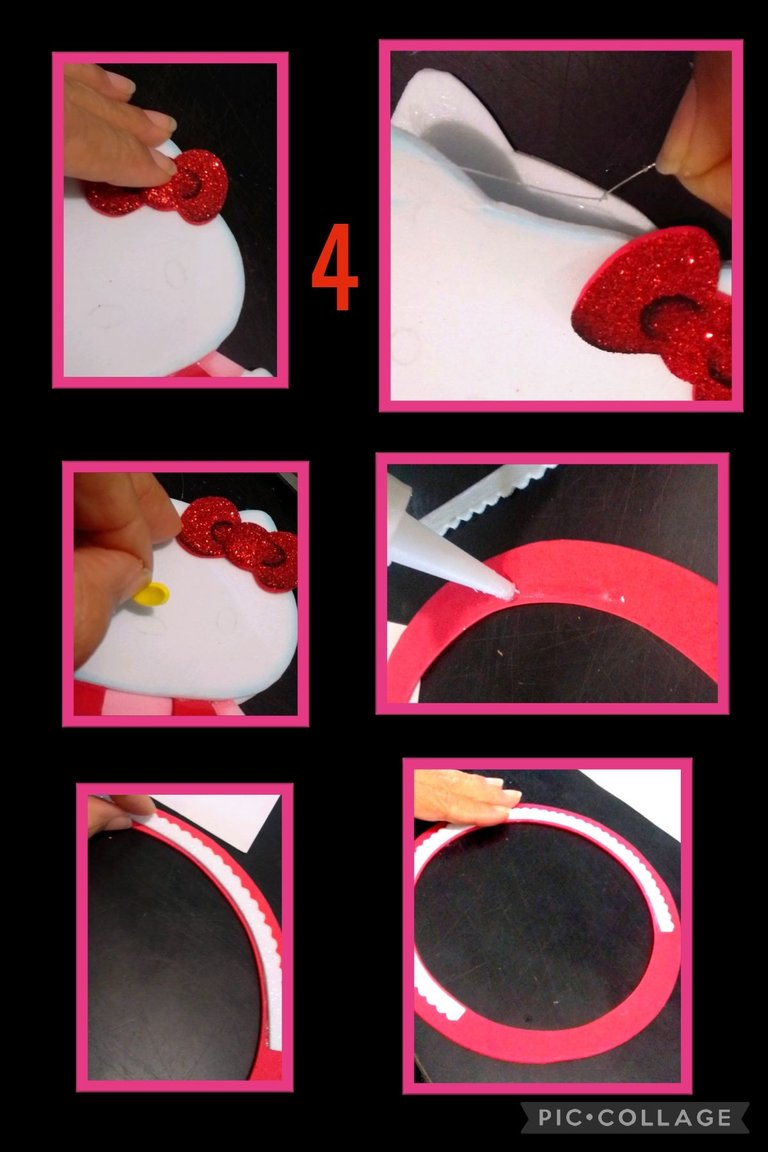
- Pega el lazo y luego aplica silicón en la parte de arriba de la cabeza e inserta el hilo de nylon para guindar y cierra haciendo presión para que se peguen ambas caras.
- Pega la nariz.
- Luego aplica silicón en el borde inferior del círculo y pega las tiras de foami blanco para decorar.
Paso 5:
Armar la estructura.
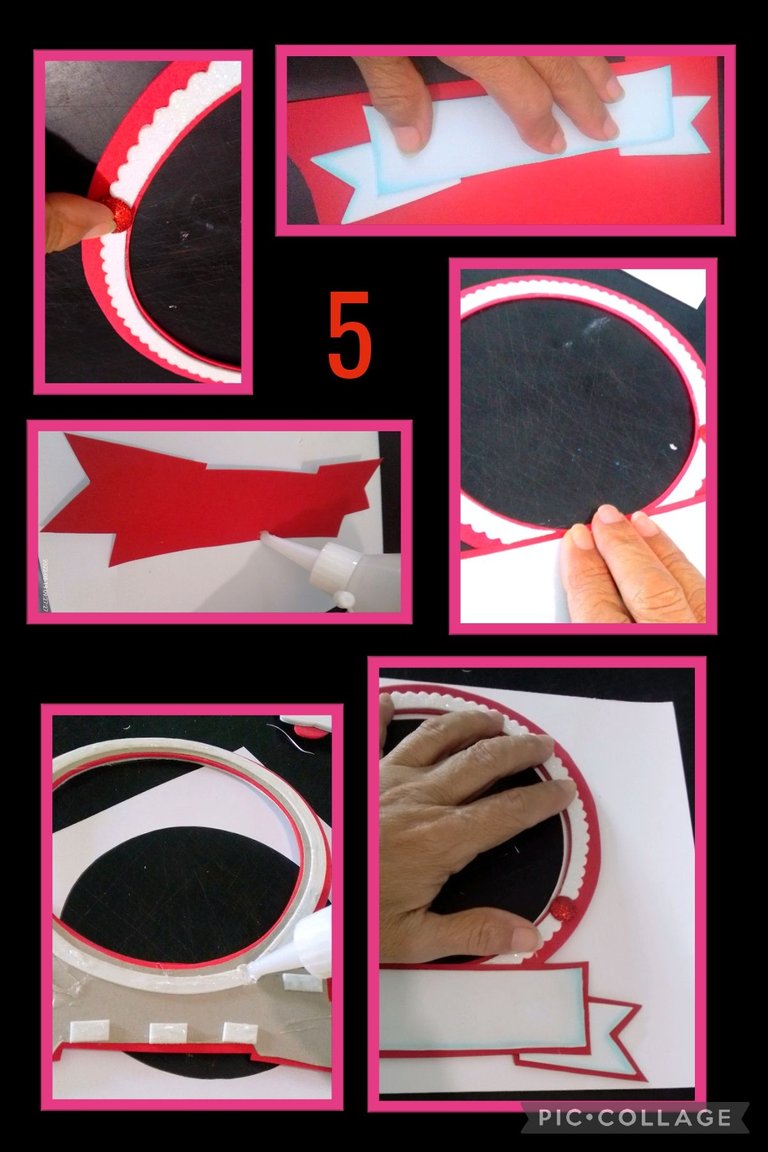
- Pegadas las tiras blancas, adorna y tapa la unión de las tiras con un circulo termoformado en ambos lados.
- Aparte pega la base del nombre sobre foami rojo y recorta dejando un borde de 2 ó 3 milímetros y luego pega en la parte inferior del círculo. (ver foto)
- Para darle firmeza al círculo marca en cartón de piñata y recorta por todo el contorno y pega a la parte trasera de este.
- Para darle volúmen recorta otras tiras de foami blanco y pega por todo el centro del círculo y por las orillas recorta pedacitos de 1 ó 2 cms y pega en la parte trasera, deja secar y aplica silicón en todos los cuadritos y la tira de foami y pega sobre la cartulina doble faz blanca y haz presión para que pegue bien y cuando seque, recorta dejando el borde de 2 ó 3 mm.
Nota: puedes marcar y sacar el centro antes de pegar.
Paso 6:
Pegar nombre y guindar figura.
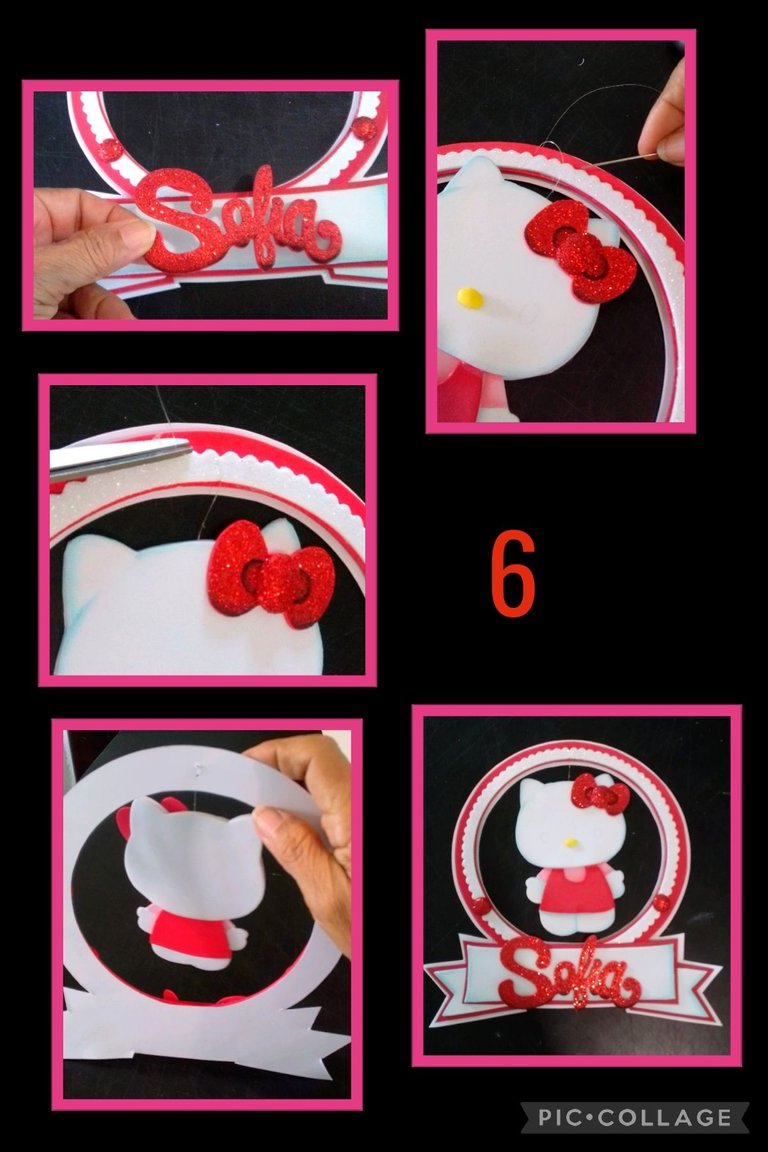
- Aplica silicón y pega el nombre del niño o niña.
- Ahora inserta el hilo de nylon de la figura en una aguja y cose haciendo dos puntadas y un nudito en el borde superior del círculo asegurando que la figura gire, luego mete el hilo por un lado del foami para esconderlo y recorta el sobrante.
Paso 7:
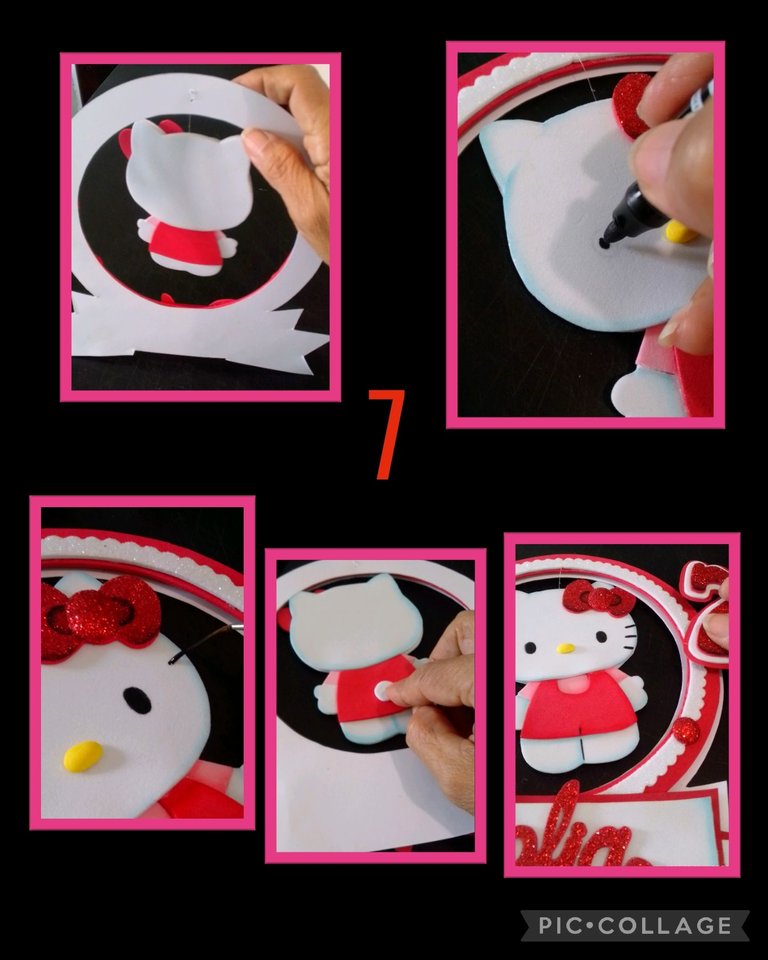
- Ya casi para terminar, pinta los ojos con marcador o pincel y delinea los bigotes, pega la colita y el nùmero 7.
Paso 8:
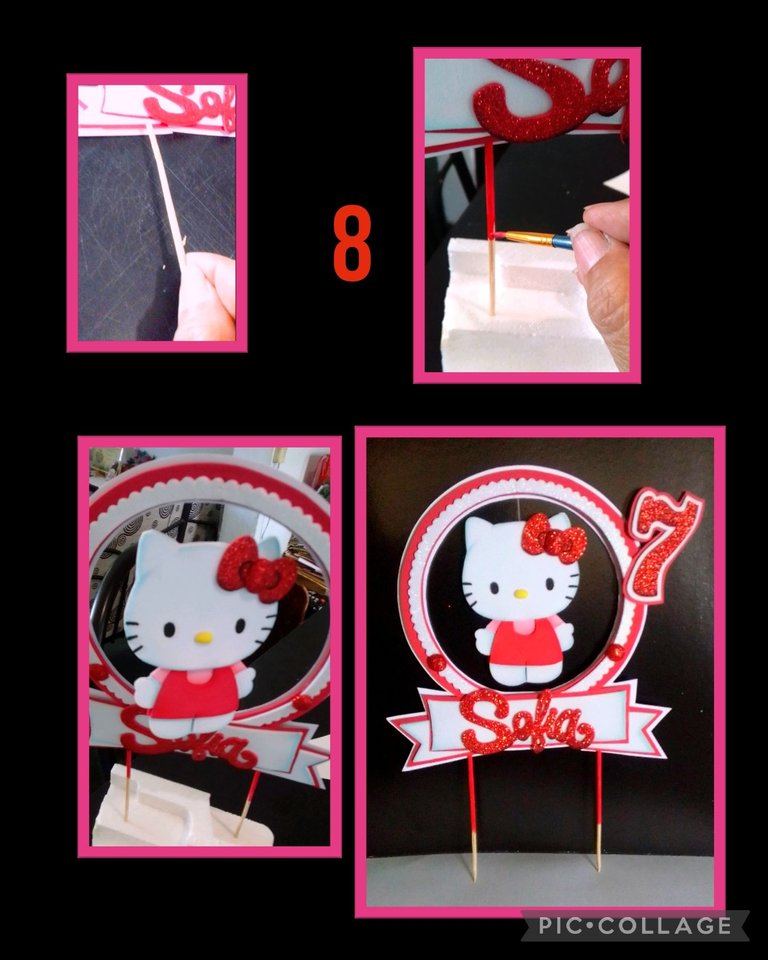
- Solo queda aplicar silicón en los palitos de madera e insertar
en la parte inferior de la base del nombre y si es de tu gusto pinta para darle un mejor acabado a tu adorno.
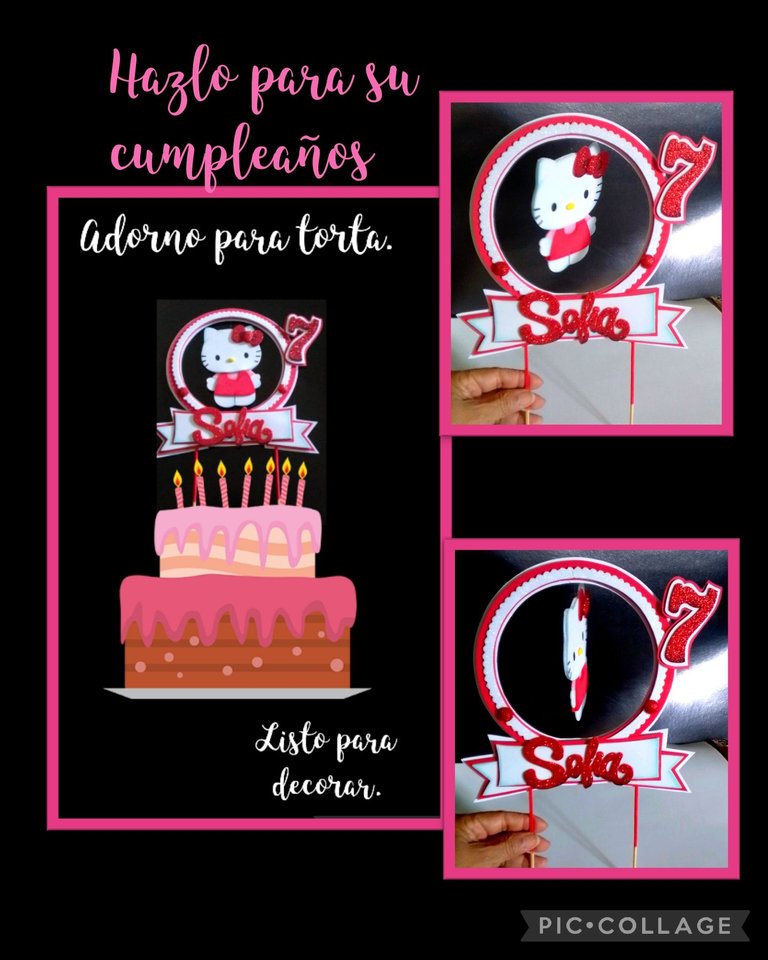
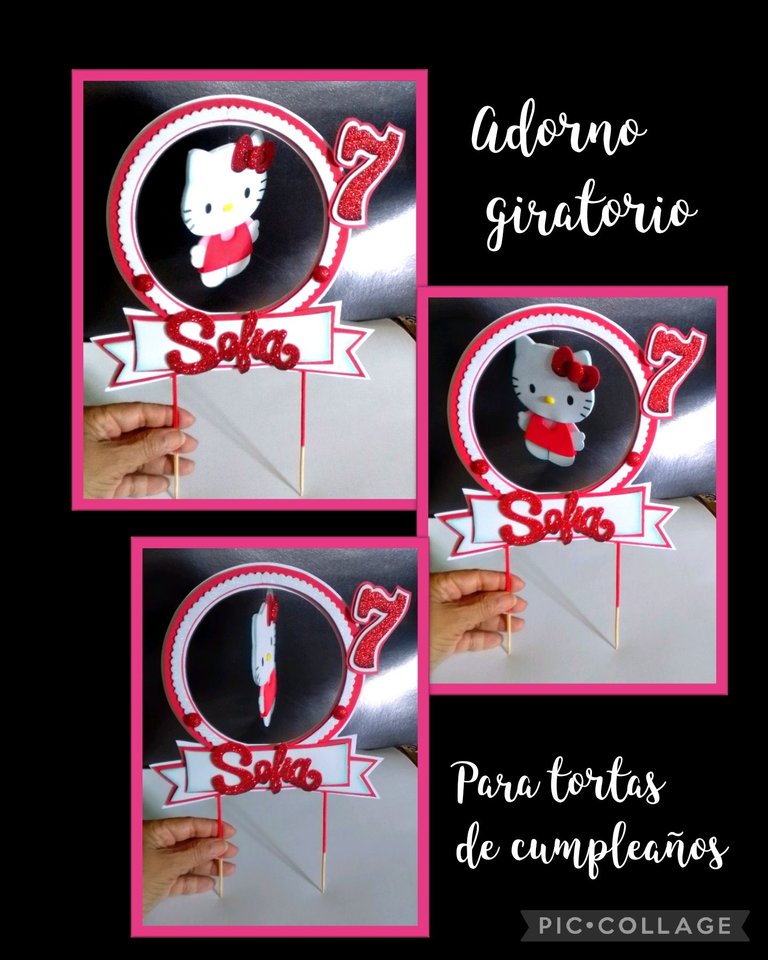
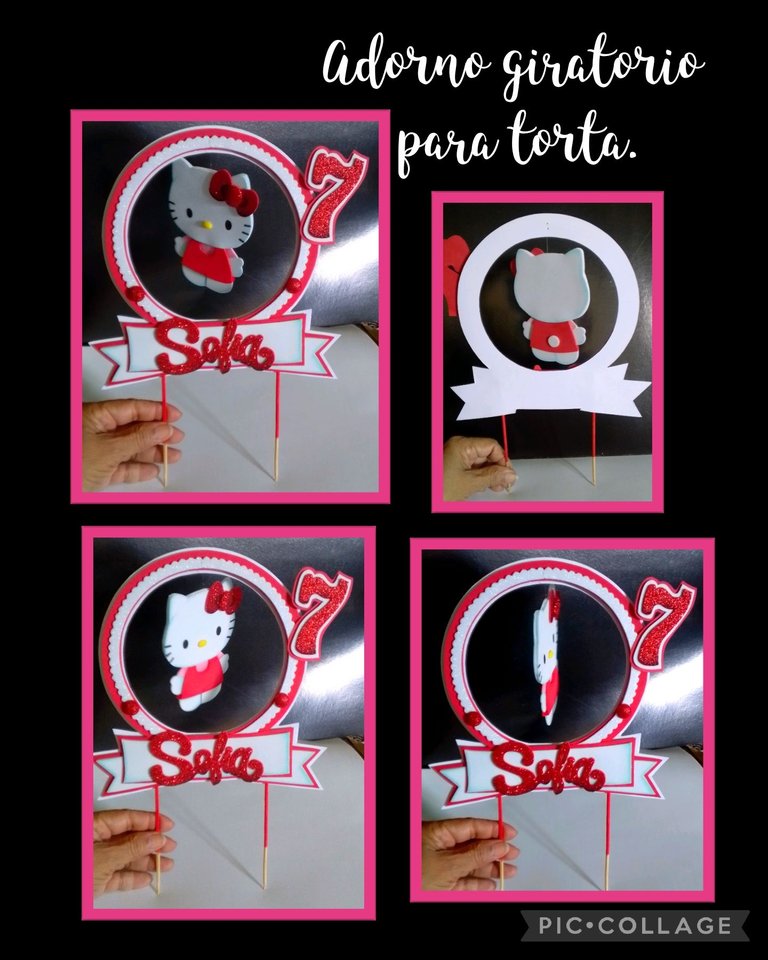
Entonces así quedó terminado este lindo adorno para torta.
Espero te guste y animes a realizar uno.
Mira que bonito queda!
Fuentes:
https://www.pinterest.com/pin/608197124647743269/
https://www.pinterest.com/pin/610167449527820188/

Me despido no sin antes mencionarles el traductor utilizado: DeepL.
Etiquetas: HTML
Fotos capturadas por mi teléfono BLU G5
Editadas con Pic Collage.
Muchas gracias por tu visita y apoyo a mi publicación.
Saludos y bendiciones.
English:
Good evening to all who visit my Blog.
Welcome to my blog.
For this you will need:

| colored and frosted Foami | double-sided cardboard |
|---|---|
| Paints and paintbrushes | Scissors |
| Compass and ruler | Pencil |
| Silicone | Blade |
| Drawing or printing | Wooden sticks |
| Electric iron |
Let's get started:
Step 1:
Transfer the drawing.

- Outline the drawing using a soft lead pencil, then place the drawing on the foami and to transfer, rub the paper with the help of the scissors, you will do this with each of the pieces and in the respective color.
- Now mark with a compass a circle of the size you need, then cut all around the edge and then remove the center by making a cut with the blade, you can also cut with the scissors.
Step 2:
Cut out and paint.

- Cut out all the pieces and then proceed to paint, for this you are going to wet the angled brush in water, pass through a tissue to remove the excess, wet only the tip of the brush in paint and start painting all around the contour of the pieces. Repeat the procedure with each color.
Step 3:
Begin to assemble the figure.

- Once the pieces are shaded or painted, let them dry, heat the iron and place the pieces of foami you want to thermoform or give volume.
- Now apply silicone and begin to glue and assemble the kitty, after it dries place on white foami and mark the edge and in the same way mark the dress in red, cut out and glue the head leaving a little piece in the center to put the thread.
Step 4:

- Glue the bow and then apply silicone on the top of the head and insert the nylon thread to hang and close by applying pressure so that both sides stick together.
- Glue the nose.
- Then apply silicone to the bottom edge of the circle and glue the white foami strips to decorate.
Step 5:
Assemble the structure.

- Once the white strips are glued, decorate and cover the junction of the strips with a thermoformed circle on both sides.
- Glue the base of the name on red foami and cut out leaving a border of 2 or 3 millimeters and then glue on the bottom of the circle (see photo).
- To give firmness to the circle mark on piñata cardboard and cut out all around and glue to the back of the circle.
- To give it volume cut other strips of white foami and glue around the center of the circle and around the edges cut small pieces of 1 or 2 cm and glue on the back, let dry and apply silicone on all the squares and the strip of foami and glue on the white double-sided cardboard and make pressure to stick well and when it dries, cut leaving the edge of 2 or 3 mm.
Note: you can mark and remove the center before gluing.
Step 6:
Glue the name and attach the figure.

- Apply silicone and glue the name of the boy or girl.
- Now insert the nylon thread of the figure in a needle and sew making two stitches and a knot at the top edge of the circle ensuring that the figure turns, then tuck the thread through one side of the foami to hide it and trim the excess.
Step 7:

- Almost finished, paint the eyes with a marker or brush and outline the whiskers, glue the tail and the number 7.
Step 8:

- All that's left is to apply silicone on the wooden sticks and insert them
and if it is to your liking, paint to give a better finish to your ornament.
So that's how this cute cake topper is finished.
I hope you like it and encourage you to make one.
Look how nice it looks!


Sources:
https://www.pinterest.com/pin/608197124647743269/
https://www.pinterest.com/pin/610167449527820188/
I say goodbye but not before mentioning the translator used: DeepL.
Tags: HTML
Photos captured by my phone BLU G5
Edited with Pic Collage.
Thank you very much for your visit and support to my publication.
Greetings and blessings.