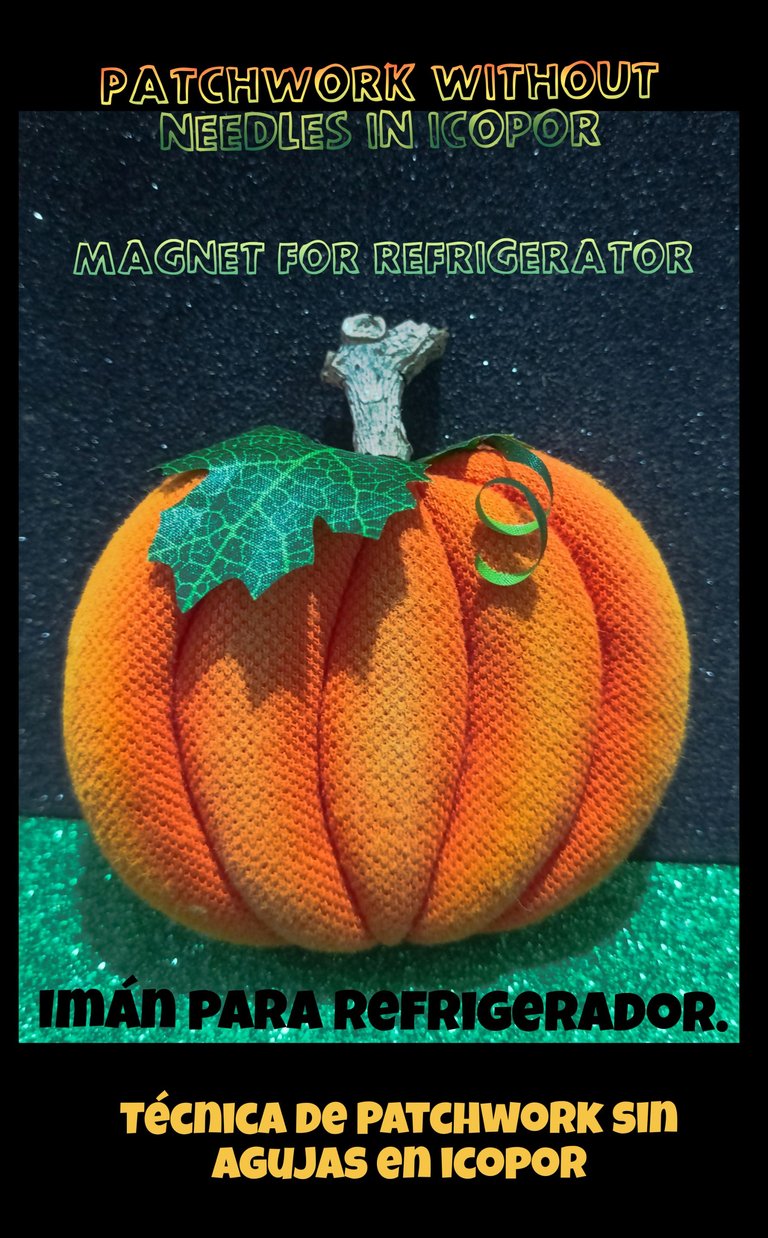
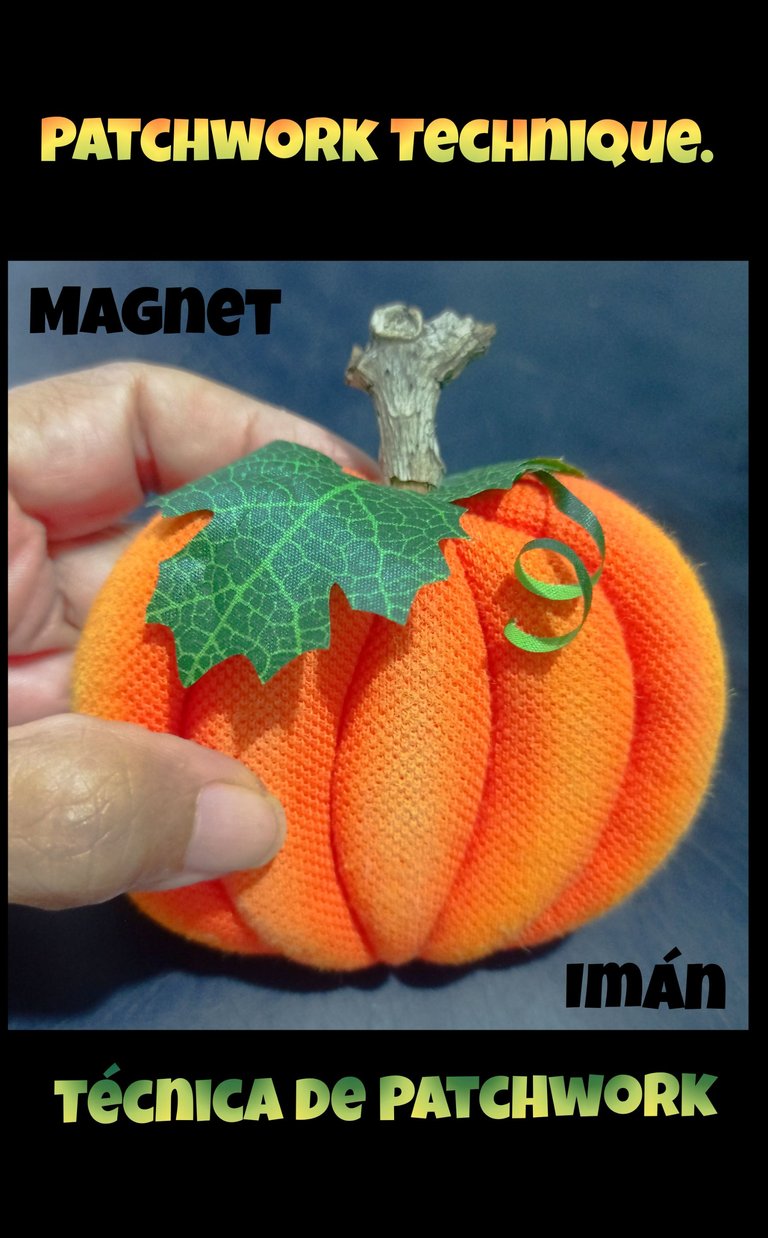
Buenas noches mis queridos amigos y creadores que me visitan.
Bienvenidos sean todos a leer y aprender de mi tutorial.
Los materiales a usar son:
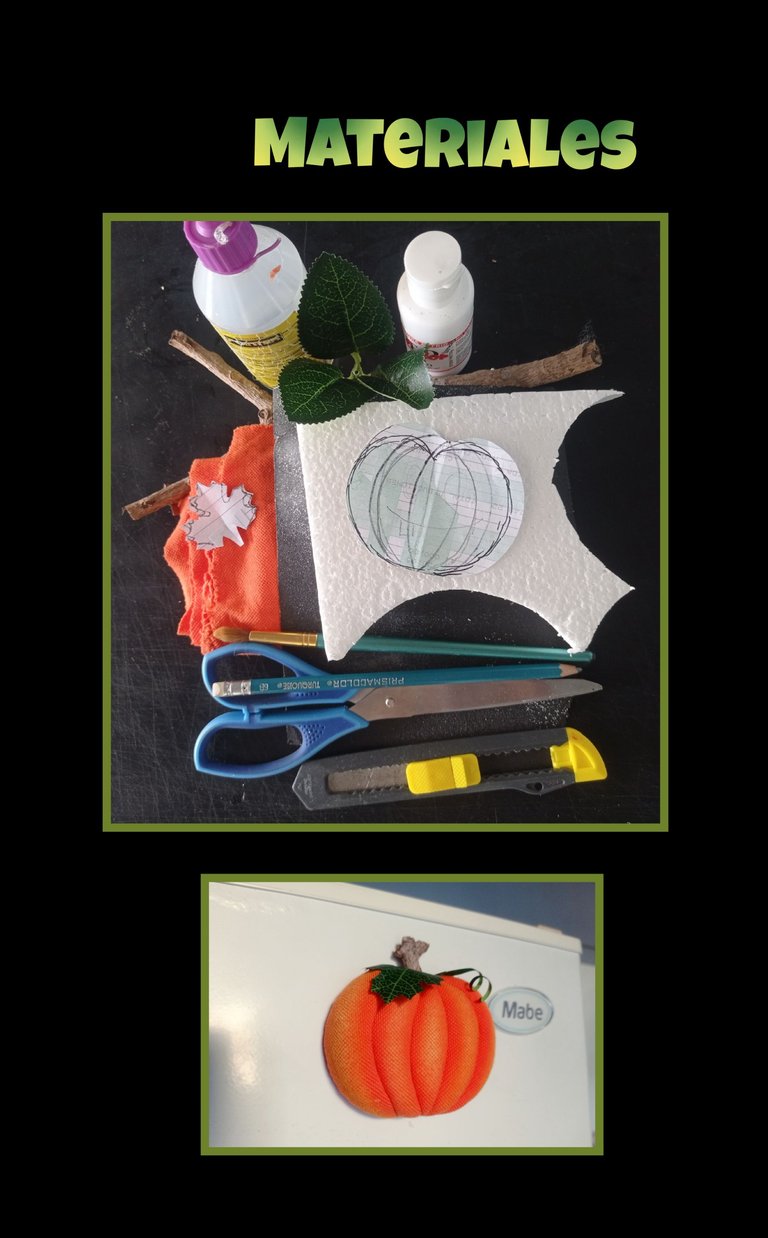
Icopor
Retazo de tela
Rama seca y hojas de tela
Pinturas y pinceles
Lija y cuchilla
Tijera y lápiz
Molde y silicón.
Imán y pinza.
Procedimiento:
Paso 1:
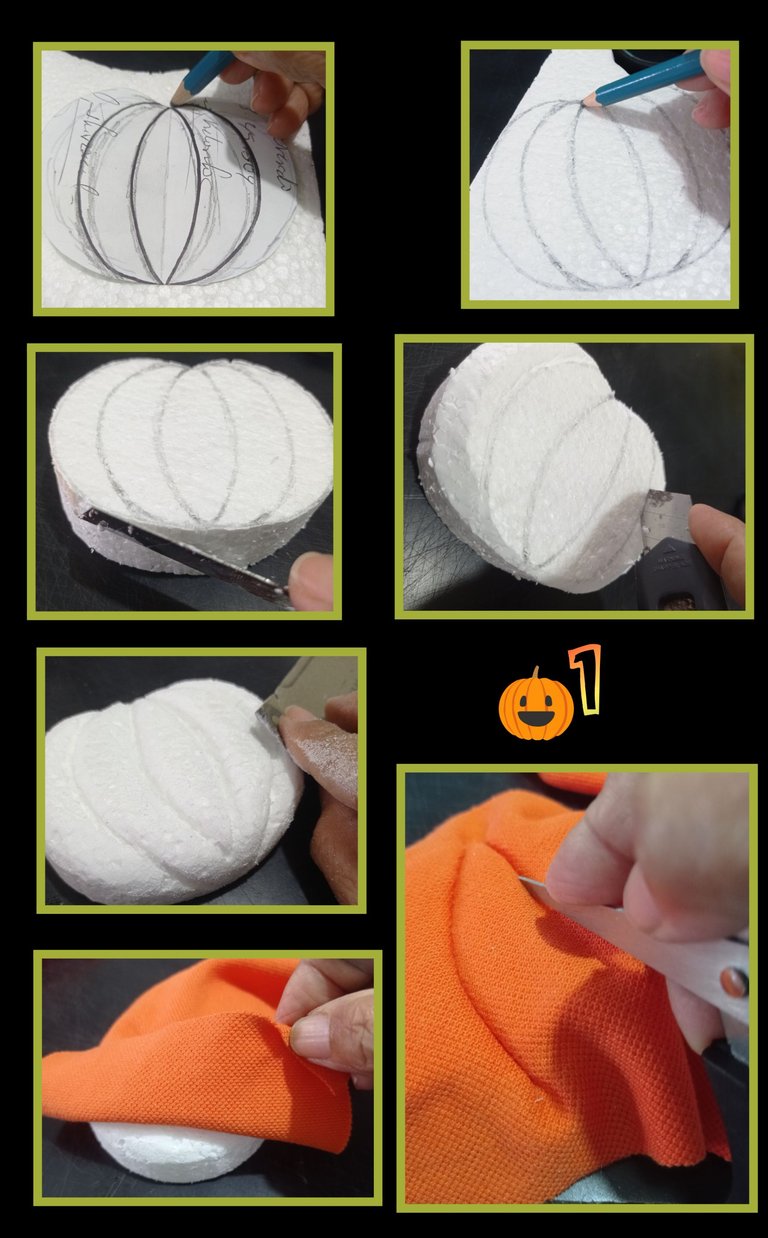
- Dibuja la forma de una calabaza sobre un papel o calca.
- Recorta por toda la orilla y luego marca sobre el icopor y luego haz las divisiones con un lápiz.
- Luego, Recorta con una cuchilla y quita el filo del icopor, después inserta aproximadamente 0,5cm de profundidad la cuchilla en las divisiones o líneas trazadas.
- También quita las orillas o filos entre cada división y con una lija rebaja y redondea las orillas.
- Ahora coloca el retazo de tela sobre la calabaza de icopor y con la punta de la tijera o una aguja gruesa comienza a insertar la tela dentro de las incisiones, también puedes aplicarle un poco de silicón para más seguridad.
Paso 2:
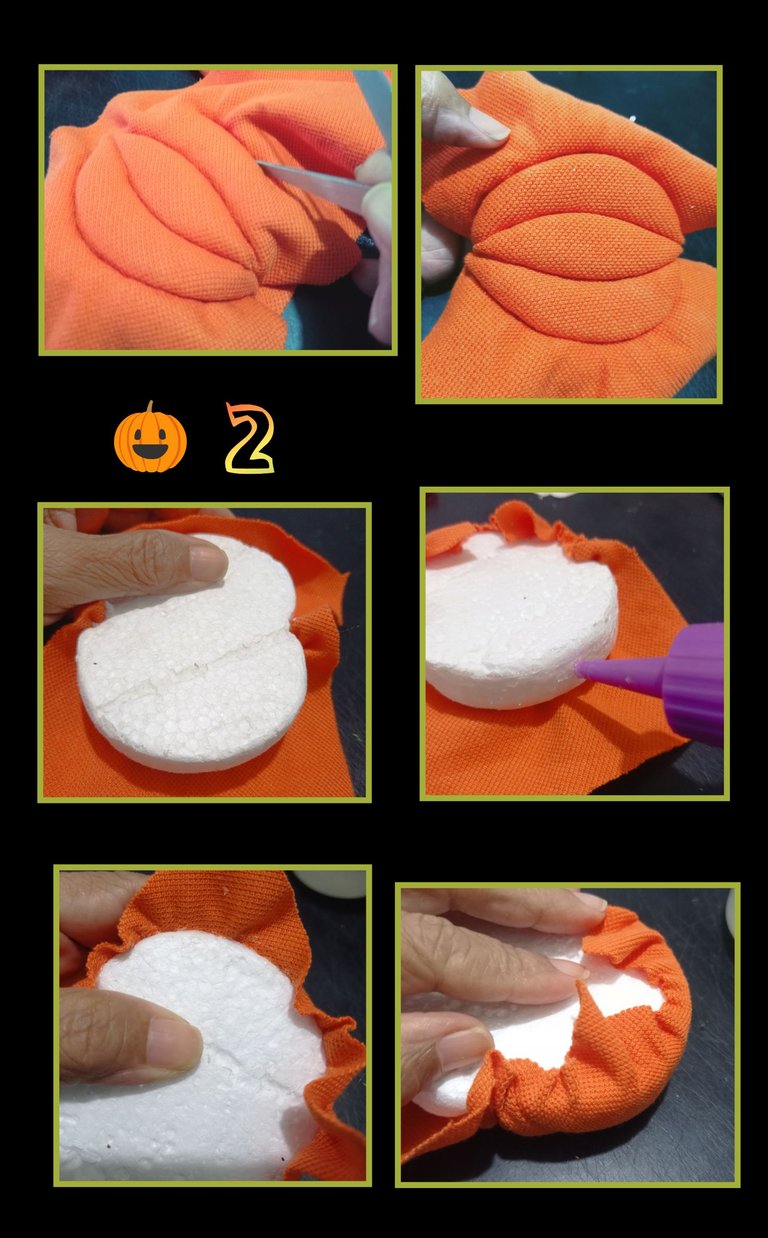
- Continúa insertando la tela en las incisiones, luego recorta el exceso de tela.
- Aplica silicón al icopor y comienza a pegar estirando un poco la tela y doblando hacia la parte trasera.
- Recorta los excesos de tela.
Paso 3:
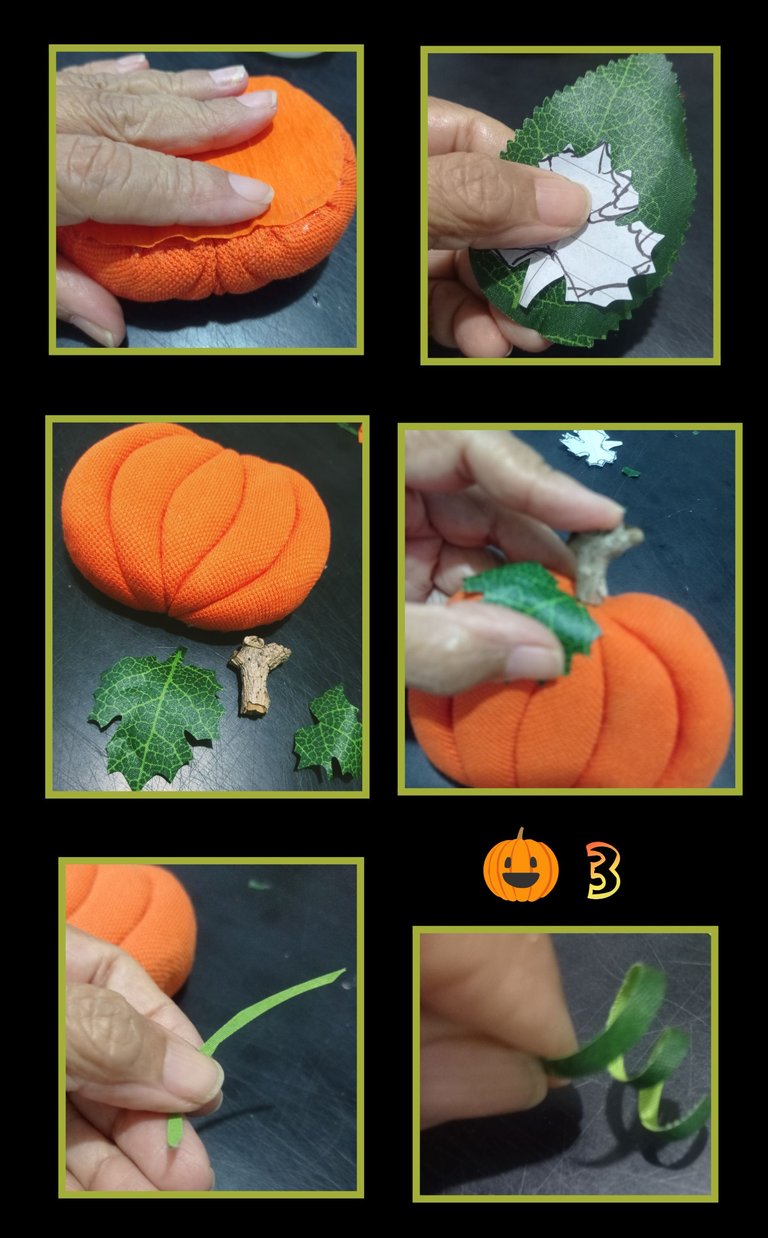
Recorta la forma de la calabaza y pega en la parte trasera para tapar imperfecciones.
Luego dibuja la hoja en papel y recorta la forma sobre la hoja de tela, recorta 2.
Ahora recorta la rama y pega en la parte de arriba de la calabaza igual pega con silicón las hojas y recorta una tirita a lo largo de una hoja y riza con la tijera haciendo un zarcillo (espiral).
Paso 4:
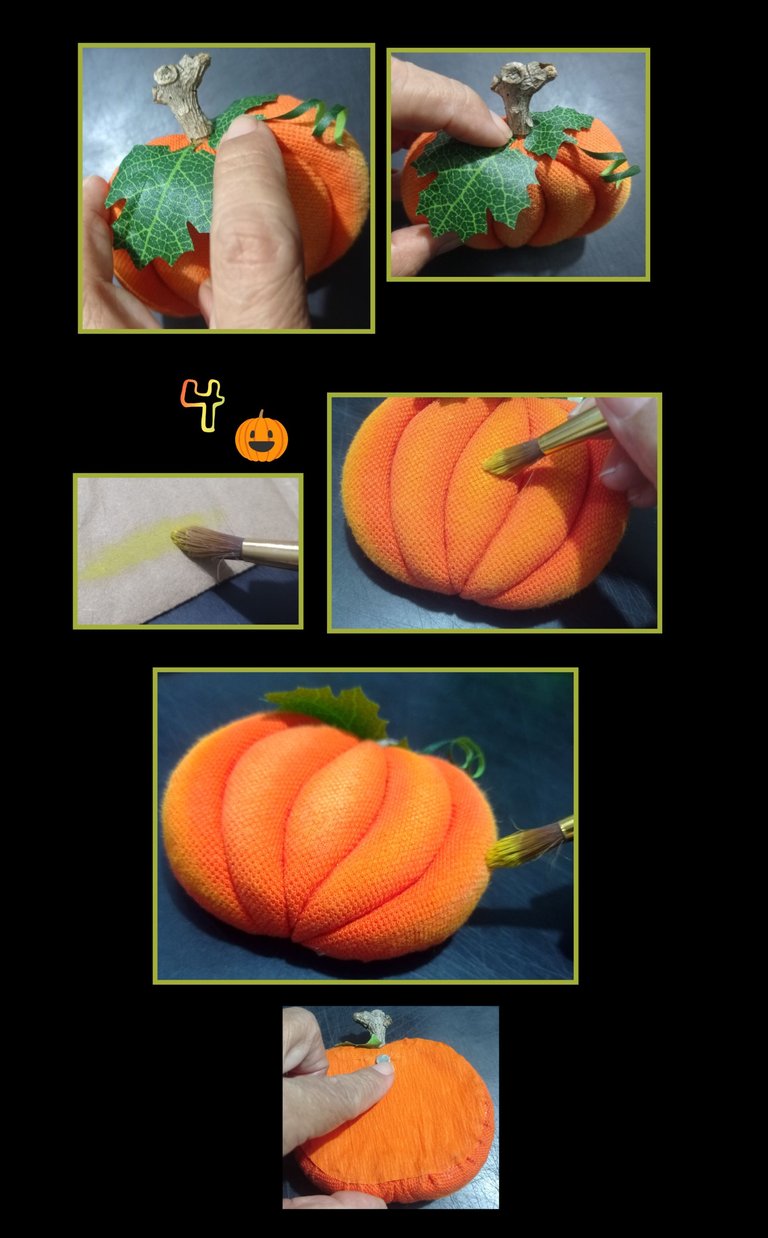
- Pega el zarcillo (espiral) y asegura que queden bien pegadas las hojas.
- Ahora con un pincel de cerdas gruesas moja en pintura amarilla, quita el exceso sobre un pedazo de cartón o tela y cuando el pincel casi esté seco, frota sobre la calabaza para aclarar y dar luz en el centro de cada división, tal como se vé en las fotos. (Esta técnica de secar el pincel pasando por un paño o cartón y luego frotar varias veces sobre una superficie se le llama Pincel seco).
- Por último aplica silicón y pega el imán.
Como puedes ver es un trabajo sencillo de realizar, solo debes tener un poco de paciencia, delicadeza y hacerlo con calma porque puedes dañar el icopor.
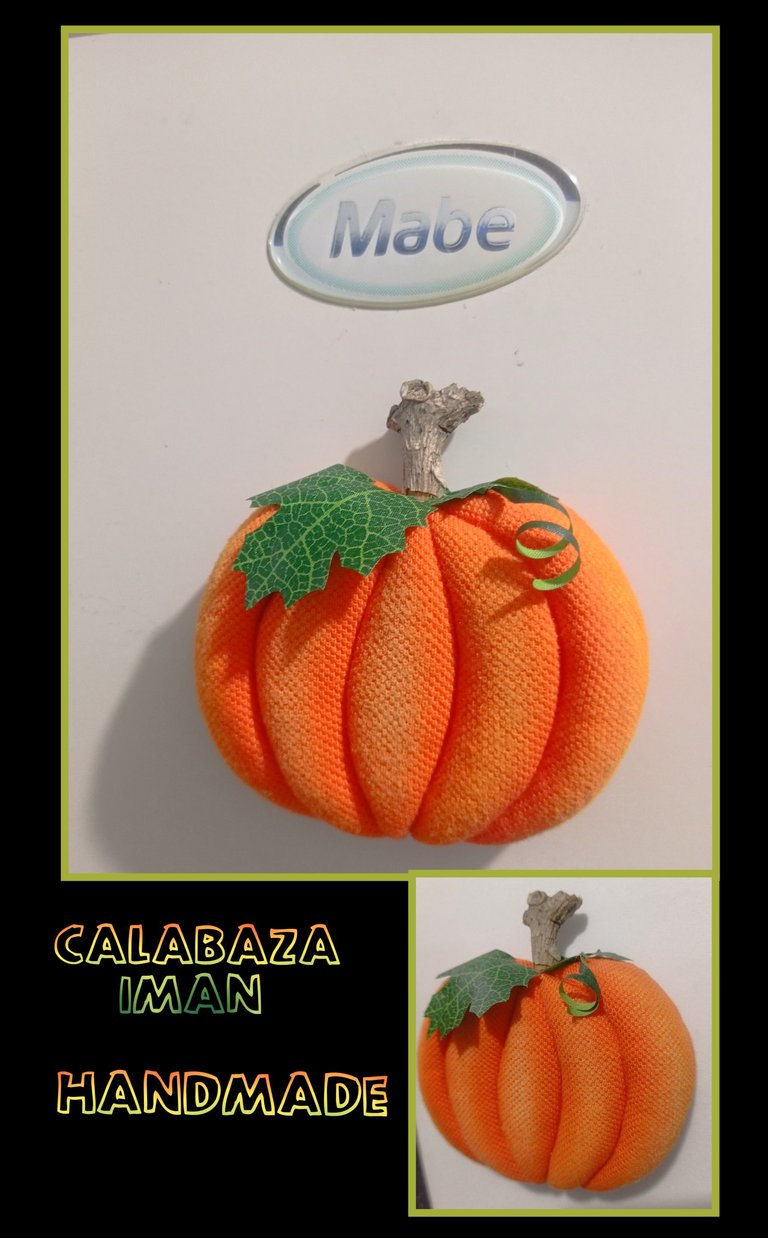
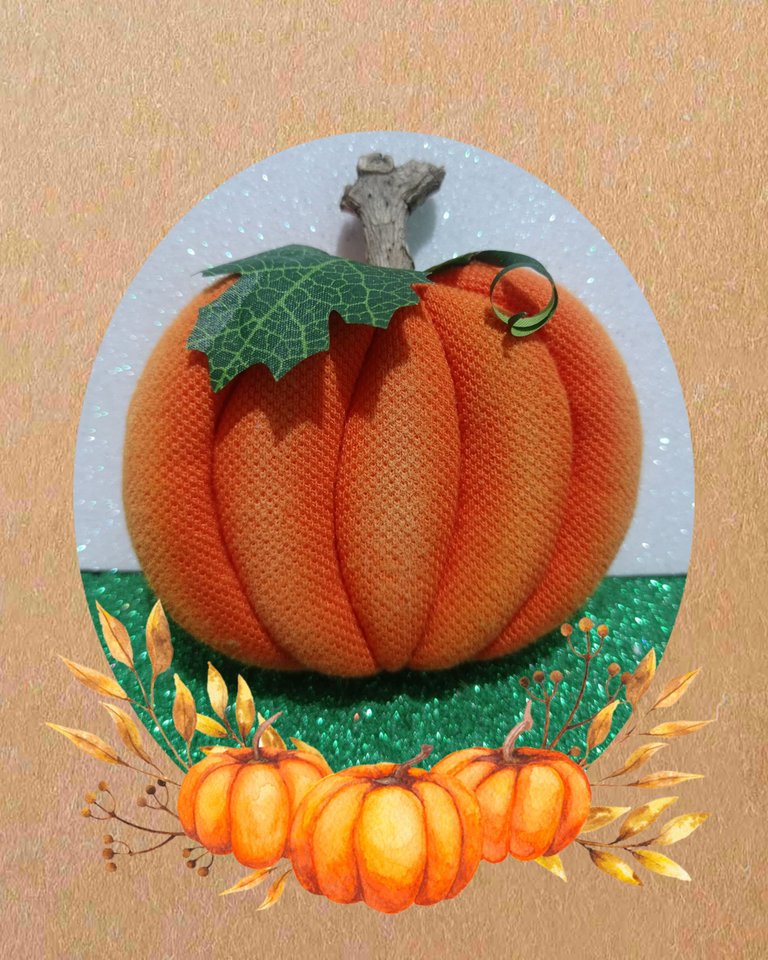
Y ahora te mostraré el resultado.

Espero te guste igual que a mí, puedes también recortar telas de distintos colores, pero en esta ocasión quise usar un solo tipo de tela, en otro tutorial te mostraré como hacerlo.
Así luce en mi refrigerador, ojalá mi tutorial te guste y te animes a realizarlo pero a tu gusto.

Teléfono Redmi Note 9
Fotos editadas con GridArt.
Y llegó la hora de la despedida, así que agradezco a todos su visita y apoyo.
Hasta mi próximo tutorial.
English
Good evening my dear friends and creators who visit me.
Welcome everyone to read and learn from my tutorial.
The materials to use are:

Icopor
Piece of fabric
Dry branch and fabric leaves
Paints and brushes
Sandpaper and blade
Scissors and pencil
Mold and silicone.
Magnet and clamp.
Procedure:
Step 1:

- Draw the shape of a pumpkin on a piece of paper or tracing paper.
- Cut out all around the edge and then mark on the foam and then make the divisions with a pencil.
- Next, cut out with a knife and remove the edge of the styrofoam, then insert the knife approximately 0.5cm deep into the traced divisions or lines.
- Also remove the edges or edges between each division and with a sandpaper, round the edges.
- Now place the piece of fabric over the icopor pumpkin and with the tip of the scissors or a thick needle begin to insert the fabric into the incisions, you can also apply a little silicone for more security.
Step 2

- Continue inserting the fabric into the incisions, then trim off the excess fabric.
- Apply silicone to the styrofoam and start gluing by stretching the fabric a little and folding towards the back.
- Trim excess fabric.
Step 3.

Cut out the pumpkin shape and glue on the back to cover imperfections.
Then draw the leaf on paper and cut out the shape onto the fabric sheet, cut out 2.
Now cut out the branch and glue on the top of the pumpkin, glue the leaves with silicone and cut a strip along the length of one leaf and curl with the scissors to make a tendril (spiral).
Step 4

- Glue the tendril (spiral) and make sure that the leaves are well glued.
- Now with a thick bristle brush dipped in yellow paint, remove the excess on a piece of cardboard or cloth and when the brush is almost dry, rub on the pumpkin to lighten and give light in the center of each division, as seen in the photos. (This technique of drying the brush passing through a cloth or cardboard and then rubbing several times on a surface is called dry brush).
- Finally apply silicone and glue the magnet.
As you can see it is a simple job to do, you just have to have a little patience, delicacy and do it calmly because you can damage the icopor.
And now I will show you the result.

I hope you like it as I do, you can also cut fabrics of different colors, but this time I wanted to use only one type of fabric, in another tutorial I will show you how to do it.
This is how it looks on my refrigerator, I hope you like my tutorial and I encourage you to do it but to your liking.


Redmi Note 9 phone
Photos edited with GridArt.
And it's time to say goodbye, so I thank you all for your visit and support.
Until my next tutorial.

