Hola, hola, queridos amigos.
Espero su inicio de semana sea de bendiciones y muy productivo para todos.
Bienvenidos sean todos!
Para este trabajo vas a utilizar:
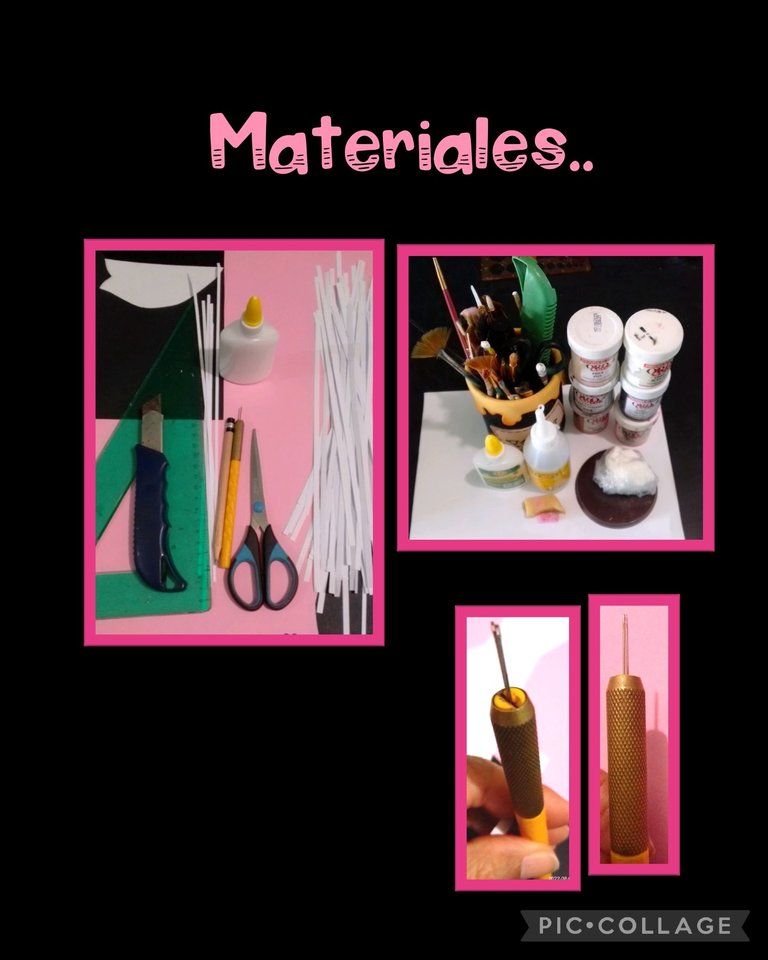
| Hojas de papel blancas | Cartulina escolar rosada |
|---|---|
| Cola blanca | Tijera |
| Cuchilla (lápiz) enrollador | agujas (2) |
| Cuchilla | Regla |
| Lápiz | tiza |
| Masa flexible | Pinturas y pinceles |
| Silicón | Base de mdf |
| Goma espuma | Palito de madera |
| Trocito de anime | Lija |
| Círculo de cartón y cartulina blanca |
Comencemos:
Paso 1:
Gorrito y cuerpo:
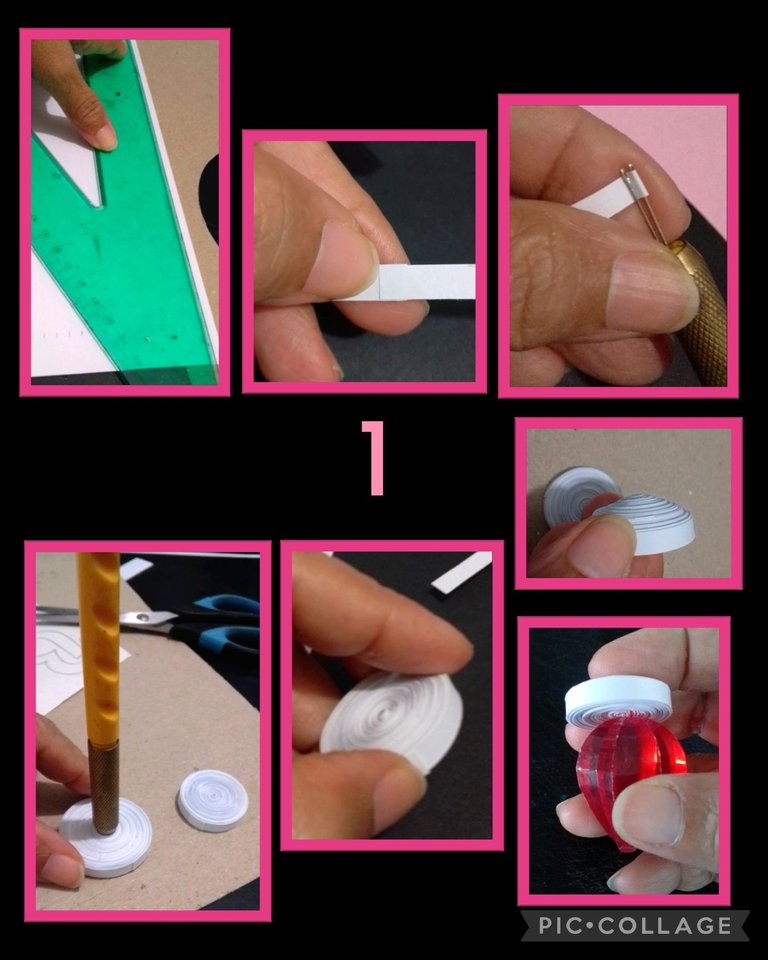
- Marca y recorta 25 tiras blancas de 0.5mm x 20cm de largo,
Para el gorro pega una a una hasta completar 10 tiras y comienza a enrollar con la aguja hasta formar dos círculos apretados, saca la aguja con cuidado hala la tira y pega la punta de la tira, después repite el procedimiento con las 15 tiras restantes,
luego con el dedo presiona desde el centro hacia afuera, también puedes utilizar un objeto redondo.
Paso 2:
Hacer bolita de anime y dar forma al gorrito y cuerpo.
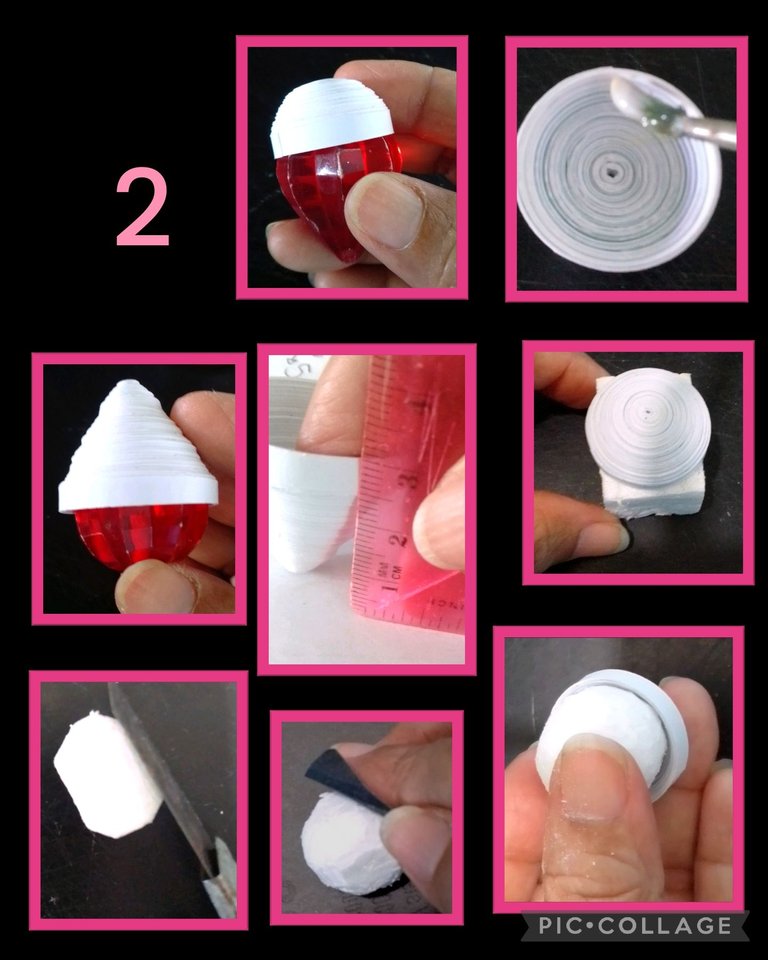
- Empuja con el objeto redondo hasta que mida 1cm y aplica pega en su interior y deja secar, luego con el otro extremo del objeto comienza a presionar el círculo más grande hasta formar un cono de 3 cms de altura, aplica en su interior cola blanca y deja secar.
- Aparte marca la circunferencia del gorrito en el trocito de anime, recorta y da forma redondeada con la cuchilla, luego pasa la lija para redondear bien e inserta dentro del gorro para asegurarte que entre bien.
Paso 3:
Brazos y piernas.
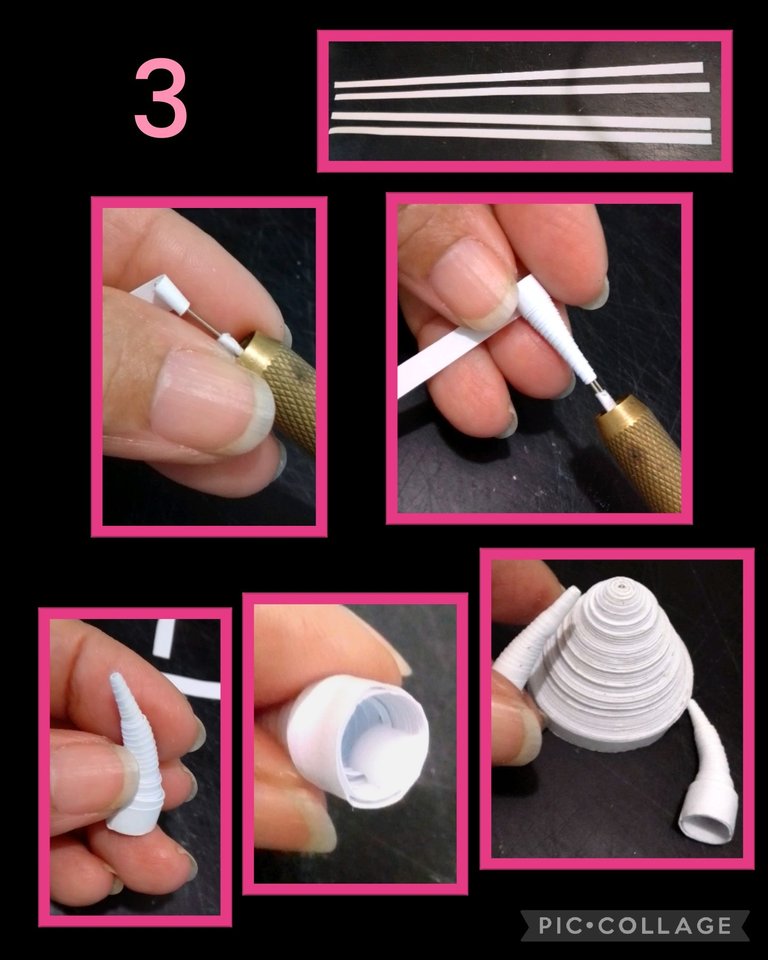
- Recorta 4 tiras de 0,5mm x 20cm de largo, aplica cola y pega armando 2 tiras.
- Comienza a enrollar y da 6 vueltas en el mismo lugar, después comienza a enrollar inclinando un poco la tira para que vaya formando el brazo, al finalizar aplica cola y pega.
- Ahora has un poco de presión en la parte de arriba para dar forma curva al brazo, repite este paso con el otro brazo y al finalizar aplica cola en su interior, riégalo y deja secar y para las piernas haz este procedimiento pero para empezar da 10 vueltas y comienza a inclinar el papel.
Paso 4:
Pinta la masa y forra la cabecita.
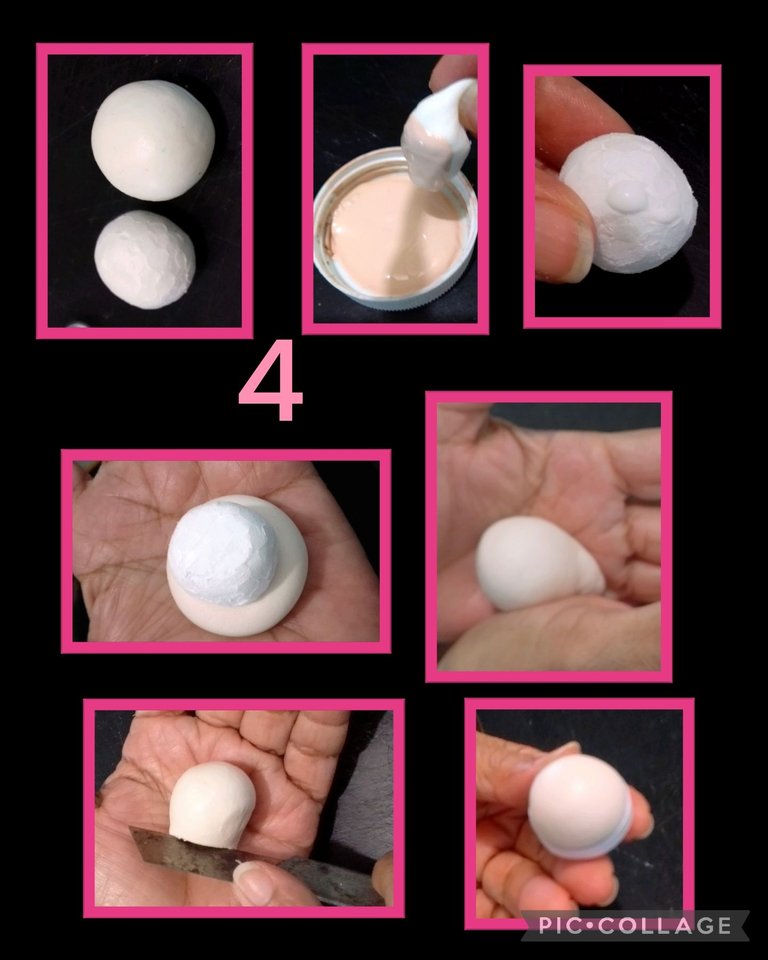
- Amasa y arma una bolita de masa un poquito mas grande que la esferita de anime, luego tiñe con pintura color piel, amasa hasta que quede uniforme el color, luego aplica un poquito de cola blanca en la esfera de anime, aplana un poco la esfera de masa y coloca sobre la palma de la mano y comienza a girar entre las dos manos y recorta el sobrante de masa, luego inserta dentro del gorrito.
Paso 5:
Hacer manitos y cabello.
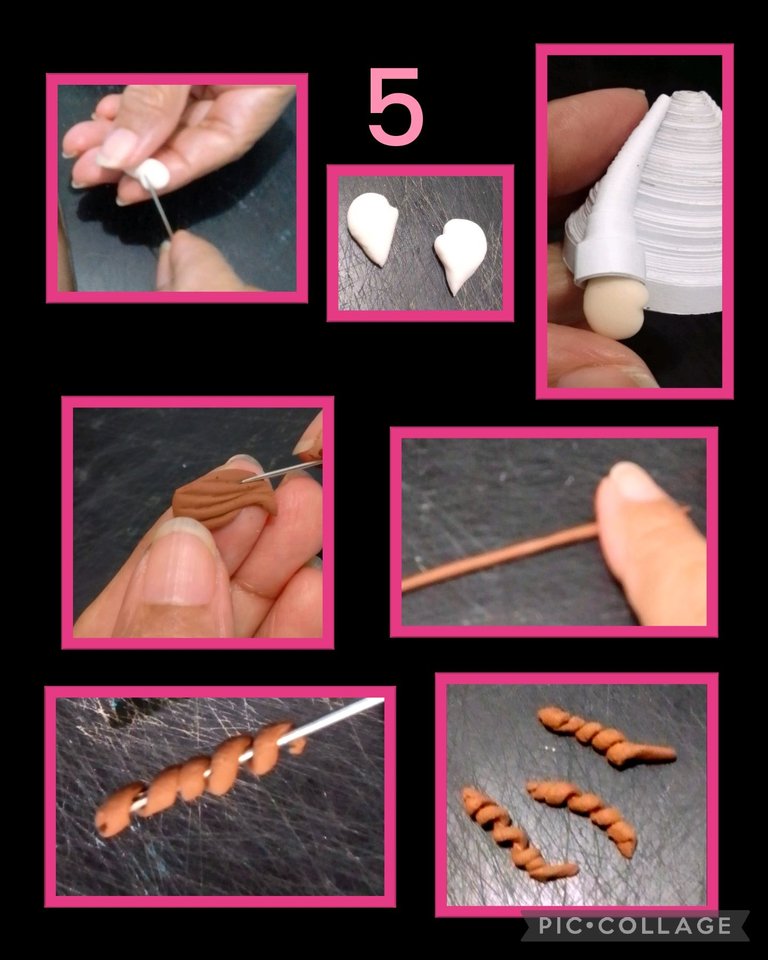
- Con lo sobrante de la masa arma dos bolitas y dale forma de gota o lágrima y con una aguja o con un palito haz un corte de un lado para hacer el pulgar en cada mano mide en el brazo y asegúrate que esté bien de tamaño y deja secar.
- Tiñe con pintura marrón otro pedacito de masa y haz dos esferas y da forma igual de gota y con la aguja haz líneas para formar el cabello.
- Ahora toma otro poquito de masa y estira con el dedo y enrolla en una aguja para formar unos rulitos o bucles y deja secar.
Paso 6:
Comenzar a armar.
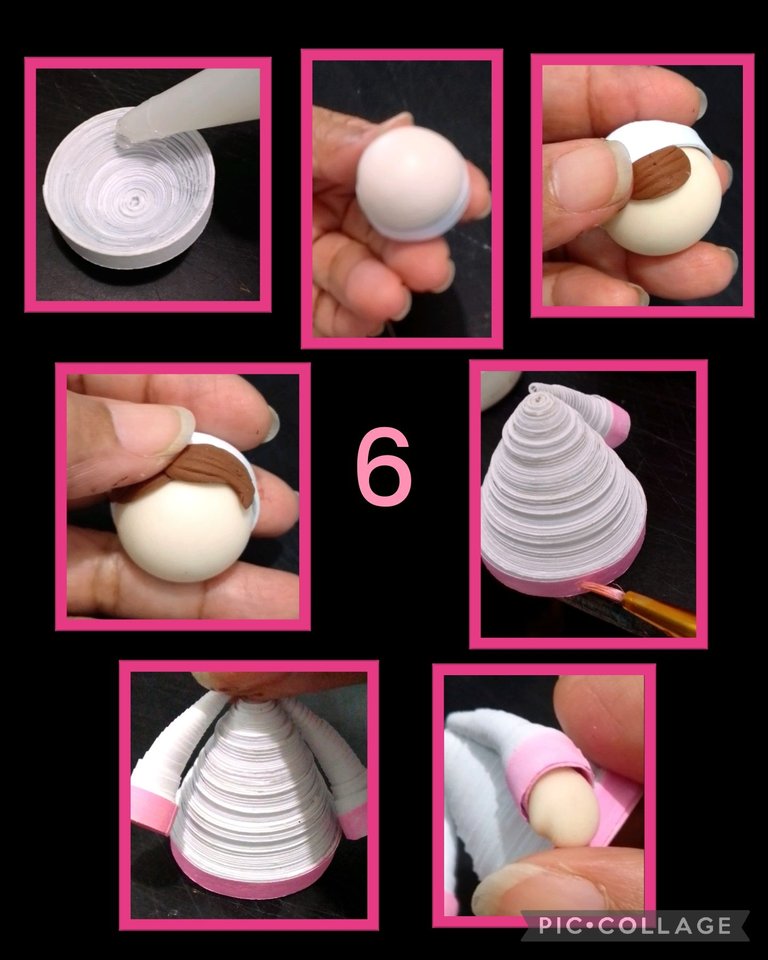
- Aplica silicón al gorrito y pega la cabecita, luego pega el cabello.
- Con un pincel delgado pinta en rosado los puños y orilla inferior del vestido, aplica silicón en las manos y pega.
Paso 7:
Hacer zapatos y pegar piernas al cuerpo.
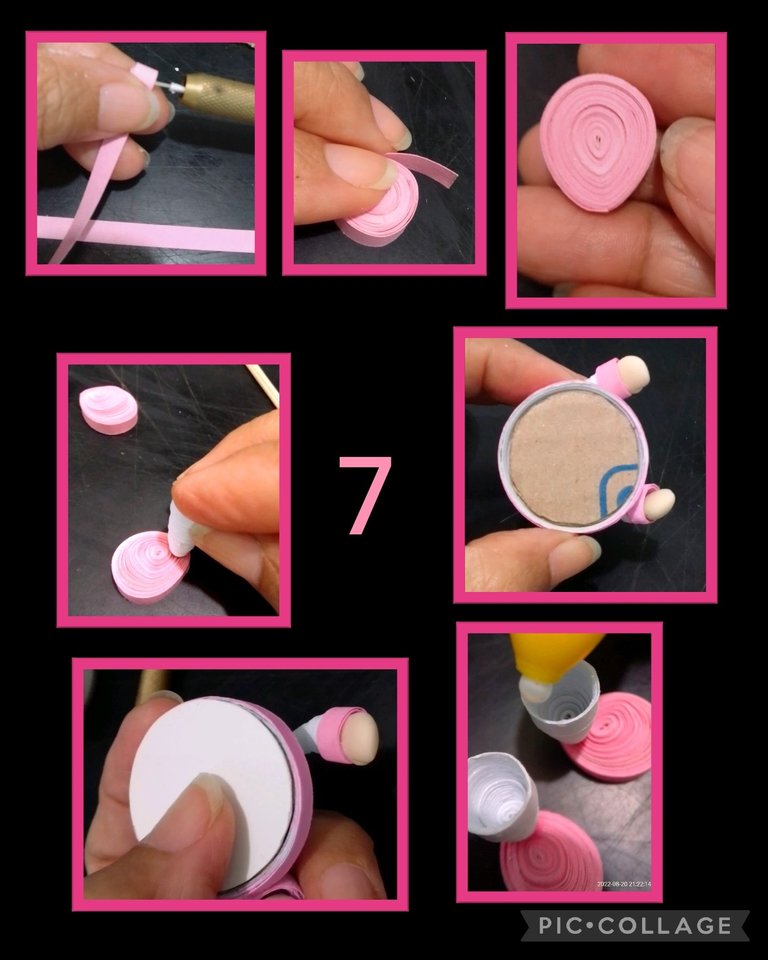
- Recorta 6 tiras rosadas de 5mm x 20cm y une 3 tiras para cada zapato, luego comienza a enrollar y arma un círculo cerrado y da forma de gota luego presiona de adentro hacia afuera aproximadamente 8mm en la parte ancha, aplica pega en la parte inferior y deja secar.
- Aparte aplica silicón en la parte delgada de las piernas y pega a la base del zapato, presiona un poco hasta que pegue bien y luego recorta un círculo de cartulina y otro de cartón para pegar en la base inferior del cuerpo o vestido.
- Después que sequen bien las piernas aplica cola blanca o silicón en el borde superior y pega.
Paso 8:
Seguir armando y pintar carita.

- Haz presión sobre el vestido hasta que peguen bien las piernas.
- Con un pincel delgado pinta en blanco dos círculos, deja secar
delinea con pincel para pintar ojos o marcador punta fina pinta pestañas y cejas. - Luego con la parte trasera del pincel, moja en pintura marrón y
negra y pinta completamente los ojitos. - Aplica cola blanca a los lados del cabello y pega los rulitos
o bucles y ahora con un poquito de masa, elabora una esferita mínima y pega como nariz.
Paso 9:

Después que sequen los ojitos, con un palito de madera pinta 2 puntos de luz en los ojitos y con una esponja y tiza, pinta las mejillas... ya estamos terminando.
Ahora solo queda aplicar silicón o cola y pegar la cabeza al cuerpo y hacer un lacito con una tira de papel de 0,5mm x 2cm y pega a un ladito de la cabeza.
Y así queda lista esta hermosa pieza, ah! y la puedes colocar sobre una pieza de mdf o en una base que tengas o simplemente la colocas en un lugar de tu preferencia.
Espero te guste!
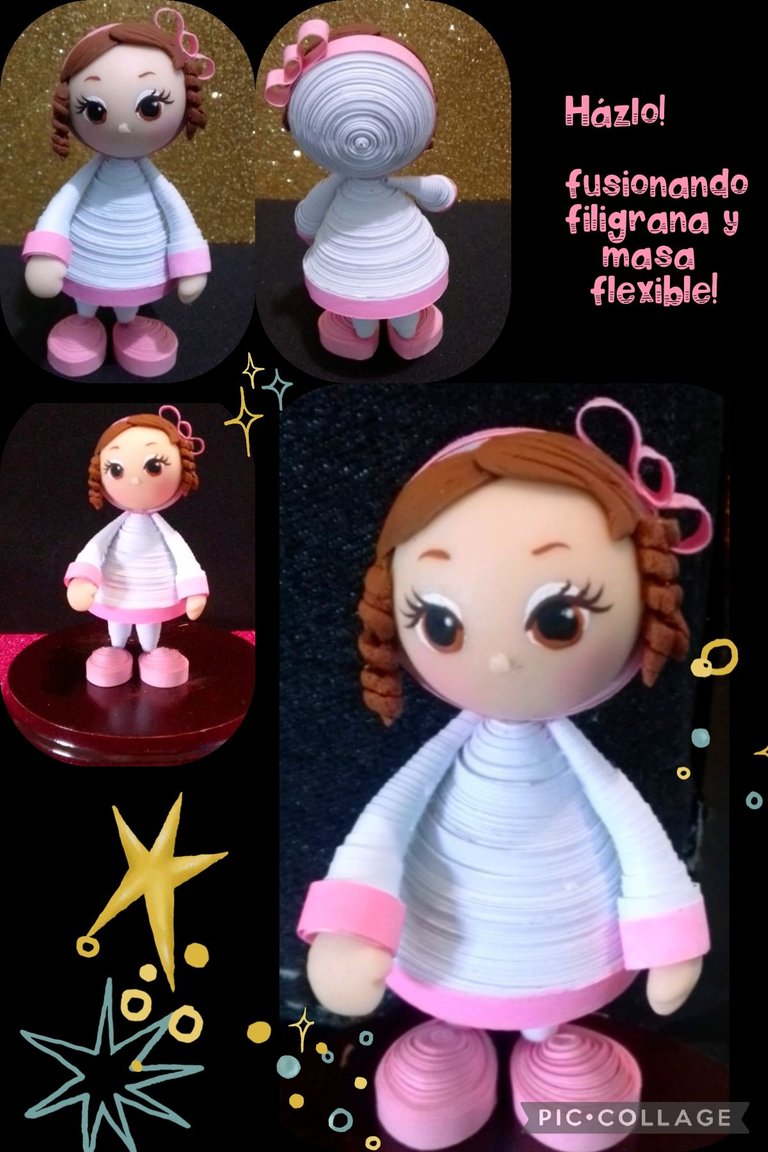
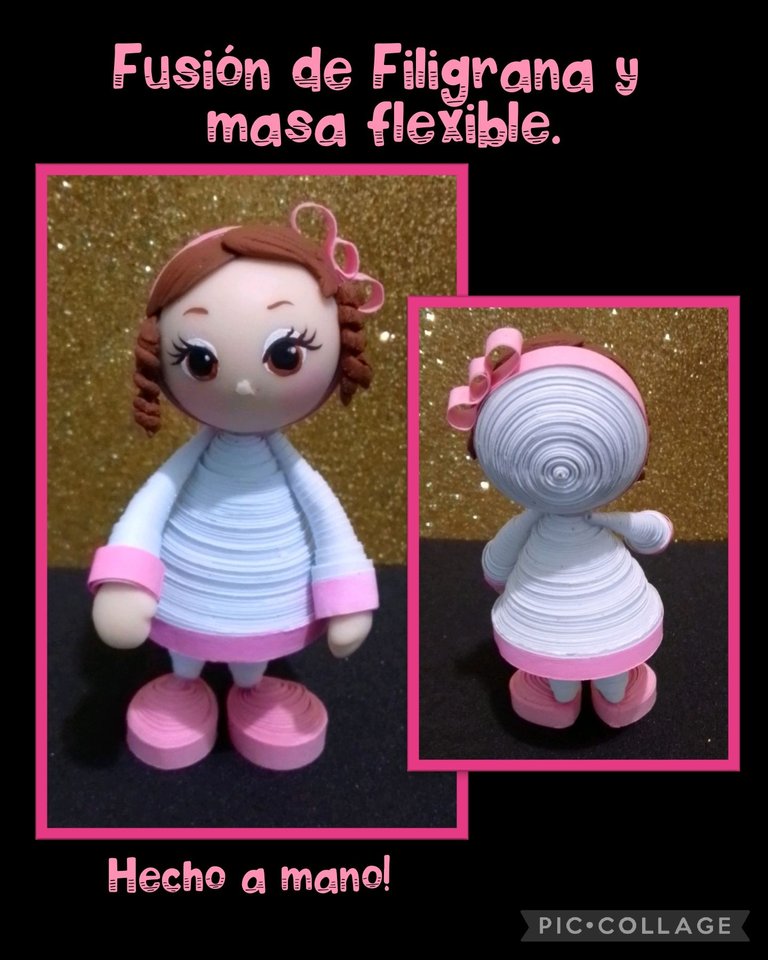
Aquí te dejo fotos para que veas el resultado.

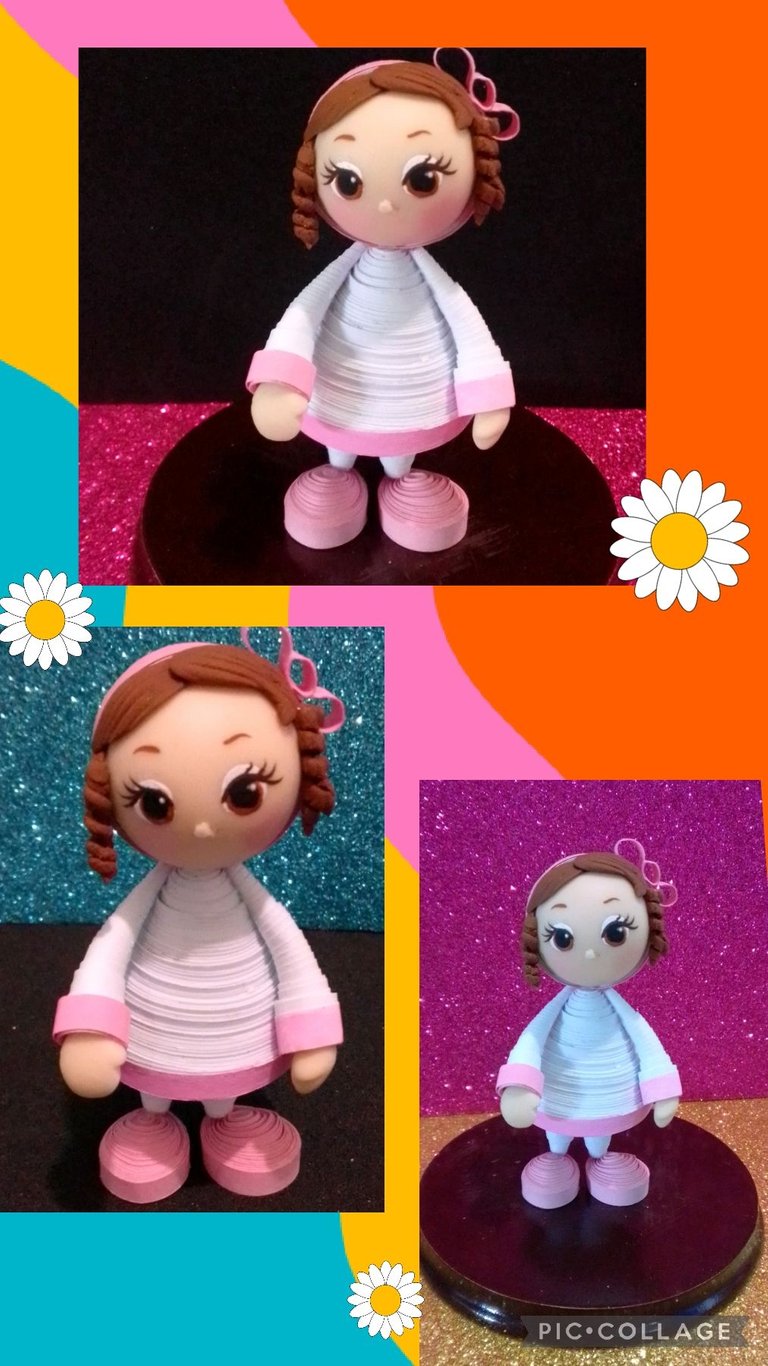
Mi publicación es traducida por DeepL, editada con HTML, las fotos son capturadas por mi teléfono Blu G5 y editadas con Pic Collage.
Me despido esperando les guste y sea útil mi paso a paso y se atrevan a realizar una linda pieza.
Saludos y bendiciones.
English:


Hello, hello, dear friends.
I hope your start of the week is blessed and very productive for all.
Welcome everyone!
For this work you will use:

| white sheets of paper | pink school cardboard |
|---|---|
| White glue | Scissors |
| Cutter (pencil) rolling pin | Needles (2) |
| Knife | Ruler |
| Pencil | Chalk |
| Flexible dough | Paints and brushes |
| Silicone | MDF base |
| Foam rubber | Wooden stick |
| Anime sticks | Lija board |
| Cardboard and white cardboard circle |
Let's get started:
Step 1:

Hat and body:
- Mark and cut out 25 white strips of 0.5mm x 20cm long,
For the hat glue one by one to complete 10 strips and begin to roll with the needle to form two tight circles, remove the needle carefully pull the strip and glue the tip of the strip, then repeat the procedure with the remaining 15 strips,
then with your finger press from the center outwards, you can also use a round object.
Step 2:
Make anime ball and shape the beanie and body.

- Push with the round object until it measures 1 cm and apply glue inside and let it dry, then with the other end of the object start pressing the larger circle to form a cone 3 cm high, apply white glue inside and let it dry.
- Then mark the circumference of the hat on the piece of anime, cut it out and give it a rounded shape with the blade, then pass the sandpaper to round it well and insert it inside the hat to make sure it fits well.
Step 3:
Arms.

- Cut 4 strips of 0.5mm x 20cm long, apply glue and glue together making 2 strips.
- Start to roll up and make 6 turns in the same place, then start to roll up tilting a little the strip to form the arm, at the end apply glue and glue.
- Now do a little pressure on the upper part to give a curved shape to the arm, repeat this step with the other arm and at the end apply glue inside, water it and let it dry and for the legs do the same procedure but to begin with do 10 turns and start tilting the paper.
Step 4:
Paint the dough and line the head.

- Knead and assemble a ball of dough a little bigger than the anime sphere, then dye it with skin color paint, knead until the color is uniform, then apply a little white glue on the anime sphere, flatten a little the dough sphere and place it on the palm of your hand and start to turn between your two hands and trim the excess dough, then insert it inside the hat.
Step 5:
Make hands and hair.

- With the leftover dough make two little balls and shape them into drops or teardrops and with a needle or a stick make a cut on one side to make the thumb on each hand, measure on the arm and make sure it is the right size and let it dry.
- Dye with brown paint another small piece of dough and make two spheres and shape them in the same way as a drop and with the needle make lines to form the hair.
- Now take another little bit of dough and stretch it with your finger and roll it in a needle to form curls or loops and let it dry.
Step 6:
Begin to assemble.

- Apply silicone to the hat and glue the head, then glue the hair.
- With a thin brush, paint the cuffs and bottom edge of the dress in pink, apply silicone to the hands and glue.
Step 7:
Make shoes and glue legs to the body.

- Cut 6 pink strips of 5mm x 20cm and join 3 strips for each shoe, then start to roll and form a closed circle and shape into a drop shape then press from the inside out about 8mm on the wide part, apply glue on the bottom and let dry.
- Then apply silicone on the thin part of the legs and glue to the base of the shoe, press a little until it sticks well and then cut out a circle of cardboard and another of cardboard to glue on the bottom base of the body or dress.
- After the legs dry well, apply white glue or silicone on the top edge and glue.
Step 8:
Continue assembling and paint the face.

- Put pressure on the dress until the legs are well glued.
- With a thin brush paint two circles in white, let dry.
With an eye brush or fine tip marker paint eyelashes and eyebrows. - Then with the back part of the brush, dip in brown and black paint and paint the
black paint and paint the eyes completely. - Apply white glue to the sides of the hair and glue the curls.
and now with a little bit of dough, make a small sphere and glue it as a nose.
Step 9:

After the eyes dry, with a wooden stick paint 2 points of light in the eyes and with a sponge and chalk, paint the cheeks... we are finishing.
Now just apply silicone or glue and glue the head to the body and make a little bow with a strip of paper 0.5mm x 2cm and glue it to one side of the head.
And that's how this beautiful piece is ready, oh! and you can place it on a piece of mdf or on a base that you have or simply place it in a place of your choice.
I hope you like it!
Sources:
https://es.wikipedia.org/wiki/Filigrana_de_papel
Here are some pictures so you can see the result.


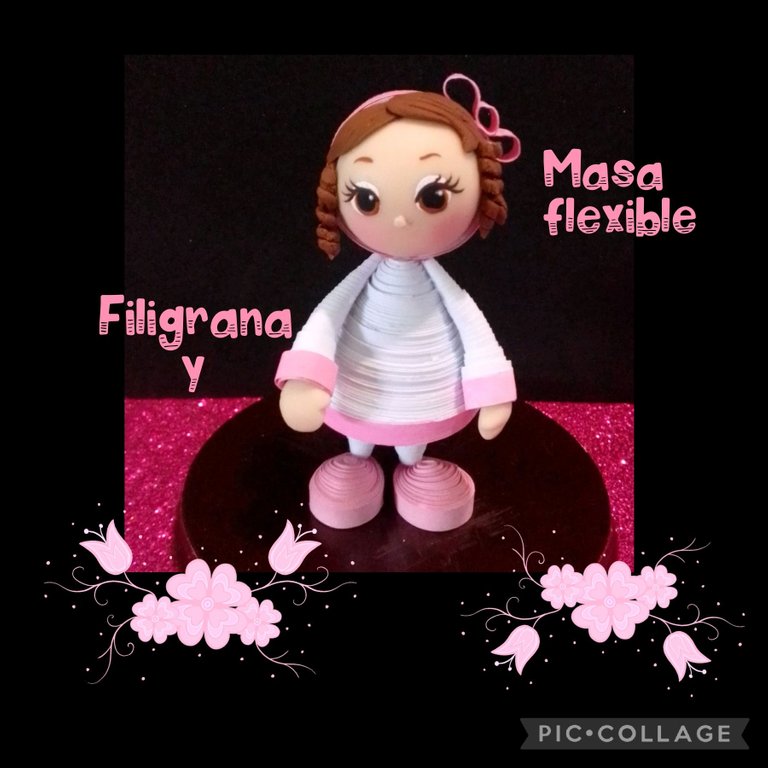
My publication is translated by DeepL, edited with HTML, the photos are captured by my Blu G5 phone and edited with Pic Collage.
I say goodbye hoping you like it and my step by step will be useful and you dare to make a nice piece.
Greetings and blessings.
