Buenas noches y bienvenidos sean todos a mi Blog.
Hola amigos!
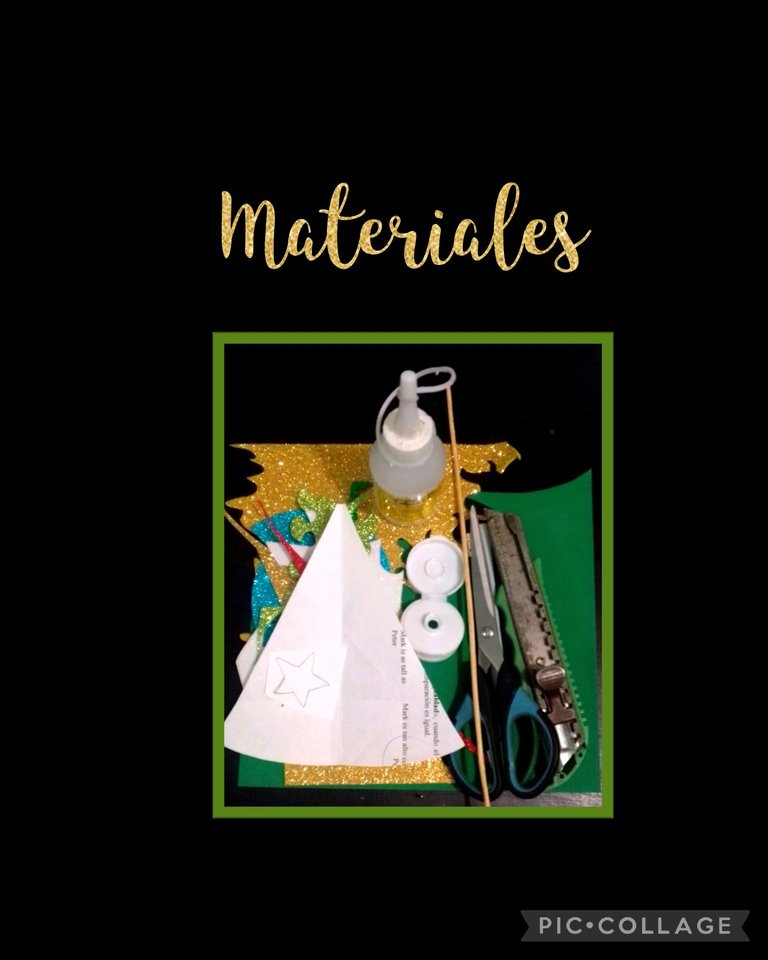
| Sobrantes de foami mate y escarchado | Palito de globo |
|---|---|
| Tapa plástica | Tijera y cuchilla |
| Cola blanca y silicón | Escarcha dorada |
| Palito de madera | Moldes |
| Plancha eléctrica |
Ahora comencemos el procedimiento:
Paso 1:
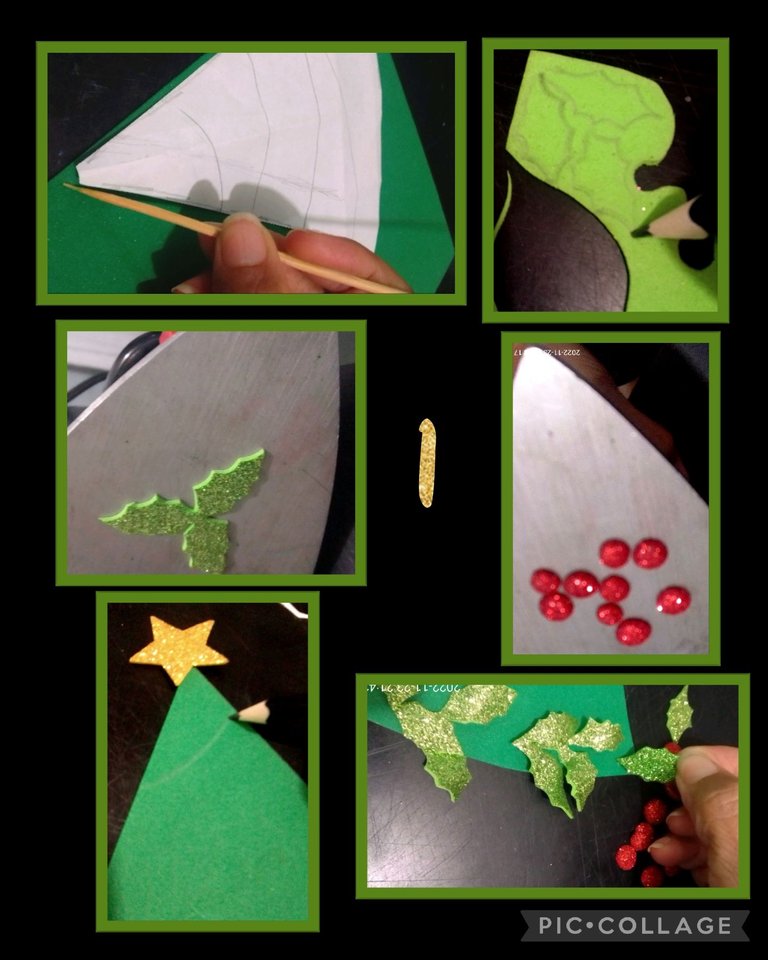
- Comienza marcando con el palito de madera todo el contorno del molde sobre el foami y recorta, aparte en el foami verde escarchado dibuja hojitas de navidad también recorta círculos en color rojo y una estrella.
- Después de recortar todas las piezas, calienta la plancha y coloca los círculos y hojas para darles forma.
- Luego marca con el lápiz líneas circulares sobre el triángulo (árbol) y coloca las flores y círculos a tu gusto.
Paso 2:
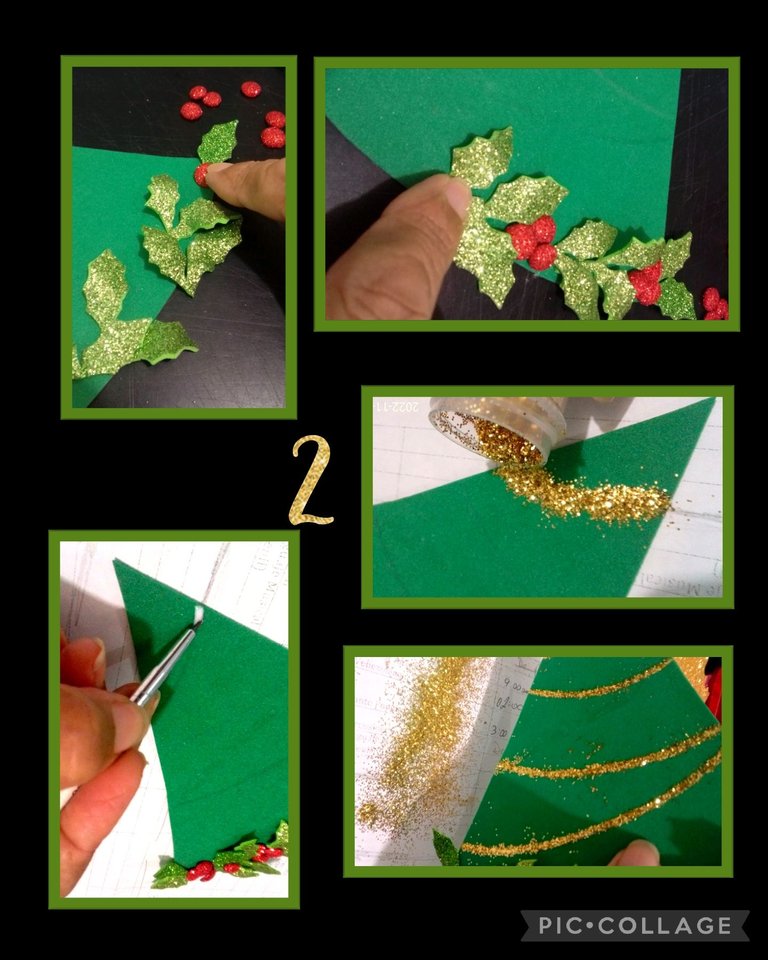
- Aplica silicón en las piezas y comienza a decorar la parte de abajo del árbol.
- Luego aplica con un pincel delgado o palito de madera la cola blanca por las líneas marcadas y echa escarcha y retira el exceso.
Paso 3:
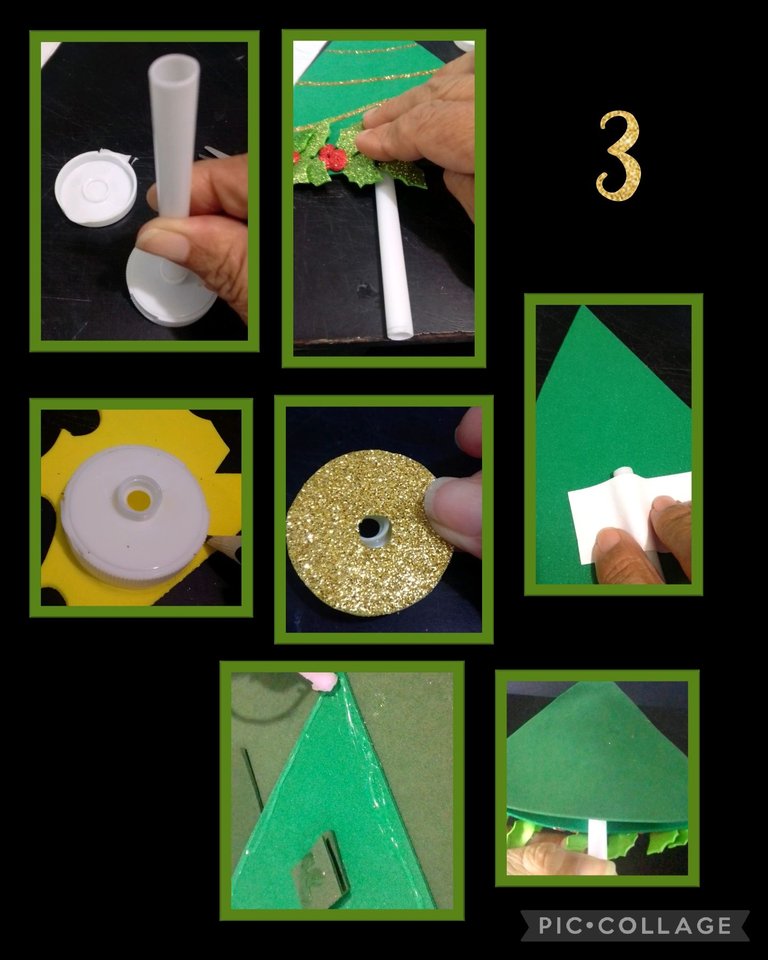
- Ahora recorta la tapa plástica y mide el palito de globo, luego aplica silicón y pega al árbol haciendo presión.
- Coloca la tapa sobre el foami dorado, marca y recorta sacando el centro.
- Luego recorta un rectángulo de cartulina o papel y pega en la parte de atrás para fijar el palito y deja secar.
- Aplica silicón en la parte posterior del árbol y pega sobre un pedazo de foami verde más oscuro y recorta dejando 1 ó 2 mm de borde.
Paso 4:
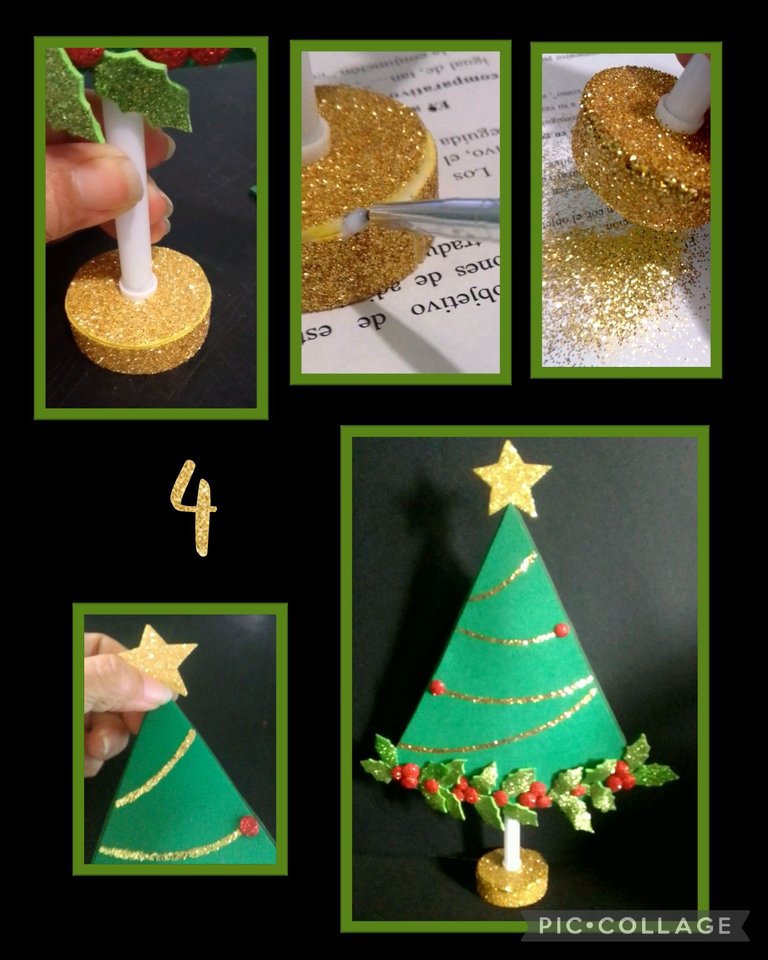
Forra la tapa, después aplica pega por la orilla y rocía escarcha para tapar el borde amarillo, esto es para dar un mejor acabado a la pieza.
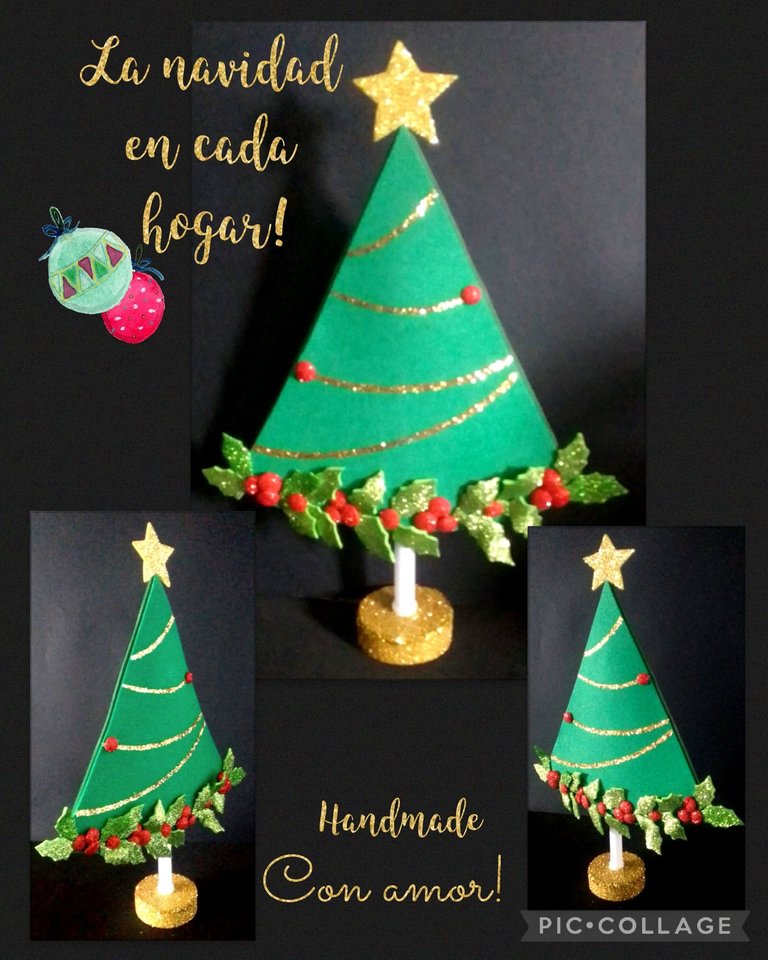
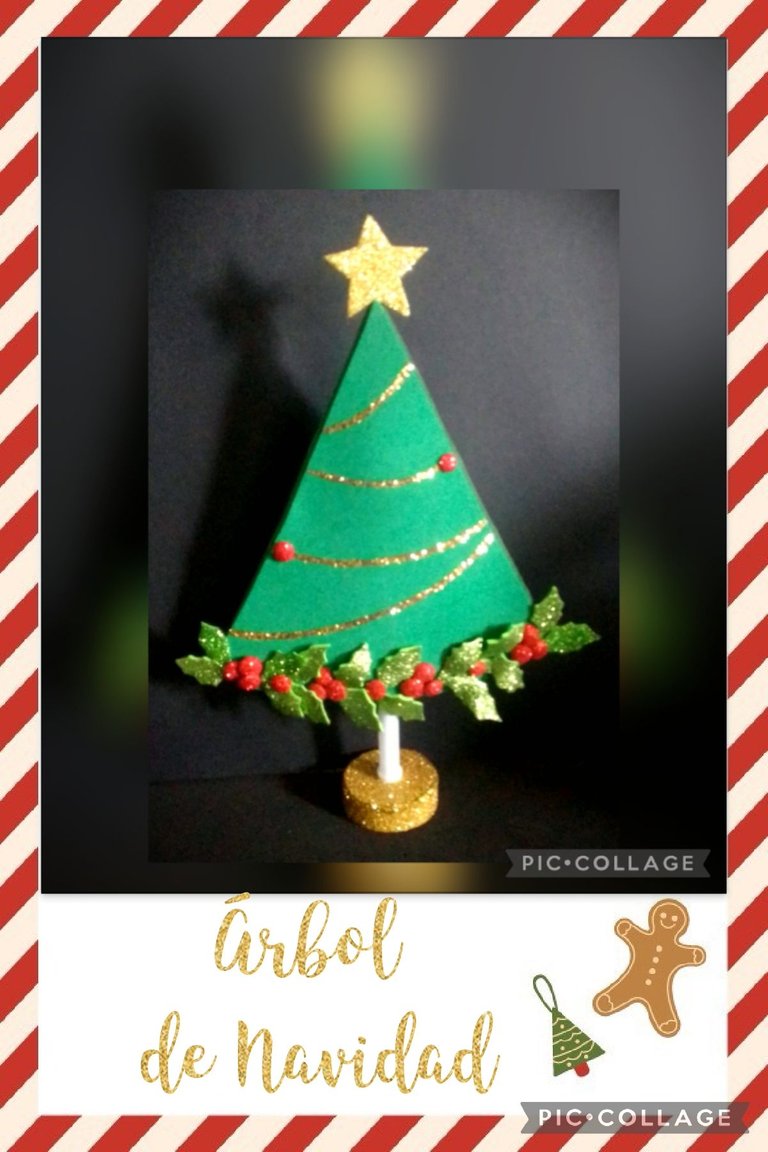
Y por último aplica silicón y pega en la punta del árbol, así queda terminado este lindo Árbol de Navidad, lo puedes realizar en el tamaño de tu preferencia.
Mi publicación la edité con Etiquetas HTML, traducida con DeepL, las fotos son capturadas con mi Blu G5 y editadas con Pic Collage.
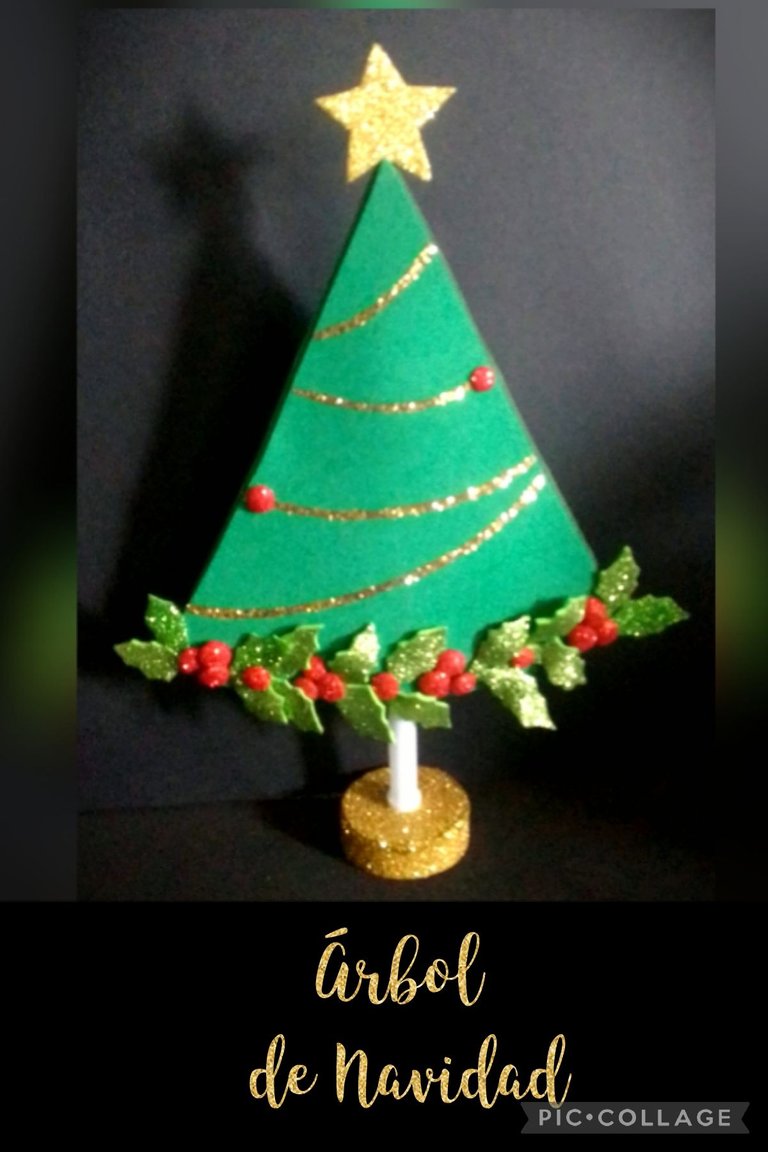
Espero haya sido de tu agrado y me despido hasta una próxima oportunidad deseando buenas noches para todos.
Muchas gracias por tu apoyo y si quieres comentas, me alegrará ver tus palabras.
Saludos y bendiciones
English:


Good evening and welcome everyone to my Blog.
Hello friends!

| Matte and frosted foami leftovers | Balloon stick |
|---|---|
| Plastic lid | Scissors and knife |
| White glue and silicone | Gold glitter |
| Wooden stick | Molds |
| Electric iron |
Now let's start the procedure:
Step 1:

- Start by marking with the wooden stick all the contour of the mold on the foami and cut it out, separately on the frosted green foami draw Christmas leaves, also cut out red circles and a star.
- After cutting out all the pieces, heat the iron and place the circles and leaves to give them shape.
- Then mark with the pencil circular lines on the triangle (tree) and place the flowers and circles to your liking.
Step 2:

- Apply silicone on the pieces and start decorating the bottom of the tree.
- Then apply with a thin brush or wooden stick the white glue along the marked lines and pour frosting and remove the excess.
Step 3:

- Now cut out the plastic cap and measure the balloon stick, then apply silicone and glue to the tree by applying pressure.
- Place the lid on the gold foami, mark and cut out the center.
- Then cut out a rectangle of cardboard or paper and glue on the back to fix the stick and let it dry.
- Apply silicone on the back of the tree and glue on a piece of darker green foami and cut out leaving 1 or 2 mm of border.
Step 4:

- Line the top, then apply glue around the edge and sprinkle frosting to cover the yellow border, this is to give a better finish to the piece.
- And finally apply silicone and glue on the tip of the tree, this is how this cute Christmas tree is finished, you can make it in the size of your preference.

I hope you liked it and I say goodbye until next time wishing good night to all of you.
Thank you very much for your support and visit.
Greetings and blessings
