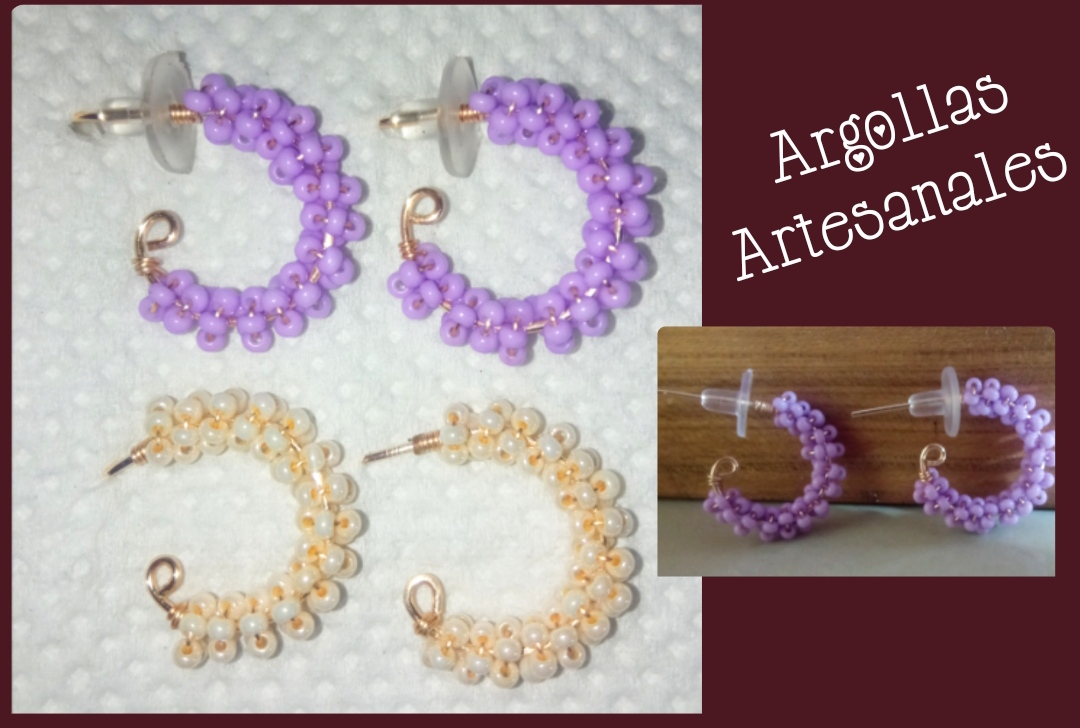
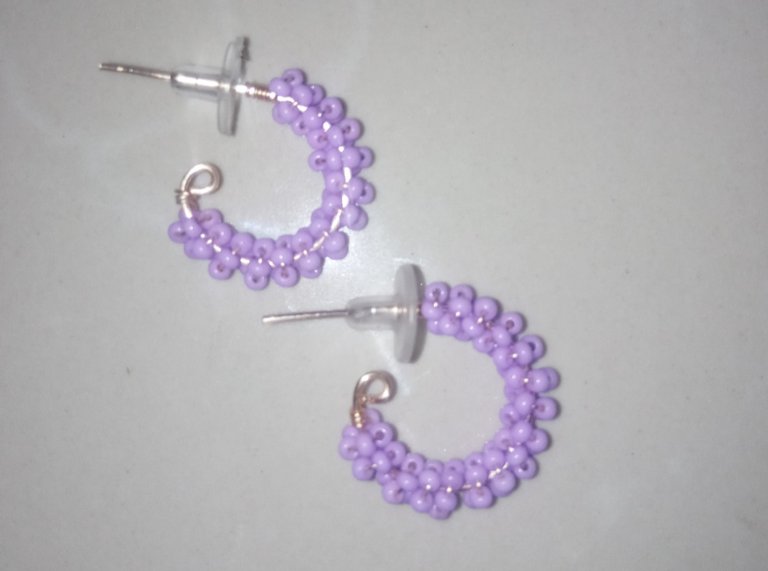
feliz y bendecido día tengan todos, espwro hayan pasado un excelente fin de semana en unión familiar, el día de hoy tengo el gran placer de pasr por esta hermosa comunidad para compartir con todos ustedes unos hermosos zarcillos, se trata de unas pequeñas argollas artesanales elaboradas en alambrismo. Este es un diseño súper fácil de elaborar, este hermoso resultado puedes obtenerlo en solo tres simples pasos, puedes elaborarlas del color de tu preferencia y lo mejor de todo en cuanto a costos es súper económicas elaborarlas.
Have a happy and blessed day everyone, I hope you have had an excellent weekend with your family, today I have the great pleasure of passing through this beautiful community to share with all of you some beautiful earrings, they are small handmade earrings made in wiring.
This is a super easy design to make, you can obtain this beautiful result in just three simple steps, you can make them in the color of your preference and best of all in terms of costs, they are super economical to make.
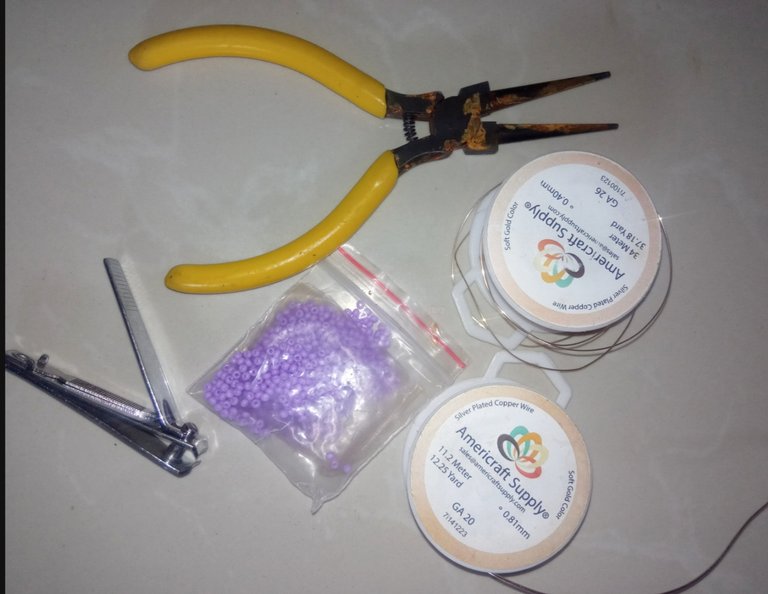
The mostacilla, which are the little stones that I select to decorate the rings, can be obtained in the color of your choice and they are very economical. In some stores you can get them by size or packaged in small bags. I bought a bag of each color for $1 each and It is enough to make four pairs of these Hoops.
Now I invite you to join me in this tutorial.
- alambre de bisutería calibre 20.
- alambre de bisutería calibre 26.
- Mostacillas pequeñas.
- pinza de bisutería.
- 20 gauge jewelry wire.
- 26 gauge jewelry wire.
- Small beads.
- jewelry clamp.
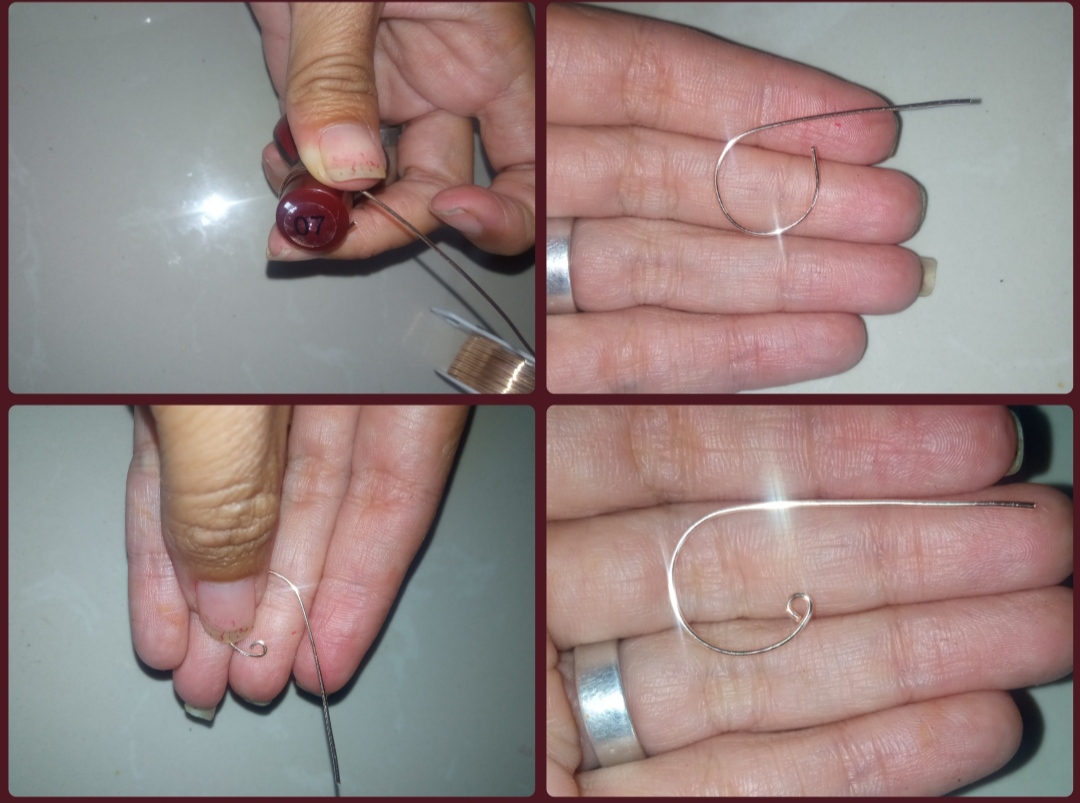
⭐ Paso 1: para iniciar la elaboración de este hermoso diseño lo primero que debemos realizar es tomar el alambre de bisutería calibre 20 y apoyándonos en un objeto cilíndrico, en mi caso usé la tapa de una pintura de uñas, moldearemos el alambre dandi forma semicircular como observarán y cortaremos el alambre dejando un extremo lineal. Seguidamente tomaremos la pinza y en la punta del alambre moldeado realizaremos un pequeño dobles tal cual pueden observarlo a continuación y así elaboraremos la base de nuestro zarcillos.
⭐ Step 1: to start making this beautiful design, the first thing we must do is take the 20 gauge jewelry wire and leaning on a cylindrical object, in my case I used the cap of a nail paint, we will shape the wire dandi semicircular shape as you will see and we will cut the wire leaving a linear end.
Next we will take the tweezers and at the tip of the molded wire we will make a small double as you can see below and thus we will make the base of our tendrils.
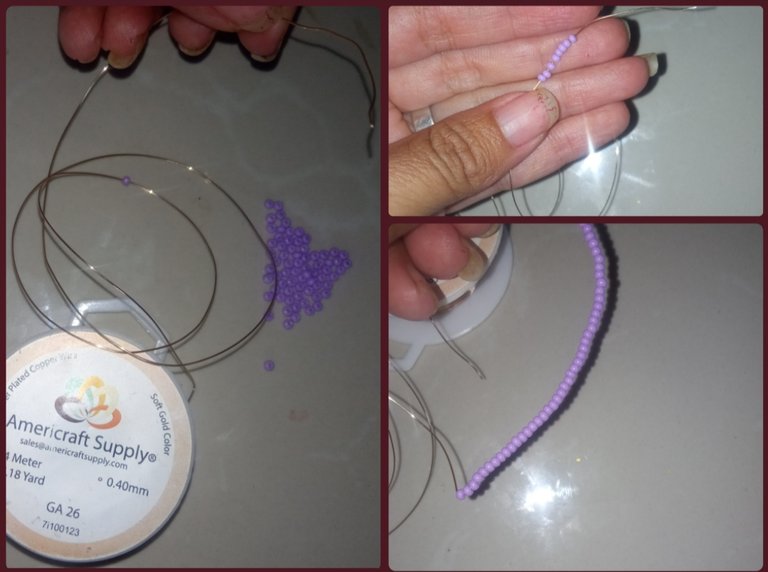
⭐ Paso 2: una vez tengamos lista nuestra base procederemos a tomar el alambre de bisutería calibre 26 y sin cortarlo del rollo comenzaremos a introducir una a una las pequeñas mostacillas,hasta lograr tener una gran cantidad, recuerden siempre es mejor que sobren a que nos vaya a faltar.
⭐ Step 2: once we have our base ready, we will proceed to take the 26 gauge jewelry wire and without cutting it from the roll we will begin to introduce the small beads one by one, until we have a large quantity, remember it is always better to have leftovers that we are going to miss it.
⭐ Paso 3: ahora tomaremos el alambre de bisutería calibre 26 en el que introducimos las mostacilla y lo uniremos a la base, enrrollandolo en la parte superior de la base dejando un espacio, que sería el pedazo lineal pues este será el clavito de nuestra argolla. Llevaremos las mostacillas hasta la unión y con mucho cuidado apretando bien comenzaremos a ir enrrollando el alambre con las mostacilla en la base semi circular hasta llegar al final de la base donde está el dobles, allí enrollaremos un poco de alambre solo y cortamos el exceso. Y así elaboramos nuestras bellas argollas Artesanales.
⭐ Step 3: now we will take the 26 gauge jewelry wire in which we inserted the beads and we will attach it to the base, winding it in the upper part of the base leaving a space, which would be the linear piece since this will be the nail of our ring.
We will take the beads to the union and with great care, pressing well, we will begin to wind the wire with the beads in the semicircular base until we reach the end of the base where the double is, there we will wind a little wire alone and cut off the excess. And this is how we make our beautiful Artisan rings.

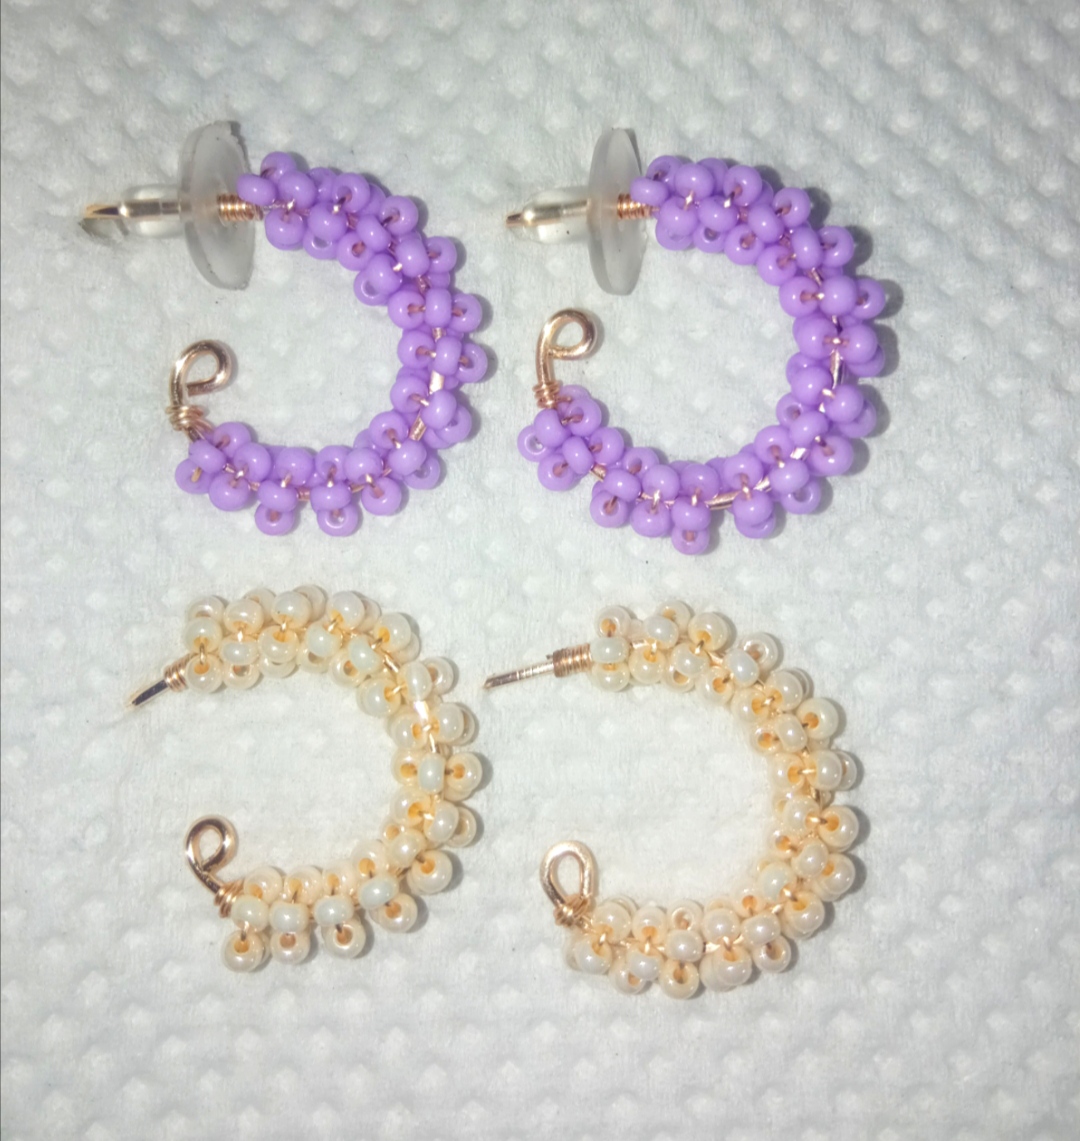
Y ésta mis queridos amigos ha Sido mi elaboración de esta semana para todos ustedes la cual espero que sea del agrado de todos ustedes y que este sencillo tutorial presentado en paso a paso les pueda ser de utilidad y provecho para todos ustedes y se animen a elaborarlos en casa. Les agradezco mucho por acompañarme hasta acá, ahora debo despedirme por esta oportunidad, deseándoles un excelente inicio de semana. Saludos y bendiciones.And what did you think of this design and this simple tutorial? I was delighted with my first creation that without hesitation I made the same ones in cream color, they are medium in size But the size can be adapted to your taste and preference, But they are not heavy, on the contrary they are super comfortable to use, they are also ideal for shine in our daily lives, Work, at home or to make a beautiful detail for a special person.
Todas las Fotos son de mi autoría y fueron tomadas con mi Celular Redmi 9.And this, my dear friends, has been my preparation this week for all of you, which I hope is to the liking of all of you and that this simple tutorial presented in step by step can be useful and beneficial for all of you and encourage you to make them. at home.
I thank you very much for accompanying me here, now I must say goodbye for this opportunity, wishing you an excellent start to the week. Greetings and blessings.
All Photos are my authorship and were taken with my Redmi 9 Cellphone

