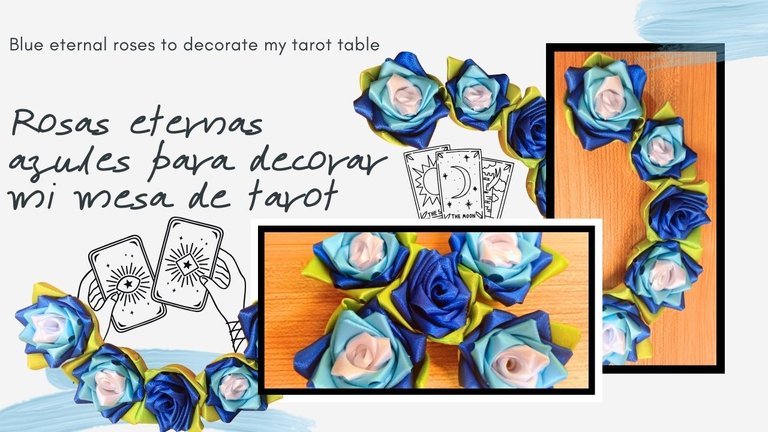


[Esp]
¡Hola comunidad DIY!
Tengo la necesidad de buscar formas distintas de decorar mi mesa de tarot para grabaciones, he visto algunos tarotistas que usan flores artificiales, como aprendía realizar rosas eternas, se me ocurrió hacer varias y hoy te presento dos opciones para hacerlas. Espero sea de tu agrado.
! [English version]
Hello DIY community!
I have the need to look for different ways to decorate my tarot table for recordings, I have seen some tarot artists that use artificial flowers, as I was learning to make eternal roses, it occurred to me to make several and today I present you two options to make them. I hope you like them.

Materiales / Materials

| Spanish | English | |
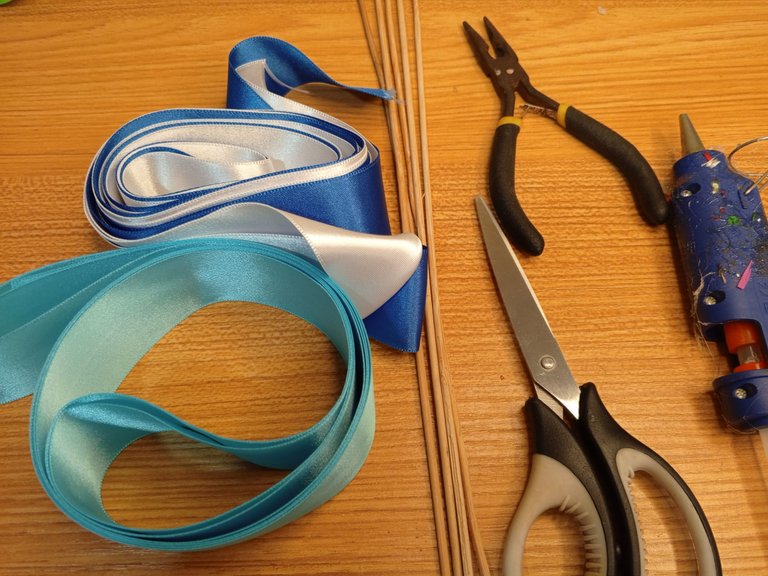
| Cinta de raso N°9 blanco, azul claro, azul rey y verde manzana | Satin ribbon N°9 white, light blue, royal blue and apple green | |
| Palitos de altura | Sticks of height | |
| Tijera, pinza | Scissors, clamp | |
| Pistola de silicón | Silicone gun |


Paso a paso / Step by Step


Step 1️⃣/ Paso 1️⃣
 |  | |
 |  |
[Esp]
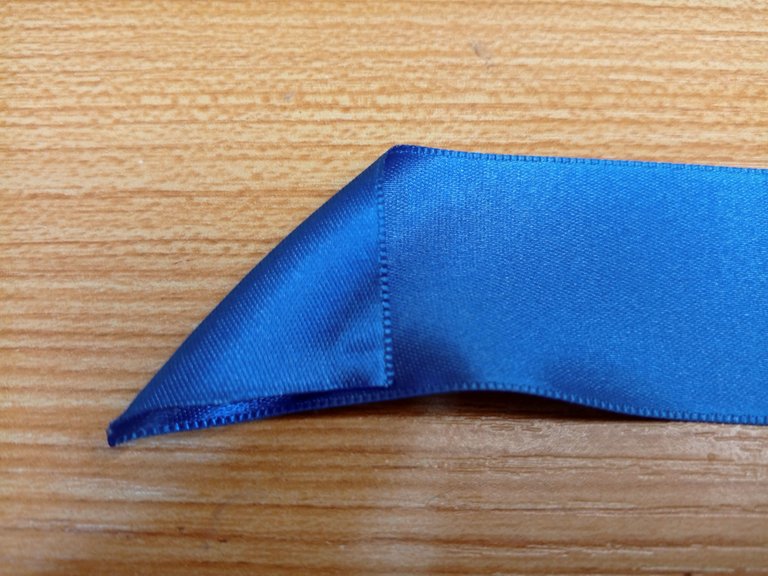
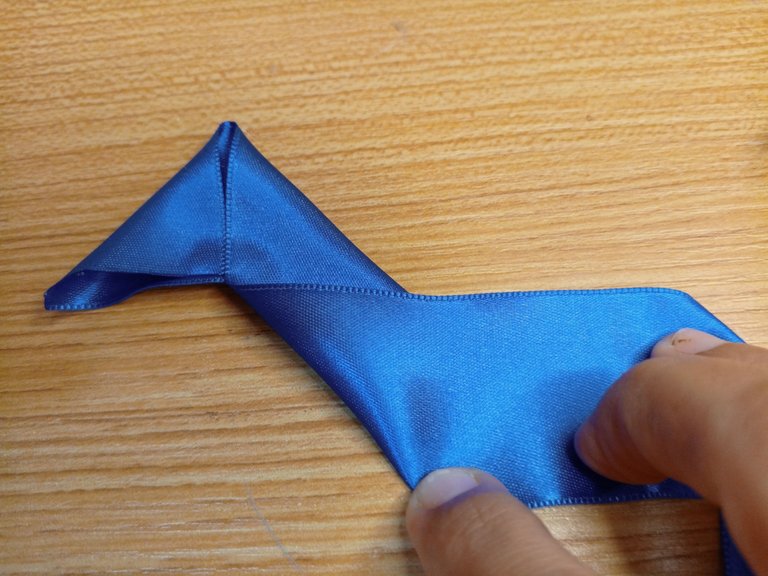
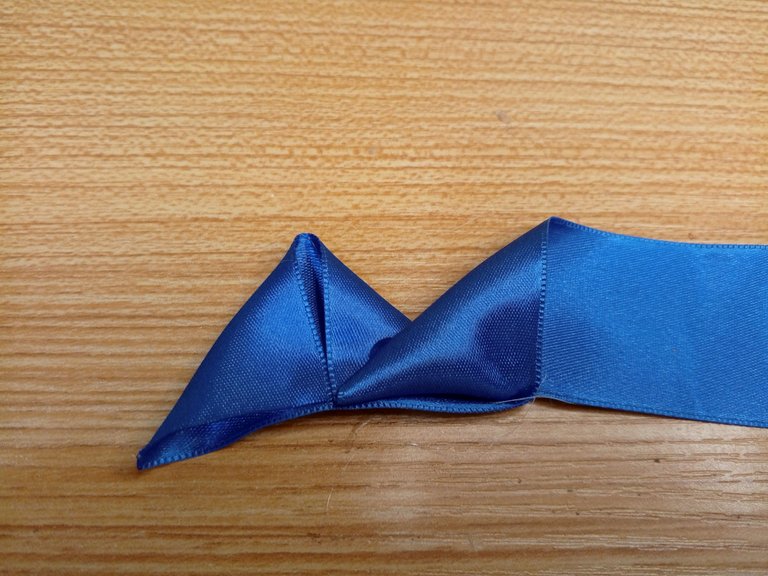
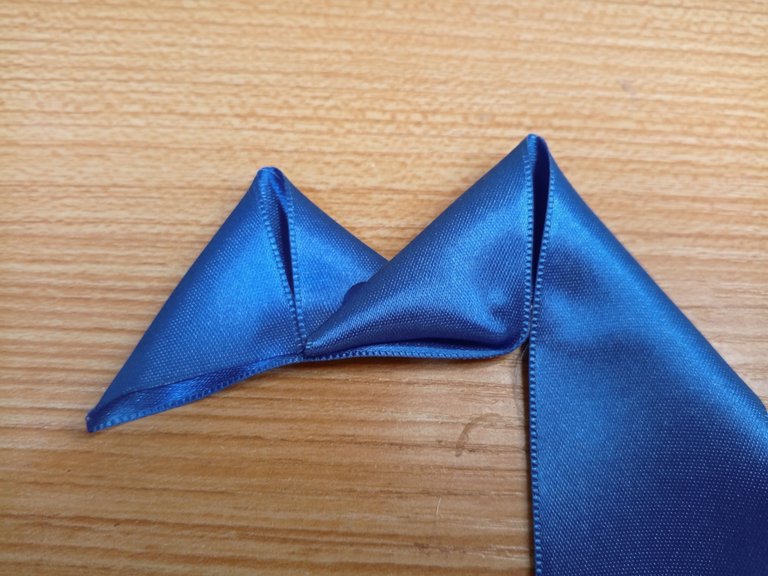
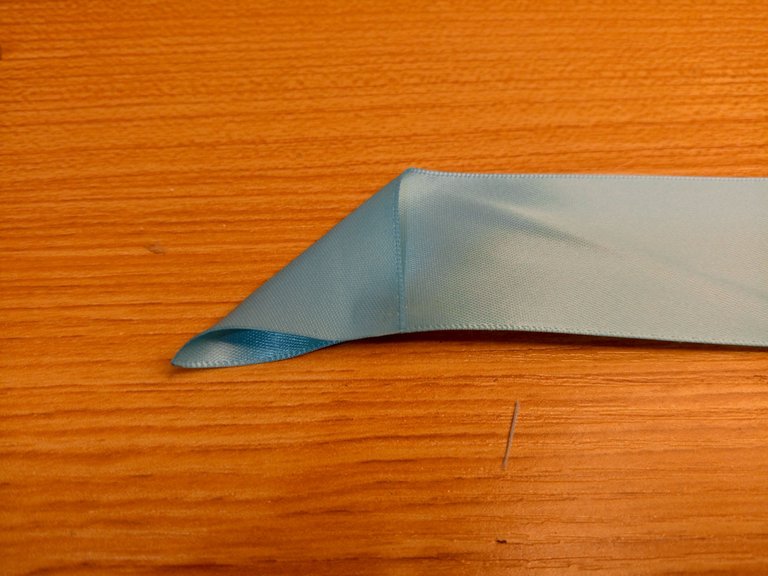
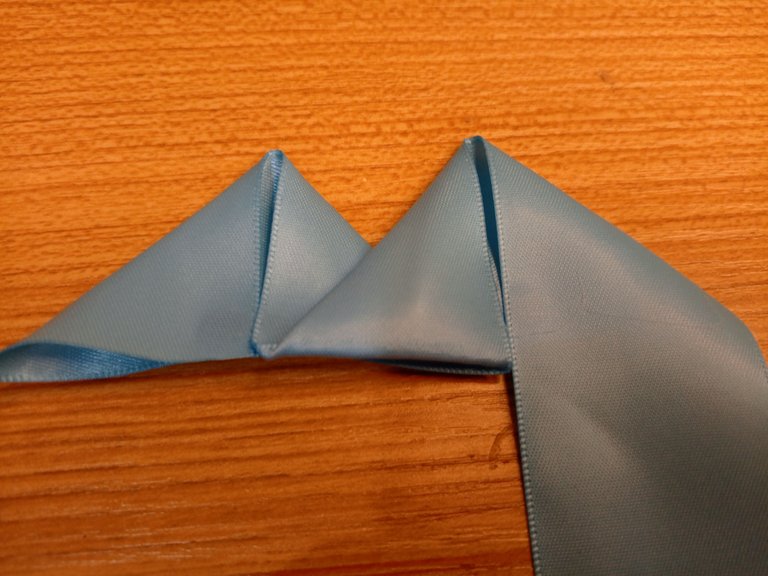
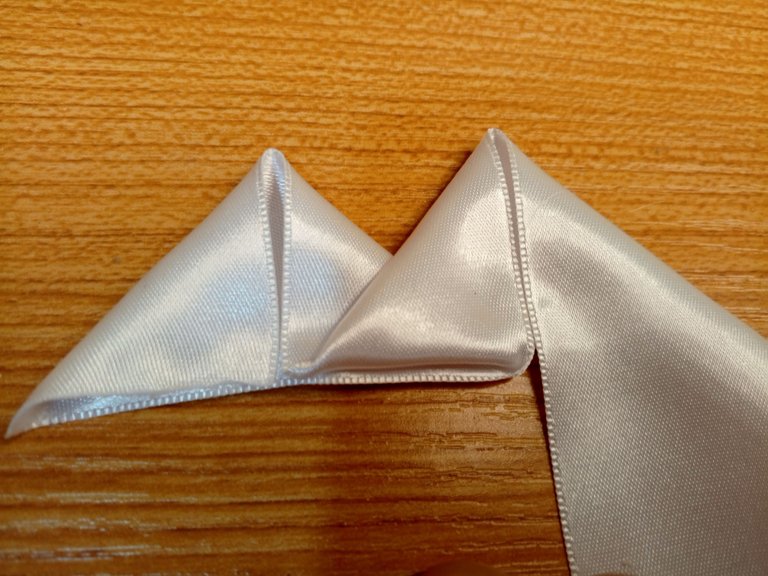
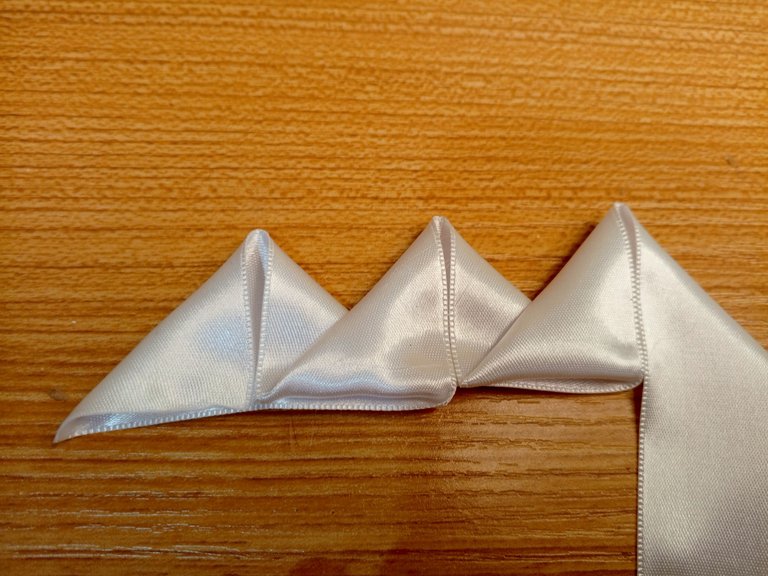
Esta forma es sencilla, se trata de mantener la forma de un triángulo, dobla la primera pestaña y aplica un punto de pegamento, ahora doble la siguiente hacia abajo para formar un triángulo más grande.
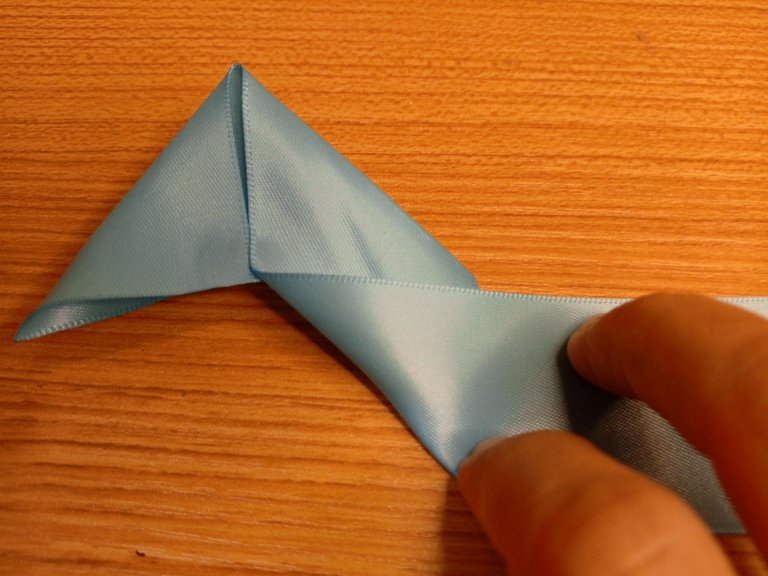
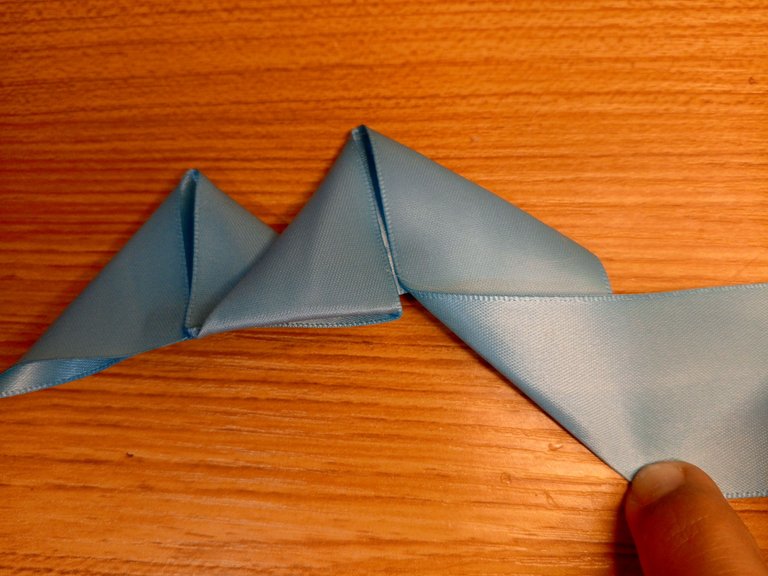
En la parte de abajo vuelve a doblar formando un triángulo pequeño.
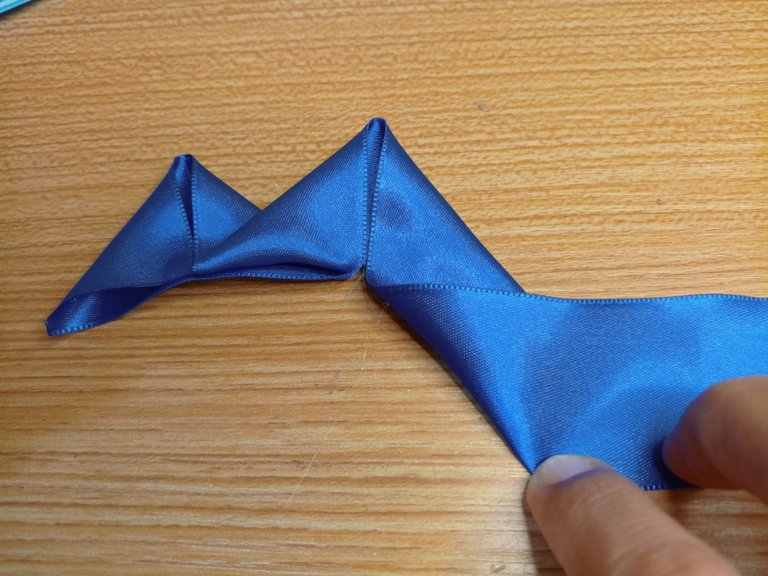
La pestaña anterior la doblas hacia arriba, aplica pegamento en la unión.
Ahora repite el paso de la imagen dos, baja la cinta formando un triángulo más grande, fíjalo con un punto de pegamento.
! [English version]
This shape is simple, it is to keep the shape of a triangle, fold the first tab and apply a dot of glue, now fold the next one down to form a larger triangle.
At the bottom fold again forming a small triangle.
Fold the previous tab upwards, apply glue to the joint.
Now repeat the step in image two, fold down the tape forming a larger triangle, fix it with a dot of glue.

Step 2️⃣/ paso 2️⃣

 |  | |
 |  |
[Esp]
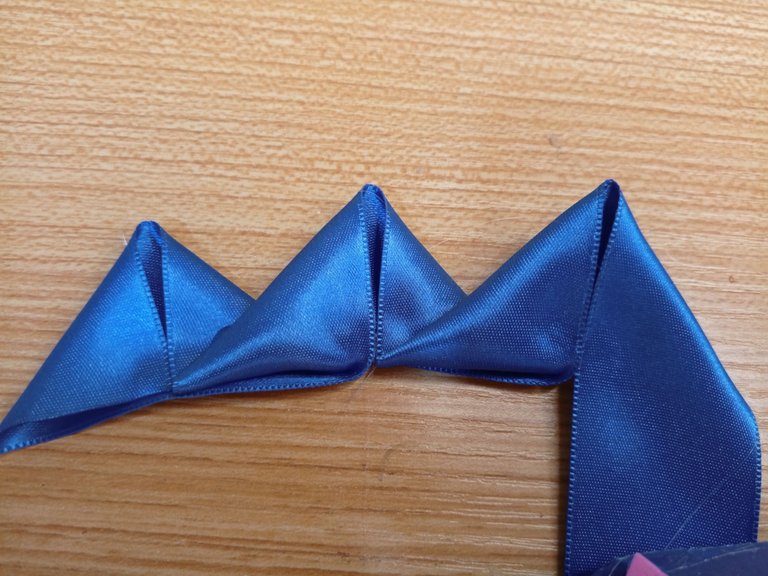
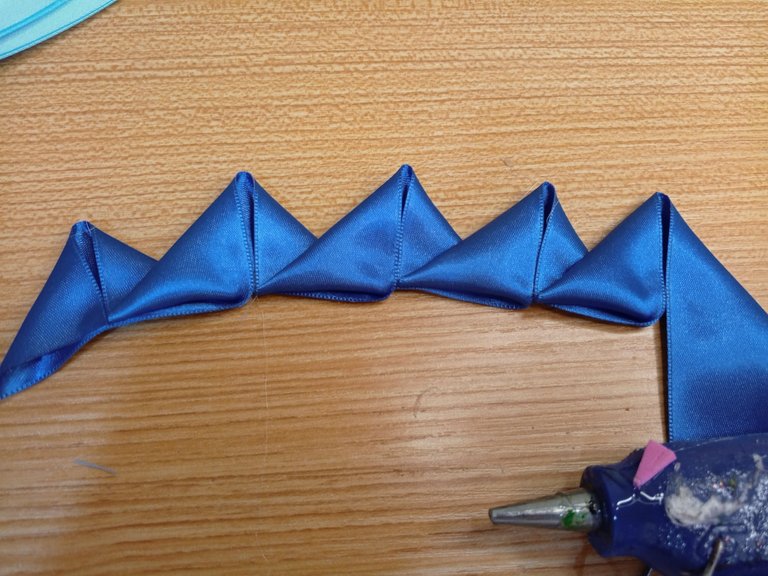
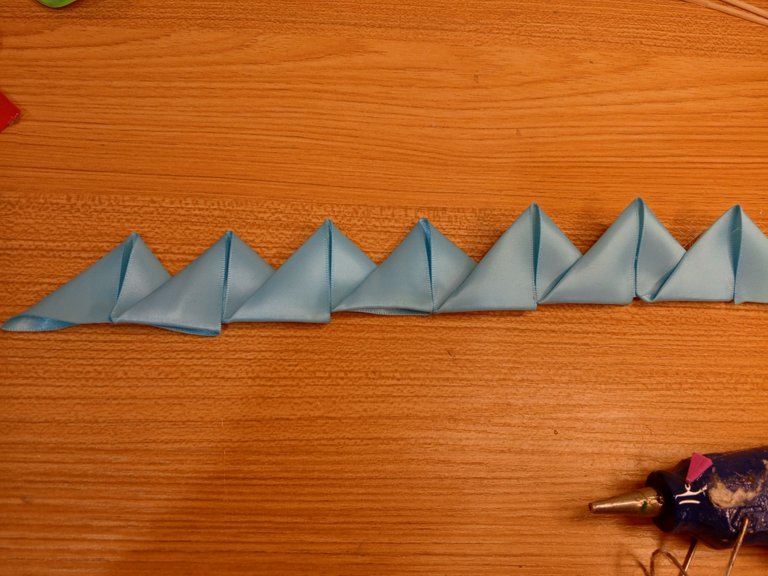
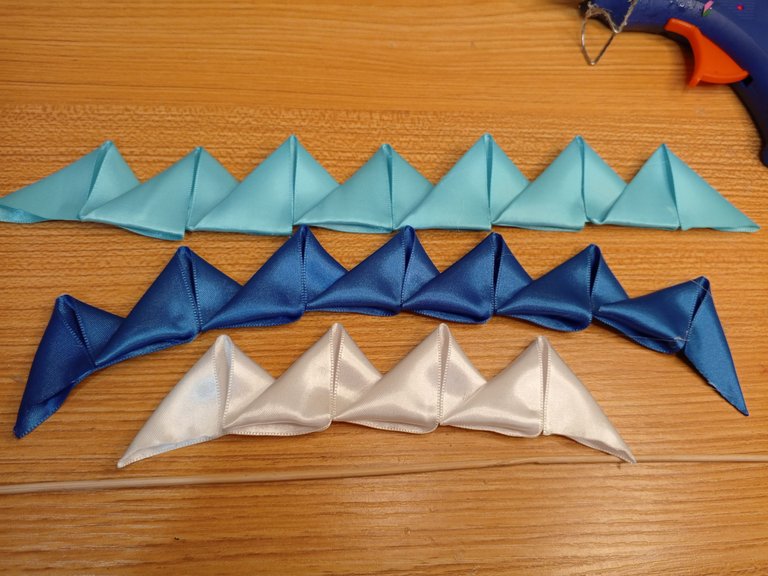
Seguimos repitiendo los pasos hasta completar una cadena de 7 picos o 7 triángulos con la cinta de color azul rey.
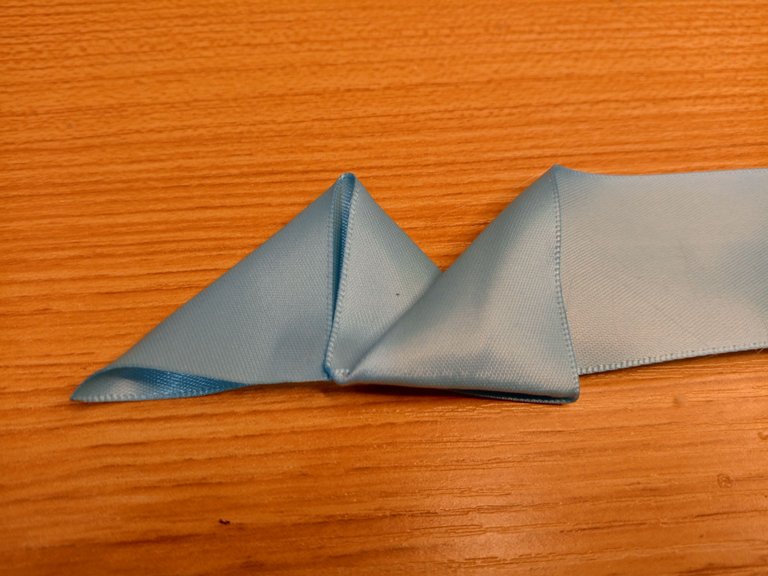
Continuamos con la cinta de color azul claro, para ello repetimos los pasos anteriores, doblando las puntas y aplicando pegamento, haciendo un triángulo pequeño y mostrando un triángulo grande.
! [English version]
We continue repeating the steps until we complete a chain of 7 peaks or 7 triangles with the royal blue ribbon.
We continue with the light blue ribbon, repeating the previous steps, folding the ends and applying glue, making a small triangle and showing a large triangle.

Step 3️⃣/ paso 3️⃣

 |  | |
 |  |
[Esp]
Repitiendo los pasos anteriores, necesitamos elaborar 7 triángulos o 7 puntas con la cinta de color azul claro.
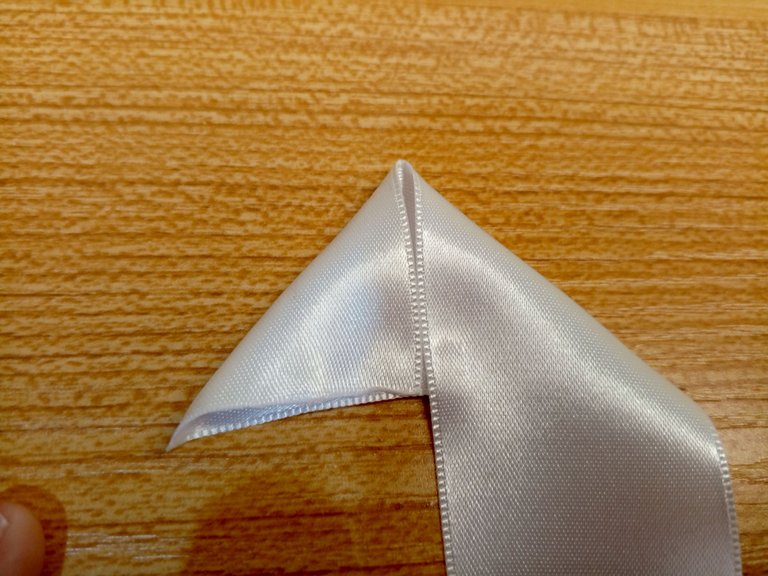
Al terminar con la cinta de color azul claro, continuamos con la cinta color blanco, repitiendo los pasos anteriores, procura quemar las partes de la cinta que quedan hacia afuera para evitar que se deshilachen.
! [English version]
Repeating the previous steps, we need to make 7 triangles or 7 points with the light blue ribbon.
When we finish with the light blue ribbon, we continue with the white ribbon, repeating the previous steps, making sure to burn the parts of the ribbon that are facing outwards to prevent them from fraying.

Step 4️⃣/ paso 4️⃣

 |  | |
 |  |
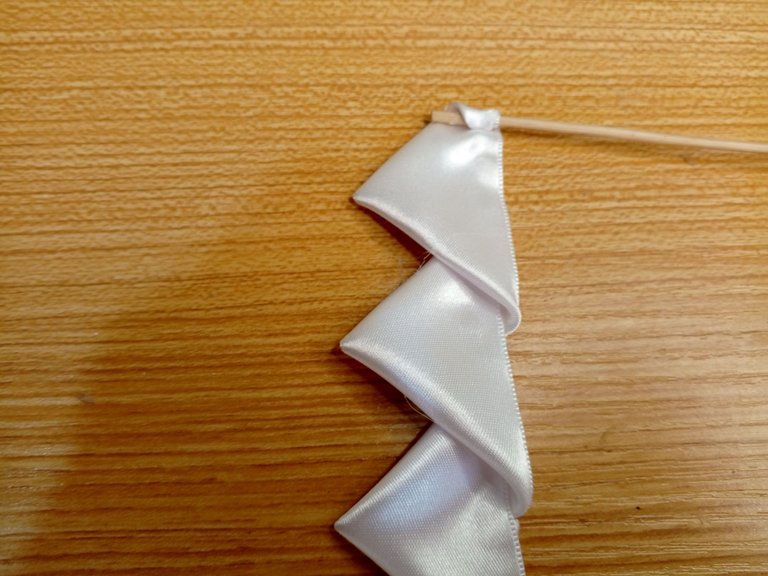
[Esp]
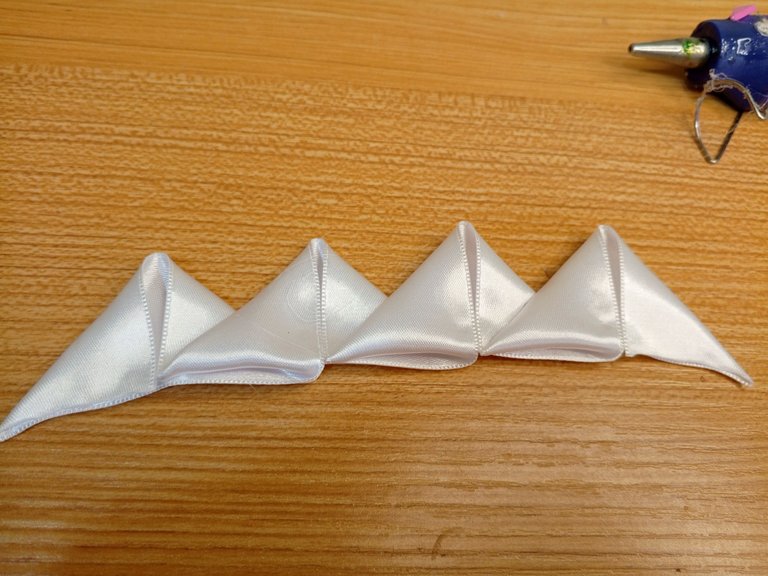
Repitiendo los pasos anteriores, necesitamos una seguidilla de 4 puntas o 4 triángulos.
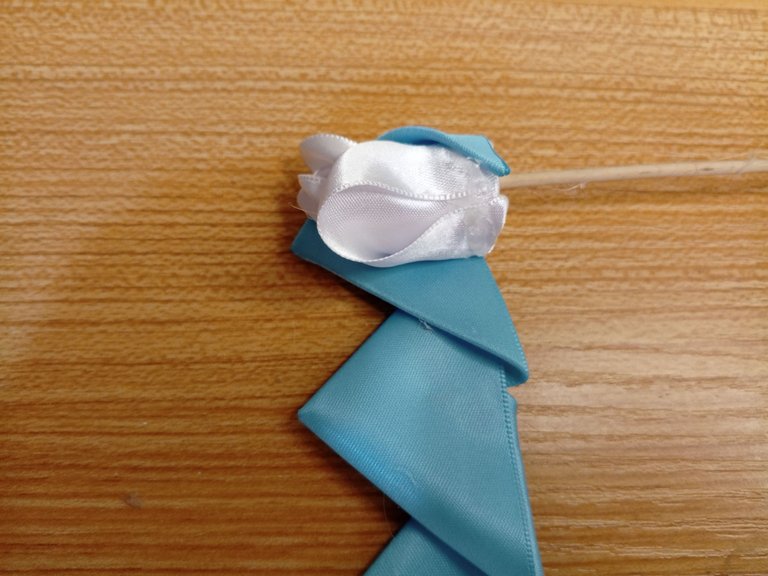
Toma el palito de altura, observa la última imagen de cómo debes colocar la cinta con las aberturas hacia la mesa. Coloca un poco de pegamento en la cinta y comienza a enrollar cada triángulo en el palito.
! [English version]
Repeating the previous steps, we need a string of 4 points or 4 triangles.
Take the height stick, look at the last picture of how you should place the ribbon with the openings towards the table. Put some glue on the ribbon and start wrapping each triangle around the stick.

Step 5️⃣/ paso 5️⃣

 |  | |
 |  |
[Esp]
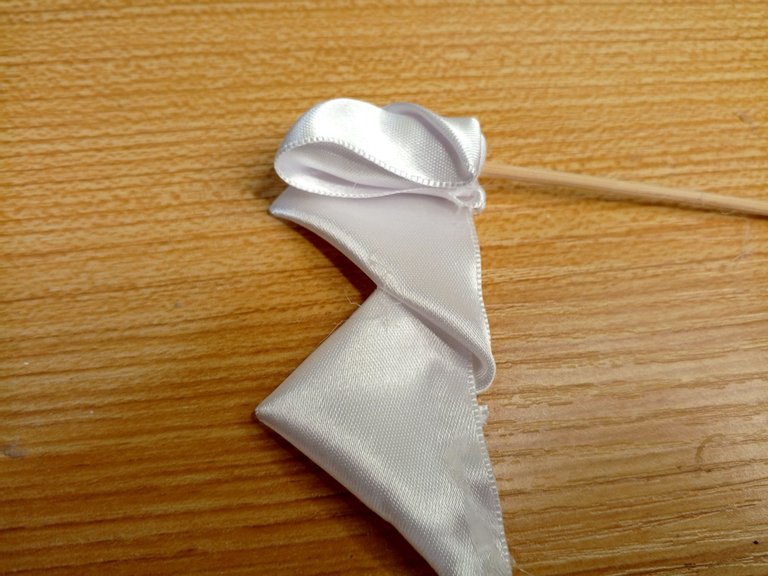
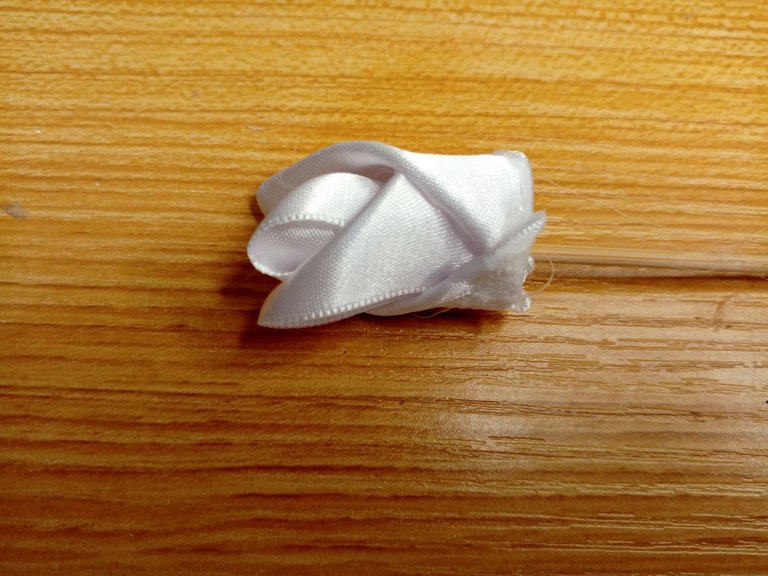
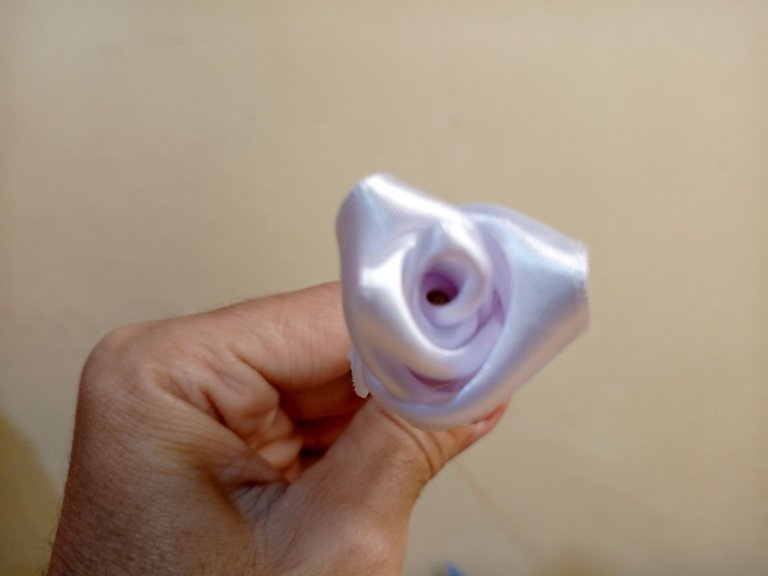
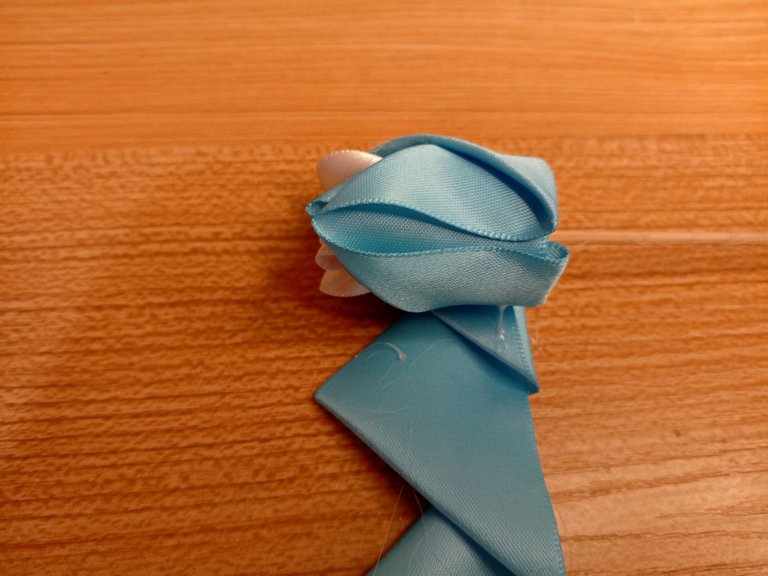
Aplica pegamento en la orilla de la cinta y ve enrollando al rededor del palito.
Al terminar con la cinta blanca, continua con la cinta azul.repite el procedimiento con la la cinta blanca, ve enrollando al rededor del botón que hemos armado dejando la abertura hacia a fuera de la rosa.
! [English version]
Apply glue to the edge of the ribbon and wrap it around the stick.
When finished with the white ribbon, continue with the blue ribbon. Repeat the procedure with the white ribbon, wrapping it around the button we have assembled, leaving the opening facing out of the rose.

Step 6️⃣/ paso 6️⃣

 |  |  |
 |  |  |
[Esp]
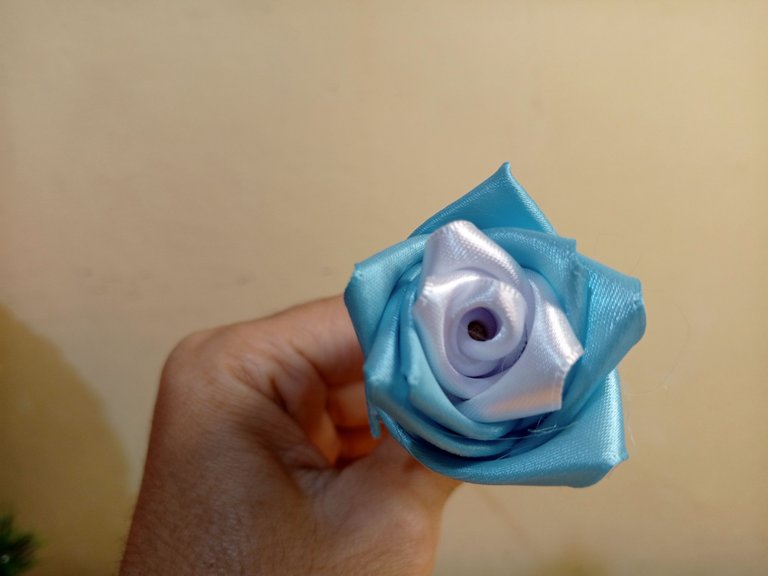
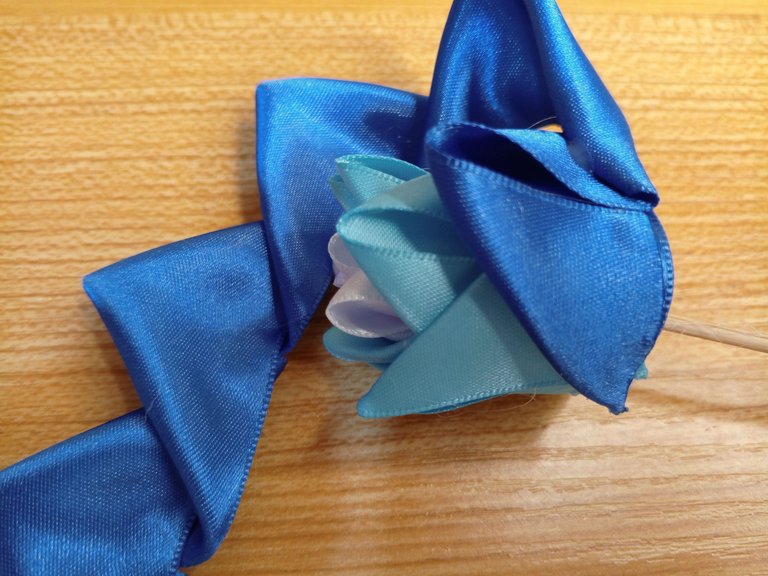
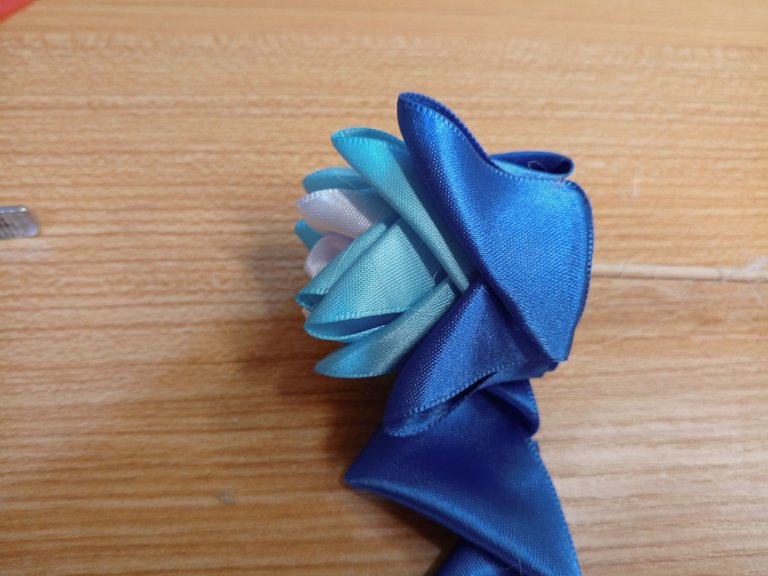
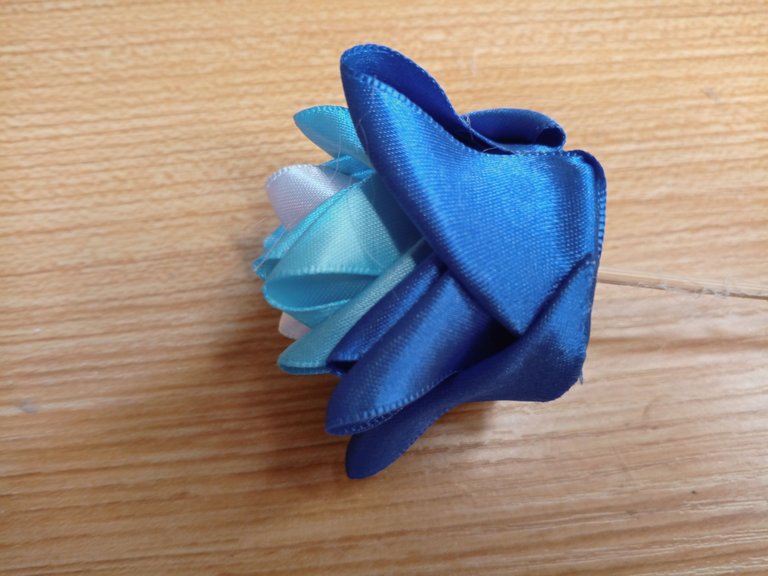
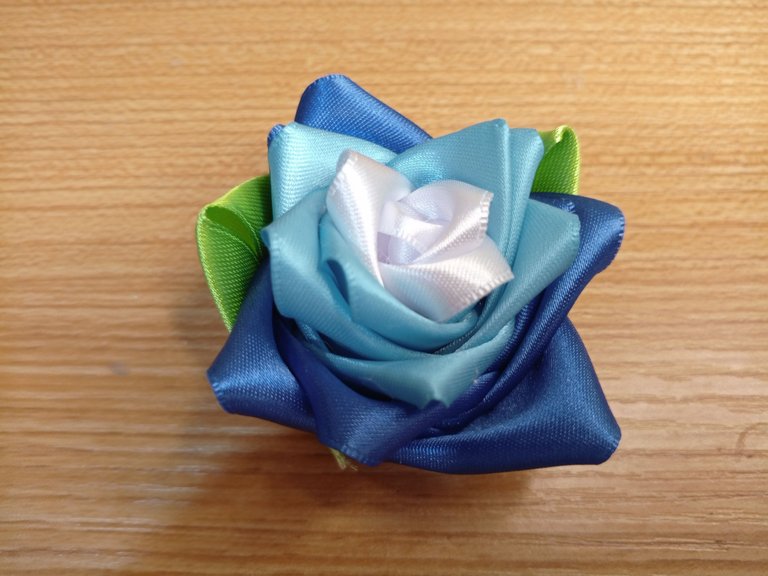
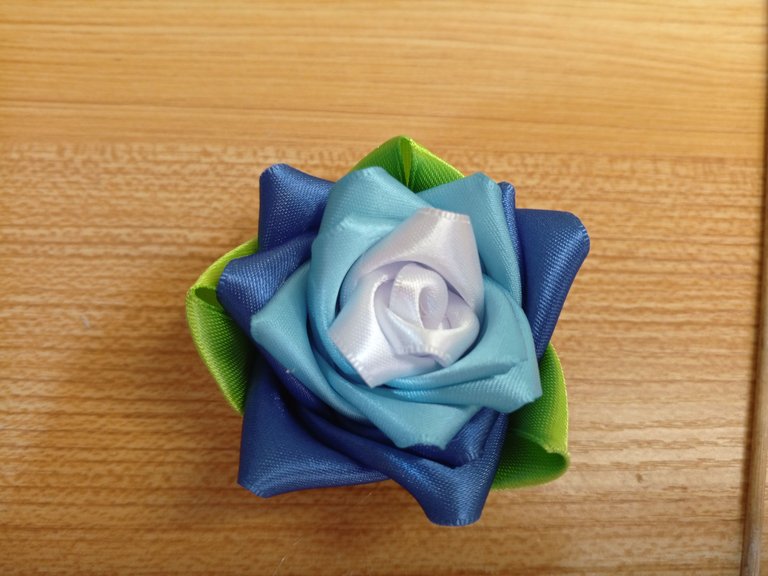
En cuanto termines de enrollar la cinta azul claro, repetimos el paso anterior pegando la cinta azul rey con los pétalos que hemos armado.
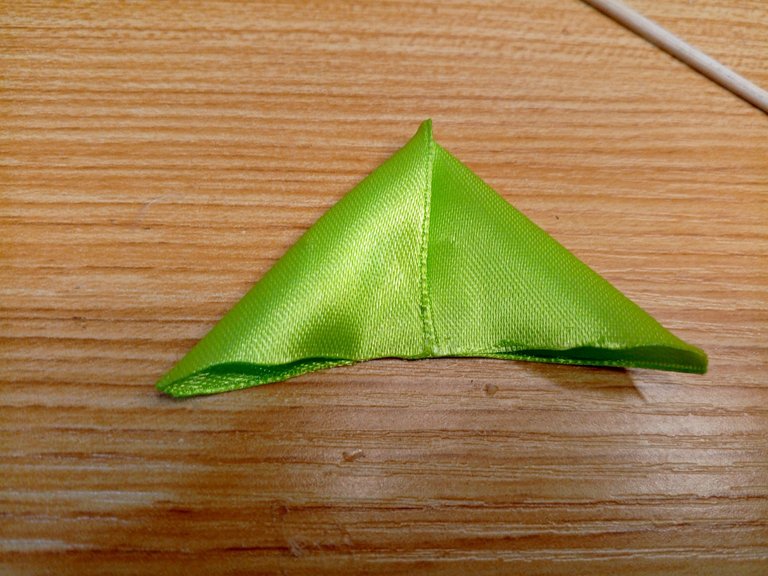
Toma la cinta color verde manzana, dobla las puntas para formar un triángulo, aplica pegamento en cada punta y corta el excedente, recuerda quemar las orillas para evitar se deshilache, repetirás este paso tres veces más.
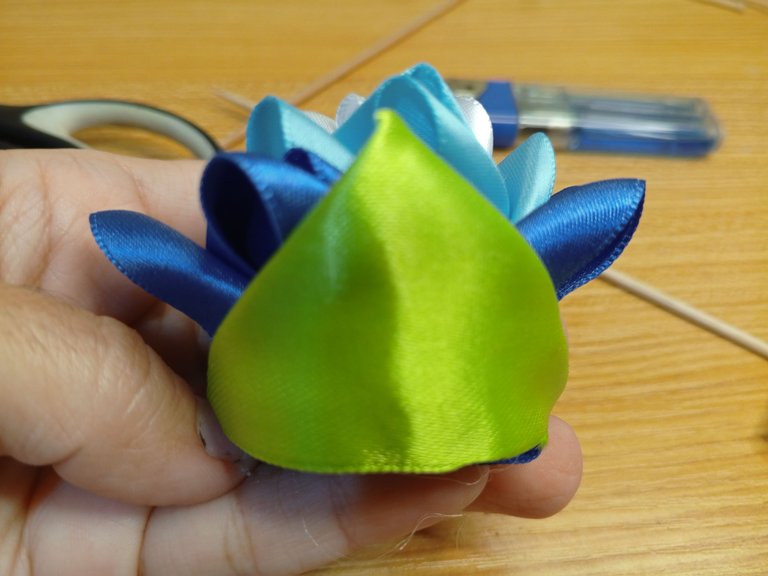
Ahora de forma intercalada y tratando de cubrir espacios faltantes, pega cada una de las piezas que formarán ahora las hojas de la rosa.
! [English version]
As soon as you finish rolling the light blue ribbon, repeat the previous step by gluing the royal blue ribbon with the petals we have assembled.
Take the apple green ribbon, fold the ends to form a triangle, apply glue on each end and cut the excess, remember to burn the edges to avoid fraying, repeat this step three more times.
Now, in an intercalary way and trying to cover the missing spaces, glue each of the pieces that will now form the leaves of the rose.

Step 7️⃣/ paso 7️⃣
Otra forma de realizar rosas eternas
Otra forma de realizar rosas eternas

 |  |  |
 |  |  |
[Esp]
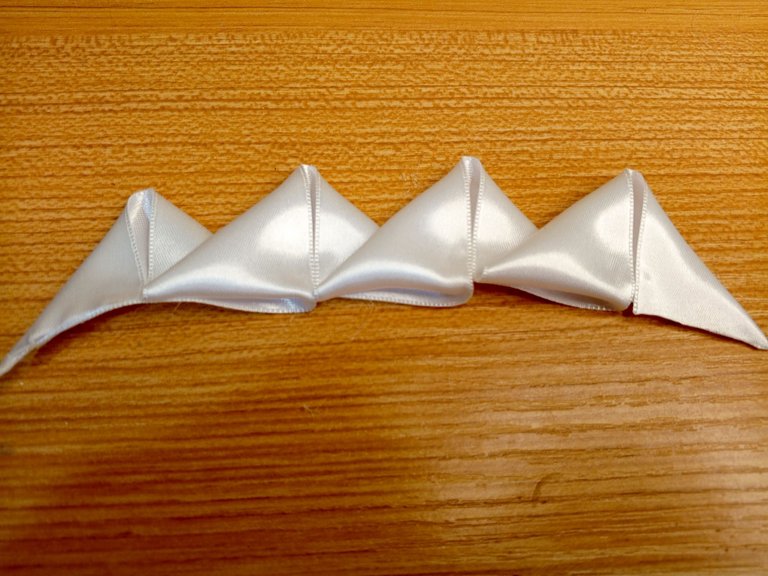
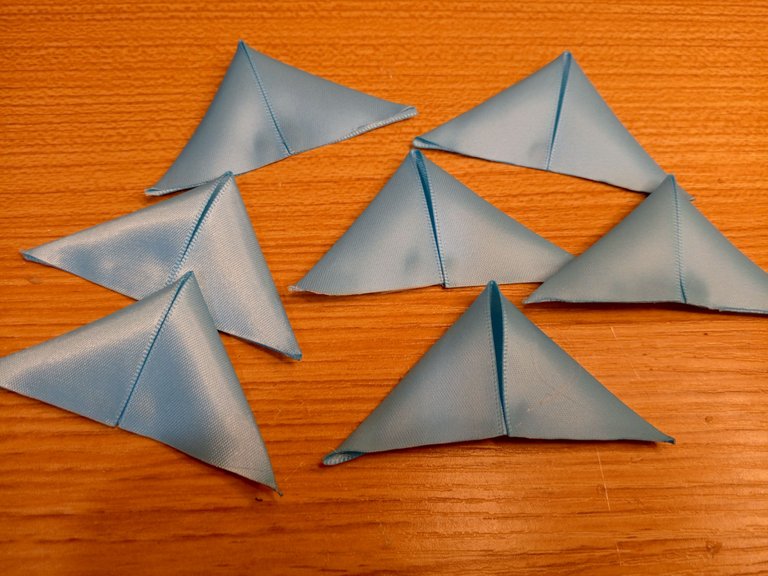
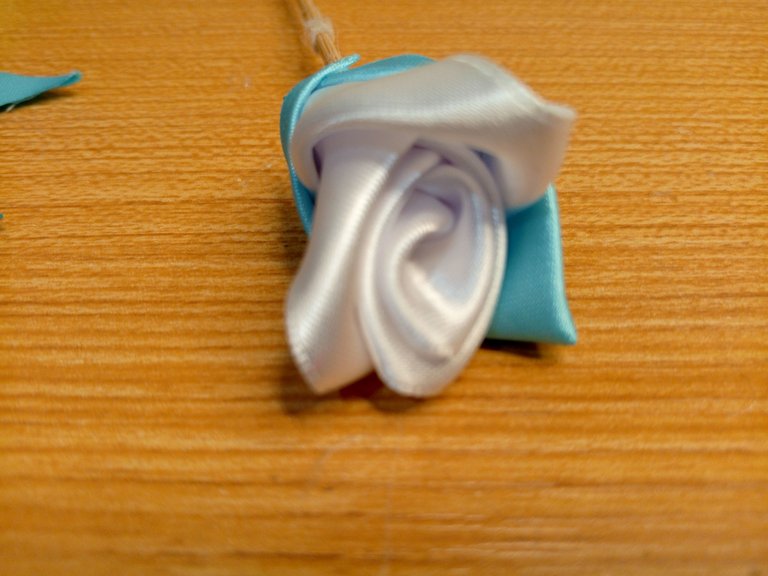
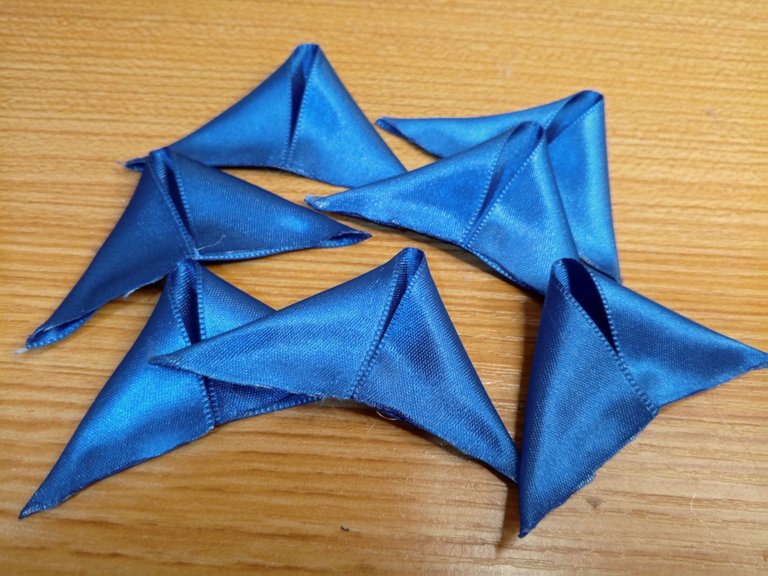
Realizamos la parte del centro del botón de la rosa con la cinta de color blanco, repetimos los pasos anteriores, necesitamos una seguidilla de 4 puntas o 4 triángulos.
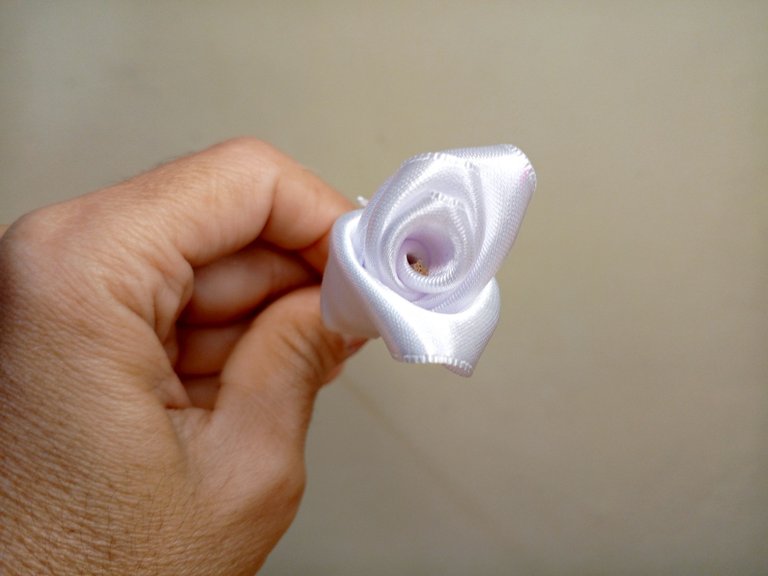
Toma el palito de altura y comienza a enrolar la cinta de color blanco alrededor del palito de altura.
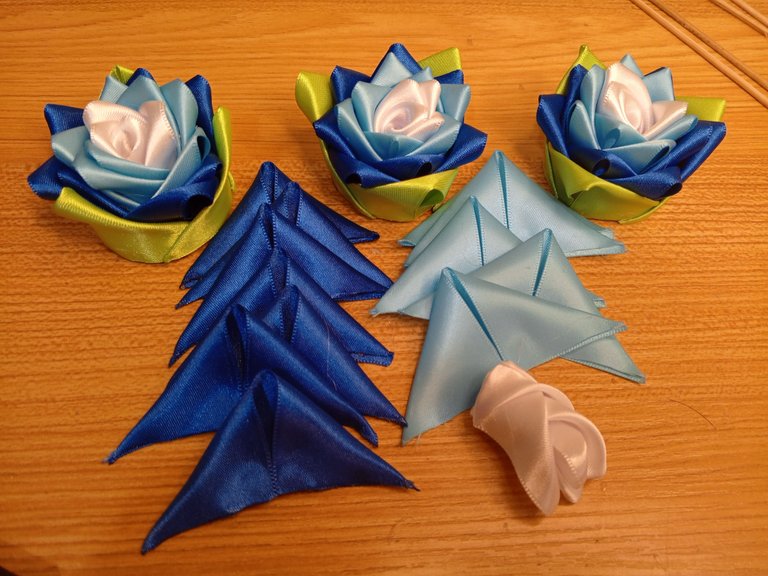
Realiza pétalos por separado, con la cinta de color azul oscuro, esta forma quizá ayude a que estén mejor distribuidos en los espacios, aunque tendrás más trabajo. Dobla la primera punta hacia abajo formando un triángulo pequeño, aplica un poco de pegamento en esa punta, ahora repite el paso en el otro extremo para formar un triángulo más grande, necesitas 7 piezas de estas.
Repite este paso con la cinta de color azul rey.
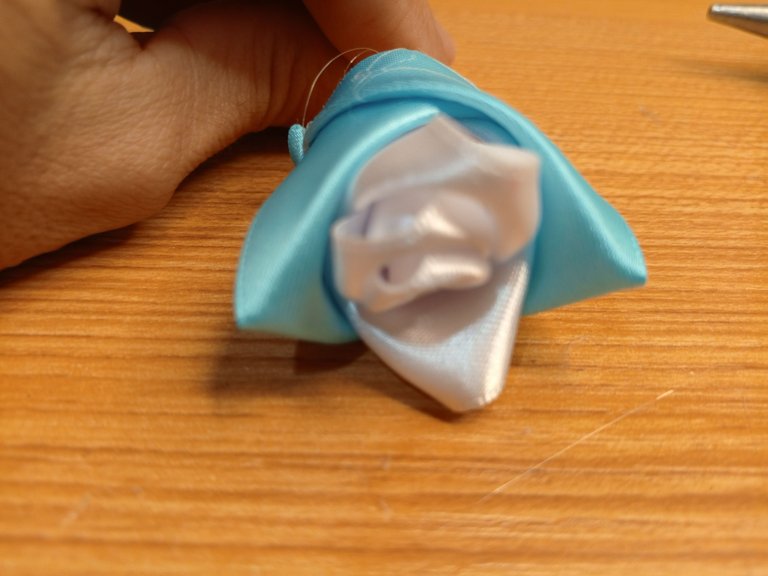
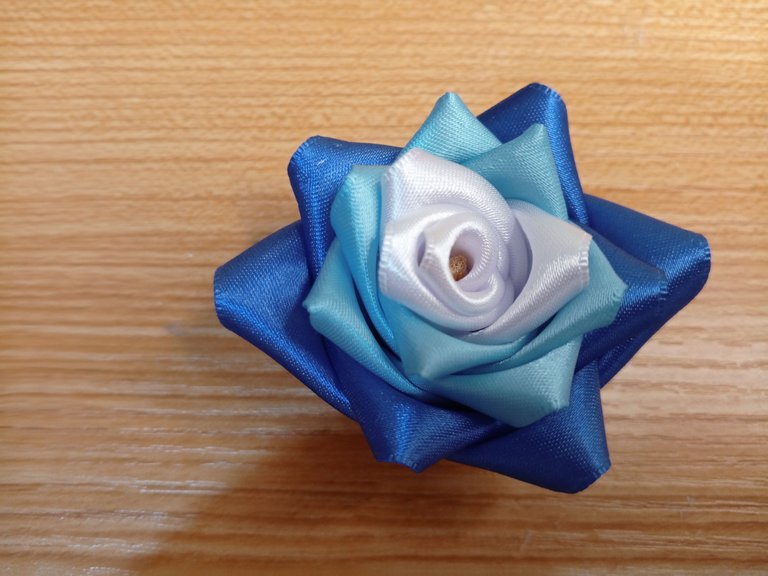
Comienza a pegar cada pétalo al rededor del botón blanco, procura cubrir los espacios.
! [English version]
We make the center part of the rose button with the white ribbon, repeat the previous steps, we need a string of 4 points or 4 triangles.
Take the height stick and start wrapping the white ribbon around the height stick.
Make petals separately, with the dark blue ribbon, this shape may help them to be better distributed in the spaces, although you will have more work to do. Fold the first end down forming a small triangle, apply some glue on that end, now repeat the step on the other end to form a larger triangle, you need 7 pieces of these.
Repeat this step with the royal blue ribbon.
Start gluing each petal around the white button, try to cover the spaces.

Step 8️⃣/ paso 8️⃣

 |  |  |
 |  |  |
[Esp]
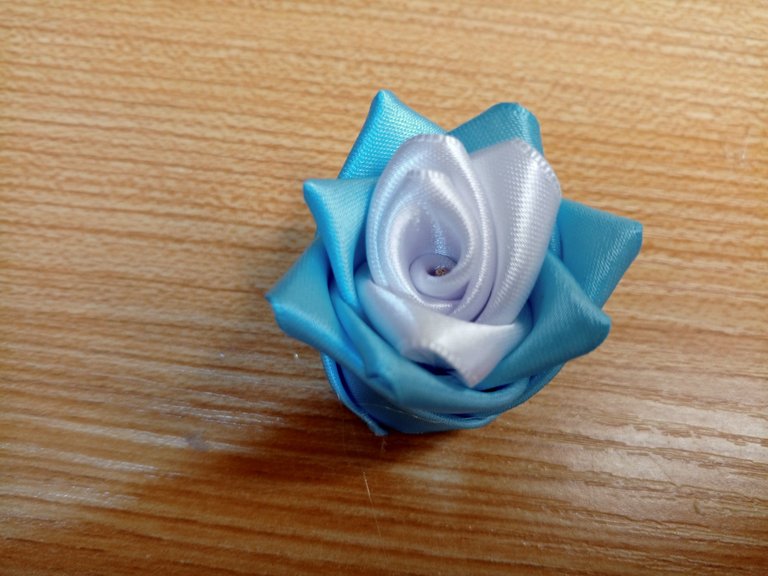
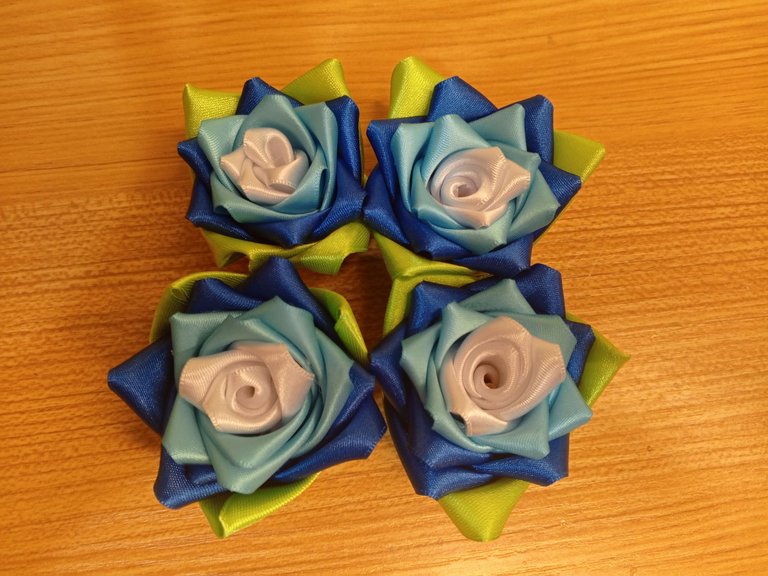
Tal como el paso anterior, ahora fija cada pétalo en la rosa con la cinta o las piezas de color azul rey.
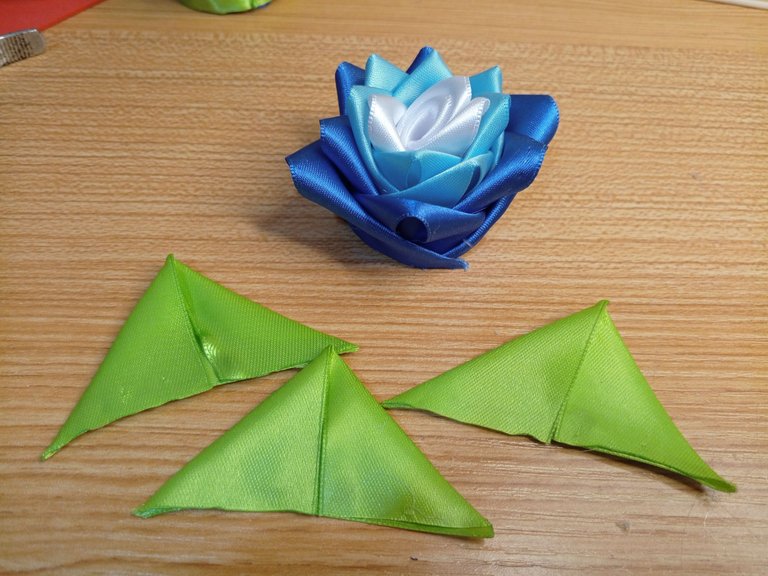
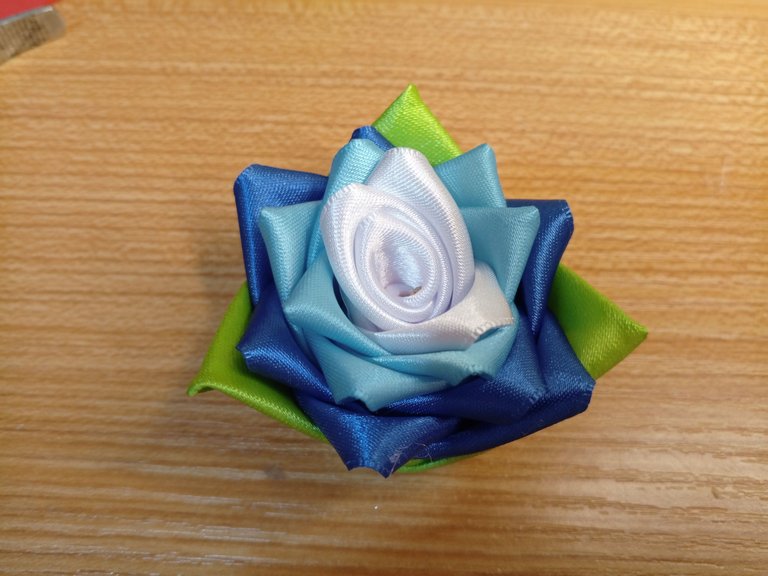
Realiza las 3 hojas y luego las pegas en la flor.
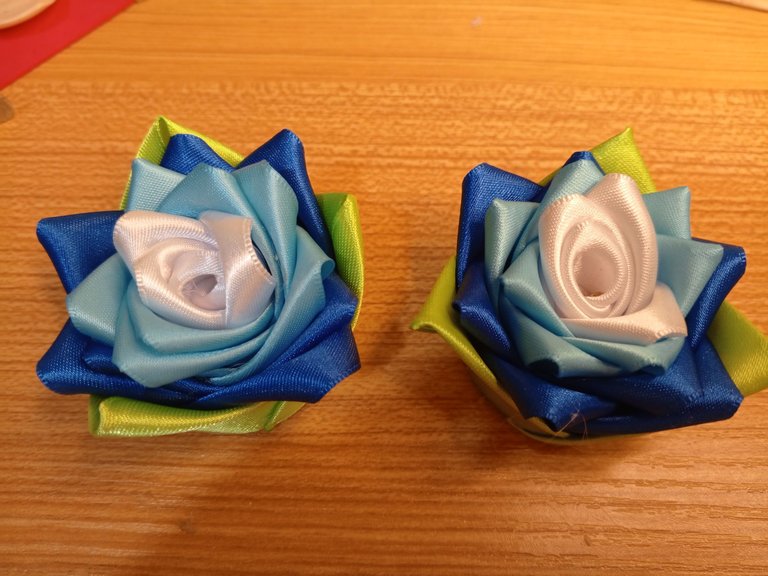
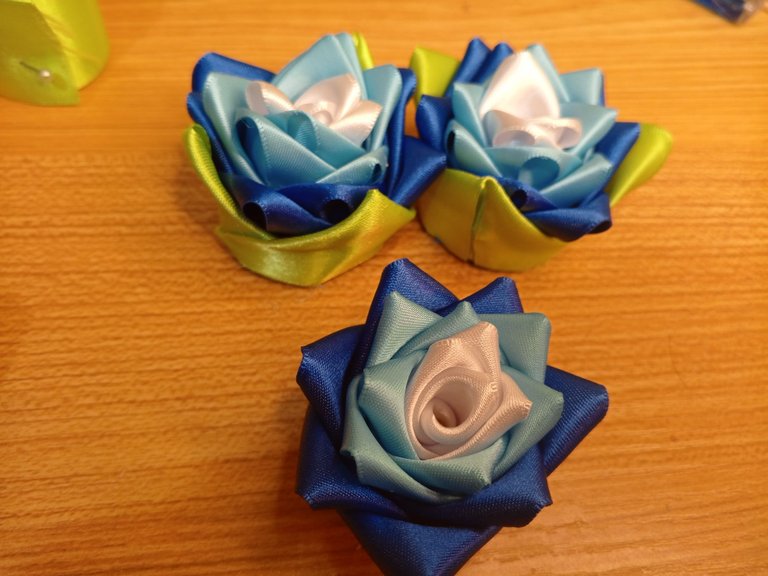
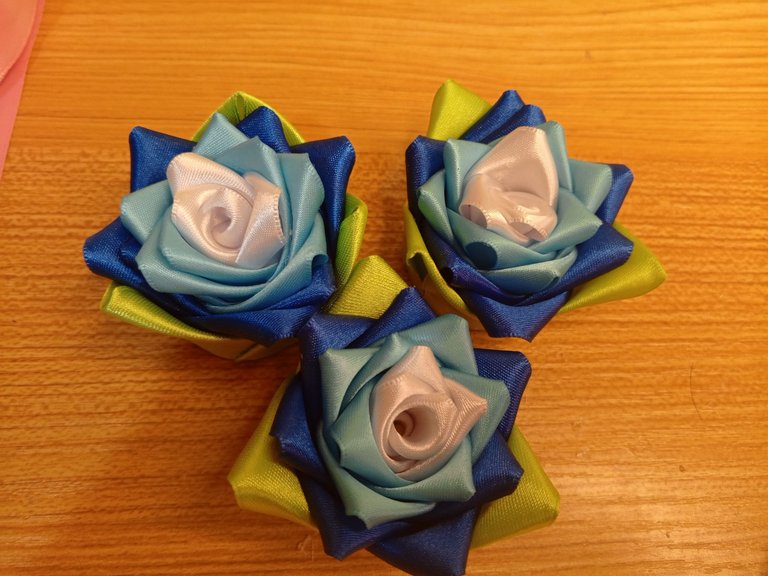
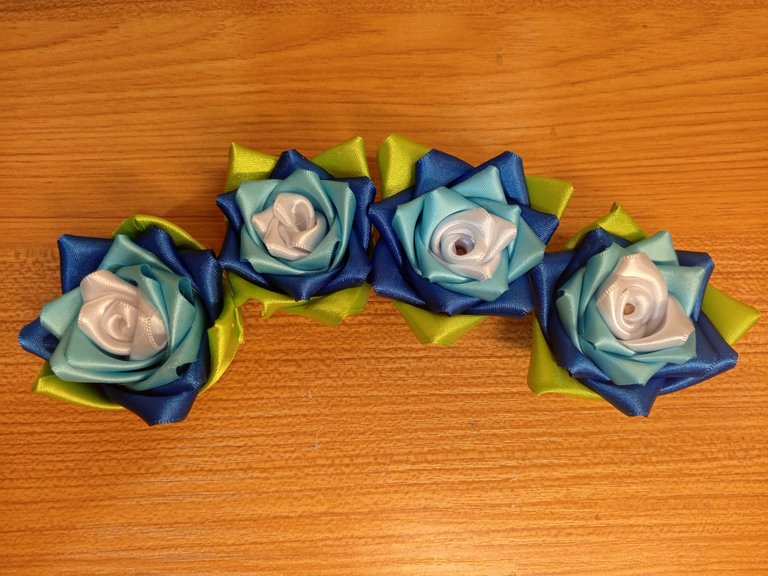
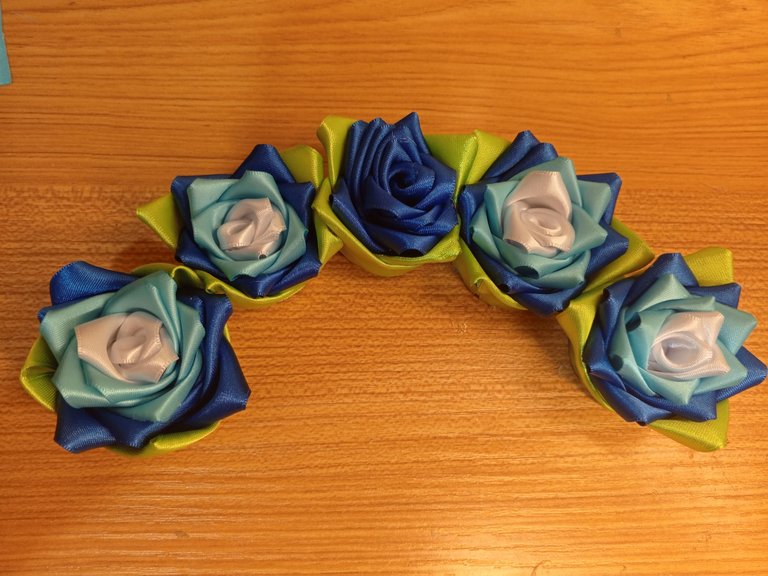
Irás repitiendo todos estos pasos cuantas flores necesites. Realicé 5 la última solo con el color azul rey, ya que se me había acabado la cinta de color azul claro.
Para hacer la cantidad de flores fueron necesarios 5 metros de cada cinta de color azul y 3 de color blanco, verde manzana.
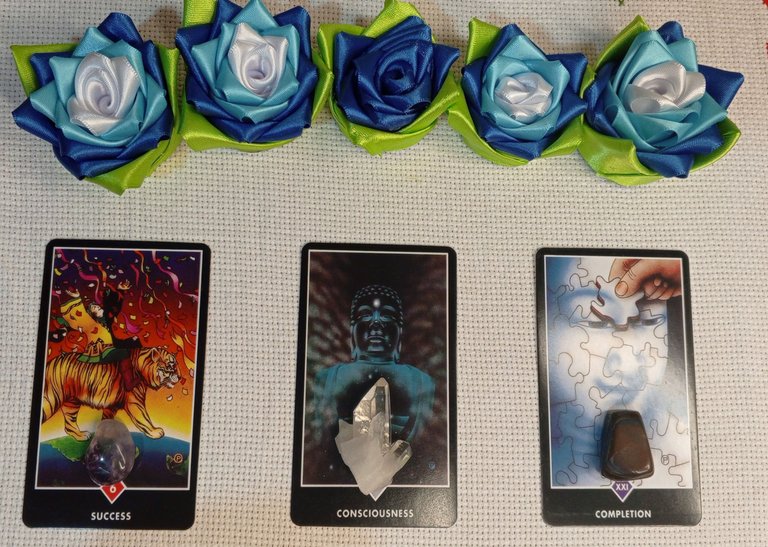
Ahora les presento mi mesa decorada, espero les guste.
! [English version]
Just like the previous step, now attach each petal to the rose with the ribbon or the royal blue pieces.
Make the 3 leaves and then glue them to the flower.
Repeat all these steps for as many flowers as you need. I made 5, the last one only with the royal blue color, since I had run out of light blue ribbon.
To make the amount of flowers I needed 5 meters of each blue ribbon and 3 meters of white, apple green.
Now I present my decorated table, I hope you like it.


Créditos / Credits




💜💜💜


![]() 👉
👉  👉
👉  👉
👉  👉
👉 
Here / Bríndame un café


