
 |  |
🌼🌼🌼🌼🌻🌼🌼🌼🌼
[Esp]
¡Saludos comunidad craftera y artesana! Me hace feliz compartir con ustedes mi creatividad.
Con la adquisición de mi máquina de coser, me he activado mucho en casa, haciendo reparaciones en prendas de vestir, modificando otras tantas que ya no me quedaban y con ello las de mis familiares en casa.
Esto me hace feliz, pues me he activado mucho en las manualidades, me distraigo y hago cosas aun más productivas y que me generan mucho bienestar.
He estado tan ocupada estos últimos días que a penas puedo atender mis teléfonos, eso quiere decir que estoy muy enfocada en mis proyectos.
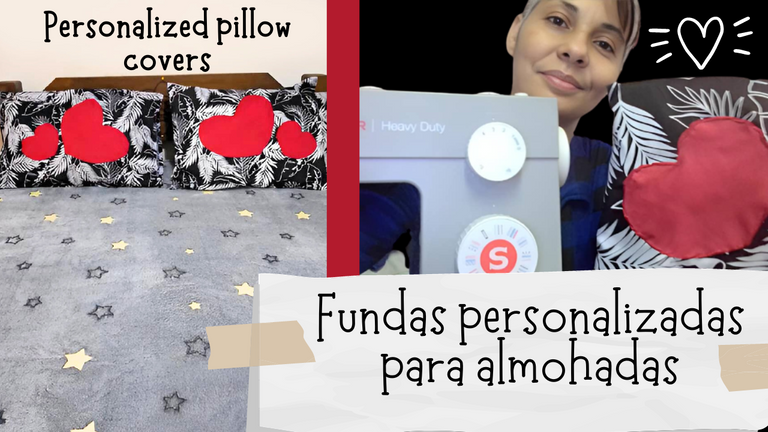
Hoy traigo para ti una idea para fundas de almohadas personalizadas, esta necesidad viene al ver que las fundas de las almohadas siempre envejecen o se deterioran primero que las sabanas, también para decorar la habitación más bonita, pues me encanta tener mi cama siempre ordenada y bonita, ya que dicen que "así como tienes tu cama tienes tu mente y tu vida" Yo como soy supersticiosa y respetuosa de las tradiciones de nuestros ancestros, trato de seguir las costumbres.
Encontré una tela que al principio no me agradó mucho, me pareció muy oscura para ser usada en la cama, luego se me ocurrió que podía agregarle algunos diseños incrustados bordados con un color plano que resaltara muy bien, entre ellos sabemos que los colores que se llevan muy bien con el negro son el rojo y el amarillo. Así que le pedí al vendedor, me vendiera la misma tela en color rojo, ya sabemos que mi daltonismo puede ser un dilema.
Ahora traigo para ustedes, estas ideas que aprendí a coser con mi madre, que bien pueden usarse como forma de emprendimiento o hacerlos tú en casa, ya que resultan más económicas que comprarlas en el mercado, mejor aún, hechas por nosotros mismos, lo cual lo hace verse especial.
! [Scroll down to read the English version]
[Eng]
Greetings craft and artisan community! It makes me happy to share with you my creativity.
With the acquisition of my sewing machine, I have become very active at home, making repairs on garments, modifying many others that no longer fit me and with it those of my relatives at home.
This makes me happy, because I have become very active in handicrafts, I am distracted and I do things that are even more productive and that generate me a lot of well-being.
I have been so busy these last few days that I can hardly answer my phones, that means that I am very focused on my projects.
Today I bring for you an idea for personalized pillowcases, this need comes to see that the pillowcases always get old or deteriorate first than the sheets, also to decorate the room more beautiful, because I love to have my bed always tidy and beautiful, as they say that "as you have your bed you have your mind and your life" I as I am superstitious and respectful of the traditions of our ancestors, I try to follow the customs.
I found a fabric that at first I didn't like very much, it seemed too dark to be used on the bed, then it occurred to me that I could add some inlaid designs embroidered with a flat color that would stand out very well, among them we know that the colors that go very well with black are red and yellow. So I asked the seller to sell me the same fabric in red, we know that my color blindness can be a dilemma.
Now I have for you, these ideas that I learned to sew with my mother, which can be used as a form of entrepreneurship or you can make them at home, as they are cheaper than buying them in the market, better yet, made by ourselves, which makes it look special.
🌼🌼🌼🌼🌻🌼🌼🌼🌼
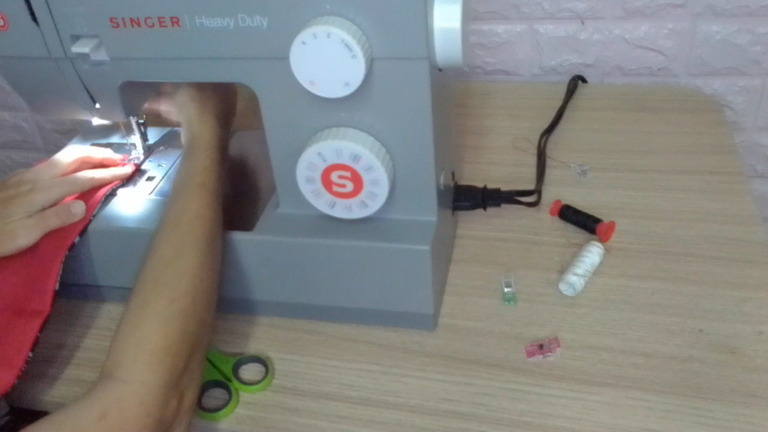
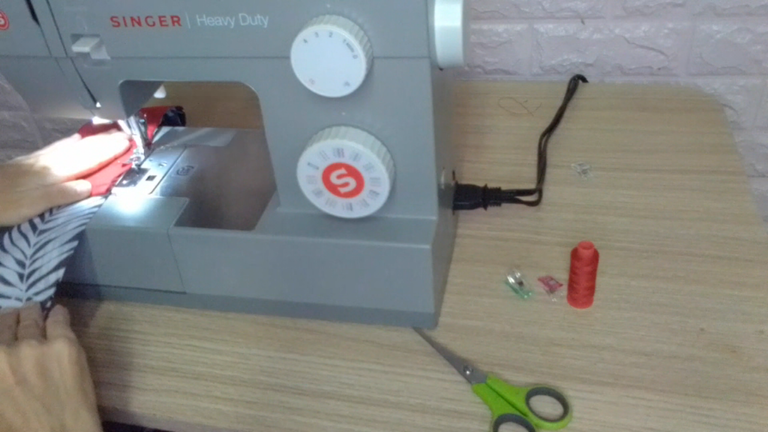
Materials / Materiales
🌼🌼🌼🌼🌻🌼🌼🌼🌼
[Esp]
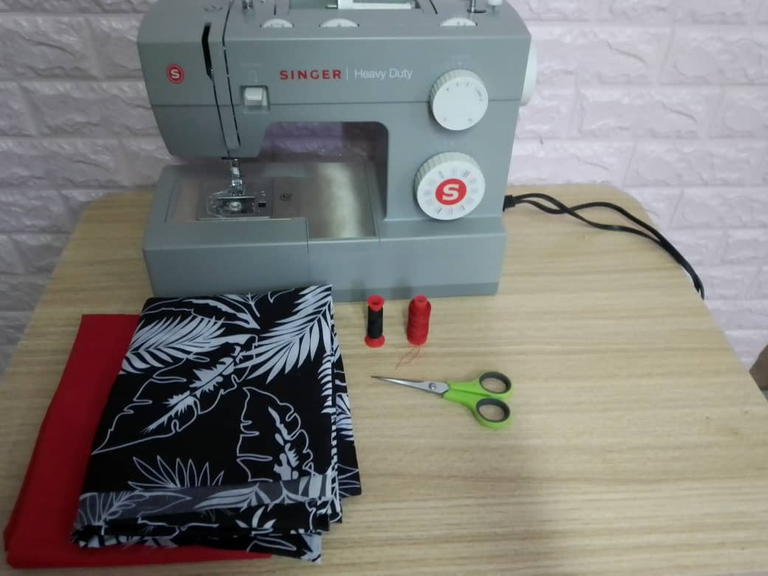
🌼 Puedes coserlas a mano si te armas de suficiente paciencia, pero considero que para un mejor acabado, es necesario una máquina de coser.
🌼 De acuerdo a los colores de tela que uses, recomiendo usar el color de hilo correspondiente. Yo usé hilos de color rojo y negro.
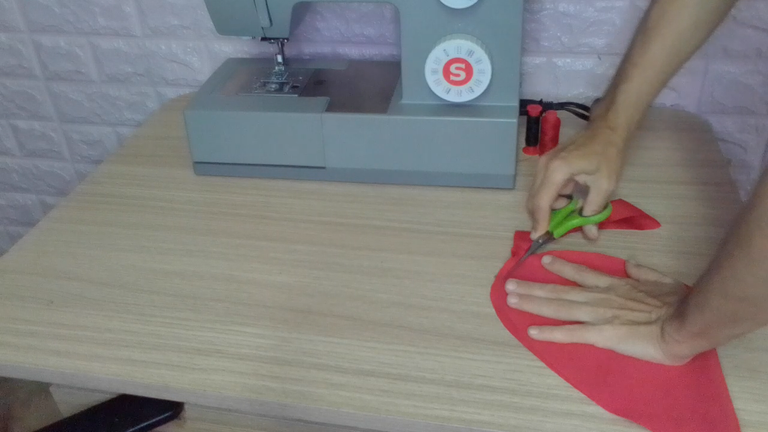
🌼 Tijera.
🌼 2 Metros de tela popelina estampada
🌼 30 Centímetros de tela popelina unicolor.
! [Scroll down to read the English version]
[Eng]
🌼 You can sew them by hand if you have enough patience, but I consider that for a better finish, a sewing machine is necessary.
🌼 According to the fabric colors you use, I recommend using the corresponding thread color. I used red and black threads.
🌼 Scissors.
🌼 2 Meters of printed poplin fabric.
🌼 30 Centimeters of unicolor poplin fabric.
Step by Step / Paso a Paso
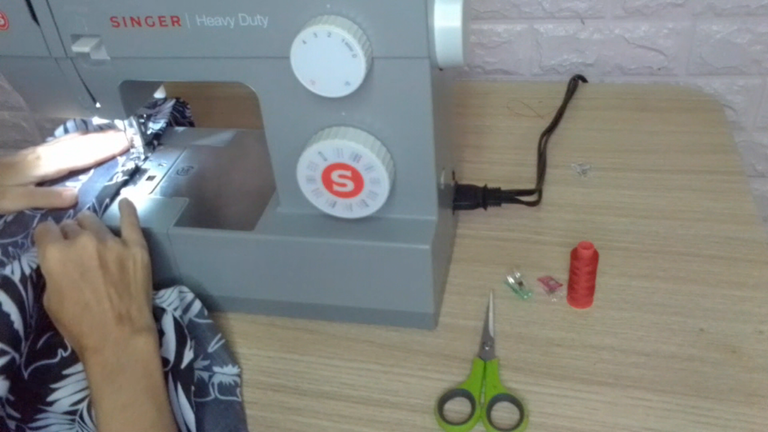
Step 1️⃣/ Paso 1️⃣
 |  |  |
 |  |  |
[Esp]
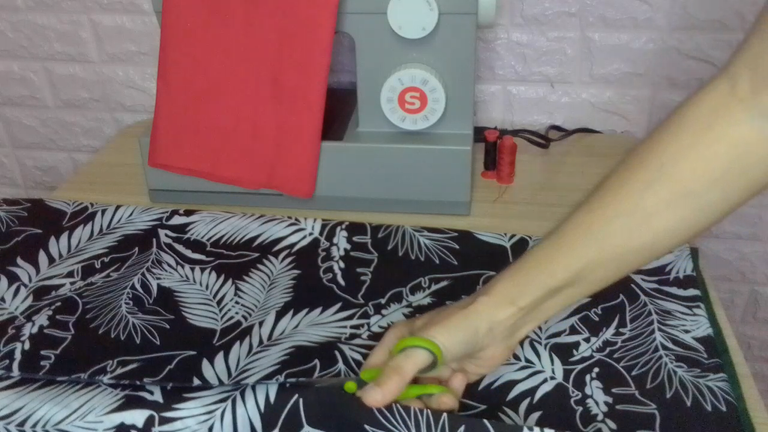
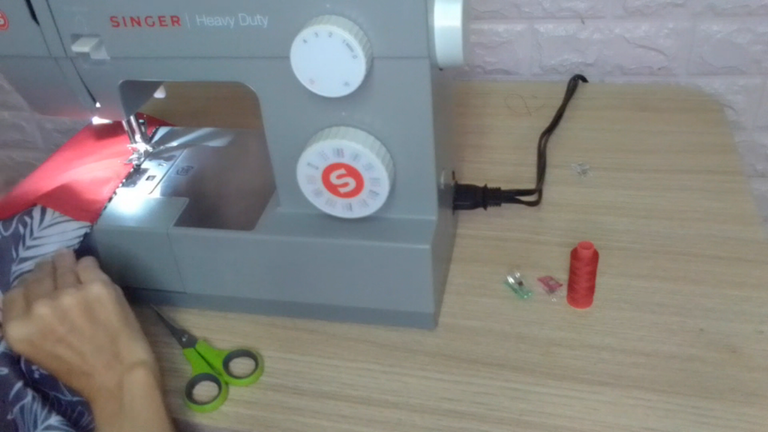
Lo primero que debemos hacer es tomar la medida de nuestras almohadas, ya que hay algunas que suelen ser más grandes que otras. Yo por ejemplo en mi cama, tengo dos almohadas pequeñas (king) de 50 x 76 cm y dos almohadas grandes (queen) de 50 x 91 cm, pero también existen las normales, un tamaño estándar que pueden medir 50 x 66 cm.
Dicho esto, procede a cortar la tela estampada por el ancho.
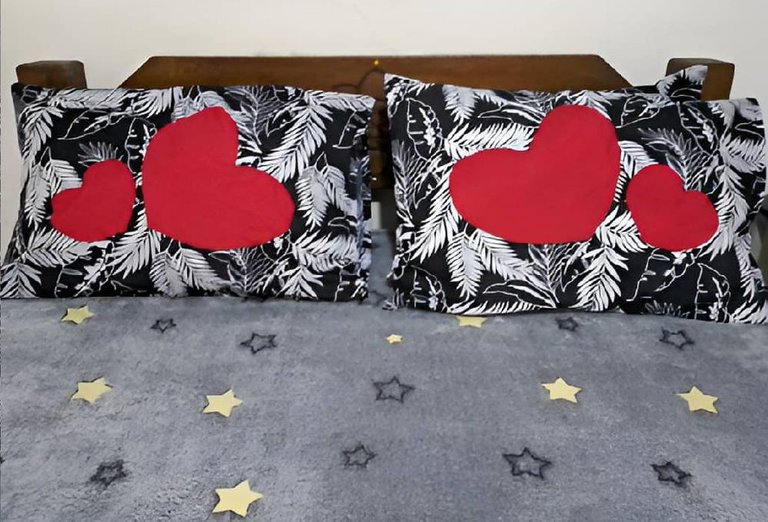
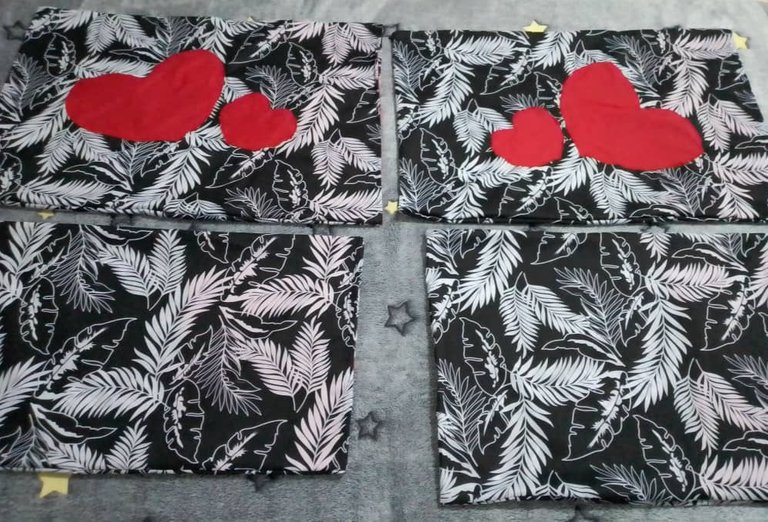
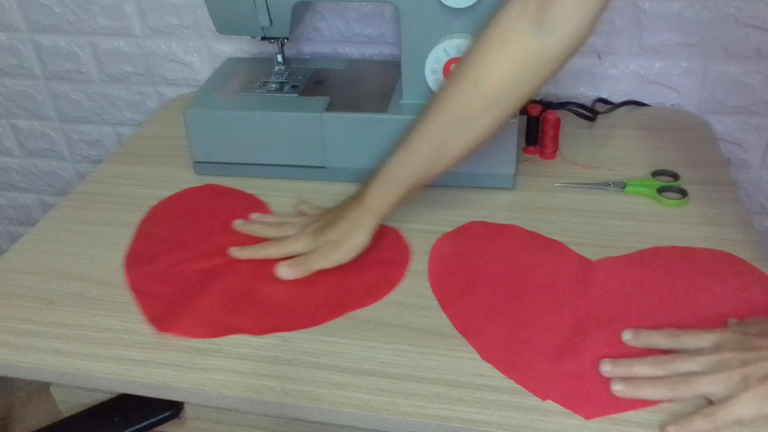
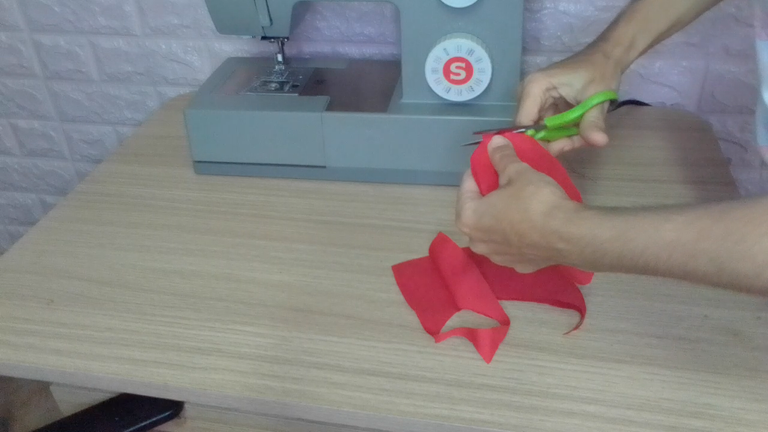
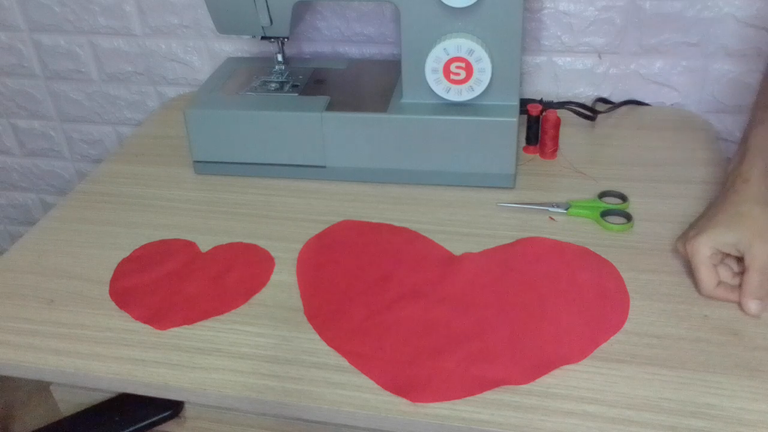
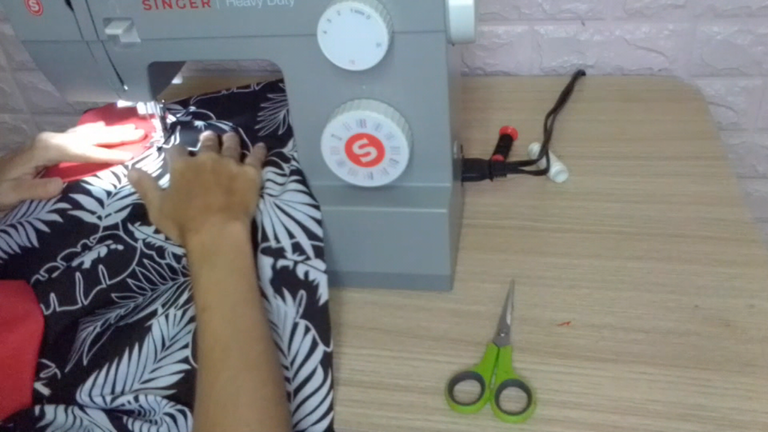
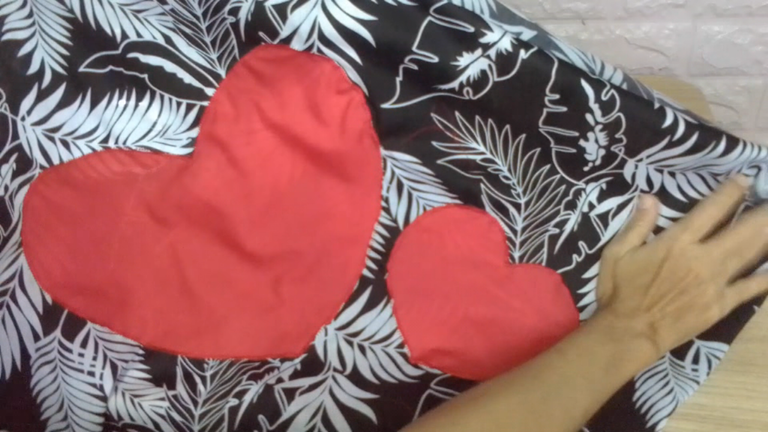
Luego recorta las figuras deseadas, en mi caso, elegí dos corazones de distintos tamaños, tomando en cuenta que solo serán visibles las dos almohadas queen, mientras que las king, quedarán detrás, por lo que no es necesario hacer los bordados.
Puedes usar plantillas para ello, yo por ejemplo lo hice a ojo.
! [Scroll down to read the English version]
[Eng]
The first thing to do is to take the measure of our pillows, as there are some that are usually larger than others, I for example in my bed, I have two large pillows (queen) of 50 x 76 cm and two small pillows (king) of 50 x 91 cm, but there are also the normal ones, a standard size that can measure 50 x 66 cm.
That said, proceed to cut the printed fabric by width.
Then cut out the desired figures, in my case, I chose two hearts of different sizes, taking into account that only the two queen pillows will be visible, while the king pillows will be behind, so it is not necessary to do the embroidery.
You can use templates for this, I did it by eye.
🌼🌼🌼🌼🌻🌼🌼🌼🌼
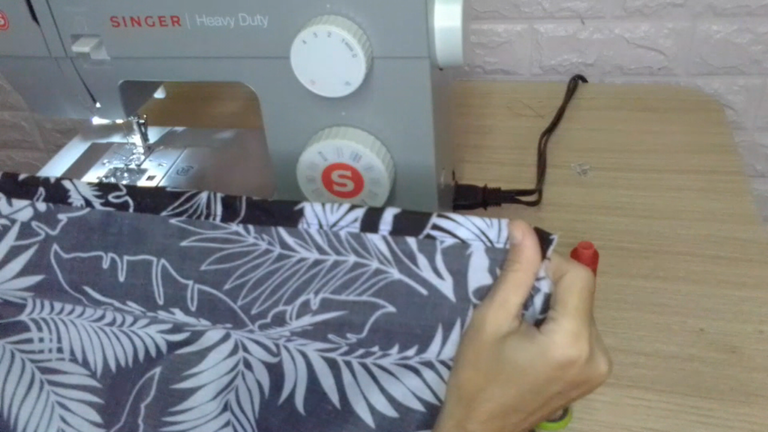
Step 2️⃣/ paso 2️⃣
 |  |  |
 |  |
[Esp]
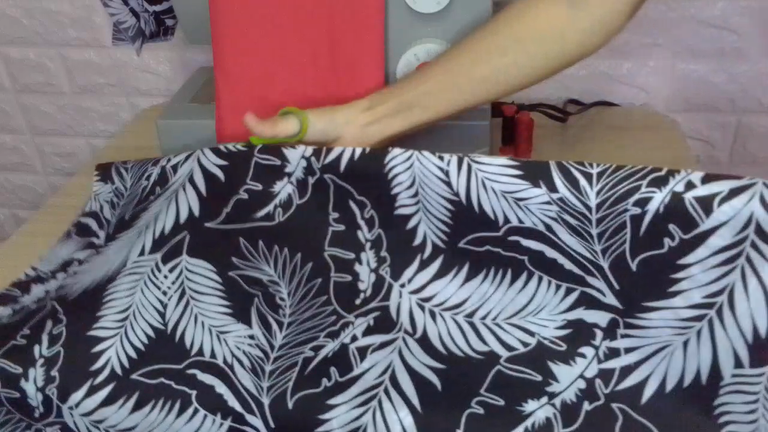
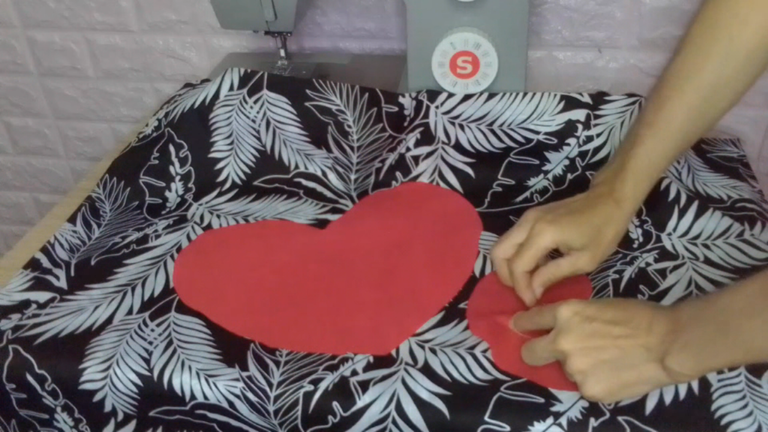
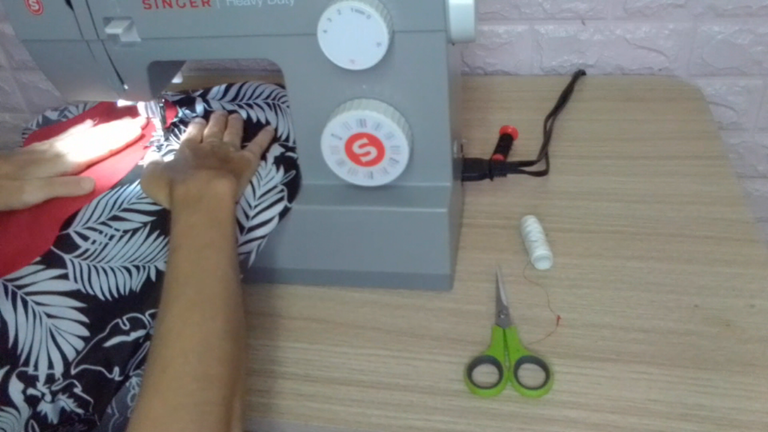
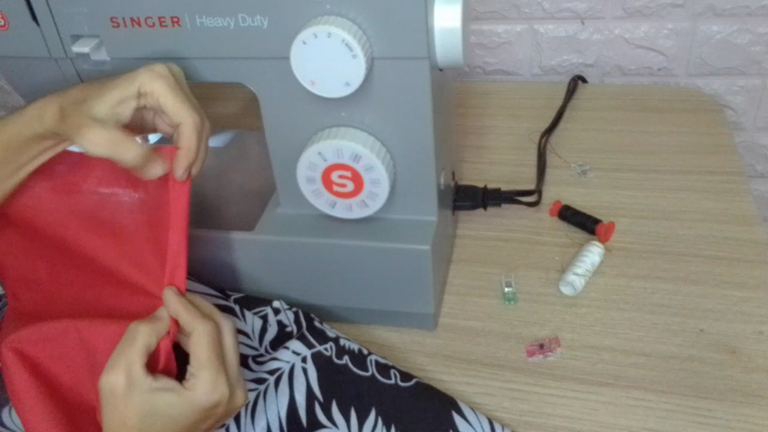
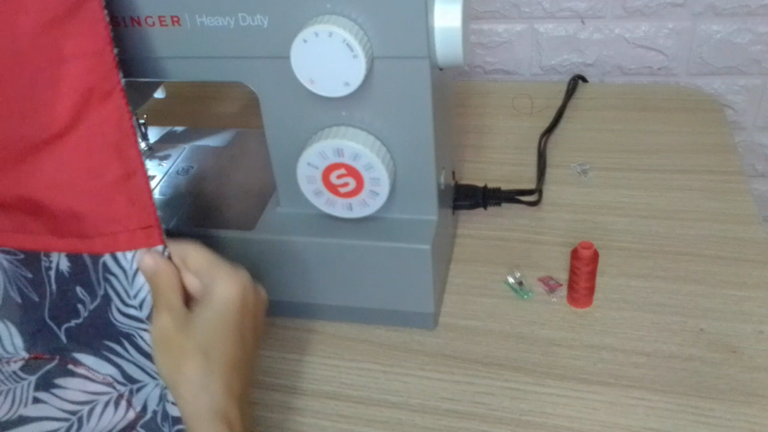
Con ayuda de alfileres puedes marcar el lugar dónde colocarás las figuras recortadas, en mi caso los corazones, también puedes bastear así evitar que se muevan.
Coloca tu máquina de coser en zig zag y cierra un poco el punto, también puedes bordar si tu máquina tuviera la opción, yo preferí usar el zig zag para mejor acabado en el sentido de evitar se deshilache en el lavado.
Cose las piezas, repite los pasos con la otra almohada.
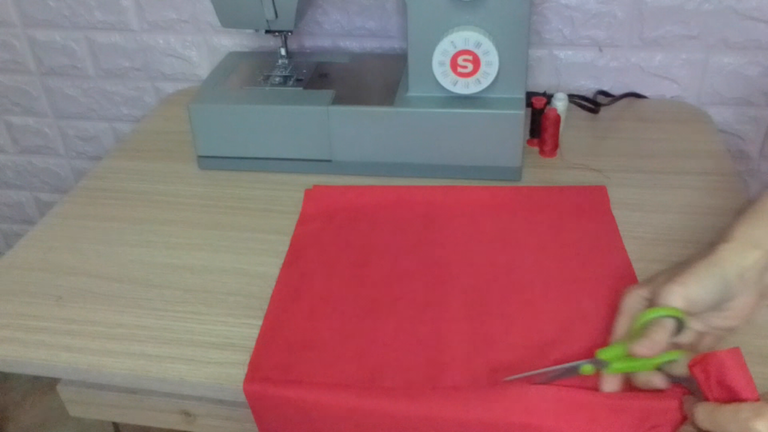
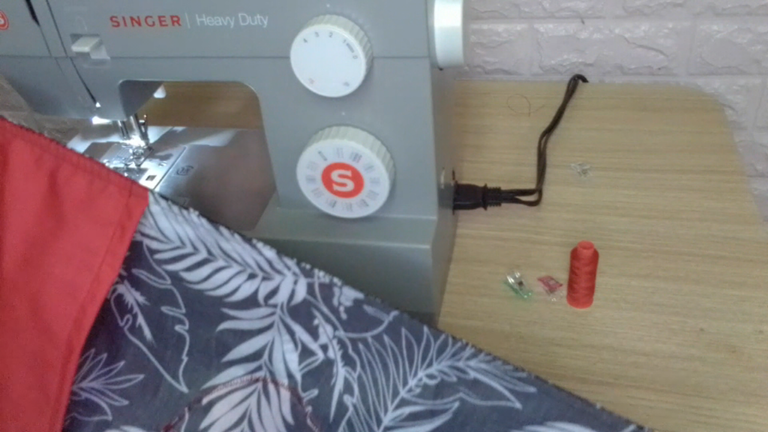
Recorta una tira de 20 centímetros de la tela unicolor midiendo el ancho de la almohada. Necesitaras 4 piezas para las 4 almohadas.
! [Scroll down to read the English version]
[Eng]
With the help of pins you can mark the place where you will place the cut out figures, in my case the hearts, you can also baste to prevent them from moving.
Place your sewing machine in zig zag and close the stitch a little, you can also embroider if your machine has the option, I preferred to use the zig zag for better finish in the sense of avoiding fraying in the wash.
Sew the pieces together, repeat the steps with the other pillow.
Cut a 20 cm strip of the unicolor fabric measuring the width of the pillow. You will need 4 pieces for the 4 pillows.
🌼🌼🌼🌼🌻🌼🌼🌼🌼
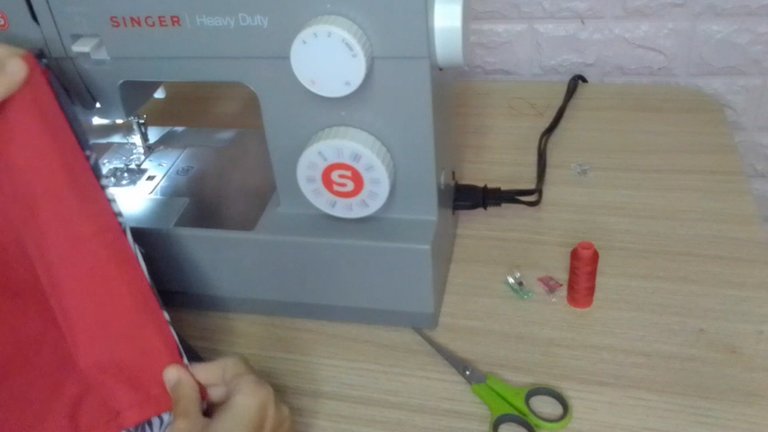
Step 3️⃣/ paso 3️⃣
 |  |  |
 |  |
[Esp]
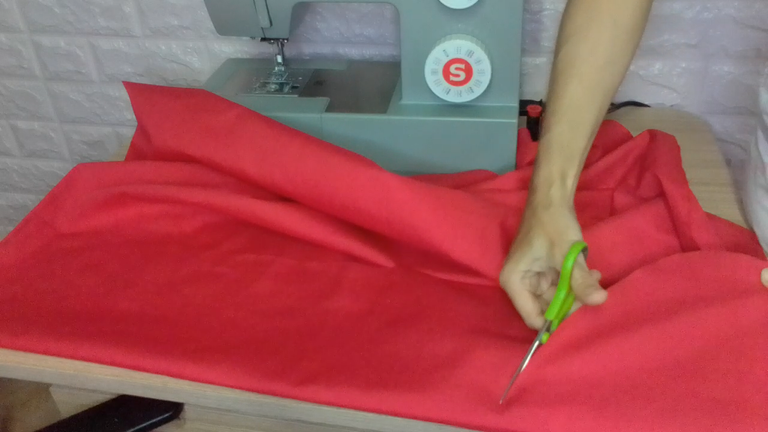
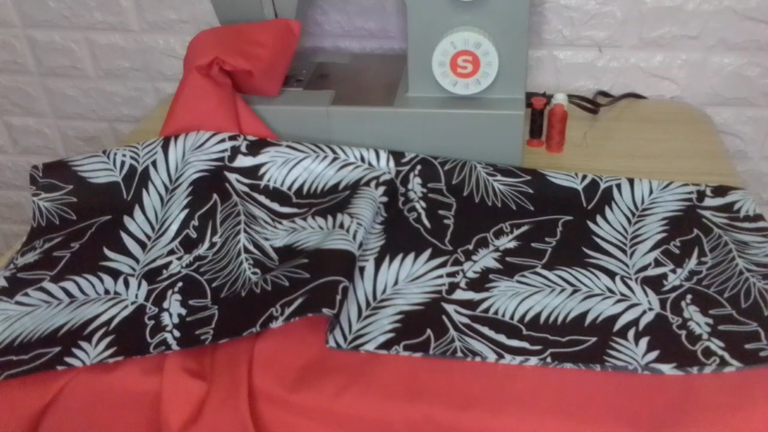
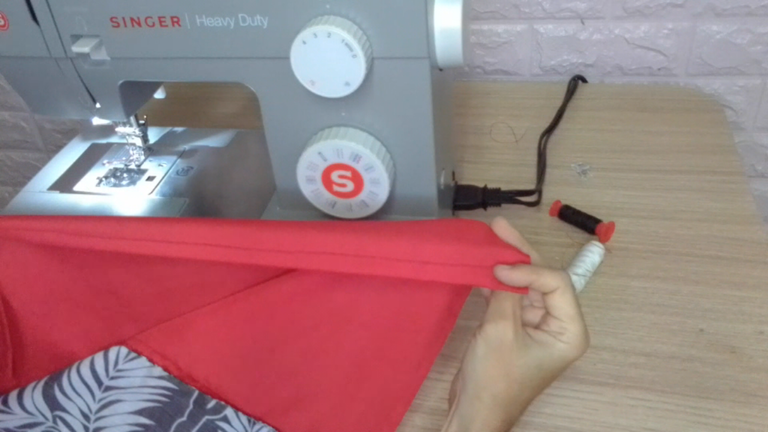
Realiza un dobladillo, en el lado ancho de la tela unicolor.
Cose la tela unicolor a la tela estampada, recuerda pasar dos costuras, una con zig zag, la otra con una costura recta.
Ahora dobla por el lado derecho y pasa una costura recta.
Aplica el mismo procedimiento de dobladillo en la tela estampada de la misma forma que lo hiciste con la tela unicolor, del otro extremo de la tela.
Estas serán las piezas de abertura.
! [Scroll down to read the English version]
[Eng]
Make a hem on the wide side of the unicolor fabric.
Sew the unicolor fabric to the printed fabric, remember to sew two seams, one with a zig zag, the other with a straight seam.
Now fold right side out and stitch a straight seam.
Apply the same hemming procedure on the printed fabric in the same way as you did with the one-color fabric, on the other end of the fabric.
These will be the opening pieces.
🌼🌼🌼🌼🌻🌼🌼🌼🌼
Step 4️⃣/ paso 4️⃣
 |  |  |
 |  |
[Esp]
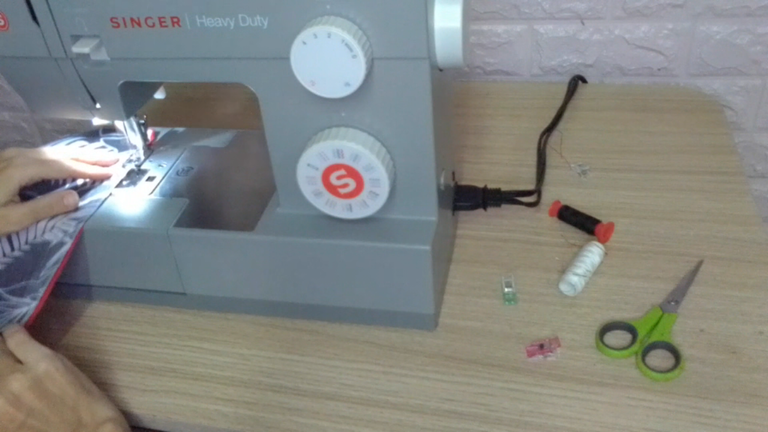
Cose las piezas por el largo, primero pasa el zig zag, luego pasas la recta.
Repite el procedimiento en el extremo opuesto.
Voltea la tela y con ello hemos acabado.
Fijense algo; la tela unicolor, es para sostener la almohada de forma interna sin que ella se salga de los extremos. Es muy incómodo estar durmiendo y que la almohada se salga de su funda.
Así mismo, según mi madre y mi hermana modista, las almohadas hechas de esta forma quedan más elegantes y mejor acabadas que hacerles botones y ojales.
Como modo de recomendación para personas alérgicas como yo. Las telas estampadas siempre vienen con químicos y pelusas de fábrica, por lo que recomiendo, antes de colocarlas en tu cama darles una previa lavada con detergente suave.
Luego del secado si gustas, puedes plancharlas para un mejor acabado.
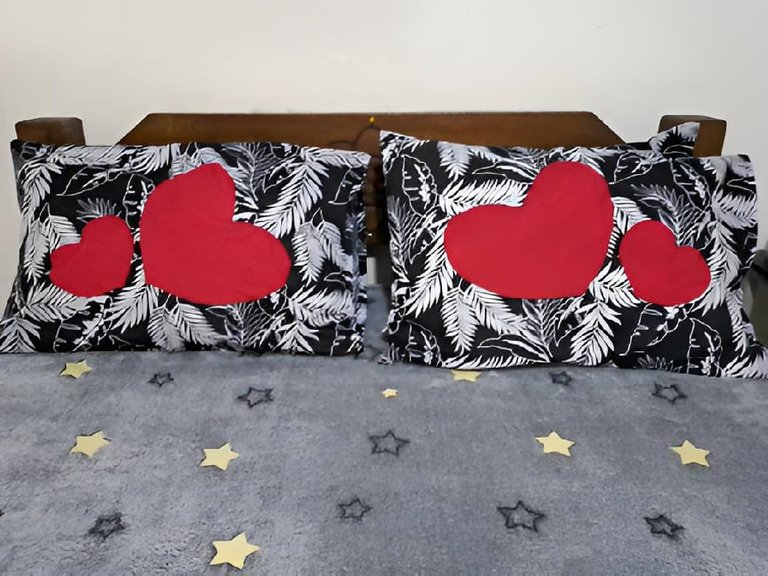
Ahora puedes lucirlas en tu cama y siéntete gloriosa, será el centro de las miradas, a mi pareja le encantó, aunque él está acostumbrado a dormir en una cama arreglada, limpia y bonita.
Espero que les guste mi creatividad de hoy y pueda aportar algo de utilidad a la comunidad Hive Diy.
Do It Yourself.
! [Scroll down to read the English version]
[Eng]
Sew the pieces lengthwise, first pass the zig zag, then pass the straight.
Repeat the procedure at the opposite end.
Turn the fabric over and we are done.
The unicolor fabric is to hold the pillow internally without it coming out of the ends. It is very uncomfortable to be sleeping and have the pillow come out of its cover.
Also, according to my mother and my dressmaker sister, pillows made in this way are more elegant and better finished than making buttons and buttonholes.
As a recommendation for allergic people like me. Printed fabrics always come with chemicals and lint from the factory, so I recommend, before placing them on your bed give them a previous wash with mild detergent.
After drying, if you like, you can iron them for a better finish.
Now you can wear them on your bed and feel glorious, it will be the center of attention, my partner loved it, although he is used to sleep in a neat, clean and nice bed.
I hope you like my creativity today and I can bring something useful to the Hive Diy community.
Do It Yourself.
🌼🌼🌼🌼🌻🌼🌼🌼🌼

Credits / Créditos.
All copyrights reserved / Reservados todos mis derechos


Vote la-colmena for witness
By @ylich

Hacks, DIY, Crafts, handmade arts Community

![]() 👉
👉 ![]() 👉
👉 ![]() 👉
👉  👉
👉 ![]()