
¡Hola Chicos!
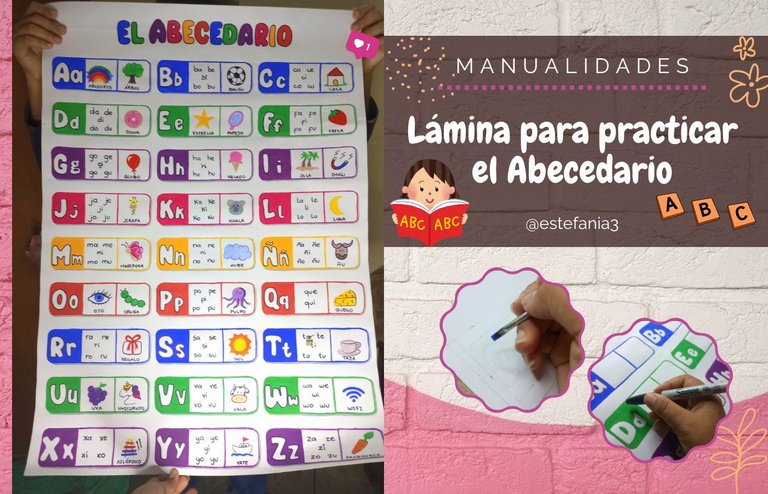
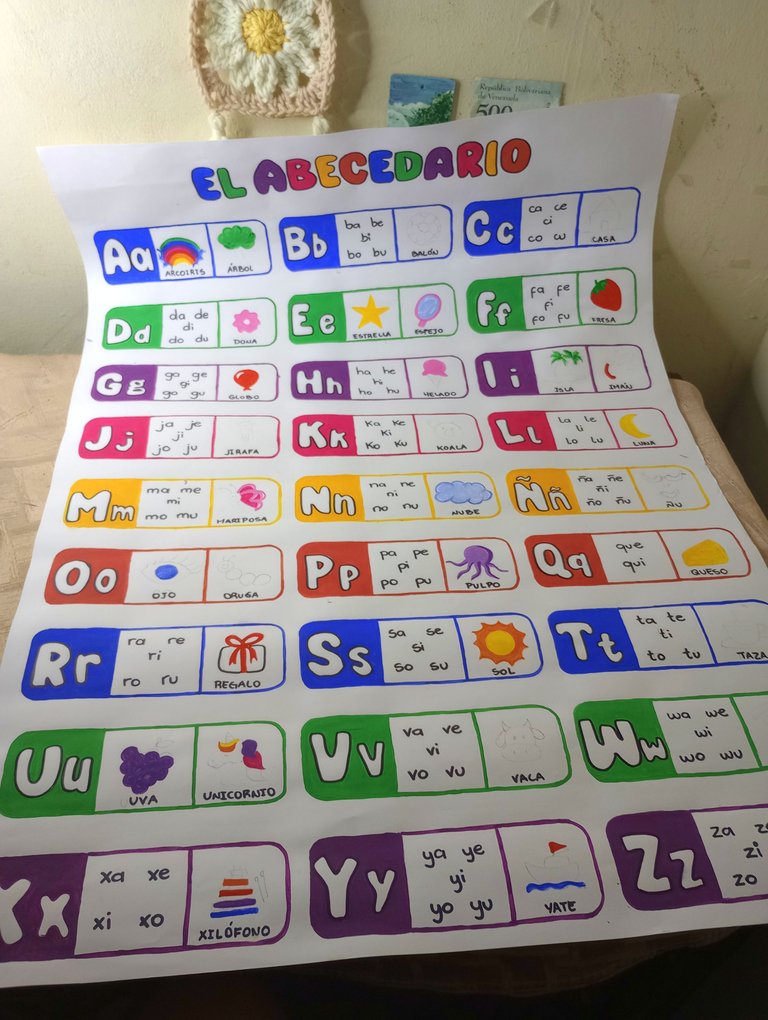
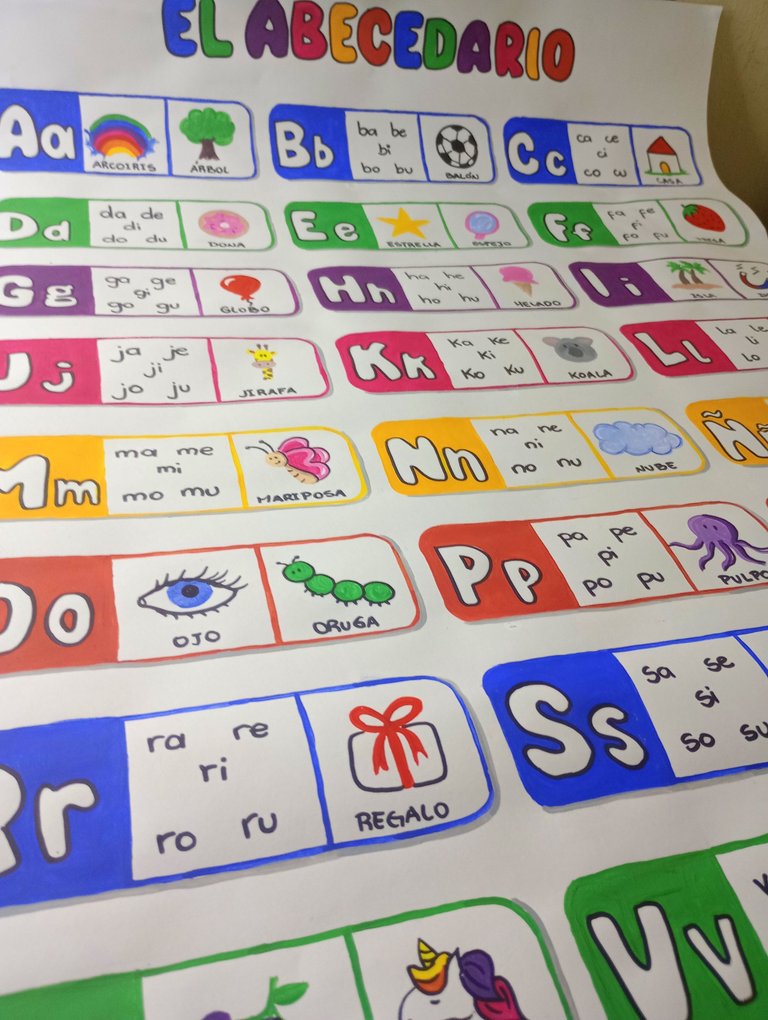
Hace algunas semanas mi compañera Elieska me encargó que le hiciera una lámina que tuviera todo el abecedario ilustrado para colocar en la academia y que así pudieran practicar los niños de la sala de tareas las letras.
Yo hace mucho tiempo trabajé haciendo este tipo de trabajos pero dejé de hacerlo porque las personas que contrataban mis servicios no querían pagar el precio justo e inclusive querían ponerle precio a mi trabajo.
Estos trabajos llevan bastante trabajo y yo suelo ser muy meticulosa a la hora de tomar las medidas y distribuir los elementos en el espacio.
Cuando ella me planteó el hacerlo yo pensaba que tardaría unos dos días en lograr completarlo, pero la verdad me llevó más tiempo de lo pensado, principalmente porque no tengo una mesa para trabajar y me tocaba hacerlo en una pequeña mesa donde trabajo mis manualidades.
Hello Guys!
A few weeks ago my colleague Elieska asked me to make her a poster with the whole alphabet illustrated to place in the academy so the kids in the homework room could practice their letters.
I used to do this kind of work a long time ago but I stopped doing it because the people who hired my services didn't want to pay the right price and even wanted to put a price on my work.
These jobs take a lot of work and I am usually very meticulous when it comes to taking measurements and distributing the elements in the space.
When she asked me to do it I thought it would take about two days to complete it, but the truth is that it took me longer than I thought, mainly because I don't have a table to work on and I had to do it on a small table where I work on my crafts.
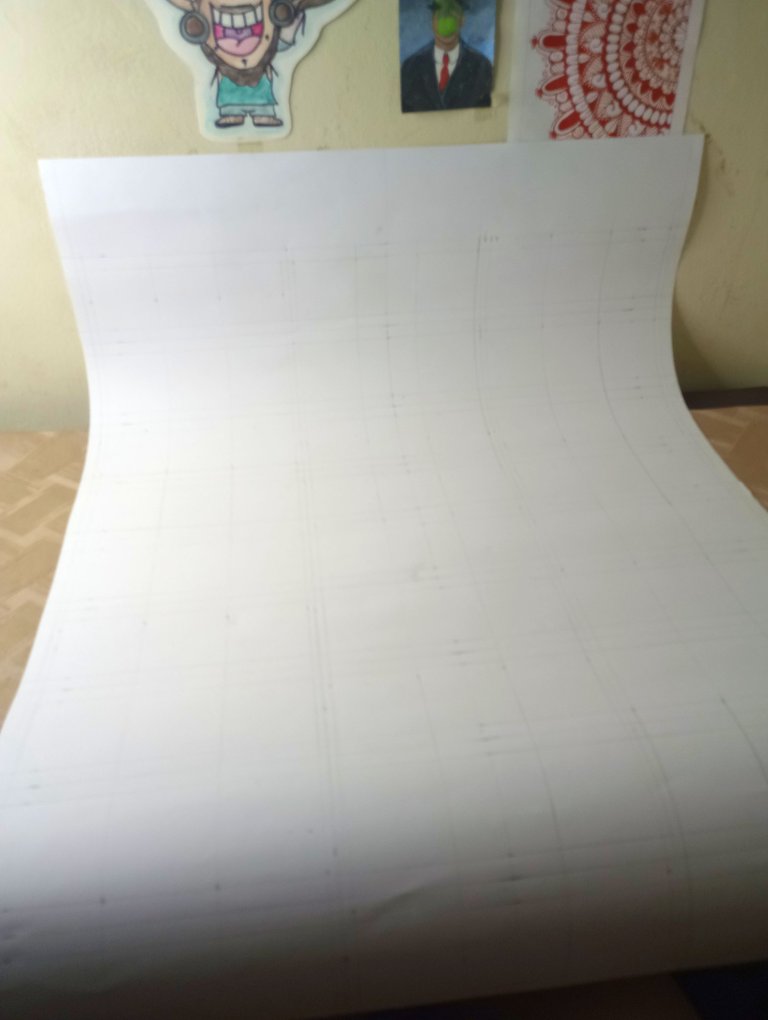
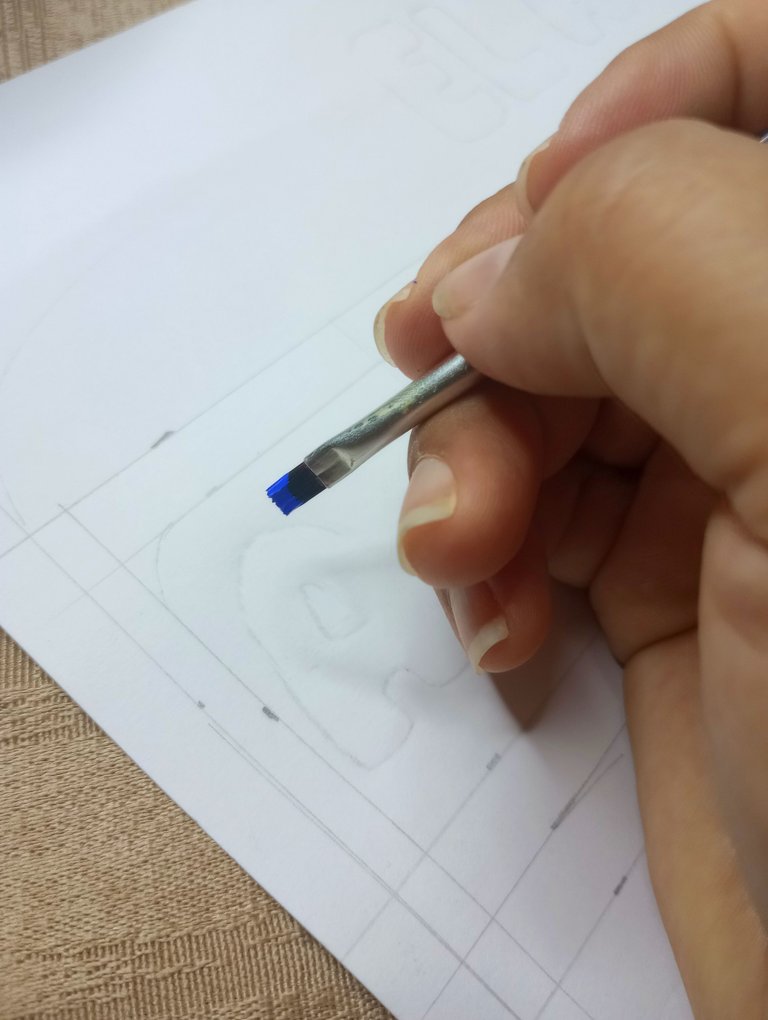
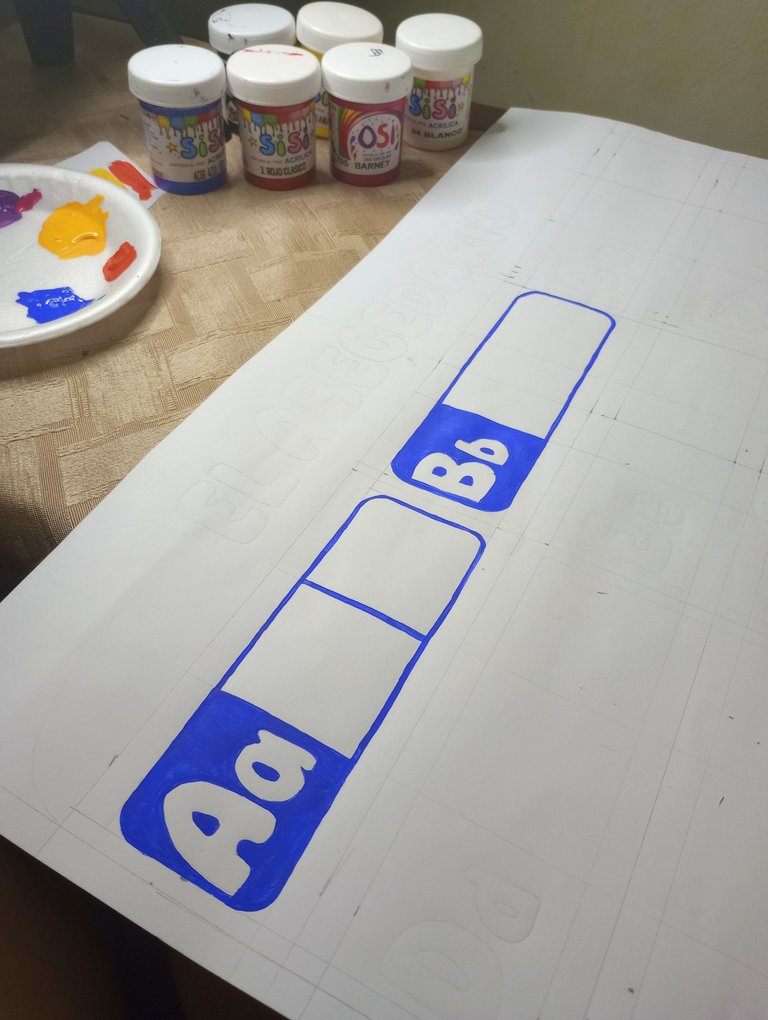
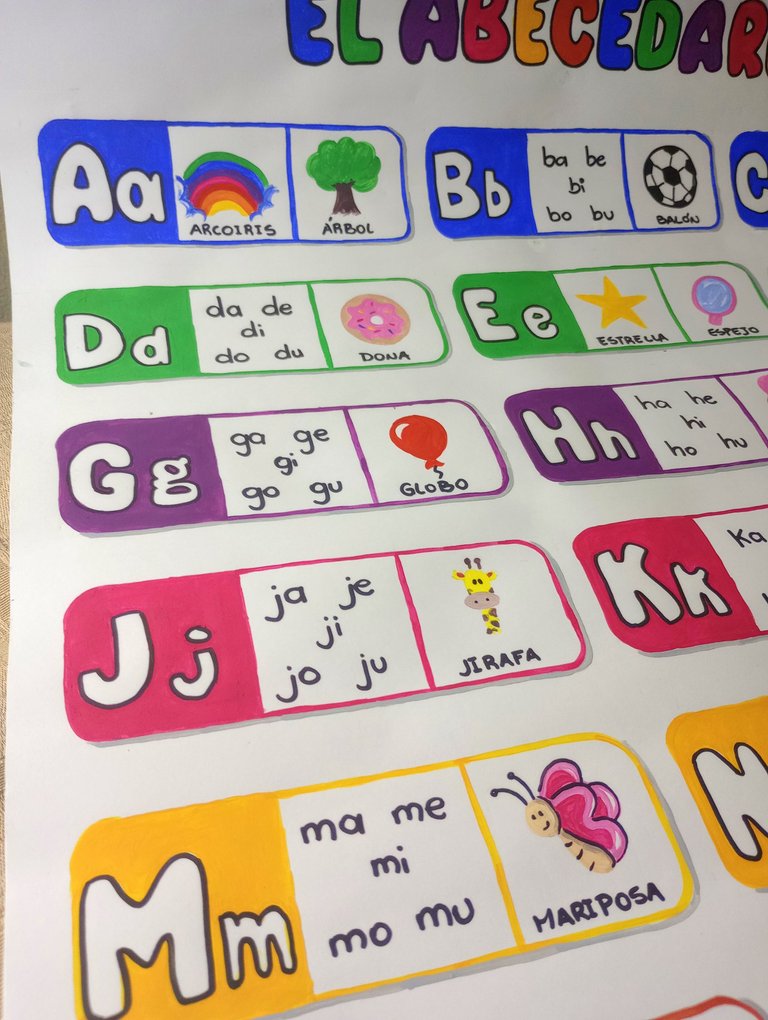
Lo primero que hice fue trazar en una lámina de cartulina las secciones donde irían las letras. Según las medidas de la lámina estos pequeños recuadros tendrían como medidas 15 centímetros de ancho y 5 centímetros de alto.
Me daba el espacio justo para tener 3 cuadrados pequeños por cada letra, lo que me venía de maravilla porque Elieska quería en uno la letra en mayúscula y minúscula, en otra las sílabas con esa letra y finalmente una imagen que ilustrara la letra.
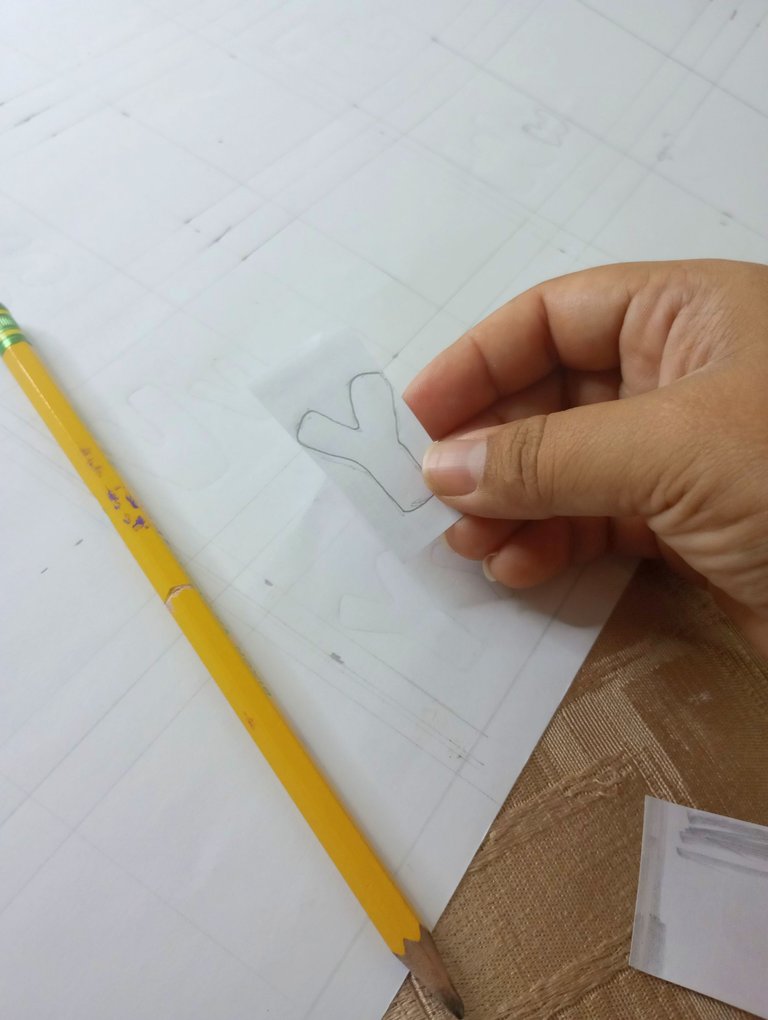
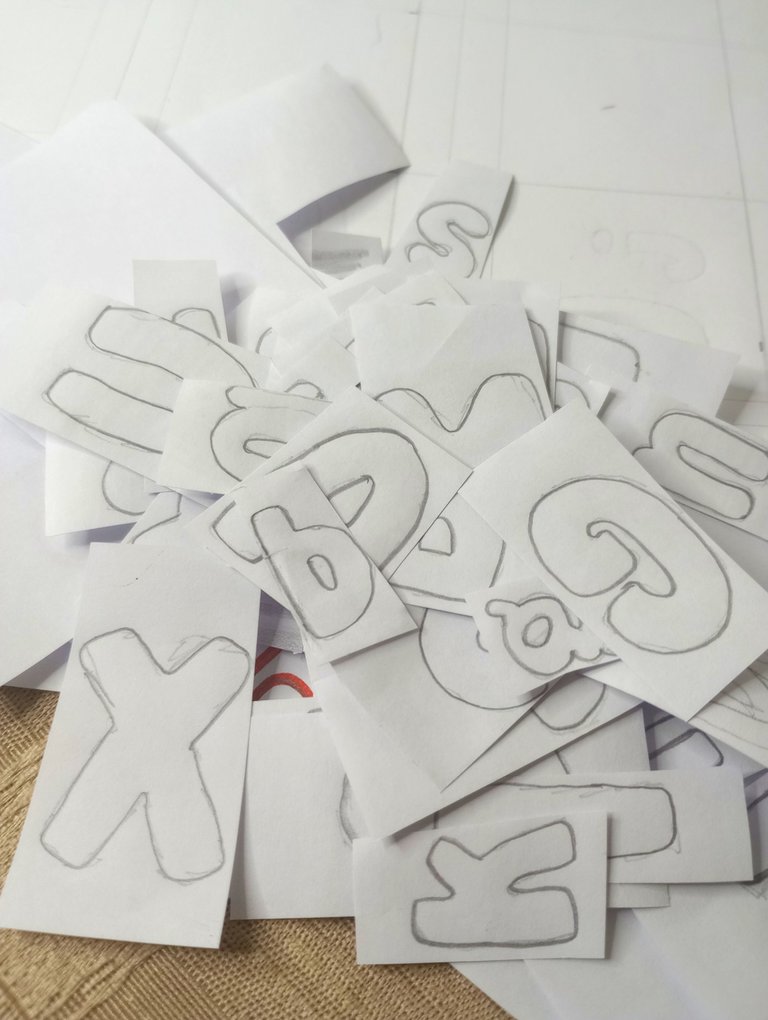
Para hacer las letras me fui hasta la computadora y busqué una fuente linda donde las letras fueran legibles. Las copié en una hoja y luego las recorté para calcar en la cartulina.

The first thing I did was to trace on a sheet of cardboard the sections where the letters would go. According to the measurements of the sheet, these small squares would measure 15 centimeters wide and 5 centimeters high.
This gave me just enough space to have 3 small squares for each letter, which came in handy because Elieska wanted the letter in uppercase and lowercase in one, the syllables with that letter in another, and finally an image illustrating the letter.
To make the letters I went to the computer and looked for a nice font where the letters were legible. I copied them on a sheet of paper and then cut them out to trace on the poster board.
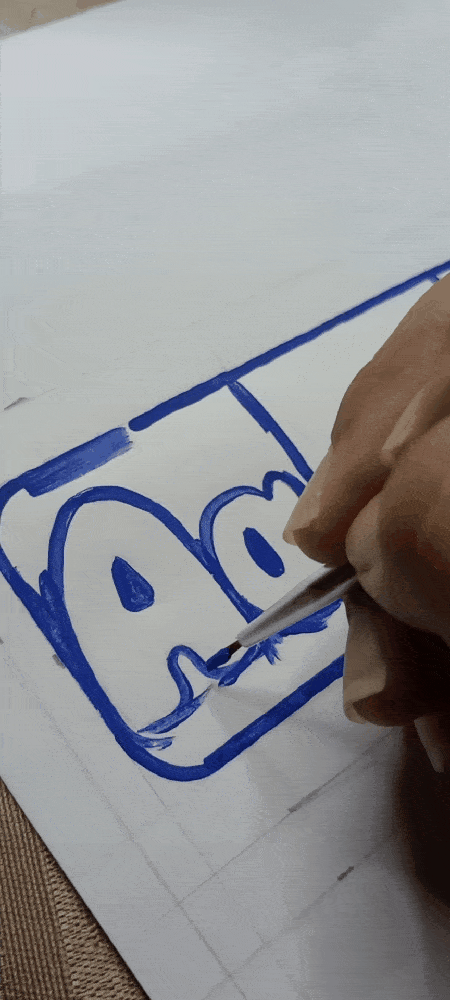
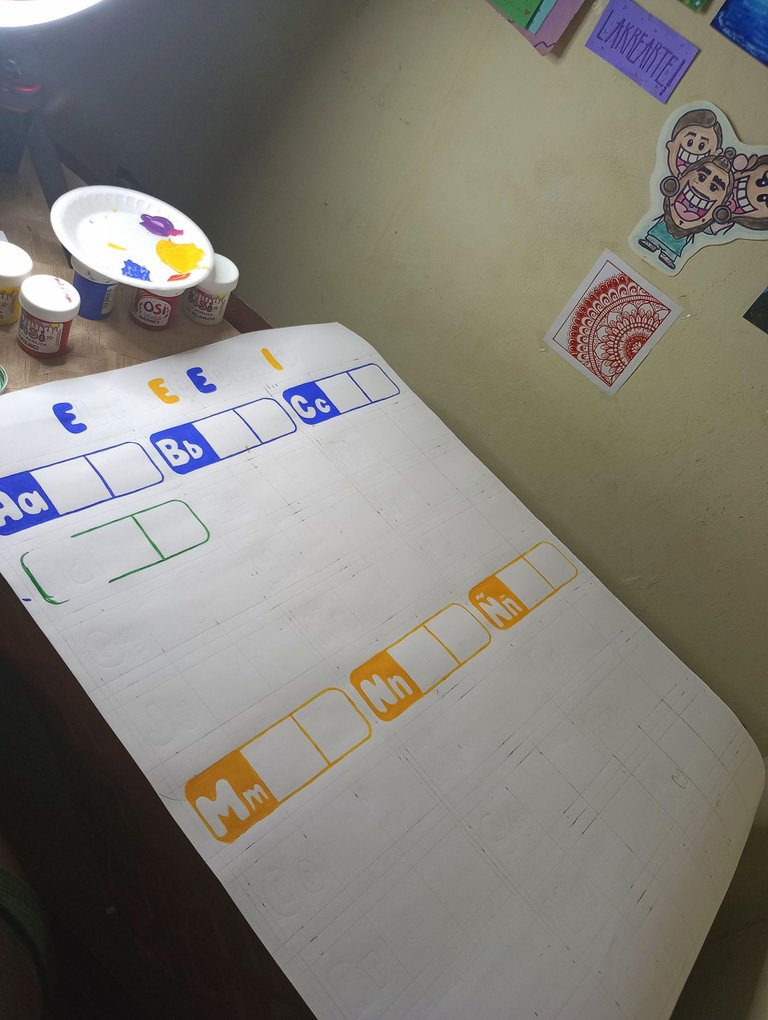
En eso se me fueron unas 3 horas, parece algo sencillo pero para que quede bien lleva su tiempo. Una vez todas las líneas y letras estuvieron trazadas comencé con lo colores.
Me pidieron colocar la lámina súper colorida, así que decidí pintar los recuadros de la letra a color y dejar las letras en blanco.
Con un pincel fino fui definiendo las líneas de cada una de las letras y remarcando los cuadros. Otra tarea que requería de bastante tiempo y dedicación.
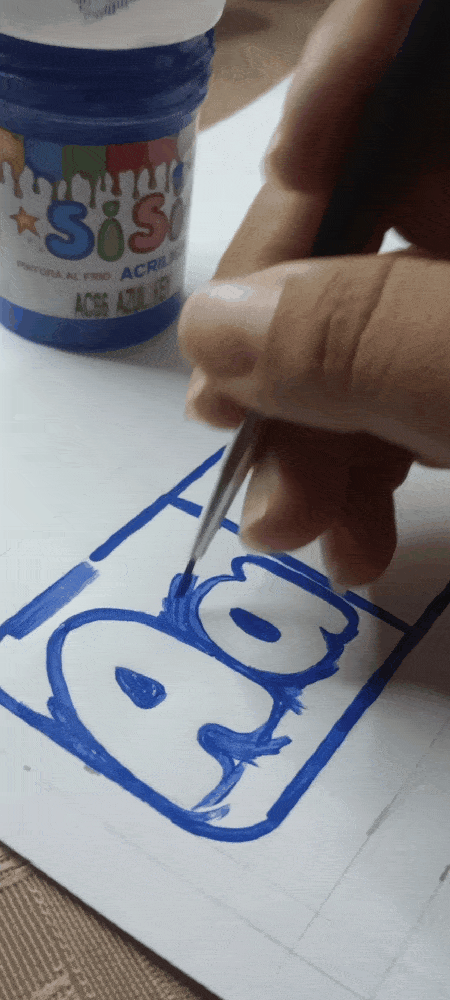
It took me about 3 hours to do that, it seems simple but it takes time to make it look good. Once all the lines and letters were traced, I started with the colors.
They asked me to place the super colorful sheet, so I decided to paint the squares of the letter in color and leave the letters blank.
With a fine brush I defined the lines of each of the letters and highlighted the squares. Another task that required a lot of time and dedication.
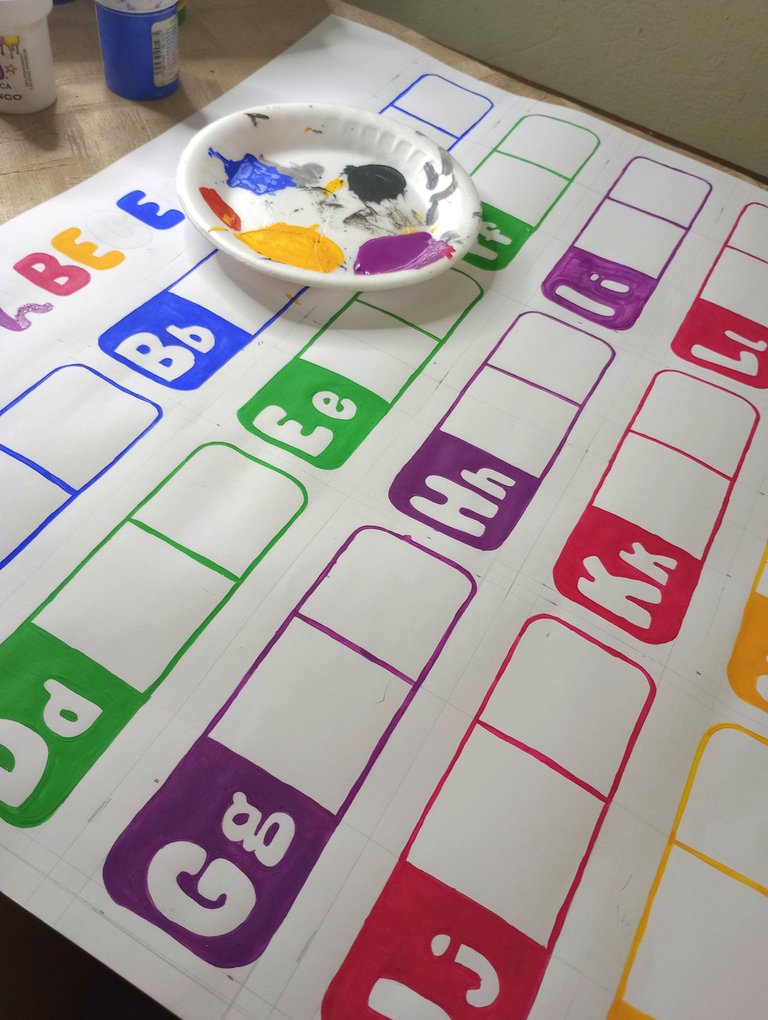
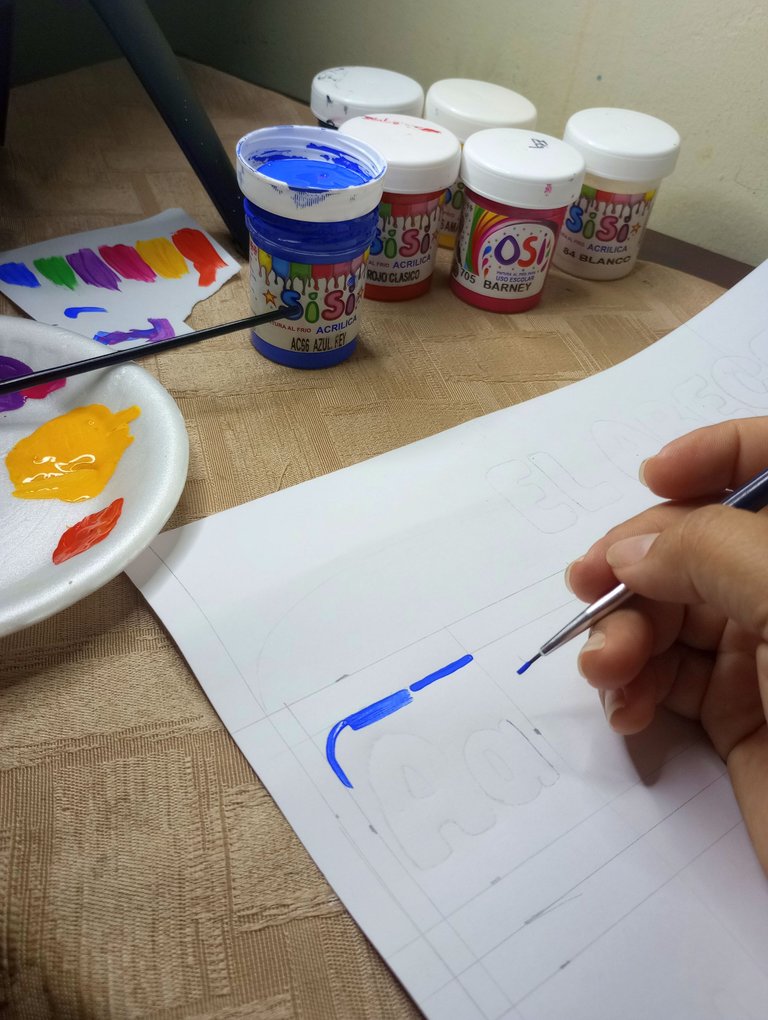
Así fui rellenando cada una de las letras. Yo tengo colores primarios entre mis pinturas, así que me tocó mezclar varios de ellos para lograr tonos como el morado, el amarillo naranja y el naranja.
Trazar las líneas rectas no fue sencillo y tuve varios errores en el camino que luego corregí con la pintura blanca.
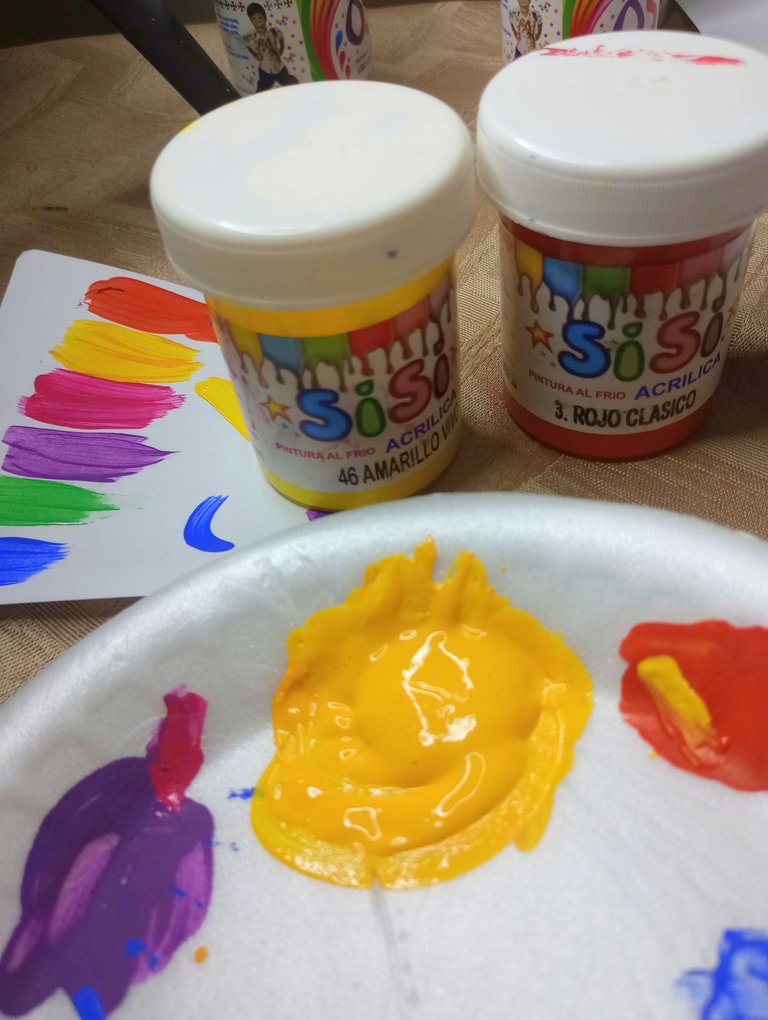
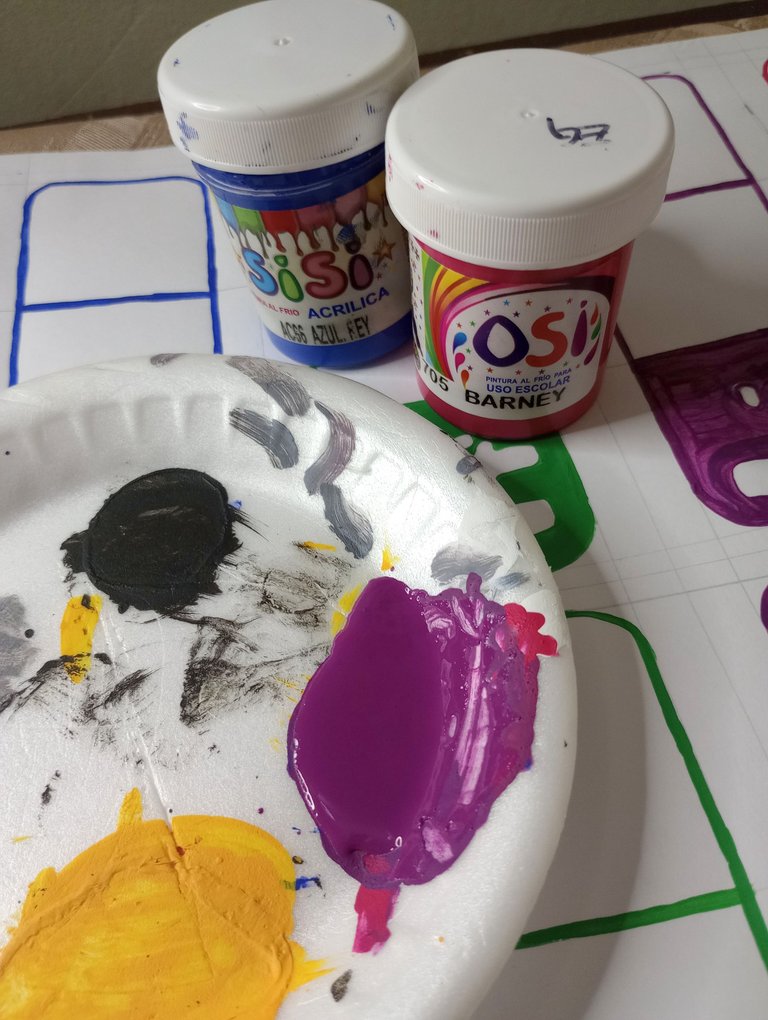

That's how I filled in each of the letters. I have primary colors among my paints, so I had to mix several of them to achieve tones such as purple, orange yellow and orange.
Drawing the straight lines was not easy and I had several mistakes along the way that I later corrected with the white paint.
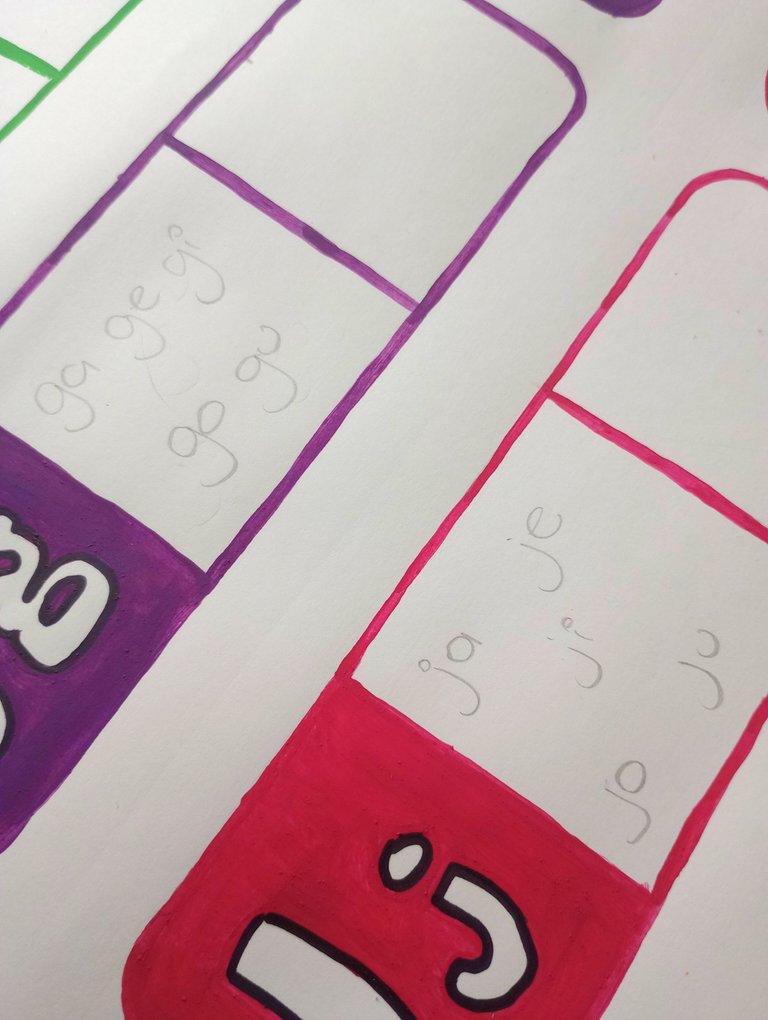
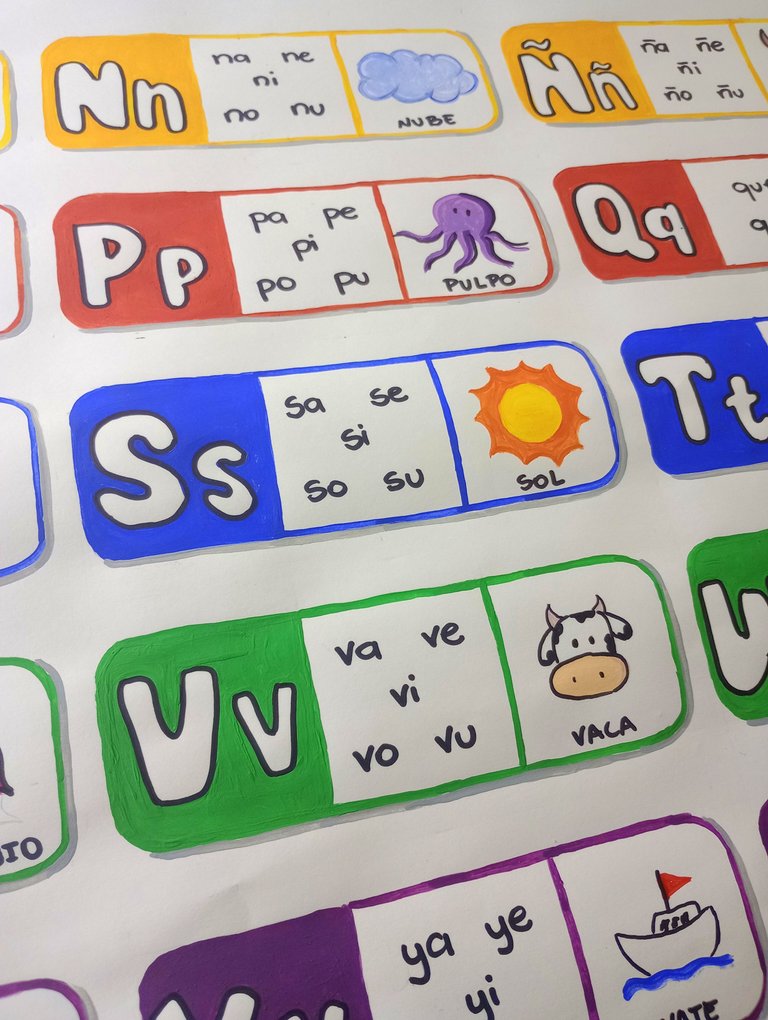
Luego comencé a trabajar en el segundo recuadro, el de las sílabas. No todas las letras lo utilizarían porque con las bocales no podemos hacer sílabas. En esos casos lo que hice fue hacer dos dibujos que representaran a las vocales.
Cuando tracé a lápiz todas las silabas, tomé un marcador de punta fina y las repasé todas.
Then I started working on the second box, the syllable box. Not all the letters would use it because we cannot make syllables with the vowels. In those cases what I did was to draw two pictures representing the vowels.
When I had drawn all the syllables in pencil, I took a fine tip marker and went over them all.
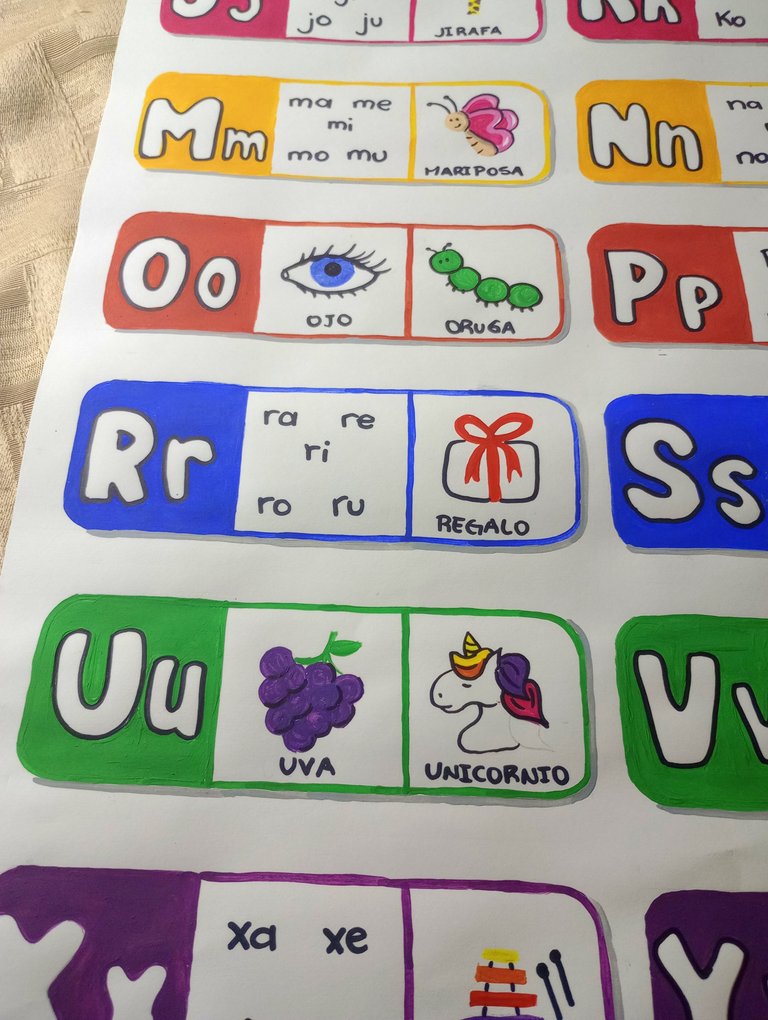
Ya la lámina iba tomando forma. En este punto dejé de documentar tanto el proceso porque como eran cosas tan pequeñitas las pintaba súper rápido y no recordaba hacerlo.
Iba creando los colores e iba pintando los elementos que lo tuvieran, como por ejemplo hice morado y pinté las uvas, el pulpo y parte del pelaje del unicornio.
Así fui aplicando color a los pequeños dibujos que hice. Esto también me llevó bastante tiempo.
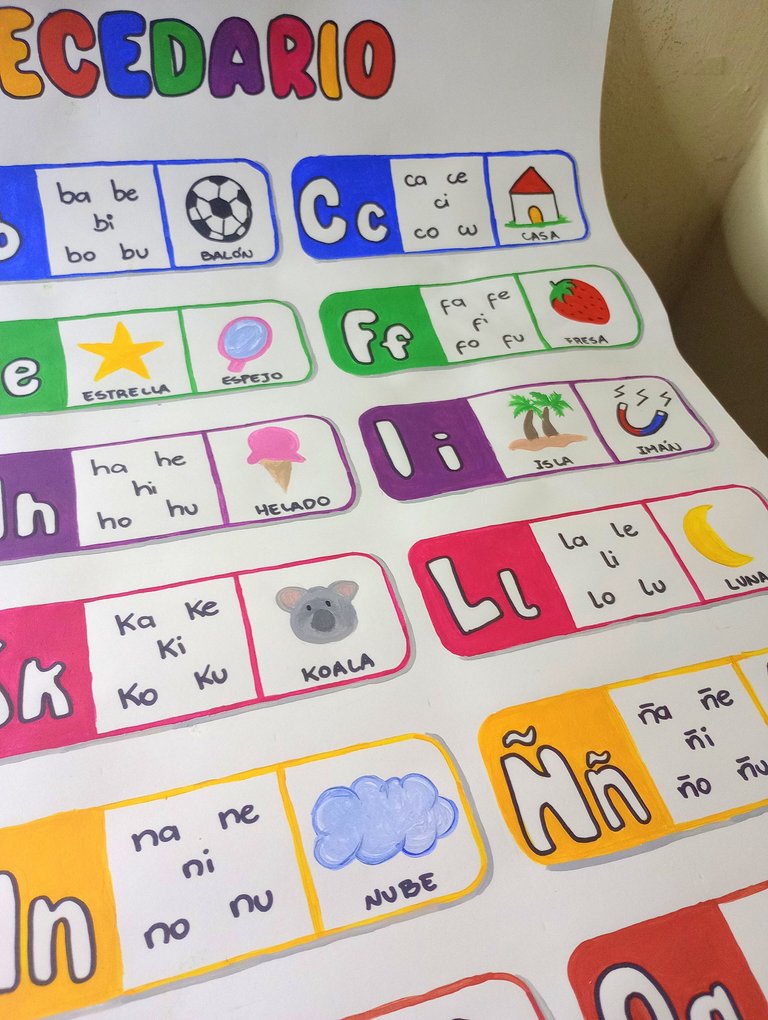

The sheet was already taking shape. At this point I stopped documenting the process so much because as they were so tiny things I painted them super fast and I didn't remember to do it.
I was creating the colors and painting the elements that had them, for example I made purple and painted the grapes, the octopus and part of the unicorn's fur.
In this way I was applying color to the little drawings I made. This also took me a long time.
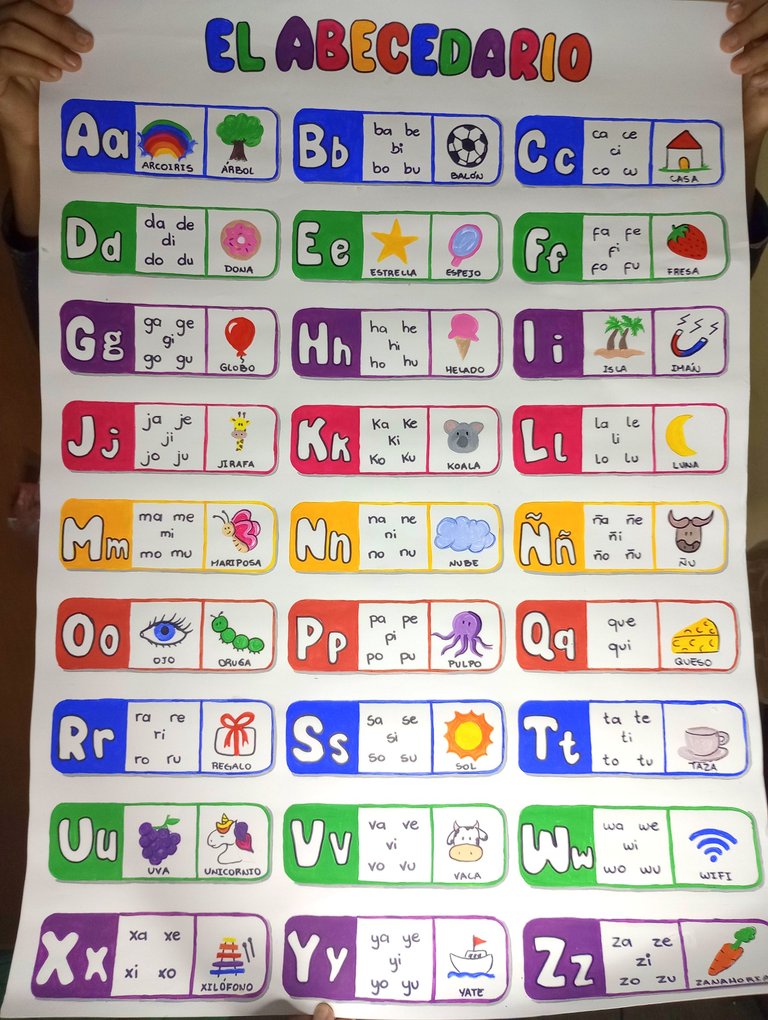
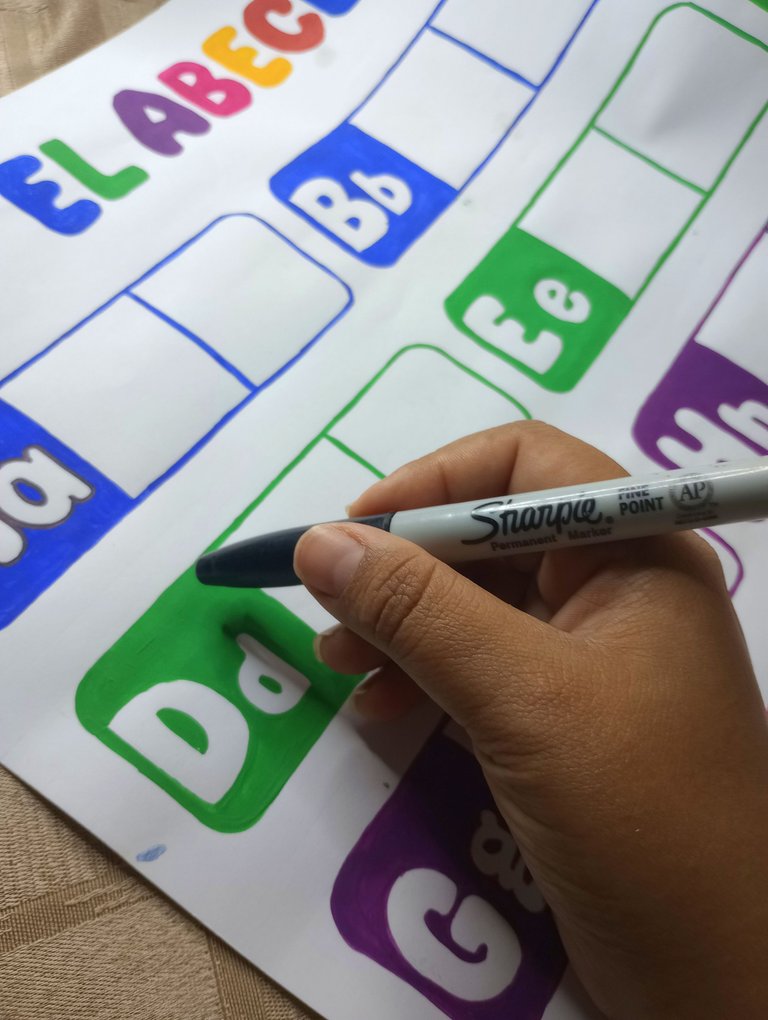
Finalmente con el marcador negro agregué algunos detalles que faltaban y así logré terminar la lámina.
Demoré unos 4 días de trabajo, en períodos de 5 horas seguidas aproximadamente. Mi espalda pedía a gritos descanso, y es que como les comenté al principio, no tengo mesa cómoda para trabajar y me tocaba hacer lo mejor que podía en ese pequeño espacio.
Cuando estaba haciendo la lámina pensé por un momento volver a trabajar con esto, pero la verdad es que no lo haría. Son muchas horas de trabajo para lograr algo bien para recibir tan poco.
Prefiero invertir ese tiempo en cosas que me dejen mayores ganancias y que además me llenen más, como hacer cosas que me gusten o manualidades para mi.
De igual forma disfruté mucho el proceso y al ver el trabajo terminado quedé bastante satisfecha con lo que logré. ♥
Espero les haya gustado al igual que a mi esta elaborada manualidad.
Finally with the black marker I added some details that were missing and so I managed to finish the sheet.
It took me about 4 days of work, in periods of approximately 5 hours at a time. My back cried out for rest, and as I mentioned at the beginning, I don't have a comfortable table to work and I had to do the best I could in that small space.
When I was making the sheet I thought for a moment I would go back to work with this, but the truth is that I wouldn't do it. It's a lot of hours of work to achieve something good for so little.
I prefer to invest that time in things that give me more profit and that also give me more satisfaction, like making things that I like or handicrafts for myself.
Anyway, I enjoyed the process a lot and when I saw the finished work I was quite satisfied with what I achieved. ♥
I hope you liked this elaborate craft as much as I did.

Espero haya sido de tu agrado y provecho.
Un gran abrazo a todos, y nos leemos en un próximo post
• Lakrearte en Hive •
Att: Estefania Garcia ♥

Imágenes y separadores de mi autoría
Portada editada en Canva
Fotografías tomadas con un Moto G31
Texto traducido en Google ImTranslate v.14.27