Hola a Todos, espero se encuentren bien. Me encontraba muy ausente por acá, debido a las actividades diarias, y no les miento!, También es un poco difícil poder organizar las ideas para poder desarrollar una buena publicación.
Pero como dice una colega, no esperes que sea perfecto para realizarlo porque sino el tiempo se nos pasa. Hazlo y a medida del tiempo con dedicación y practica vas ajustando todo.
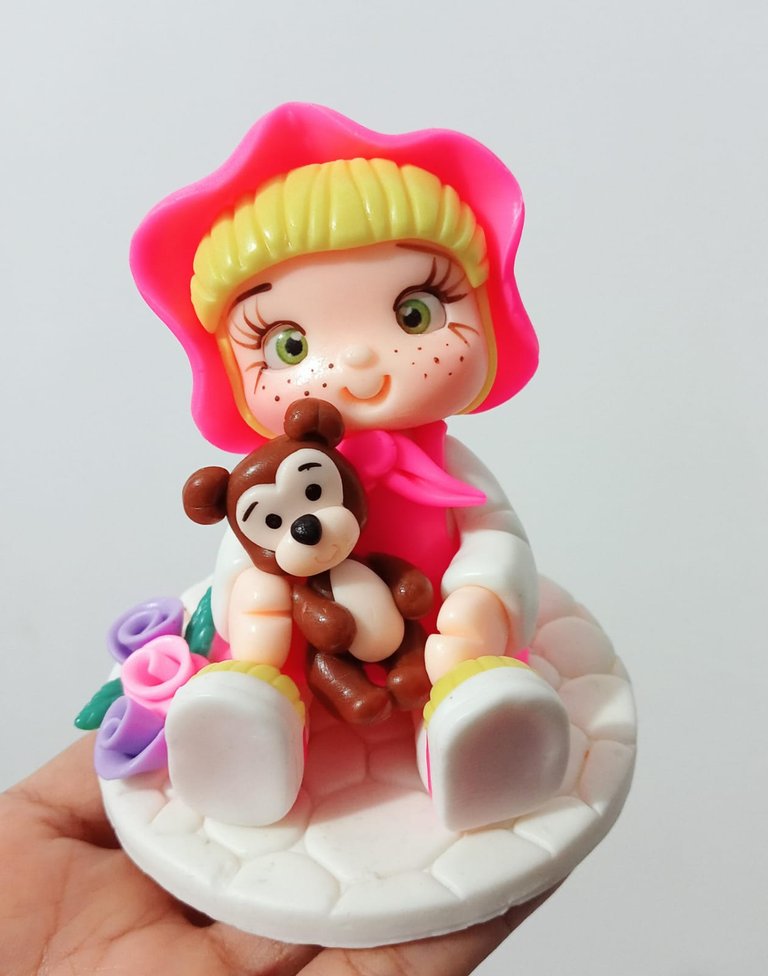
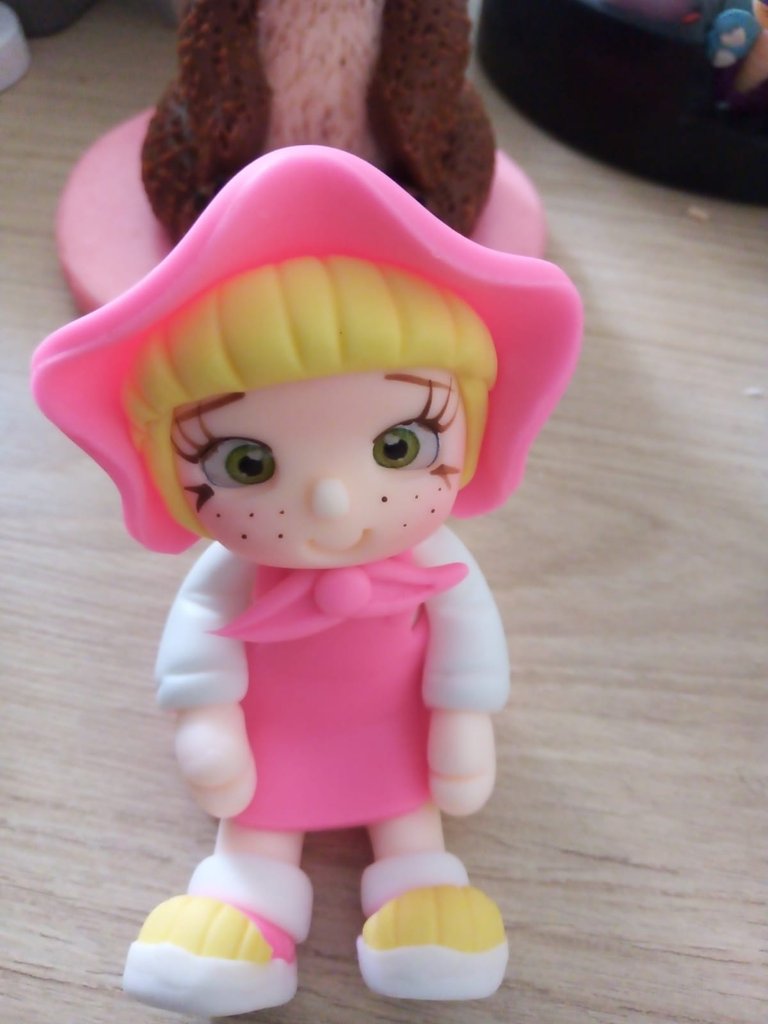
Hoy les voy a compartir un poco de como realice una tierna Masha (de la Caricatura Masha y el oso ) para un Toppers para torta.
Esta masha la realice 100 % moldeada, es decir, a mano sin la ayuda de moldes.
Solo me apoye con cucharitas medidoras las cuales me permiten tener una medida de cuanta cantidad de porcelana utilizo para cada parte del cuerpo. Estas medidas también varían de acuerdo al tamaño que deseamos que quede nuestra pieza.
También les comento que estoy ajustando mi lugar de trabajo para que los próximos paso a paso las imágenes queden con mas claridad.
Hello everyone, I hope you are well. I was very absent here, due to daily activities, and I'm not lying to you. It is also a bit difficult to organize ideas to develop a good publication.
But as a colleague says, Don't expect it to be perfect to do it because otherwise time will pass us by. Do it and over time with dedication and practice you adjust everything.
Today I am going to share with you a little bit about how to make a tender Masha (from the Cartoon Masha and the Bear) for a Cake Toppers.
This masha is made 100% molded, that is, by hand without the help of molds.
I only support myself with measuring spoons which allow me to have a measure of how much porcelain used for each part of the body. These measurements also vary according to the size we want our piece to be.
I also tell you that I am adjusting my workplace so that the next step-by-step images are more clear.
Paso 1 / Step 1:
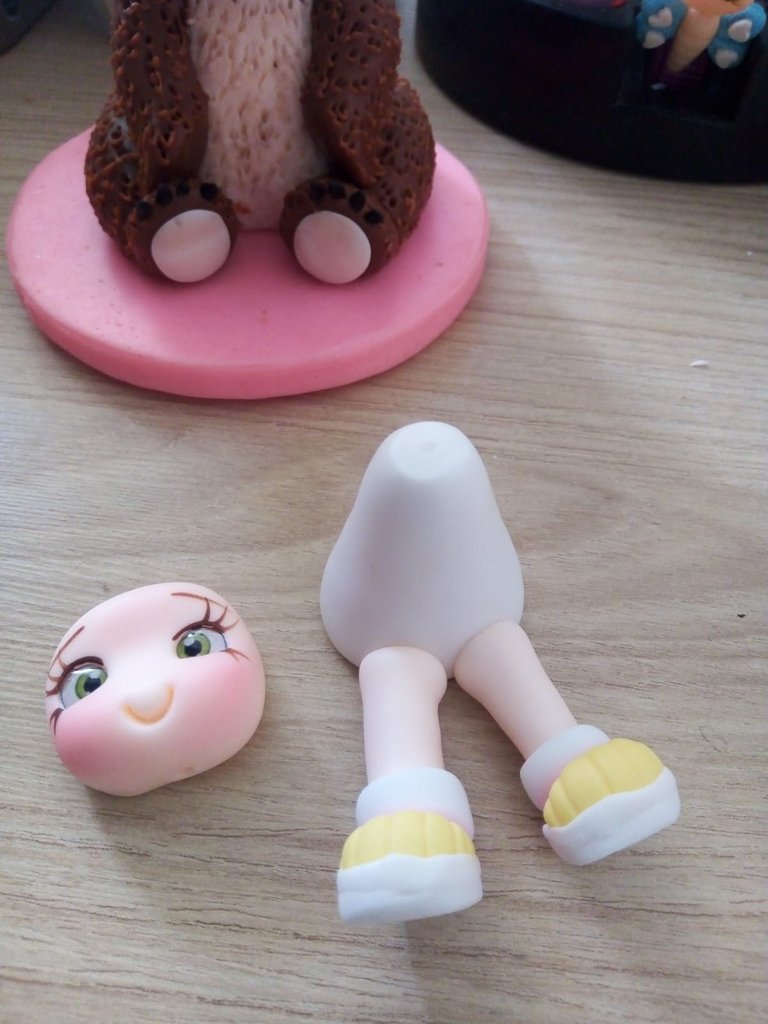
Tomamos una porción de masa blanca y la hacemos como forma de cono y esta sera la base del cuerpo de la niña.
También tomamos una porción de masa color piel y con las manos la hacemos forma de bolita y ajustamos con los dedos que quede la forma de la cara. Le hacemos la marca de la boquita y yo uso ojitos resinados. Si no tienes ojitos resinados se pueden marcar y hacer con pintura acrílica o vinilo.
We take a portion of white dough and make it into a cone shape and this will be the base of the girl's body.
We also take a portion of skin-colored dough and with our hands we shape it into a ball and adjust it to the shape of the face with our fingers. We make the mark of the little mouth and I use little resin eyes. If you don't have resin eyes, you can mark them and make them with acrylic paint or vinyl.

Paso 2 / Step 2:
Tomamos dos porciones de color piel y las hacemos en forma de tubo no muy largas y estas serán las piernitas, pegamos un extremo al cuerpo y el otro en las puntas la cubrimos con un poco de masa blanca para que simulen las medias de la niña.
We take two skin-colored portions and make them in the shape of a tube, not very long, and these will be the legs. We glue one end to the body and cover the other end at the tips with a little white dough to simulate the girl's stockings.

Paso 3 / Step 3:
Con dos bolitas de color amarillo hacemos los zapaticos. Con un estile o algún articulo de podamos utilizar para marcar, le realizamos los detalles de los zapatos.
With two yellow balls we make the shoes. With a style or some item we can use to mark, we make the details of the shoes.
Paso 4 / Step 4:
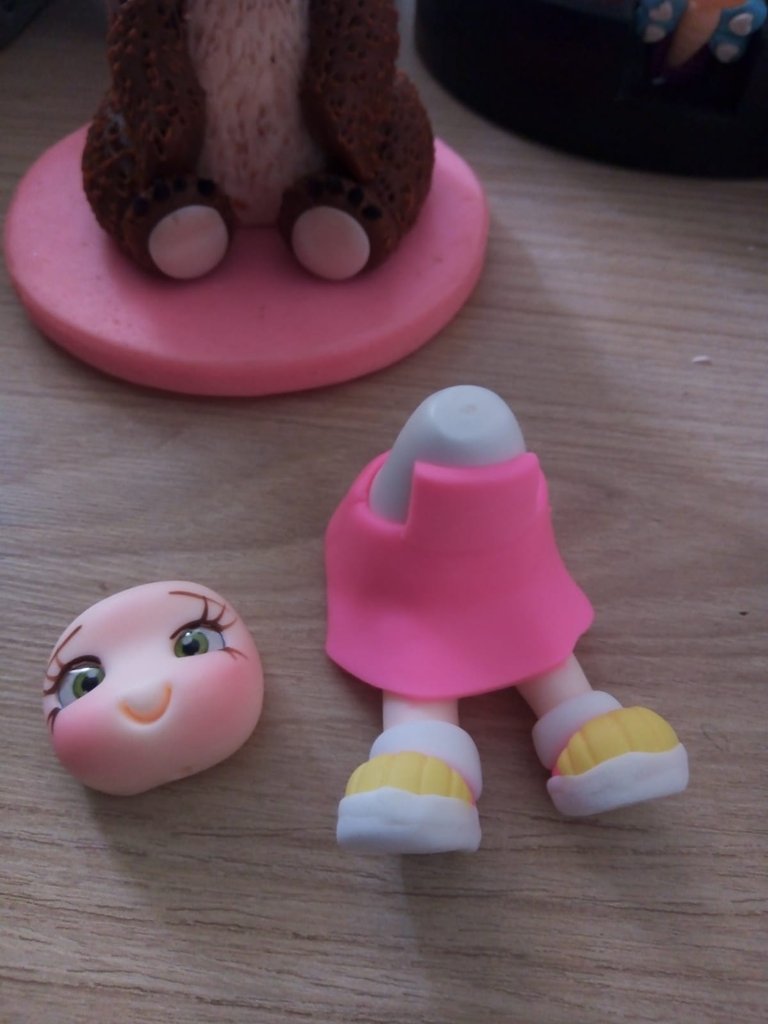
Estiramos masa color fucsia y la colocamos por encima del cuerpo para poder realizar el efecto del vestido de la niña.
We stretched fuchsia-colored dough and placed it above the body to create the effect of the girl's dress.
Paso 5 / Step 5 :
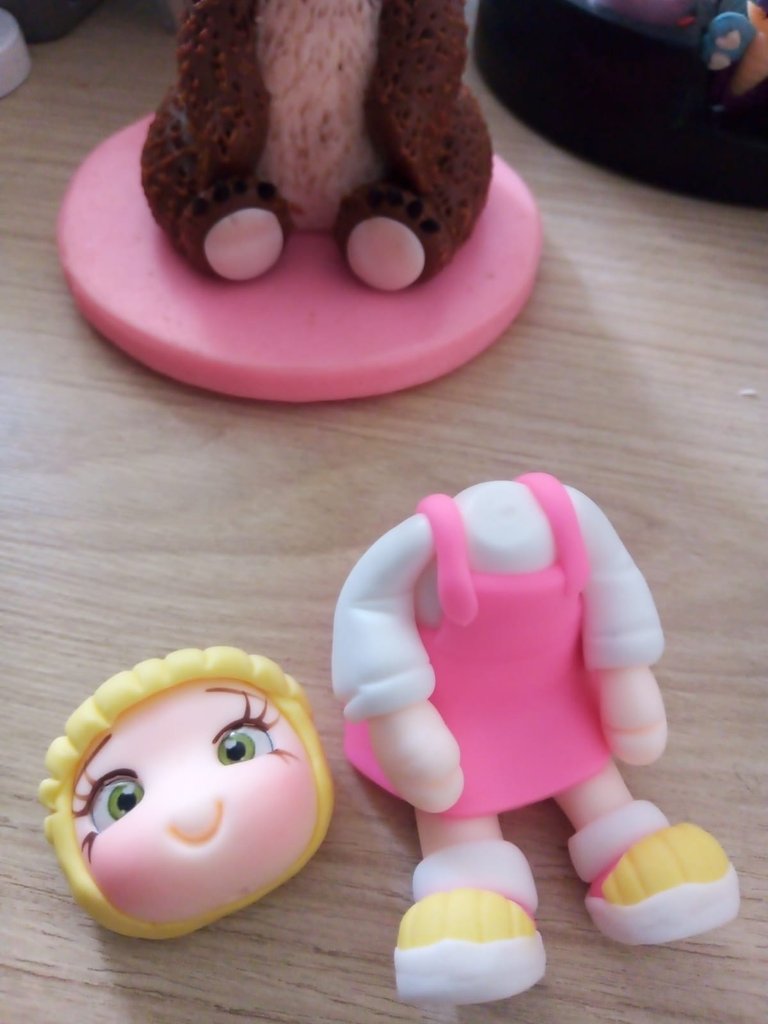
Tomamos dos porciones de masa blanca y dos de color piel mas pequeñas y las moldeamos de forma larga para que sean los brazos y las manitos.
Con dos tiritas muy delgas de color fucsia las pasamos por los hombro para que sean las tiras del vestido de la niña.
We take two portions of white dough and two smaller skin-colored ones and mold them into long shapes to be the arms and hands.
With two very thin strips of fuchsia color we pass them over the shoulders so that they are the straps of the girl's dress.

Paso 6 / Step 6:
Estiramos masa amarilla, la cortamos en forma de circulo y la bajos a ir pegando y ajustando en la parte de atrás de la cabeza para que sea su cabello.
Con un poco de masa amarilla la pegamos en la parte superior del frente para que sea el capul (Pollina o china) de la niña.
We stretch yellow dough, cut it into a circle and lower it to glue and adjust it to the back of the head so that it is your hair.
With a little yellow dough we glue it on the upper part of the front so that it is the girl's capul (Pollina or china).
Paso 7 / Step 7:
Pegamos la cabecita al cuerpo y con un circulo de masa Fucsia, vamos ajusta para hacer el efecto del gorrito de la niña, y con otro poquito de masa fucsia realizados el lacito que lleva en el cuello.
Por ultimo hacemos los detalles de la nariz y las pequitas que tiene nuestra Masha.
We glue the head to the body and with a circle of fuchsia dough, we adjust it to make the effect of the girl's hat, and with another little bit of fuchsia dough we make the little bow that she wears on her neck.
Finally we make the details of the nose and the freckles that our Masha has.
Este es un paso a paso algo relámpago, si te gusto déjame tu comentario y si quieres conocer mas detallado los trabajos en porcelanicron déjame en los comentarios que te gustaría que les explicara.
Nos vemos en una próxima publicación y espero ir mejorando día a día.
This is a somewhat lightning-fast step by step, if you liked it, leave me your comment and if you want to know more about the work in porcelanicron in more detail, leave me in the comments what you would like me to explain.
See you in a next publication and I hope to improve day by day.
Mi publicación esta traducida con ayuda de Traductor Google, las fotos son mías utilizando mi Teléfono Oppo

