
Existen estilos que no pasan de moda, así como una blusa blanca es un must en todo guardarropa, el borde blanco en las imágenes de portada se mantiene, desde hace muchísimo tiempo, como un recurso bastante utilizado por los creadores de contenido. Una línea que aporta un extra al diseño y lleva la atención hacia la imagen que suele ser la foto del creador.
A continuación les comparto una de mis portadas de hace cinco años cuando era una asidua usuaria del borde blanco, con el pasar del tiempo he ido probando nuevos estilos.
There are styles that never go out of style, just as a white blouse is a must in every closet, the white border on cover images has been a very popular resource for content creators for a long time. A line that brings an extra to the design and draws attention to the image, which is usually the creator's photo.
Below I share with you one of my covers from five years ago when I was a regular user of the white border, with the passing of time I have been trying new styles.

Recuerdo que en ese entonces usaba CorelDraw para lograr este efecto, debía ir bordeando la imagen poco a poco, colocarla dentro de un powerclip (una especie de recipiente), cambiar el color y el grosor de la línea. No sabría decirles si era el proceso más idóneo, pero era lo que yo utilizaba y me rendía buenos resultados.
Actualmente contamos con herramientas que nos permiten realizar este trabajo de diseño de una manera muchísimo más rápida y sencilla. Hoy quiero mostrarles cómo hacerlo desde la página web Pixlr, usando la versión E (Pixlr E) editor de fotos avanzado, es un proceso bastante fácil y con el cual obtienes un buen acabado en tu imagen.
En este tutorial te estaré mostrando cómo colocar el borde a una imagen. mientras te enseño los pasos que seguí para diseñar la portada de esta publicación.
I remember that at that time I used CorelDraw to achieve this effect, I had to border the image little by little, place it inside a powerclip (a kind of container), change the color and the thickness of the line. I couldn't tell you if it was the most suitable process, but it was what I used and it gave me good results.
Nowadays we have tools that allow us to do this design work in a much faster and easier way. Today I want to show you how to do it from the Pixlr website, using the E version (Pixlr E) advanced photo editor, it is a fairly easy process and with which you get a good finish on your image.
In this tutorial I will be showing you how to place the border on an image, while I show you the steps I followed to design the cover of this publication.
¡Házlo tú mismo! Do it yourself!
Antes de empezar (Before you start)
Para bordear una imagen requieres haber eliminado el fondo de la misma, puedes ver cómo hacerlo en este tutorial:
Tips & Tricks | ¿Ya usaste estas propiedades de Pixlr?
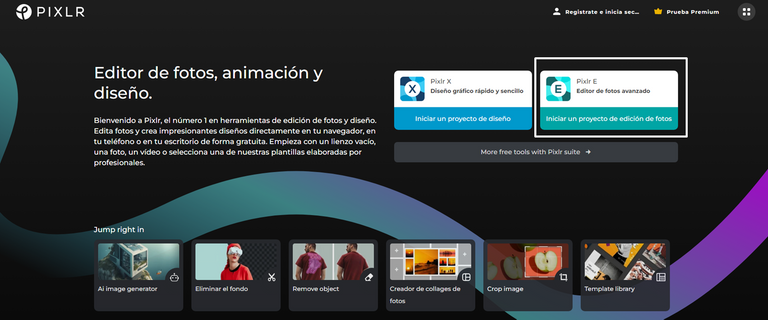
- Teniendo lista la imagen a la cual deseas colocarle el borde blanco, lo siquiente que harás es ir a la página web https://pixlr.com/es/ y seleccionar la opción Pixlr E.
To border an image you need to have removed the background of the image, you can see how to do it in this tutorial:
Tips & Tricks | Have you already used these Pixlr properties?
- Having ready the image to which you want to put the white border, the next thing you will do is to go to the web page https://pixlr.com/es/ and select the Pixlr E option.
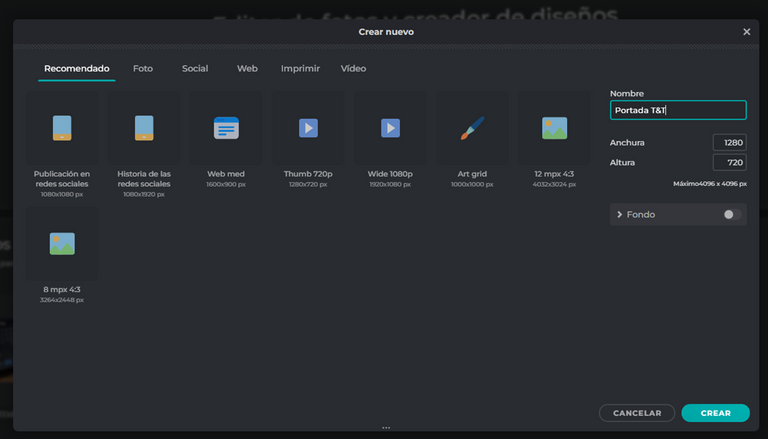
- Seleccionarás Crear nuevo y en tamaño de imagen colocarás 1280 px x 720 px, estas son las medidas que uso para mis portadas, añadirás un nombre para tu archivo y luego darás clic en crear. Recuerda que voy a mostrarte cómo hice mi portada incluyendo la imagen con el borde blanco.
You will select Create new and in image size you will put 1280 px x 720 px, these are the measures I use for my covers, you will add a name for your file and then click create. Remember that I'm going to show you how I made my cover including the image with the white border.

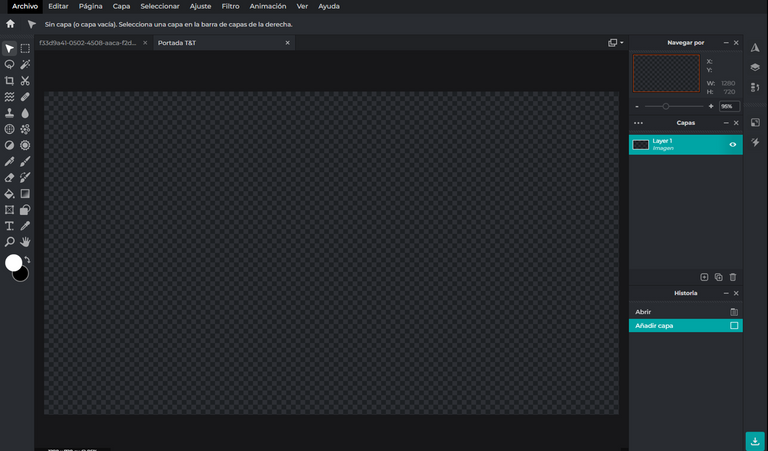
- Este será tu espacio para diseñar.
This will be your space to design.
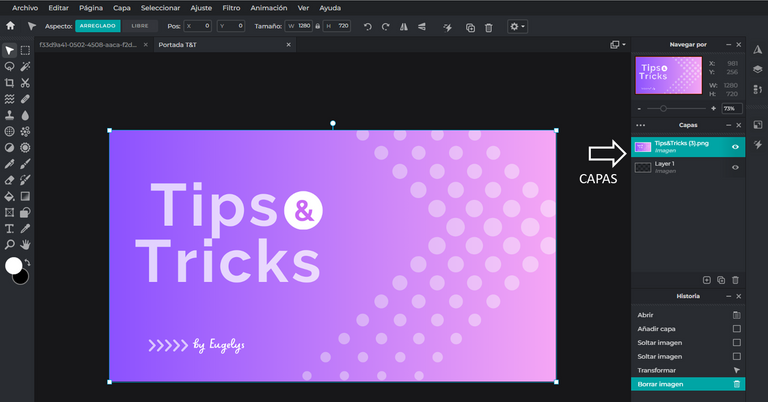
- En mi caso como ya tengo un formato para mis portadas de Tips & Tricks en Canva, lo que hice fue guardar ese fondo que personalice para incluirlo en este diseño. En Pixlr E puedes incluir una imagen a través de abrir imagen o arrastándola hasta la zona de diseño. El siguiente paso es dar clic en añadir actual.
In my case, since I already have a format for my Tips & Tricks covers in Canva, what I did was to save the background I customized to include it in this design. In Pixlr E you can include an image through open image or by dragging it to the design area. The next step is to click add current.


- Aquí puedes ver el fondo que hice en Canva, ya exportado a Pixlr E, aquí podrás trabajar con capas, así que para hacer cambios en las imágenes tienes que seleccionar la capa. No te sientas abrumado por esto, porque es una forma mucho más organizada de trabajar, solo hay que acostumbrarse a la interfaz.
Here you can see the background I made in Canva, already exported to Pixlr E, here you will be able to work with layers, so to make changes to the images you have to select the layer. Don't feel overwhelmed by this, because it's a much more organized way of working, you just have to get used to the interface.
- Ahora solo basta con adicionar la imagen a la cual deseamos colocar el borde blanco, ya sea por Archivo > Abrir imagen o arrastrándola hasta la zona de diseño y clic en añadir actual, tal como se hizo con la imagen de fondo.
Now just add the image to which you want to add the white border, either by File > Open image or drag it to the design area and click on add current, as you did with the background image.
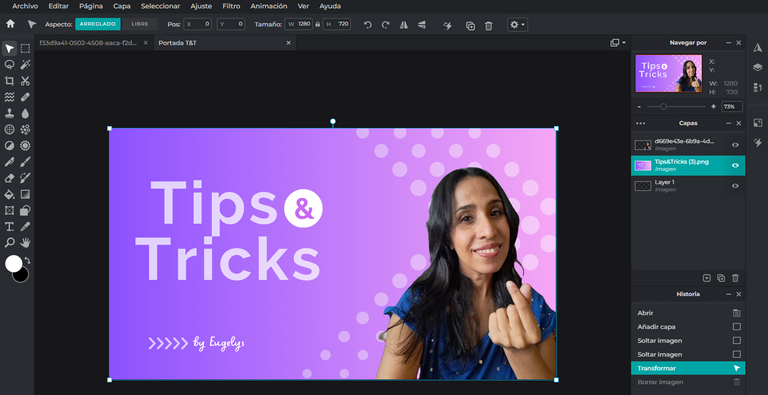
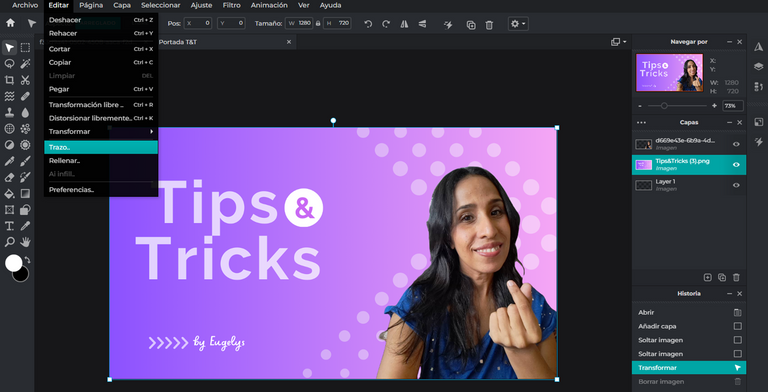
- Luego iremos al menú superior y seleccionaremos Editar > Trazo
Then go to the top menu and select Edit > Stroke.
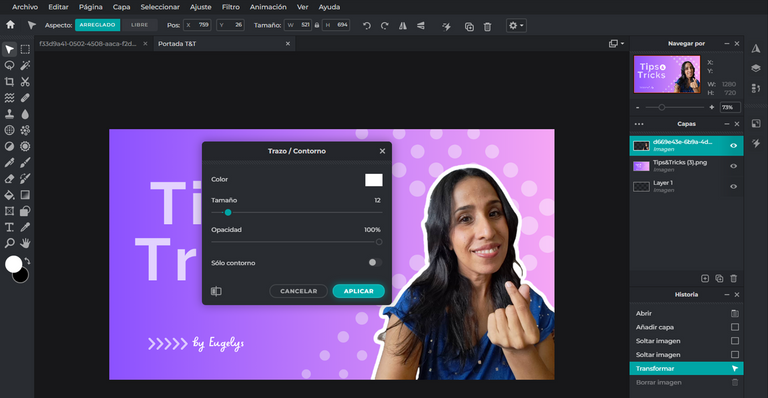
- ¡Y ya tendrás tu imagen con borde blanco! Puedes seleccionar el color, grosor y opacidad de la línea de borde de acuerdo a tu gusto.
And you have your image with a white border! You can select the color, thickness and opacity of the border line according to your taste.
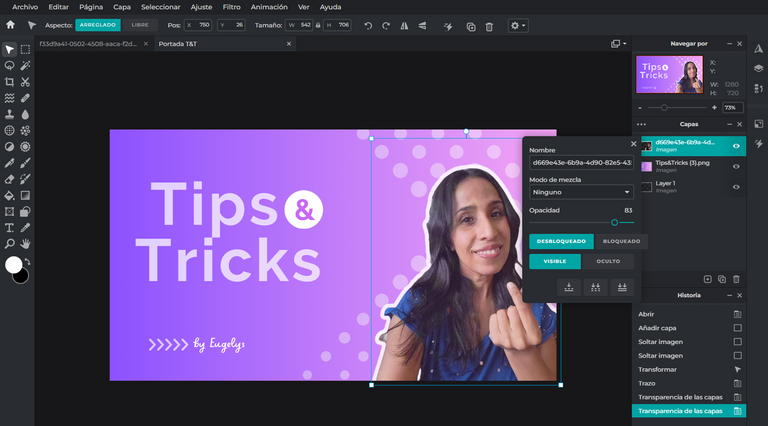
Personalmente me gusta darle otro toque a las selfies que uso en mis portadas y se trata de bajar la opacidad, como un plus te mostraré cómo hacerlo con esta herramienta.
- Te ubicarás en la capa y dara clic sobre ella con el botón secundario del mousse (derecho), podrás ver que se despliega un pequeño menú, basta con dar clic en opacidad, el menú se cierra en la x (esquina superior derecha).
Personally I like to give another touch to the selfies I use in my covers and it is about lowering the opacity, as a plus I will show you how to do it with this tool.
You will place yourself on the layer and click on it with the right mouse button, you will see a small menu pop up, just click on opacity, the menu closes at the x (upper right corner).
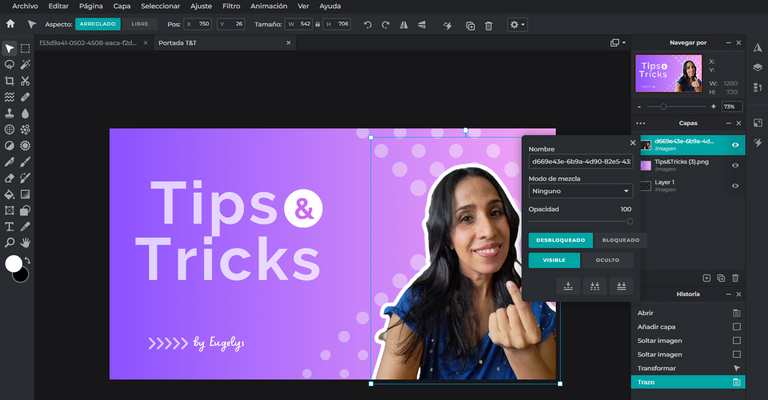
¡Listo con un 83% de opacidad!
Ready with 83% opacity!
Quizá puedas sentir que son muchos pasos, pero te aseguro que es algo fácil de hacer, así que espero que esta información sea de mucha utilidad y que te animes a explorar esta interesante y poderosa herramienta.
You may feel that it is a lot of steps, but I assure you that it is easy to do, so I hope you find this information very useful and that you are encouraged to explore this interesting and powerful tool.
Thank you for stopping by, for stopping to read or listen, for commenting, for voting.
¡Un gran abrazo! A big hug!
