✨Hello community! Welcome | ¡Hola comunidad! Bienvenido/a✨
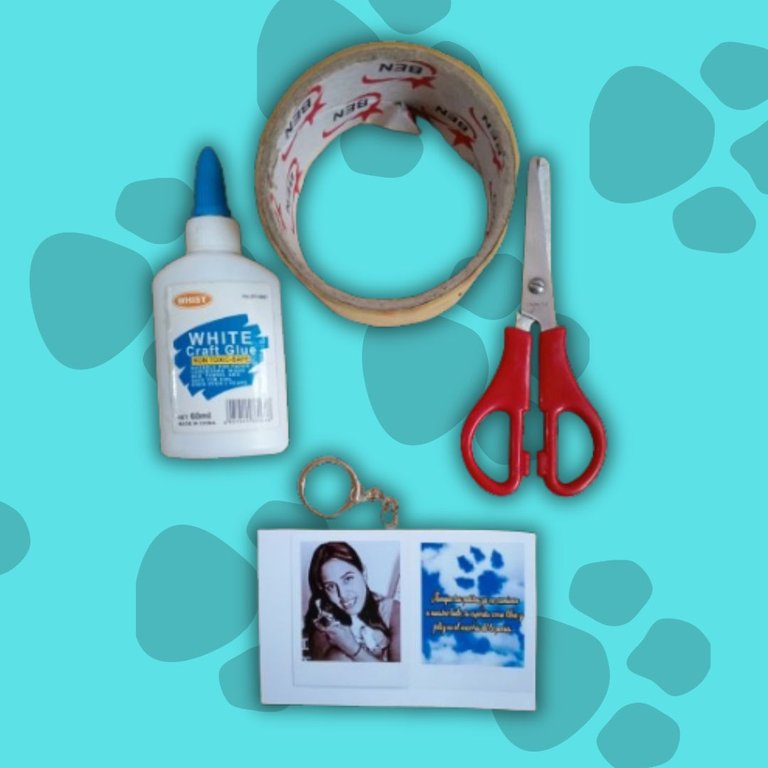
¿Te animarías a sorprender a tus seres queridos con un regalo único y creativo? ¡Este post es para ti! Con este regalo te apuesto a que a quien se lo regales lo amara de por vida ya que las fotografías son un recuerdo que queda para siempre. Este regalo es sencillo de hacer para cuando no sepas que regalarle a ese amigo o persona especial y que mejor idea que un llavero con un colgante de polaroid. A continuación, los materiales que utilizaremos:
Would you dare to surprise your loved ones with a unique and creative gift? This post is for you! With this gift I bet that whoever you give it to will love it for life because the photographs are a memory that stays forever. This gift is easy to make for when you do not know what to give to that friend or special person and what better idea than a keychain with a polaroid pendant. Here are the materials we will use:

•Materials to be used•
•Materials to be used•
| - Scissor | - Tijera | |
|---|---|---|
| - Adhesive tape | - Cinta adhesiva | |
| - Photos printed on photographic paper | - Fotos impresas en papel fotográfico | |
| - Stick or liquid glue | - Pega en barra o liquida | |
| - Key ring | - Llavero |
•STEP BY STEP•
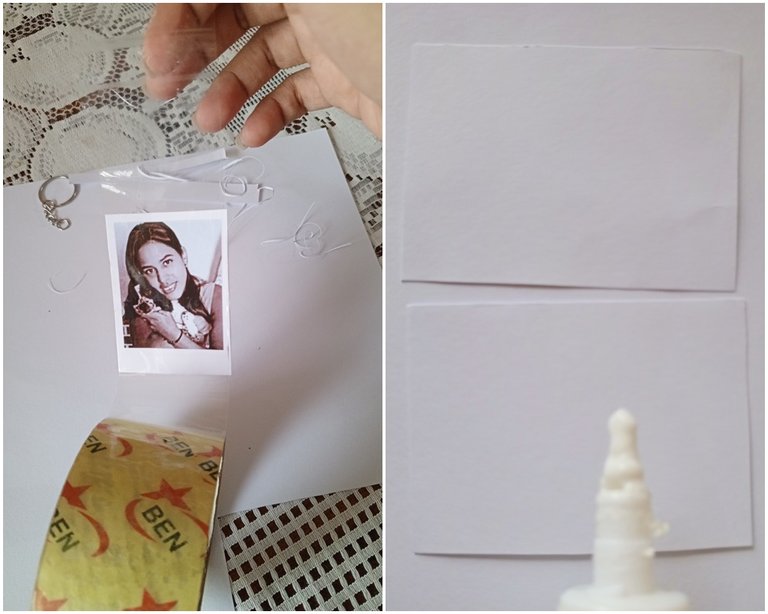
•STEP BY STEP• Imprimiremos las polaroid en el papel fotográfico previamente editadas en tu teléfono o computadora y del mismo tamaño para a continuación recortarlas sin pasarnos del corte limite ya que tienen que estar parejas las dos polaroids porque serian dos caras.
We will print the polaroids on the photographic paper previously edited on your phone or computer and of the same size and then cut them out without going over the cut limit since the two polaroids have to be even because they would be two sides.

Como segundo paso vamos a pegar las polaroid. Si en el paso anterior no las recortaste bien, al pegarlas, te puedes dar cuenta si se encuentran paralelamente y si no, lo que quede de exceso o mal recortado lo recortas. Luego de ello, pasamos a pegarlas en la cinta adhesiva como se muestra en la foto tratando de que no se llene de aire para forrarlas y que con el tiempo no se dañen.
As a second step we are going to glue the polaroids. If in the previous step you did not cut them well, when you glue them, you can see if they are parallel and if not, you can cut the excess or badly cut out. After that, we glue them on the adhesive tape as shown in the photo trying not to fill it with air to cover them and that over time they will not be damaged.
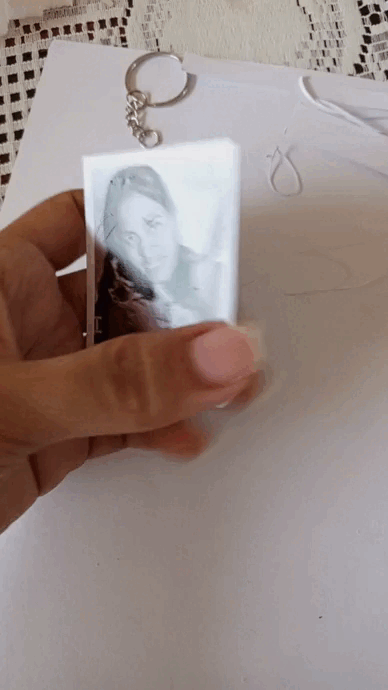
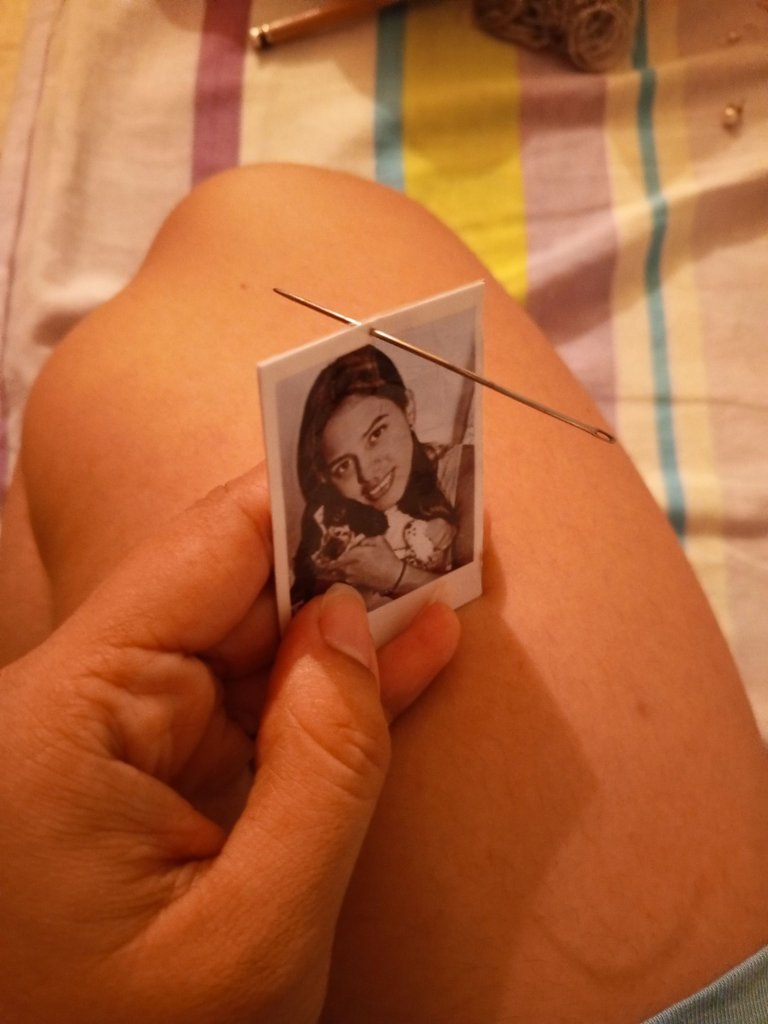
Como último paso, perfeccionamos el forro que realizamos con cinta adhesiva recortando los excesos para luego realizarle un orificio en la parte de arriba de en medio con una aguja gruesa para colocarle la tira del llavero y finalizamos de esta manera nuestro lindo llavero.
As a last step, we perfect the lining that we made with adhesive tape, trimming the excess and then we make a hole in the top of the middle with a thick needle to place the strip of the keychain and we finish in this way our nice keychain.
•💖RESULT💖•
•💖RESULT💖•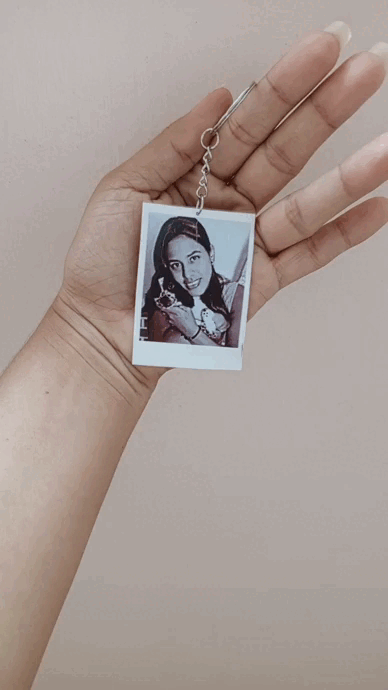
Y este es el resultado😊
Este regalo se lo hice a una amiguita, ya la conocen de mis post anteriores y si no se llama Keily. Su perrito se murió y quise hacerle este regalo tan único y bonito para que siempre lo tenga con ella y la acompañe a donde quiera que vaya. Me gustó mucho como quedo y espero que le encante su regalo. Lo hice con mucho amor para alguien que me regala un pedacito de su corazón todos los días 💖🌷✨
I made this gift for a friend of mine, you already know her from my previous posts and if not her name is Keily. Her puppy died and I wanted to give her this unique and beautiful gift so she can always have it with her and accompany her wherever she goes. I really liked how it turned out and I hope she loves her gift. I made it with a lot of love for someone who gives me a little piece of her heart every day.

💞Thank you so much for making it this far! I hope you liked my post, I'll see you next time!💞
💞¡Muchas gracias por llegar hasta aquí! Espero que te haya gustado mi post. ¡Nos vemos en una próxima oportunidad!💞
📲 Todas las fotografías fueron tomadas con un teléfono Tecno Spark 10 pro
📷 TODAS LAS FOTOS SON DE MI PROPIEDAD