¡Hi, friends! ❤️
I hope you are having a great, productive and creative week. For my part it has been a bit exhausting but I have increased my creativity.
This is the first time I post in this community, and I wanted to start my journey, with a step by step drawing of a girl that I painted with school watercolors.
Before I start I want you to know that I am learning to draw and paint with watercolor. So don't look for perfection 😁 however, tips are welcome ❤️

🖌️🎨STEP BY STEP🖌️🎨
Step 1 🖌️
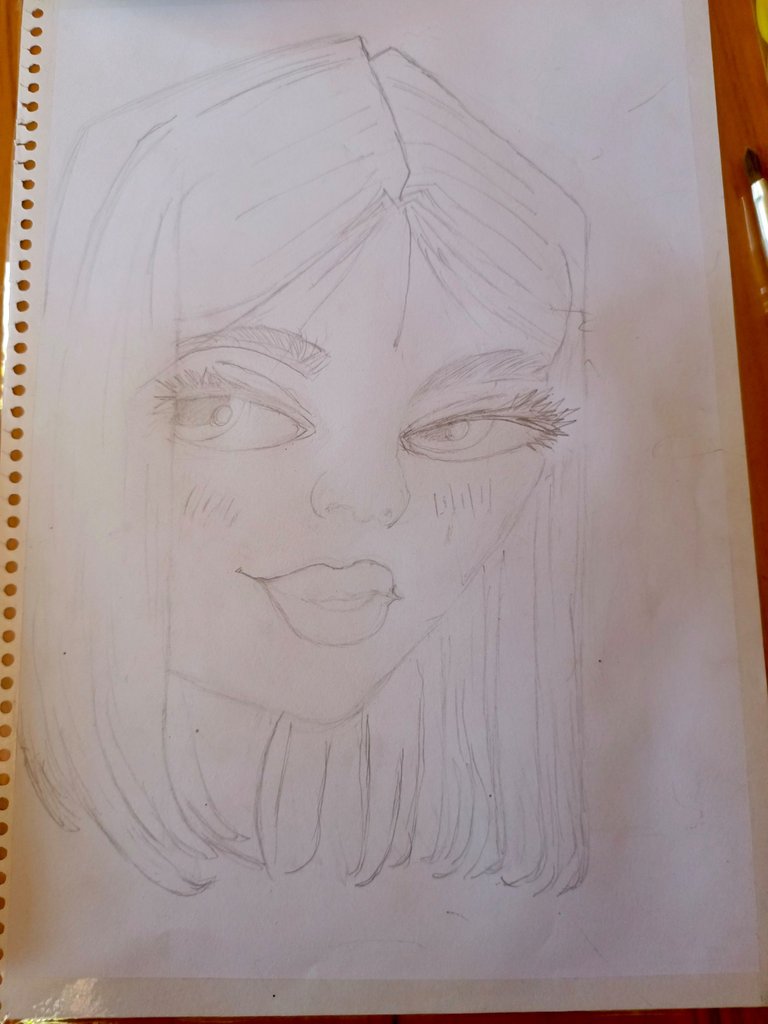
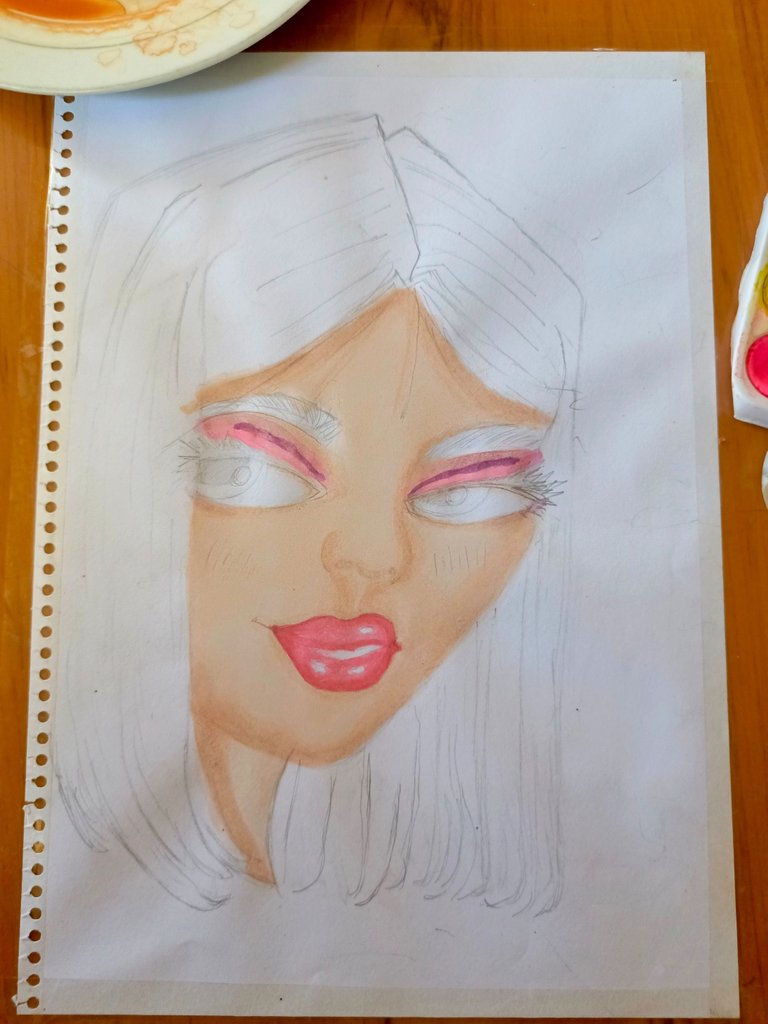
The first thing I did was to draw my character with a graphite pencil on a piece of cardboard from a school pad, since I don't have a watercolor pad at the moment, but it's useful for learning.
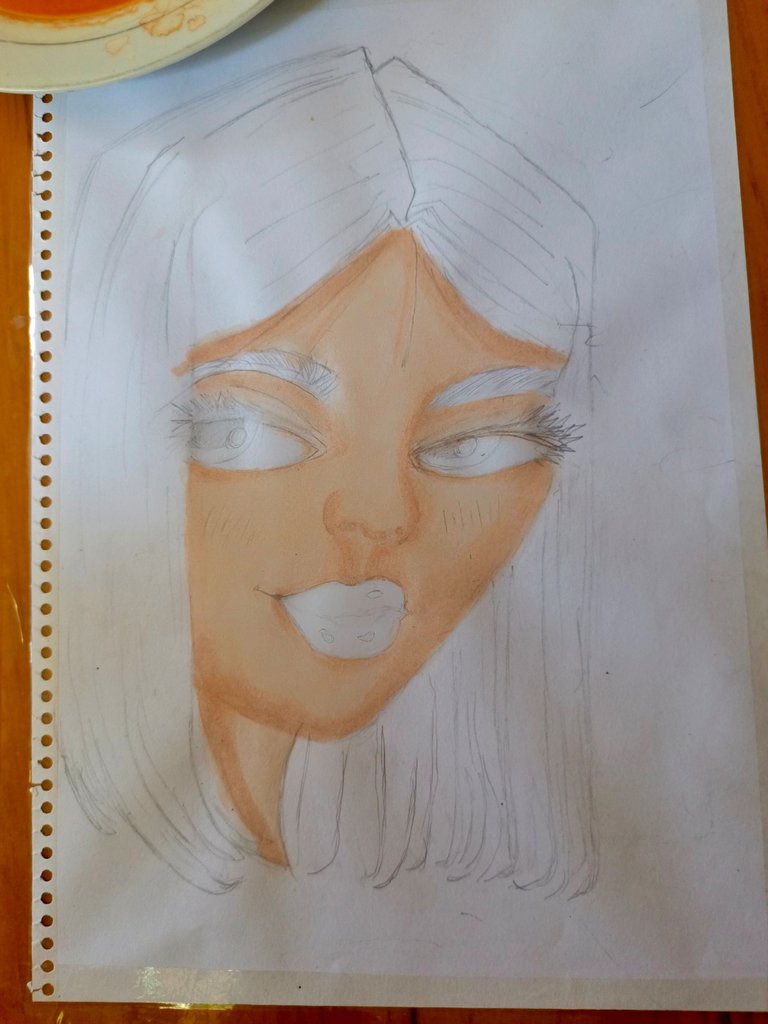
Then I started to paint his face mixing the mustard yellow color with a little bit of red. After letting it dry a little bit I applied a layer again but this time only to make some shadows.

Step 2 🖌️
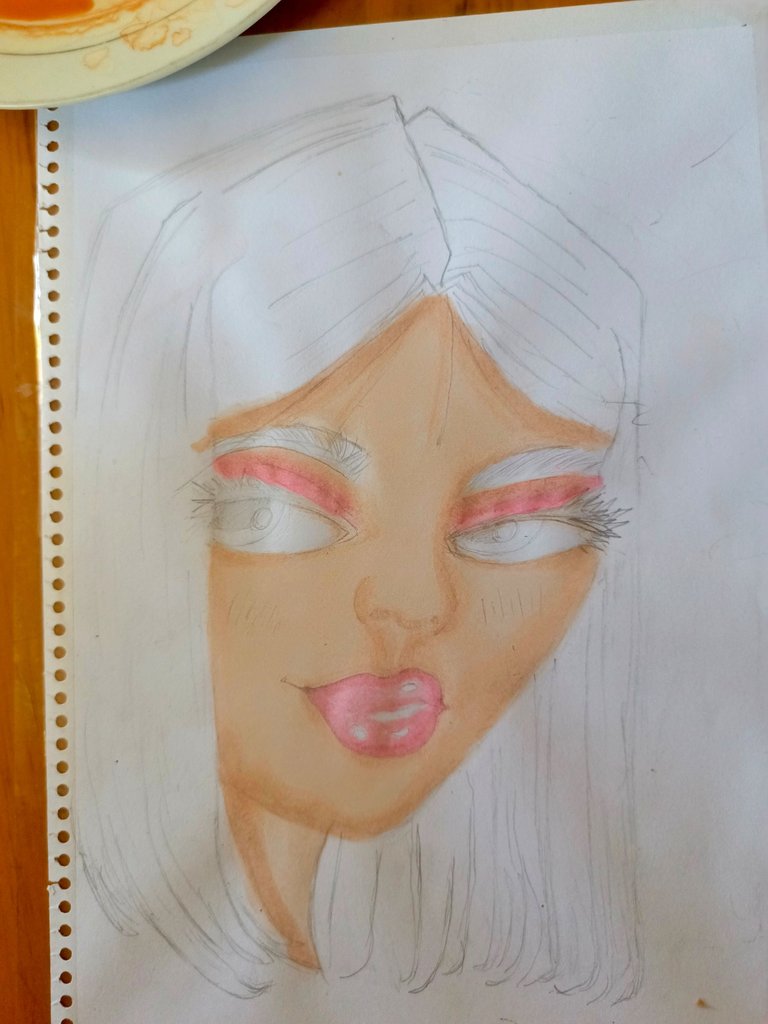
Then to simulate eye shadow I painted her eyelids with a pink, and the line of the mobile eyelid I painted with purple.
While the eyelids were drying, I started to paint her lips with a red diluted with a lot of water, starting from the edges to the center. When it dried a bit, I applied another coat. Always respecting the limit of the shine I wanted the lips to have.
For those who do not know, in watercolor we must start from the lightest to the darkest color, never the other way around. And leave the spaces we want in white.

Step 3 🖌️
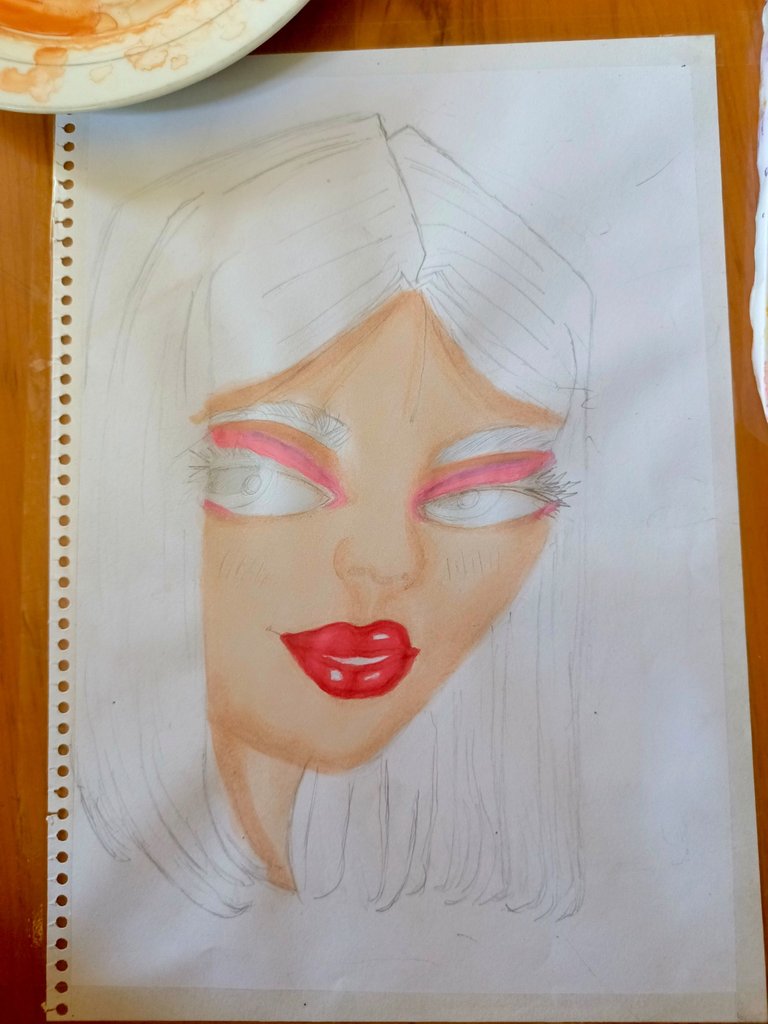
I blended the purple line on the eyelids with pink. And I also gave her lips another coat of paint until I got a deep red, like my friend @mamaemigrante wears them sometimes, which looks fabulous on her, by the way 😁❤️
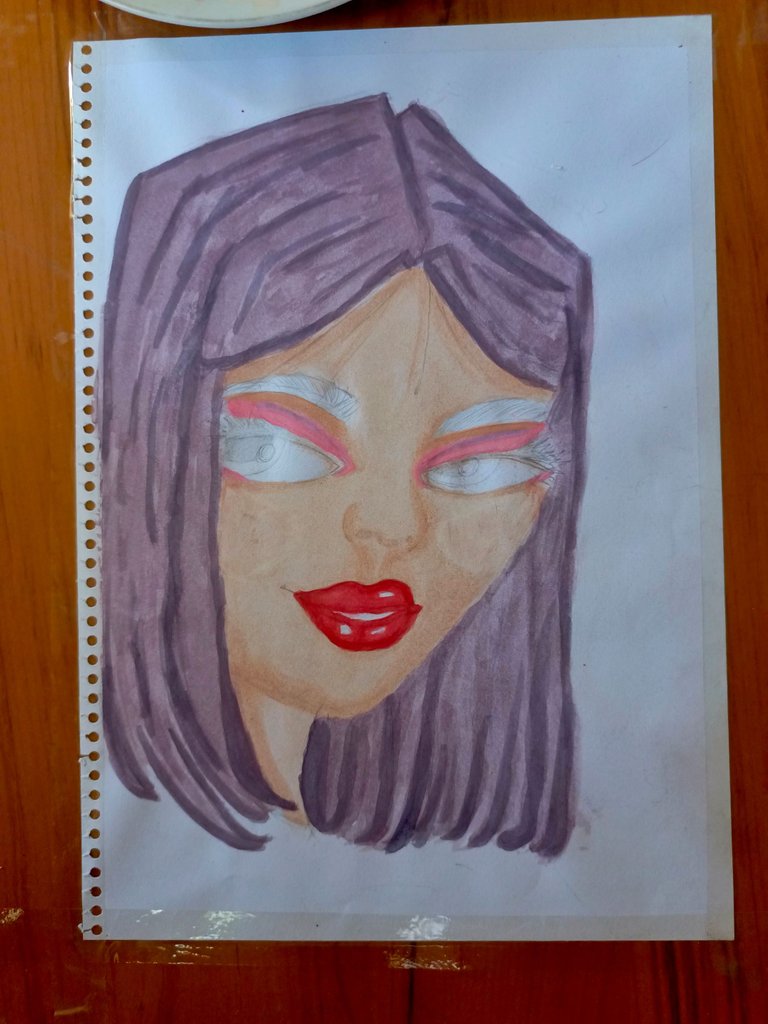
Next I started painting her hair with a light coat of purple that I got by mixing red with blue. And when it dried a bit I marked the strands of her hair with another layer..... Have you noticed that I'm always mixing colors? 😁😁 That's because I have a basic watercolor palette with few colors. It's my turn to go back to primary.

Step 4 🖌️
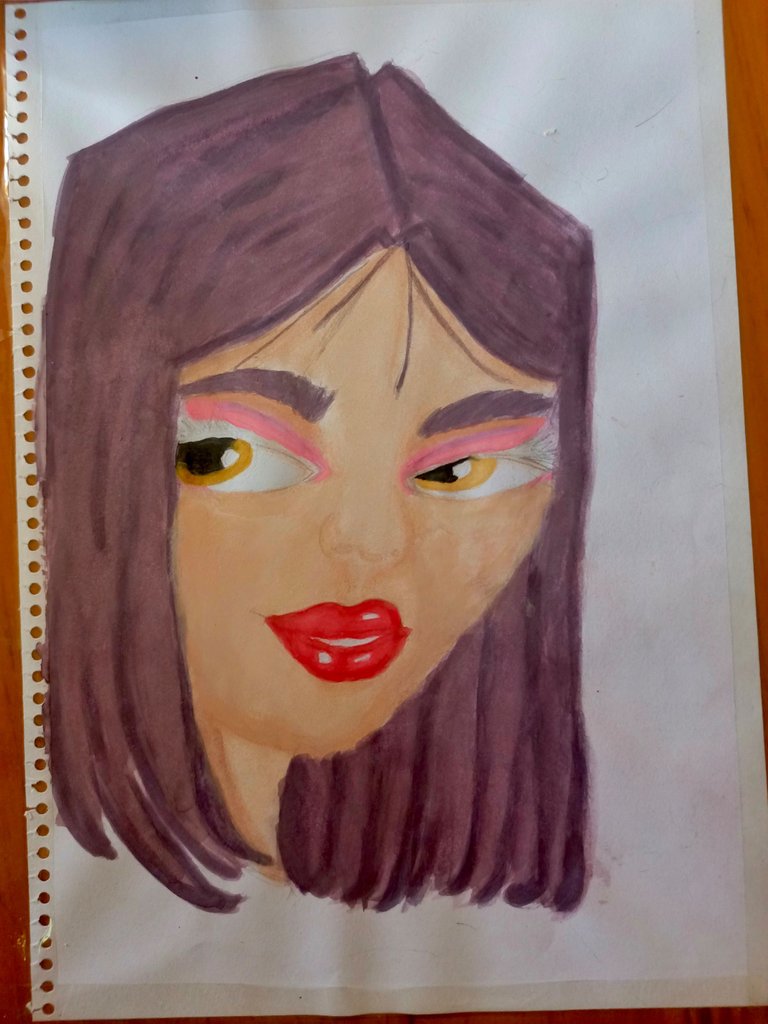
To the hair I gave more coats of paint until I got the desired color, as always I highlighted her locks, giving her shadows in the places I wanted.
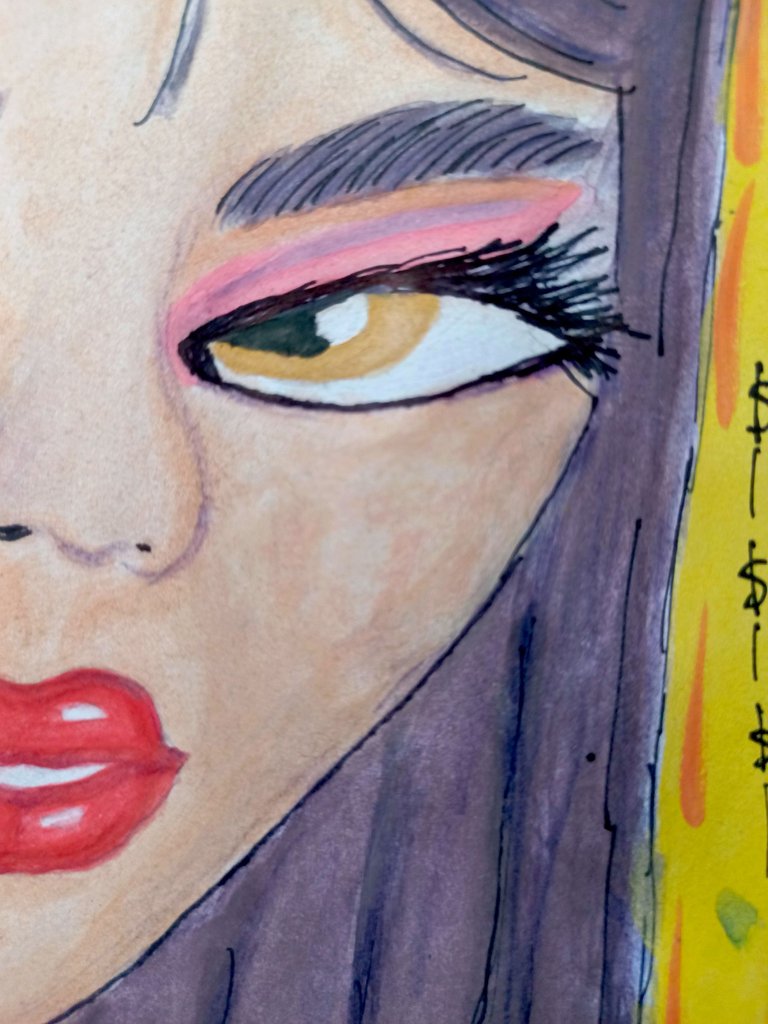
I also painted her eyebrows with the same tone of the hair and gave color to her eyes with mustard yellow (the iris), the pupil I painted with a black with little water to obtain the pure color. I respected the brightness of the eyes avoiding to paint there.
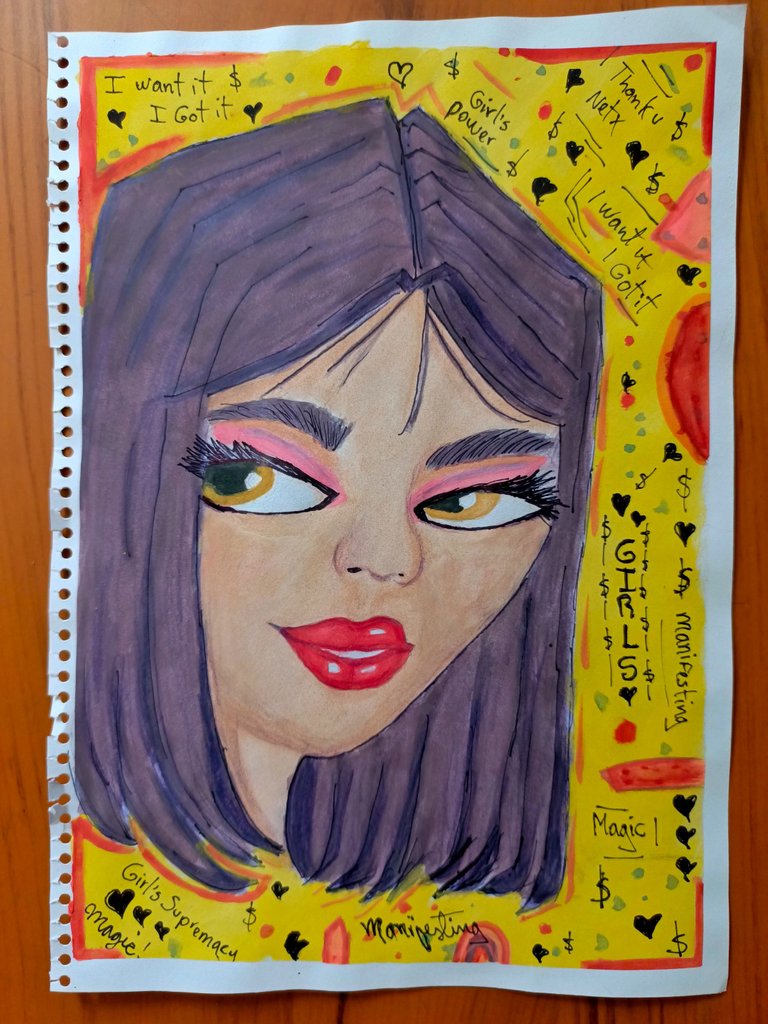
And to finish the drawing, I made the details in the hair with a purple crayon and a black marker with extra fine tip. With the same marker I painted her eyelashes and outlined her eyes to intensify the look.
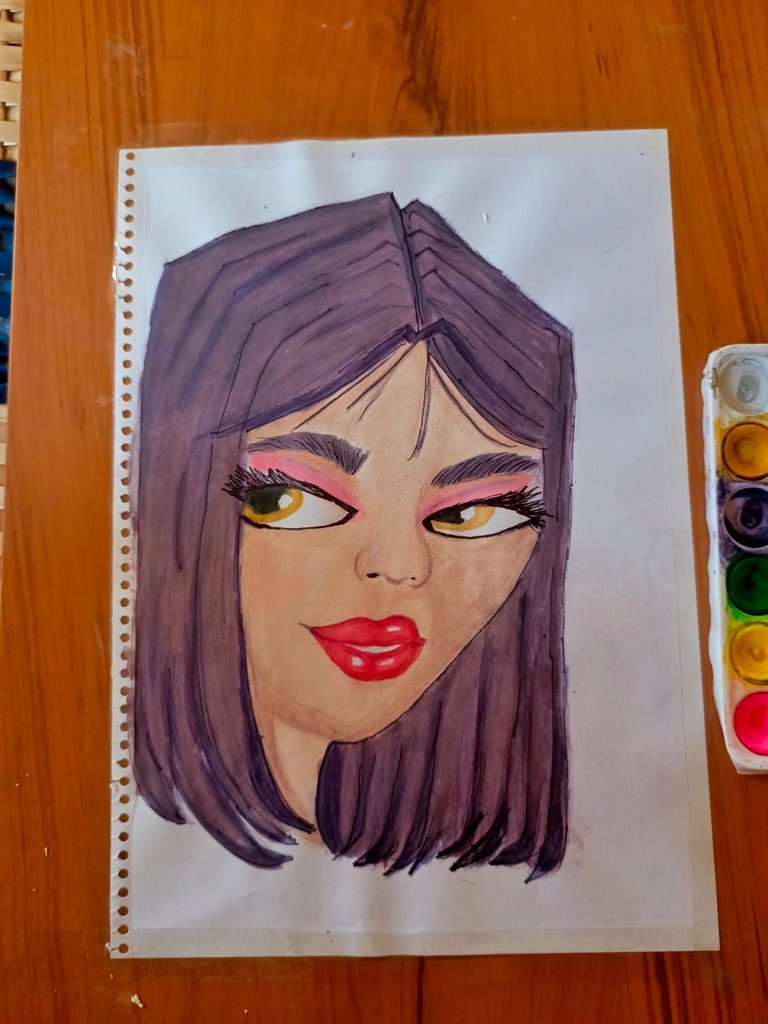

Step 5 🖌️
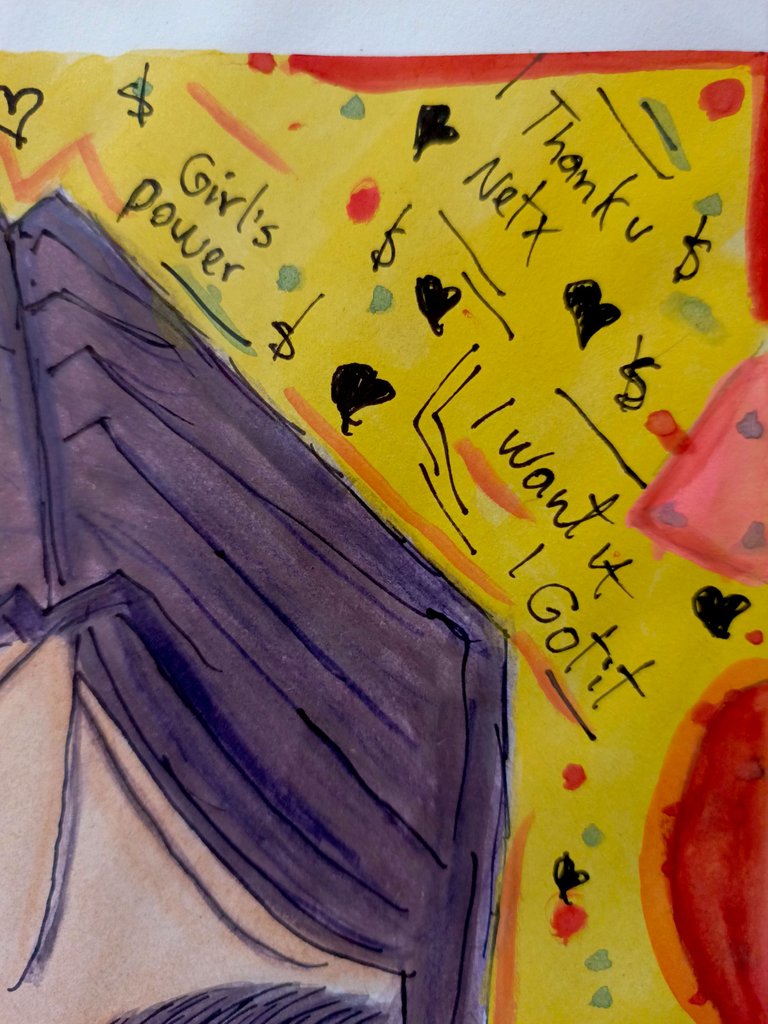
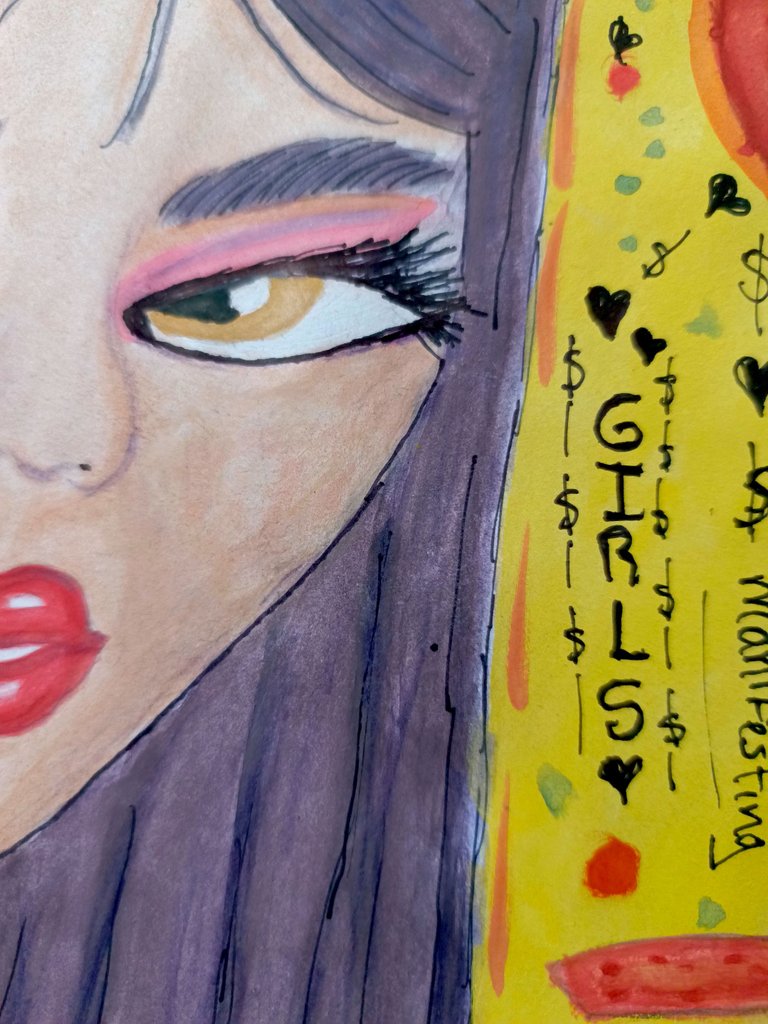
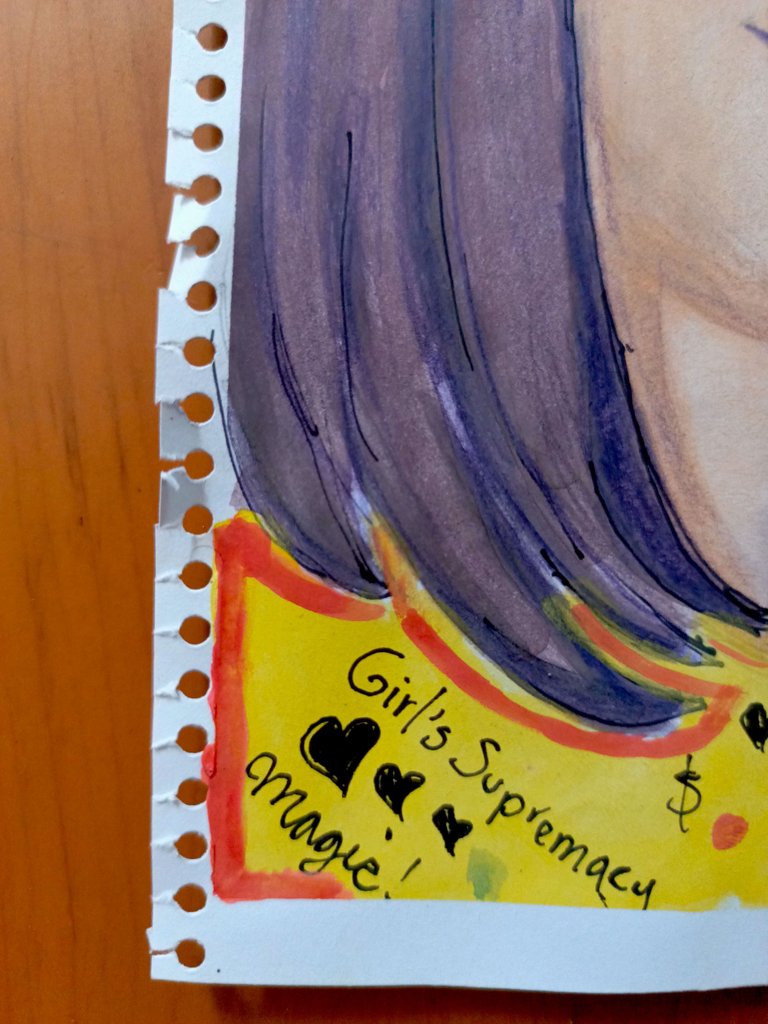
I wanted to give it more personality so I painted the background a bright yellow. And after thinking about it I decided to write some affirmative phrases of female empowerment on it as well as little hearts and dollar signs ($) because that's what we love most 😁
✨Manifesting✨
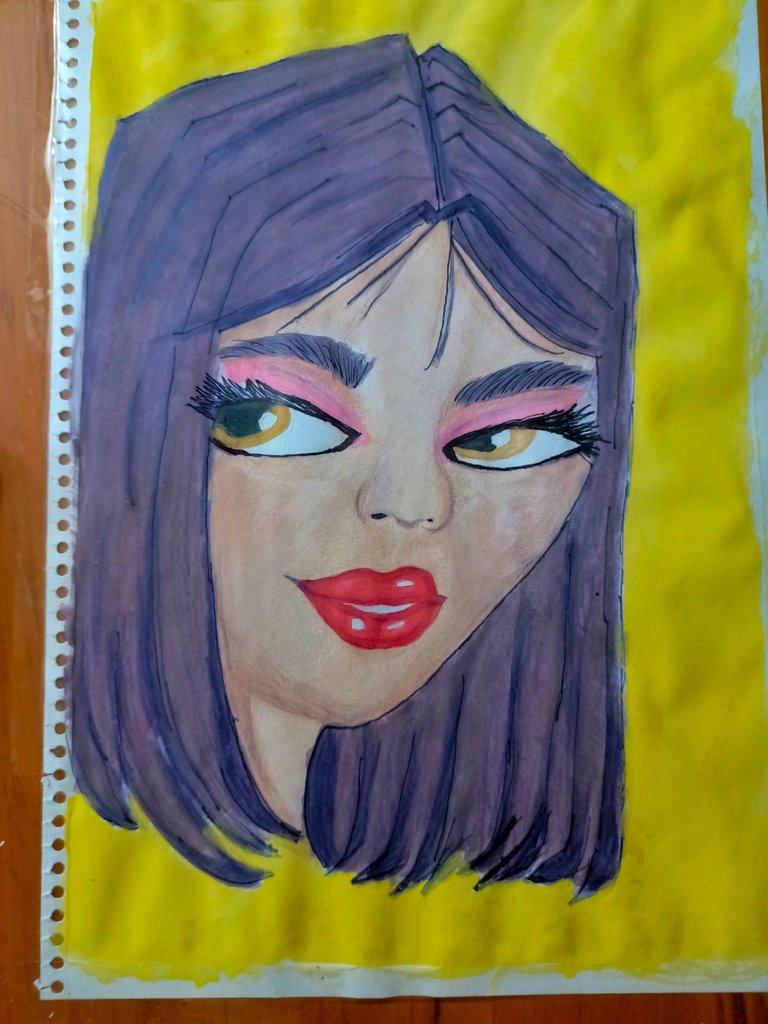


Details ✨
Here you can see clearly what I wrote and the details I made to my drawing.


Photos are my property
Visual identity by @pentaghast

¡Hola, amigos!

Espero que estén teniendo una excelente semana, productiva y creativa. Por mi parte ha sido algo agotadora pero sí he aumentado mi creatividad.
Es la primera vez que publico en esta comunidad, y quise iniciar mi recorrido, con el paso a paso de un dibujo de una chica que pinté con acuarelas escolares.
Antes de iniciar quiero que sepan que estoy aprendiendo a dibujar y a pintar con acuarela. Así que no busquen perfección 😁 sin embargo, los consejos son bienvenidos❤️

🖌️🎨PASO A PASO🖌️🎨
Paso 1 🖌️
Lo primero que hice fue dibujar a mi personaje con lápiz de grafito en una cartulina de un block escolar ya que por ahora no tengo un block para acuarelas, pero para ir aprendiendo me sirve.
Posteriormente empecé a pintar su rostro mezclando el color amarillo mostaza con un poquito rojo. Luego de dejar secar un poco volví a pasar una capa pero esta vez solo para hacerle algunas sombras.


Paso 2 🖌️
Luego para simular la sombra de ojos le pinté los párpados con un rosado, y la línea del párpado móvil la pinté con púrpura.
Mientras se secaban los párpados, empecé a pintar sus labios con un rojo diluido con bastante agua, empezando por los bordes hasta el centro. Cuando se secó un poco le pasé otra capa. Siempre respetando el límite de los brillos que quería que tuvieran los labios.
Para el que no sepa, en la acuarela debemos iniciar desde el color más claro hasta el más oscuro, nunca al revés. Y dejar los espacios que queremos en blanco.


Paso 3 🖌️
La línea púrpura en los párpados la difuminé con rosa. Y asimismo le di otra capa de pintura a los labios hasta obtener un rojo intenso, como los usa mi amiga @mamaemigrante a veces, que le queda fabuloso, por cierto 😁❤️
Seguidamente empecé a pintar su cabello con una capa clara de púrpura que obtuve mezclando el rojo con el azul. Y cuando secó un poco le marqué los mechones del cabello con otra capa... ¿Ya se dieron cuenta que siempre ando mezclando colores? 😁😁 Eso es porque tengo una paleta de acuarelas básica con pocos colores. Me toca volver a primaria.


Paso 4 🖌️
Al cabello le di más capas de pintura hasta obtener el color deseado, así como siempre remarqué sus mechones, dándole sombras en los lugares que quería.
Tambien pinté sus cejas con el mismo tono del cabello y le di color a sus ojos con el amarillo mostaza (el iris), la pupila la pinté con un negro con poca agua para obtener el color puro. Respeté el brillo de los ojos evitando pintar allí.
Y para finalizar el dibujo, le hice los detalles en el cabello con un crayón morado y un marcador negro con punta extra fina. Con ese mismo marcado pinté sus pestañas y le hice un delineado a sus ojos para intensificar la mirada.


Paso 5 🖌️
Quería darle más personalidad así que pinté fondo de un amarillo intenso. Y luego de pensarlo decidí escribirle algunas frases afirmativas de empoderamiento femenino así como corazóncitos y el símbolo de dólar ($) porque es lo que más queremos 😁
✨Manifesting✨


Detalles ✨
Aquí pueden observar con las claridad lo que escribí y los detalles que le hice a mi dibujo.


Las fotos son de mi propiedad
Identidad visual por @pentaghast


