Hello Beautiful people!
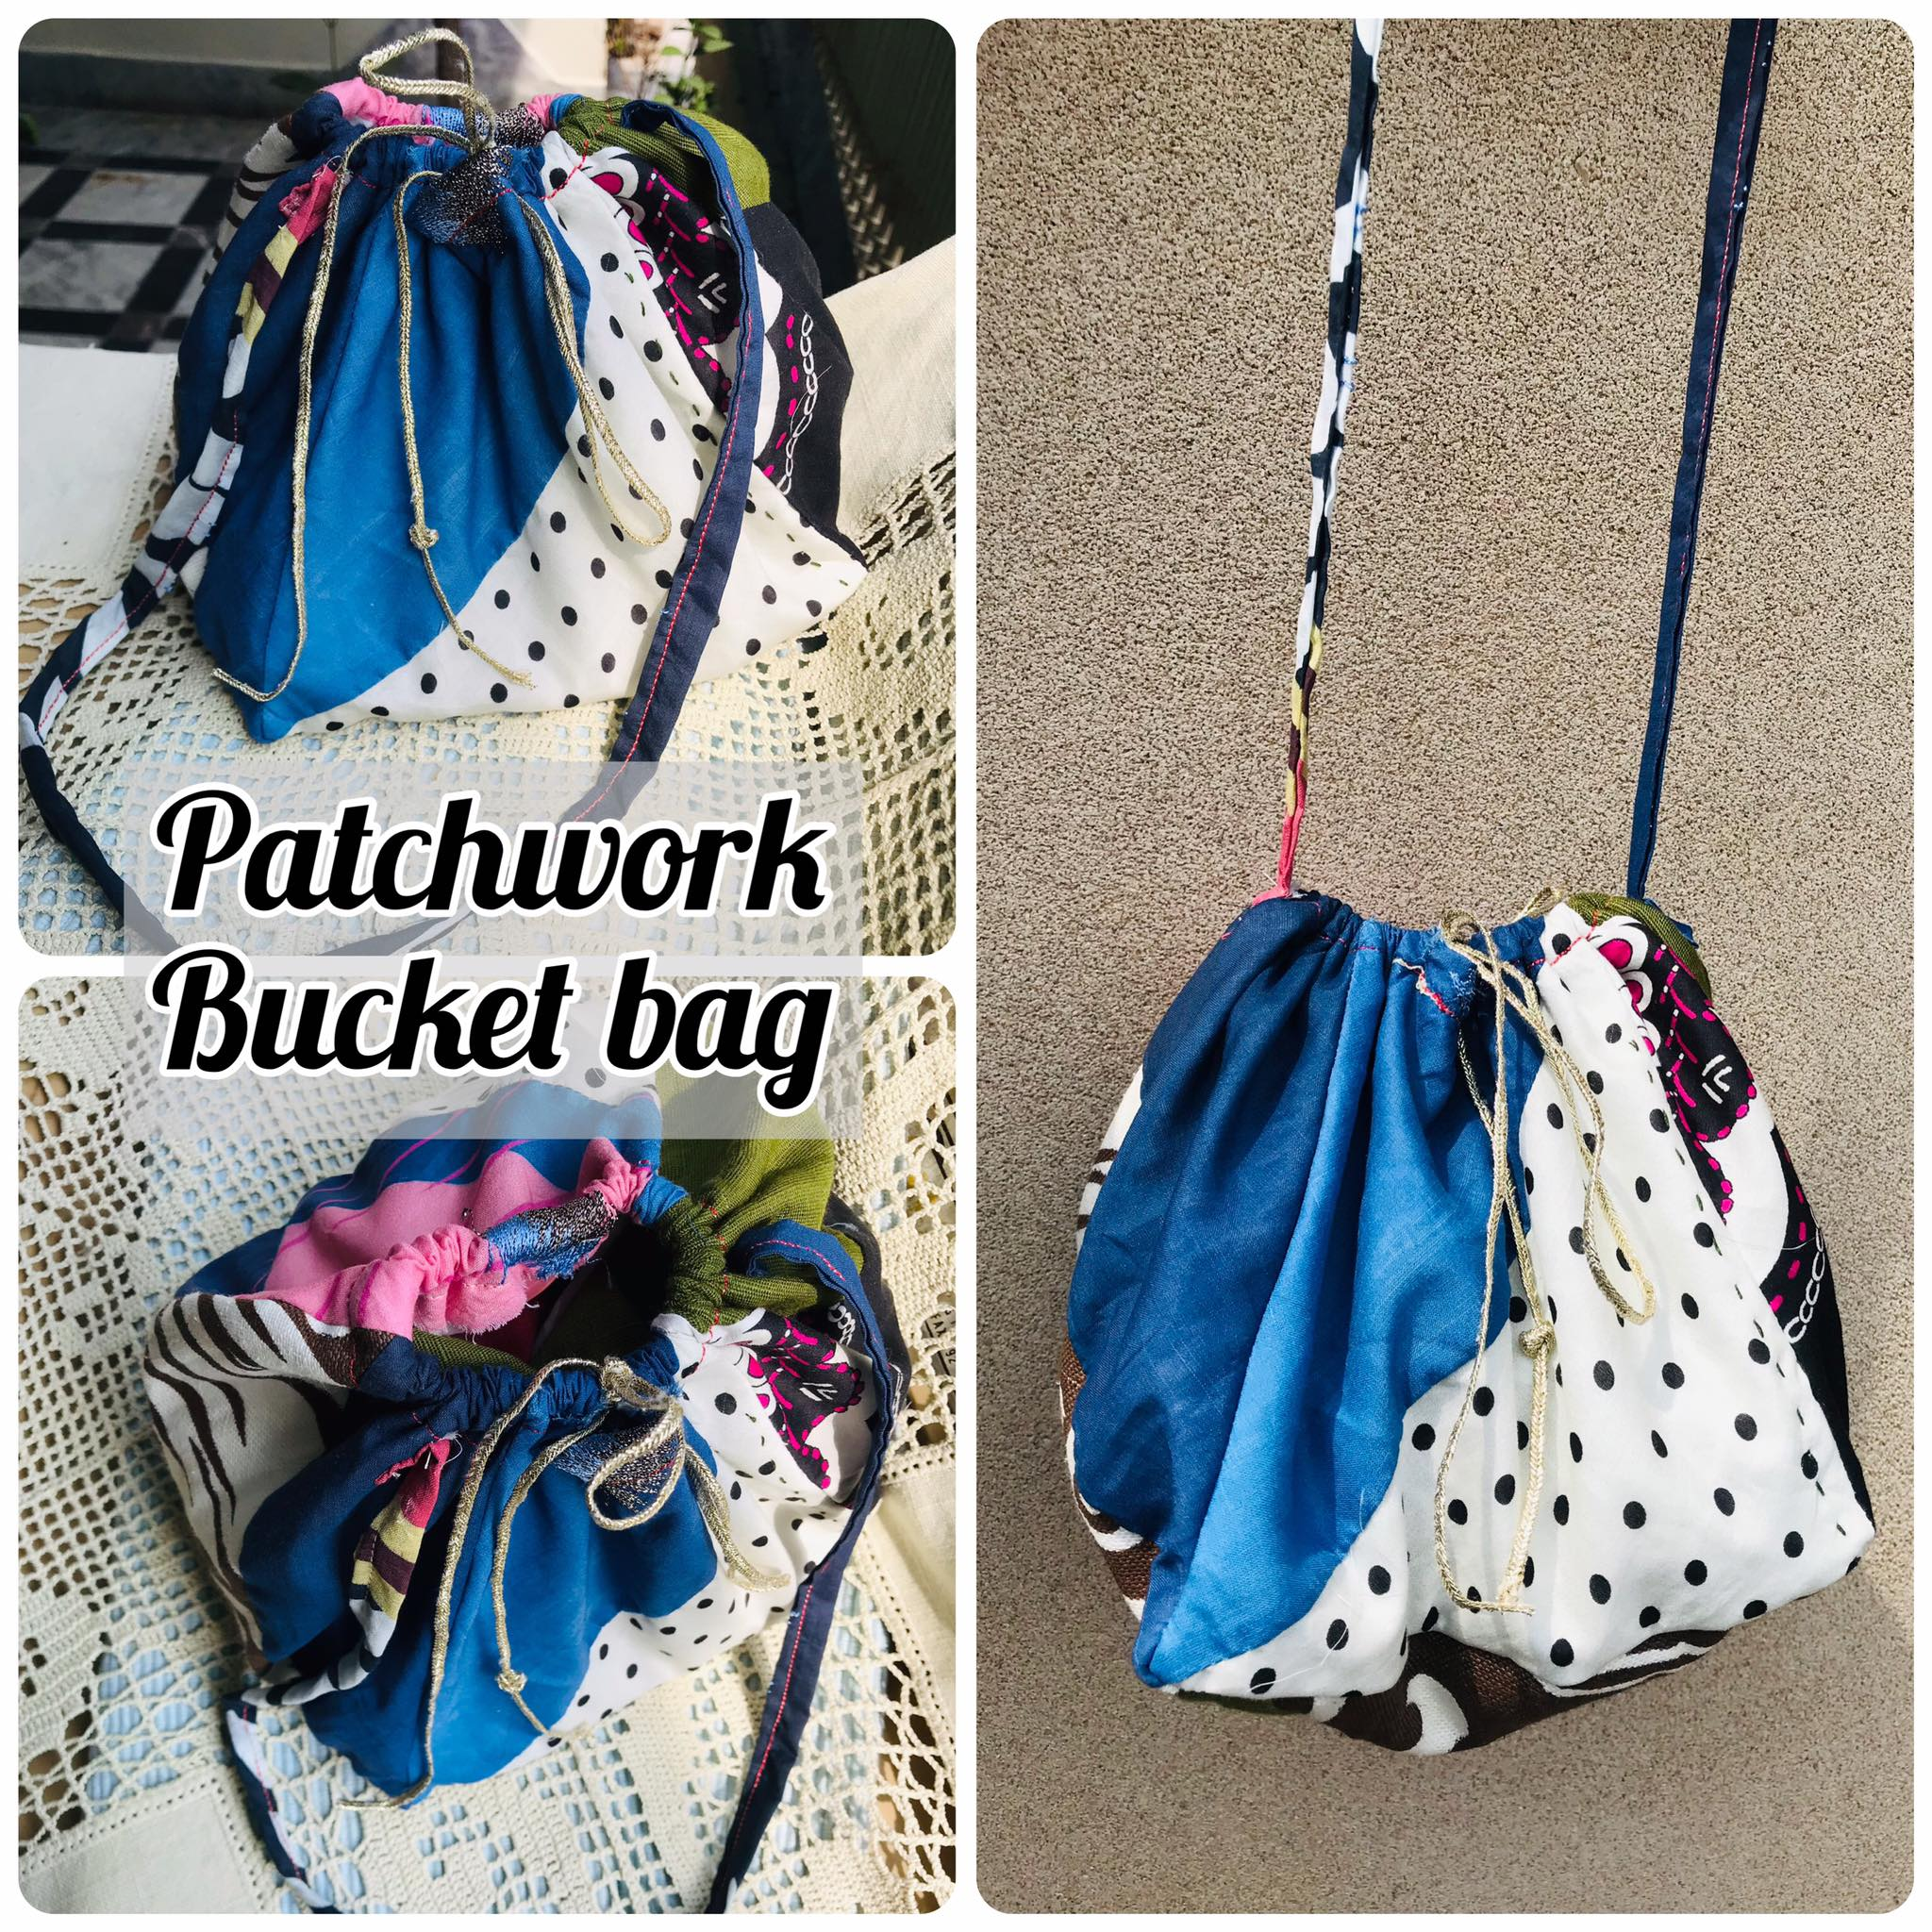
A very beautiful and interesting contest has been started by the Hive DIY community, I really liked the idea and I have already done a little work like this patchwork before and I was very excited to participate in the contest and here I present my entry to the contest.
¡Hola gente hermosa!
La comunidad de Hive DIY ha iniciado un concurso muy bonito e interesante, me ha gustado mucho la idea y ya he hecho un trabajito como este patchwork antes y estaba muy emocionada de participar en el concurso y aquí les presento mi entrada al concurso.
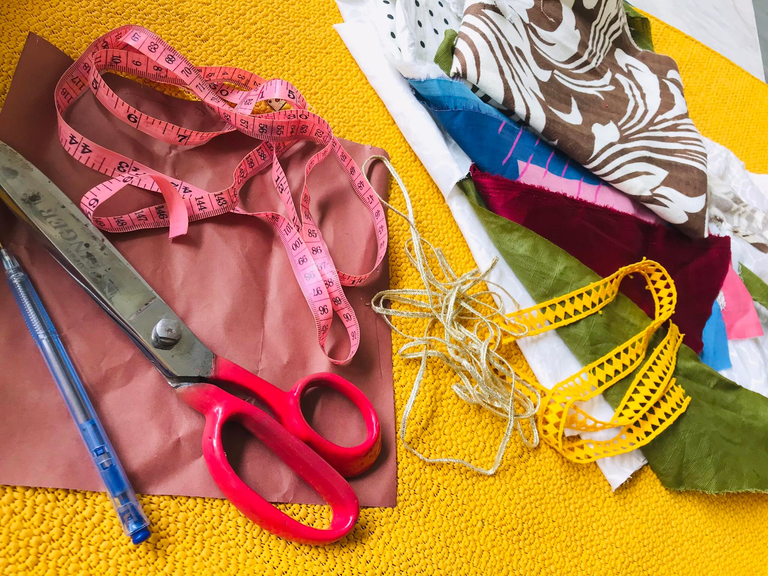
Material Required
- Different cloth patches
- Scissor
- Sewing machine
- Needle and thread
- Thin lace
- Pen
- Measuring tape
Material requerido
- Diferentes parches de tela
- tijera
- Máquina de coser
- Aguja e hilo
- Encaje fino
- Lápiz
- Cinta métrica
STEP #1
- Take a piece of paper and measure a piece of 7 * 7 inches.
- Now take one piece of cloth and take the same measurement on the cloth with the help of paper.
- Cut out the piece measured.
PASO 1
- Tome una hoja de papel y mida una pieza de 7 * 7 pulgadas.
- Ahora tome una pieza de tela y tome la misma medida en la tela con la ayuda de papel.
- Recortar la pieza medida.
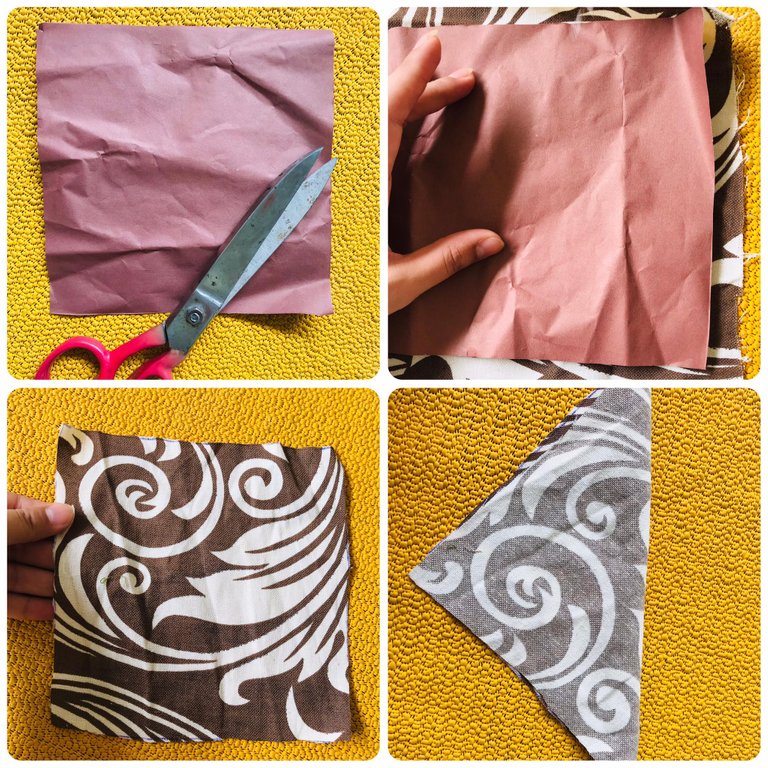
STEP #2
- Take the one measured piece of cloth, trace on other pieces of cloths.
- Repeat the procedure with other clothes.
- Make 10 triangles patched from different clothes.
PASO 2
- Tome la pieza de tela medida, trácela en otras piezas de tela.
- Repita el procedimiento con otras prendas.
- Haz 10 triángulos remendados con diferentes prendas.
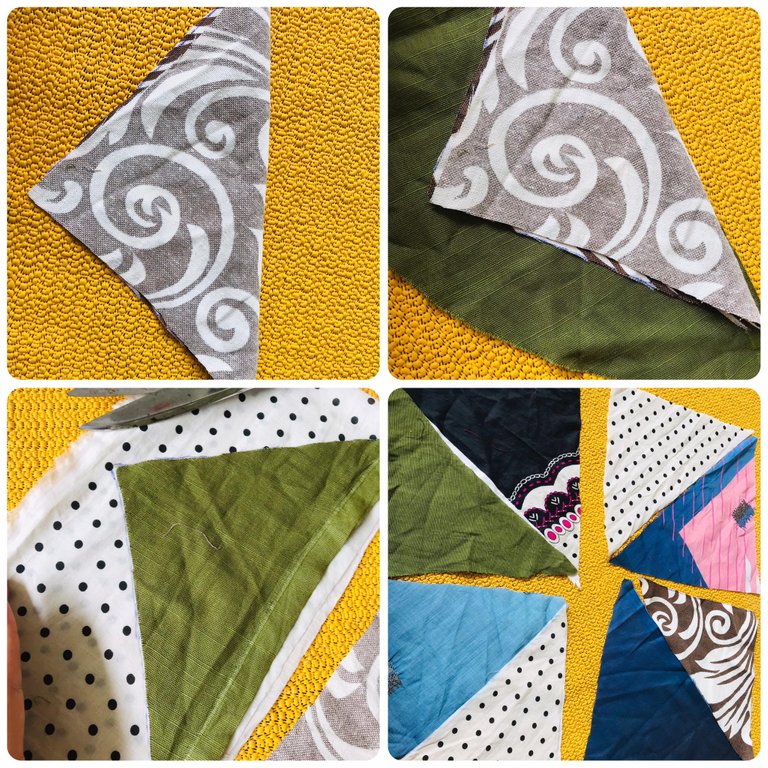
STEP #3
- Stitch pair of two triangles together from the long side.
- Repeat the same process for all the patches.
- I am using a sewing machine for sewing here, you can sew with your hands using a needle and thread.
PASO 3
- Coser un par de dos triángulos juntos desde el lado largo.
- Repita el mismo proceso para todos los parches.
- Estoy usando una máquina de coser para coser aquí, puedes coser con tus manos usando una aguja e hilo.
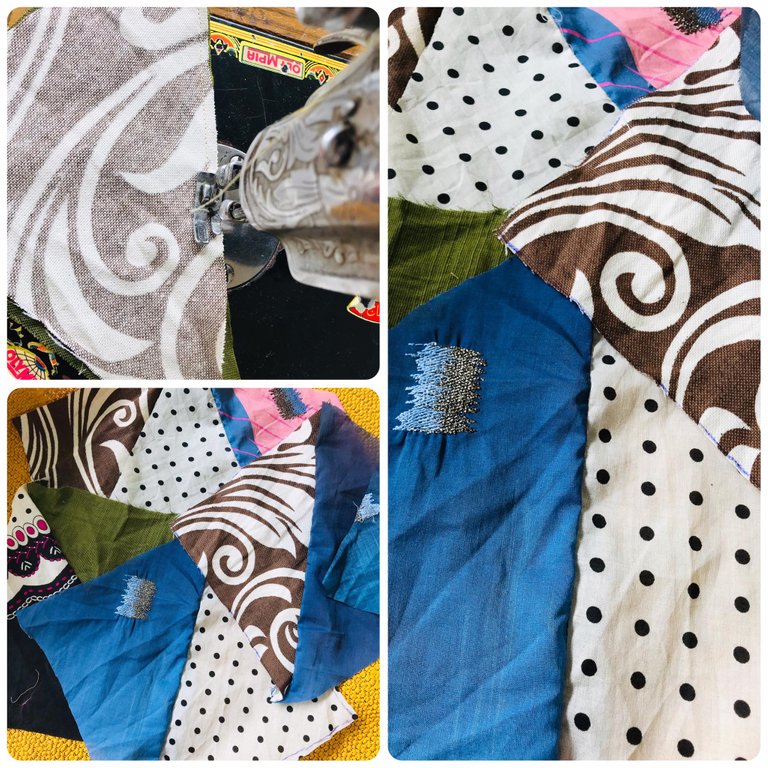
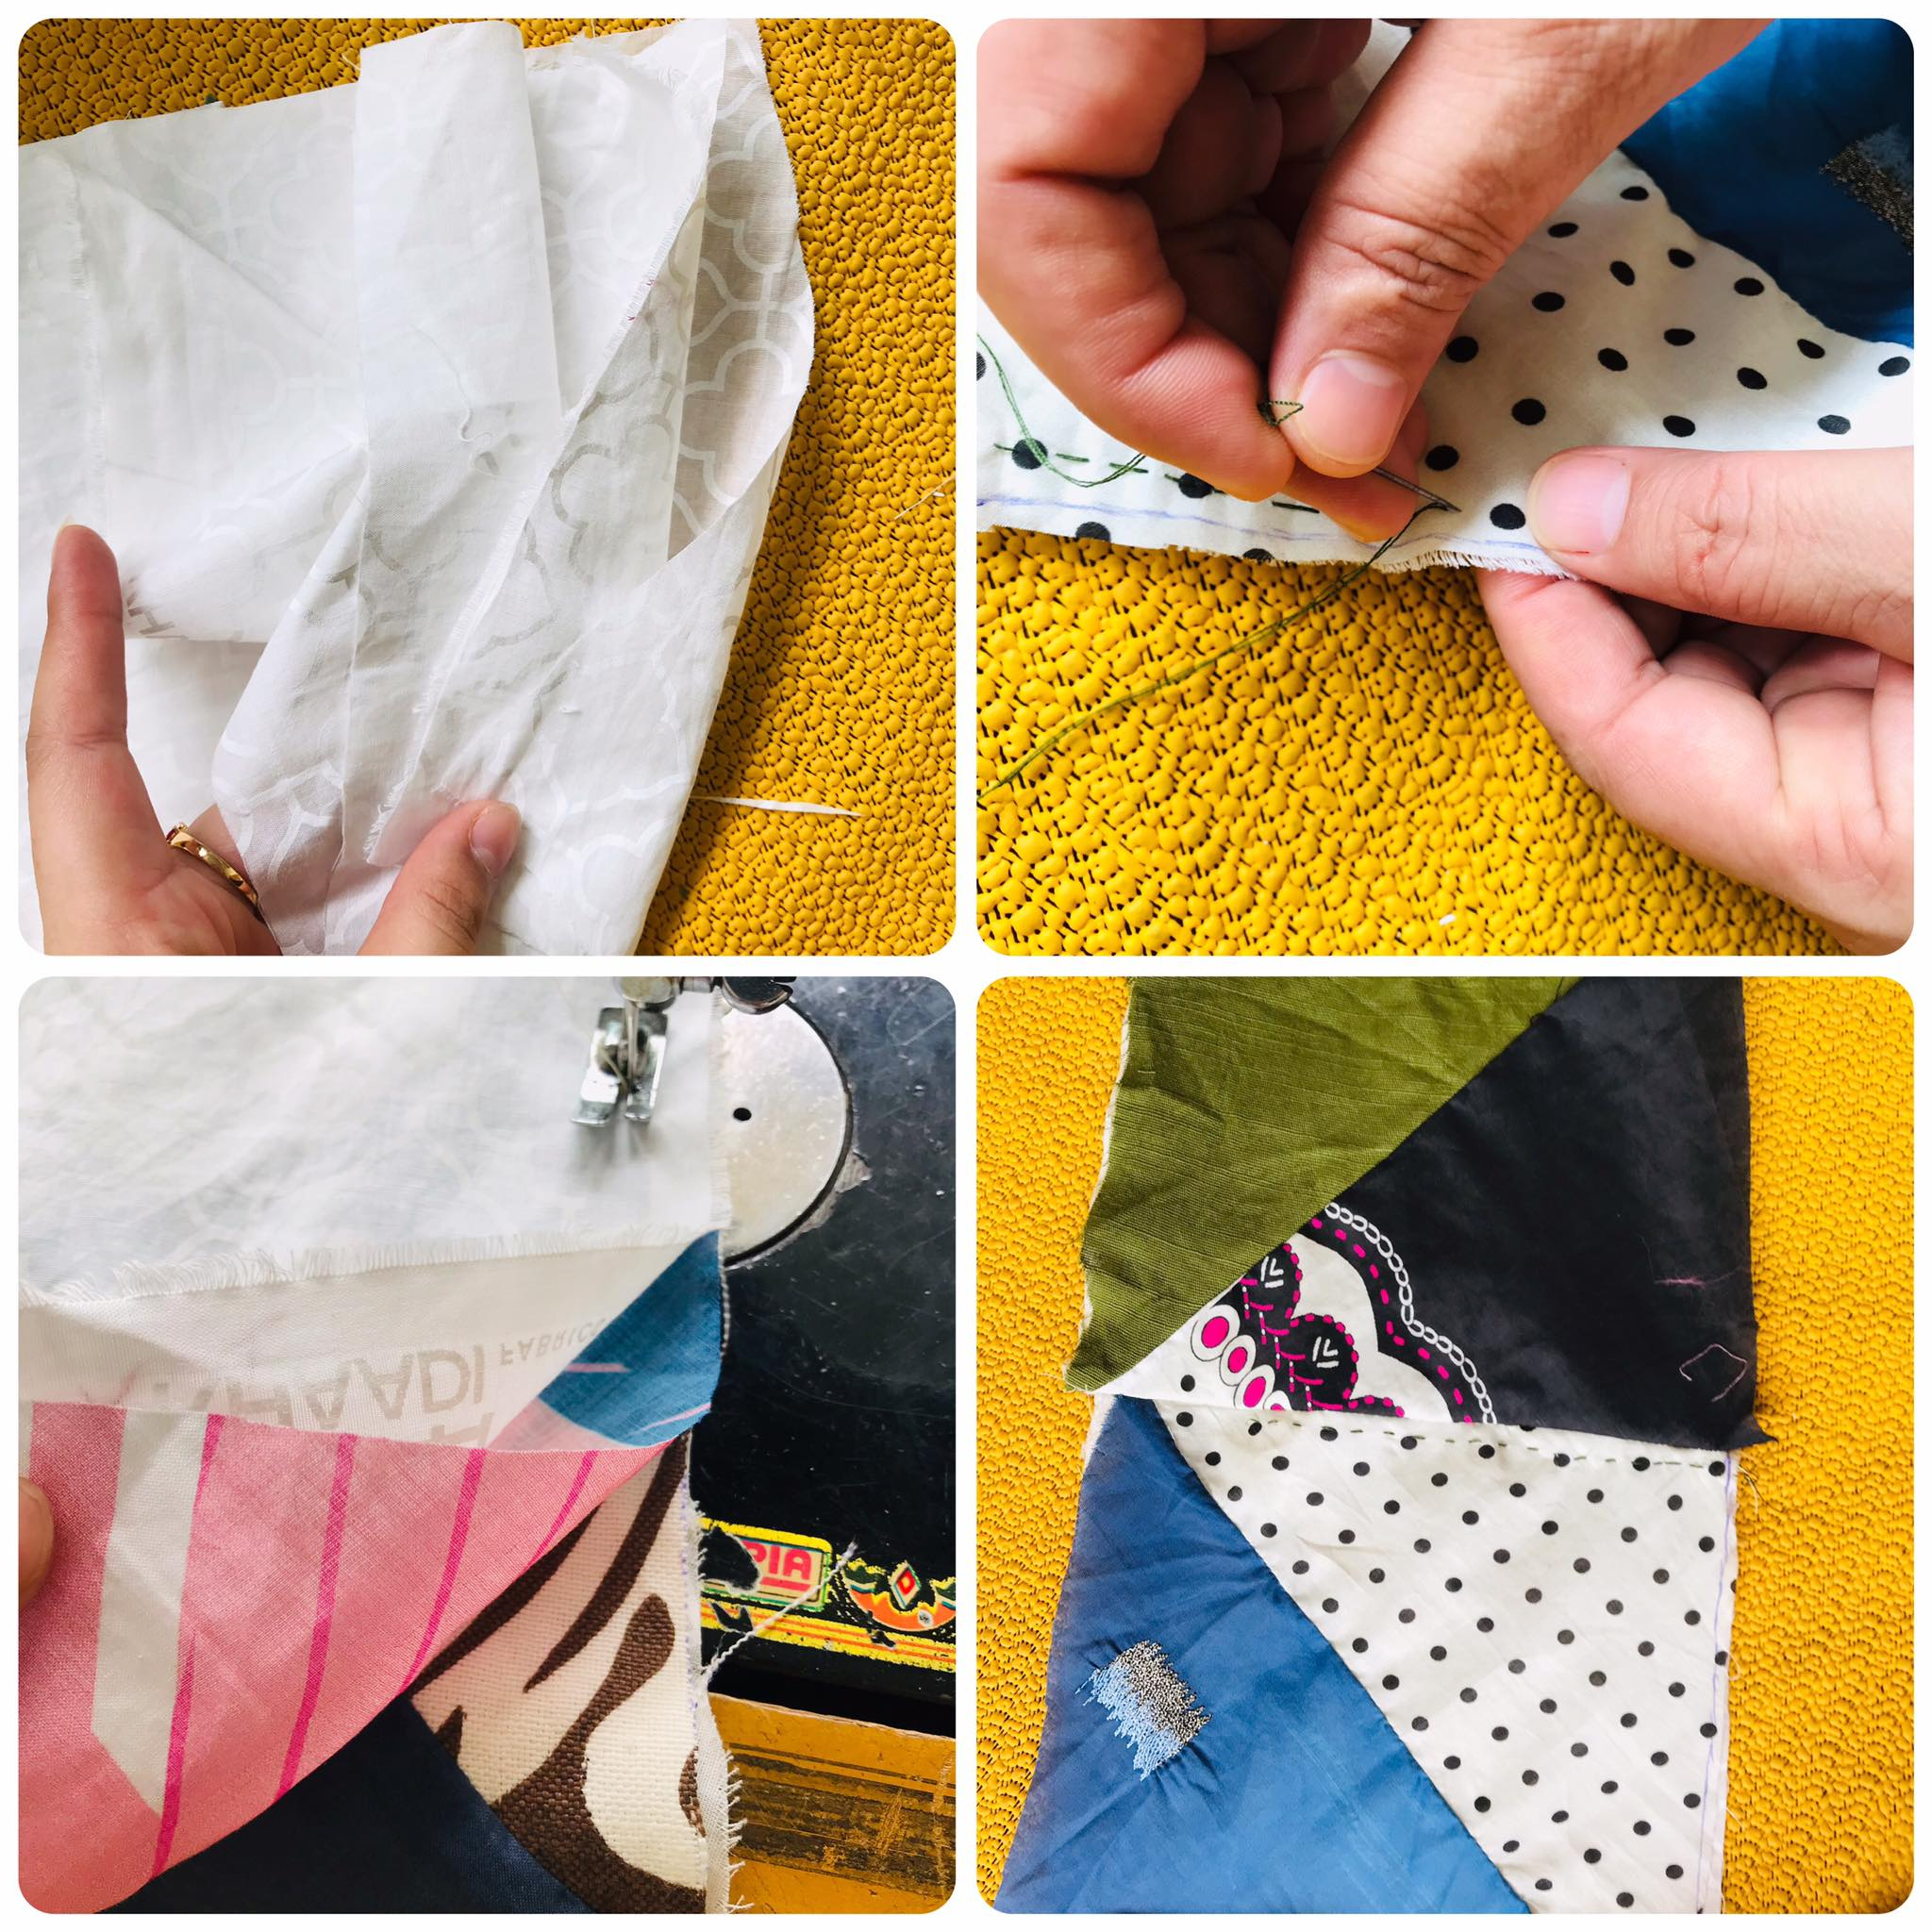
STEP #4
- Once all the triangle patches are stitched together, you will get 5 pieces each measuring 7 by 7 inches.
- Now I am taking white cloth for the inner of the bag for extra neatness.
- Measure 5, 7 by 7 inches squares and attach them under each piece.
- Now sew two, two pieces together.
PASO 4
- Una vez que todos los parches triangulares estén cosidos, obtendrá 5 piezas, cada una de 7 por 7 pulgadas.
- Ahora estoy usando tela blanca para el interior de la bolsa para mayor pulcritud.
- Mida cuadrados de 5, 7 por 7 pulgadas y péguelos debajo de cada pieza.
- Ahora cosa dos, dos piezas juntas.
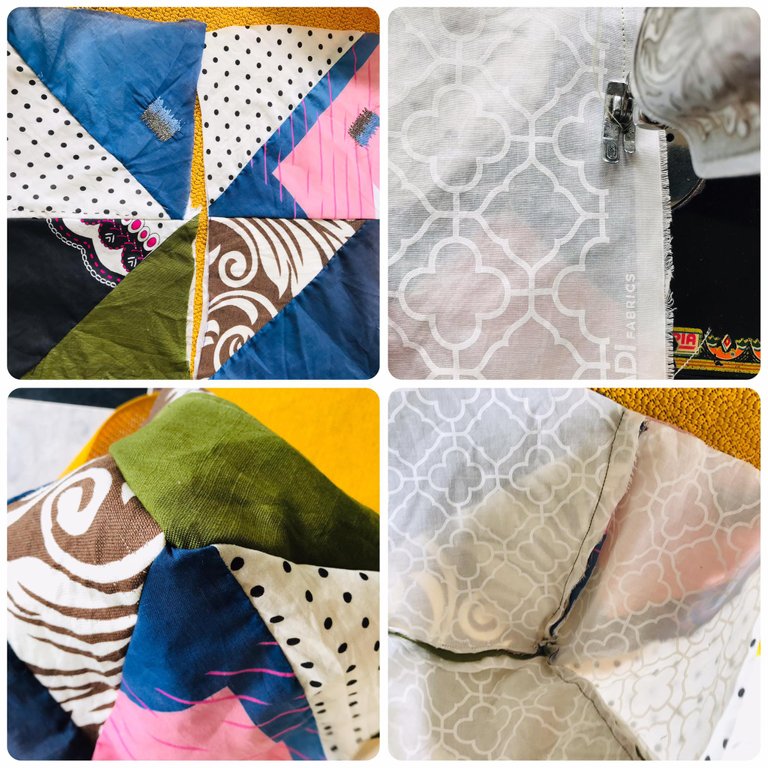
STEP #5
- Take the 5th piece of cloth for the bottom of the bag.
- Start sewing the big pieces together with the bottom piece.
- Repeat the same for the other piece.
- A bucket shape of the bag is ready now with all the patches attached together.
PASO #5
- Tome la quinta pieza de tela para el fondo de la bolsa.
- Comenzar a coser las piezas grandes junto con la pieza de abajo.
- Repetir lo mismo para la otra pieza.
- Una forma de cubo de la bolsa está lista ahora con todos los parches unidos.

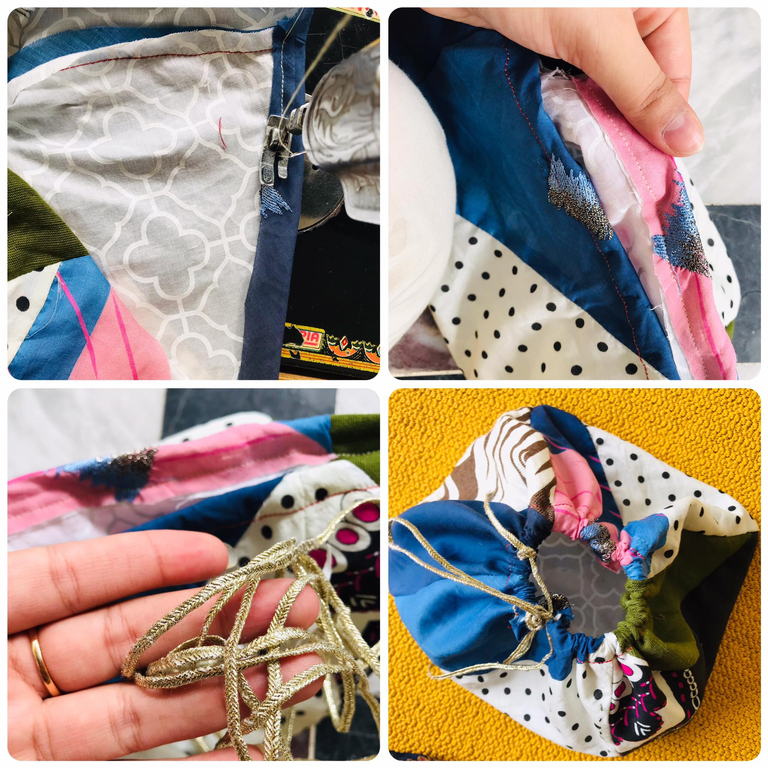
STEP#6
- Now to make a hoop at the end of the bag for easy closing, bend the ends for about 1/2 inch and start sewing inside.
- When it is done now take a lace, rope or anything you like and insert in this area and the bucket bag is ready.
PASO#6
- Ahora, para hacer un aro en el extremo de la bolsa para facilitar el cierre, doble los extremos aproximadamente 1/2 pulgada y comience a coser por dentro.
- Cuando haya terminado, ahora tome un cordón, una cuerda o lo que desee e insértelo en esta área y la bolsa de cubo estará lista.
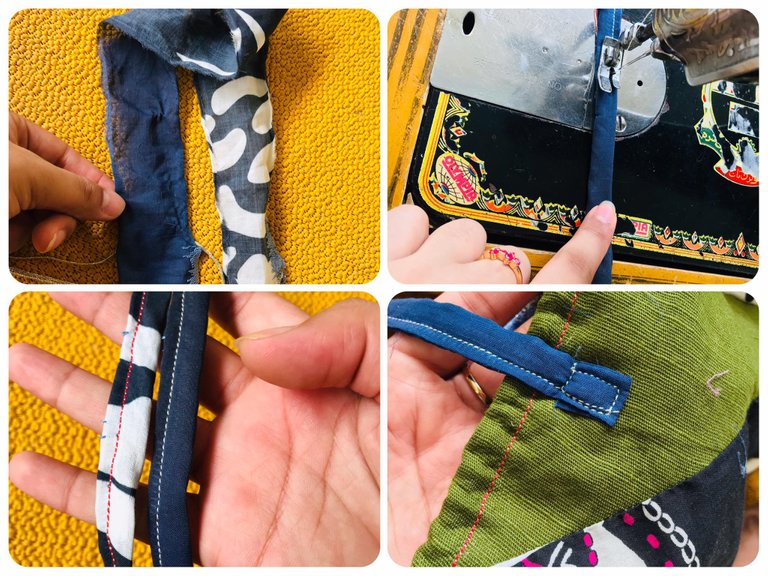
STEP #7
- Take 2 inches wide and 20 inches long cloth to make the strap of the bag.
- Neatly stitch the piece.
- When it is ready attach it to both sides of the bag and your bucket bag is ready to carry.
PASO #7
- Tome tela de 2 pulgadas de ancho y 20 pulgadas de largo para hacer la correa de la bolsa.
- Coser cuidadosamente la pieza.
- Cuando esté listo, colóquelo en ambos lados de la bolsa y su bolso de cubo estará listo para llevar.
Some other shots of my creation!

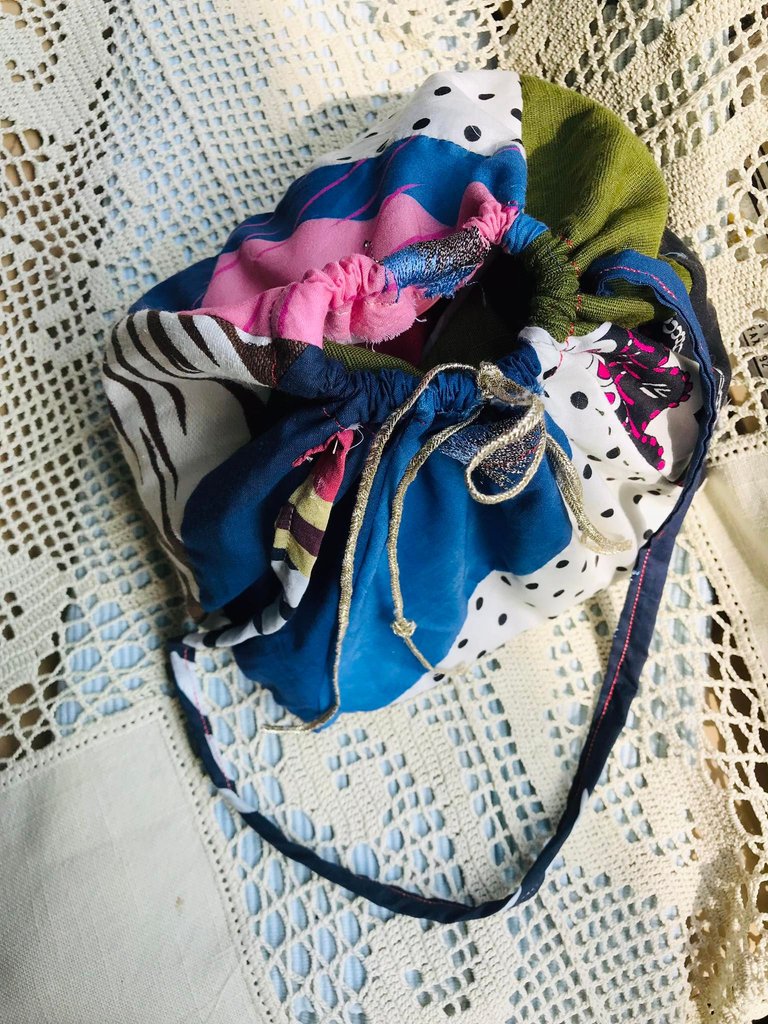


Thanks For Your Time!
Note: All the pictures are my own and are clicked by my IPhone 7 Plus.
Nota: Todas las imágenes son mías y mi iPhone 7 Plus hace clic en ellas.
With Love @janemorane1