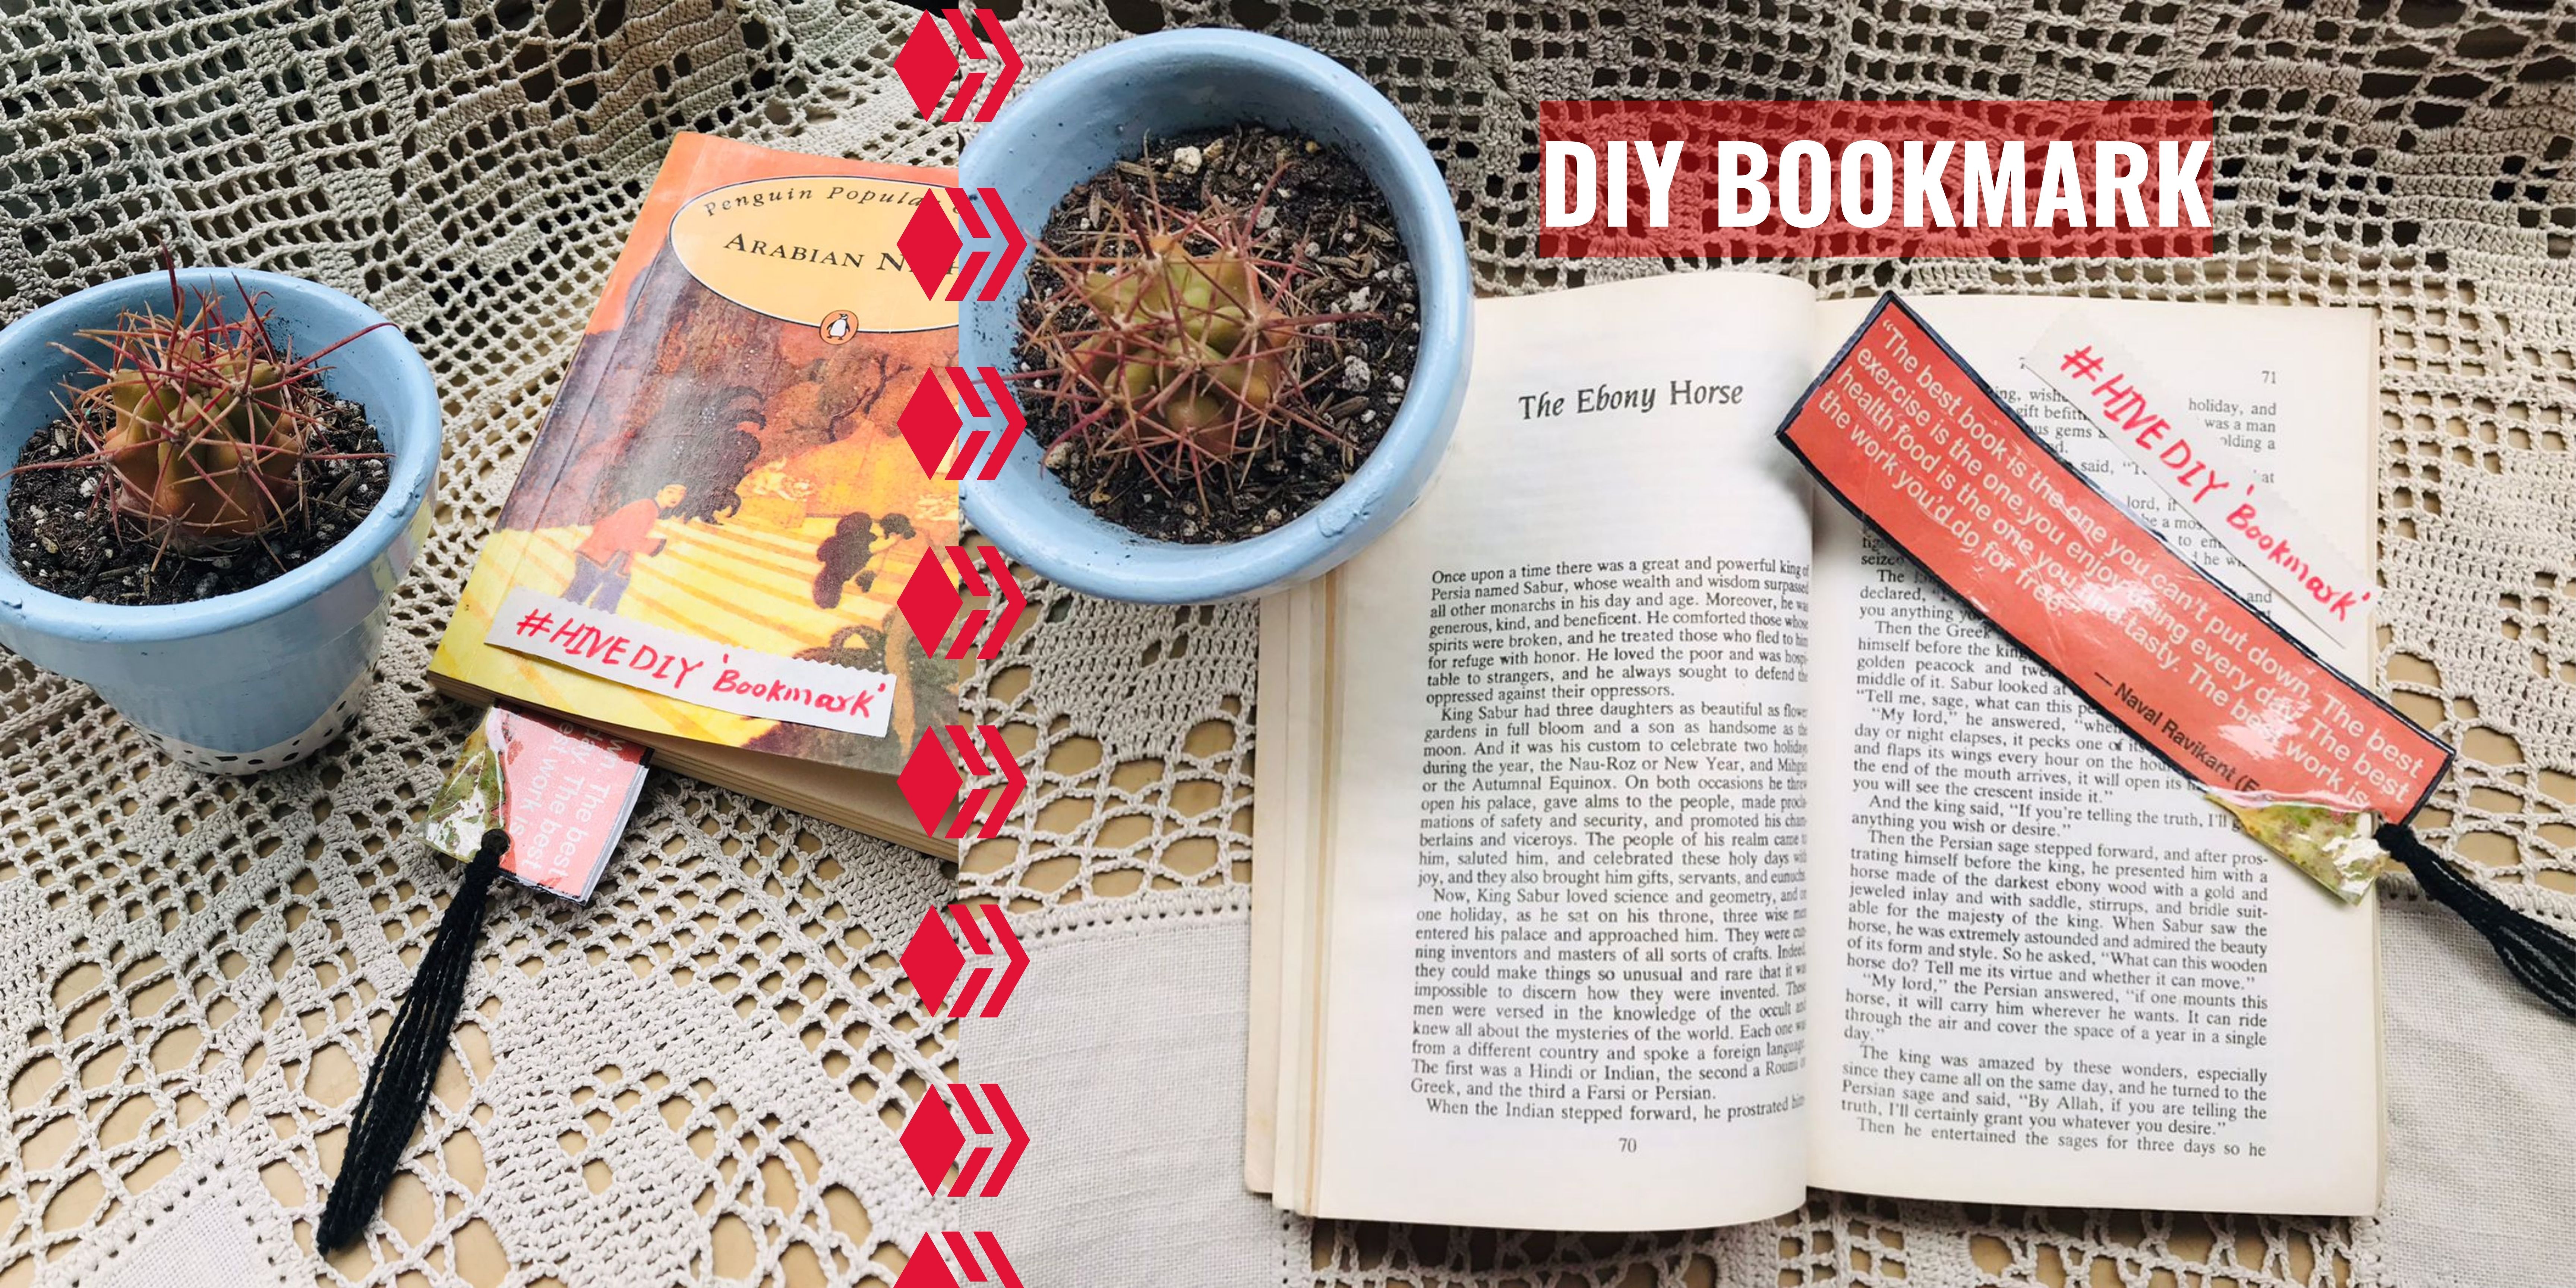
Hello creative crafters!
Today I am going to show you how you can make a very quick and easy bookmark at home with all the materials available with you at home. I personally make them for my friends as one of my friends love to read books, and she really liked it. Here is a simple step by step tutorial how you can make one for yourself and for your loved ones.
¡Hola artesanos creativos!
Hoy os voy a enseñar cómo podéis hacer en casa un marcapáginas muy rápido y sencillo con todos los materiales que tenéis en casa. Personalmente los hago para mis amigos, ya que a una de mis amigas le encanta leer libros y le gustó mucho. Aquí tienes un sencillo tutorial paso a paso sobre cómo puedes hacer uno para ti y tus seres queridos.
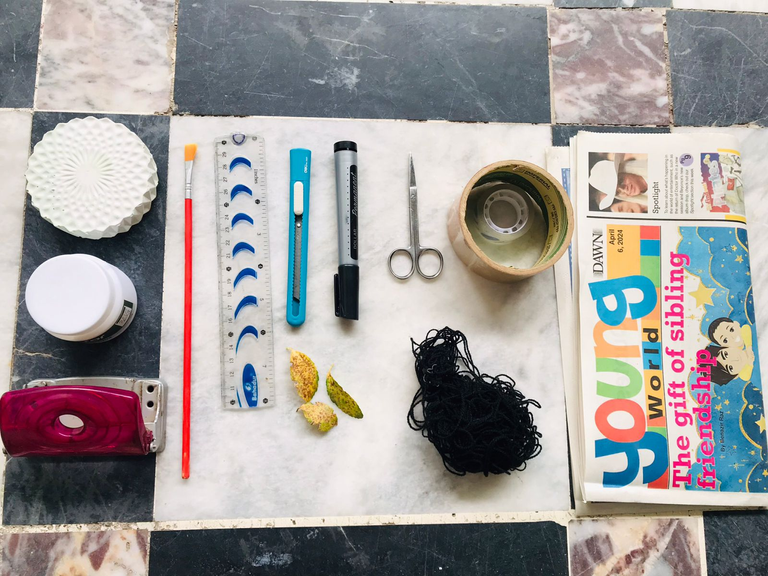
Materials required:
- Scotch tape
- Scissor / Cutter
- Hole puncher
- News paper
- White glue
- Brush
- Dried leaves
- Black marker
- Thread / yarn
Materiales necesarios:
- Cinta adhesiva
- Tijera / Cortadora
- Perforadora
- Periódico
- Pegamento blanco
- Cepillar
- Hojas secas
- Marcador negro
- Hilo/hilo
Directions:
Step #1
Take a scotch tape, you can take it in any size it totally depends on you. Take one long piece of it, secure its one end and cut the rest of the tape.
Direcciones:
Paso 1
Toma una cinta adhesiva, puedes tomarla en cualquier tamaño, depende totalmente de ti. Tome un trozo largo, asegure un extremo y corte el resto de la cinta.
.jpg)
Step #2
Now take newspaper, you can use any old newspaper or any other magazine of your own choice in which you find relevant material.
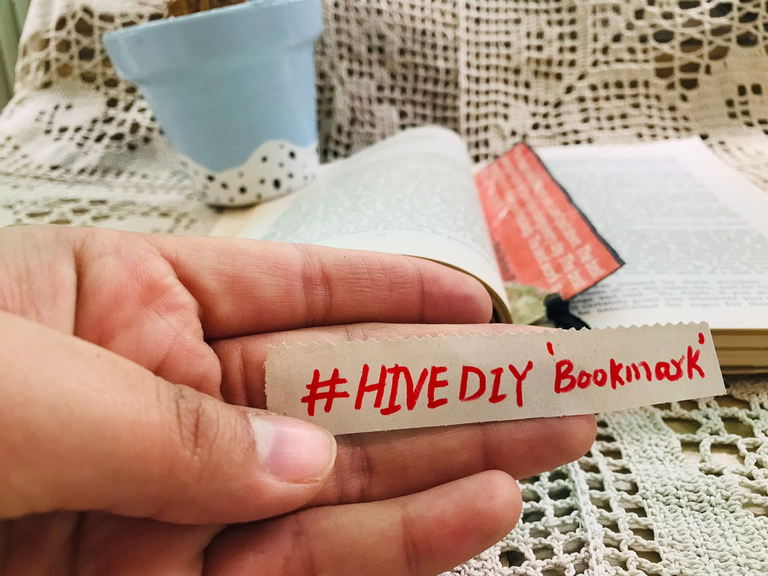
I choose this kids one, I cut out one of the quotes that I found really nice because it was related to books.
Once you cut it, place it on the sticky side of the tape.
Paso 2
Ahora tome el periódico, puede utilizar cualquier periódico antiguo o cualquier otra revista de su elección en la que encuentre material relevante.
Elegí este infantil, recorté una de las citas que me parecieron muy bonitas porque estaba relacionada con los libros.
Una vez que lo cortes, colócalo en el lado adhesivo de la cinta.
.jpg)
Step #3
Now its to add some extra decoration I took a dried leaf, put some white glue on it with the help of the brush. Stick it on the side of the quotation we earlier placed.
Paso 3
Ahora es para agregar un poco de decoración extra, tomé una hoja seca y le puse un poco de pegamento blanco con la ayuda del pincel. Pégalo al lado de la cita que colocamos anteriormente.
.jpg)
Step #4
After placing the leaf, wait for it to dry now take permanent black marker and out line it.
Now take some more scotch tape and put it on the top of the other. Your main design is secure, cut out any remaining tape.
Paso 4
Después de colocar la hoja, espera a que se seque, ahora toma un marcador negro permanente y delinea.
Ahora toma un poco más de cinta adhesiva y colócala encima de la otra. Su diseño principal está seguro, corte la cinta restante.
.jpg)
Step #5
Now with the help of the hole puncher make a hole at one end of the bookmark.
Take a yarn or any other thread a bit thick in size now cut the length according to your preference. Insert it in the hole and tie a knot accordingly. And you are done!
Paso 5
Ahora con ayuda de la perforadora haz un agujero en un extremo del marcapáginas.
Tome un hilo o cualquier otro hilo un poco grueso y luego corte el largo según su preferencia. Insértalo en el agujero y haz un nudo correspondiente. ¡Y ya está!
.jpg)
.jpg)
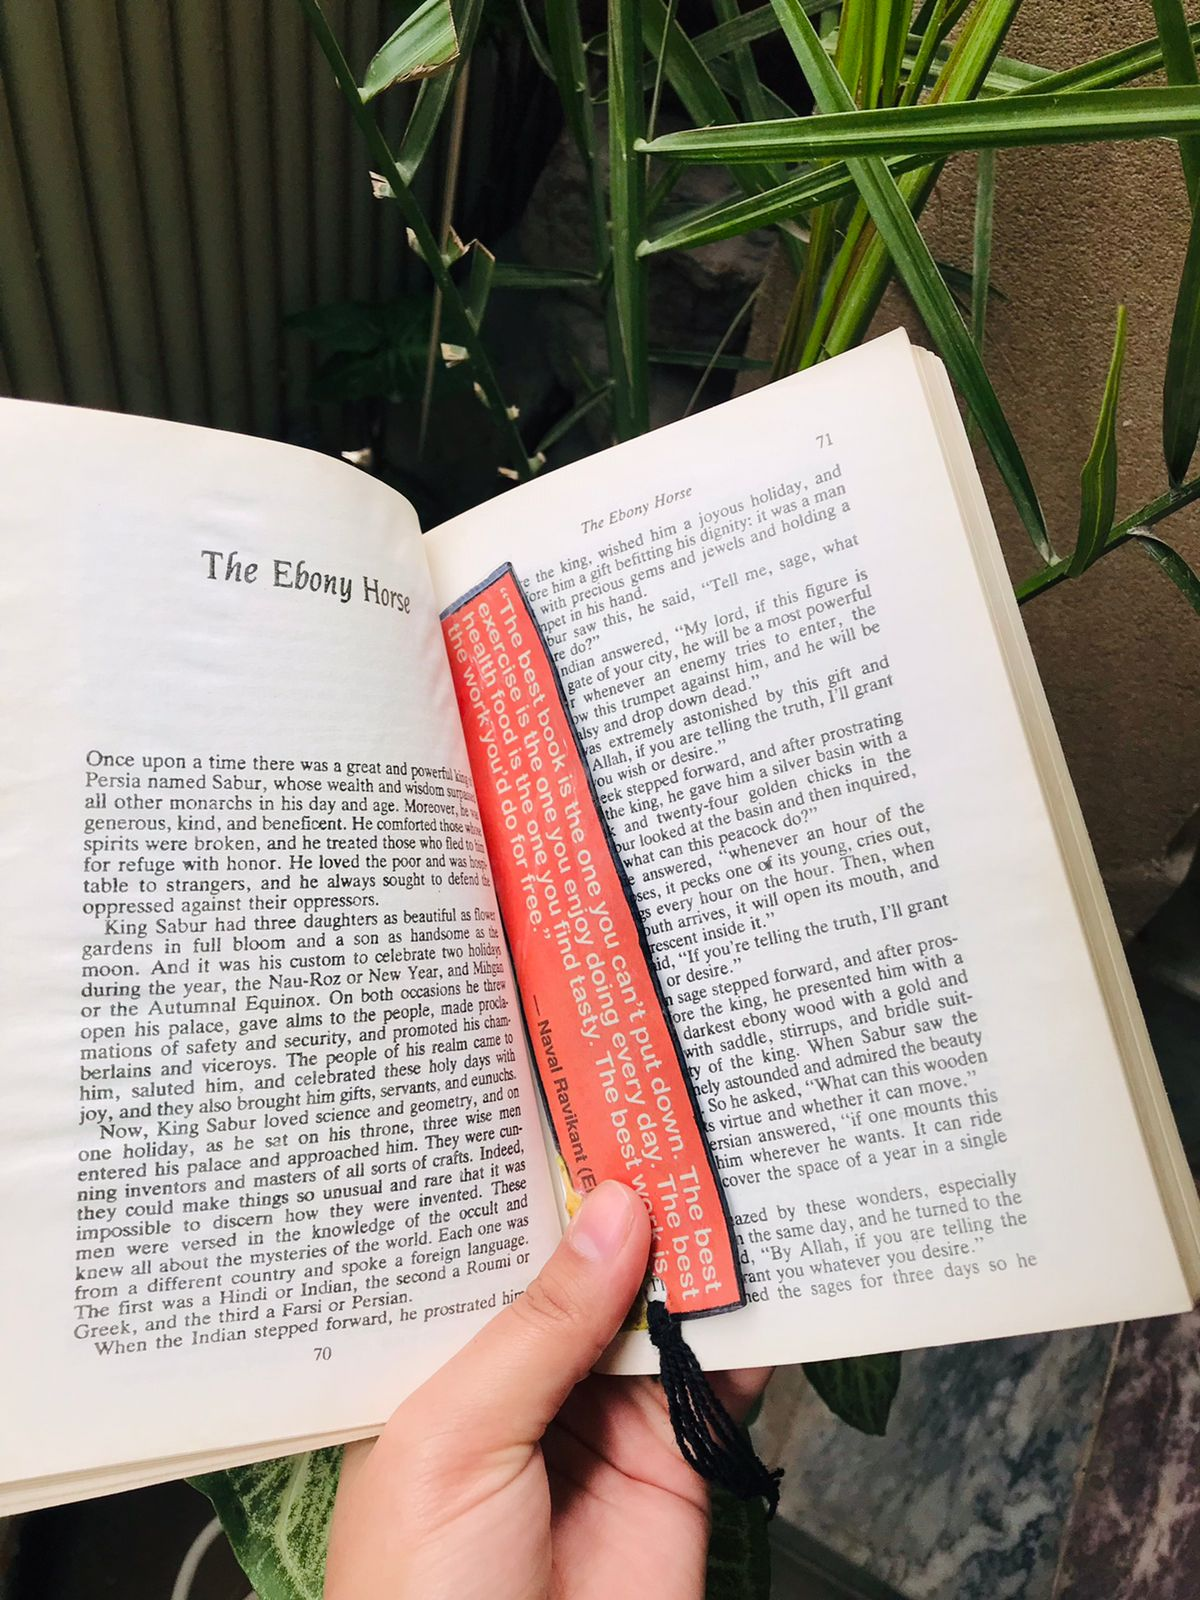
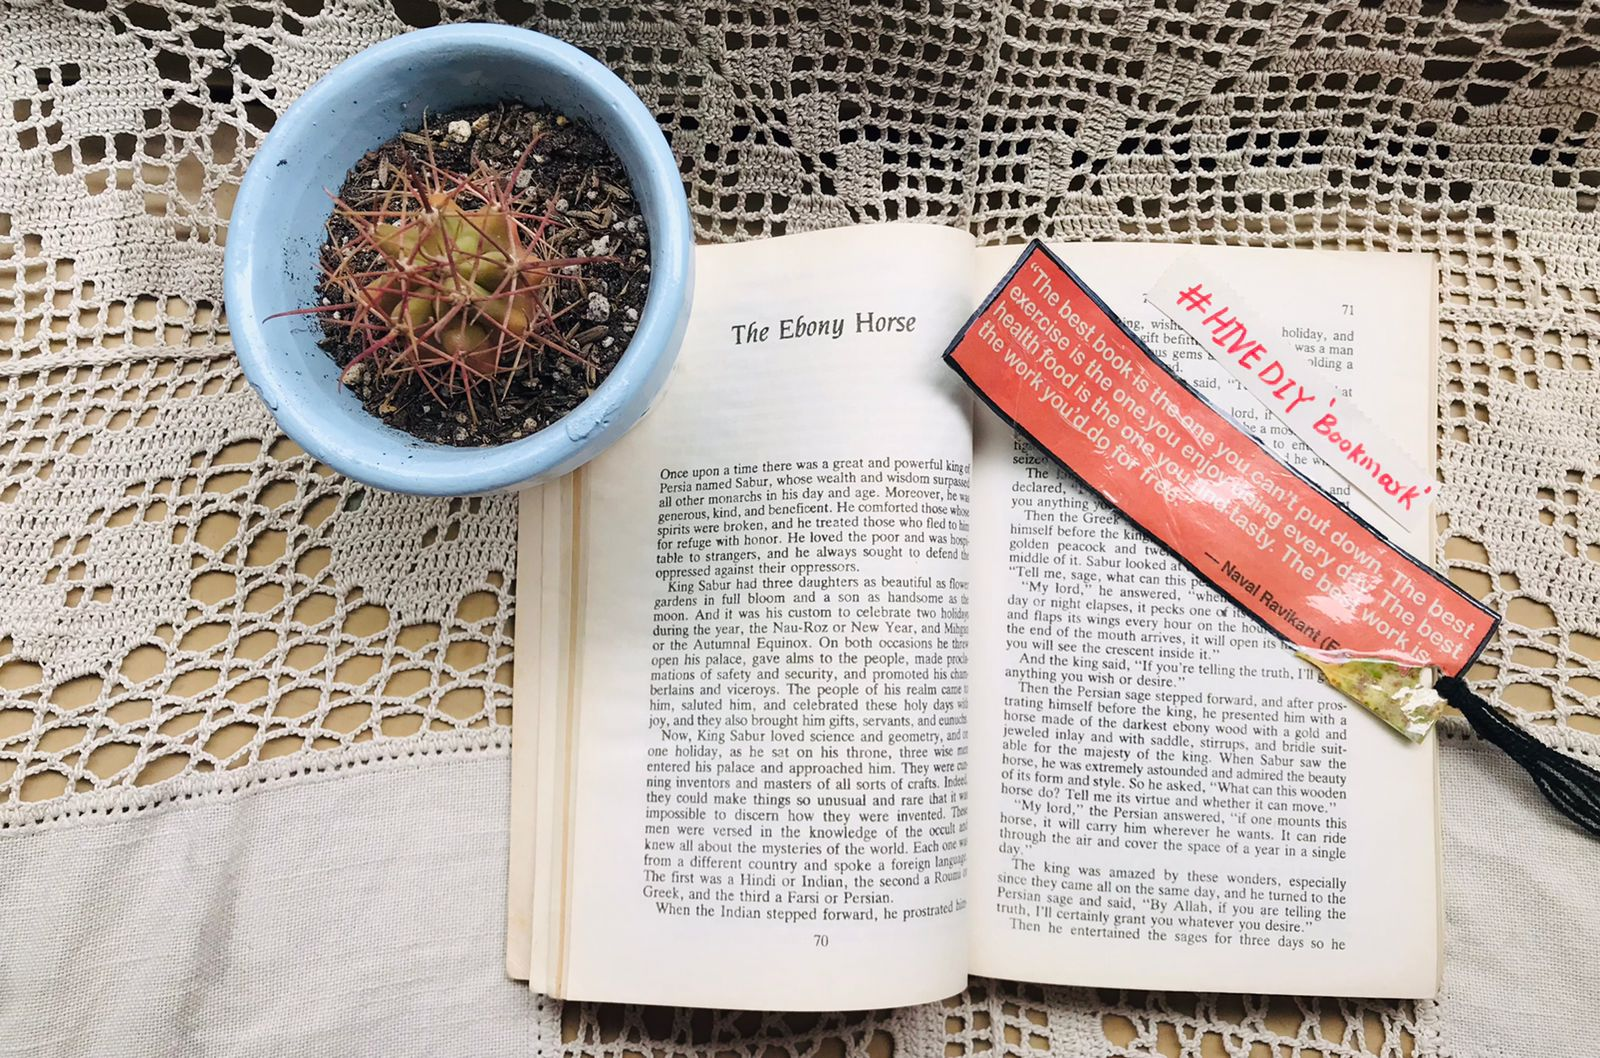
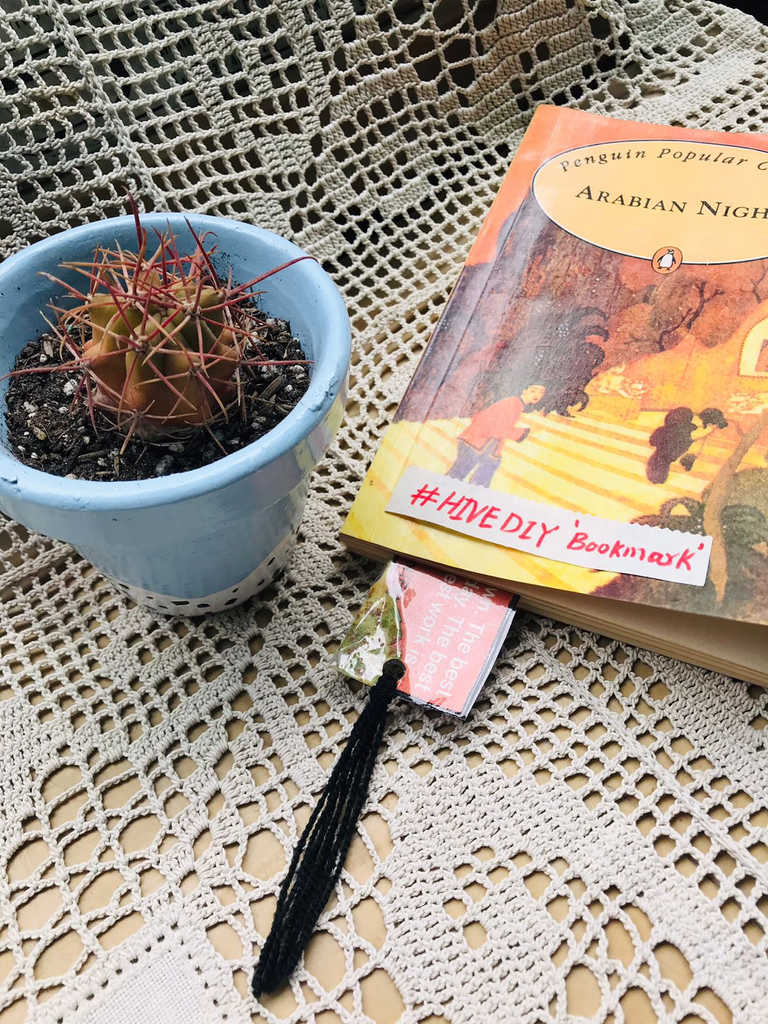
Final Results
"You can see how easily you can make this beautiful and very quick book mark for those who love books believe me its the best gift you can make them."
Resultados finales
"Puedes ver con qué facilidad puedes hacer este hermoso y muy rápido marcapáginas para los amantes de los libros, créeme, es el mejor regalo que les puedes hacer".

Note: All the pictures are my own and are clicked by my IPhone 7 Plus.
Nota: Todas las imágenes son mías y mi iPhone 7 Plus hace clic en ellas.
With Love @janemorane1


