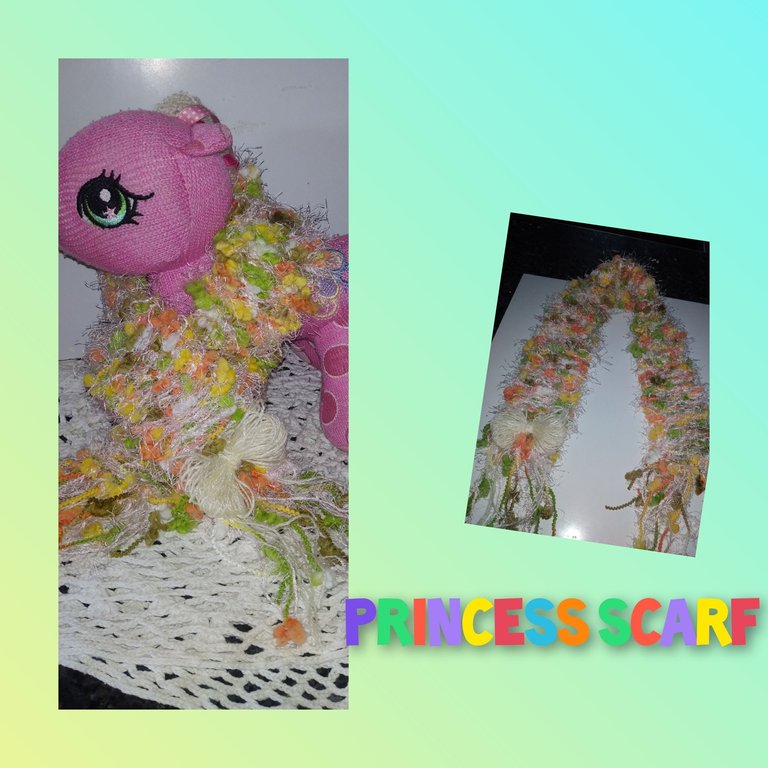
Hello everyone at @hivediy, I am pleased to be with you again, wishing this a great and very productive day, today I am showing you a very simple step by step, on how to make a beautiful and very delicate Scarf, for the most small and spoiled of the house. Ideal, to use in cold climates, making it not only protect itself from it, but also making them look very striking and flirtatious. Follow me and you will see how easy it is to make.//
Hola a todos en @hivediy, me complace estar, de nuevo con ustedes,deseando este sea un gran y muy productivo día,hoy paso mostarndoles un muy sencillo paso a paso, de cómo hacer una, linda y muy delicada Bufanda, para las más pequeñas y consentidadas de la casa. Ideal, para usar en climas frios, haci ndola no solo protegerse de el si no, haciéndolas lucir muy llamativas y coquetas. Sígame y verás lo facil, que resulta su elaboración.
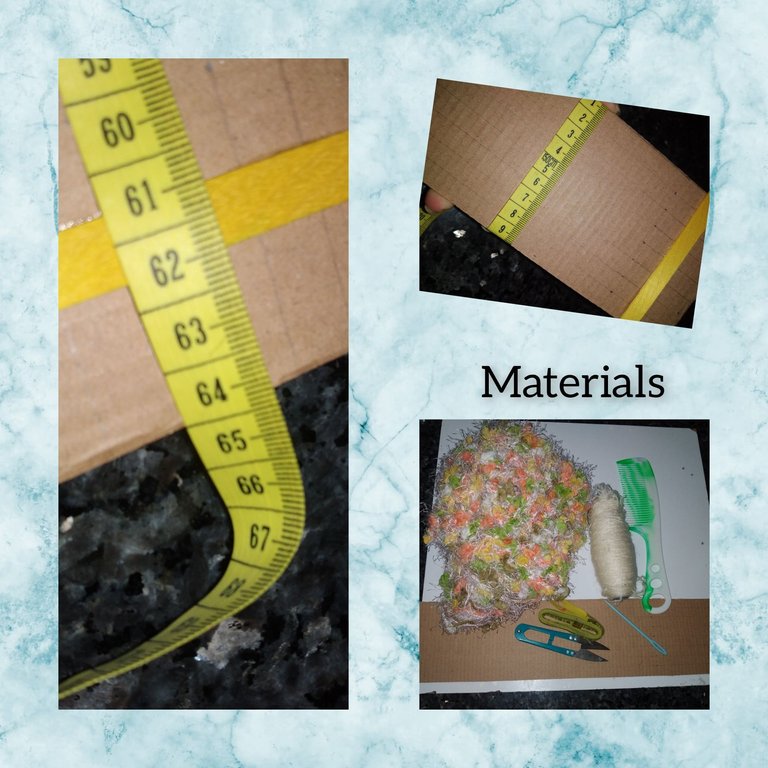
Materials/Materiales.
. Previously, I made a cardboard loom, it is 64 cm long, with 1 cm wide gaps, I passed straight lines with the ruler, and at the ends I made small cuts with scissors. Then glue an ice cream palette to the cut part, to give more support to the work.
. Shaded wool, with friz.
. Yarn needle.
. Comb.
. Scissors.
. Measuring tape.
. Antiallergic stamen, light yellow color.//
. Previamente, fabrique un telar de cartón,este consta de 64cm de largo, conaeparaciones de 1cm de ancho, pase lineas rectas con la regla, y en los extremos hice pequeños cortes con la tijera. Luego pegue en la parte de los cortes una paleta de helado, para dar más soporte a el trabajo.
. Lana matizada, con friz.
. Aguja lanera.
. Peine.
. Tijeras.
. Cinta métrica.
. Estambre antialérgico, color amarillo claro.
Step/Pasos
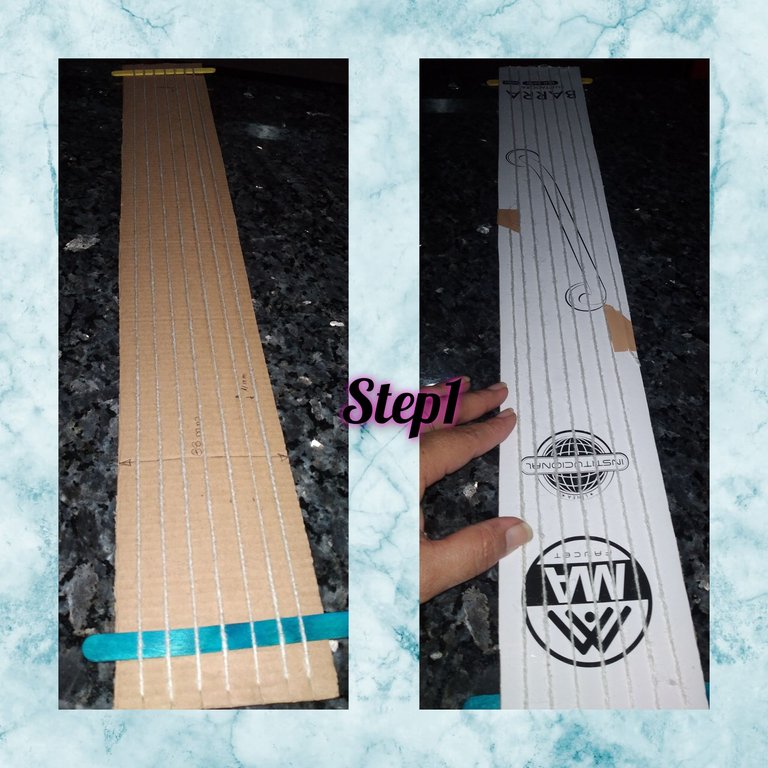
1.) With the yarn, I begin to pass the cuts from the bottom up, I place a little piece of masking tape, on the back of the loom, to secure. After doing this, I cut the thread.
1.) Con el estambre, comienzo a pasar los cortes de abajo a arriba, coloco un pedacito de cinta adhesiva, por la parte tracera de el telar, para asegurar. Luego de hacer esto, corto el hilo.
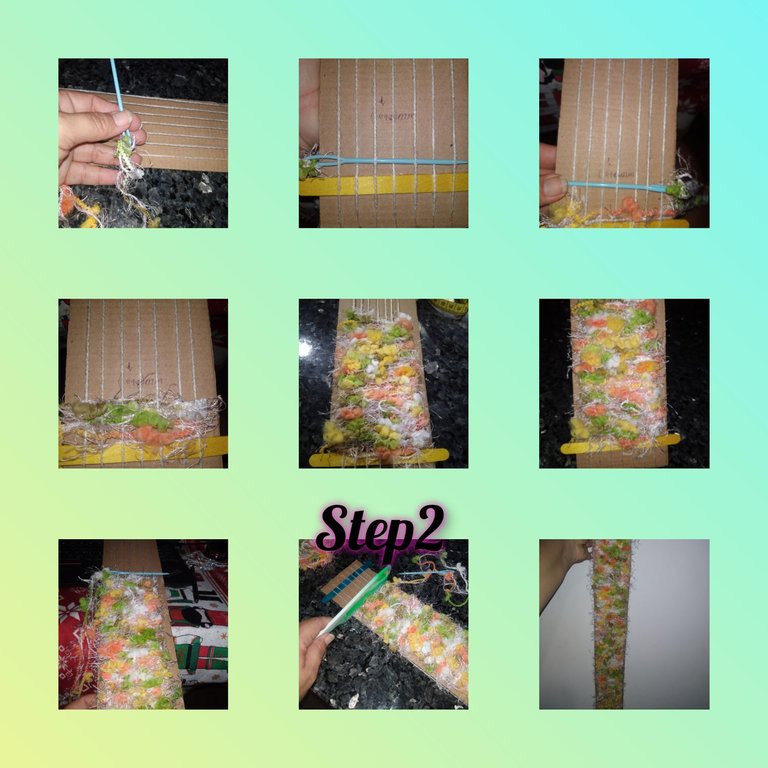
2.) I put friz wool on the needle, I tie the wool to the lower part of the first worsted thread that passes through the first, cut from the loom, and begin to ektremetwe between the other threads of worsted, in the first pass above, then below and so on until I reach the other side of the loom, I go back, pass the needle in the opposite direction, from the previous pass, and thus I will go up and fill the loom, carefully I am ordering with the teeth of the comb, this should be with very soft movements, to avoid damaging the wool. In this way I weave 60 cm of the entire loom. This is because it takes 2cm to glue the pallets and make the cuts at both ends.
2.) Pongo lana friz a la aguja, ato la lana a l aparte inferior de el primer hilo estambre que pasa por el primer, corte de el telar, y comienzo a ektremetwe entre las demas hebras de estambre, en el primero paso por encima, luego por debajo y así hasta llegar al otro lado de el telar, me devuelvo, paso la aguja en sentido contrario, de la pasada anterior, y así iré subiendo y llenando el telar, cuidadosamente voy ordenando con los dientes de el peine,esto debe ser con movimientos muy suaves, para evitar dañar la lana. De esta manera tejo 60 cm de la totalidad de el telar. Esto porque tome 2cm para pegar las paletas y hacer los cortes en ambos extremos.
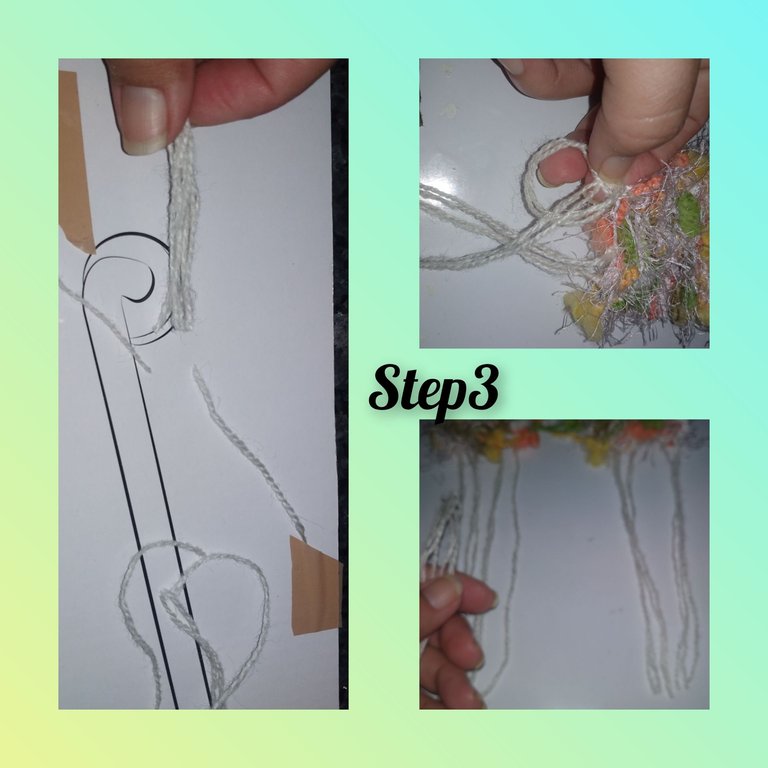
3.) I cut the thread, on the back of the loom, this cut will be exactly in the middle of the loom, now I will make knots between the yellow worsted thread strands.
3.) Corto el hilo, por la parte tracera de el telar, este corte, será justamente a la mitad de el telar, ahora haré nudos entre las hebras de hilo estambre amarillo.
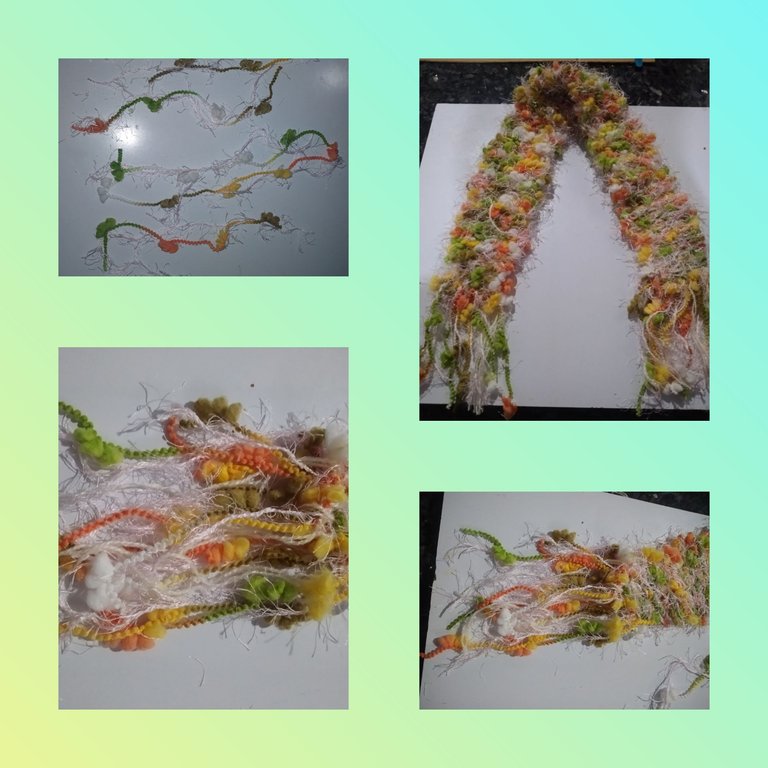
4.) I cut several strands of yarn and begin to tie at each end of the scarf, done this, I make straight cuts at both ends.
4.) Corto varias hebras de lana y comienzo a atar en cada extremo de la bufanda, hecho esto, hago cortes rectos en ambos extremos.
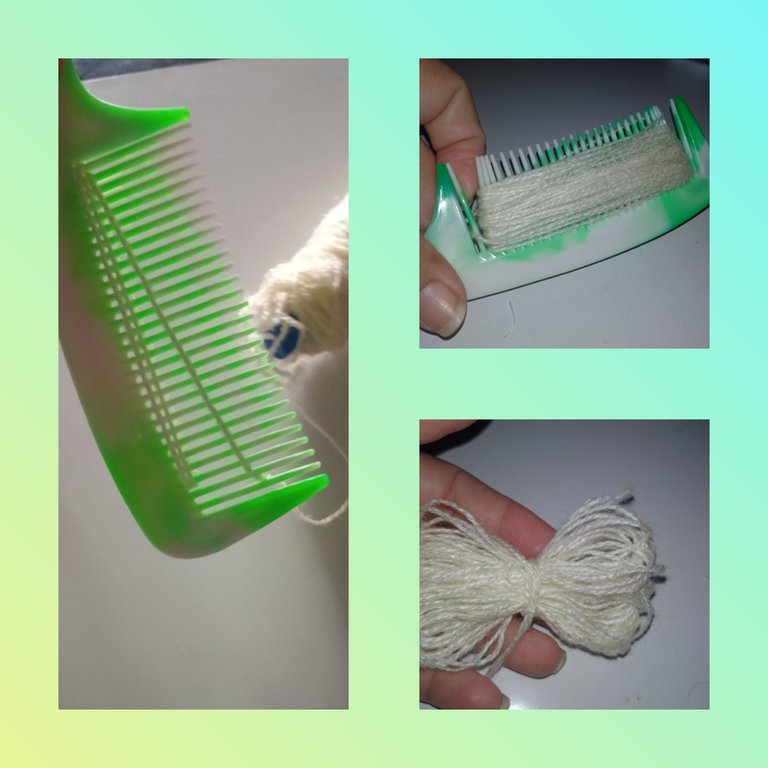
5.) Using the comb, and the yellow yarn, I twist the teeth of the end of it, I do a total of twenty turns, then, I take the yarn out of the comb, with another strand of thread, I tie the strands right at the the medium to form a loop, with the woolen needle and yarn, I hit one of the ends at the bottom of the scarf, finish off and cut the thread.
5.) Usando el peine, y el estambre color amarillo, doy vueltas en los dientes del extremo de estw, doy un total de veinte vueltas, luego, saco el estambre de el peine, con otra hebra de hilo, ato las hebras justo en el medio para formar un lazo, con la aguja lanera y estambre, pego en una de las puntas en la parte inferior de la bufanda, remato y corto el hilo.
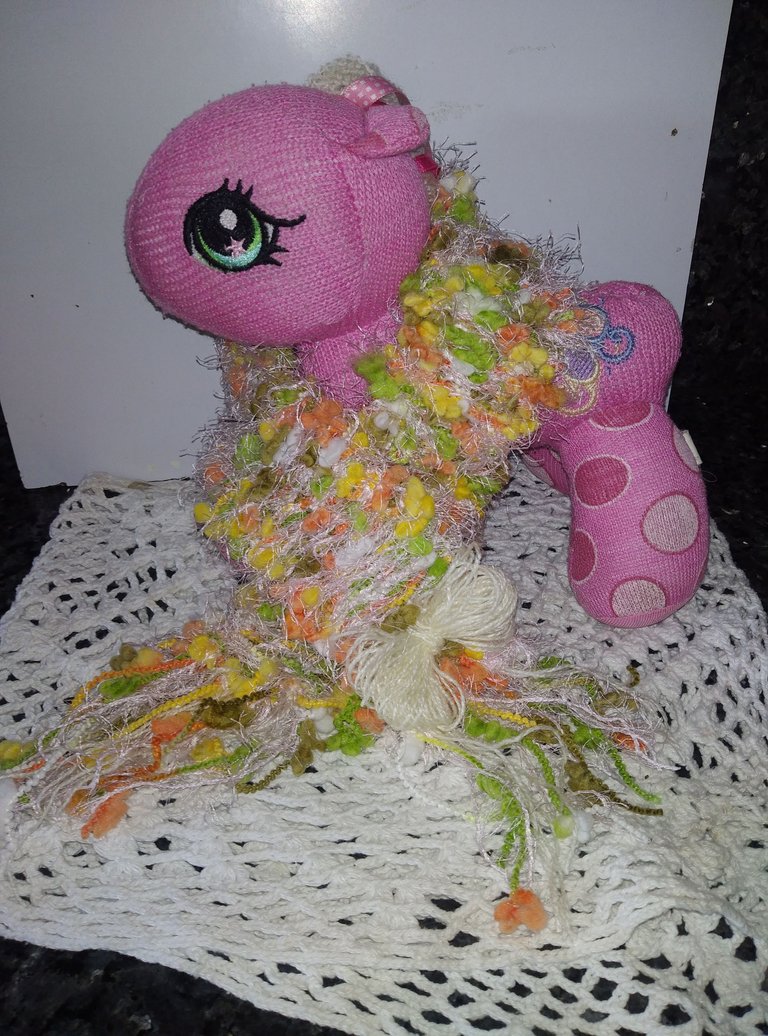
In this way, I have culminated with this very tender and delicate tutorial, Hoping soon to see it on that lovely girl. I am very happy with the end result. I hope you enjoyed it.//
De esta manera, he culminado con este muy tierno y delicado, tutorial, Esperando pronto pueda verlo puesto a esa nena encantadora. Yo muy contenta con el resultado final. Espero lo hayan disfrutado.
. All the photos, as been taken with my smartphone.
. Use Incollage, to organize the steps.
. Use Google translate.
Grateful, you have followed me to the end, it is always a great pleasure to show you my latest manual creation.//
. Todas las fotos, tan Sido tomadas con mí teléfono inteligente.
. Use Incollage, para organizar los pasos.
. Use traductor Google.
Agradecida, me hayas seguido hasta el final,.siempre es un gran placer mostrarles mí última creación manual.