(ESP-ENG) HOW TO DO Transformé el marco de un cuadro que era basura / I transformed the frame of a painting that was junk.

in #hive-1305603 years ago

Un mural.png

Hola Hivers! Espero estén bien!

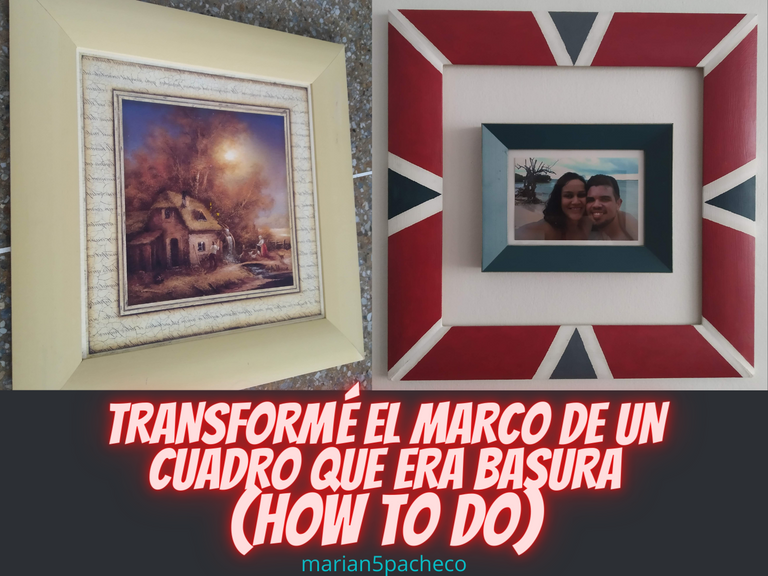
En esta oportunidad quiero mostrarles cómo intervine el marco de un cuadro que mi madre había echado a la basura, como quien dice "la basura de uno es tesoro de otro", cuando vi que mi mamá lo desecharía lo guardé inmediatamente pensando en darle una segunda oportunidad y poder seguir construyendo un estilo propio en mi casita.

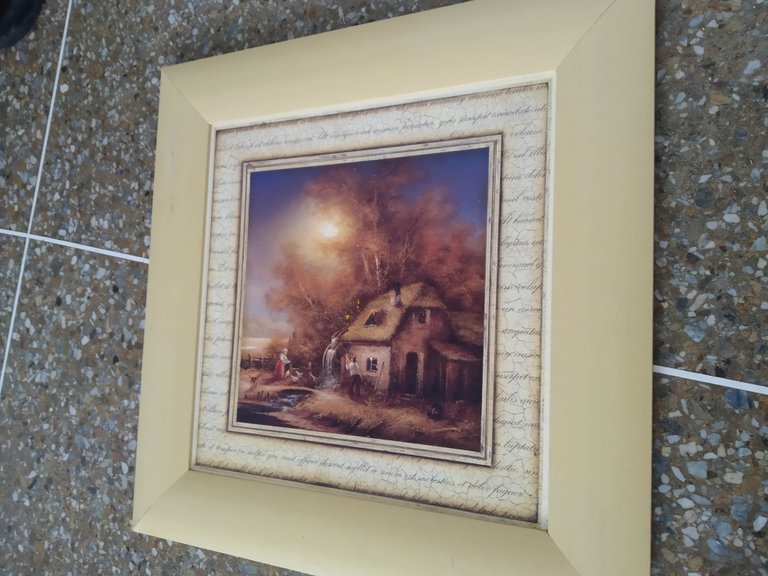
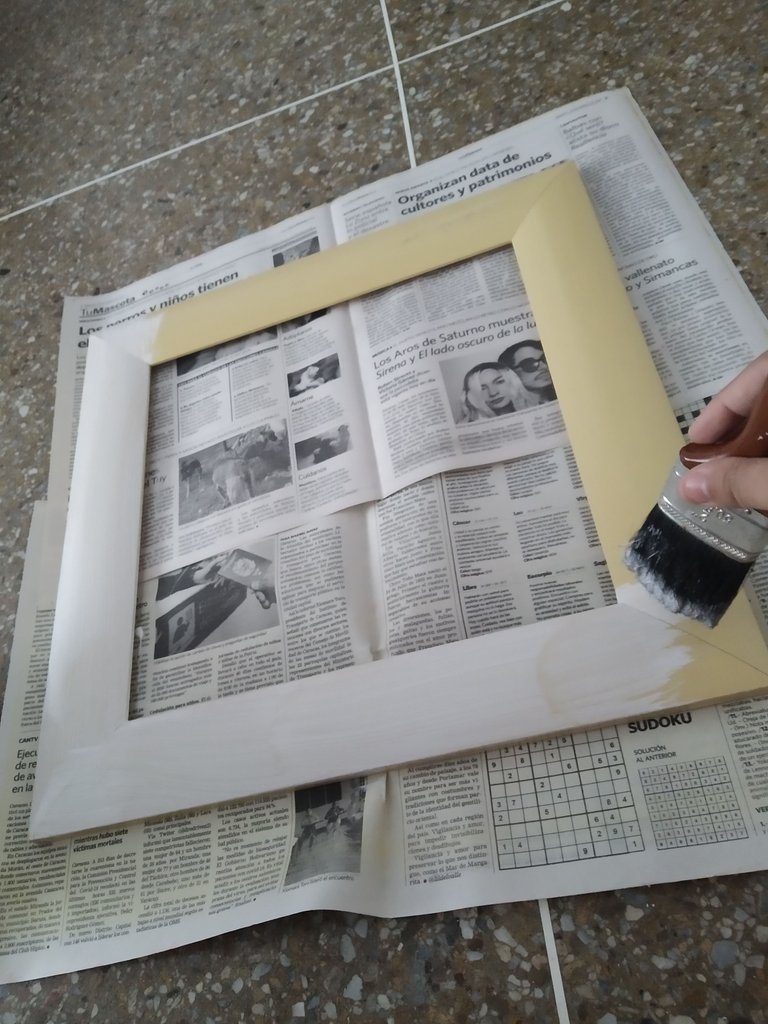
Este era el cuadro original, es un marco de MDF forrado con papel de color crema y el cuadro era de cartón rugoso, realmente mamá tenía razón, es un cuadro feo, pero se podía reutilizar. Actualmente cualquier marco de ese tamaño vale al menos $20 así que utilizando mi creatividad y con amor podía ahorrarme ese dinero y hacer algo lindo.

Hello Hivers! I hope you are well!

This time I want to show you how I intervened the frame of a painting that my mother had thrown in the trash, as they say "one man's trash is another man's treasure", when I saw that my mom would throw it away I kept it immediately thinking of giving it a second chance and to continue building my own style in my little house.

This was the original frame, it is an MDF frame lined with cream colored paper and the frame was made of rough cardboard, mom was really right, it is an ugly frame, but it could be reused. Nowadays any frame of that size is worth at least $20 so using my creativity and love I could save that money and make something nice.

IMG_20210620_102625.jpg

Paso 1: El desarme

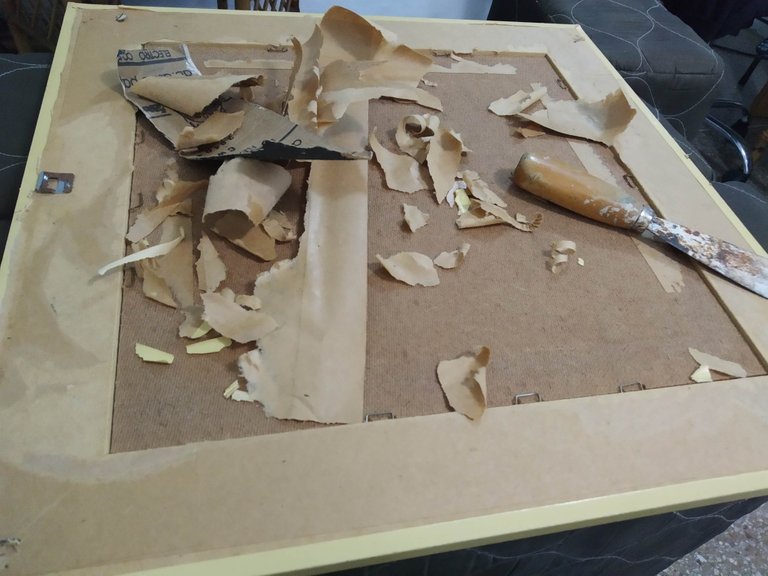
Lo primero que hice fue voltearlo y desarmar el cuadro, para eso tuve que levantar un forro de papel que tenía pegado atrás y sacarle las grapas para poder separar el centro del marco.

Step 1: Disassembly
The first thing I did was to turn it over and disassemble the frame, for that I had to lift a paper lining that was glued to the back and remove the staples to be able to separate the center of the frame.

IMG_20210619_221420.jpg

IMG_20210620_103318.jpg

Paso 2: Lienzo en blanco

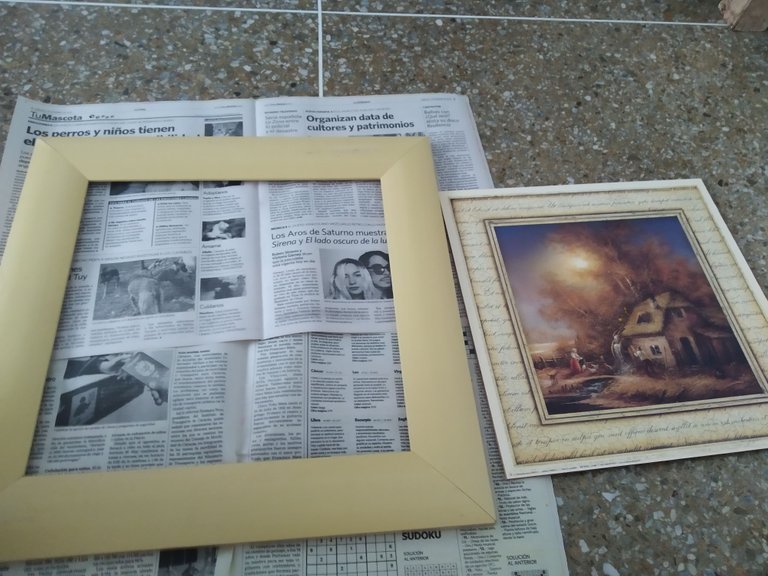
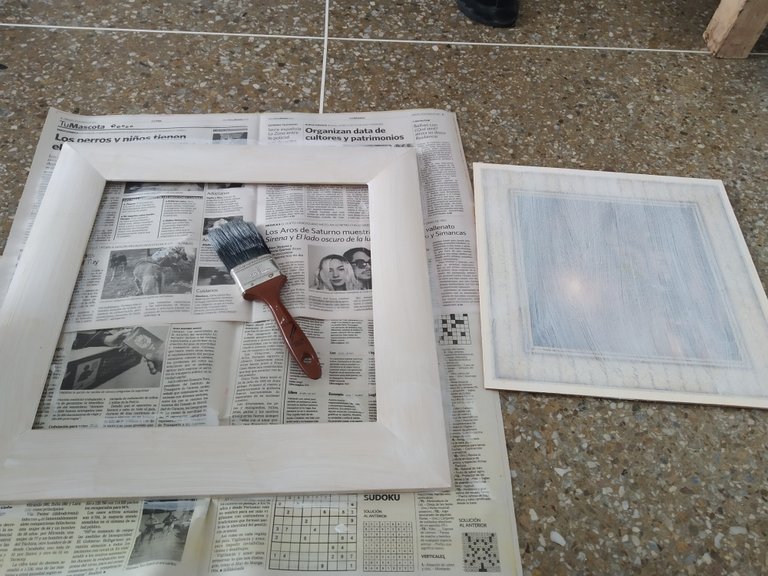
Para este momento no estaba segura si iba a usar el cuadro de la casa así que lo que hice fue pintarlos de blanco ambos para así poder tener un lienzo de base blanca para poder pintarla.

Step 2: Blank Canvas

At this point I wasn't sure if I was going to use the house painting so what I did was to paint them both white so I could have a white base canvas to paint it on.

IMG_20210620_103415.jpg
IMG_20210620_103831.jpg

Paso 3: El diseño

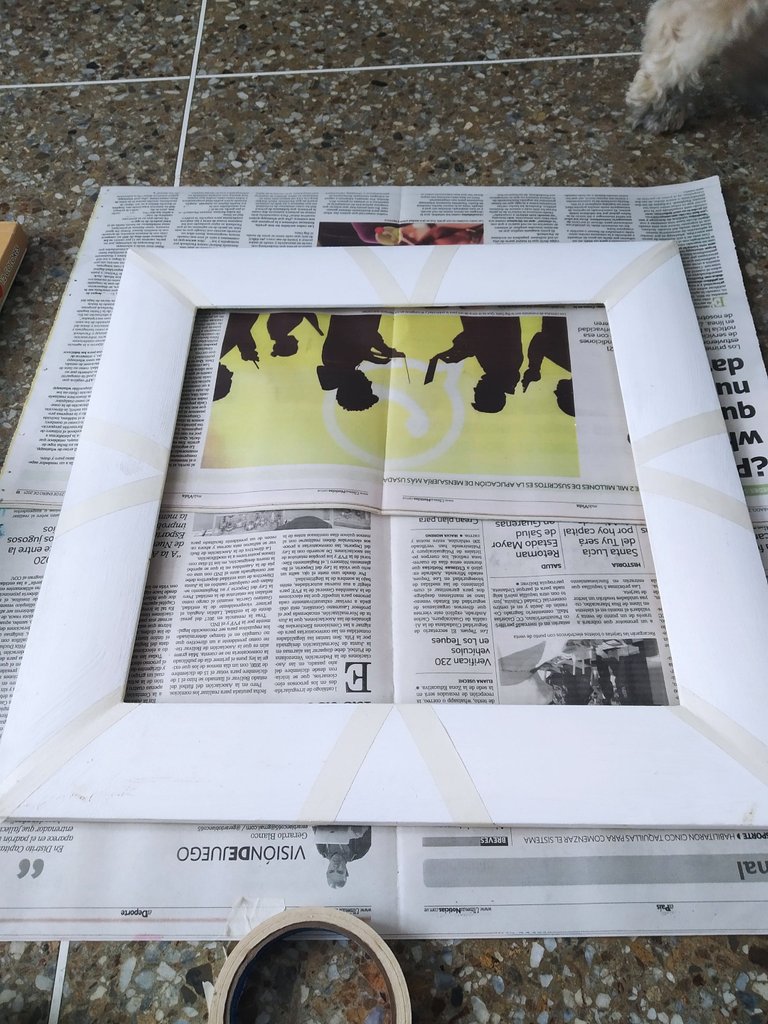
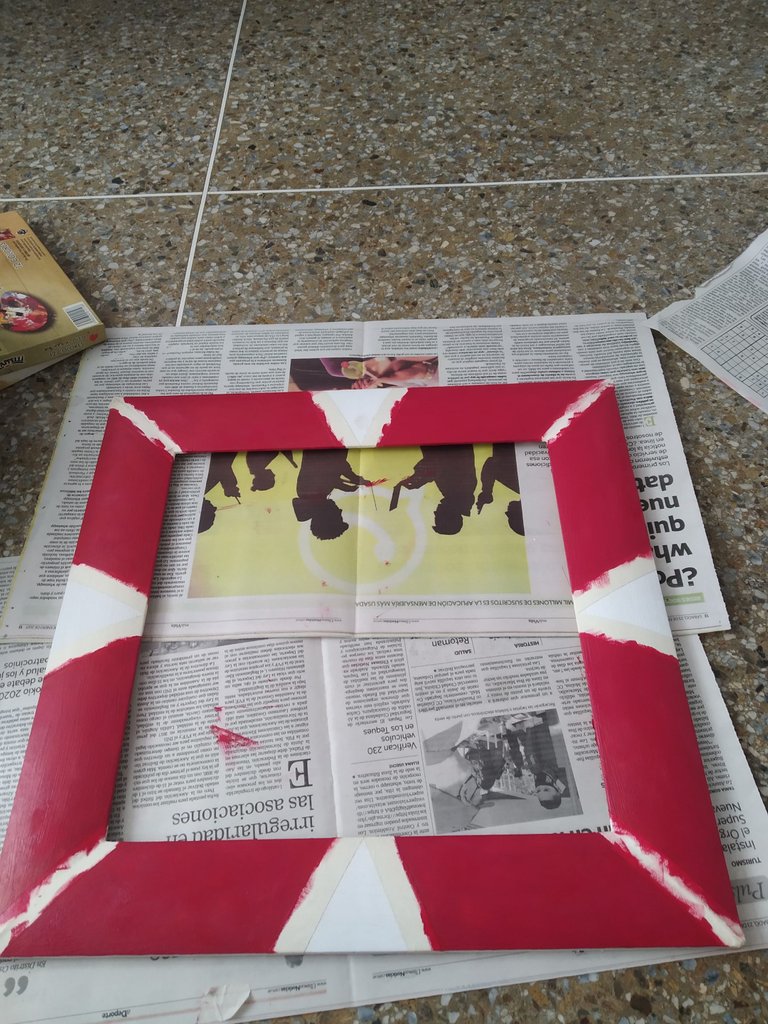
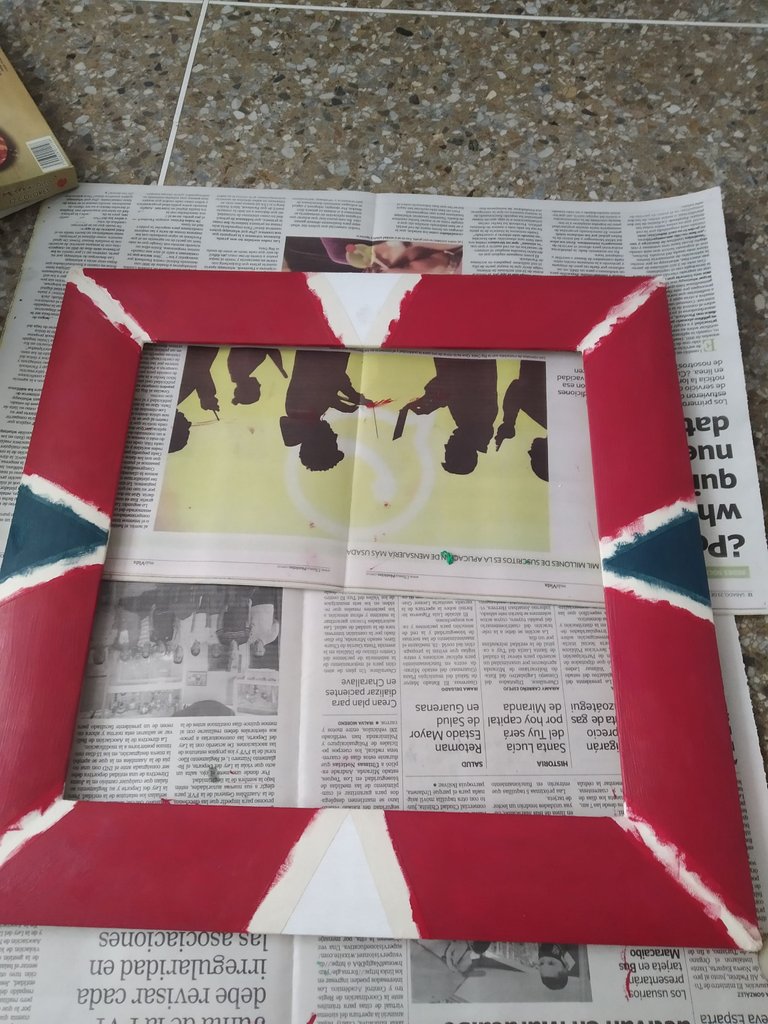
Después de pensar en cómo quería intervenir el marco y finalmente elegir para intervenir solo el marco decidí hacer un diseño tipo tribal con triángulos, por lo que con tirro de papel hice las figuras muy bien pegadas y les añadí unos detalles a las esquinas, de manera que al echarle color quedaran las líneas de blancas como detalle distinto del marco.
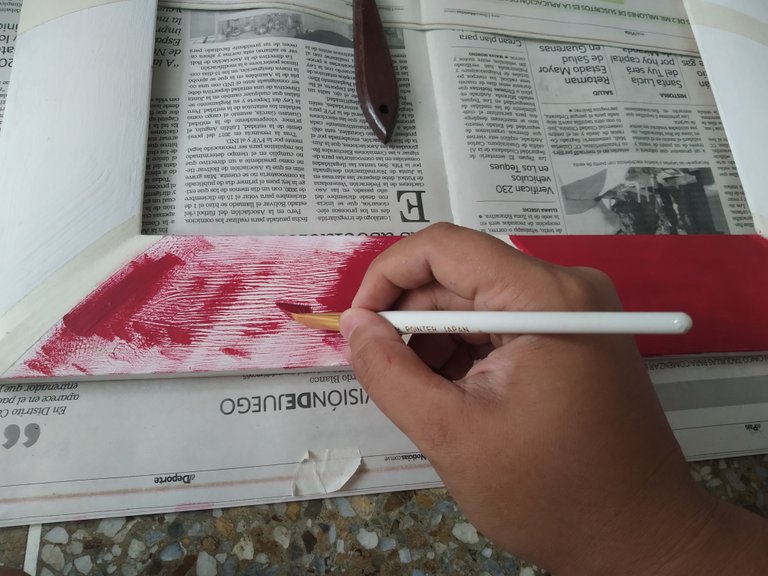
Step 3: The design
After thinking about how I wanted to intervene the frame and finally choosing to intervene only the frame, I decided to make a tribal design with triangles, so with a paper strip I made the figures very well glued and I added some details to the corners, so that when I added color the white lines would remain as a different detail of the frame.

IMG_20210717_111104.jpg

Paso 4: La pintura
Como los colores base para nuestra decoración (por ahora) serán gris, rojo, blanco y azul cobalto fueron los que escogí para pintar el marco. De pintura solo tenía óleo y como era poca superficie no me importó utilizarlos.

Inicié con el rojo:

Step 4: Painting

As the base colors for our decoration (for now) will be gray, red, white and cobalt blue were the ones I chose to paint the frame. Of paint I only had oil paints and as it was little surface I didn't mind using them.

I started with red:

IMG_20210717_112548.jpg
IMG_20210717_115508.jpg

Luego pinté los triángulos de gris y azul, uno frente al otro.
Then I painted the triangles gray and blue, one in front of the other.

IMG_20210717_120739.jpg

Luego de echarle varias capaz de pintura y de retocarlo lo deje secar hasta el día siguiente ya que apenas lo tocaba me manchaba, preferí esperar pacientemente a que estuviese bien bien seco.
After applying several coats of paint and touching it up, I let it dry until the next day because as soon as I touched it, it stained me, I preferred to wait patiently until it was very dry.

.

Paso 5: Comienza a develarse el misterio

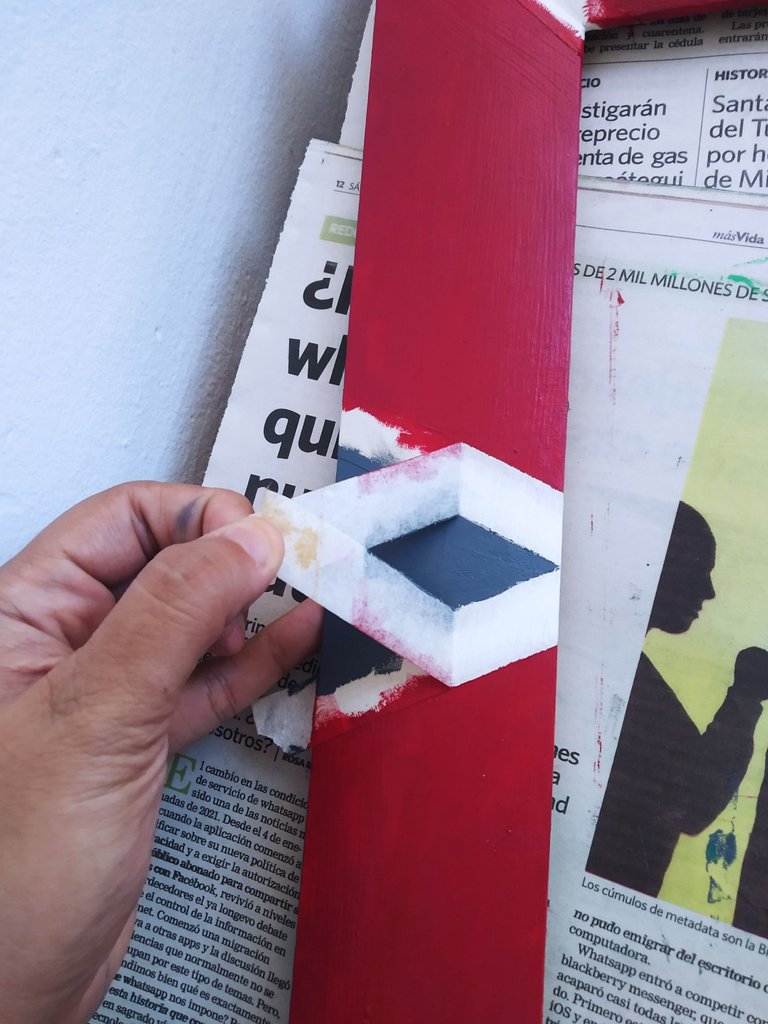
Vamos quitando poquito a poco el tirro, teniendo cuidado por si acaso se viene algo de la pintura, luego, si es necesario, retocamos el blanco.

Step 5: The mystery begins to unfold

Little by little, we remove the paint, being careful in case some of the paint comes off, then, if necessary, we retouch the white.

IMG_20210718_093451.jpg

Paso 6: Disfrutando el resultado
Amigos, les muestro como quedo mi hermoso marco. ¡irreconocible!
Step 6: Enjoying the result
Friends, I show you how my beautiful frame turned out. Unrecognizable!

IMG_20210718_093821.jpg

Para terminar con mi decoración hice un último paso, ya tenía un portarretrato de un tono azul muy parecido al que pinte en el marco, lo que hice fue colocarlo en la pared con unos clavos e igual colocar el marco nuevo de forma superpuesta en la pared.

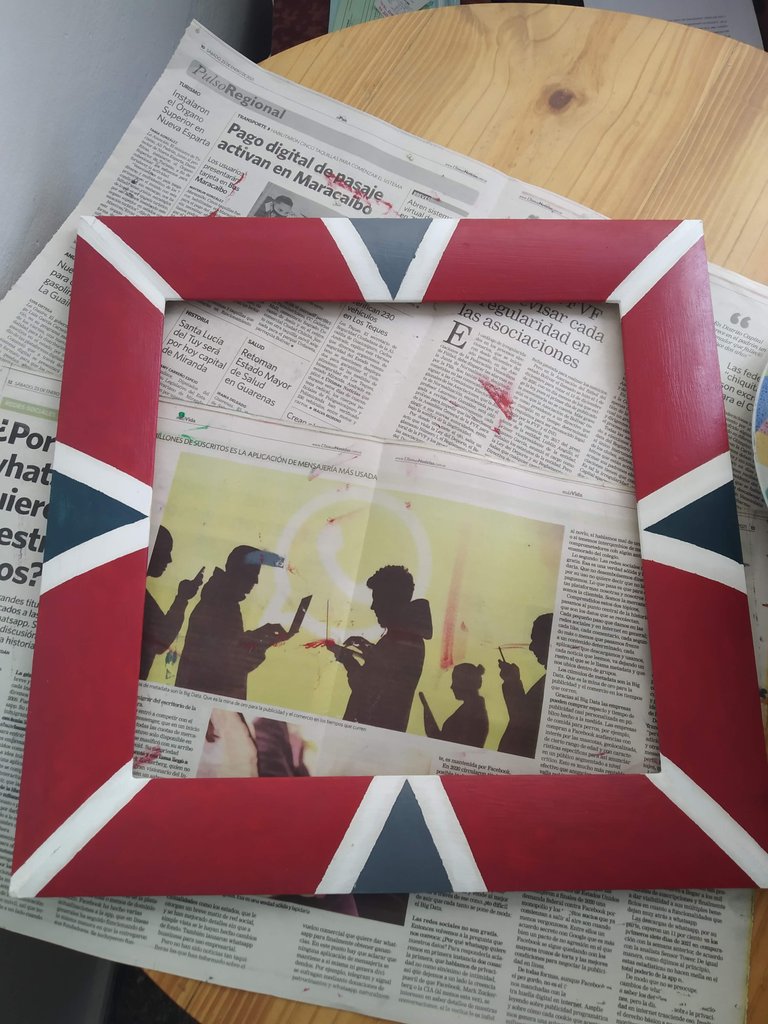
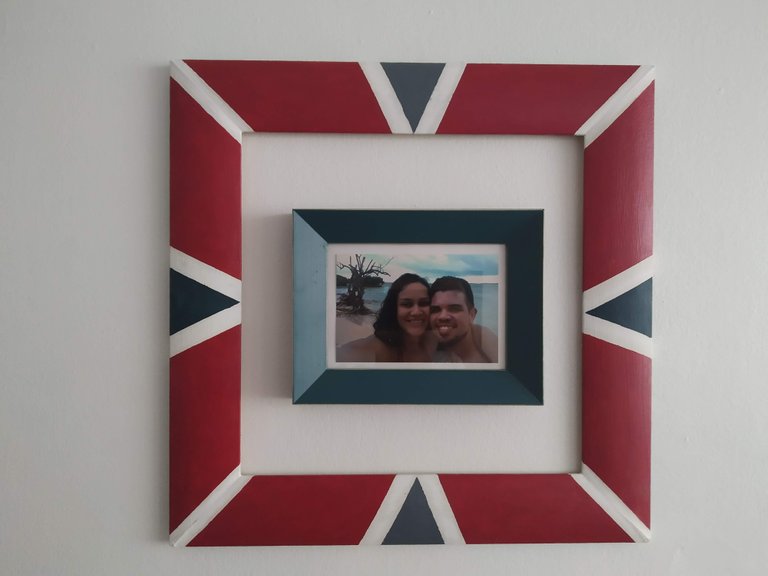
El resultado me pareció hermosísimo y hace un contraste con la foto increíble. Un detalle hermoso para mi esposo y para mi que sigue sumando un poquito más para hacer de esta casa un hogar.

To finish with my decoration I did a last step, I already had a picture frame in a blue tone very similar to the one I painted in the frame, what I did was to place it on the wall with some nails and place the new frame overlapping it on the wall.

I found the result beautiful and it makes an incredible contrast with the photo. A beautiful detail for my husband and for me that keeps adding a little more to make this house a home.

IMG_20210719_104830.jpg

Quisiera recomendarles a todos que se atrevan a hacer iniciativas por si mismos, a veces lo más caro no necesariamente es lo mas bonito y hacer estos detalles con nuestras propias manos le da aún mucho mas valor que ninguna cantidad de dinero puede comprar.
I would like to recommend everyone to dare to make initiatives by themselves, sometimes the most expensive is not necessarily the most beautiful and making these details with our own hands gives even more value that no amount of money can buy.
.

Muchas gracias por leerme!
Nos vemos en un próximo post!

Fotos de mi Xiaomi Redmi 7
Edición con Canva
Traducción DeepL

banner mp.png

Sort:  

Quedó muy bonito, que bueno que pudieras reutilizar ese marco y crear algo además de especial, único. Nadie más tendrá un marco como ese.

Muchas gracias! Qué bueno que te gustó!! Y sí! Eso es lo que me encanta! Y se ve bellísimo en mi pared 😍

Me encanta. Por más proyectos así 😍

Gracias!!! Si!! Así haré!! Y en tu casa hay muchas cosas por hacer también 😍


The rewards earned on this comment will go directly to the person sharing the post on Twitter as long as they are registered with @poshtoken. Sign up at https://hiveposh.com.