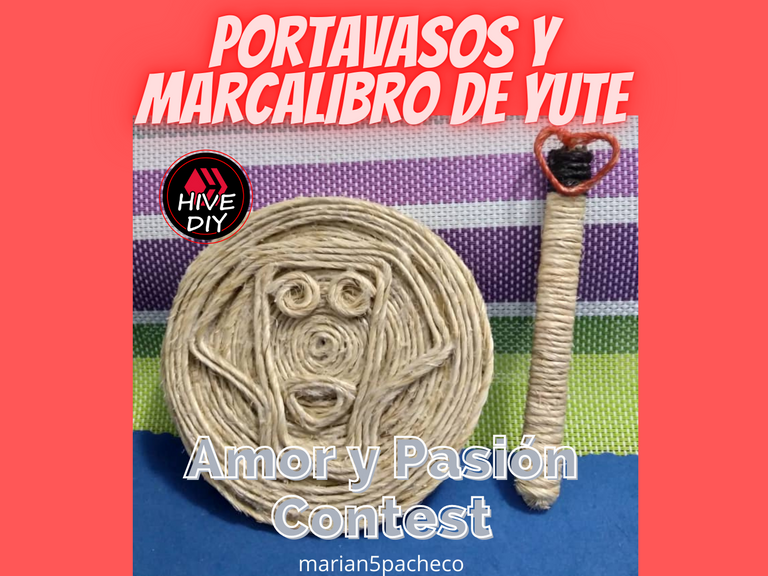
Antes que todo, quisiera dar las gracias a la comunidad de #hivediy por el concurso "Amor y pasión" en cual estoy participando, me parece bonita y romántica, definitivamente el amor se celebra todos los días pero si hay una oportunidad tan singular no hay que desaprovecharla. Gracias también a @equipodelta por su constancia e ideas tan creativas! Me encantan.
Invito a participar en el siguiente concurso a @mxryp07 con tu creatividad estoy segura que traeras buenas ideas a la comunidad.
POSAVASOS/COASTER
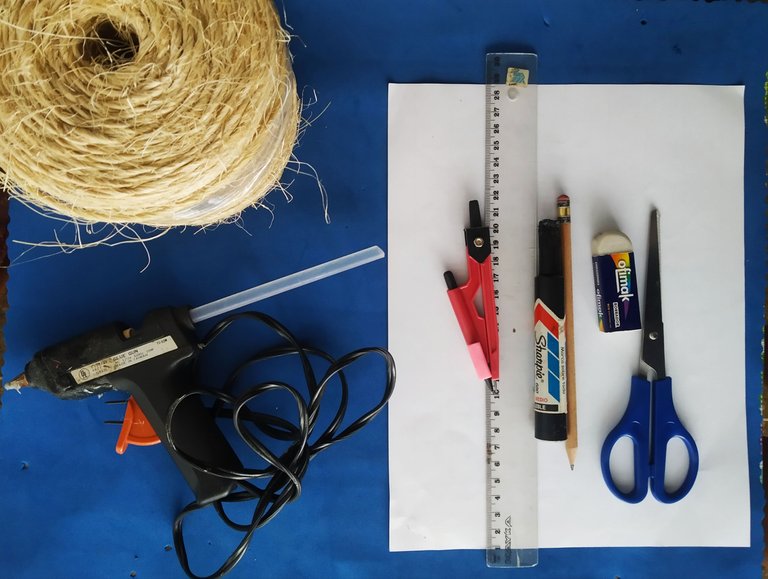
Materiales a necesitar
Para el posavasos:
- Rollo de Yute
- Pistola de Silicón
- Silicón
- Compas o algo redondo que mida 10cm de diámetro
- Regla larga
- Lápiz y marcador
- Borra
- Tijera
- Hojas reciclables
For the coaster:
- Jute roll
- Silicone Gun
- Silicone
- Compass or something round measuring 10cm in diameter
- Long ruler
- Pencil and marker
- Eraser
- Scissors
- Recyclable sheets
Paso 1 / Step 1
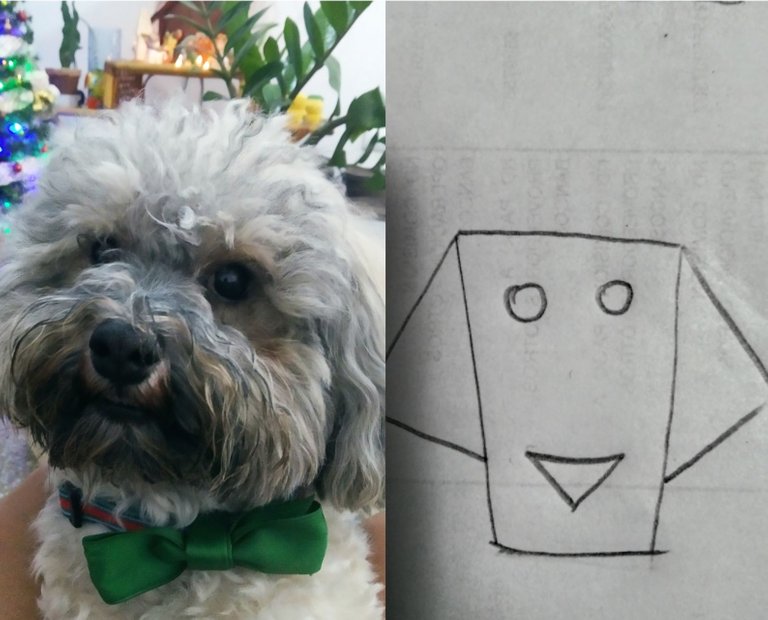
Dibujar el patrón que quieres hacer para el posavasos, trata de que sean líneas geométricas completas y fáciles de manipular con el yute.
En este caso dibuje lo principal de la carita de nuestro perrito Baco, Elías (mi esposo) ama profundamente a nuestro perrito y me pareció un hermoso detalle que tuviese algo de él en la oficina.
Hace poco regreso a trabajar de forma presencial después de dos años de pandemia y realmente lo extraña mucho, además de ser adicto al café, creo que será un regalo que usará bastante
Draw the pattern you want to make for the coaster, try to make them full geometric lines and easy to manipulate with the jute.
In this case I drew the main part of the face of our little dog Baco, Elias (my husband) loves our dog deeply and I thought it was a beautiful detail to have something of him in the office.
He recently returned to work after two years of pandemic and he really misses him a lot, besides being addicted to coffee, I think it will be a gift that he will use a lot.
Paso 2: / Step 2:
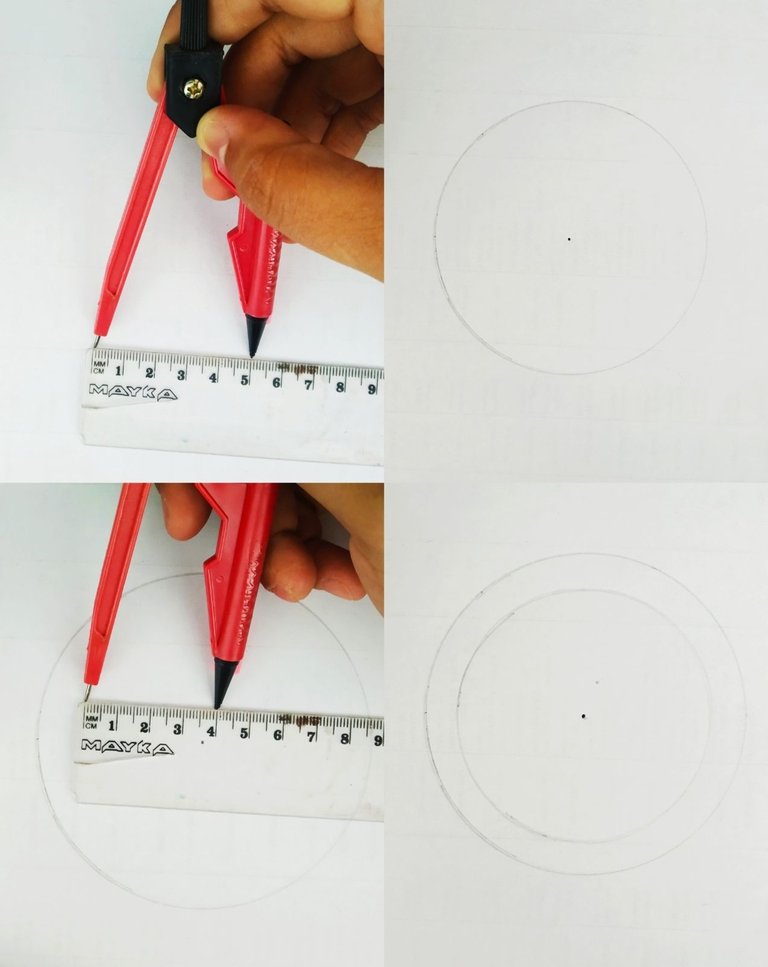
Vamos a dibujar dos círculos, el primero será de 10cm de diámetro, este será el que de el tamaño del posavasos (radio 5cm como en la foto) y el otro será de 8cm para el marco (radio 4cm como en la foto)
We will draw two circles, the first will be 10cm in diameter, this will be the one that will give the size of the coaster (radius 5cm as in the photo) and the other will be 8cm for the frame (radius 4cm as in the photo).
Paso 3: / Step 3:
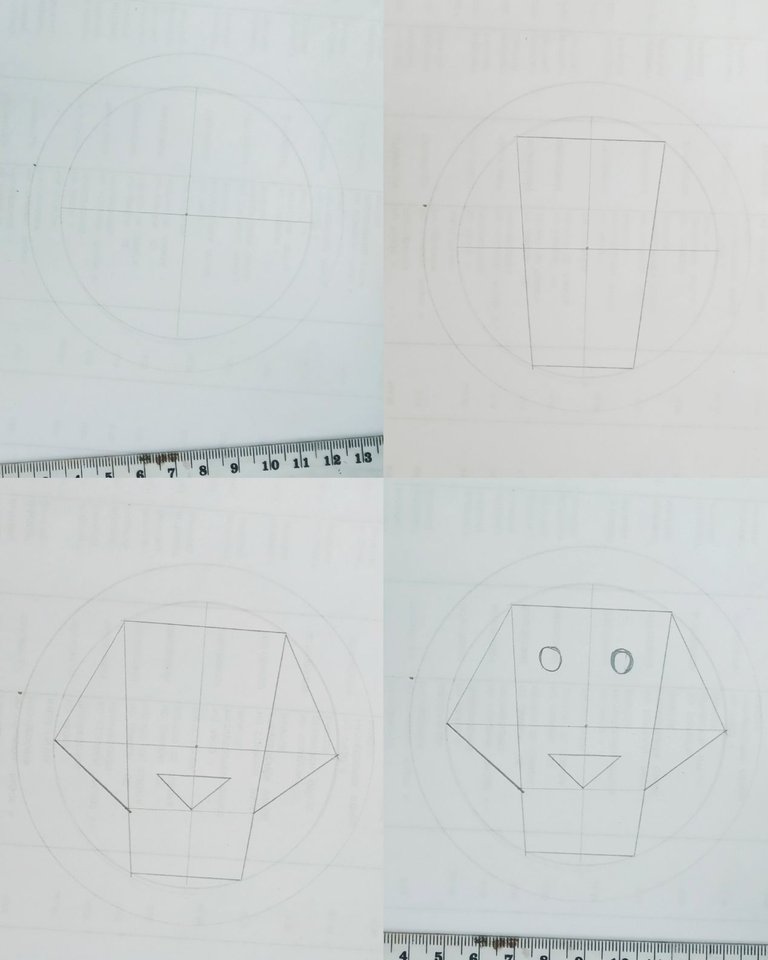
Primero divido el círculo en cuatro partes y luego el dibujo en el diseño lo más geométrico y proporcional posible siempre pensando en función de que las líneas sean gruesas para poder rellenarlas con el yute
First I divide the circle in four parts and then I draw the design as geometric and proportional as possible, always thinking in terms of thick lines to be able to fill them with the jute.
Paso 4: / Step 4:
Comenzamos a echar silicón en el círculo exterior y a pegar el yute desde afuera hacia adentro hasta haber dado la vuelta completa
We start to apply silicone on the outer circle and glue the jute from the outside to the inside until we have gone all the way around.
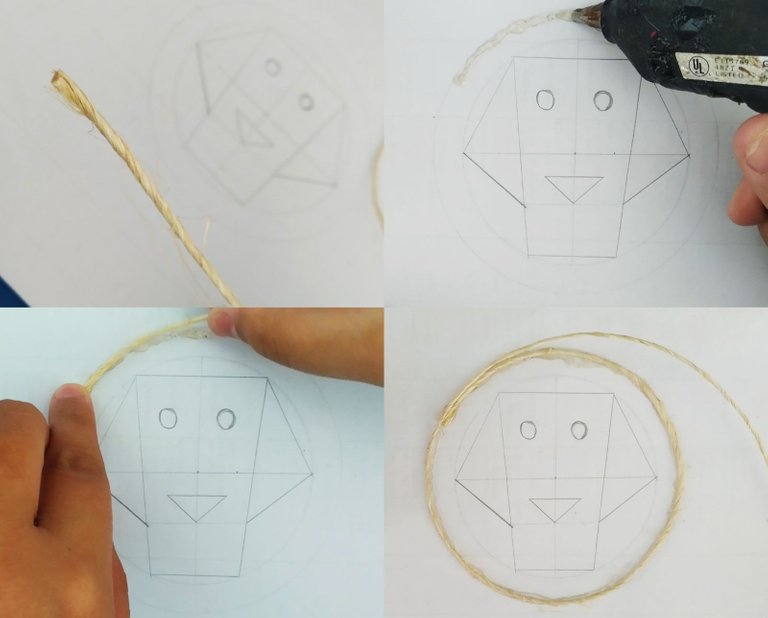
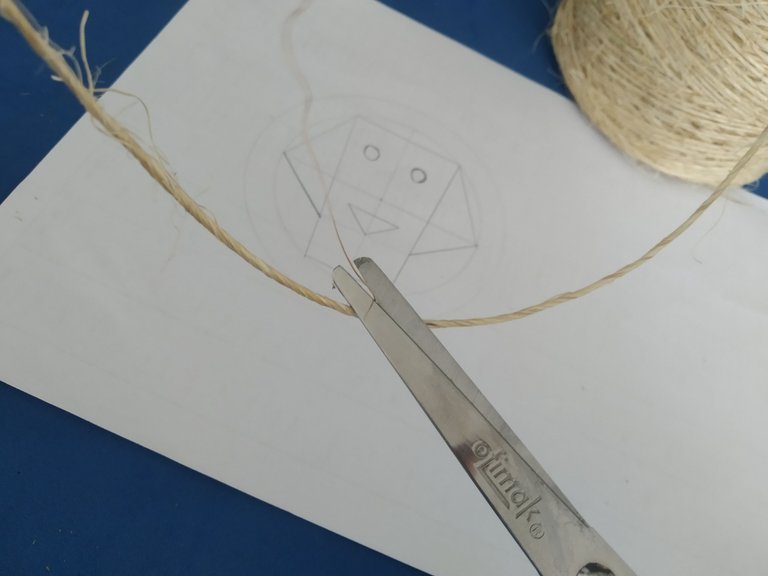
Tip: Cuando vayas a usar el yute procura cortar todos los pelitos que estén sueltos para así facilitar la manipulación y el pegado
Tip: When using jute, try to cut any loose hairs to facilitate handling and gluing.
Paso 5: / Step 5:
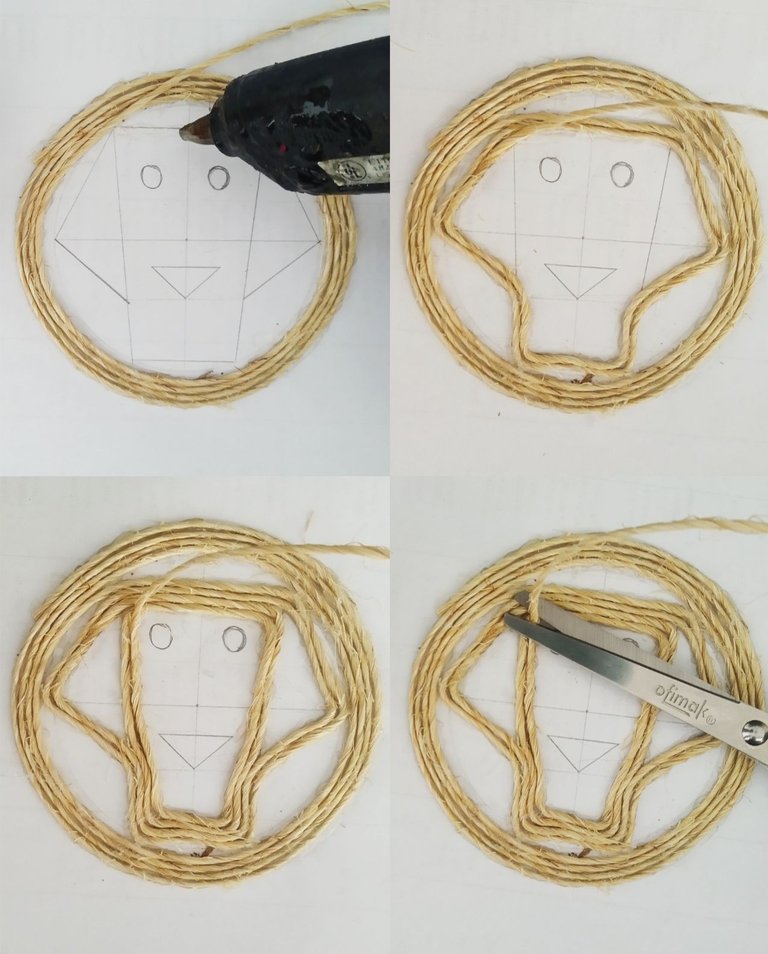
Luego de haber dado 4 vueltas, nos detenemos en la cabeza del diseño y comenzamos a trazar el contorno con mucho cuidado, recordando siempre de hacer las figuras de afuera.
Nota: Para lograr que quede el yute ajustado procura echad silicon no a la hoja sino al yute, de manera que se quede pegado entre los cordeles, ayudaré con la punta de la tijera o algo puntiagudo para hacer presión entre ellos.
After we have made 4 turns, we stop at the head of the design and begin to trace the outline very carefully, always remembering to make the figures on the outside.
Note: To get the jute to fit tightly, try to apply silicone not to the leaf but to the jute, so that it sticks between the strings, I will help with the tip of the scissors or something sharp to make pressure between them.
Paso 6: / Step 6:
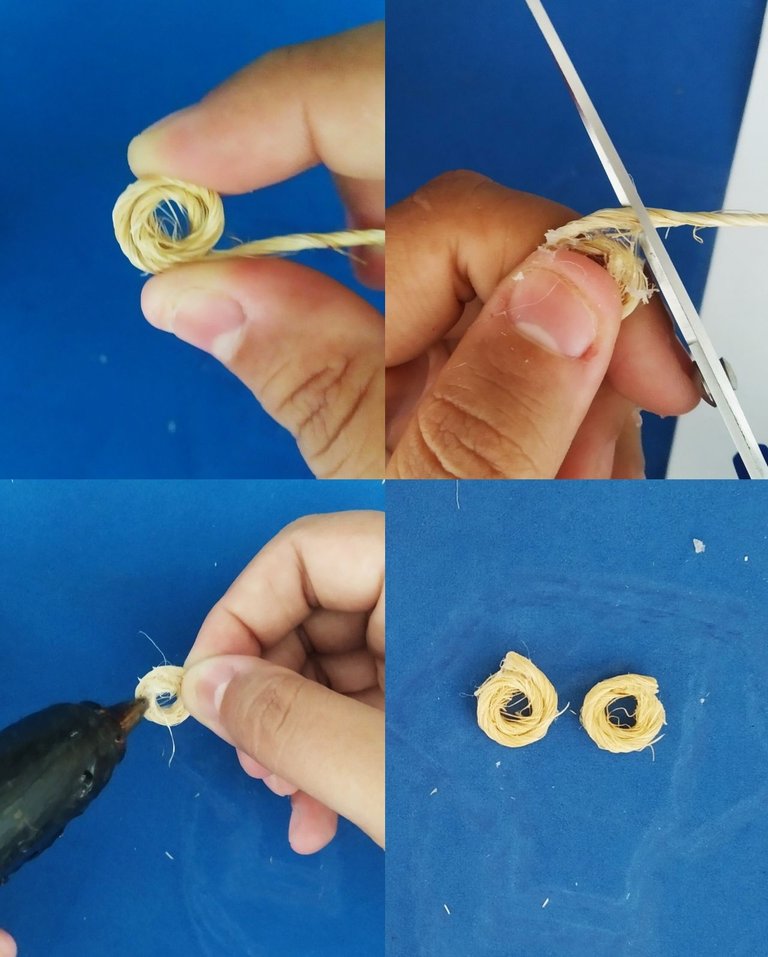
Hacemos los ojitos del perrito y usamos igual el silicón para lograr la forma y luego cortamos
We make the eyes of the puppy and use the same silicone to achieve the shape and then we cut them.
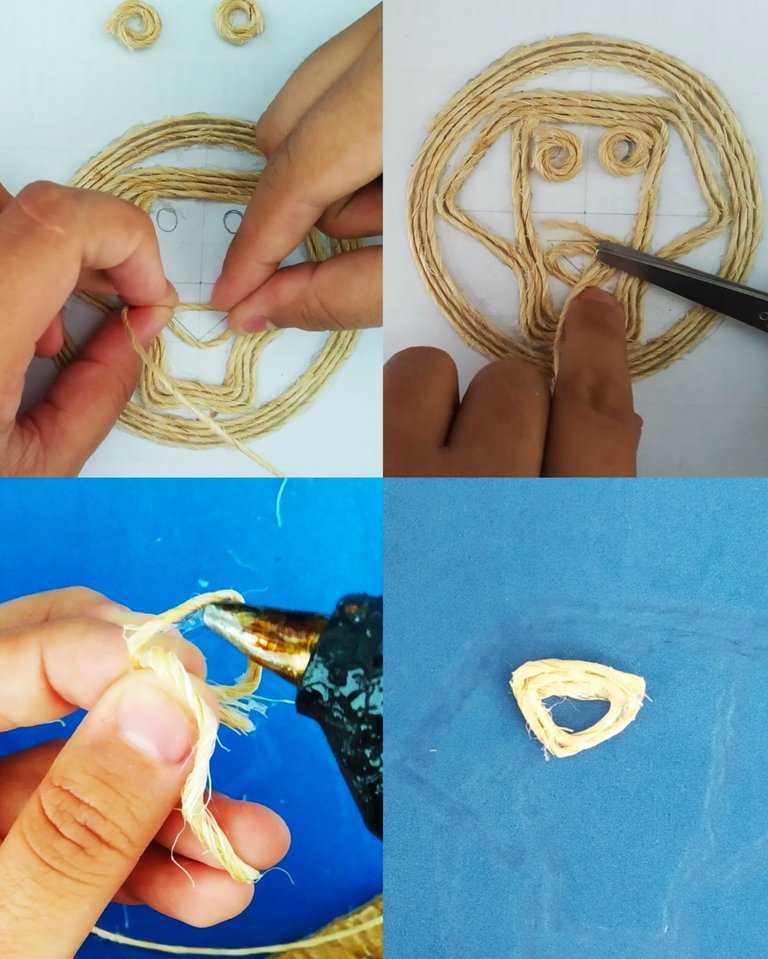
Medimos dentro de la figura de forma que el hocico quedé ajustado al espacio existente. Cómo este es un triángulo y necesitas que se vea bien la forma, dobla las esquinas dónde lo necesites antes de pegarlo
Measure inside the figure so that the snout fits the existing space. As this is a triangle and you need the shape to show well, fold the corners where you need it before gluing it.
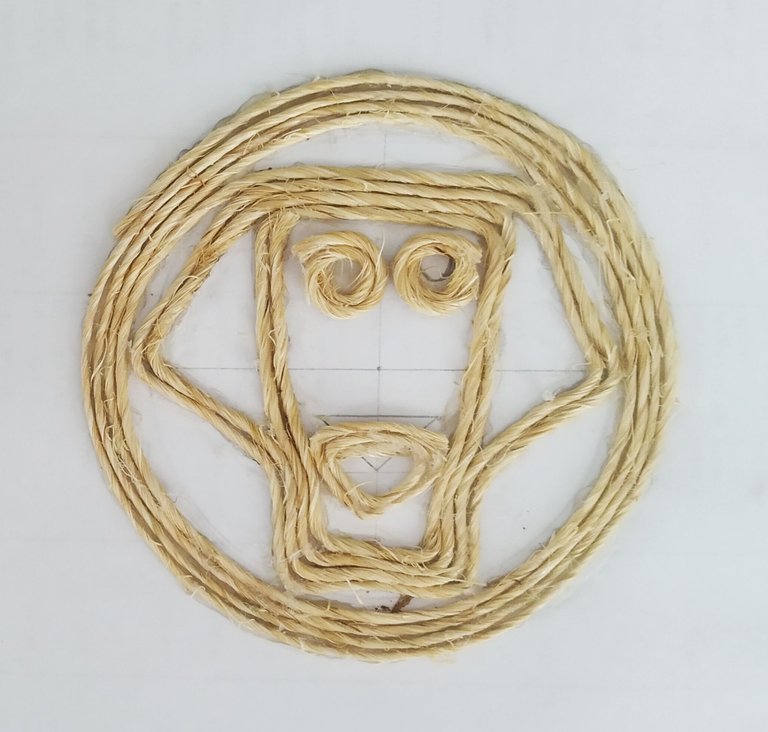
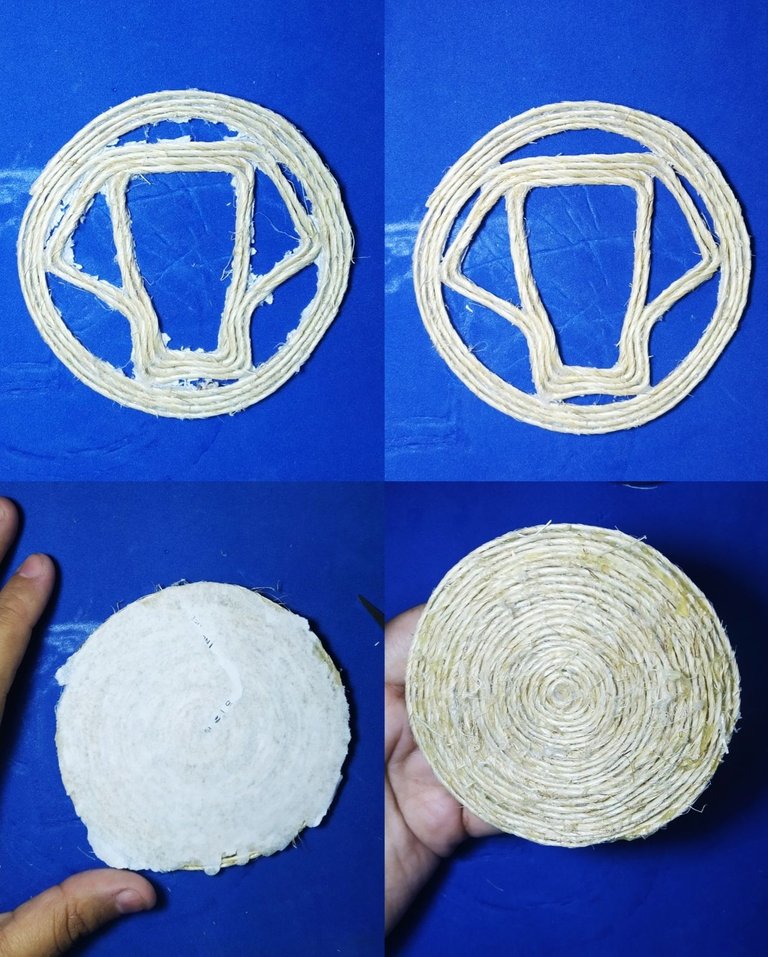
PRIMERA PARTE LISTA!
Así queda la primera parte de nuestro posavasos 😍 cada vez más cerca de nuestro producto final.
This is how the first part of our coaster 😍 is getting closer and closer to our final product.
Paso 7: / Step 7:
Ahora vamos con la base.
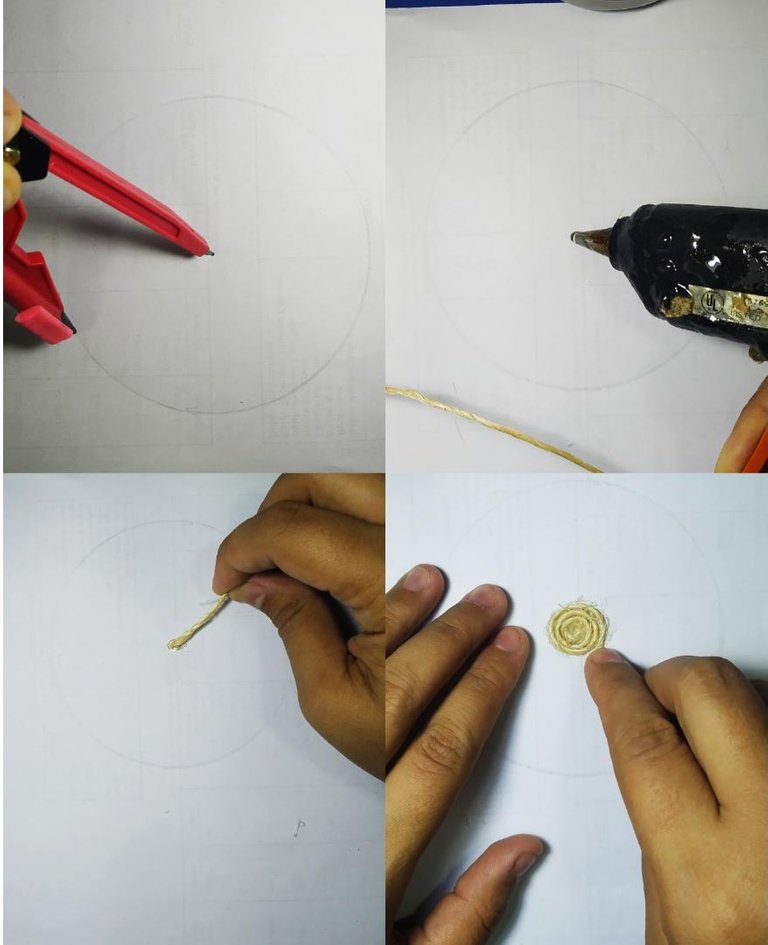
Para eso hacemos otro círculo de diámetro de 10 cm (radio de 5cm), como esta vez será un círculo completo empezamos a pegar El yute desde el centro hacia afuera
Now let's go to the base.
For this we make another circle with a diameter of 10 cm (radius of 5 cm), as this time it will be a complete circle, we start gluing the jute from the center outwards.
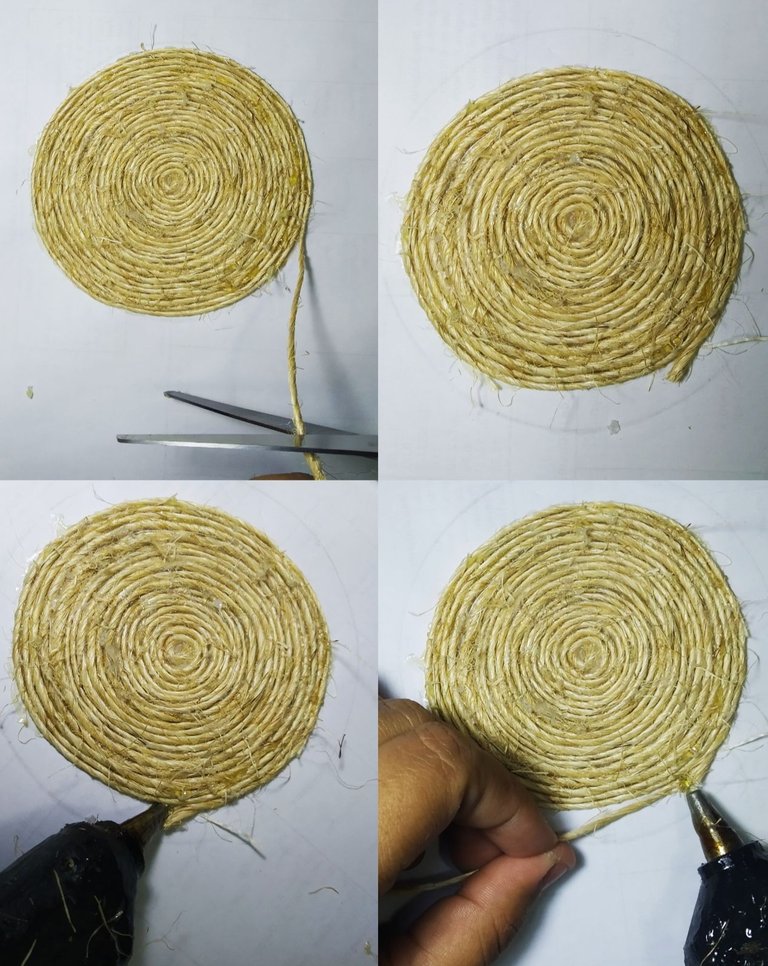
Seguimos siguiendo el patrón pegando el yute entre si lo más pegado y plano que se pueda.
A veces, el yute viene con nudos y el cordón en dos partes. Lo que hacemos es seguir pegando punta con punta para que no se note hasta terminar el patrón
We continue following the pattern by gluing the jute together as close and flat as possible.
Sometimes, the jute comes with knots and the cord in two parts. What we do is to continue gluing end to end so that it is not noticeable until the pattern is finished.
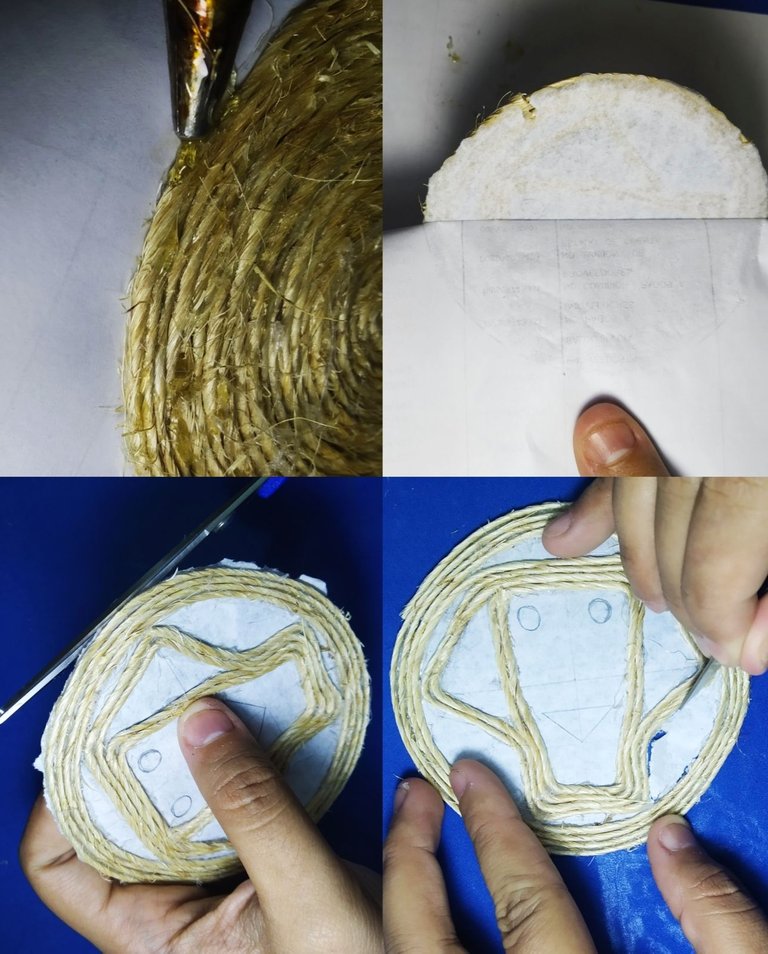
Paso 8: / Step 8:
Pulido de detalles:
Para ello hacemos lo siguiente:
- en las puntas del yute le echamos un poco de silicón para buscar sellar
- Despegamos las figuras de las hojas blancas
- Cortamos los bordes lo mas que podemos para darle un aspecto limpio, así como también los pelitos del yute que estén sueltos.
- Con un cuchillito o tijera quitamos la parte blanca de la figura del perrito
Polishing of details:
For this we do the following:
- We put a little silicone on the ends of the jute to seal it.
- Peel the figures off the white sheets
- Cut the edges as much as possible to give it a clean look, as well as the loose jute hairs.
- With a small knife or scissors we remove the white part of the figure of the little dog.
Nota de duelo 😔⚰️ / Bereavement note 😔⚰️
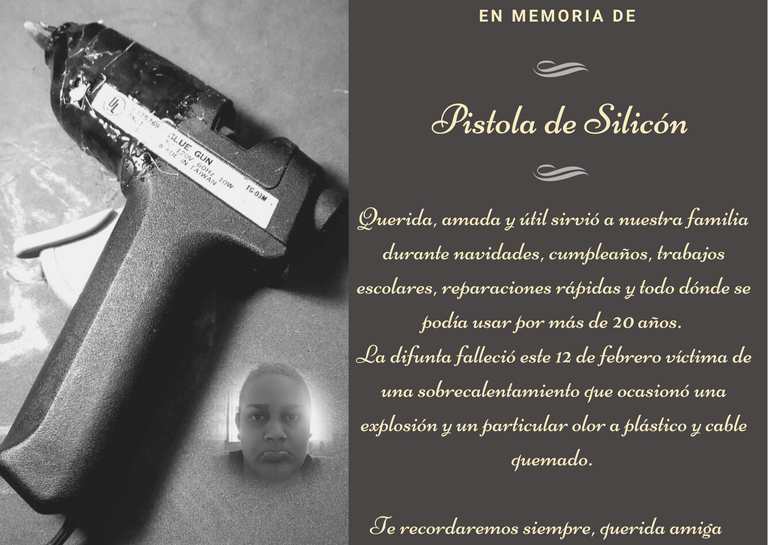
In memory of the silicon gun

Loved, and useful, she served our family during Christmas, birthdays, school work, quick repairs and everything where she could be used for more than 20 years.
The deceased passed away this February 12 victim of overheating which caused an explosion and a particular smell of plastic and burnt wire.

We will remember you always, dear friend 🙏🏽
Paso 9: / Step 9:
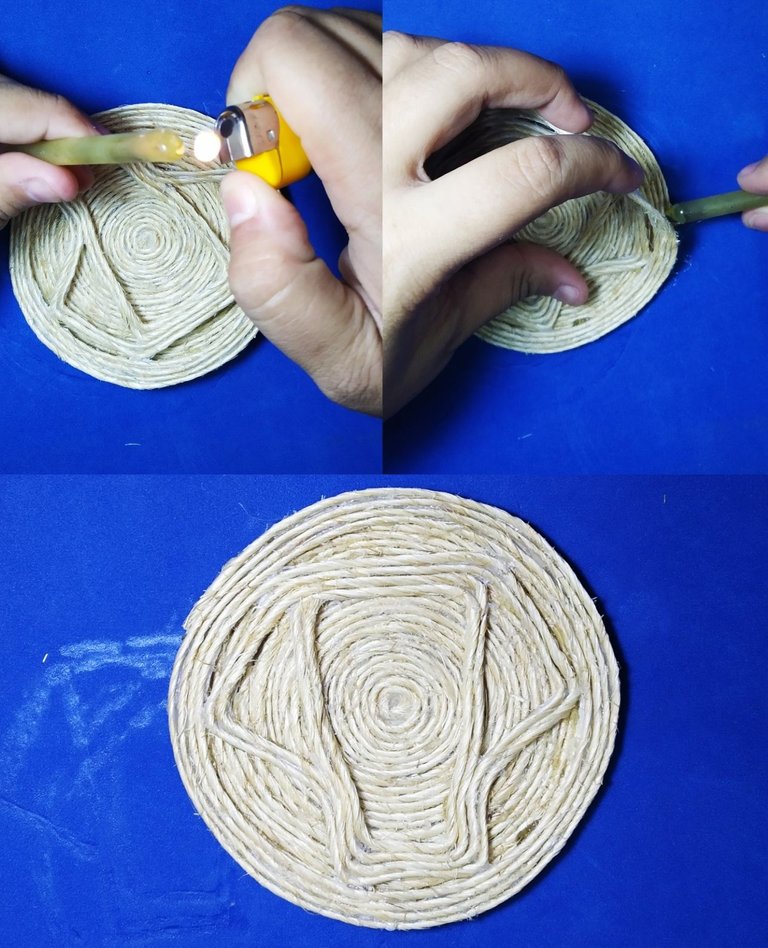
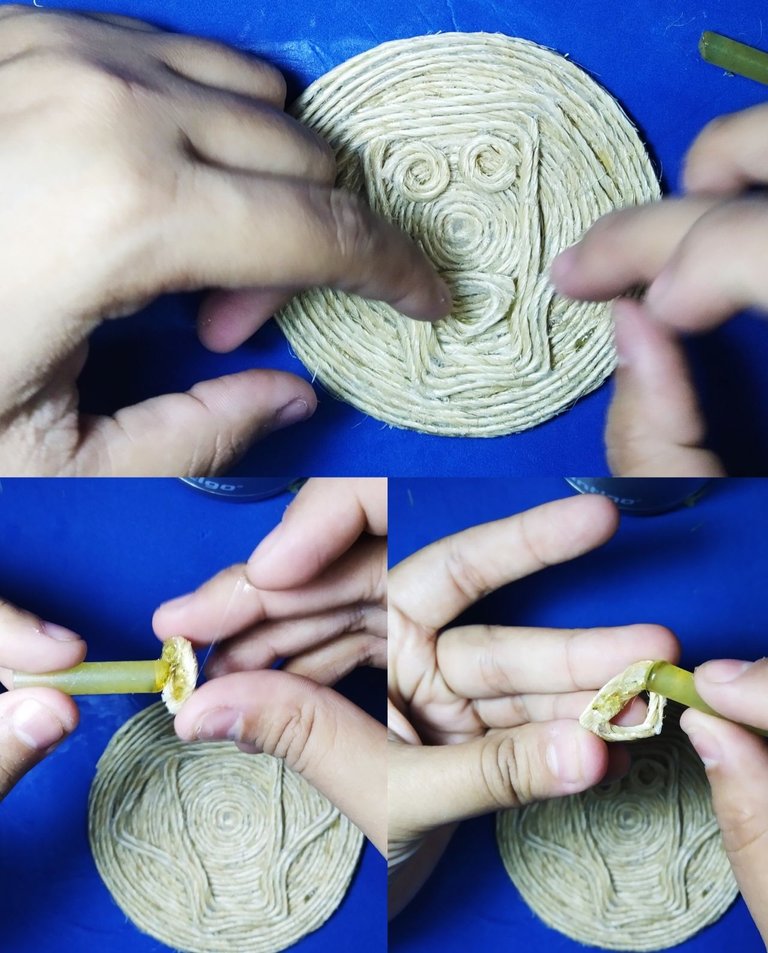
Y como no podíamos parar a pesar de no tener una pistola de silicón decidí calentar el silicón con un yesquero y pegar las piezas con mucho cuidado de no poner excesos ni quemarme yo.
El pegado debe hacerse sumamente cuidadoso y bien hecho para que no se despegue en un futuro
And since we couldn't stop even though we didn't have a silicone gun, I decided to heat the silicone with a tinder and glue the pieces together, being very careful not to over-glue or burn myself.
The gluing must be done very carefully and well done so that it does not peel off in the future.
Paso 10: / Step 10:
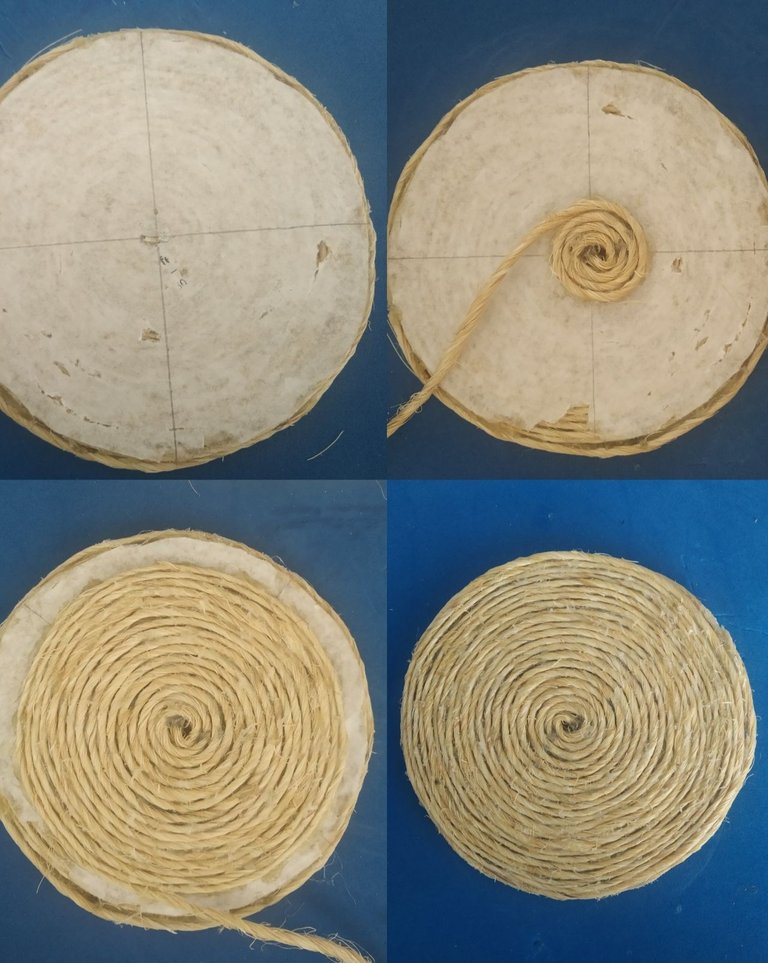
Para hacer mas fuerte y estético el portavaso, por la parte de atrás le damos otra vuelta de yute, para eso, marcamos el centro del circulo y comenzamos a pegar el yute desde adentro hacia afuera hasta llegar al extremo e incluso tapar los bordes.
To make the cup holder stronger and more aesthetic, on the back we give it another round of jute, for that, we mark the center of the circle and begin to glue the jute from the inside out to reach the end and even cover the edges.
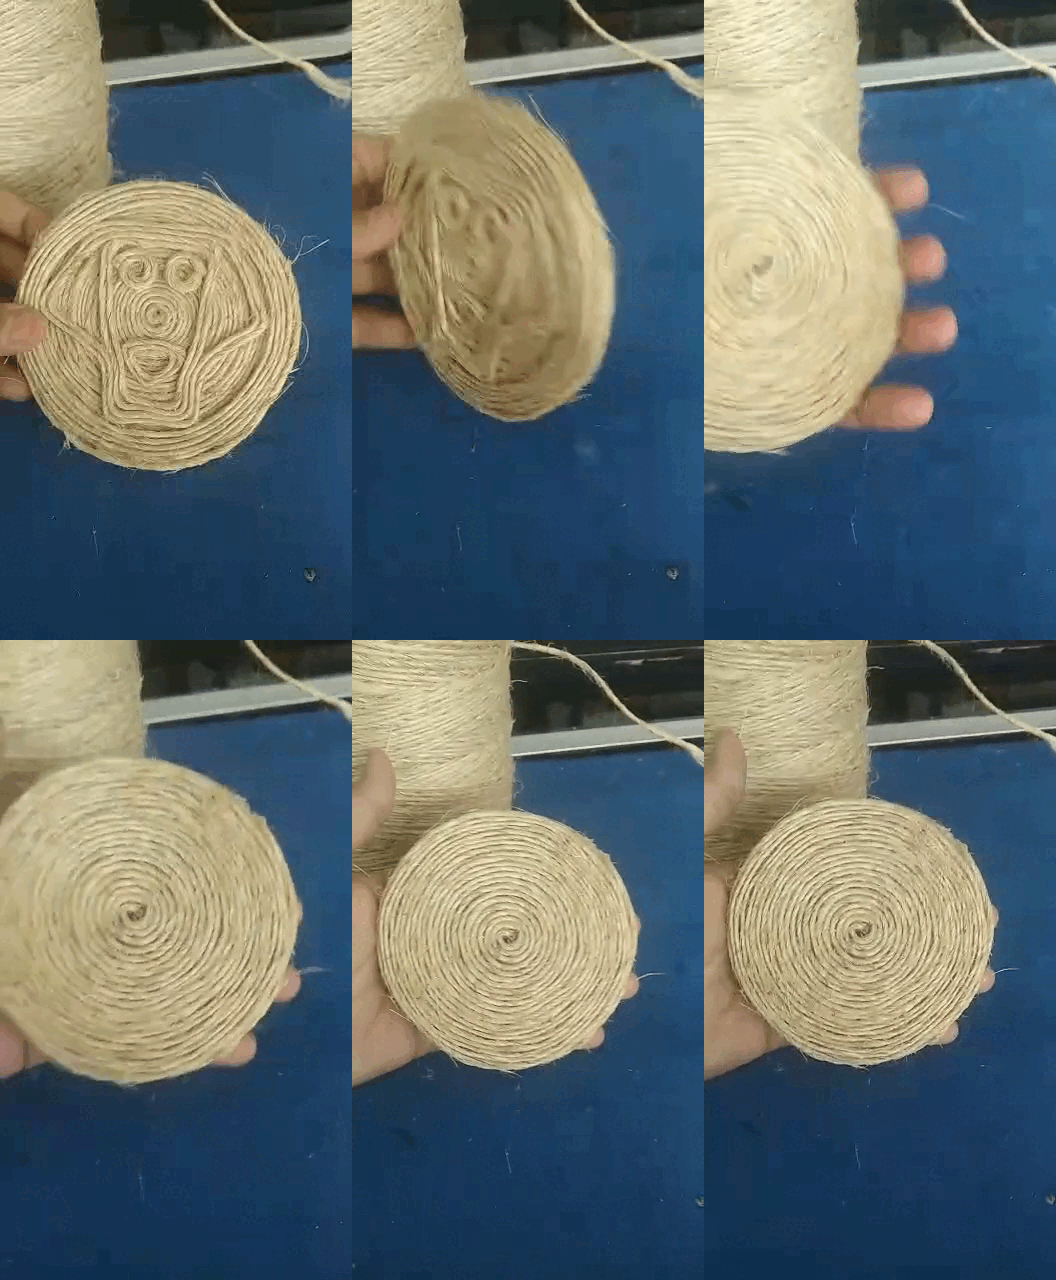
LISTO NUESTRO PORTAVASOS!! / OUR CUP HOLDER IS READY!
MARCALIBRES / BOOKMARK
Materiales a necesitar / Materials needed
- Rollo de Yute
- Silicón
- Tijera
- Paleta de helado
- Marcadores
- Jute roll
- Silicone
- Scissors
- Popsicle stick
- Bookmarks
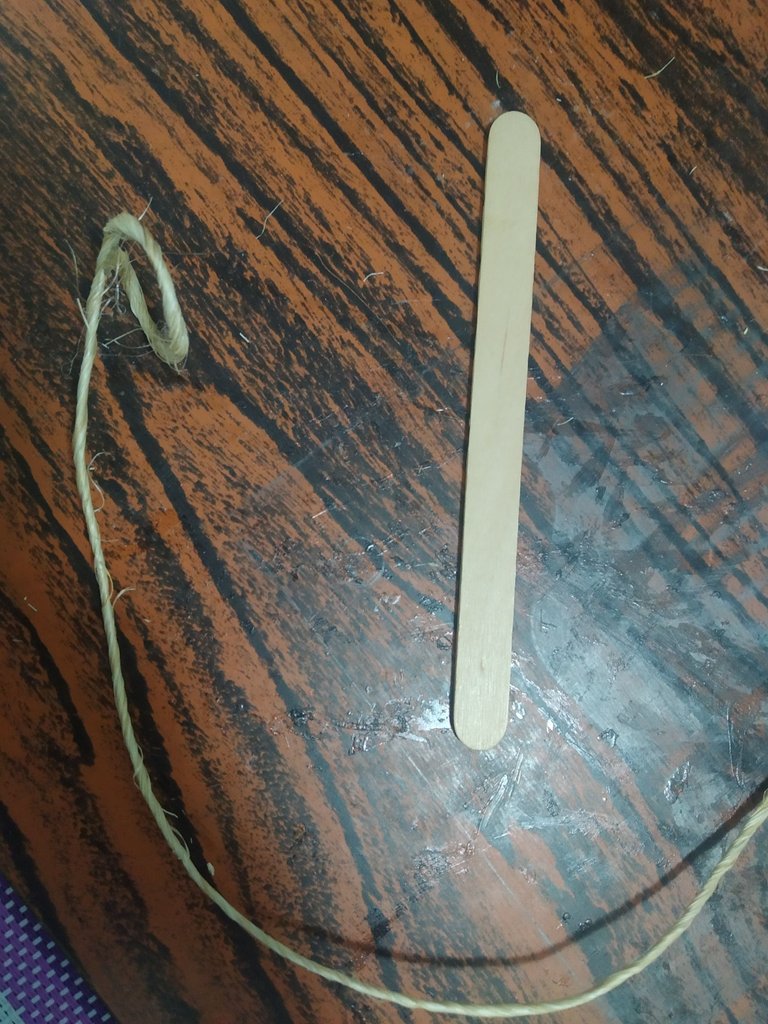
Paso 1 / Step 1
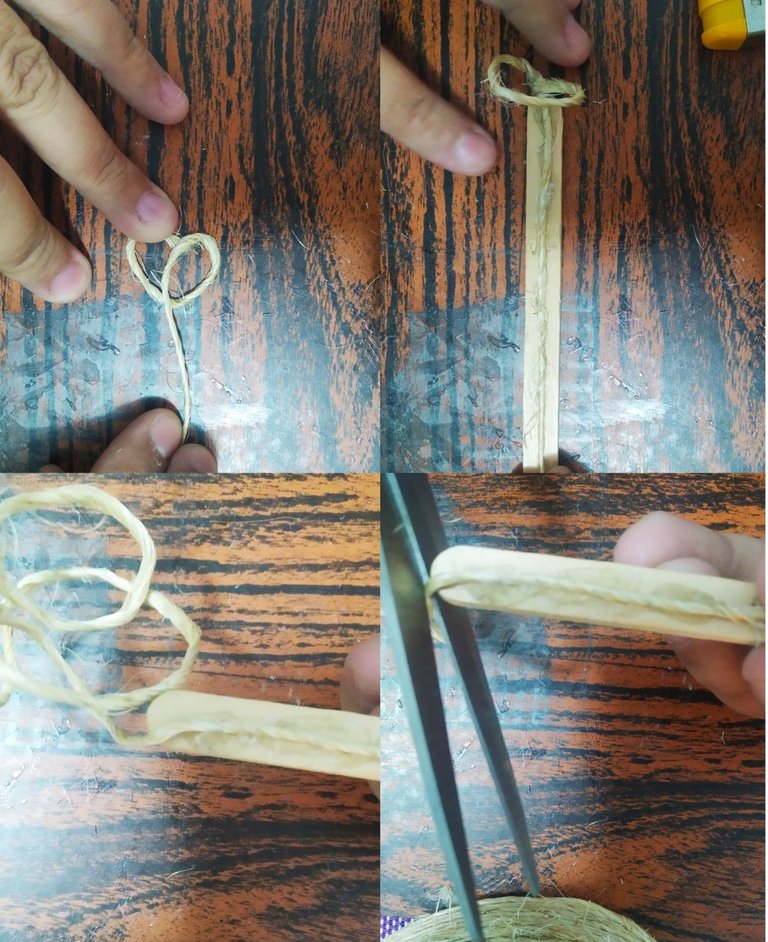
Hacemos la forma de un corazón con la punta hacia adentro, pegamos el yute a lo largo de la paleta dejando el corazón en el extremo por donde comenzamos, al terminar la paleta cortamos el yute.
We make the shape of a heart with the tip facing inwards, we glue the jute along the pallet leaving the heart at the end where we started, when we finish the pallet we cut the jute.
Paso 2 / Step 2
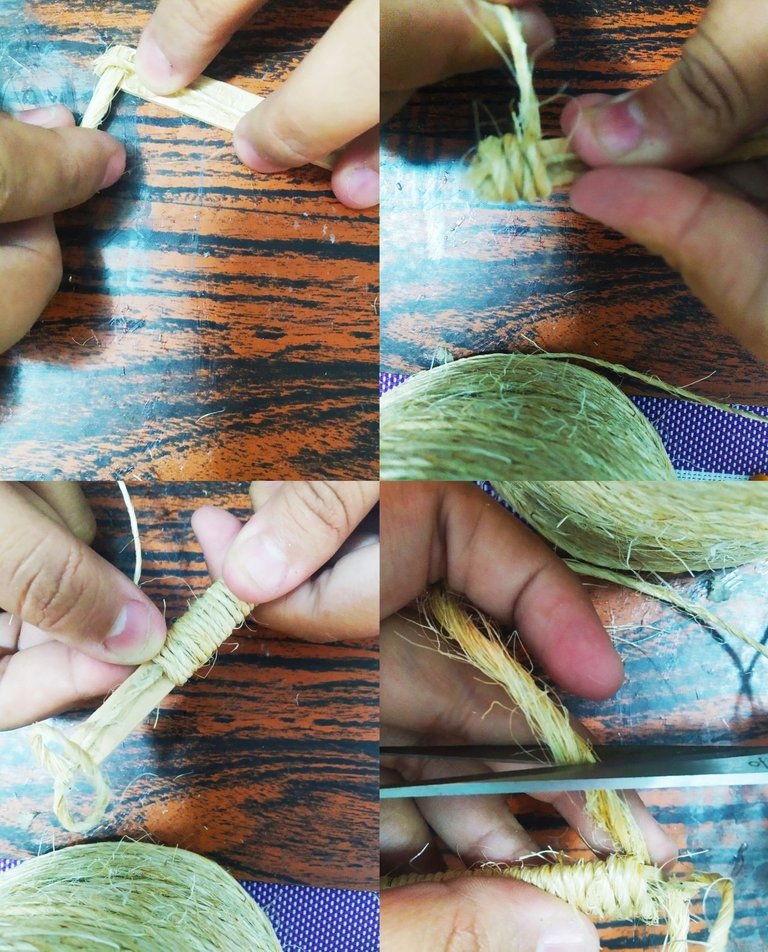
Vamos a cubrir la paleta de yute, comenzando pegando la punta del yute al extremo de la paleta y comenzamos a darle vueltas a la misma hasta llegar al otro lado y cortamos.
We are going to cover the jute pallet, starting by gluing the end of the jute to the end of the pallet and start turning it around until we reach the other side and cut it.
Paso 3 / Step 3
Con el marcador rojo pintamos el corazón lo mejor que podamos y con el negro simulamos una cinta negra, escogí estos colores porque combinan con la taza que le voy a dar con el regalo.
With the red marker we paint the heart as best we can and with the black one we simulate a black ribbon, I chose these colors because they match the mug I am going to give her with the gift.
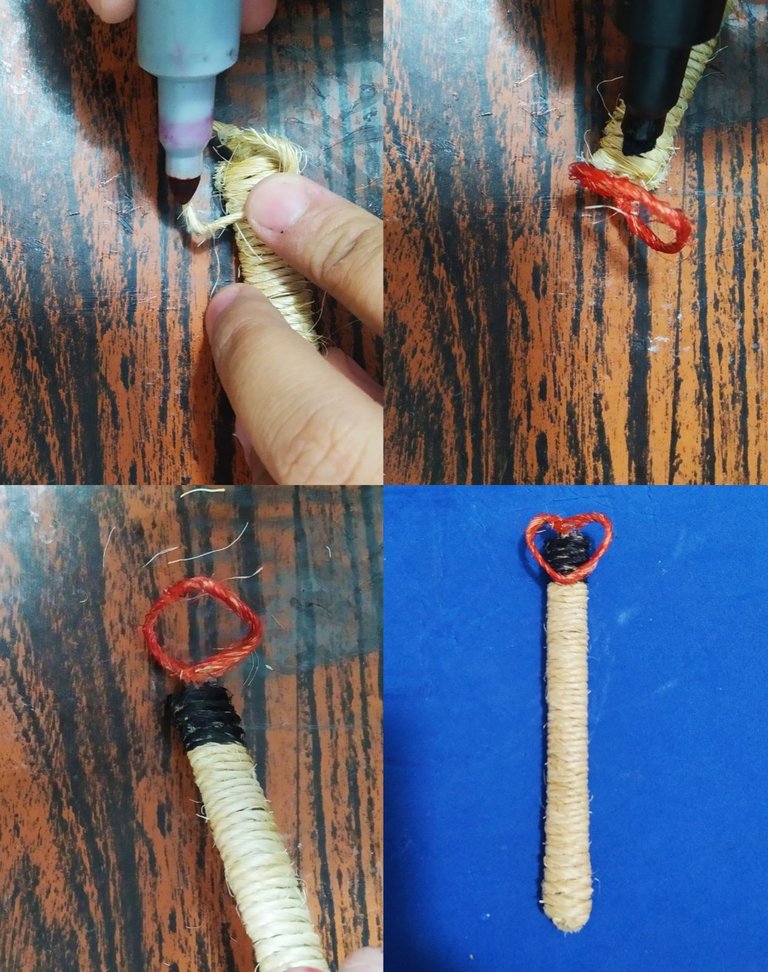
Listos mi regalito!! Me encantó como quedaron ambas cosas, espero le sean útiles a mi esposo 😍
Ready my little gift!!! I loved how they both turned out, I hope they will be useful to my husband 😍
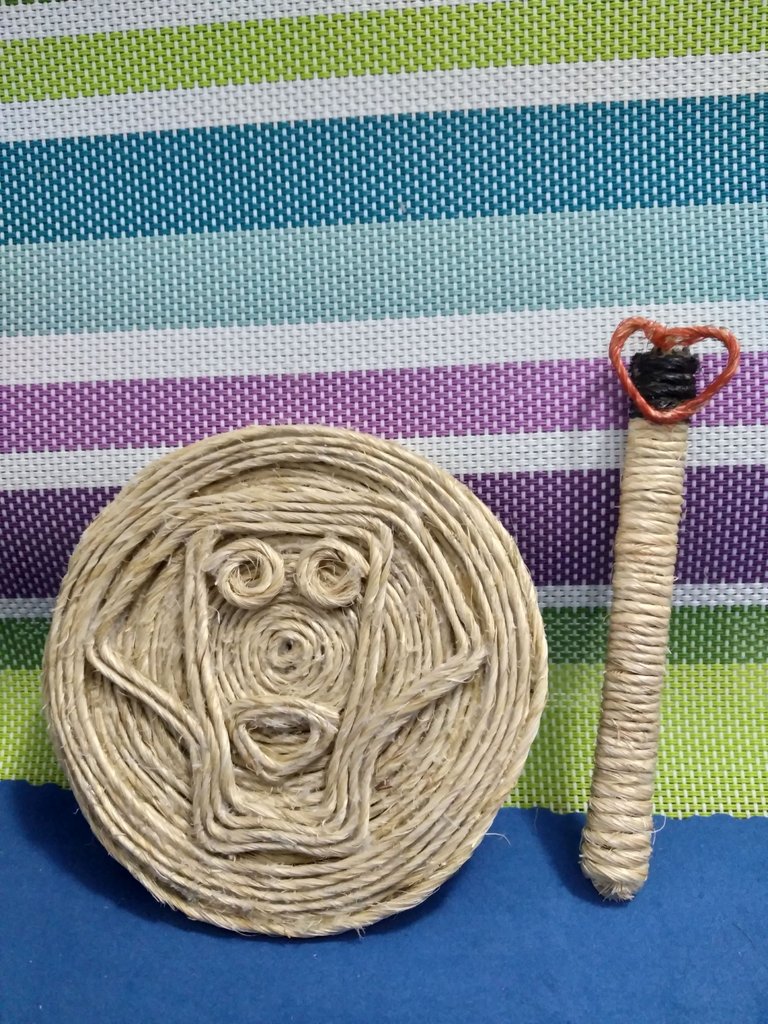
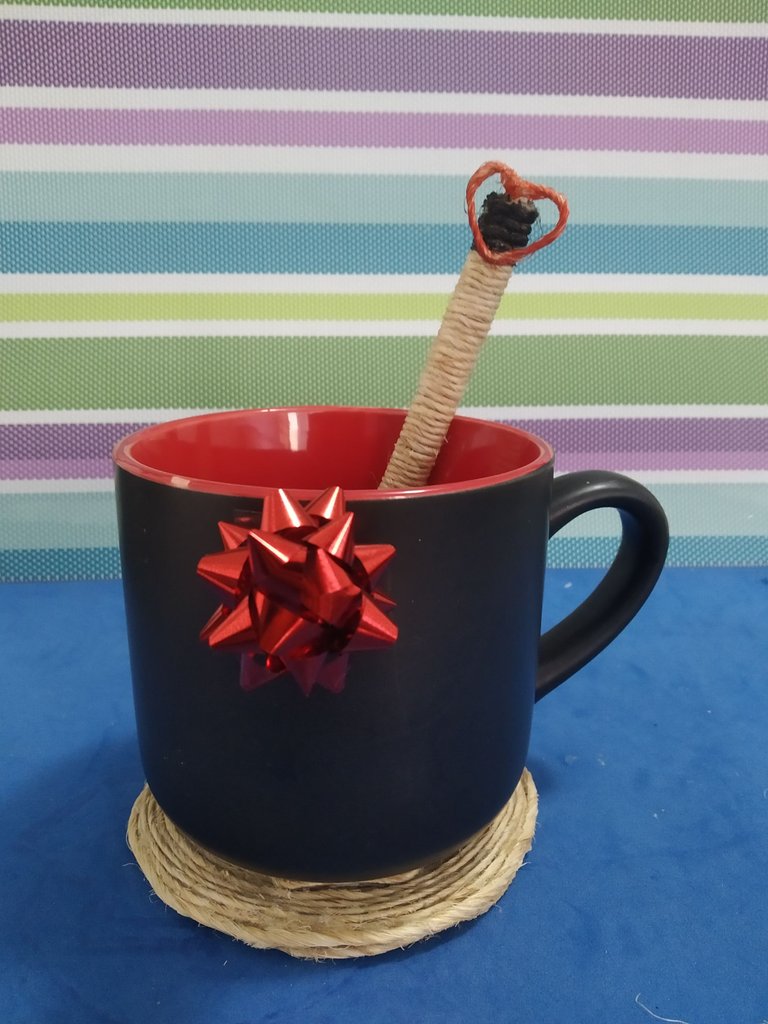
Este será el regalo completo para este día tan especial, le agregué un lacito rojo que tenía guardado para reusarlo.
This will be the complete gift for this special day, I added a red bow that I had saved to reuse it.
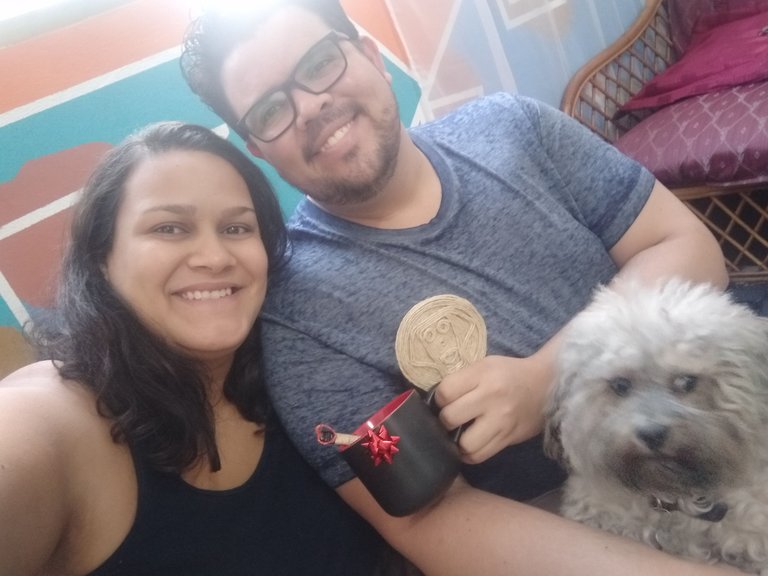
Regalo entregado!
Esperé hasta hoy 14 de febrero para dárselo, me encantó su carita cuando vio que el portavaso tenía la cara de nuestro perrito. De hecho todo se lo llevó a su trabajo para usarlos allá.
Gift delivered!
I waited until today February 14th to give it to him, I loved his little face when he saw that the cup holder had our doggy's face on it. In fact she took it all to her work to use it there.
Muchas gracias a todos por haber leído mi post, disfruté muchísimo participando en este concurso. Definitivamente si se quiere sorprender a alguien bien sea pareja, amigos o la familia lo que se debe tener es creatividad y aprovechar los materiales que ya se tienen, no necesariamente debe ser un regalo caro para expresar lo mucho que amamos al otro.
Feliz día del amor y la amistad!
Que todos tus días sean de San Valentín!
Thank you all for reading my post, I really enjoyed participating in this contest. Definitely if you want to surprise someone either partner, friends or family what you should have is creativity and take advantage of the materials you already have, it does not necessarily have to be an expensive gift to express how much we love the other.
Happy Valentine's Day!
May all your days be Valentine's Day!
.
.
Fotos con mi Xiaomi Redmi 7
Edición de imágenes Creative de Xiaomi, Instagram y Canva
Traducción DeepL
Conversión de video a GIF en online - convert.
