 🥀🌹🥀🌹🥀🌹🥀🌹🥀🌹🥀
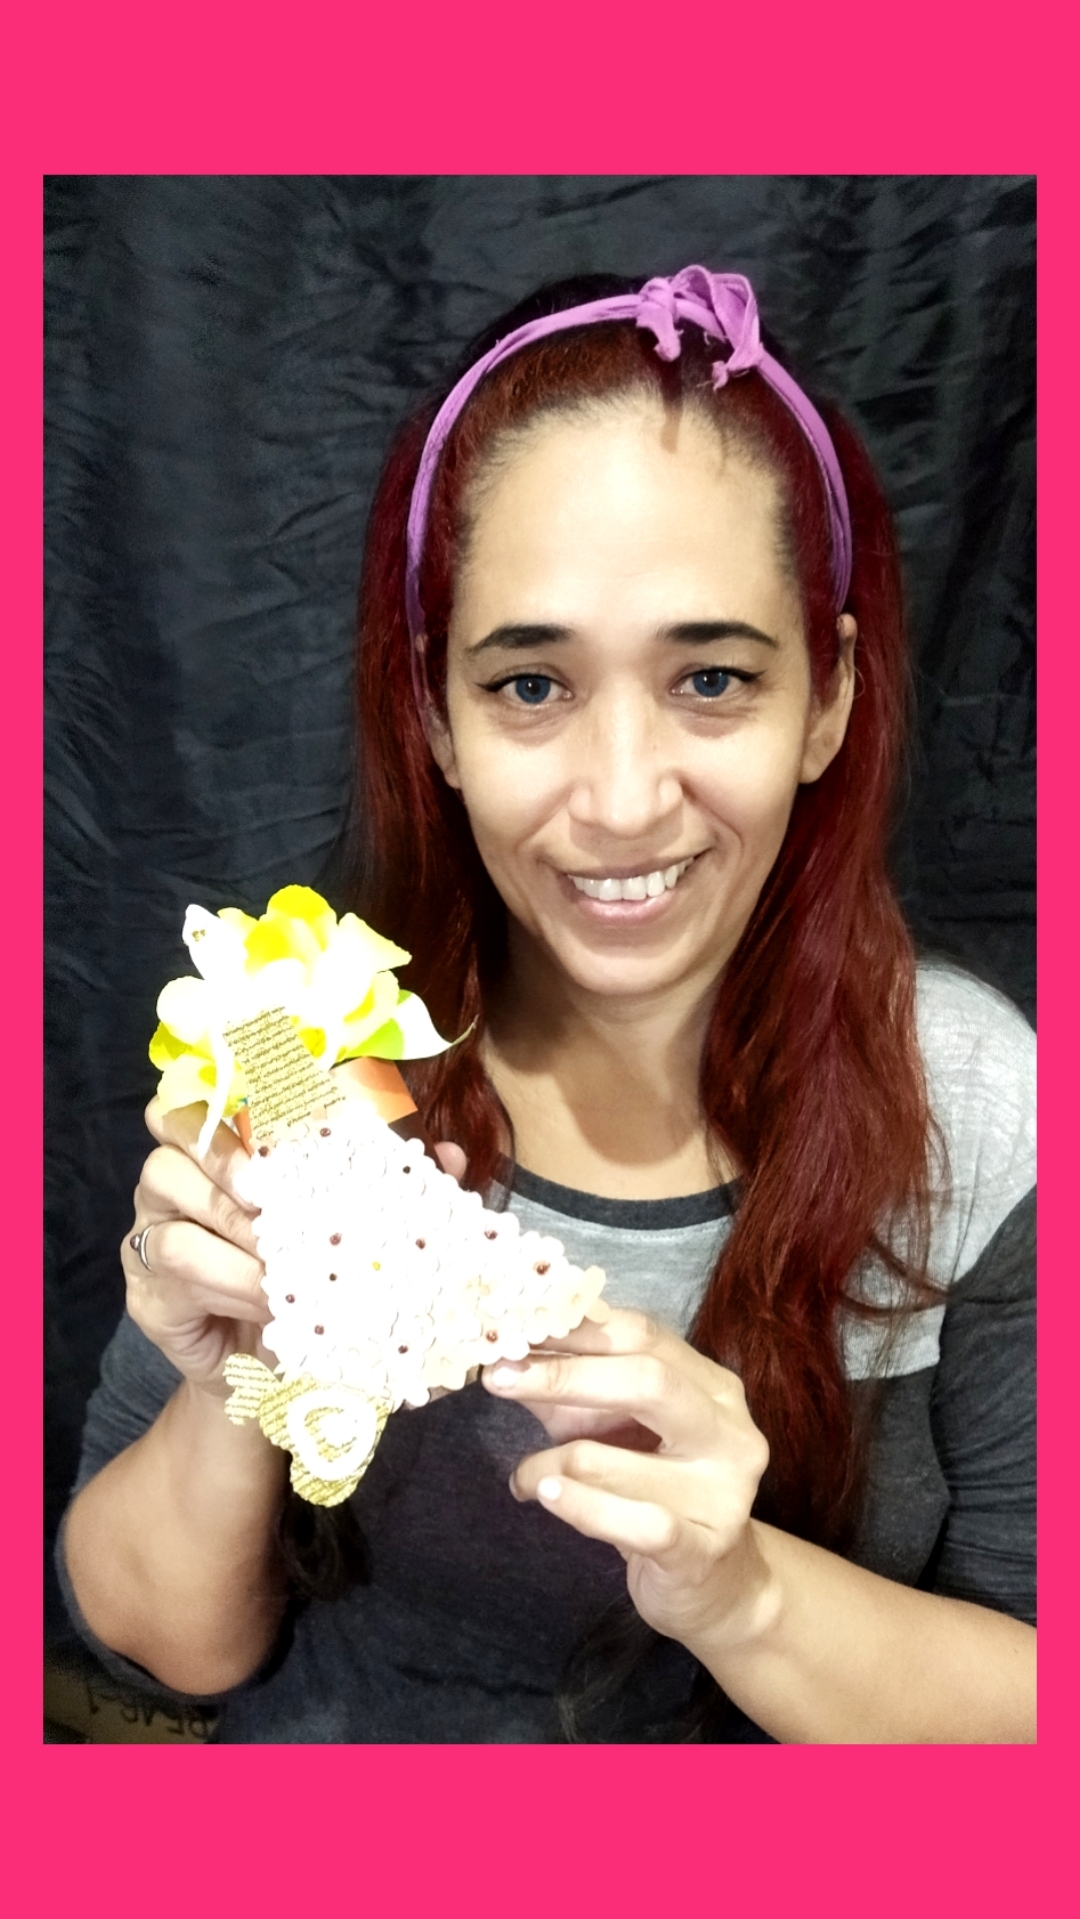
Hola mis abejitas hermosas de esta plataforma llamada hive, desde este pedacito de patria les envío toda mi buena vibra, deseándoles feliz inicio de fin de semana, el día de hoy vengo con una propuesta muy bonita, muy divertida y sobretodo es algo útil.
Hello my beautiful bees of this platform called hive, from this little piece of homeland I send you all my good vibes, wishing you a happy start of the weekend, today I come with a very nice proposal, very funny and above all it is something useful.
Para nadie es un secreto que en Latinoamérica la celebración de los 15 años de una niña es bien importante, y se convierte en motivo de unión familiar, las madres que por lo general son las encargadas de cuidar todos los pequeños detalles para hacer de su fiesta un evento maravilloso, por eso el dia de hoy vamos a elaborar un hermoso detalle decorativo para colocar el el centro de la mesa, un detalle que aunque es bien sencillo no deja de ser bonito y elegante que seguramente le darán a tu fiesta un toque diferente, así que sin más, manos a la obra.
It is no secret that in Latin America the celebration of a girl's 15th birthday is very important, and becomes a reason for family togetherness, mothers are usually responsible for taking care of all the little details to make your party a wonderful event, so today we are going to develop a beautiful decorative detail to place in the center of the table, a detail that although it is very simple but still beautiful and elegant that will surely give your party a different touch, so without further ado, let's get to work.
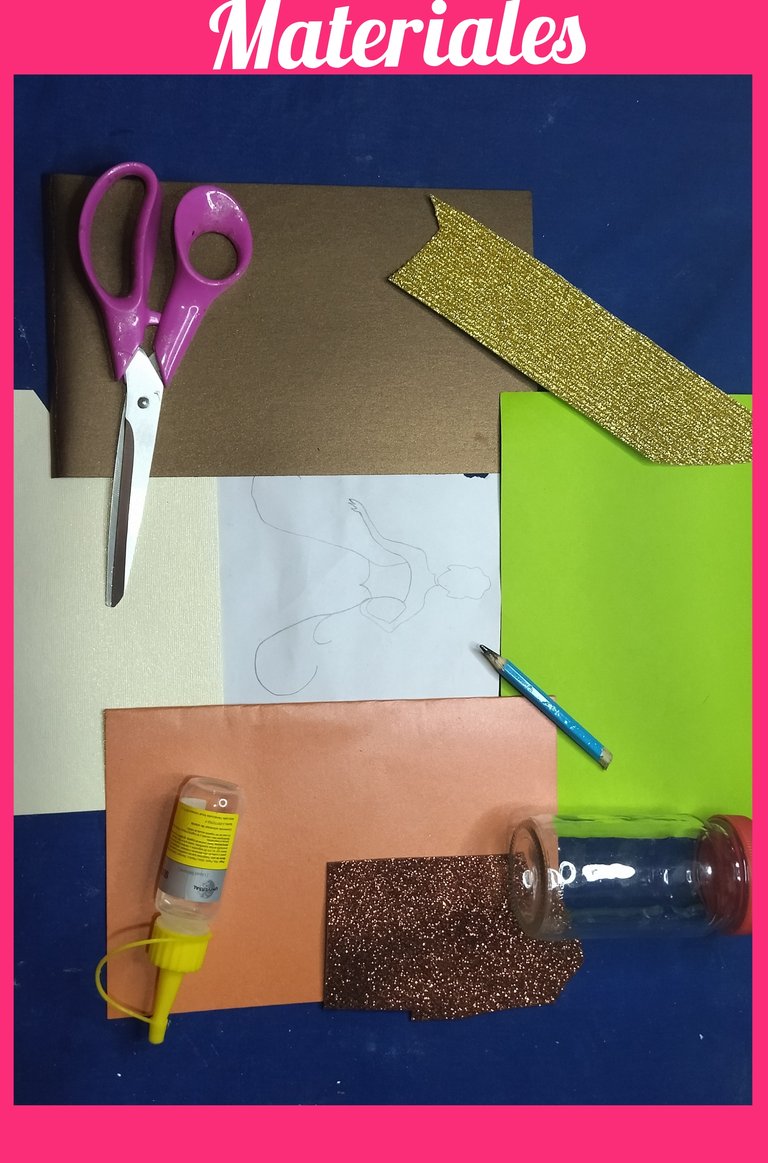
MATERIALES// MATERIALS.
🥀🌹🥀🌹🥀🌹🥀🌹🥀🌹🥀
🥀 Cartulina de variados colores//Cardboard of various colors.
🥀 1 hoja en blanco.//1 blank sheet.
🥀 Retazo de foami escarchado, yo utilice en este caso de color marrón.//Piece of frosted foami, in this case I used brown.
🥀 Retazo de cartulina perlada dorada//Piece of gold pearlized card stock.
🥀 Silicón frío.//Cold silicone.
🥀 Frasco de vidrio.//Glass flask.
🥀 Lápiz.//Pencil.
🥀 Tijera.//Scissors.
🥀 Saca huecos pequeños.//Small holes are pulled out.
🥀 Piedritas de aplicación.//Application stones.
 PROCEDIMIENTO//PROCEDURE
🥀🌹🥀🌹🥀🌹🥀🌹🥀🌹🥀
PASO 1 // STEP 1
🥀🌹🥀🌹🥀🌹🥀🌹🥀🌹🥀
PROCEDIMIENTO//PROCEDURE
🥀🌹🥀🌹🥀🌹🥀🌹🥀🌹🥀
PASO 1 // STEP 1
🥀🌹🥀🌹🥀🌹🥀🌹🥀🌹🥀
Primero que nada vamos a sacar el patrón con el que vamos a trabajar el día de hoy, yo me ayude con una imagen que baje del internet, que me pareció linda y propicia para esta ocasión.
First of all we are going to draw the pattern that we are going to work with today, I helped myself with an image that I downloaded from the internet, which I thought was cute and appropriate for this occasion.
Calqueamos la figura de la silueta de nuestra quinceañera en la hoja blanca, la cual procederemos a recortar, ya una vez recortado nuestro patrón procedemos a colocarlo encima de la cartulina color perlada y marcamos la imagen.
We trace the figure of the silhouette of our quinceañera on the white sheet, which we will proceed to cut out. Once our pattern is cut out, we proceed to place it on the pearl-colored cardboard and mark the image.
 PASO 2 // STEP 2
🥀🌹🥀🌹🥀🌹🥀🌹🥀🌹🥀
PASO 2 // STEP 2
🥀🌹🥀🌹🥀🌹🥀🌹🥀🌹🥀
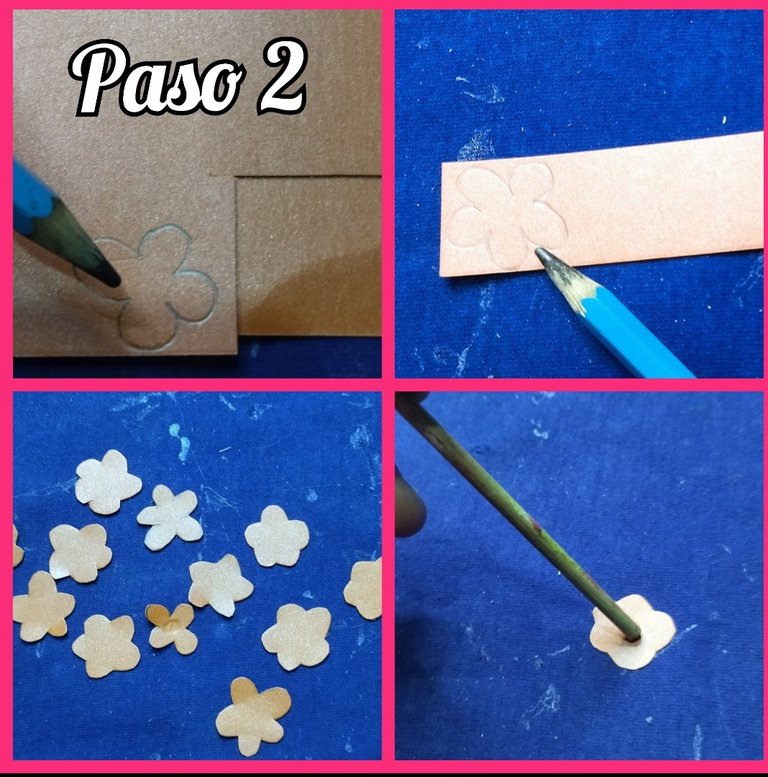
En un trozo de cartulina naranja dibuje muchas florecitas las cuales recorte y con ayuda de la parte trasera de un palillo de altura remarcamos el centro de todas y cada una de las florecitas que hemos picado.
On a piece of orange cardboard draw many little flowers which you cut out and with the help of the back of a toothpick you mark the center of each and every one of the little flowers that you have cut out.
Yo utilice la del color naranja, pero ustedes pueden utilizar el color de su elección
I used the orange one, but you can use the color of your choice.
 PASO 3 // STEP 3
🥀🌹🥀🌹🥀🌹🥀🌹🥀🌹🥀
PASO 3 // STEP 3
🥀🌹🥀🌹🥀🌹🥀🌹🥀🌹🥀
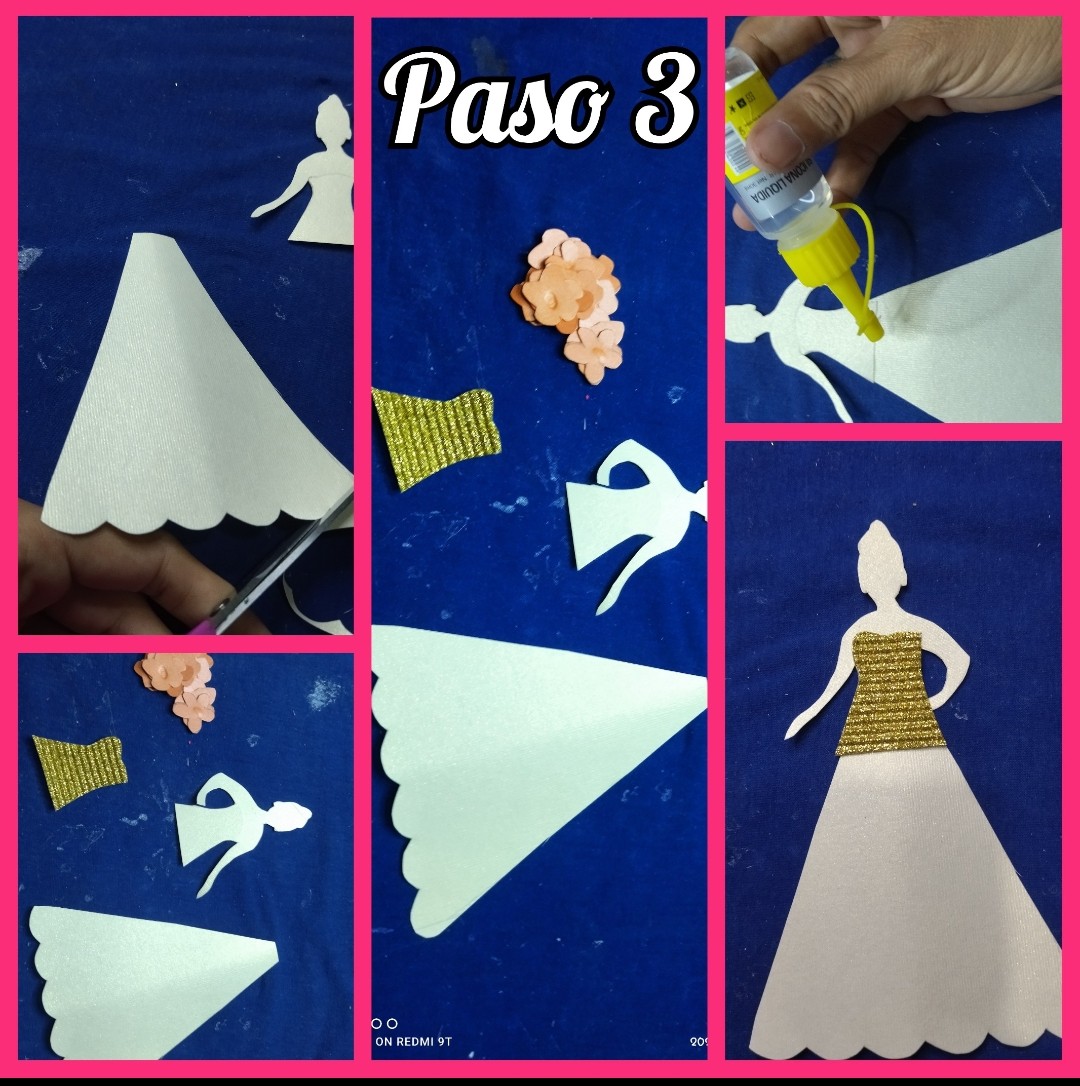
Previamente había recortado la silueta de la quinceañera y también la falda del vestido, luego tome el silicón y uni las dos piezas para formar la quinceañera.
I had previously cut out the silhouette of the quinceañera and also the skirt of the dress, then I took the silicone and joined the two pieces together to form the quinceañera.
Luego tome el retazo de cartulina perlada dorada y marque la parte del corset del vestido, la recortamos y con un poquito de silicón frío lo pegamos en nuestra silueta.
Then take the piece of gold pearlized cardboard and mark the corset part of the dress, cut it out and with a little bit of cold silicone we glue it on our silhouette
 PASO 4 // STEP 4
🥀🌹🥀🌹🥀🌹🥀🌹🥀🌹🥀
PASO 4 // STEP 4
🥀🌹🥀🌹🥀🌹🥀🌹🥀🌹🥀
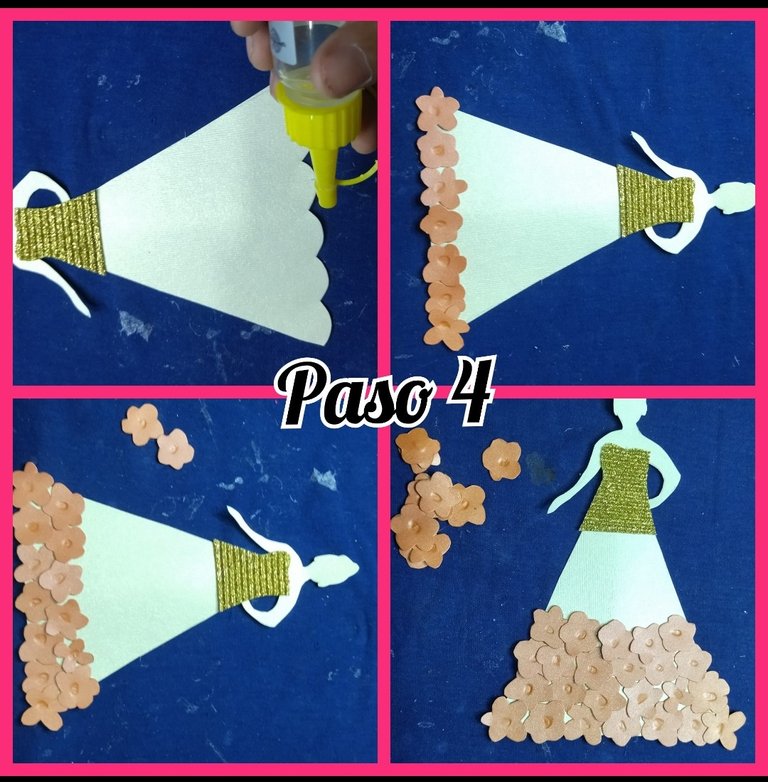
A la falda del vestido le aplicamos un poco de silicón frío y le vamos a ir pegando poco a poco las flores que hicimos,eso sí debemos recordar que las flores deben irse colocando de las más grandes primero hasta las más pequeñas, esto lo haremos hasta llegará la cintura de la muñeca.
To the skirt of the dress we apply a little cold silicone and we will gradually glue the flowers we made, we must remember that the flowers should be placed from the largest first to the smallest, we will do this until we reach the waist of the doll.
 PASO 5 // STEP 5
🥀🌹🥀🌹🥀🌹🥀🌹🥀🌹🥀
PASO 5 // STEP 5
🥀🌹🥀🌹🥀🌹🥀🌹🥀🌹🥀
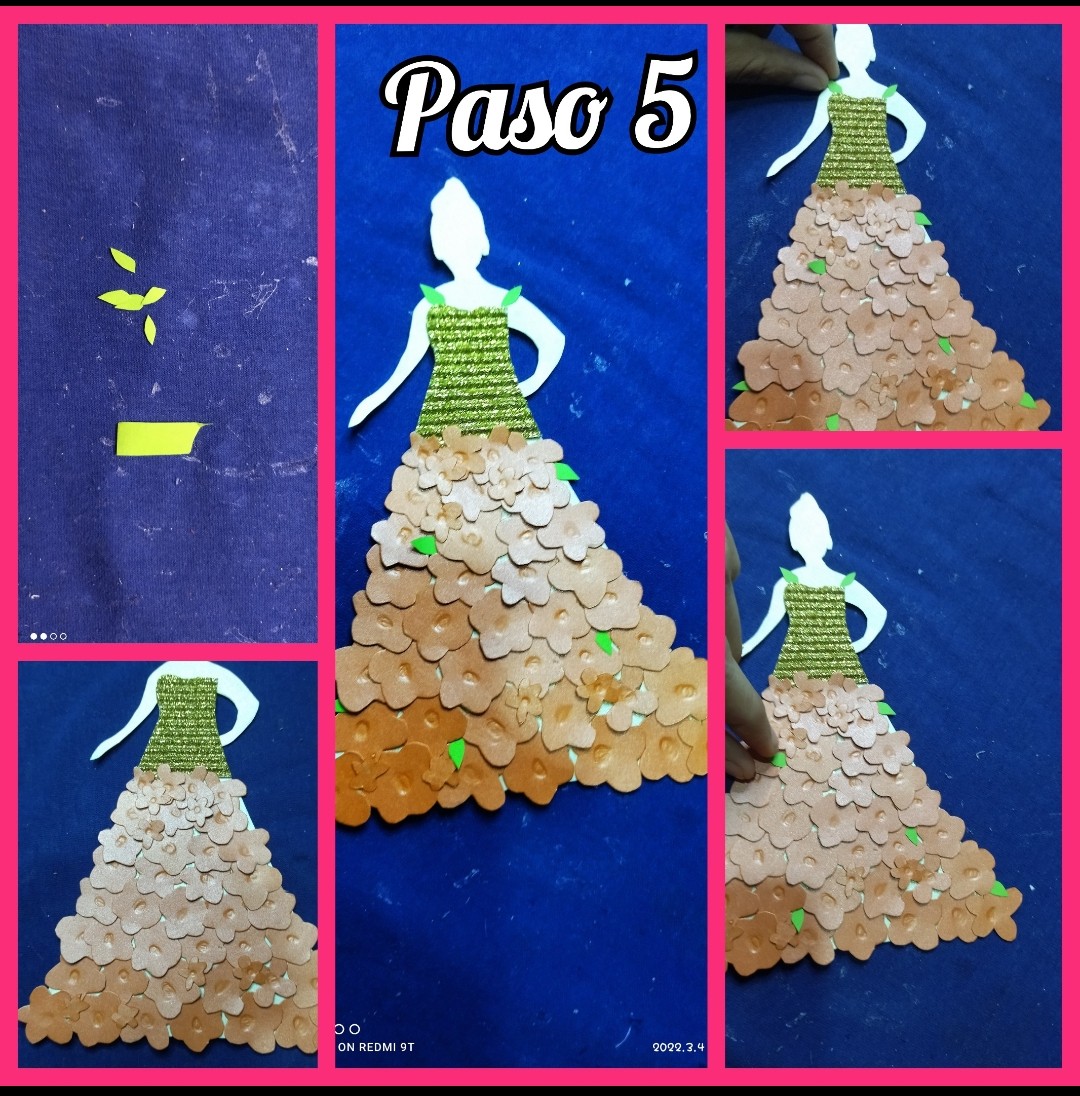
Vamos a tomar un trozo de cartulina verde y sacaremos unas cuantas hojas, las cuales vamos a colocar en la silueta, primero tomamos dos le aplicamos un poco de silicón y las pegamos a modo que formen los tiros del vestido, seguido de eso fui colocando el resto de las hojas en diferentes partes de la falda de la muñeca.
We are going to take a piece of green cardboard and take out a few leaves, which we are going to place on the silhouette, first we take two we apply a little silicone and glue them so that they form the dress straps, followed by placing the rest of the leaves in different parts of the skirt of the doll.
 PASO 6 // STEP 6
🥀🌹🥀🌹🥀🌹🥀🌹🥀🌹🥀
PASO 6 // STEP 6
🥀🌹🥀🌹🥀🌹🥀🌹🥀🌹🥀
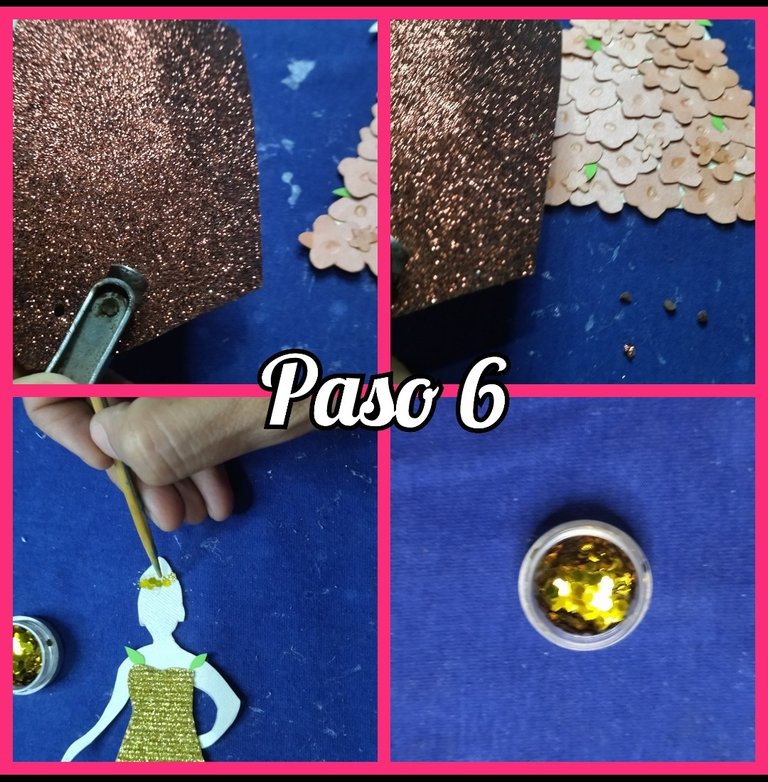
Luego vamos a tomar el pedacito de foami escarchado y con el saca huecos vamos a sacar varios centros, debemos asegurarnos de que el saca huecos sea pequeño, ahora bien si no contamos con uno podemos recortar círculos bien pequeños.
Then we are going to take the little piece of frosted foami and with the hole punch we are going to take out several centers, we must make sure that the hole punch is small, now if we do not have one we can cut out very small circles.
Tome las aplicaciones y las pegué en la cabeza, formando la diadema de la quinceañera.
I took the appliqués and glued them on the head, forming the quinceañera's headband.
 PASO 7 // STEP 7
🥀🌹🥀🌹🥀🌹🥀🌹🥀🌹🥀
PASO 7 // STEP 7
🥀🌹🥀🌹🥀🌹🥀🌹🥀🌹🥀
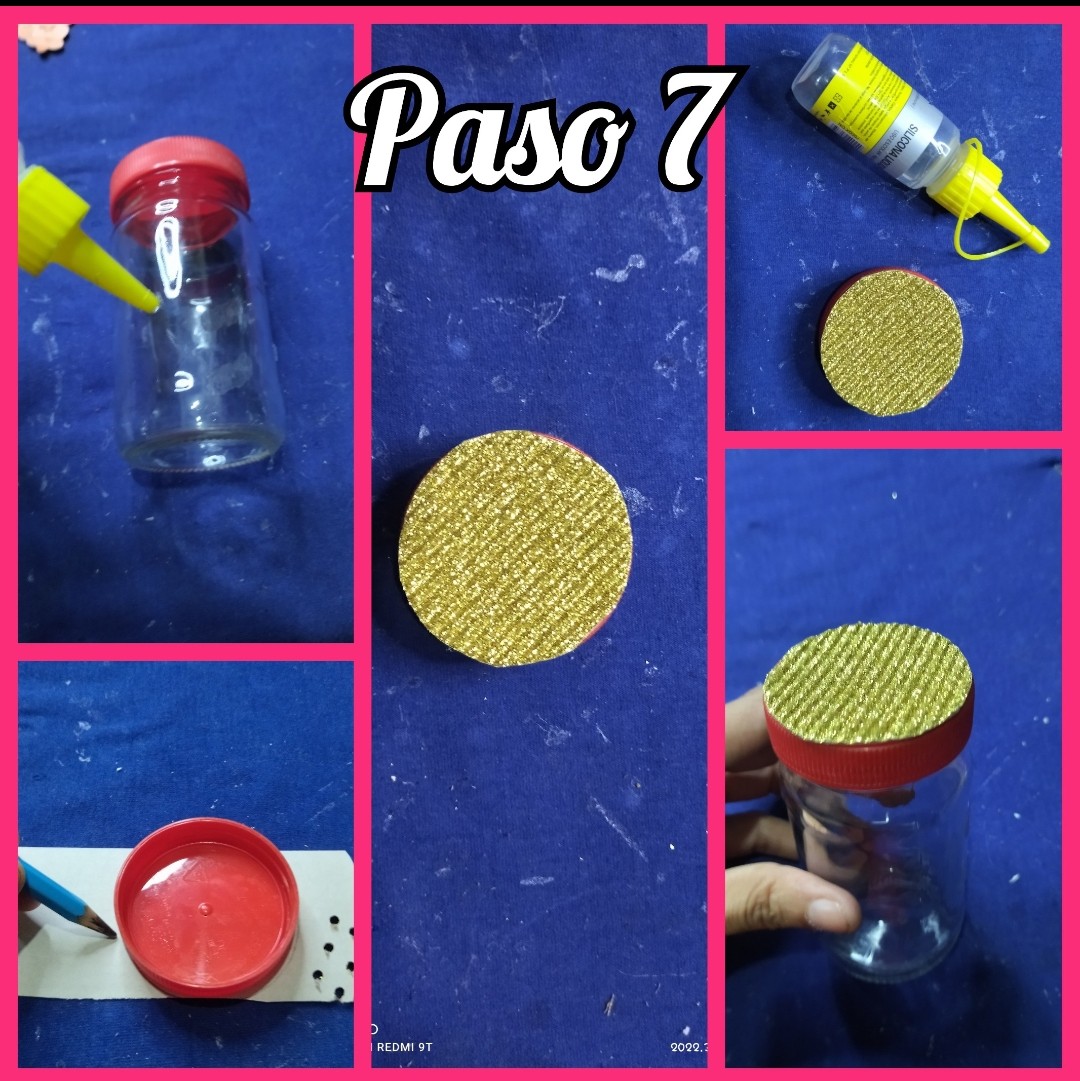
Tomaremos un trozo de cartulina perlada dorada y dibujamos un círculo, el cuál vamos a pegar en la tapa del frasco.
We will take a piece of gold pearlized cardboard and draw a circle, which we will glue on the lid of the jar.
 PASO 8 // STEP 8
🥀🌹🥀🌹🥀🌹🥀🌹🥀🌹🥀
PASO 8 // STEP 8
🥀🌹🥀🌹🥀🌹🥀🌹🥀🌹🥀
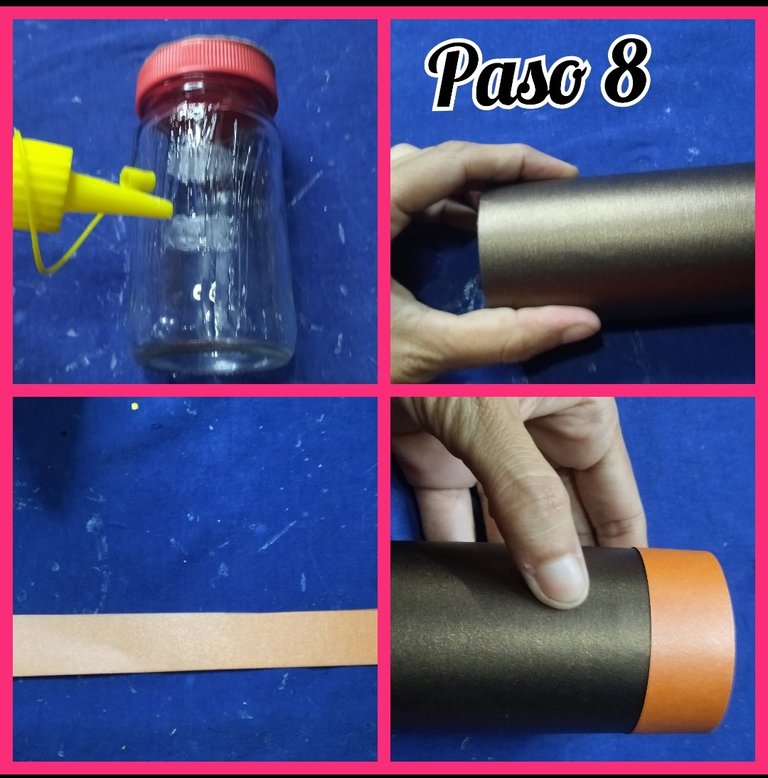
Sacamos una tira gruesa de la cartulina y la vamos a pegar con el silicón en el frasco de vidrio, cubrimos bien, luego saque una tira más delgada de color naranja y la pegue al rededor de la tapa, así de esta forma cubrimos completamente el frasco.
Take a thick strip of cardboard and stick it with the silicone on the glass jar, cover it well, then take a thinner strip of orange color and stick it around the lid, thus completely covering the jar.
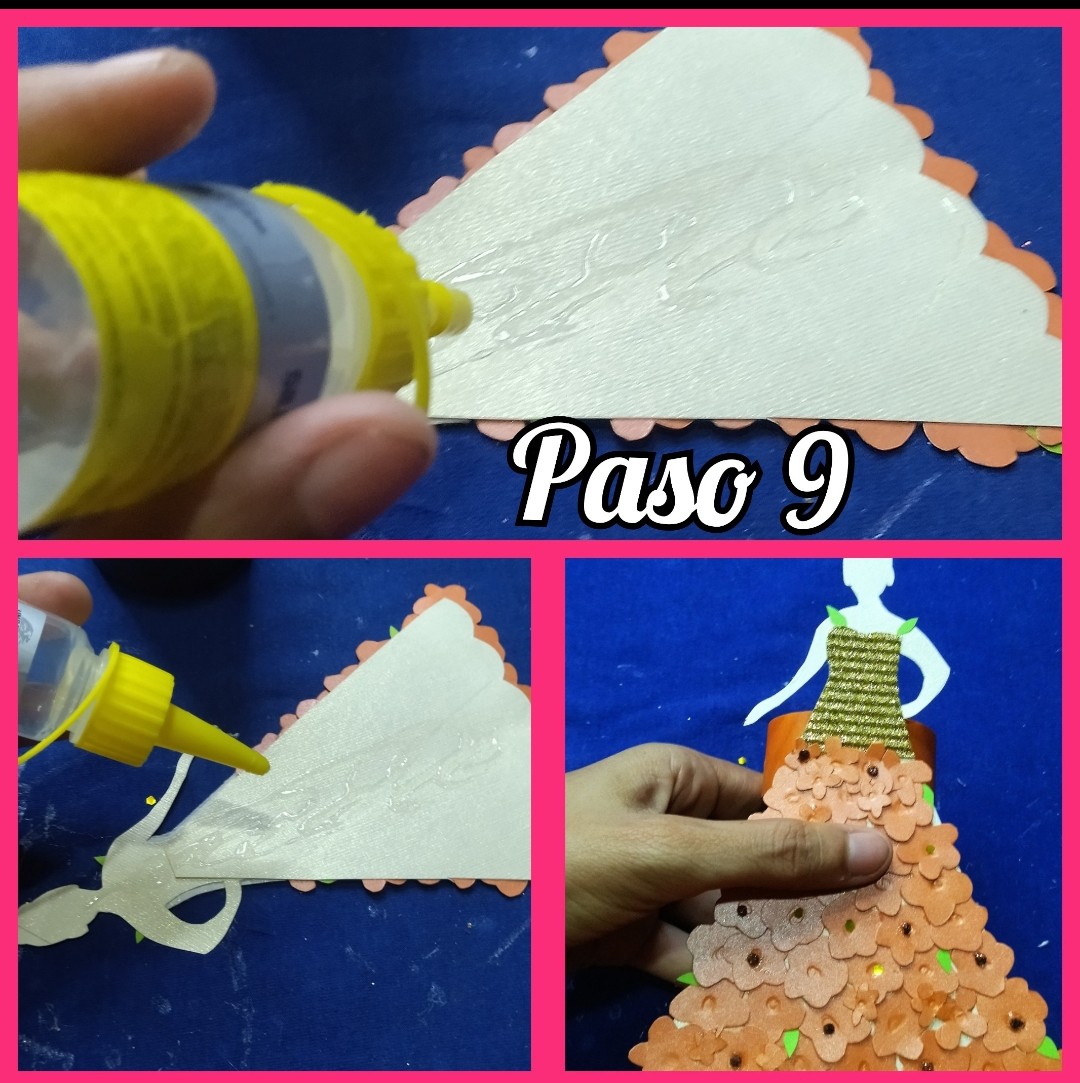
 PASO 9 // STEP 9
🥀🌹🥀🌹🥀🌹🥀🌹🥀🌹🥀
PASO 9 // STEP 9
🥀🌹🥀🌹🥀🌹🥀🌹🥀🌹🥀
Una vez terminada la silueta le colocamos silicón frío por la parte de atrás y procedemos a pegarlos en el frasco, realmente es muy fácil.
Once the silhouette is finished, we put cold silicone on the back and proceed to glue them on the bottle, it is really very easy.
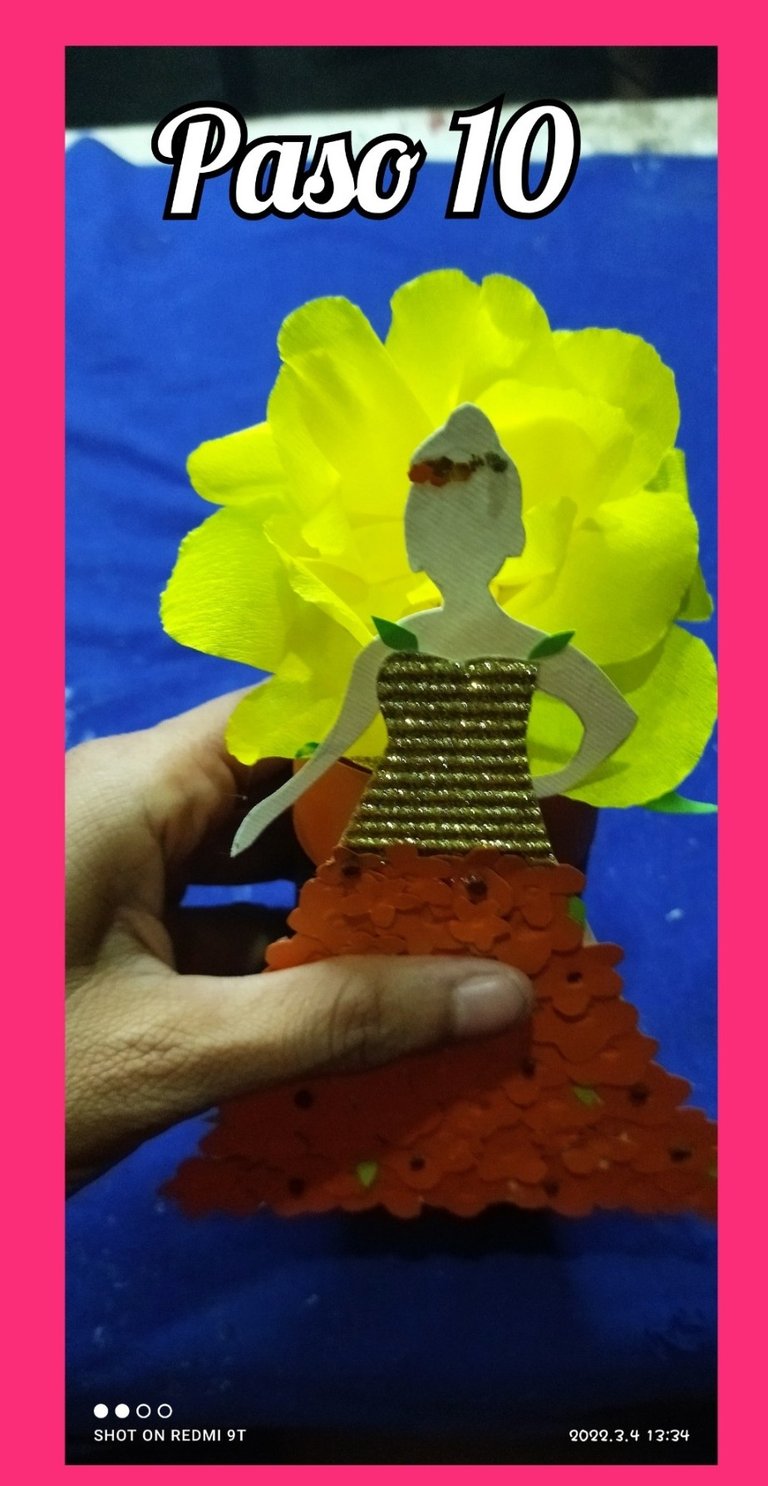
 PASO 10 // STEP 10
🥀🌹🥀🌹🥀🌹🥀🌹🥀🌹🥀
PASO 10 // STEP 10
🥀🌹🥀🌹🥀🌹🥀🌹🥀🌹🥀
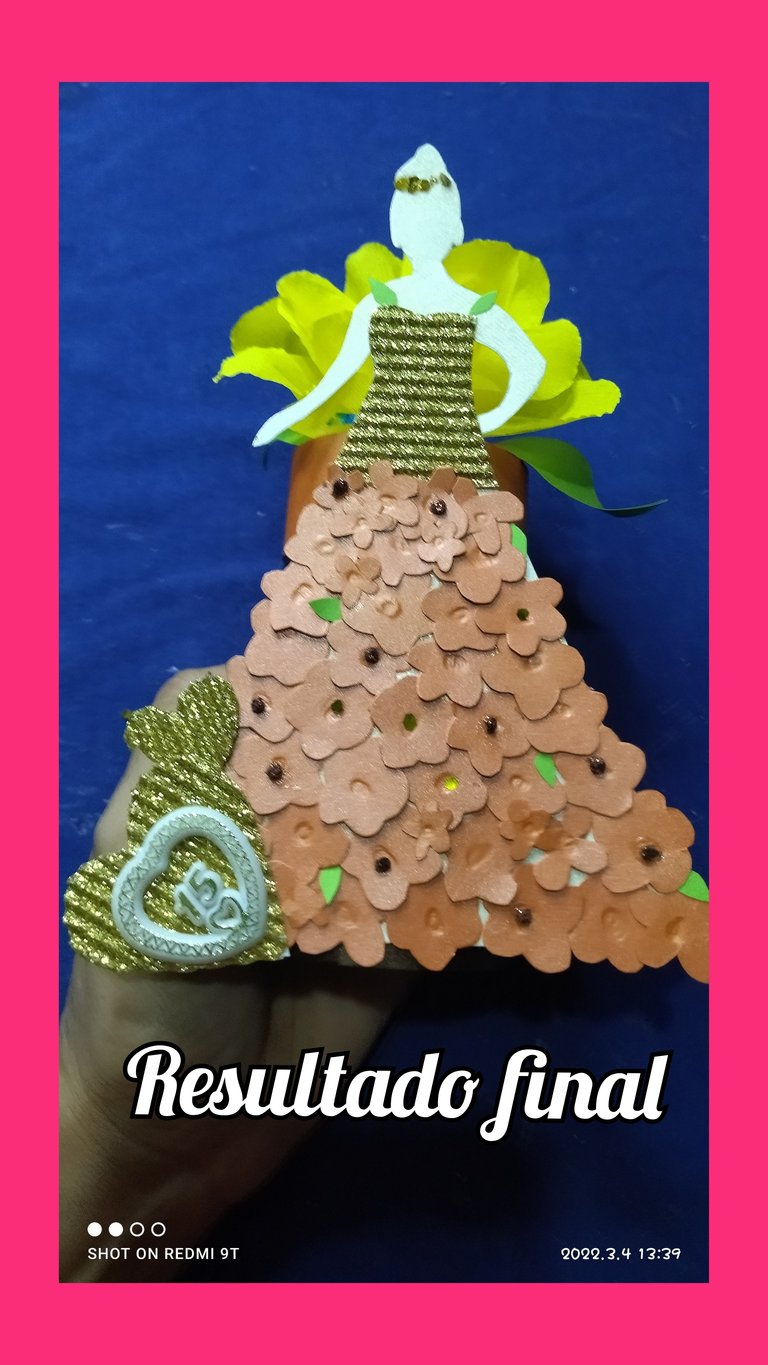
Para darle un toque más Romántico al centro de mesa le coloque una rosa de papel que yo había elaborado en otro post, pueden ver en la foto lo lindo que queda.
To give a more romantic touch to the centerpiece I placed a paper rose that I had made in another post, you can see in the photo how nice it looks.
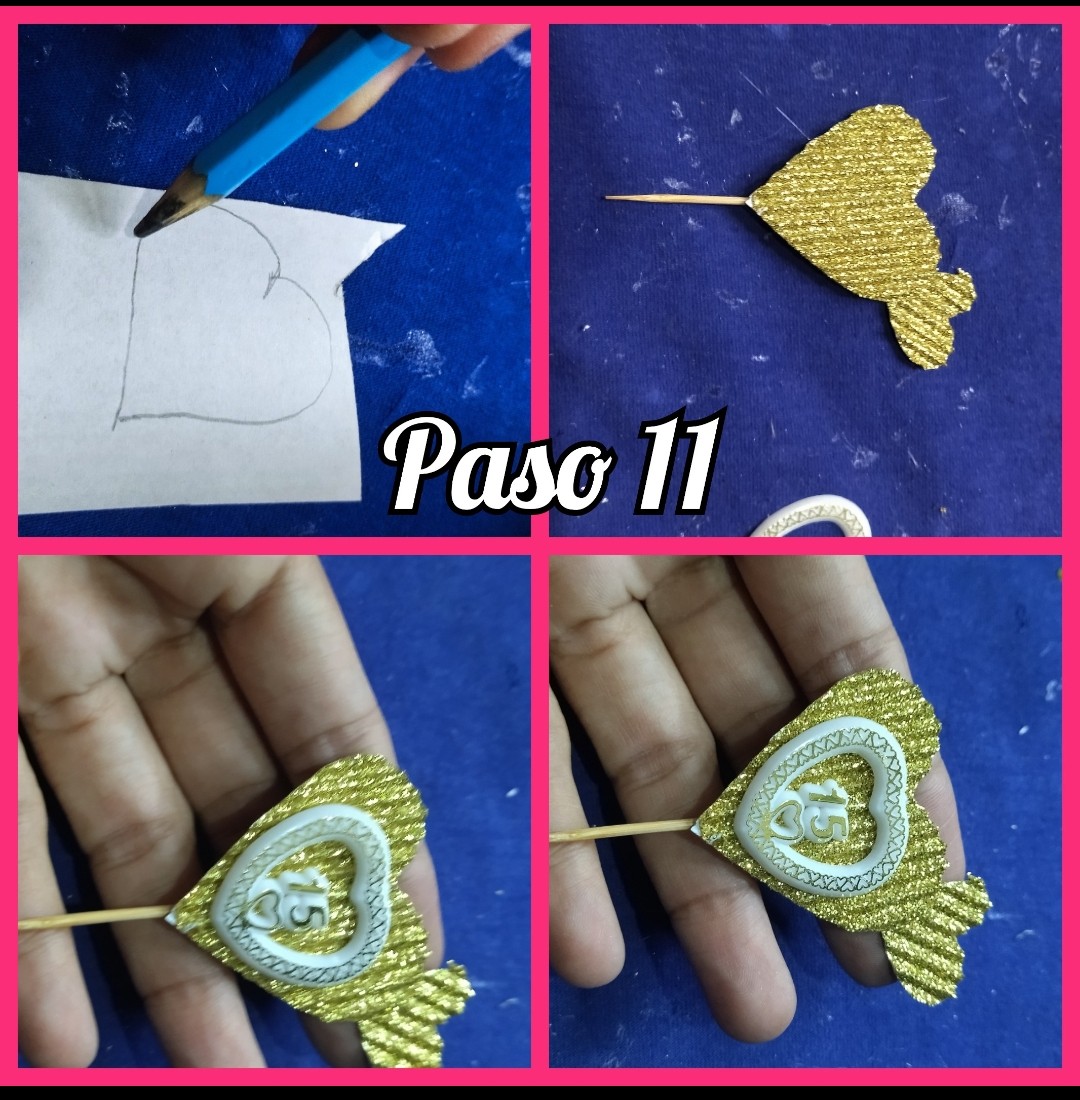
 PASO 11 // STEP 11
🥀🌹🥀🌹🥀🌹🥀🌹🥀🌹🥀
PASO 11 // STEP 11
🥀🌹🥀🌹🥀🌹🥀🌹🥀🌹🥀
Luego dibuje unos corazones en la cartulina perlada dorada y los monte con un poco de silicón en un palillo, Finalmente le coloque una aplicación de 15 años,en el centro de uno de los corazones, y después lo pegué al final del vestido.
Then I drew some hearts on the gold pearlized cardboard and mounted them with a little silicone on a toothpick. Finally I placed a 15 years application in the center of one of the hearts, and then I glued it to the end of the dress.
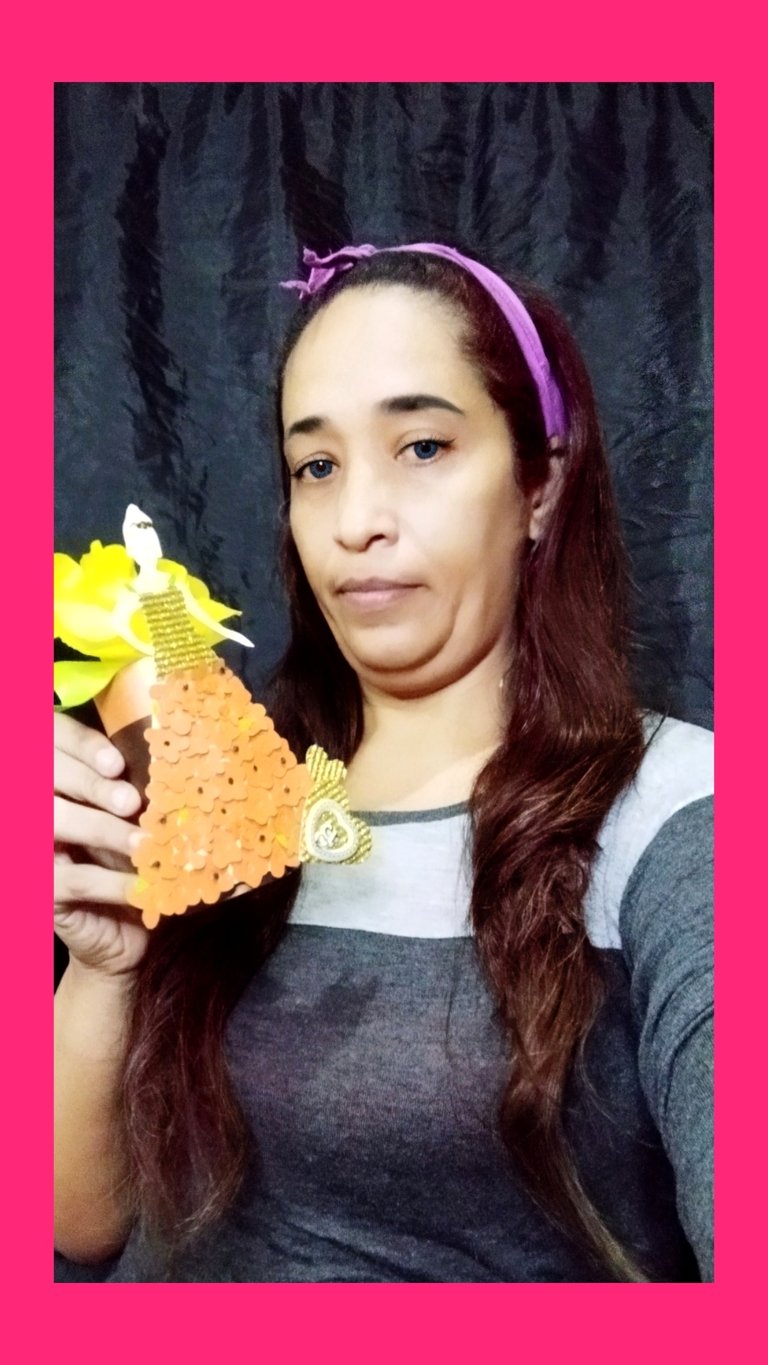
 RESULTADO FINAL//FINAL RESULT
🥀🌹🥀🌹🥀🌹🥀🌹🥀🌹🥀
RESULTADO FINAL//FINAL RESULT
🥀🌹🥀🌹🥀🌹🥀🌹🥀🌹🥀
 🥀🌹🥀🌹🥀🌹🥀🌹🥀🌹🥀
 🥀🌹🥀🌹🥀🌹🥀🌹🥀🌹🥀
 🥀🌹🥀🌹🥀🌹🥀🌹🥀🌹🥀
 🥀🌹🥀🌹🥀🌹🥀🌹🥀🌹🥀
 🥀🌹🥀🌹🥀🌹🥀🌹🥀🌹🥀
Bueno mis bellezas esto ha Sido todo por el día de hoy, espero que esta propuesta les haya gustado, realmente es un detalle muy bonito que puede hacerse colocando otro tipo de figuras, por si la fiesta tiene una temática y color específico, como por ejemplo estrellas, flores, etc solo debemos dejar fluir nuestra imaginación, si lo hacemos les aseguro que el resultado será muy bonito. Bueno ahora sí me despido, y si te gustó mi post ya sabes que hacer comenta, vota y rebloguea, nos vemos en el siguiente post.
Well my beauties this has been all for today, I hope you liked this proposal, it really is a very nice detail that can be done by placing other types of figures, if the party has a specific theme and color, such as stars, flowers, etc. We just have to let our imagination flow, if we do I assure you that the result will be very nice. Well now I say goodbye, and if you liked my post you know what to do comment, vote and reblog, see you in the next post.
🥀🌹🥀🌹🥀🌹🥀🌹🥀🌹🥀
🥀Todas las fotos fueron tomadas con mi teléfono Xiaomi readmi 9T y son de mi propiedad.
🥀All photos were taken with my Xiaomi readmi 9T phone and are my property.
🥀 Utilicé el traductor Deepl y el programa polish para la edición de las fotos.
🥀 I used Deepl translator and polish for photo editing.
🥀🌹🥀🌹🥀🌹🥀🌹🥀🌹🥀
 🥀🌹🥀🌹🥀🌹🥀🌹🥀🌹🥀