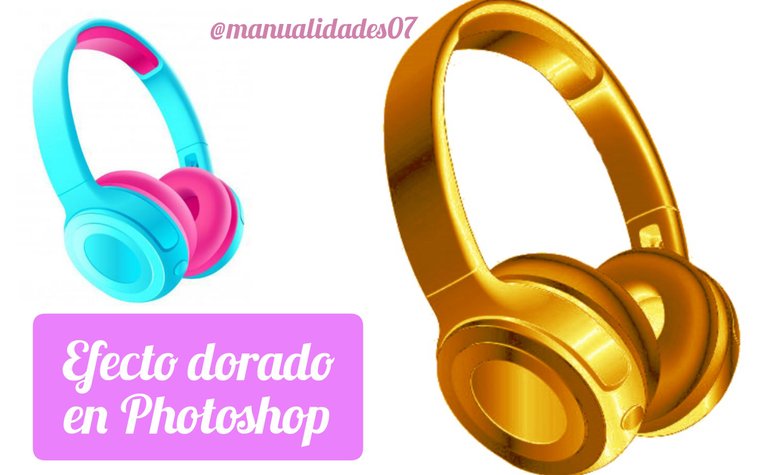
EFECTO DORADO EN PHOTOSHOP
Así que ya con una idea de lo que necesitaba y un poquito de lógica e improvisación, llegue a este resultado de forma rápida y con un acabo muy bello.
Es importante que la primera vez se siga el paso a paso con cuidado ya que puede ser un poco confuso porque los pasos se repiten.
A continuación intentare explicarlo de la manera más sencilla que pueda para ustedes.
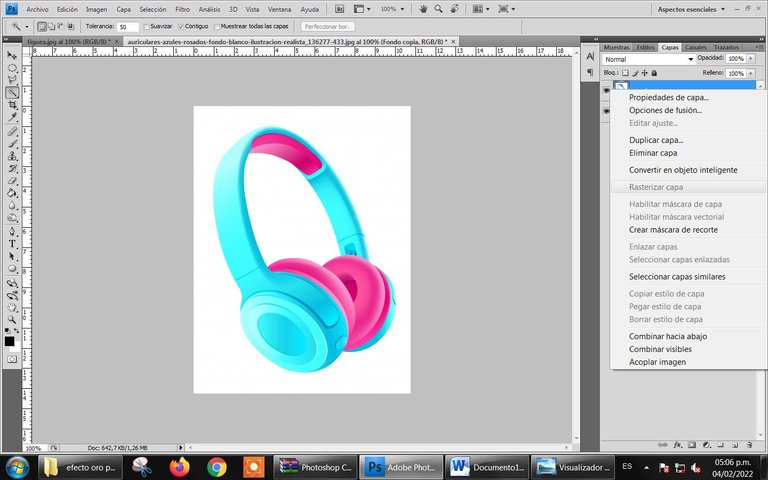
- Abrir imagen
GOLDEN EFFECT IN PHOTOSHOP
A few days ago I was making some designs in photoshop for a decoration and I needed to generate a golden effect on the figure, I began to see several tutorials on the internet that started very simply but then got complicated and complicated and finally, it didn't turn out as it should.
So, with an idea of what I needed and a little bit of logic and improvisation, I arrived at this result quickly and with a very beautiful finish.
It is important that the first time you follow the step by step carefully as it can be a bit confusing because the steps are repeated.
Here I will try to explain it in the simplest way I can for you.
- Open image

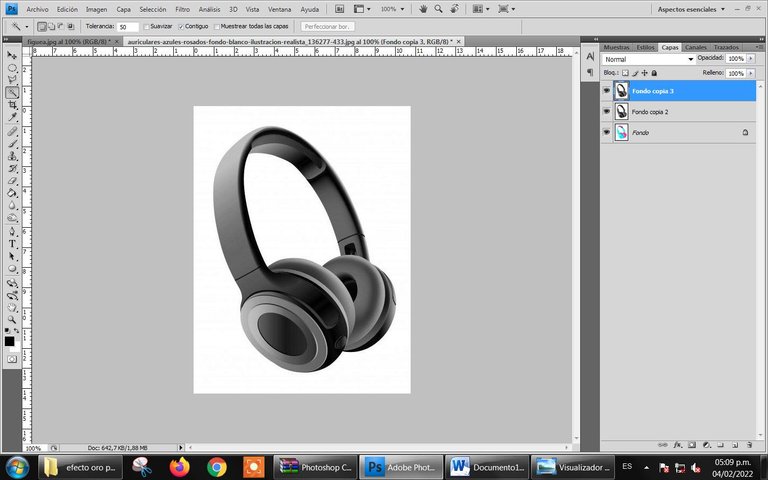
- Duplicar capa
- Rasterizar capa duplicada (si esta opción aparece en color gris, no hace falta realizar este paso)
- Duplicate layer
- Rasterize Duplicate Layer (if this option is greyed out, this step is not required).
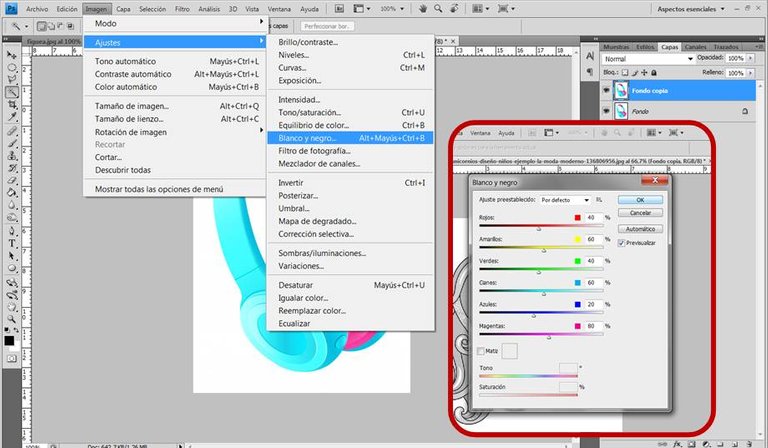
- Seleccionamos la capa duplicada y rasterizada y la convertimos a Blanco y negro
- We select the duplicated and rasterized layer and convert it to Black and White
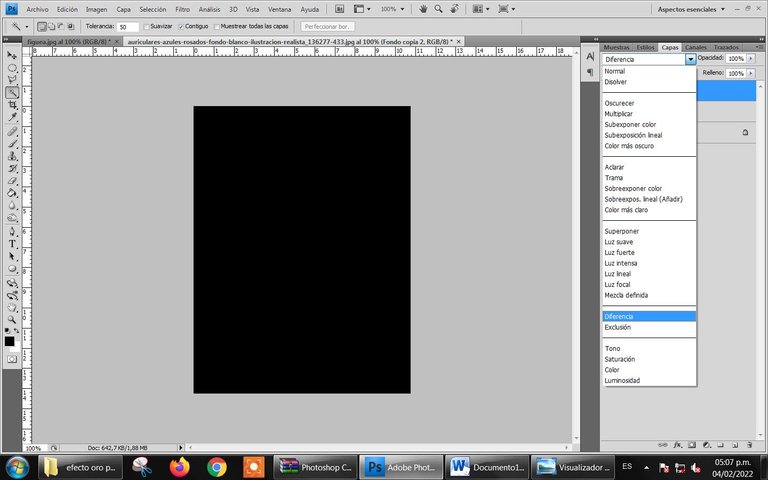
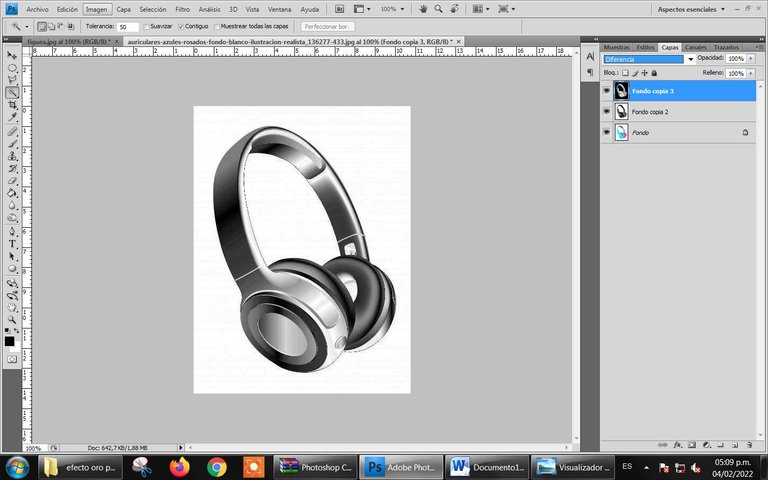
- Duplicamos la capa blanco y negro, y a esa nueva capa la convertimos de normal a diferencia
- We duplicate the black and white layer, and we convert that new layer from normal to difference
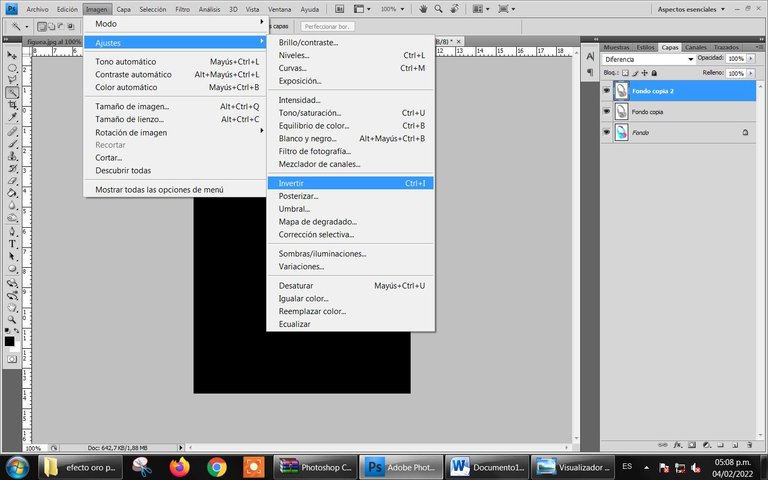
- Seleccionamos esa tercera capa e invertimos
- We select that third layer and invert
- Combinamos las últimas dos capas y la nueva capa resultante, la duplicamos
- We combine the last two layers and the new resulting layer, we duplicate it
- A esta nueva capa duplicada la vamos a cambiar a Diferencia y luego invertimos como en los pasos anteriores y combinamos
- We are going to change this new duplicated layer to Difference and then invert as in the previous steps and merge
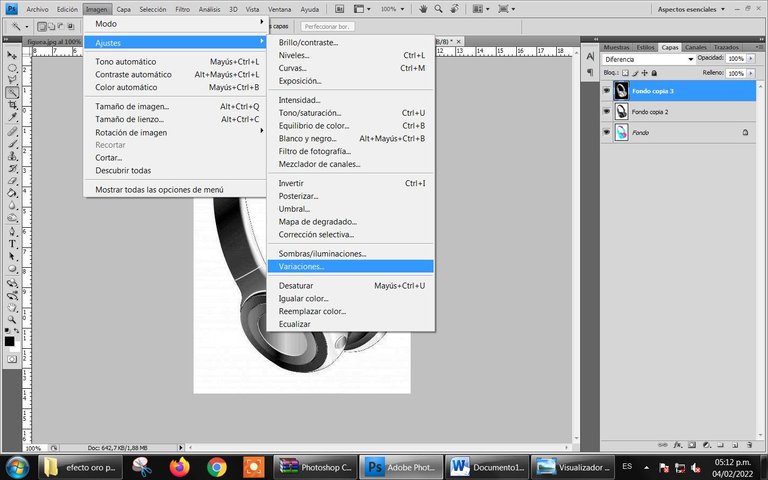
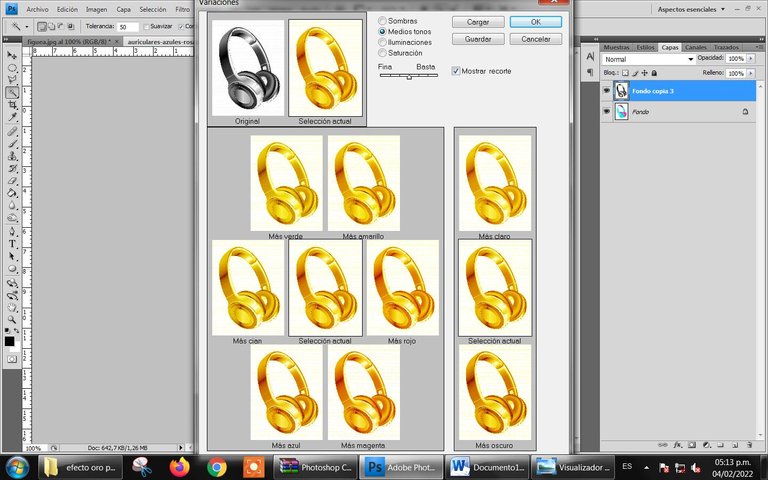
- Ya en este punto la imagen se ve muy bien, y puedes jugar con los colores y los efectos de muchas maneras, pero para continuar con el efecto dorado, será tan sencillo como ir a las variaciones
Aquí podrás escoger el tono de dorado que deseas, si lo haces mas claro y brillante o si lo quieres mas oscuro
- Already at this point the image looks great, and you can play with the colors and effects in many ways, but to continue with the golden effect, it will be as simple as going to the variations
Here you can choose the tone of gold you want, if you make it lighter and brighter or if you want it darker
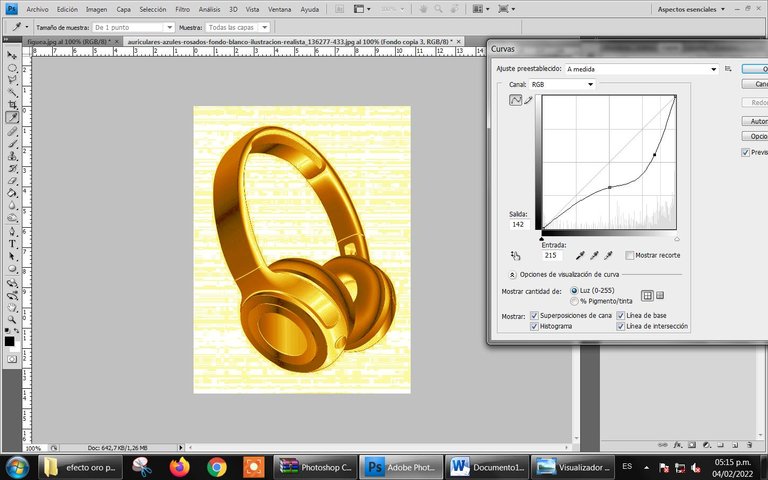
- Una vez que escoges el tono que mas se acomoda a tus necesidades, nos vamos a jugar con las curvas
Once you choose the tone that best suits your needs, we are going to play with the curves
En mi caso mis curvas quedaron así
In my case my curves were like this
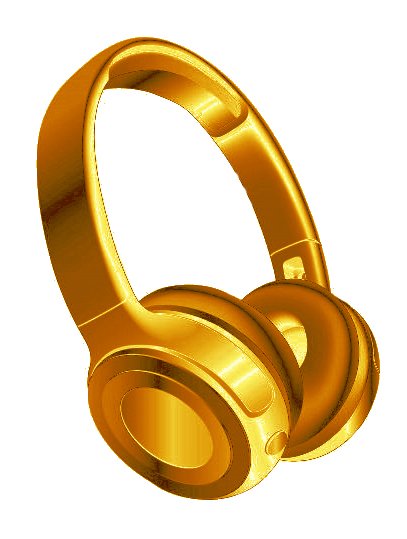
Limpie el fondo y así quedo el resultado final.
Clean the background and so is the final result.
Espero que les haya gustado y les sea de mucha utilidad este tutorial
I hope you like this tutorial and will be very useful for you.