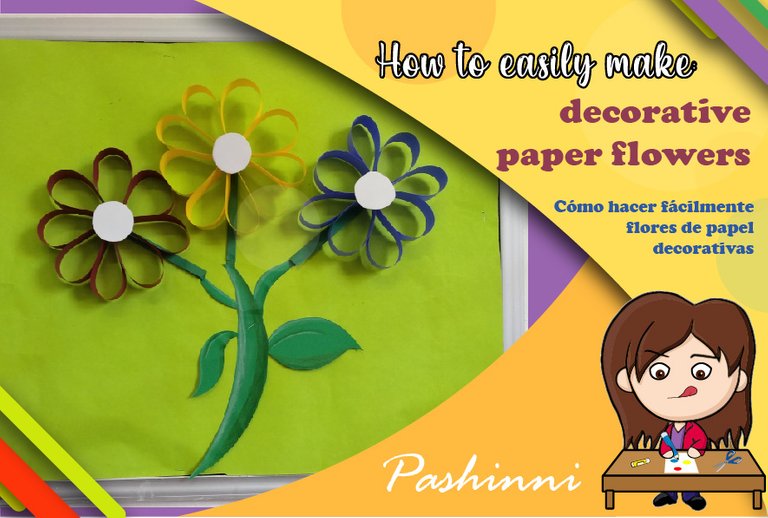
Hey everyone! Spring is almost here and so its decorations!
I work at a school and I have to help decorate the classrooms every week, and there's a big board at the back of each classroom that have to be decorated each month.
I didn't have much time to make decorations for the classrooms I'm assigned to, and not many materials. All I had were sheets of color paper.
¡Hola a todos! ¡la primavera llegó y con ella sus decoraciones!
Trabajo en una escuela y tengo que ayudar a decorar los salones cada semana, y hay una gran pizarra al fondo de cada salón que tienen que ser decoradas cada mes.
No tenía mucho tiempo para hacer las decoraciones para los salones que me asignan, y no muchos materiales. Todo lo que tenían eran hojas de colores.
Materials:
- Colored paper, 1 sheet per flower
- Scissors or cutter
- Glue in stick and liquid
- Color pencils
Materiales
- Hojas de colores, 1 hoja por flor
- Tijeras o navaja exacto
- Pegamento en barra y líquido
- lápices de colores
Step 1
Paso 1
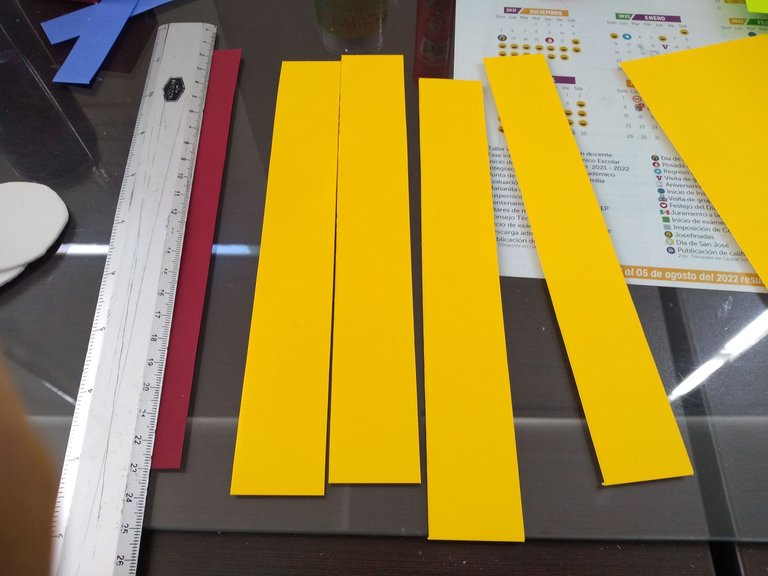
Cut stripes of the sheet of paper, in order to make it fast I didn't measure, I just cut using the ruler itself as a width measurement, that way I made sure all stripes were the same size and with the cutter was fast and smooth, if you don't have a cutter then first draw pencil lines across the paper and then cut it with the scissors.
Corta tiras de la hoja de papel, para hacerlo más rápido no medí, solo corté usando la regla como tal como medida de anchura, de esa manera me aseguré que todas las tiras fueran del mismo tamaño y con el exacto fue un corte rápido, si no tienen exacto entonces primero tracen las líneas con lápiz y luego corten con tijeras.
Step 2
Paso 2
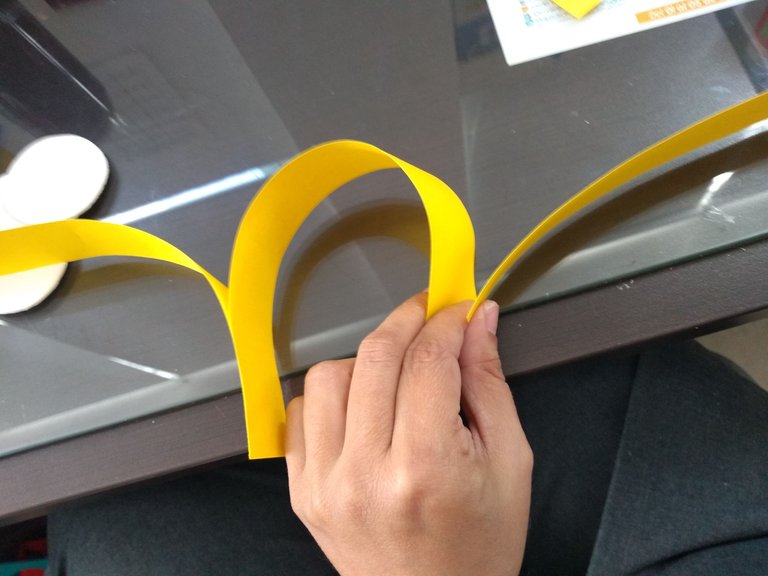
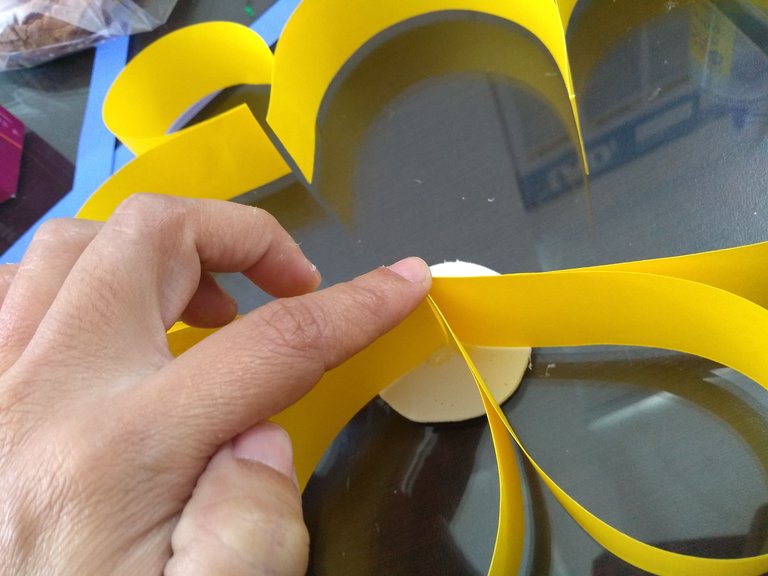
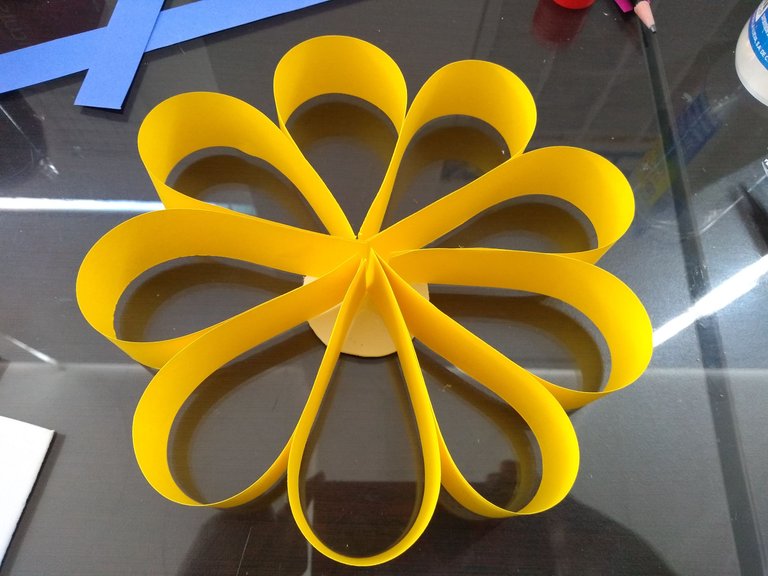
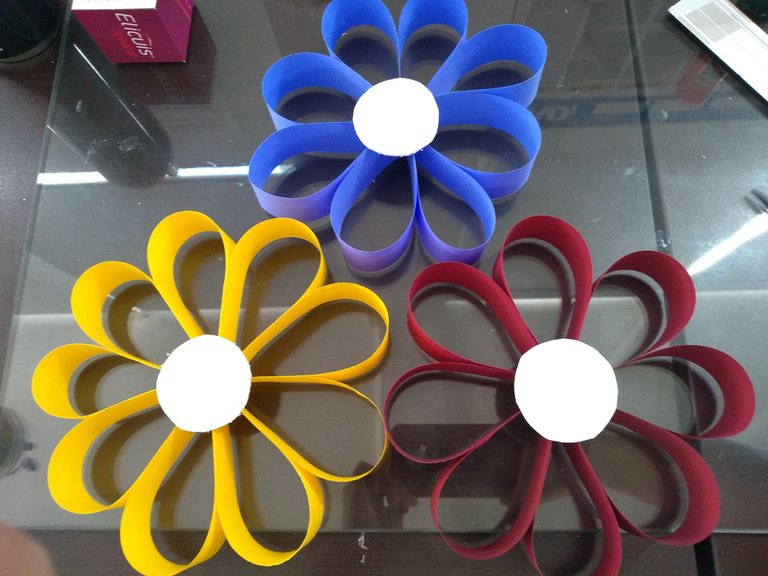
Glue each stripe with each other, creating "m"s one after the other using all the stripes you got from the sheet, in my case I got 8 strips so that'll be the number of petals each flower will have. Glue the last strip to the first one to complete the circular form.
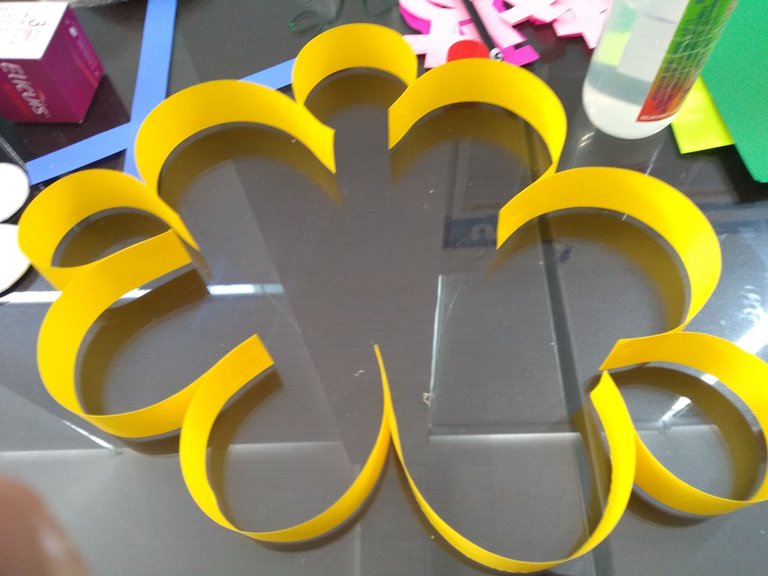
Peguen cada tira entre ellas, creando "m"s una tras otra usando todas las tiras que obtuvieron de una hoja, en mi caso saqué 8 tiras así que ese será el número de pétalos que cada flor tendrá. Peguen la última tira a la primera para completar la forma circular.
Step3
Paso 3
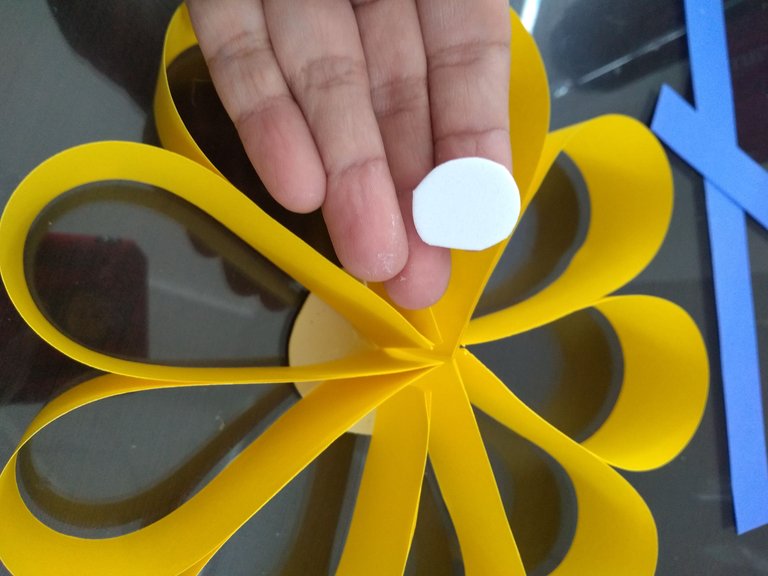
Cut a small circle of a different color of paper, it'll be the center of the petals, I used white for all the flowers, and put a couple of drops of liquid glue on the center of your circle and then glue the tips of the strips that were sticked together.
Corta un círculo pequeño de un color diferente de papel, será el centro de los pétalos, yo usé blanco para todas las flores, y coloca un par de gotas de pegamento líquido al centro del círculo, después pega las puntas de las tiras que pegaste antes.
Step 4
Paso 4
Cut another circle for the back, in my case I cut it smaller than the one in the front so that it won't be easily seen. Paste this circle in the center, this circle works not only to keep the petals on their place but also that's where you can glue the stem.
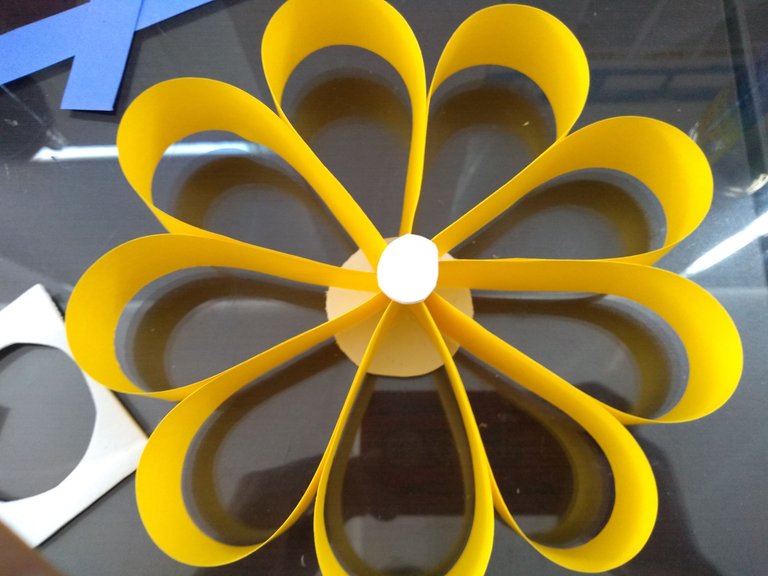
Corta otro círculo para el reverso, en mi caso corté uno más pequeño que el de adelante para que no se vea mucho. Pega este círculo al centro, este círculo sirve no solo para mantener los pétalos en su lugar sino que de ahí puedes pegar el tallo.
Step 5
Paso 5
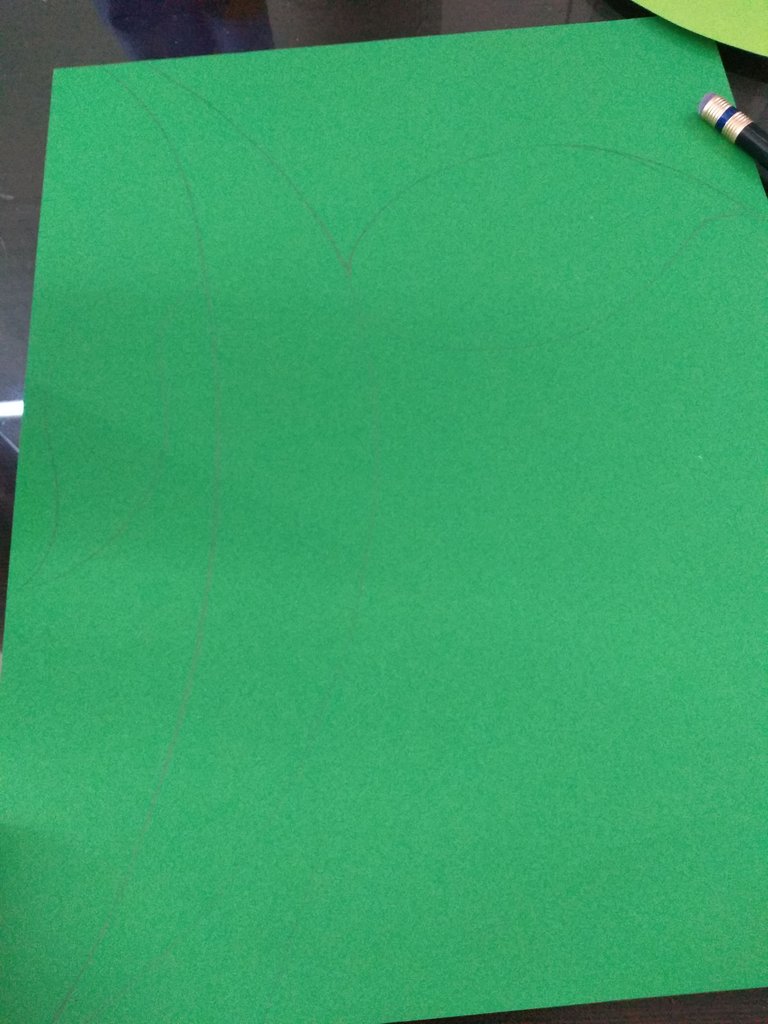
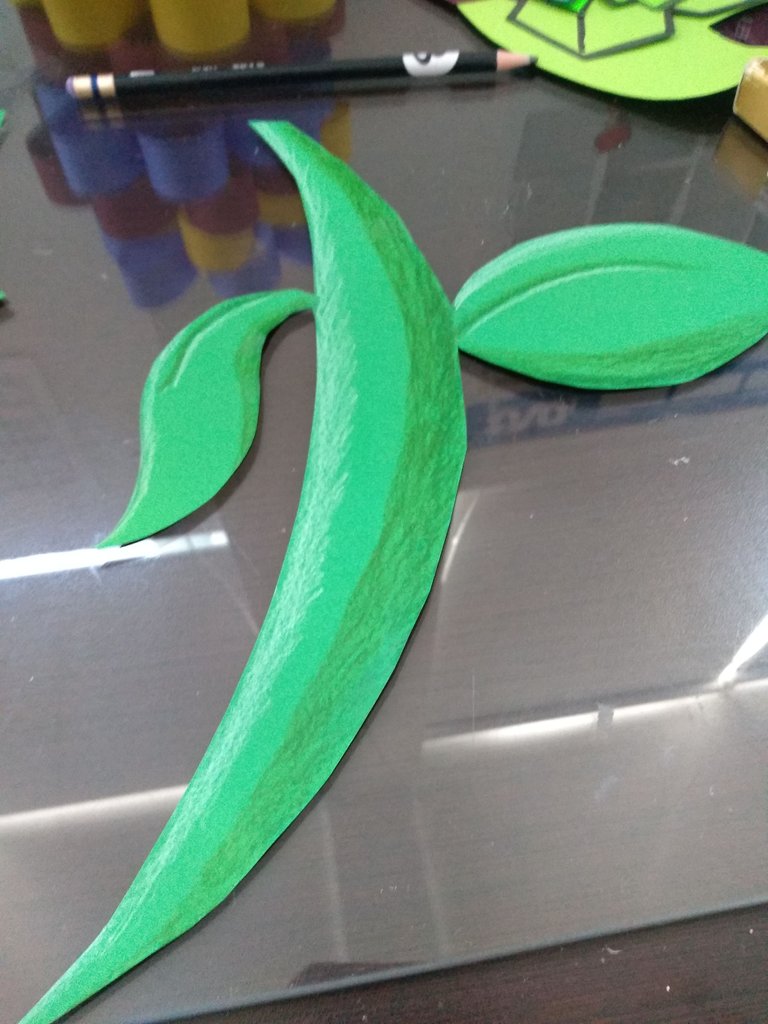
On a green paper, draw and cut the stem and its leaves, if you want you can add some shades and light with color pencils as a detail.
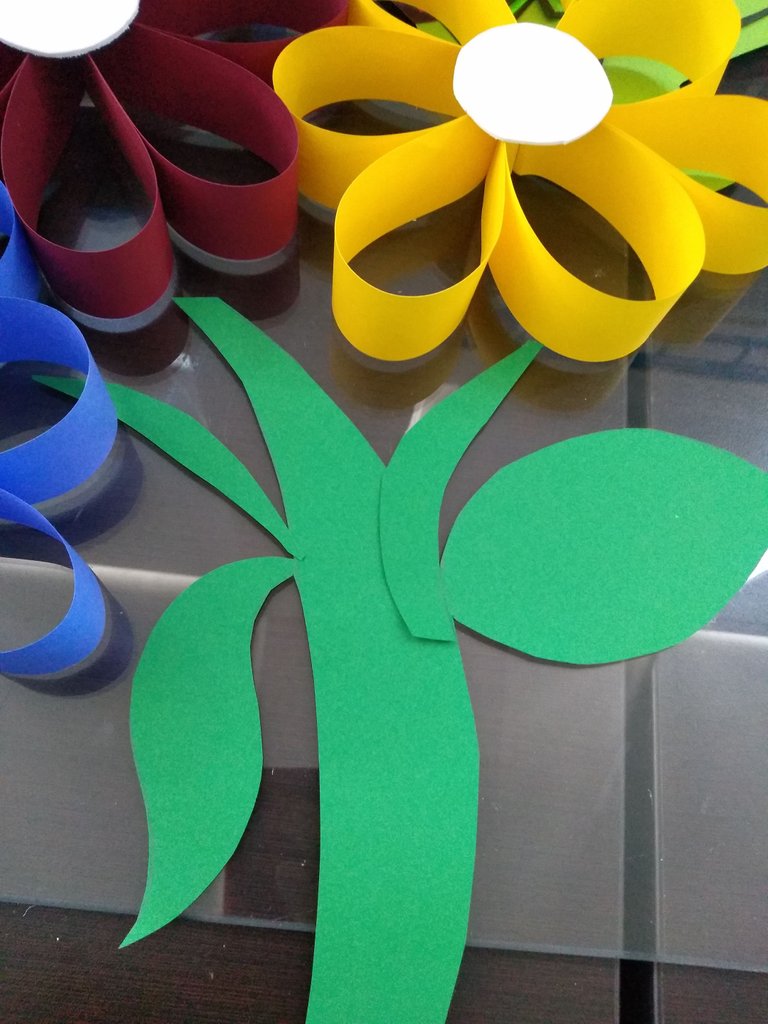
My idea was to have 3 flowers coming out of the same stem, so I added 2 little more stems, which later I made longer to reach the center of each flower.
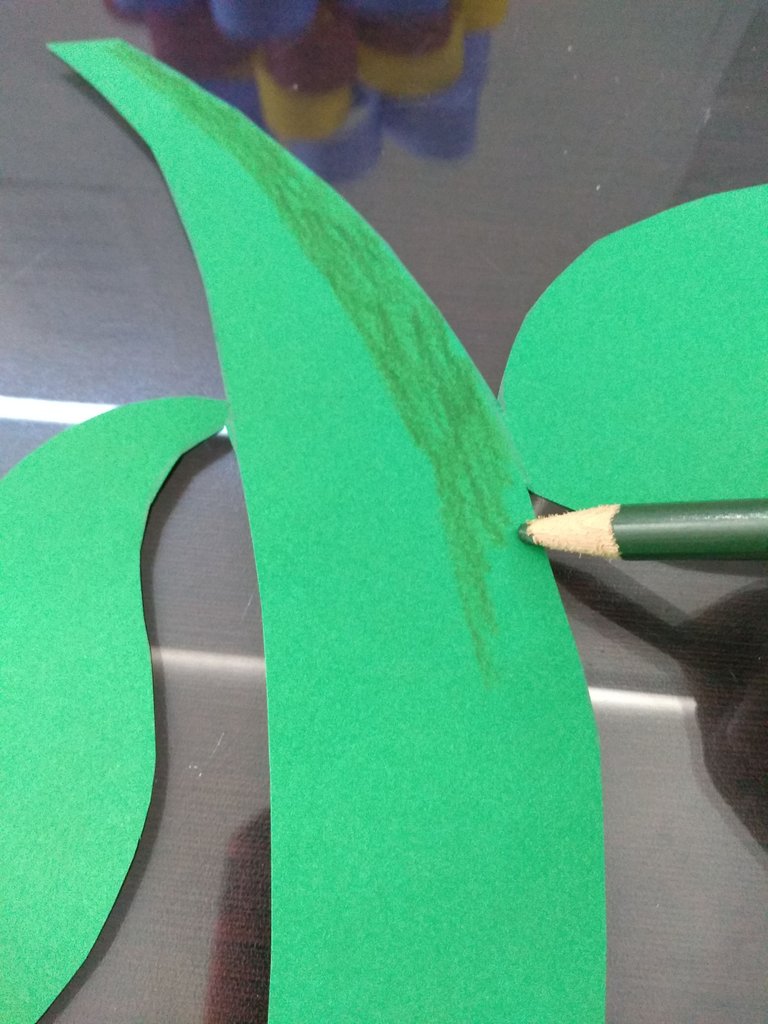
En una hoja verde, dibuja y corta el tallo y sus hojas, si quieres puedes agregar algo de luces y sombras con lápices de colores como detalle.
Mi idea era tener 3 flores saliendo del mismo tallo, así que añadí 2 pequeños tallos más, los cuales después volví a hacer pero más largos para alcanzar el centro de cada flor.
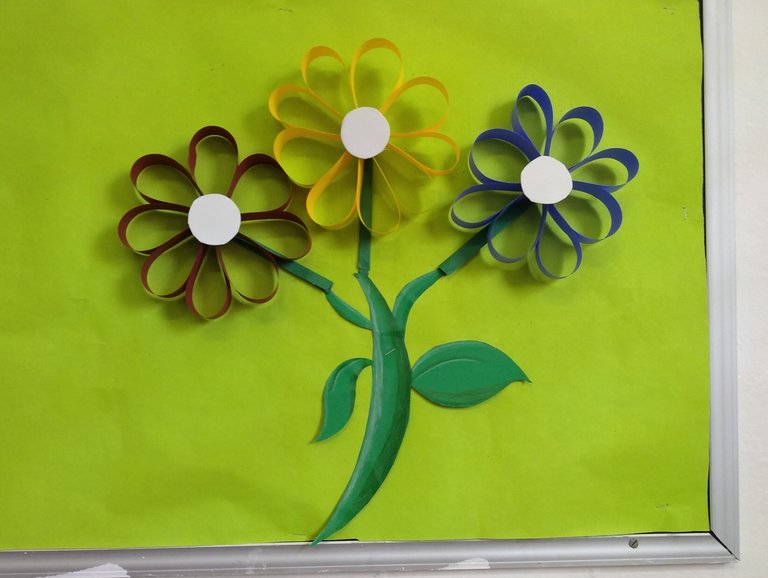
The longest stems were made in a rush, I had time over me 😅 but in the end, just a couple of bouquets like that one were enough to fill a lot of space of the decorated board, also I had some flowers without stem just pasted on random places to fill the blanks.
So if you need some fast paper flowers and think you don't have enough paper, try something like this.
Los tallos más largos los hice apresurada, tenía el tiempo encima 😅 pero al final, solo un par de ramos como este fueron suficientes para llenar mucho espacio de la pizarra a decorar, también puse flores sin tallo pegadas aleatoriamente para llenar los espacios.
Así que si necesitan unas flores de papel rápido y piensan que no tienen suficiente papel, intenten algo como esto.

Banners designed by me with Ai.
Social media icons drawn by me with Procreate.


If you want to enjoy some cool mash up mixes, feel free to visit my brother LuigiParrinni's youtube channel.
You can find me at:
    |
|---|
