Greetings to the Hive DIY community, I hope you are having a productive and, if possible, fairly calm week.
I've been doing minor jobs that don't cover enough to publish, so I'll share two jobs that aren't very complex, but can be interesting.

Image's Source - Image Source
At home I had a problem with the range of the Wii signal, to solve it I needed a signal repeater or move the modem to another location.
Since none of the options were viable, one due to the location of the network connection point and the other due to a very low financial budget, I had to exercise a little creativity.
Create a cardboard screen, covered with aluminum foil (called tin foil or metallic foil in some parts), the modem is on the wall facing the outside, it is one end of the house and the signal does not have to go through That wall, the aluminum foil is so that the Wii signal is reflected inside the house.
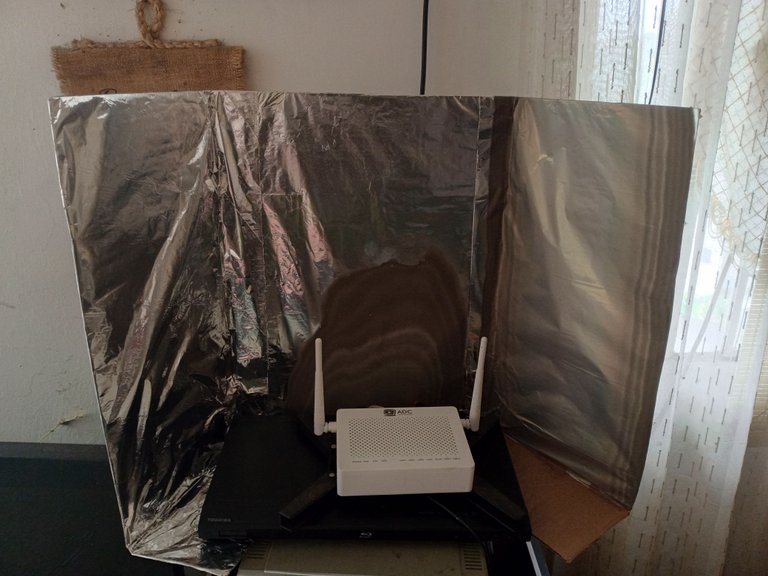
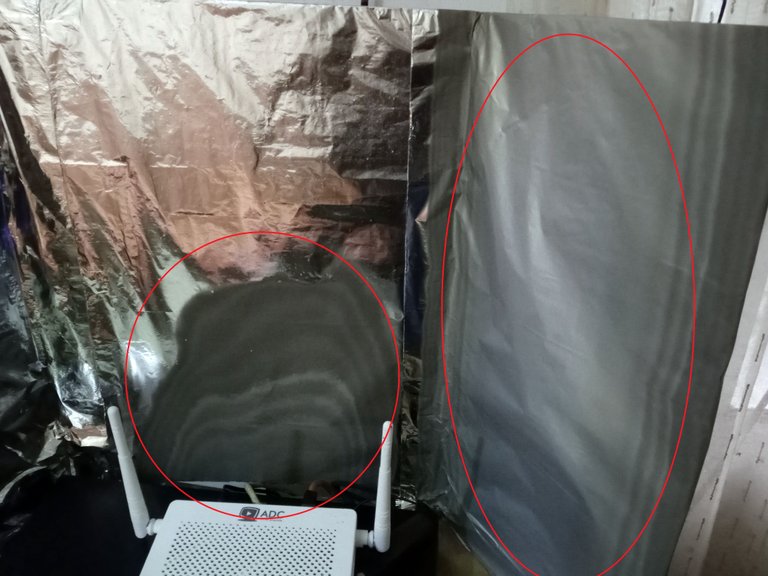
To do that job, I had two rolls of aluminum foil without any use, but there was only a small segment of the metallic foil in good condition on only one of the rolls of paper, I was not very happy with the matter, I spent the money and both rolls were damaged.
Despite everything, I put the screen together, I didn't expect it to work, but happily, now I have a signal throughout the house. In the future, I now have to buy another roll of metallic paper from a different store and I hope that the paper is not damaged, to improve the screen.
I spend time recycling, as you know if each of us makes a small effort, no matter how minimal it may seem, the result is worth it in the end.

Image's Source - Fuente de la Imagen
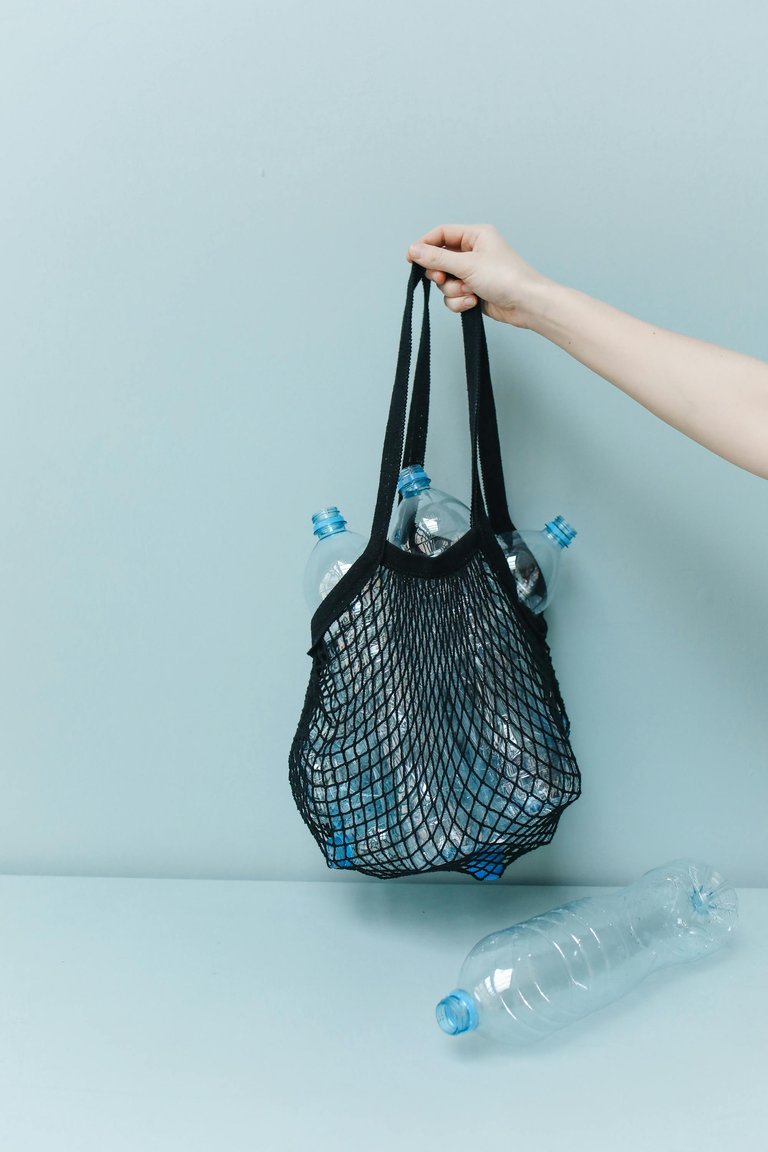
It is the reason for my next job, I needed a cutter to recycle PET bottles.
As you know, plastic is the most common material for many containers, but its degradation process in the environment is very slow, so recycling projects are about reusing those plastic bottles and containers and reducing the amount ends up in the environment.
Image's Source - Image Source
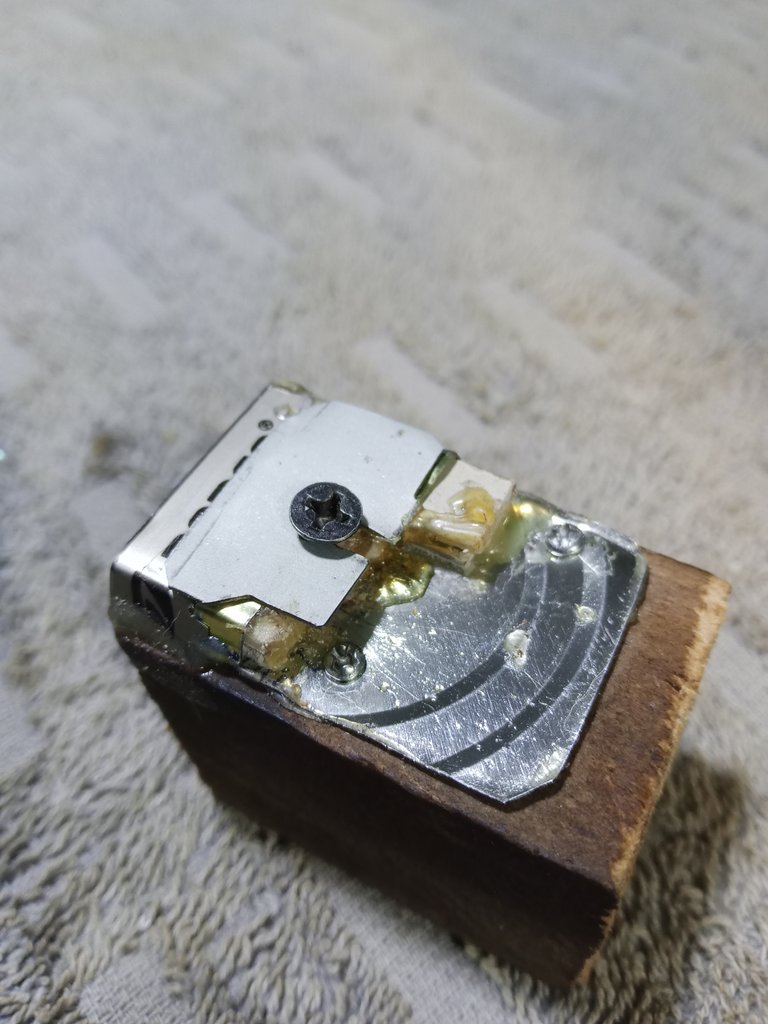
A manual cutter for PET bottles is a very simple tool, you only need a cutting blade and a support, it can even be made with the plastic cap of a bottle.
I was creating my own PET bottle cutter, for that I worked as always with recycled material, I admit that I made many mistakes, it seems hard to believe that making something that is so simple could cause so many errors.
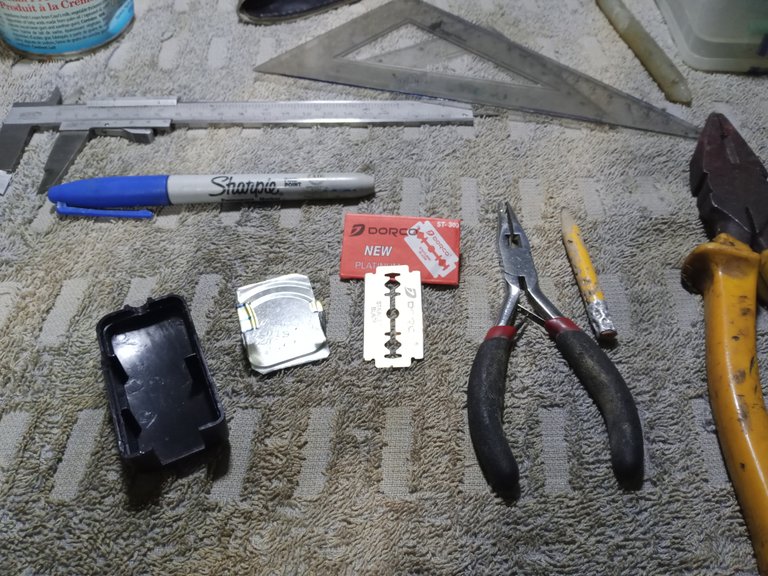
In the first design I tried to work with a phone charger case, but that model didn't work.
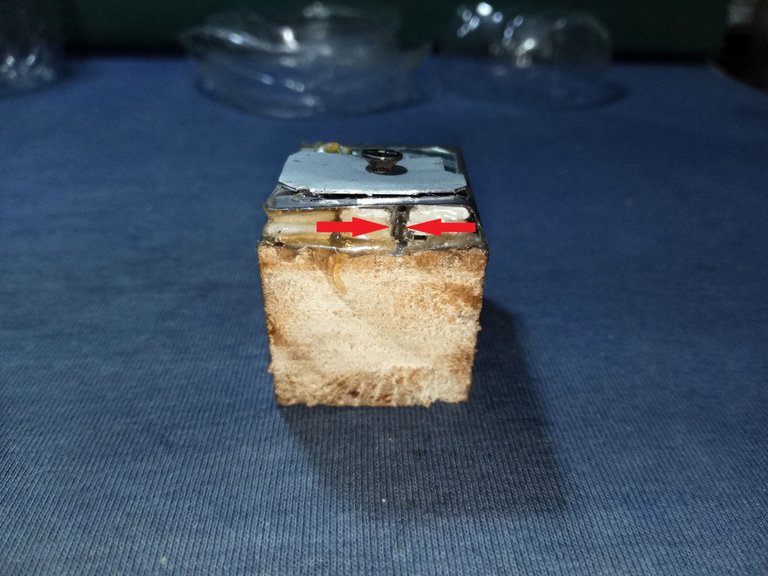
The cutter that I ended up putting together was mounted on a piece of wooden slat, the chassis is made from a metal lid, which was part of a can of tuna, the separators are plastic pieces of the chassis of a dot printer.
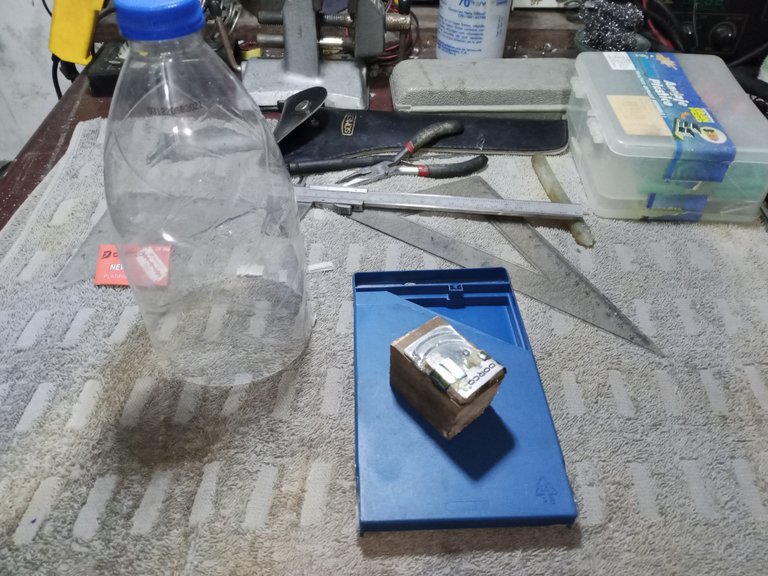
The important thing in this tool is the height at which the cutting blade must be, which is 5 mm, and that the lower part of the support or chassis is metal. If it is wood or cardboard (MDF), the plastic strip ends up cutting the metal or cardboard and the size of the plastic tape that we are cutting is altered.
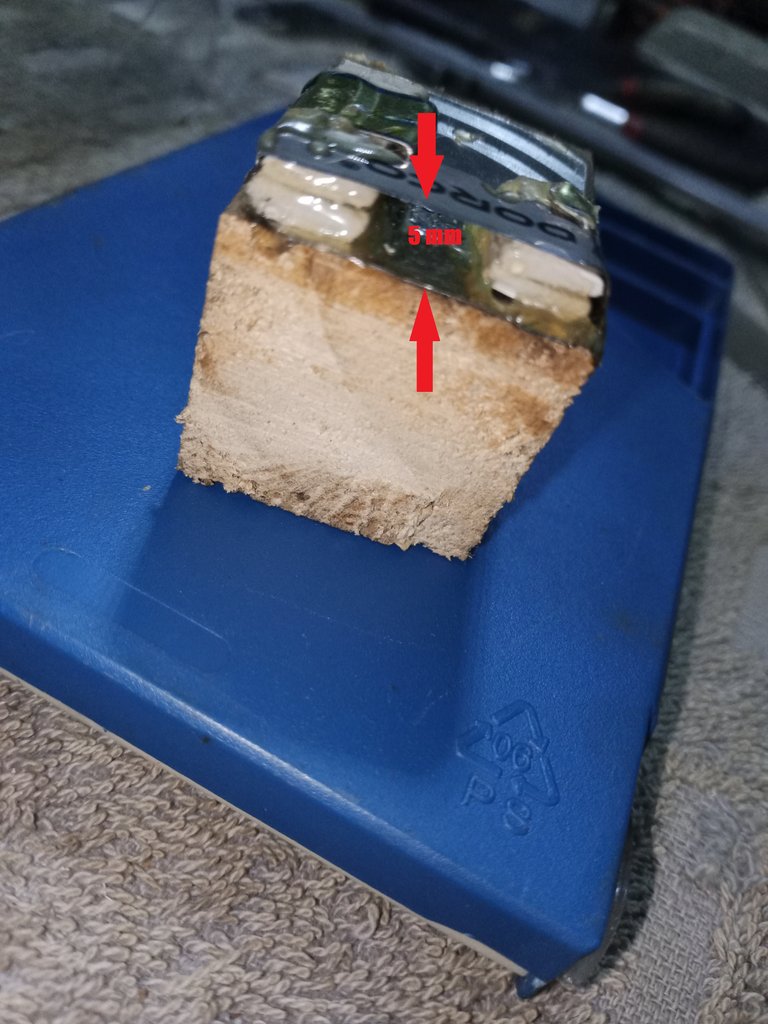
Once the correct height is achieved, we must close the opening enough so that the plastic passes just enough so that it does not turn or get stuck.
One of the last problems I had creating the tool was with the cutting blade, I used a razor blade, the thickness is very thin and it curved when I was cutting the bottle, the plastic got stuck, which stopped the work .
I needed a blade from a cutter, or make a blade with a piece of a can, which are thicker and much more resistant.
I had already bent and cut and attached the razor blade, so I looked to see if there was a way to make it useful.
To improve the blade, I made a reinforcement with a piece of metal and fixed it over the cutting blade.
I was testing it and for it to be the first model I have built, I am satisfied, it took me a little practice, making the first cuts due to the shapes that some bottles have, but I am already doing it a little better.
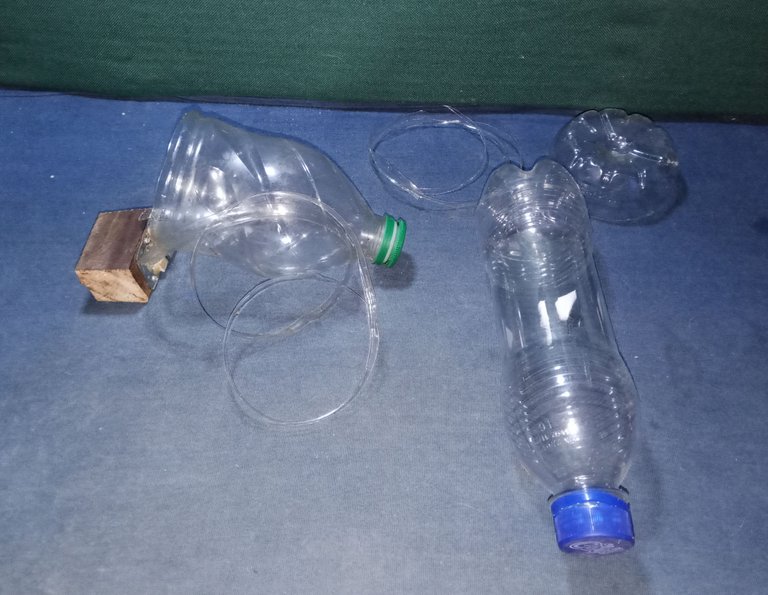
Strips of PET plastic bottles can be processed for use in 3D printers modified to support that material, hence the detail that they are 5 mm wide.
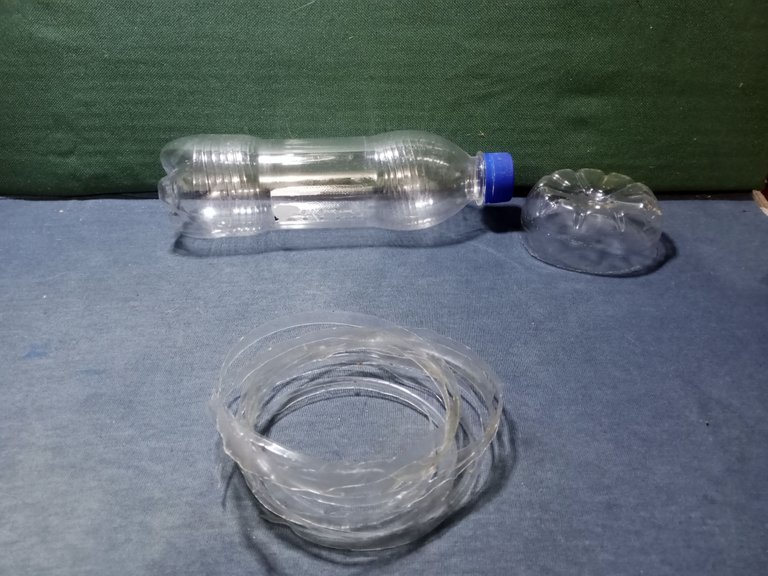
I don't have a 3D printer at the moment, but those PET plastic strips are useful for welding plastic parts when I make repairs or restorations.
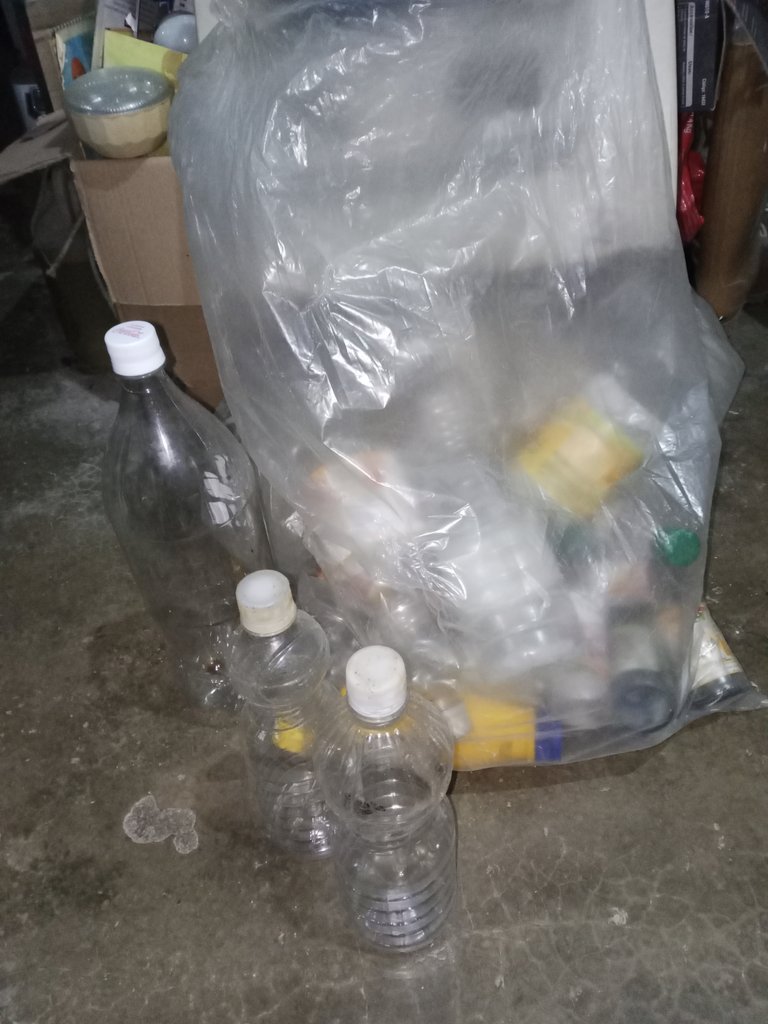
I have accumulated as much as possible several bags filled with plastic bottles and containers, now I can gradually process them for future use.
Thank you very much for stopping by and reading me.
Have an excellent week.
Peace.
- Images, unless noted, are shots of work in the workshop.
- I have used Google translator for English.
*I used some free images from Pexels page - The decorative header is made with the help of Textstudio Image's Source - Image Source

Saludos a la comunidad de Hive DIY, estoy deseando que estén teniendo una semana productiva y de ser posible bastante tranquila.
He estado haciendo trabajos menores que no abarcan lo suficiente para publicar, así que les compartiré dos trabajos que no son muy complejos, pero pueden ser interesantes.
Image's Source - Fuente de la Imagen
En la casa tenía un problema con el alcance de la señal del Wii, para resolverlo necesitaba de un repetidor de señal o mover el módem de sitio.
Como ninguna de las opciones era viable, una por la ubicación del punto de conexión de red y la otra por un muy bajo presupuesto financiero, tuve que hacer un poco de ejercicio de creatividad.
Cree una pantalla de cartón, cubierta con papel de aluminio (es llamado, papel de estaño o papel metálico en algunas partes), el modem queda en la pared que da al exterior, es un extremo de la casa y la señal no tiene que atravesar esa pared, el papel de aluminio es para que la señal del Wii se reflejen al interior de la casa.
Tenía para hacer ese trabajo, dos rollos de papel de aluminio sin ningún uso, pero solo había un pequeño segmento del papel metálico en buen estado en uno solo de los rollos de papel, no quede muy contento con el asunto, gaste el dinero y ambos rollos estaban dañados.
A pesar de todo armé la pantalla, no esperaba que me funcionara, pero felizmente, ahora tengo señal en toda la casa. A futuro, ahora debo comprar otro rollo de papel metálico en otra tienda diferente y espero que el papel no esté deteriorado, para mejorar la pantalla.
Dedico un tiempo en hacer reciclajes, como saben, si cada uno de nosotros hace un pequeño esfuerzo, por mínimo que puede parecer el resultado al final vale la pena.
Image's Source - Fuente de la Imagen
Es el motivo de mi siguiente trabajo, necesitaba un cortador para reciclar botellas PET.
Como saben, el plástico es el material más común para muchos envases, pero su proceso de degradación en el medio ambiente es muy lento, por lo que en los proyectos para reciclar se trata de reutilizar esas botellas y envases de plástico y reducir la cantidad que termina en el ambiente.
Image's Source - Fuente de la Imagen
Un cortador manual para botellas PET, es una herramienta muy simple, solo se necesita una hoja cortante y un soporte, se puede hacer hasta con la tapa plástica de una botella.
Estaba creando mi propio cortador de botellas PET, para eso trabajé como siempre con material reciclado, reconozco que cometí muchos errores, parece difícil de creer que hacer algo que es tan sencillo pudiese causar tantos fallos.
En el primer diseño intenté trabajar con la carcasa de un cargador de teléfono, pero ese modelo no funciono.
El cortador que termine armando lo monte sobre un trozo de listón de madera, el chasis está hecho de una tapa metálica, que era parte de una lata de atún, los separadores son trozos plásticos del chasis de una impresora de puntos.
Lo importante en esta herramienta, es la altura a la que debe quedar la hojilla de corte, que son 5 mm, y que la parte inferior del soporte o chasis, sea metálica. Si es madera o cartón (MDF), la tira de plástico termina por cortarla y se altera el tamaño de la cinta plástica que vamos cortando.
Lograda la altura correcta, debemos cerrar la abertura lo suficiente para que el plástico pase lo suficientemente justo para que no se gire o se trabe.
Uno de los últimos problemas que tuve creando la herramienta, fue con la hojilla de corte, use una hojilla de máquina para afeitar, el grosor es muy fino y se curvaba cuando estaba cortando la botella, se trababa el plástico, lo que detenía el trabajo.
Necesitaba una cuchilla de un cutter, o hacer una cuchilla con un trozo de una lata, que son de un grosor mayor, son mucho más resistentes.
Ya yo había doblado y cortado y fijado la hojilla de la máquina de afeitar, así que busque si habría una forma para hacerla útil.
Para mejorar la cuchilla, hice un refuerzo con un trozo de metal y lo fijé sobre la hojilla de corte.
La estuve probando y para ser el primer modelo que he construido, estoy satisfecho, me costó un poco de práctica, hacer los primeros cortes por las formas que tienen algunas botellas, pero ya estoy haciéndolo un poco mejor.
Las tiras de botellas plásticas PET, se pueden procesar para usarse en impresoras de 3D modificadas para soportar ese material, por eso el detalle de que sean de 5 mm de ancho.
No poseo de momento una impresora de 3D, pero esas tiras de plástico PET, me sirven para soldar piezas plásticas cuando hago reparaciones o restauraciones.
He acumulado lo más que he podido varias bolsas llenas con botellas y envases plásticos, ahora puedo ir poco a poco procesándolos para un uso a futuro.
Muchas gracias por pasar y leerme.
Que tengan una excelente semana.
Paz.
- Las imágenes, a menos que se indique, son capturas del trabajo en el taller.
- He usado el traductor de Google para el inglés.
- He usado algunas imágenes gratuitas de la página Pexels
- El encabezado decorativo está hecho con la ayuda de Textstudio Image's Source - Fuente de la Imagen