
Greetings to the Hive DIY community, this year 2025 is coming in strong, I hope it has been for the best for all of you.
At one of my relatives' houses they were going to throw away an old refrigerator, so I stopped by to see what condition it was in. I wasn't going to publish the work at first, so I took the images after I had already had a day of work.
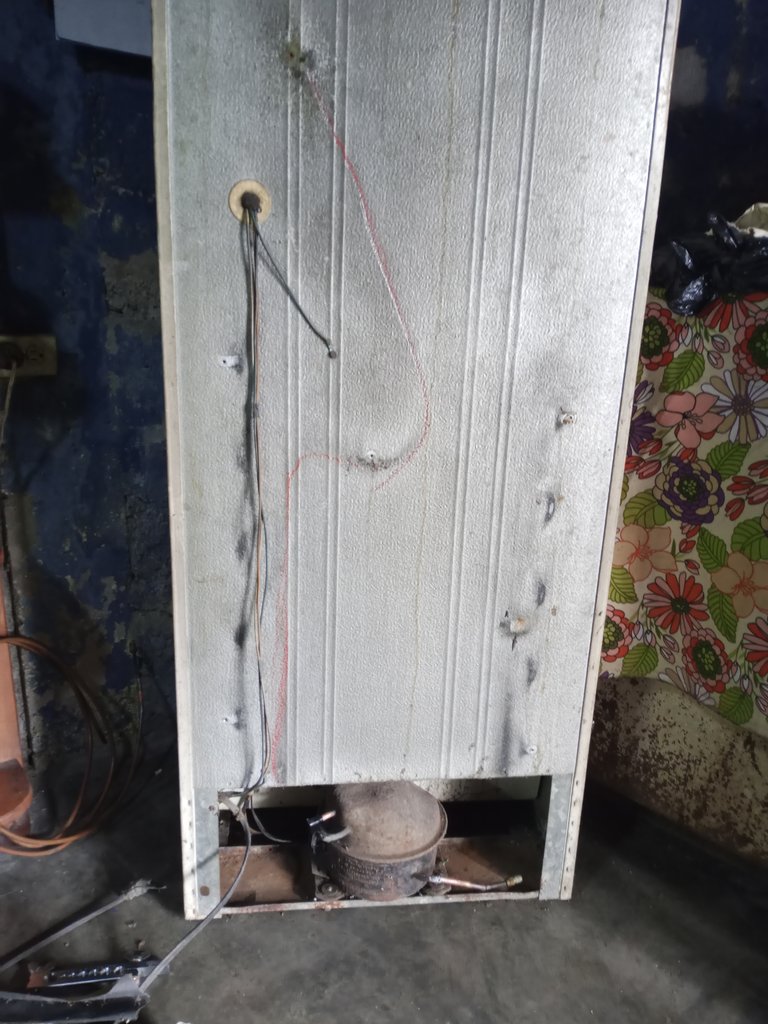
The chassis was very well preserved, but most of the pipes were made of steel and over time they ended up corroding and becoming porous, allowing the refrigerant to escape.
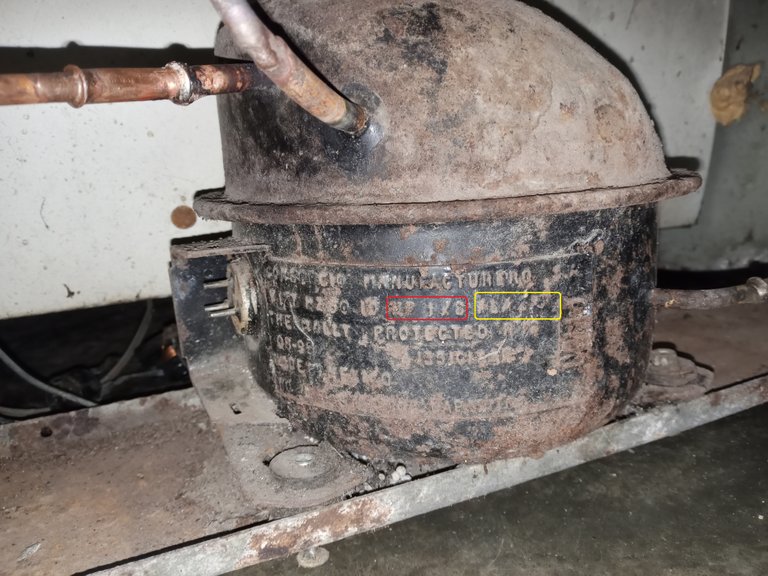
The compressor motor, even though it looks very deteriorated, has sufficient compression power.
The horsepower (highlighted in red) and the amp draw (highlighted in yellow) were indicated on these old compressors, nowadays compressors have a model coded with that information.
I welded a valve to the compressor discharge pipe and measured the compression, the compression of a common household refrigerator motor has to be equal to or greater than 150 PSG, any value less than that makes the use of the compressor in a refrigerator unfeasible.
So the compressor is the first thing to be measured before working on a refrigerator.
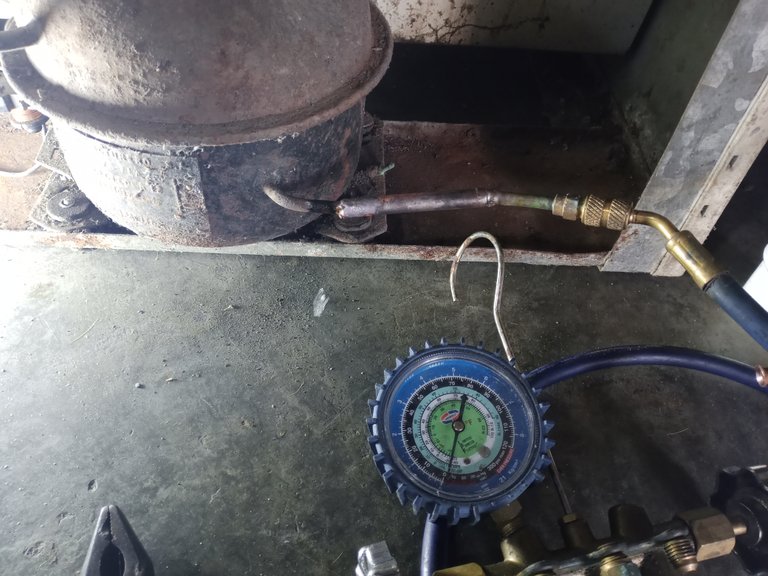
The high pressure gauge was damaged, but I had already measured it with another gauge, the image is for reference.
To re-pipe the condenser coil I used leftover 1/4" copper tubing I had in storage, left over from previous jobs that had been collecting dust.
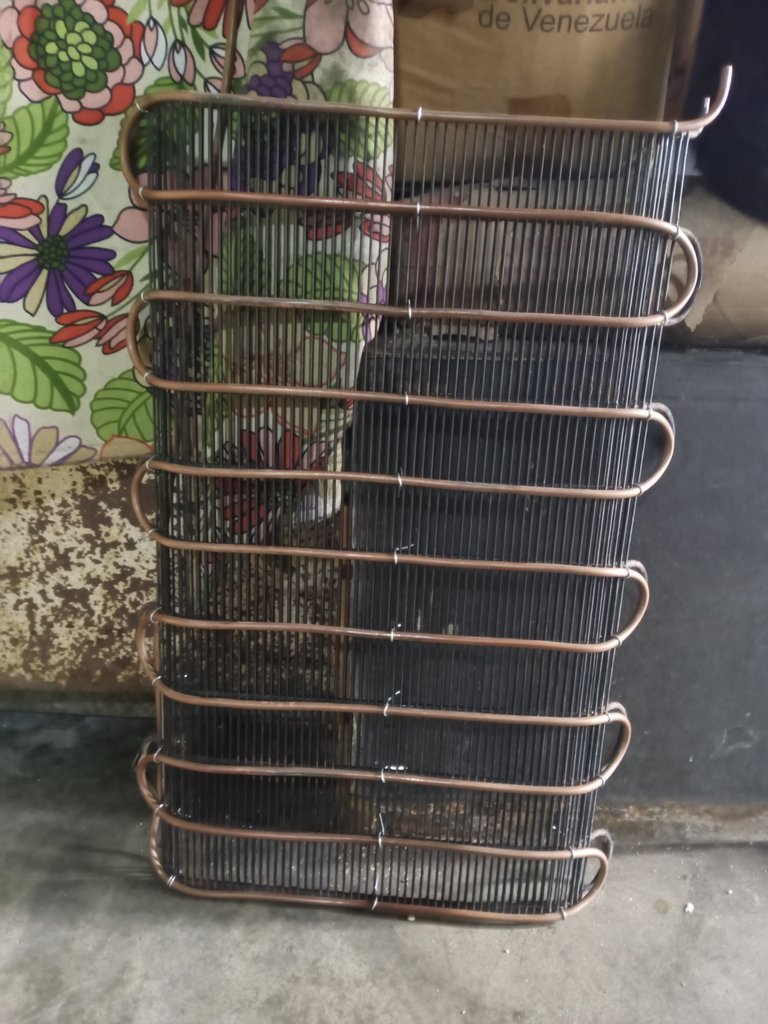
The evaporator coil (the part that cools and goes inside the refrigerator) was a little more complicated.
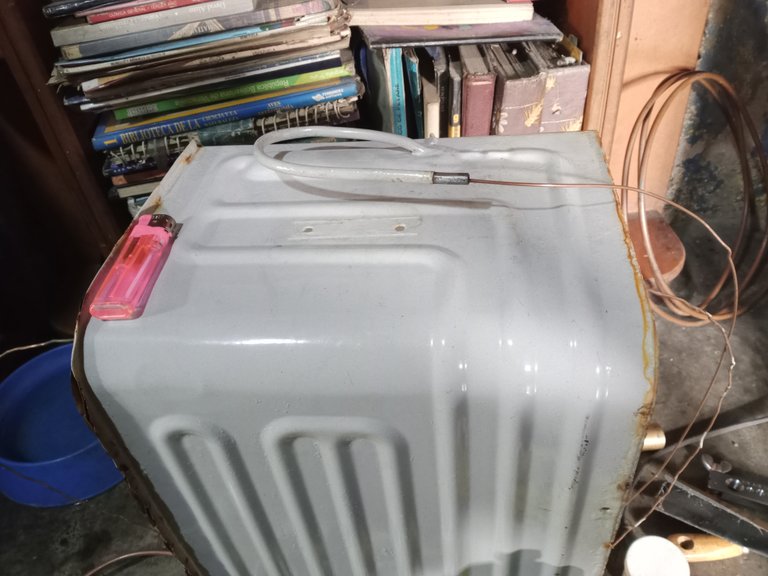
The evaporator coil pipe had another pipe, (the capillary tube pipe) that carries high pressure refrigerant liquid, inside the pipe that returned to the compressor (the pipe that is wider than 1/4") with low pressure gas.
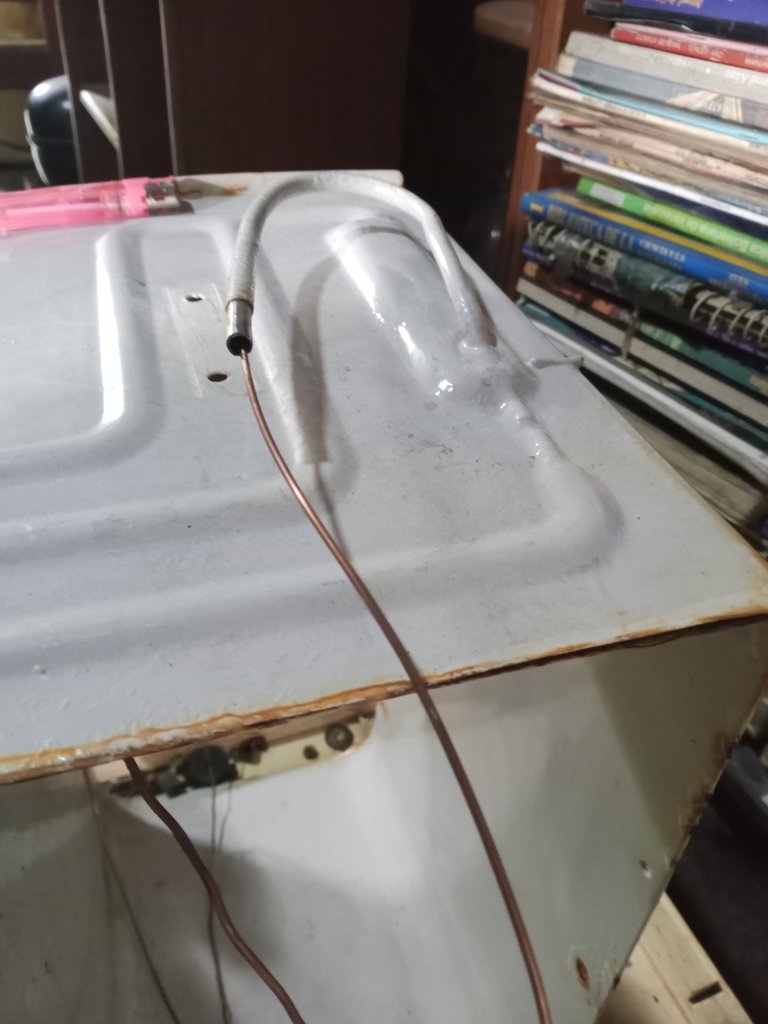
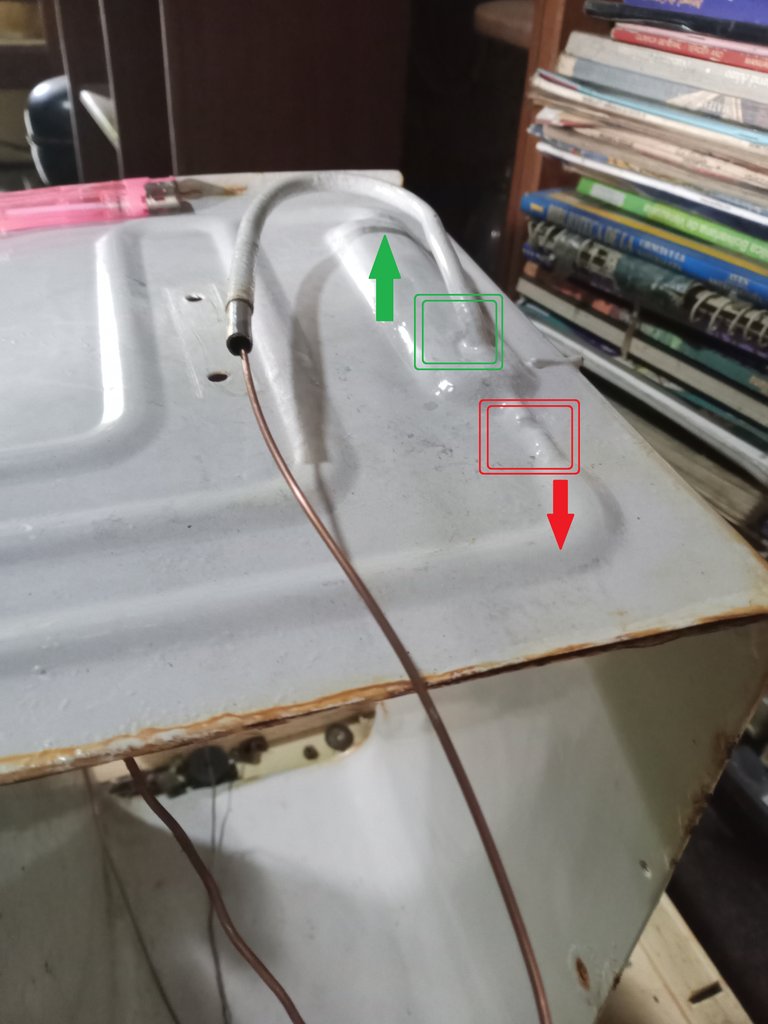
It is an efficient form of construction, through the capillary tube goes high pressure and high temperature refrigerant liquid, this capillary comes from the condenser coil (entrance to the coil through the red box) and through the large tube low pressure gas returns to the compressor (returns to the compressor through the green box), the exchange of temperatures helps a lot to the operation of the circuit cooling.
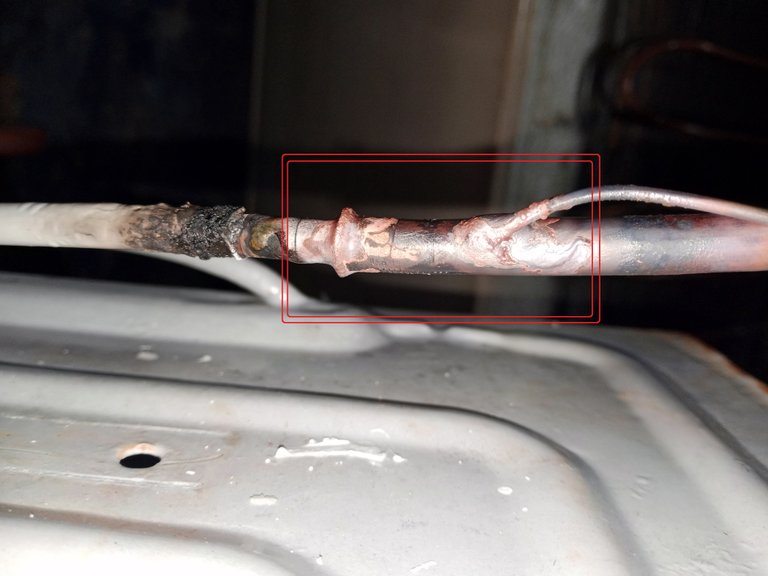
I had to cut a rusty tube without breaking the pipe that was on the inside.
I soldered the new copper pipe to the evaporator coil, but left the capillary tube on the outside.
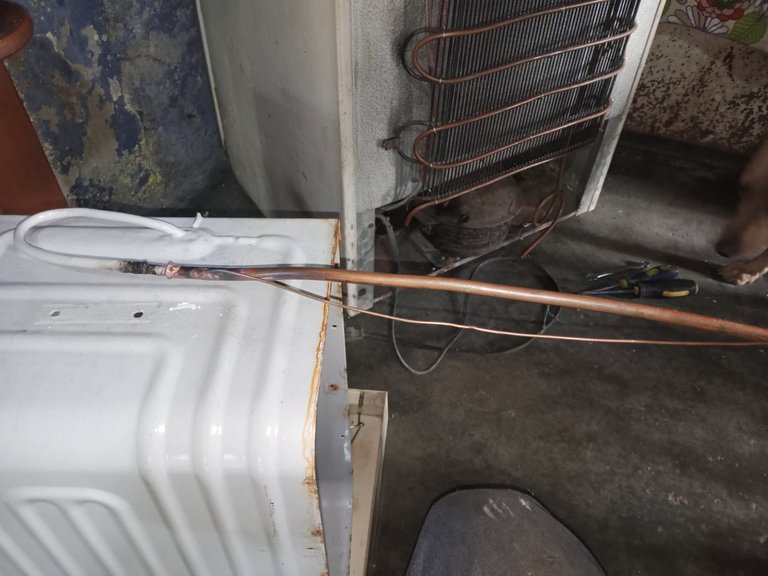
These old refrigerators are extremely simple, this job of re-plumbing and getting it working took about three days, if I was in better health it would have only taken one day of work.
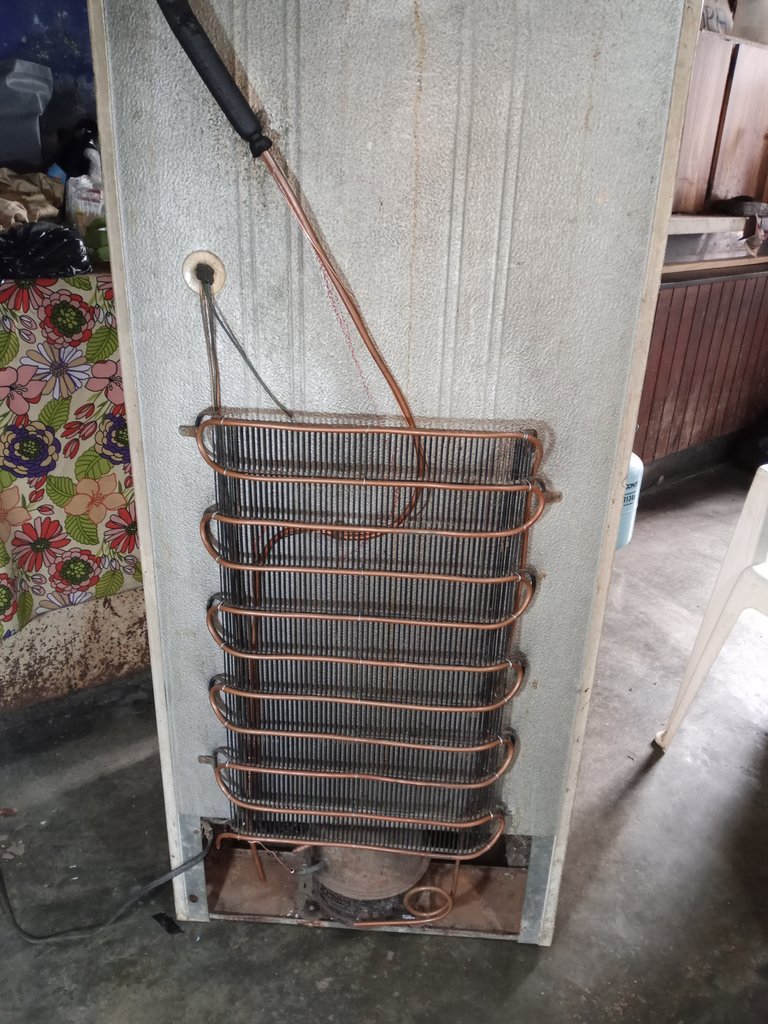
With calm and care, this work was completed.
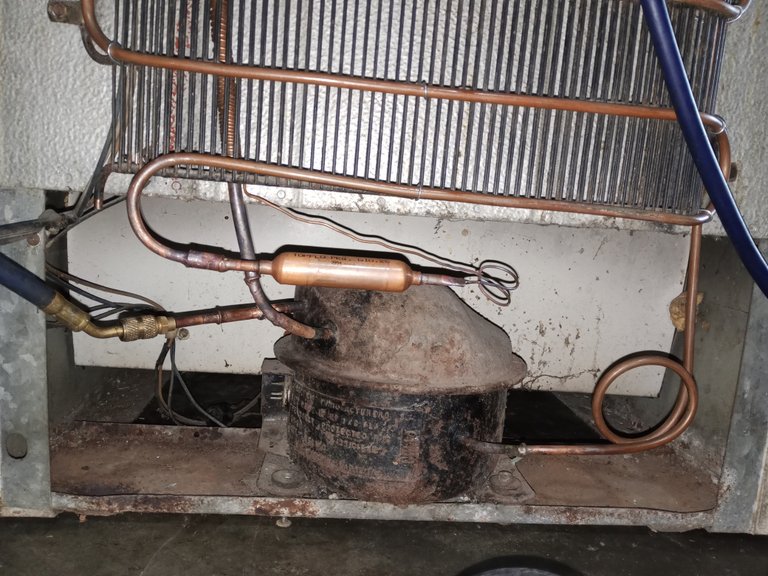
Creating a vacuum in the cooling circuit, with a special pump is very helpful, many failures occur when a repair is not accompanied by a good vacuum (at least 24 mmHg), before charging the refrigerant.
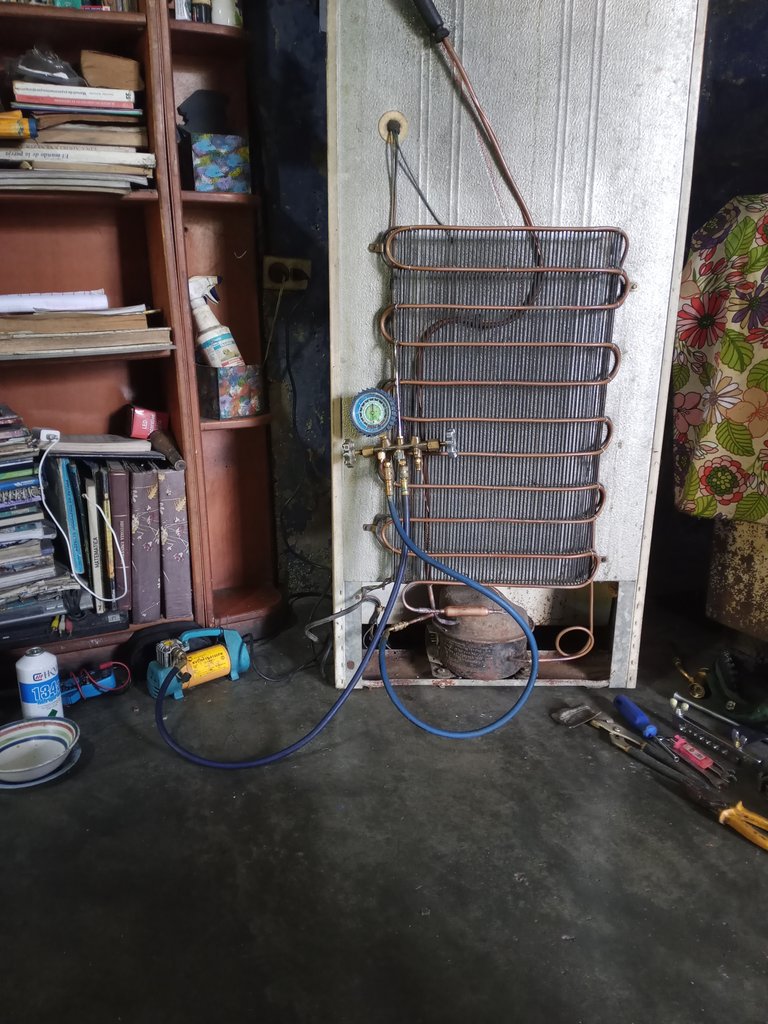
Okay, I'm glad we finally kept the fridge out of the trash, it worked without any issues, someone else will do the painting and changing the rubber on the doors, I did my part and I hope this fridge works for many more years.
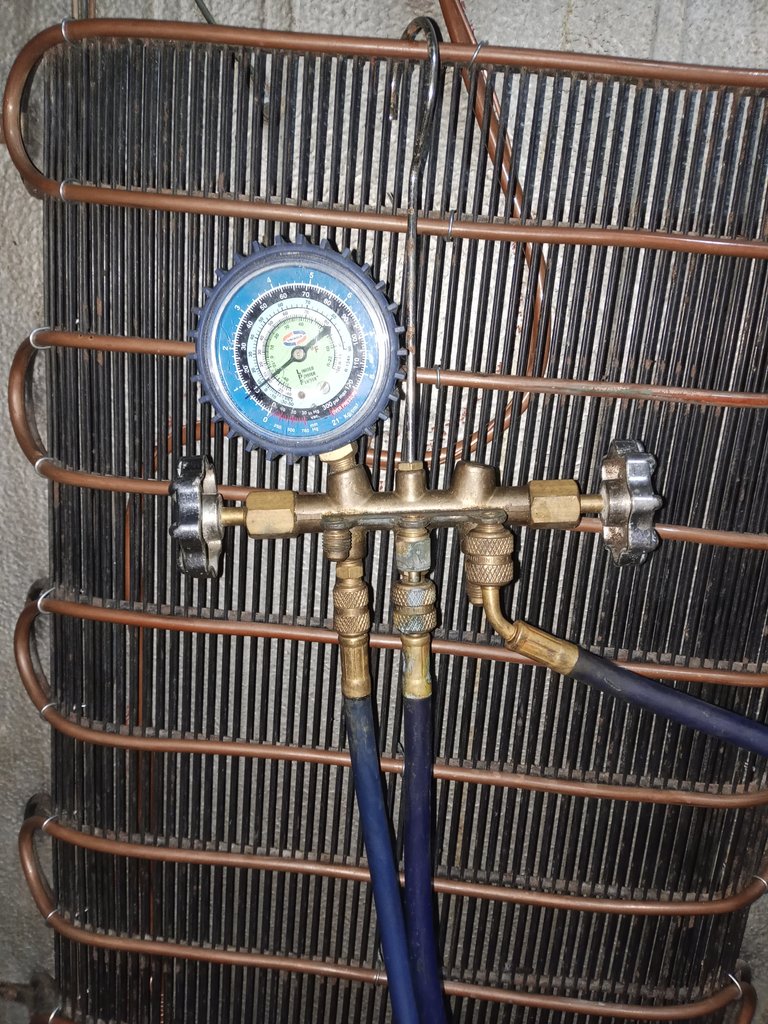
The working pressure is fine, it's about 10 psi.
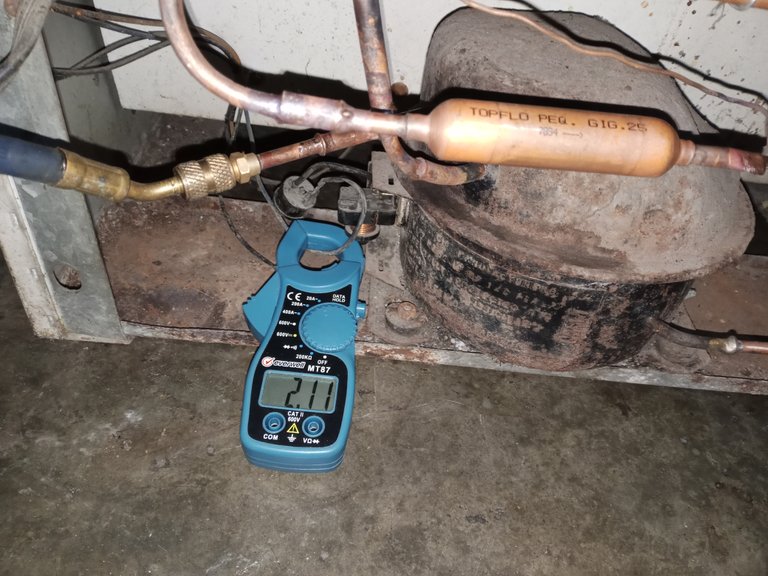
The amp consumption is acceptable, it's impressive that such an old engine that was abandoned had so much life.
If you rub the door rubbers with Vaseline and apply heat with a hair dryer, you can rehabilitate them, it's a repair or recycling, but it's a slow and tedious job that takes quite a while.
But I think they're going to send them to change them for a new set of door rubbers.
As always, if you're interested in this world of repairs and restorations, the first thing you should do is a technical training course, let's avoid accidents or damaging equipment.
Thank you so much for stopping by and reading.
Well, I hope you have a great week.
Peace.

- I used Google Translate for English.
- The decorative banner in Spanish was made with TextStudio.
- The images, unless otherwise noted, are screenshots of the workshop work.


Saludos a la comunidad de Hive DIY, este año 2025 llego pisando fuerte, espero que haya sido para bien a todos ustedes.
En casa de uno de mis familiares iban a botar a la basura un viejo refrigerador, por lo que pase a ver en que condición estaba, en principio no iba a publicar el trabajo, por eso hice las imágenes después de que ya tenía un día de trabajo.

El chasis estaba muy bien conservado, pero la mayoría de las tuberías eran de acero y con el tiempo terminaron por corroerse y volverse porosas, dejando escapar el refrigerante.
El motor compresor, aun cuando se ve muy deteriorado, tiene una potencia de compresión suficiente.
La potencia en HP (resaltado en rojo) y el consumo en amperios (resaltado en amarillo) estaba indicada en estos viejos compresores, hoy día los compresores tienen un modelo codificado con esa información.

Soldé una válvula a la tubería de descarga del compresor y le medí la compresión, la compresión de un motor de un refrigerador doméstico común tiene que ser igual o mayor a 150 PSG, cualquier valor por menos de eso hace inviable el uso del compresor en un refrigerador.
Así que el compresor es lo primero que se mide antes de trabajar en un refrigerador.

El manómetro de alta presión estaba dañado, pero yo ya lo había medido con otro manómetro, la imagen es como referencia.
Para hacer de nuevo la tubería del serpentín del condensador usé tuberías sobrantes de cobre 1/4", que tenía guardadas en el depósito, sobrantes de trabajos anteriores que habían ido acumulando polvo.

El serpentín del evaporador (la parte que enfría y va adentro del refrigerador) fue un poco más complicado.

La tubería del serpentín evaporador tenía otra tubería (la tubería del tubo capilar) que lleva líquido refrigerante a alta presión, por dentro de la tubería que regresaba al compresor (la tubería que es más ancha de 1/4") con gas a baja presión.

Es una forma eficiente de construcción, por el tubo capilar va líquido refrigerante a alta presión y alta temperatura, este capilar viene del serpentín del condensador (entrada al serpentín por el cuadro en rojo) y por el tubo grande regresa gas a baja presión de al compresor (regresa al compresor por el cuadro en verde), el intercambio de temperaturas ayuda mucho al funcionamiento del circuito de enfriamiento.

Tuve que cortar un tubo oxidado sin romper la tubería que estaba por el lado de adentro.
Soldé la tubería de cobre nueva al serpentín del evaporador, pero dejé el tubo capilar por la parte externa.


Estos viejos refrigeradores son extremadamente sencillos, este trabajo de rehacer las tuberías y dejar funcionando se llevó unos tres días, si estuviera con mejor salud solo habría llevado un día de trabajo.

Con calma y cuidado, este trabajo se fue completando.

Hacer vacío en el circuito de refrigeración, con una bomba especial es de mucha ayuda, muchas fallas se suceden cuando una reparación no se acompaña con un buen vacío (mínimo unos 24 mmHg), antes de hacer la carga de refrigerante.

Vale, me alegra que al final evitamos que el refrigerador terminara en la basura, quedo funcionando sin problemas, el trabajo de pintura y cambio de gomas de las puertas se lo encargan a otra persona, yo hice mi parte y espero que este refrigerador funcione por muchos años más.

La presión de trabajo, quedo bien, son unos 10 psi.

El consumo en amperios es aceptable, es impresionante que un motor tan viejo que estaba abandonado tuviese tanta vida.
Si se frotan las gomas de las puertas con vaselina y le aplican calor con un secador de pelo, puedes rehabilitarlas, es una reparación o reciclaje, pero es un trabajo lento y tediosos que se lleva bastante tiempo.
Pero creo que van a mandar a cambiarlas por un juego de gomas para puertas nuevo.
Como siempre si les interesa este mundo de reparaciones y restauraciones, lo primero que deben hacer es un curso de capacitación técnica, evitemos accidentes o dañar equipos.
Bueno, espero que tengan una excelente semana.
Muchas gracias por pasar y leerme.
Paz.

- He usado el traductor de Google para el Inglés.
- El banner decorativo en español fue hecho con TextStudio.
- Las imágenes, a menos que se indique, son capturas del trabajo de taller.


