English
Greetings to the Hive Diy community, I send you a big greeting from my workshop, wishing you are in the best situation possible. And if for whatever reason you are going through difficult times, I wish you the best possible encouragement to move forward.
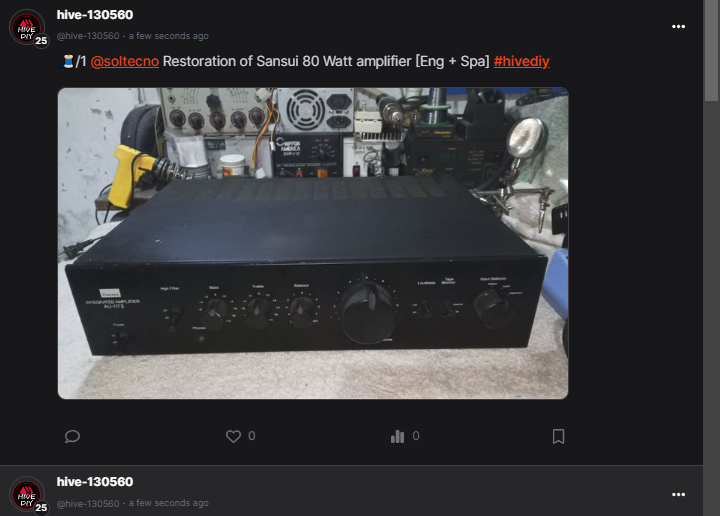
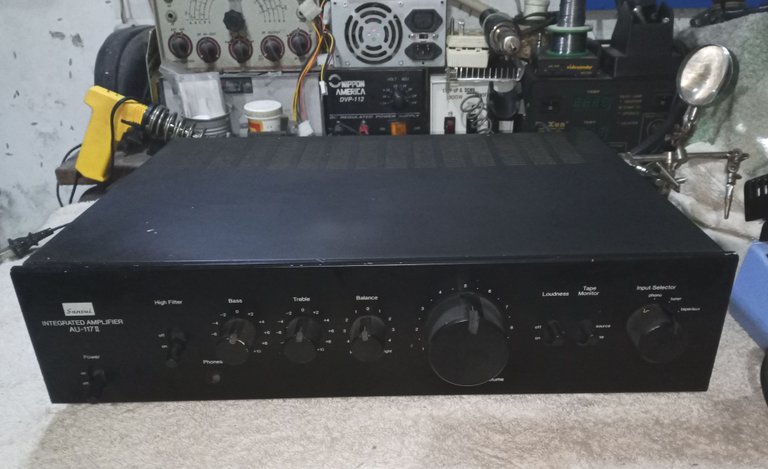
I am restoring an old 80 Watt Sansui brand amplifier. They were very reliable equipment, like an old Volkswagen, or to say that they are like a tank. They endured a lot of use and abuse. I am going to share part of the repair process and the most common fault and the easiest to correct even without much knowledge of electronics.
This equipment is from when amplifiers came with a linear power supply, with a huge transformer. And the 80 Watt of power may sound like little, but compared to the esoteric power measurement of the PMPO that modern equipment brings, those 80 Watt sound good.

The PMPO power is not the power that the output of the equipment has on a regular basis, it is actually the measure of power when the horns break, so it is a somewhat fallacious term, but it is very useful to sell the products. equipment.
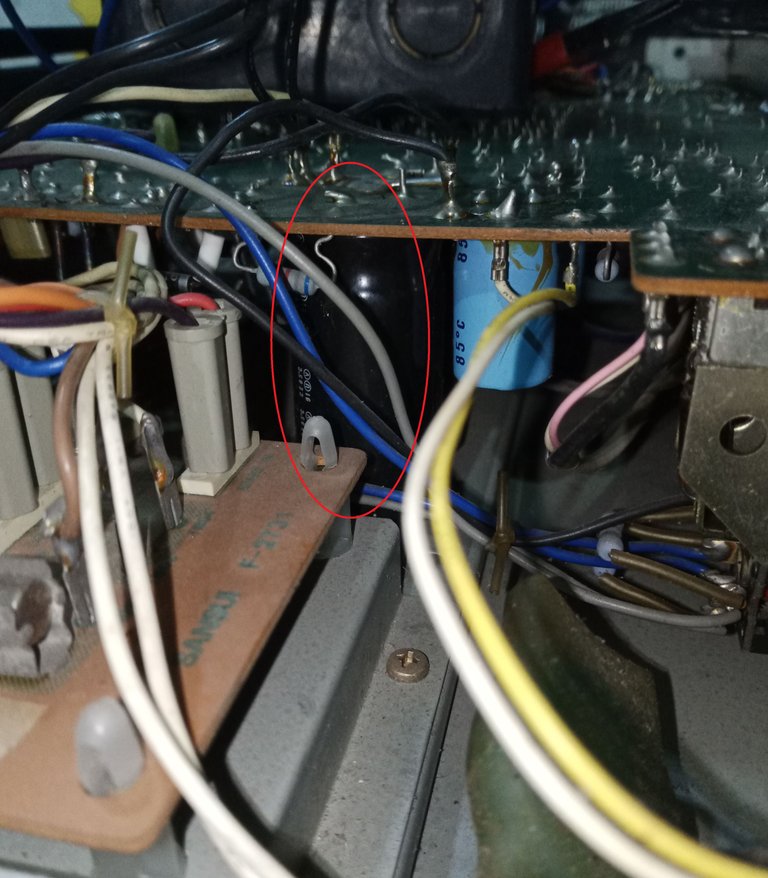
Well, first before doing any measurement, I look for the main capacitor of the power supply (The largest capacitor of the entire equipment), it is not very noticeable because the capacitor cover is black, but I highlight it in red on the picture.
And I apply the tool to discharge any remaining voltage, which could damage the tester.
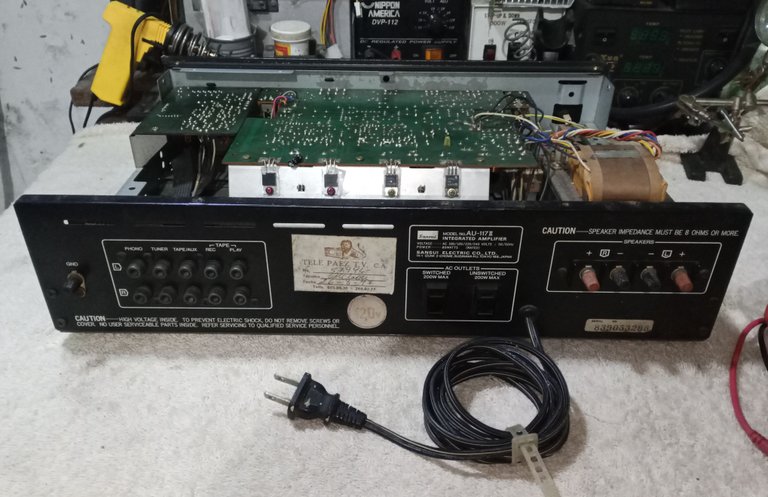
Then, the most basic thing in the repair service: I verify that there is no continuity between the power cable terminals and the chassis of the equipment, what we generally call that there are no shorts with the chassis.
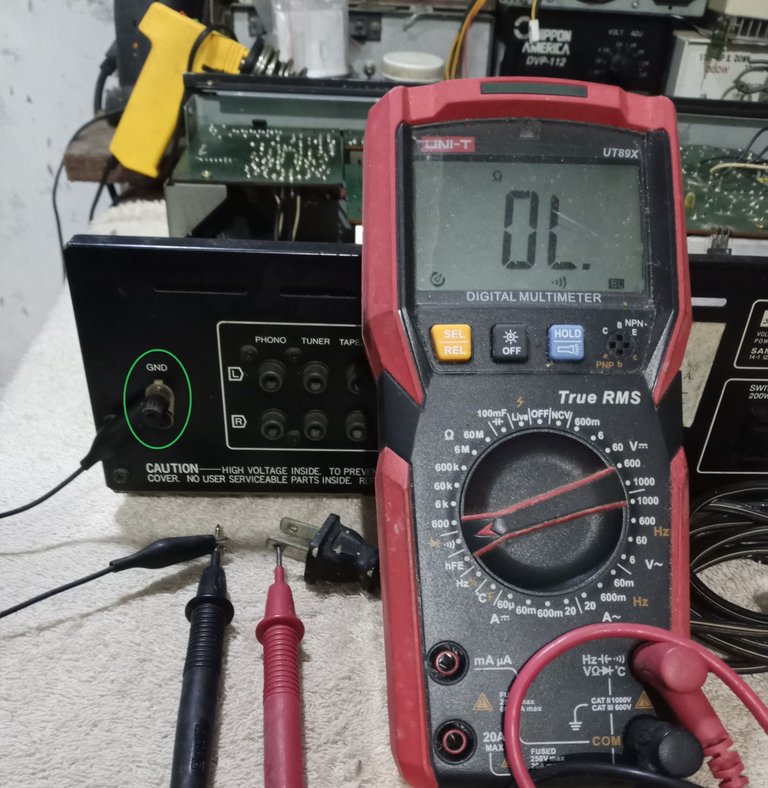
Fortunately there is no continuity with the team's chassis. And I check the fuse.
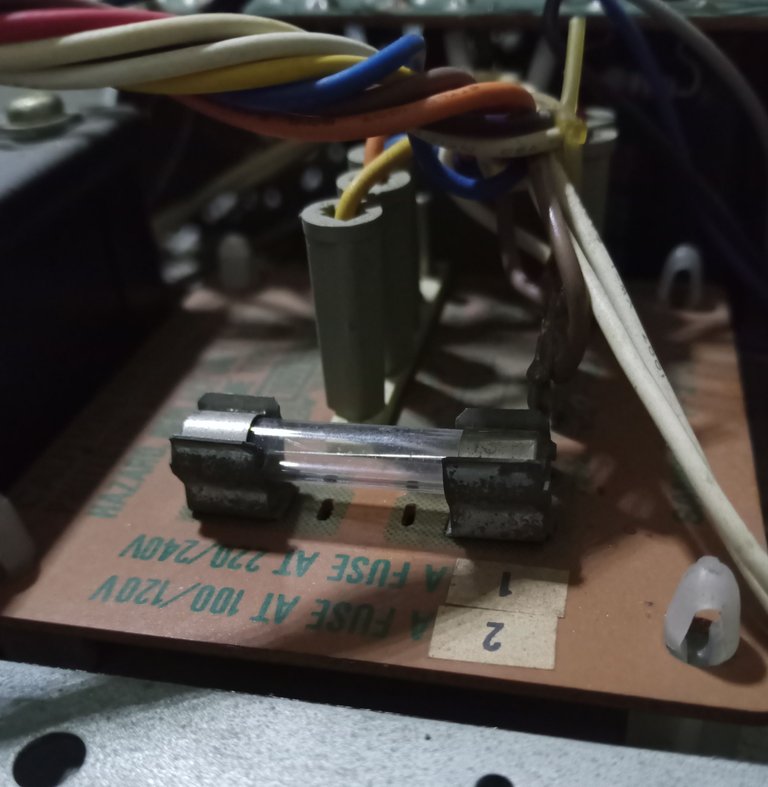
As strange as it may seem, many equipment is damaged without the protection fuse failing.
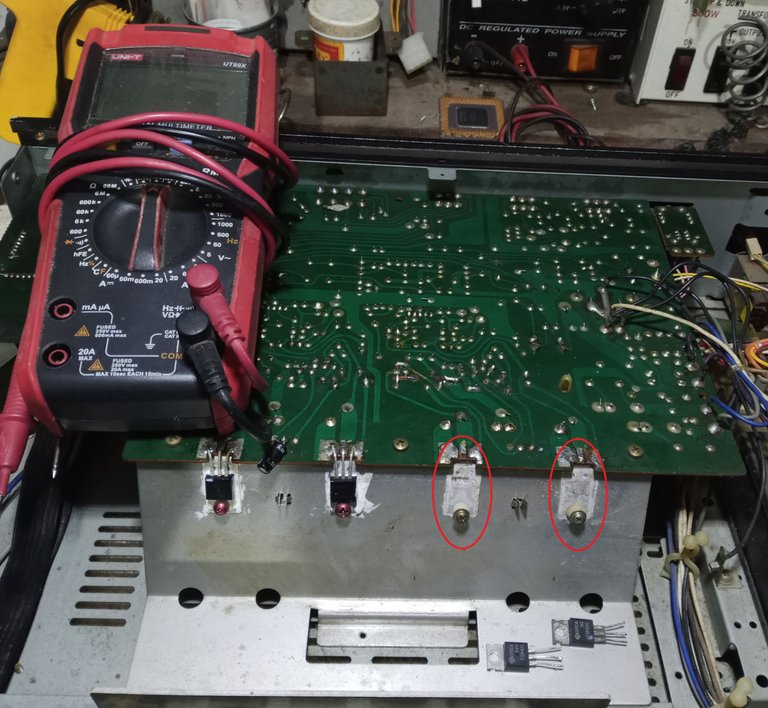
Now, with the accumulated experience, I jump directly to the most common cause of damage to an amplifier and I am completely successful. I measured the four transistors for the sound output (they use Tip 41 transistors), the first two from left to right were in good condition.
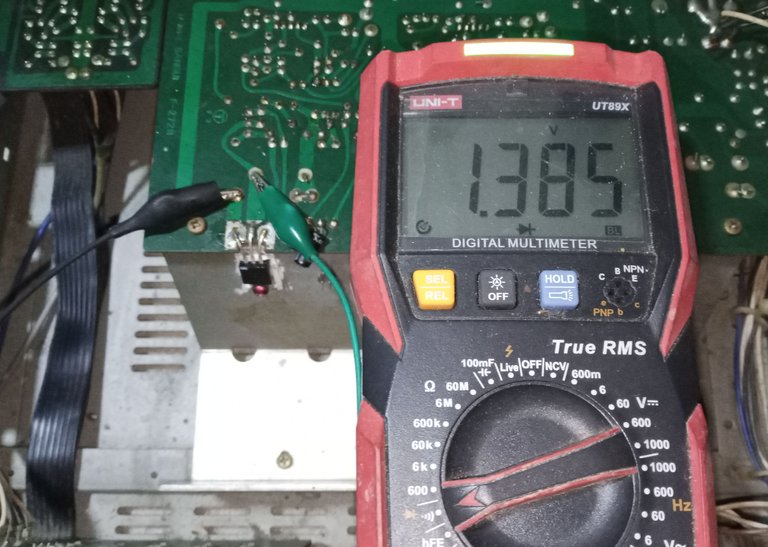
The last two transistors showed total continuity between all their terminals, and that is not possible to happen when a transistor is in good condition, it never indicates total continuity between its pins, when you measure it with the tester.

I disassemble them to verify that they are the transistors and not another component connected to them, but they are damaged, luckily it is a common component and I have enough in the recycled spare parts warehouse.
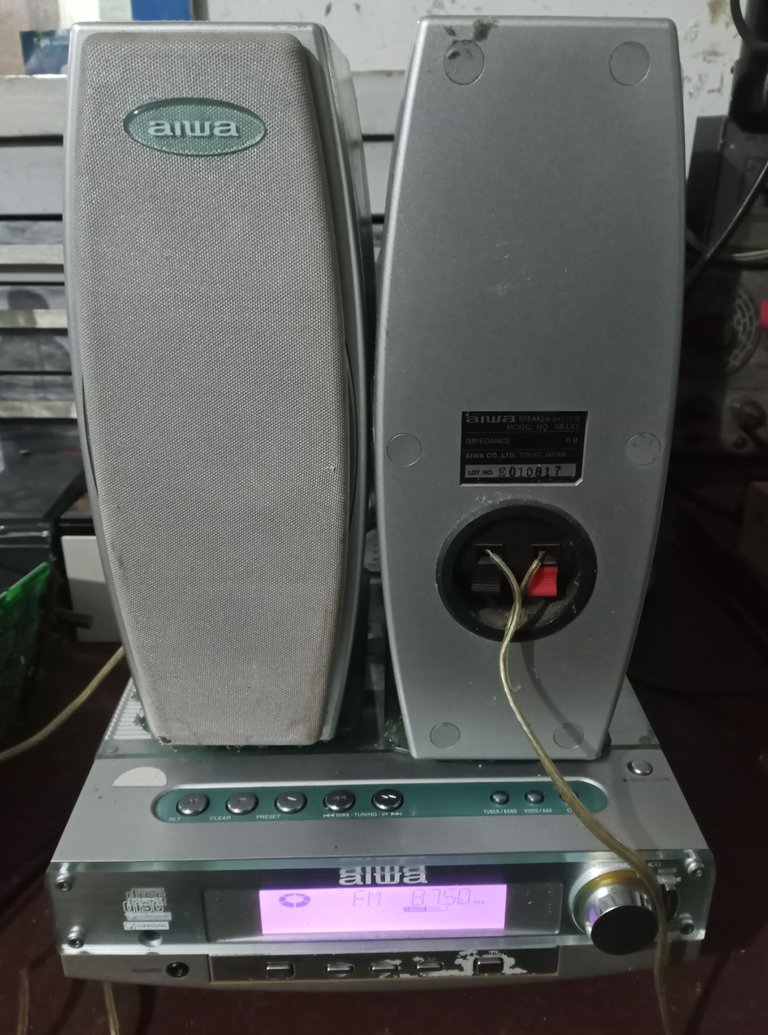
The most common cause of failure is connecting a damaged cornet or horn to the sound output or what I see much more frequently is poor connections to the equipment. It can also happen when you connect an old amplifier to modern equipment, in some old equipment the working voltages for the sound signal input are different, you have to make an adapter.
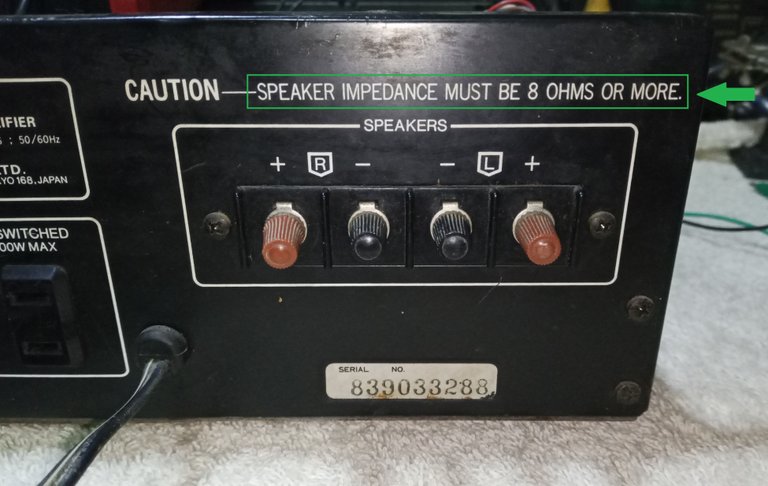
Regarding the connection of the horns or horns, I can explain myself a little better: the common thing is that the sound equipment indicates the impedance measured in Ohm that the output has or supports and the horns in turn indicate what their impedance is in Ohm.
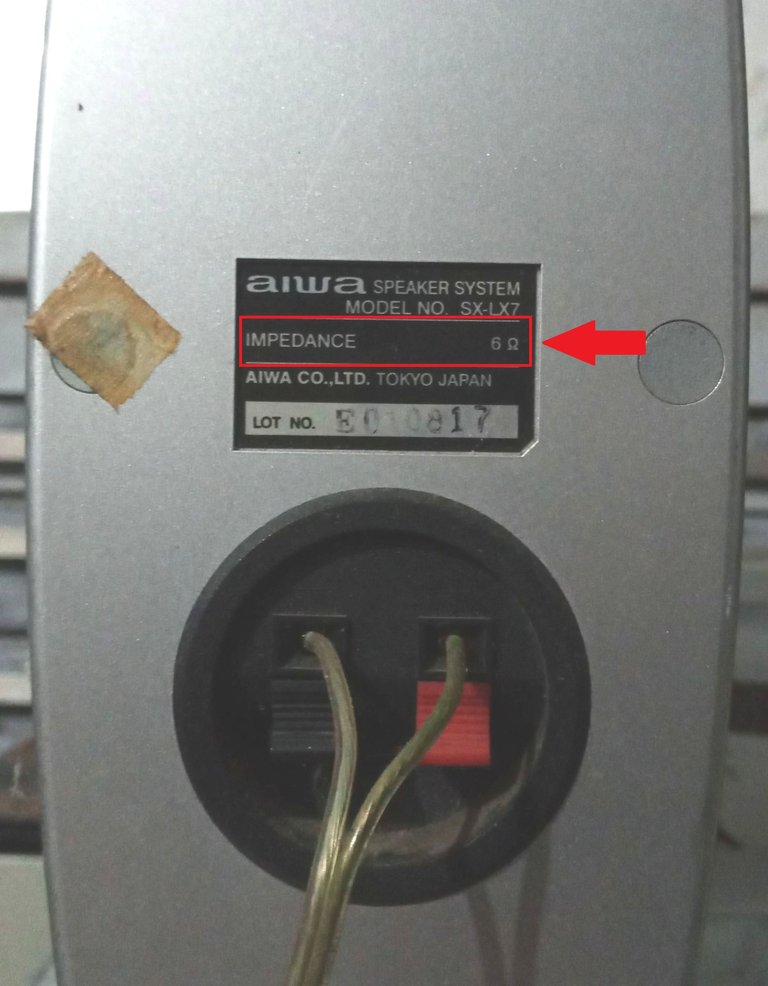
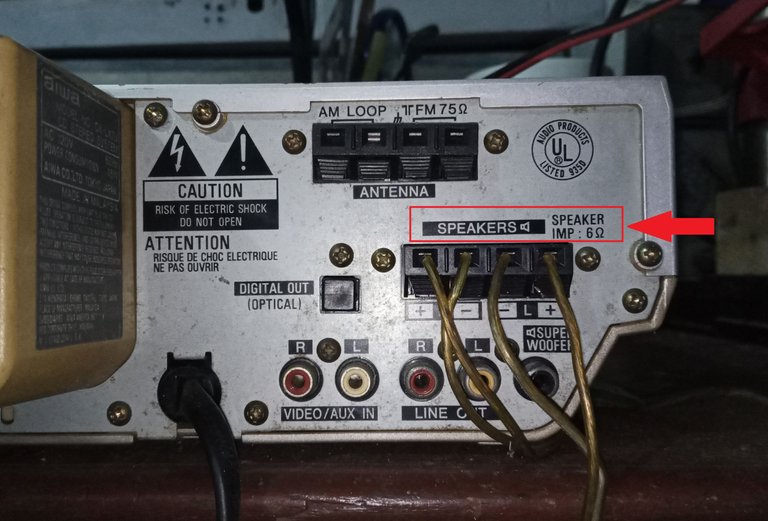
If it does not indicate it on the horns we have to measure it with a tester.

And the correct thing is that, for example, to a device that has two 8 Ohm outputs, an 8 Ohm cornet or horn is connected to each output.

What I usually find is that people connect three or four horns of different impedances to an 8 Ohm output, in complete disorder, without measurement or control.

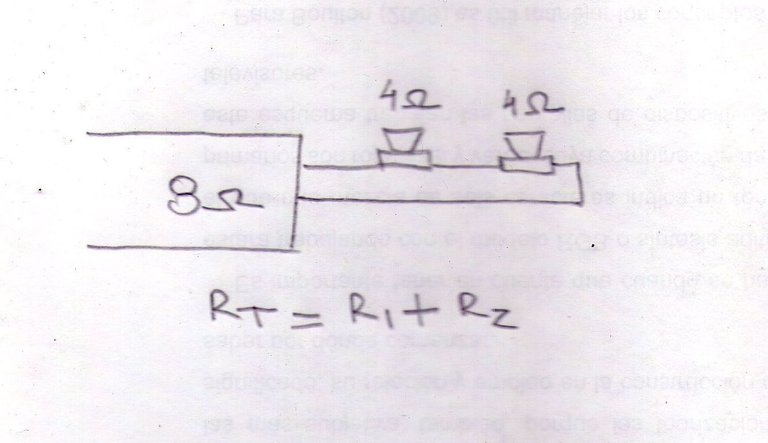
More horns can be connected to one output, if done correctly, respecting the impedance. For example: two 4 Ohm horns can be connected to an 8 Ohm output if you connect them in series, respecting the polarity (it enters through the positive, it comes out through the negative of the first horn, it goes to the positive of the second horn. and finally comes out through the negative of the second cornet)
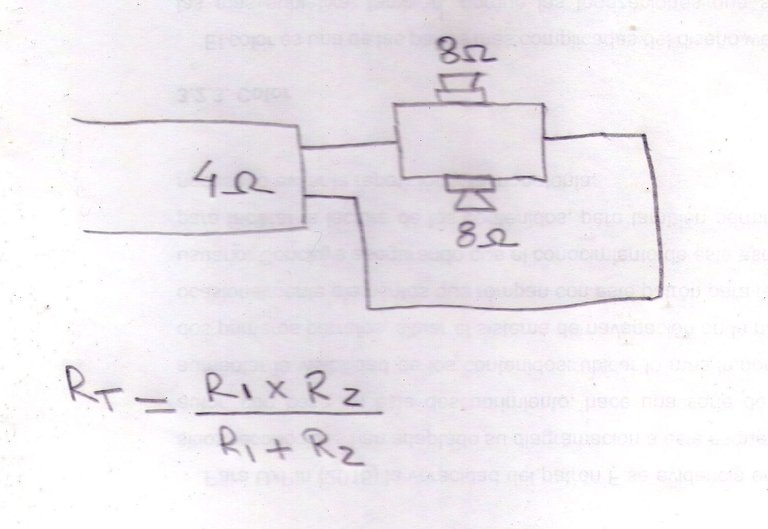
You can connect two 8 Ohm horns to a 4 Ohm output, as long as you connect them in parallel, as always respecting the polarities.
As long as the polarities are respected, the sound of the horns is better and you avoid damaging them, and as long as the output impedance is respected (8 Ohm, 6 Ohm, 4 Ohm, etc.), you can connect the horns you want without damaging the horns. Departures.
With the horns incorrectly connected, a device can still work, but after a while of working or when the volume intensity is increased, the amplifier will most likely die.
Well, thank you very much for reading, I just have to check that the damage has not affected other components, and tune up the amplifier.
Have an excellent week.
Peace.
I have used Google translator for the English language.
The images, unless indicated, are captures of the workshop's work.
Español
Saludos a la comunidad de Hive Diy, les mando un gran saludo desde mi taller, deseando que estén en la mejor situación que sea posible. Y si por el motivo que sea están pasando por momentos difíciles, les deseo el mejor ánimo que se pueda para que salgan adelante.
Estoy restaurando un viejo amplificador de la marca Sansui de 80 Watt. Eran equipos muy confiables, como un viejo Volkswagen, o por decir que son como un tanque. Soportaban mucho uso y abuso. Voy a compartir en parte del proceso de reparación y la falla más común y la más sencilla de corregir aún sin muchos conocimientos de electrónica.
Este equipo es de cuando los amplificadores traían una fuente de alimentación lineal, con un transformador inmenso. Y los 80 Watt de potencia, pueden sonar como poco, pero comparados con la medida de potencia esotérica de los PMPO que traen los equipos modernos, suenan bien esos 80 Watt.
La potencia PMPO, no es la potencia que tiene la salida del equipo de modo regular, en realidad es la medida de potencia de cuando se llegan a romper las cornetas, así que es un término un poco falaz, pero que sirve mucho para vender los equipos.
Bueno, lo primero antes de hacer cualquier medida, busco el capacitor principal de la fuente de alimentación (El capacitor más grande de todo el equipo), no se nota mucho porque la cubierta del capacitor es de color negro, pero lo resalto en rojo en la imagen.
Y aplico la herramienta para descargar cualquier voltaje remanente, que podrían dañar el tester.
Luego, lo más básico en el servicio de reparación: verifico que no haya continuidad entre los terminales del cable de alimentación y el chasis del equipo, lo que generalmente llamamos que no haya cortos con el chasis.
Por fortuna no hay continuidad con el chasis del equipo. Y verifico el fusible.
Por extraño que puede parecer, muchos equipos se dañan sin que el fusible de protección falle.
Ahora, con la experiencia acumulada, salto directamente a la causa más común de daño en un amplificador y acierto de pleno. Medí los cuatro transistores para la salida de sonido (usan unos transistores Tip 41), los dos primeros de izquierda a derecha estaban en buen estado.
Los dos últimos transistores marcaban continuidad total entre todos sus terminales, y eso no es posible que suceda cuando un transistor está en buen estado, nunca indica continuidad total entre sus pines, cuando lo mides con el tester.
Los desmonto para verificar que son los transistores y no es otro componente conectad a ellos, pero están dañados, por suerte es un componente común y tengo suficientes en el depósito de repuestos reciclados.
La causa más común de la falla es conectar una corneta o bocina dañada en la salida de sonido o lo que veo con mucha más frecuencia, es por malas conexiones al equipo. También puede pasar cuando conectas un amplificador antiguo a un equipo moderno, en algunos equipos viejos los voltajes de trabajo para la entrada de la señal de sonido son diferentes, hay que hacer un adaptador.
En cuanto a la conexión de las cornetas o bocinas, me explico un poco mejor: lo común es que el equipo de sonido indica la impedancia medida en Ohm que tiene o que soporta la salida y las cornetas a su vez indican cuál es su impedancia en Ohm.
Si no lo indica en las cornetas tenemos que medirlo con un tester.
Y lo correcto es que, por ejemplo, a un equipo que tiene dos salidas de 8 Ohm, a cada salida se conecte una corneta o bocina de 8 Ohm.
Lo que yo suelo encontrar es que la gente conecta a una salida de 8 Ohm, tres o cuatro cornetas de diferentes impedancias, en completo desorden, sin medida o control.
Se pueden conectar más cornetas a una salida, si se hace de la forma correcta, respetando la impedancia. Como por ejemplo: a una salida de 8 Ohm se le pueden conectar dos cornetas de 4 Ohm si las conectas en serie, respetando la polaridad (entra por el positivo, sale por el negativo de la primera corneta, va al positivo de la segunda corneta y finalmente sale por el negativo de la segunda corneta)
Puedes conectar dos cornetas de 8 Ohm a una salida de 4 Ohm, siempre y cuando las conectes en paralelo, como siempre respetando las polaridades.
Mientras se respeten las polaridades, el sonido de las cornetas es mejor y evitas dañarlas, y mientras se respeta la impedancia de la salida (8 Ohm, 6 Ohm, 4 Ohm, etc.), se pueden conectar las cornetas que quieras sin dañar las salidas.
Con las cornetas mal conectadas aún puede funcionar un equipo, pero al rato de trabajar o al subir la intensidad del volumen, lo más seguro es que se muera el amplificador.
Bueno, muchas gracias por leerme, solo me queda revisar que el daño no haya afectado a más componentes, y poner a punto el amplificador.
Que tengan una excelente semana.
Paz.
He usado el traductor de Google para el idioma inglés.
Las imágenes a menos que lo indique son capturas del trabajo del taller.