Hello to all my dear creative Hive Diy family! Welcome to one more craft made with love. I hope you are feeling wonderful and this first month of the year goes excellent, may it be blessed, as well as the others, that you do not lack prosperity, creativity and productivity to continue with our creations full of love.♡
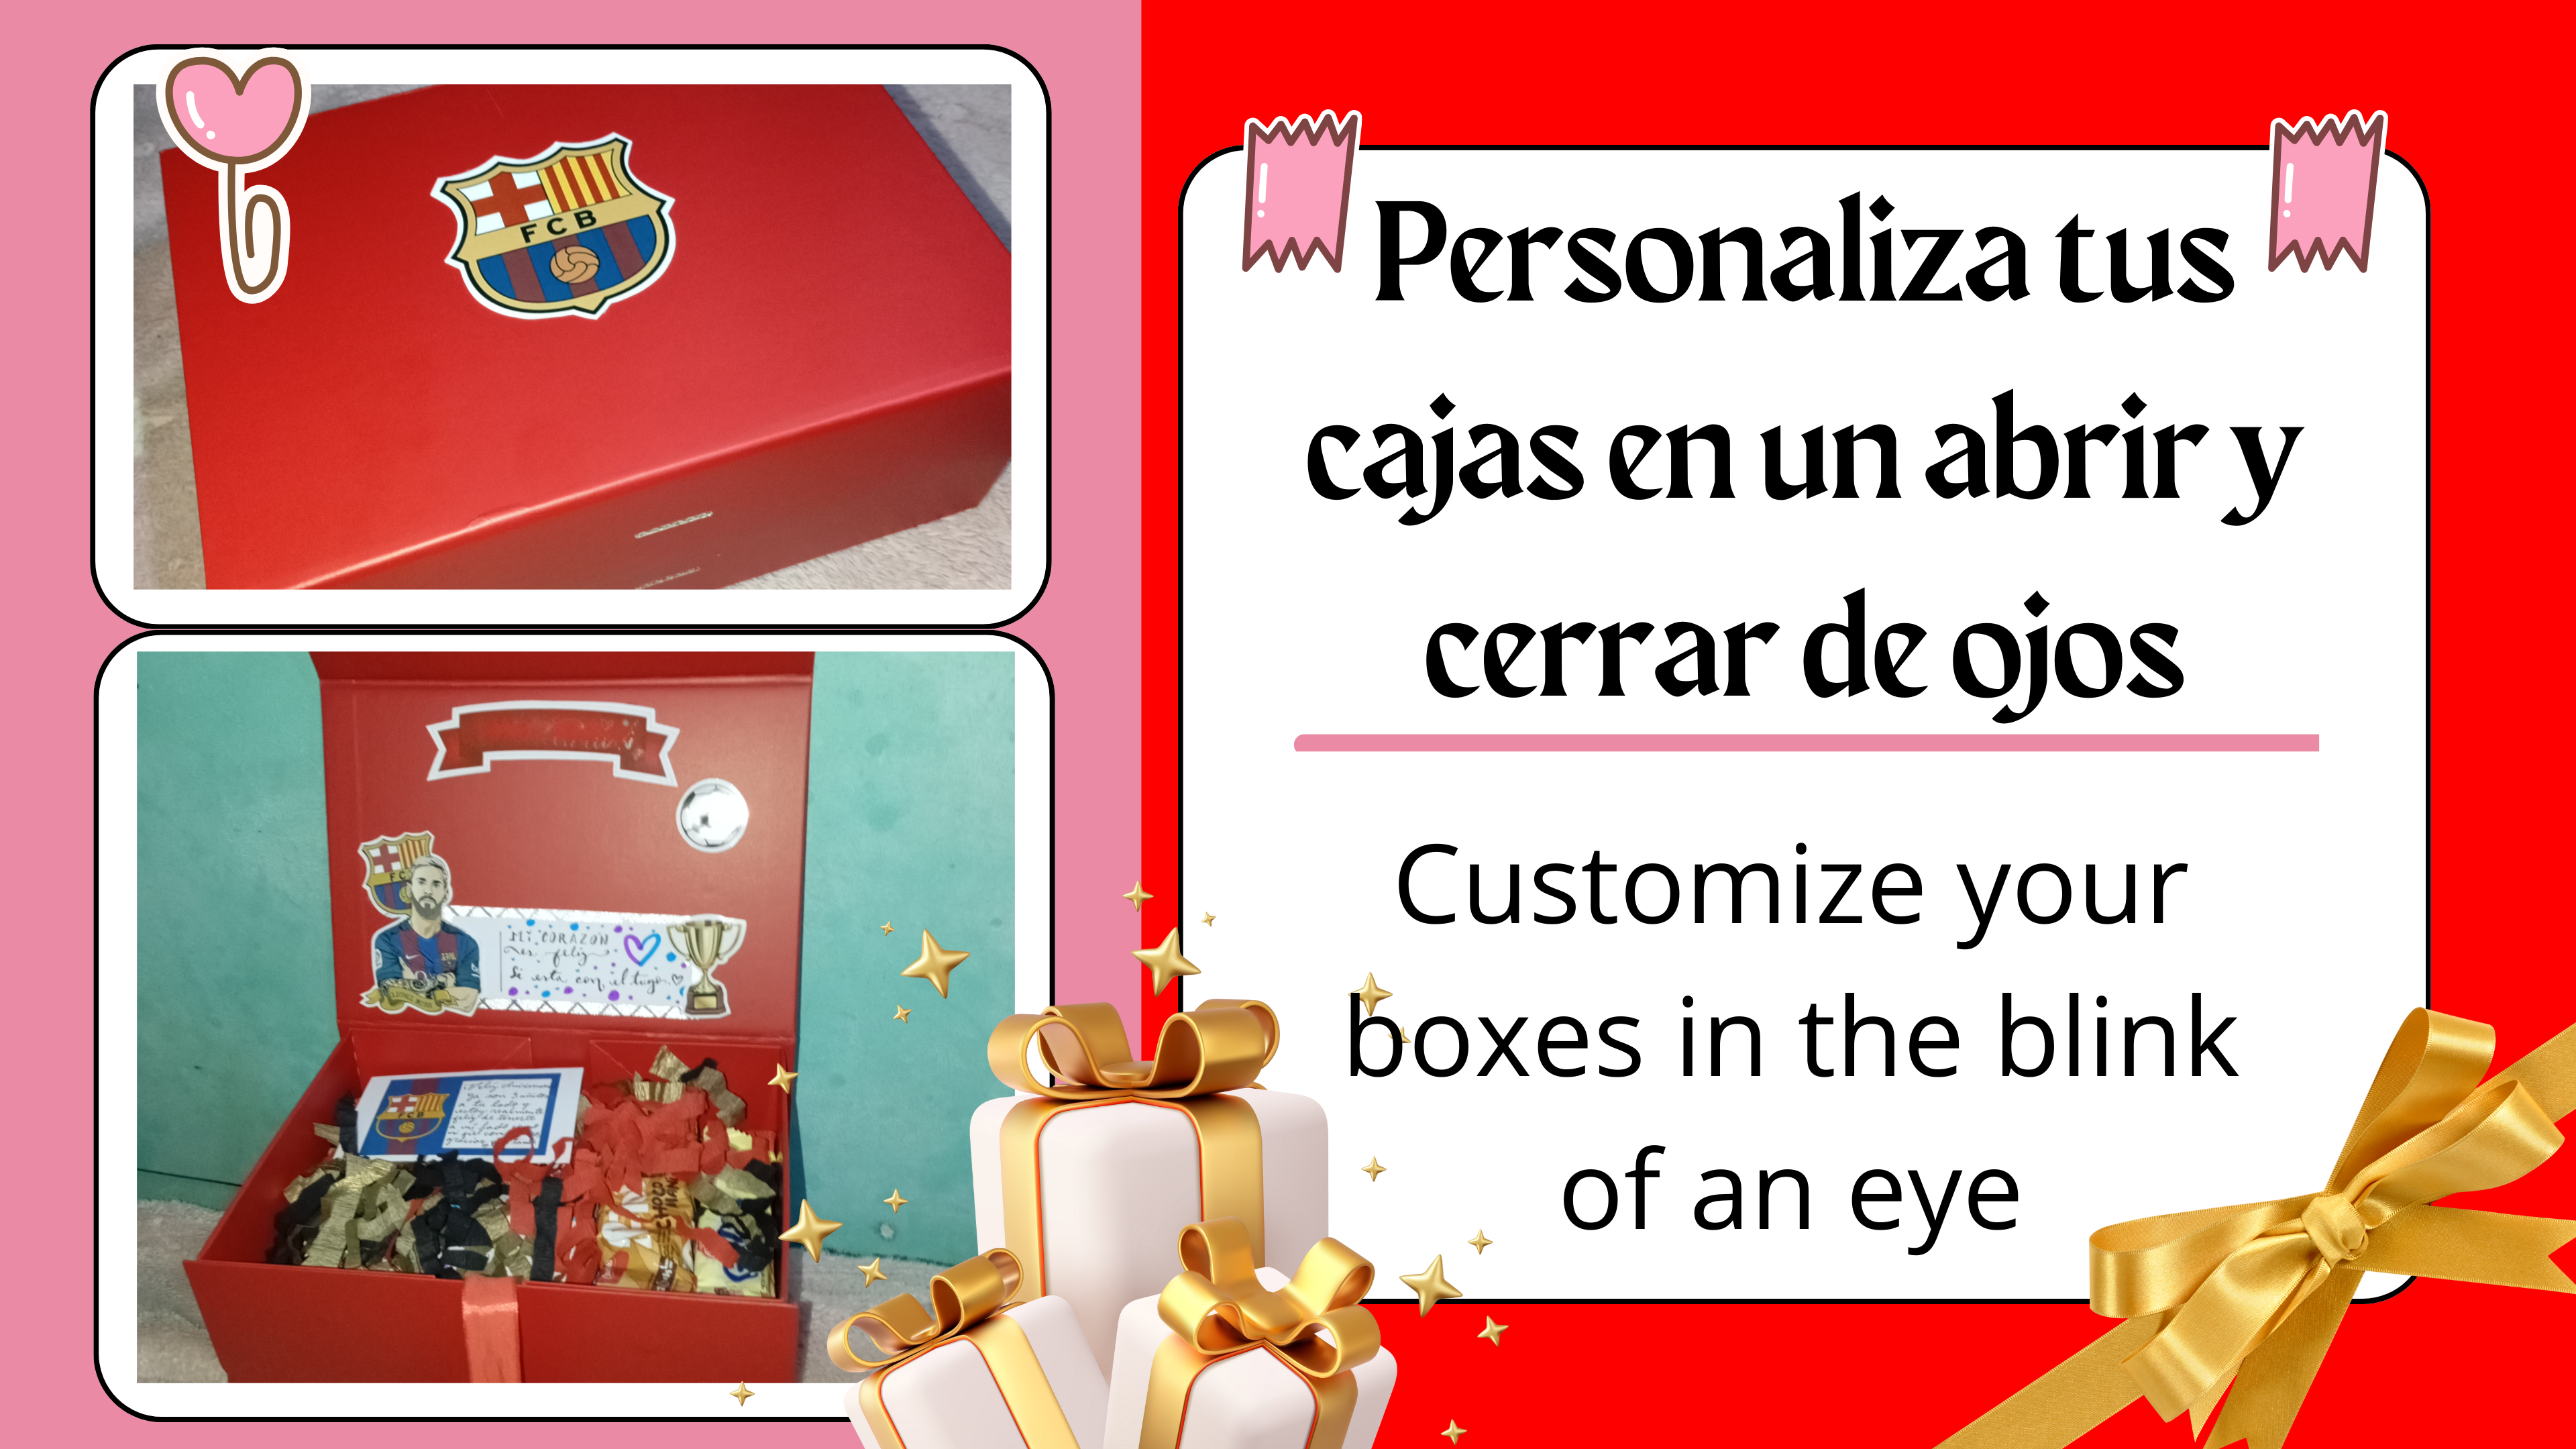
¡Bendecido día domingo familia de Hive Diy! Sean bienvenidos a un nuevo DIY ❤️. Esta vez, les tengo una idea fácil, al igual que rápida, está para poder decorar una caja, personalizada a nuestro gusto. Es una idea sencilla para personalizar con cualquier temática una caja, ya sea para nosotros y guardar cosas o para obsequiar y hacer esta un regalo único y diferente, a continuación empiezo con el tutorial paso a paso.
Blessed Sunday Hive Diy family! Welcome to a new DIY ❤️. This time, I have an easy idea, as well as quick, to decorate a box, personalized to our liking. It is a simple idea to customize with any theme a box, either for us and keep things or to give away and make this a unique and different gift, then I start with the step by step tutorial.

♡❤️💙Msterials💙❤️♡
- Caja
- Papel crepe
- un lazo o cinta para lazo
- Silicón
- Tijeras
- Box
- Crepe paper
- a ribbon or ribbon ribbon
- Silicone
- Scissors
♡❤️💙Step by Step💙❤️♡
Paso 1:
Step 1:
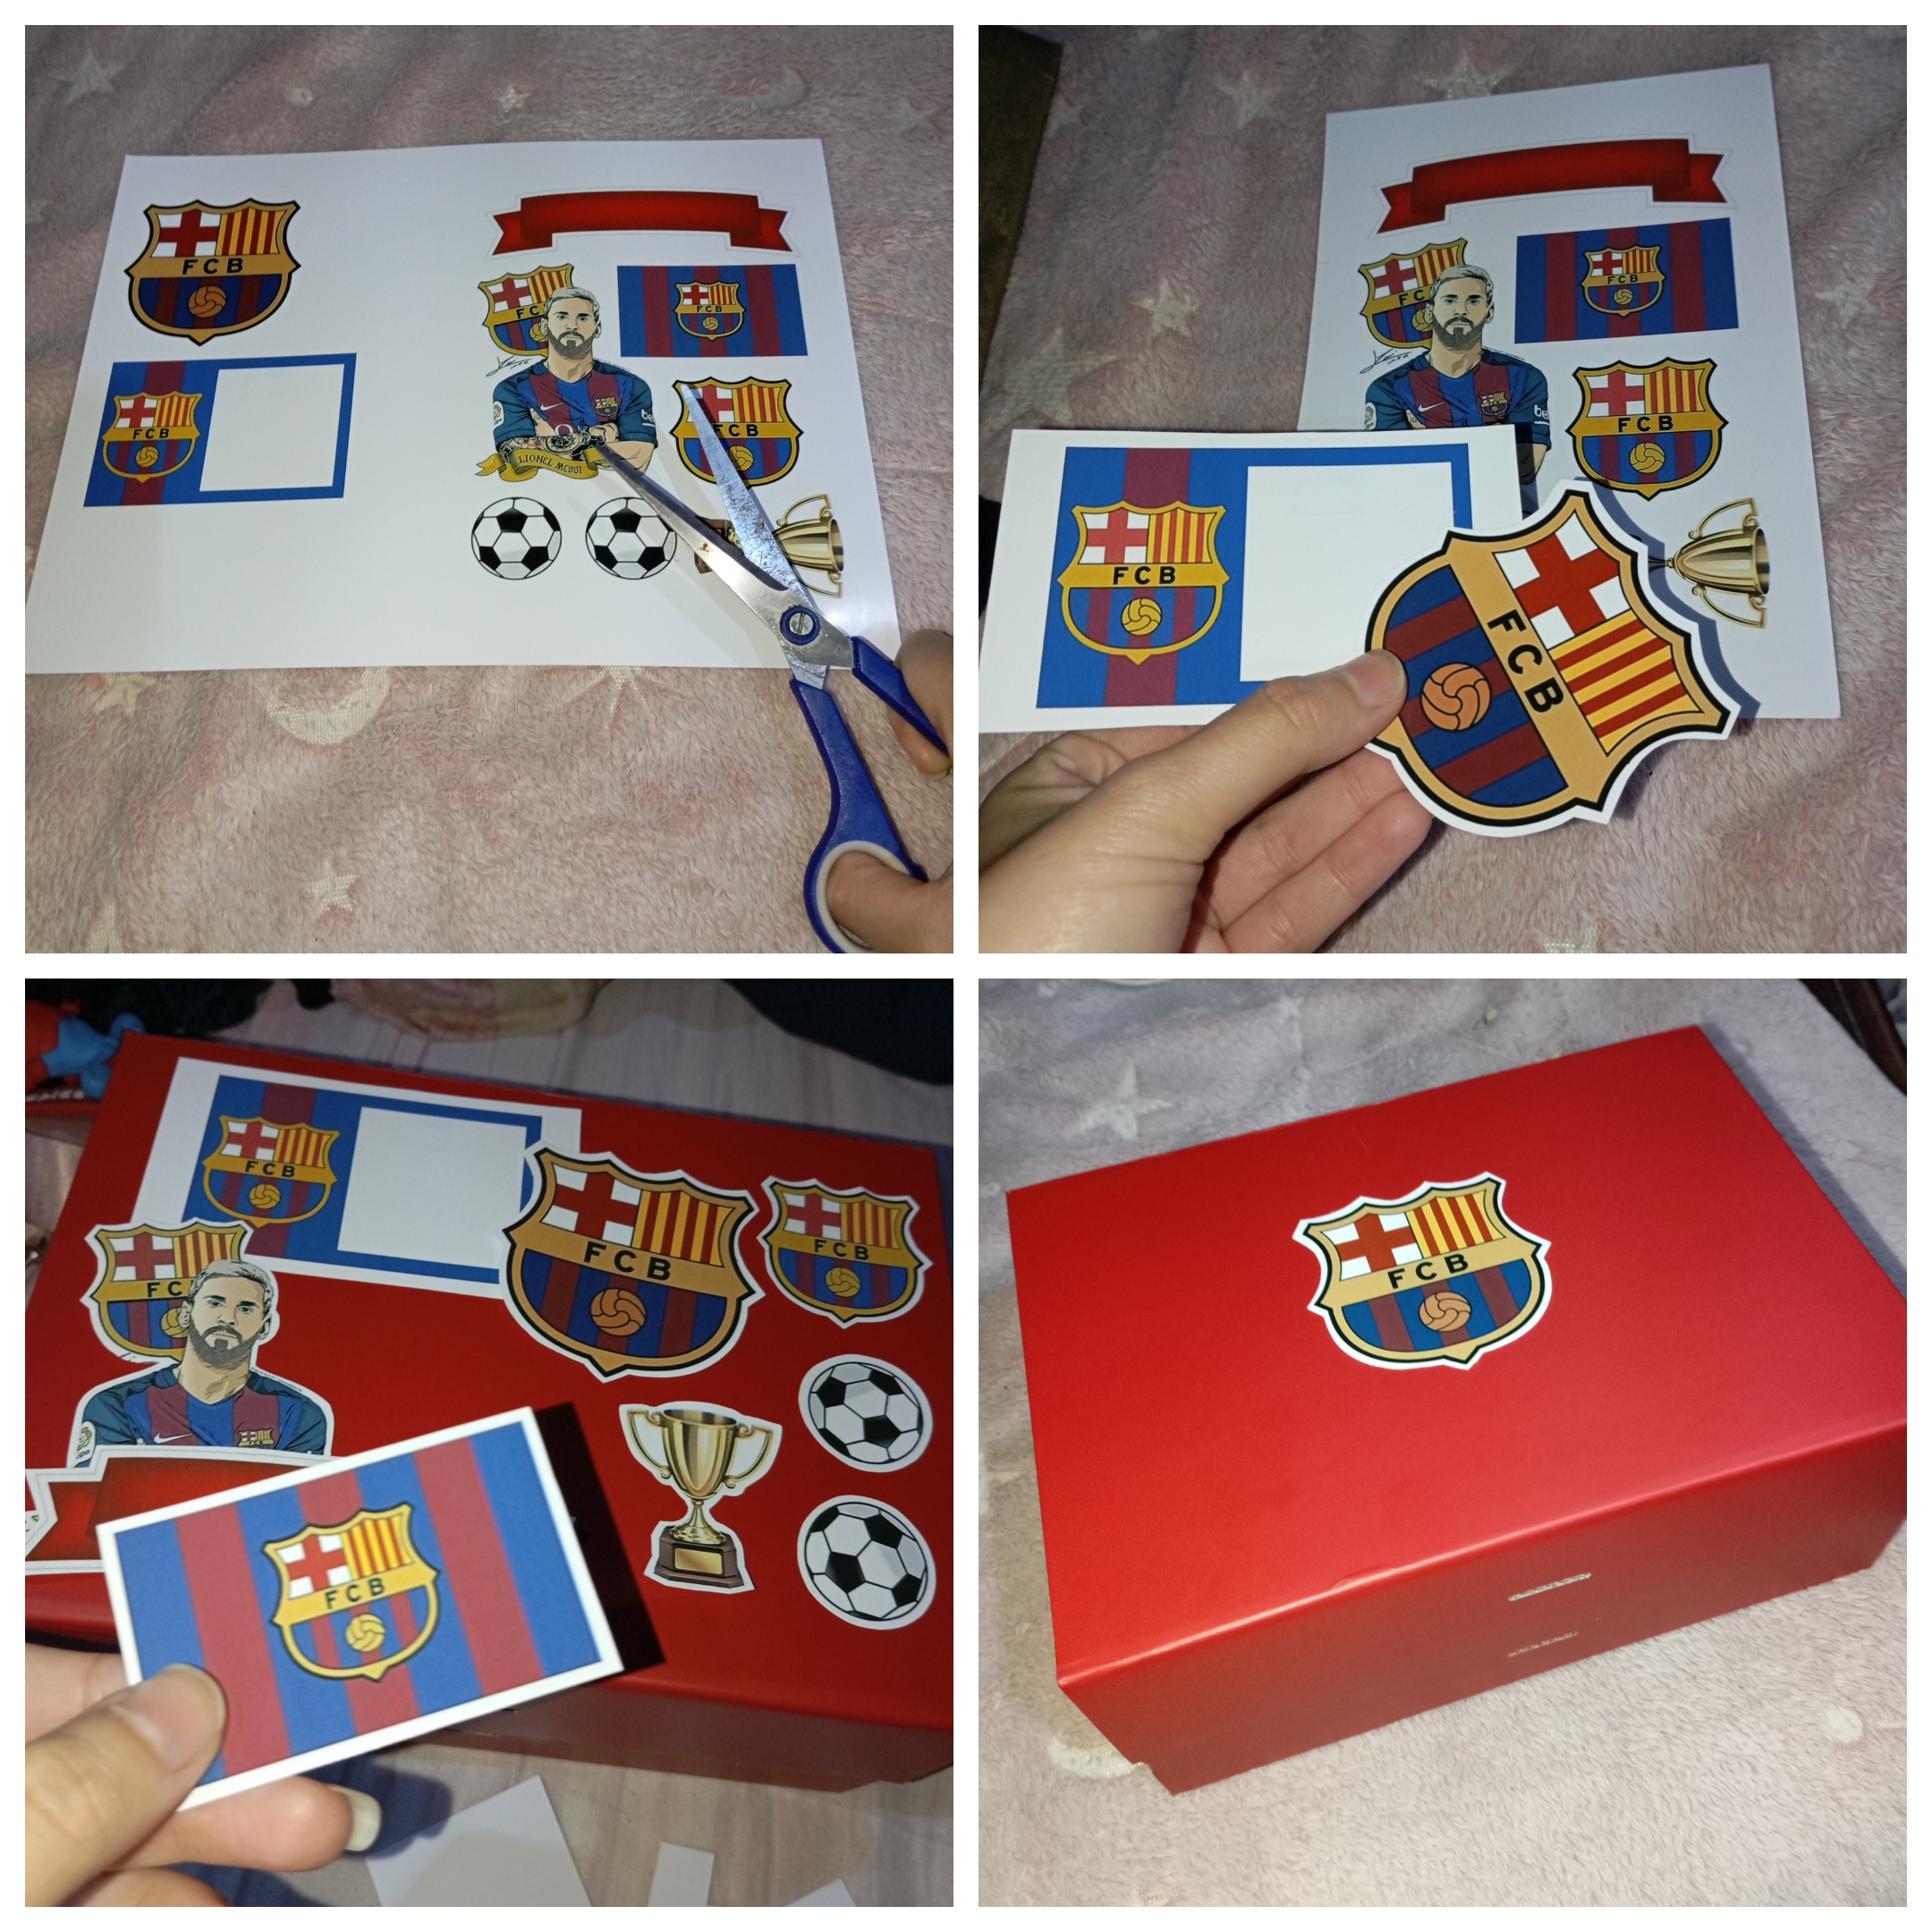
Lo primero que vamos a necesitar son impresiones personalizadas de la temática que vamos a querer decorar nuestra caja, estas impresas preferiblemente en papel fotográfico o también para mayor facilidad, es ideal el papel fotográfico autoadhesivo.
The first thing we will need are personalized prints of the theme that we want to decorate our box, preferably printed on photographic paper or for ease of use, self-adhesive photographic paper is ideal.
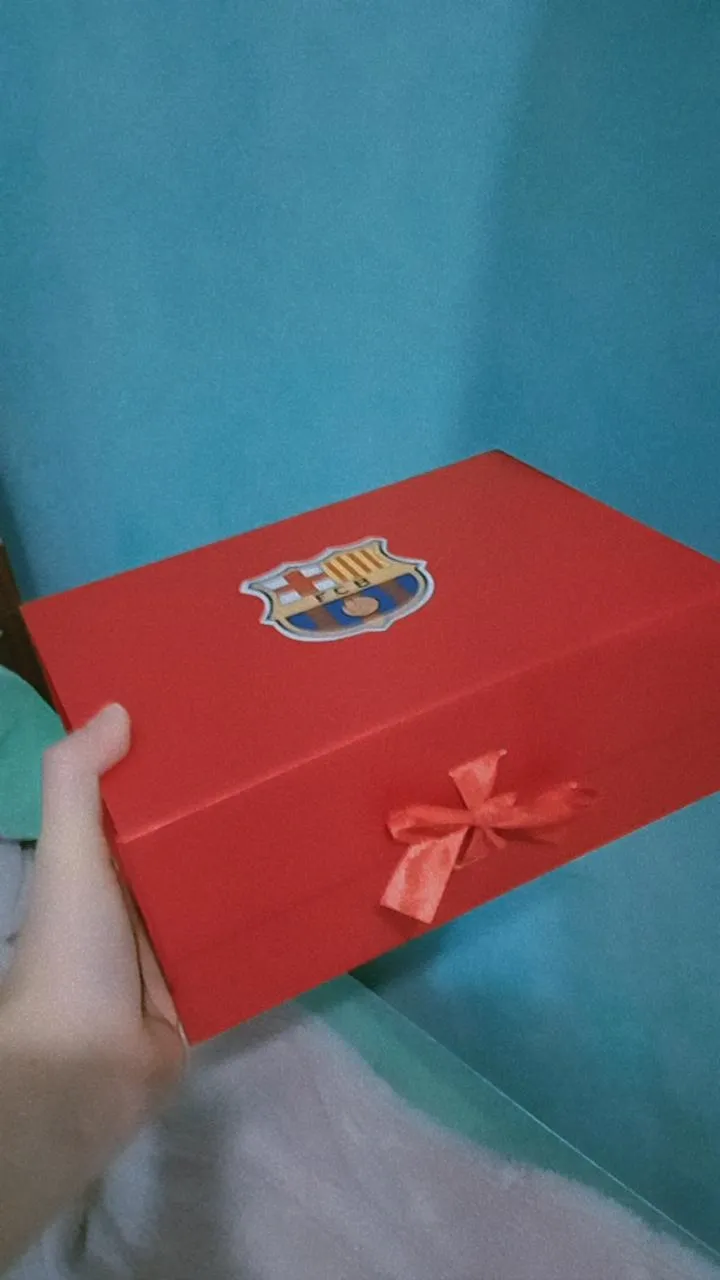
Así con nuestra tijera vamos a recortar cada una de estas figuras, así, me gusta recortarlas dejando un pequeño borde blanco de unos pocos milímetros de ancho, recortados podemos empezar a pegarlos con ayuda del silicón, yo comencé pegando el escudo en el centro de la tapa de la caja para que sea estilo su "portada" algo minimalista y lindo.
So with our scissors we are going to cut out each of these figures, like this, I like to cut them leaving a small white border of a few millimeters wide, cut out we can start gluing them with the help of silicone, I started by gluing the shield in the center of the lid of the box to make it style your "cover" something minimalist and cute.
Paso 2:
Step 2:
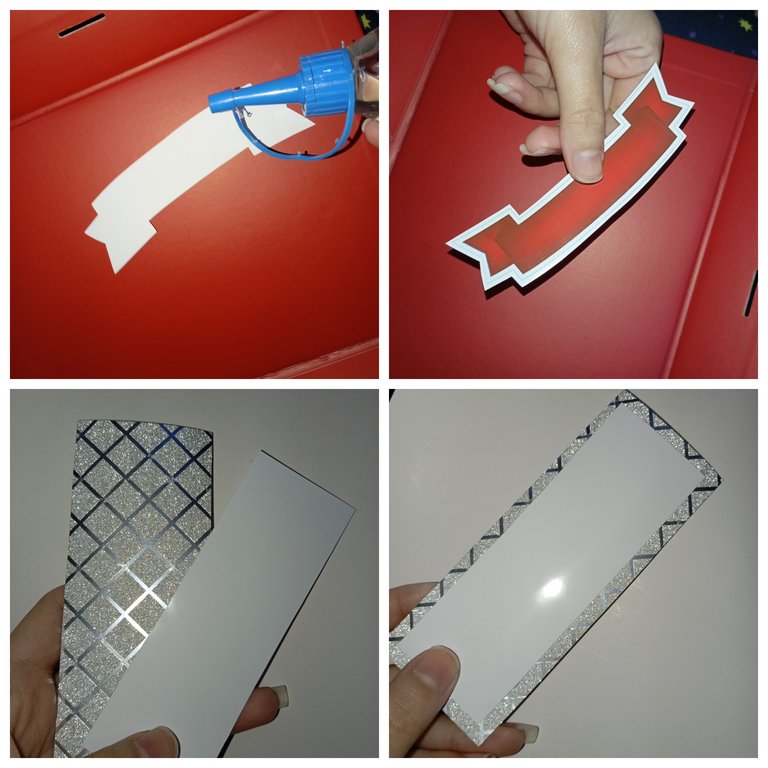
En este paso, continúe agregando silicón frío a la parte de atrás de una figura en forma de cinta, también pueden pegarlo con silicón caliente, así lo pegué en la parte de la tapa de adentro. También recorte un rectángulo alargado en cartulina blanca, en el cual se puede escribir encima un mensaje, luego también recorte un rectángulo medio centímetro más grande que el anterior en cartulina plateada y la pegué en la parte de atrás uniendo ambas, como pueden apreciar.
In this step, continue adding cold silicone to the back of a figure in the shape of a ribbon, you can also glue it with hot silicone, so I glued it on the inside of the lid. I also cut an elongated rectangle in white cardboard, in which you can write a message on top, then I also cut a rectangle half a centimeter larger than the previous one in silver cardboard and glued it on the back joining both, as you can see.
Paso 3:
Step 3:
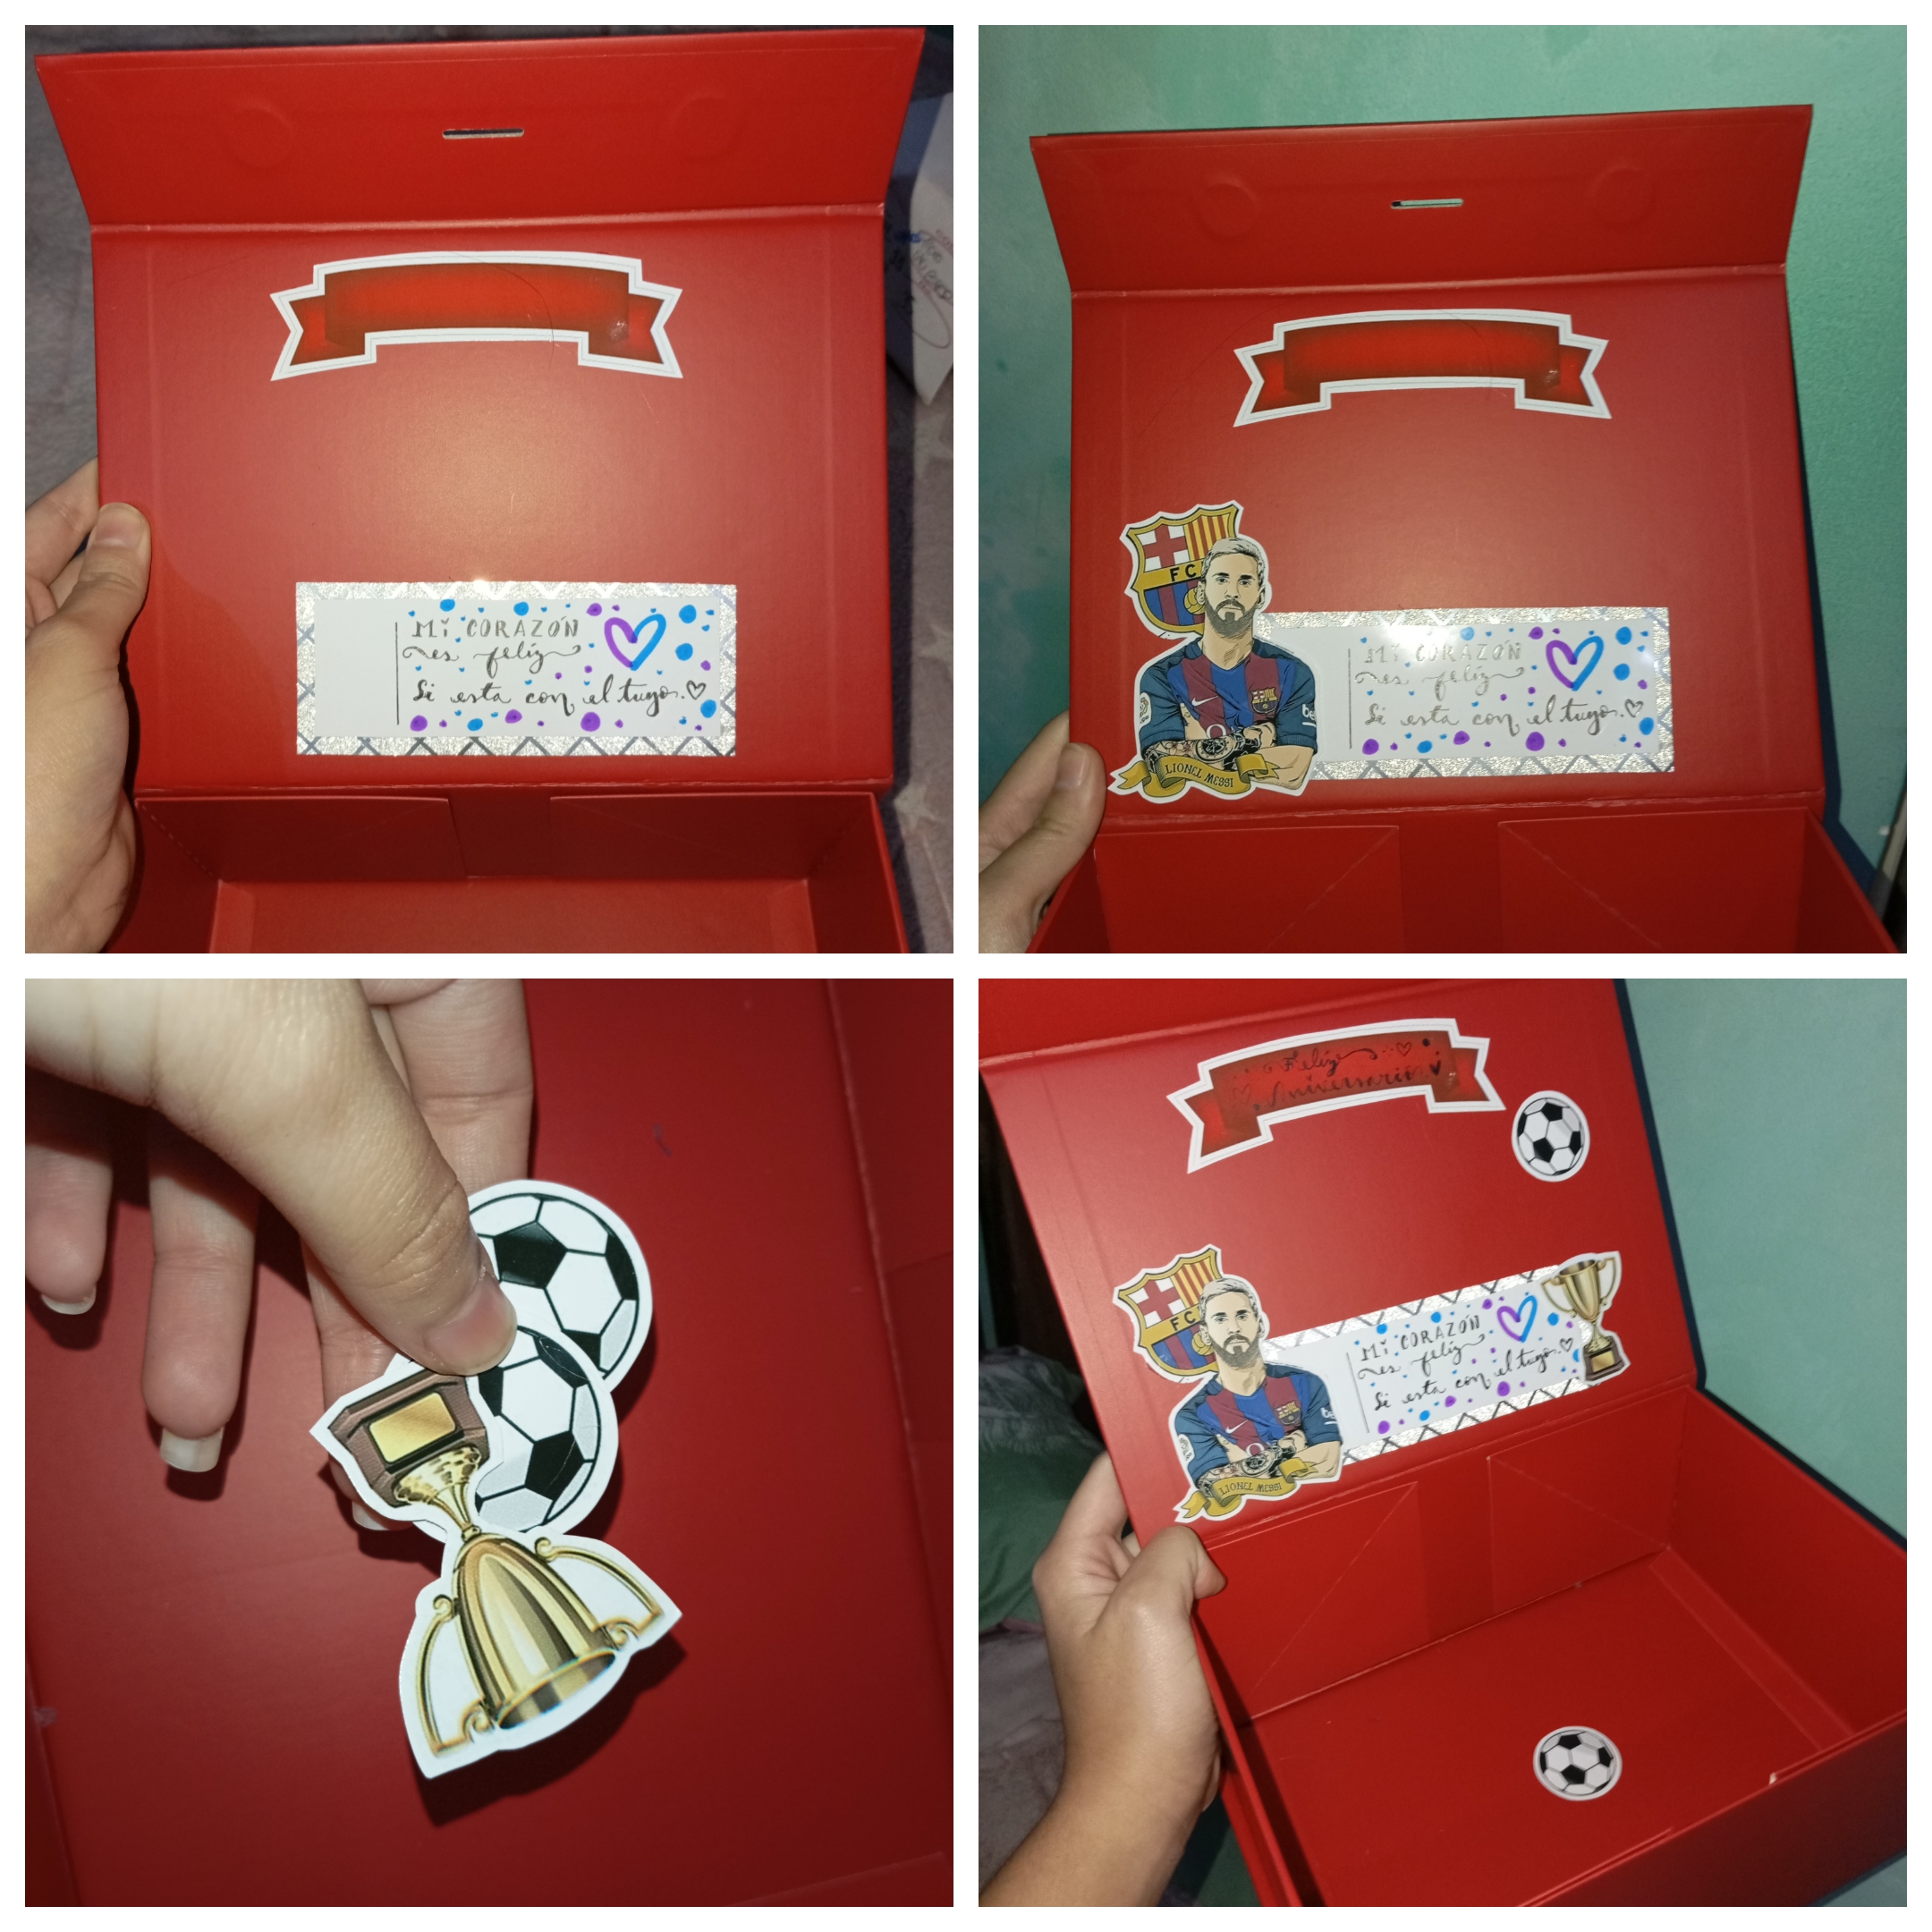
Ahora teniendo estas dos piezas, pegué la restante igualmente en la misma parte donde pegue la anterior, está vez más abajo, antes de escribir una linda frase. Después siguiendo la temática, pegué otra imagen esta vez de Messi, complementando así el diseño que quiero realizar, también pegué unos balones y un trofeo.
Now having these two pieces, I glued the remaining one in the same part where I glued the previous one, this time lower, before writing a nice phrase. Then following the theme, I glued another image this time of Messi, complementing the design I want to make, I also glued some balls and a trophy.
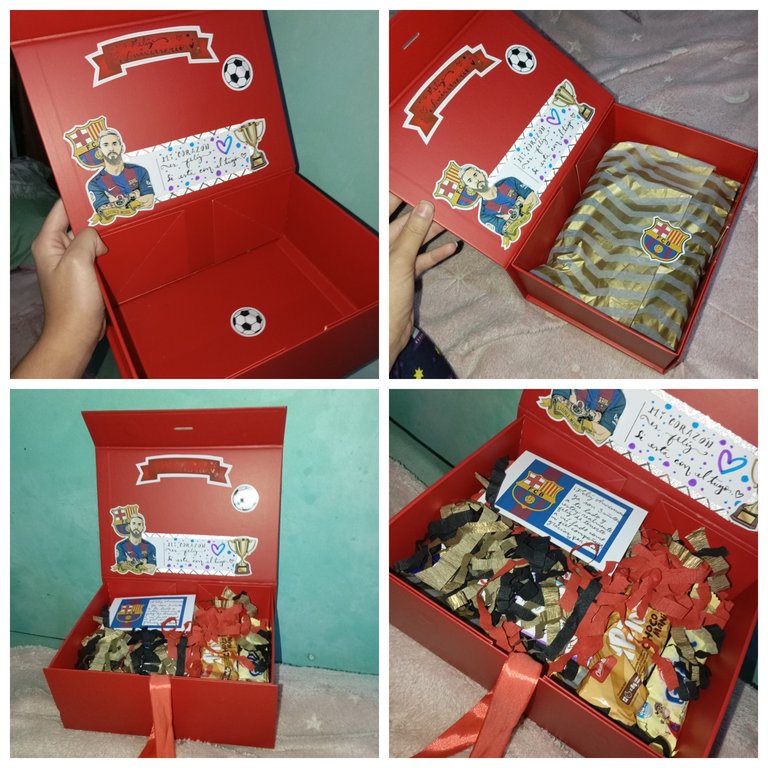
Por último, solo nos queda agregar los últimos detalles, yo primero coloqué la camisa envuelta en papel de seda con un stiker encima para que quede semi-sellado y agregué los dulces, al igual que pequeñas tiras que hice de papel crepé para rellenar el regalo y tenga un estilo sorpresa, también agregué la cinta para hacer un lazo al final. Así, tenemos como resultado una hermosa caja, personalizada con la temática que deseemos, hechas con poco tiempo, pocos materiales y mucho amor. ❤️✨
Finally, we only have to add the last details, I first placed the shirt wrapped in tissue paper with a stiker on top so that it is semi-sealed and added the candy, as well as small strips I made of crepe paper to fill the gift and have a surprise style, I also added the ribbon to make a bow at the end. Thus, we have as a result a beautiful box, personalized with the theme we want, made with little time, few materials and lots of love. ❤️✨
Espero que les haya gustado el tutorial del día de hoy, es un placer para mí seguir compartiendo con ustedes cada semana, les agradezco por llegar hasta el final de este tutorial, les envío un abrazo grande y espero leerlos en los comentarios al igual que compartir con ustedes de nuevo pronto, los quiero familia.💙❤️✨
I hope you liked today's tutorial, it is a pleasure for me to keep sharing with you every week, I thank you for reaching the end of this tutorial, I send you a big hug and I hope to read you in the comments as well as share with you again soon, I love you family.💙❤️✨
💙❤️¡Gracias por leer familia! Hasta la próxima aventura❤️💙
💙❤️Thanks for reading family! Until the next adventure❤️💙
Photos of my authorship taken from my Xiaomi Redmi 13C phone, edited in the free version of Canva
