✦ Sometimes from 1 single project can derive many different useful knowledge! It's good to section the tutorials in several parts to make it easier for the reader to digest the information, so here we are! I hope you enjoy this continuation 💕 - FotoJet Collage and Editing, photos by @Tesmoforia ✦

🇪🇸 ~ ¡Moshiii moshii! 💖 Ésta es la segunda parte del proceso de creación de una mini mochila anti-robo, donde exploramos cómo crear un morral en casa con unas características muy especiales, ¡adorable, diferente y funcional!; a modo complementario, en esta publicación encontraras todas las medidas con detalle, mejores fotos del resultado y también el instructivo complementario de cómo crear sus patrones de modo resistente y durable en el tiempo 🧩 💡
🇺🇸 ~ Moshiii moshii! 💖 This is the second part of the process of creating a mini anti-theft backpack, where we explore how to create a backpack at home with some very special features, adorable, different and functional! As a complementary, in this publication you will find all the measurements in detail, better photos of the result and also the complementary instructive of how to create your patterns in a resistant and durable way over time 🧩 💡
• 𝕊𝕋𝔼ℙ 𝔹𝕐 𝕊𝕋𝔼ℙ 𝕋𝕌𝕋𝕆ℝ𝕀𝔸𝕃 •
« "How to create durable patterns economically and efficiently" »

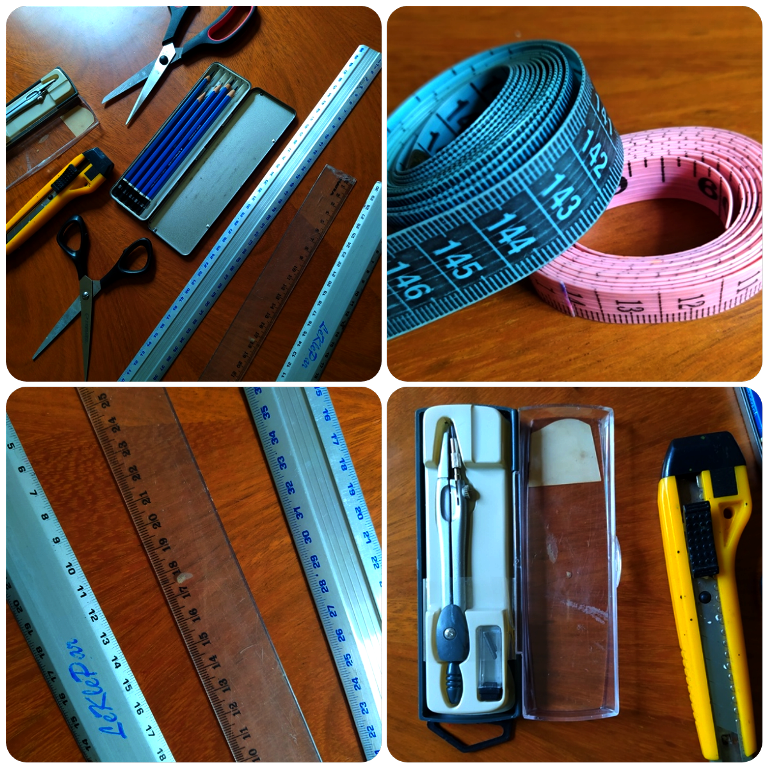

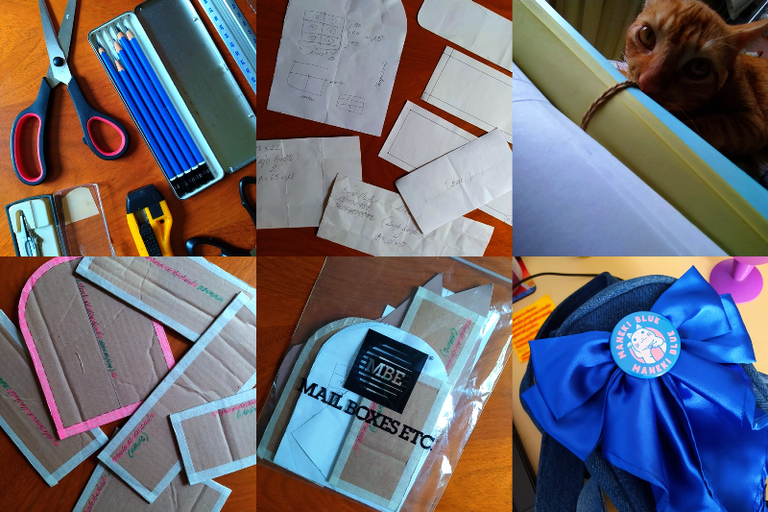
🔶 Los materiales y herramientas que necesitas para la creación de estos nuevos y más resistentes patrones son: Lápiz, borrador, reglas de distintos tamaños, compas, tijeras, exacto, cartón de reciclaje, papel para patronar o papel reciclado, cinta adhesiva o tirro, cinta métrica, marcadores de colores, resaltadores, bolígrafo y una bolsa de plástico mediana.
🔷 The materials and tools you need to create these new and more resistant patterns are: Pencil, eraser, rulers of different sizes, compass, scissors, cutting tools, recycled cardboard, pattern paper or recycled paper, masking tape or string, tape measure, colored markers, highlighters, pen and a medium plastic bag.

« ¿Cuál es el origen de este tópico? »
Para muchos proyectos creativos la creación de patrones es indispensable, es un proceso de ensayo y error en la experimentación y búsqueda de la guía-base que replicaremos en el material final (muchas veces costoso o dificil de conseguir); asi, es una pena que con el uso, los patrones de papel, cartulina o materiales suaves se van deteriorando, su vida útil es realmente corta.« What is the origin of this topic? »
For many creative projects the creation of patterns is indispensable, it is a process of trial and error in the experimentation and search of the guide-base that we will replicate in the final material (many times expensive or difficult to obtain); thus, it is a pity that with the use, the patterns of paper, cardboard or soft materials are deteriorating, their useful life is really short.
✦ After two uses these patterns began to decline in resistance, also the tips of the hearts were damaged ✦
« ¿Por qué necesitas aprender a generar patrones más resistentes? »
La probabilidad de que quieras o necesites replicar un proyecto son altas, quizá en un futuro quieras hacer esa prenda y vestir o accesorio de nuevo y no recuerdes las medidas, o los patrones se hayan desfigurado al punto de la inutilidad. ¡Piensa más grande!, ¿qué pasa si te comisionan una replica?, ¿qué pasa si quieres vender tu arte o formalmente abrir una tienda?, en la reproducción de piezas de manera artesanal, los patrones pueden llegar a ser usados varias veces al día.« Why do you need to learn how to generate more resistant patterns? »
The likelihood that you want or need to replicate a project are high, maybe in the future you want to make that piece of clothing and garment or accessory again and you don't remember the measurements, or the patterns have been defaced to the point of uselessness. Think bigger!, what if you are commissioned to make a replica?, what if you want to sell your art or formally open a store?, in the reproduction of handmade pieces, patterns can be used several times a day.
✦ I really like the thick lumpy paper like the one in the pictures, Tokio seems to like it too, but it is expensive and I keep it only for the final patterns that go in my file ✦
Pensemos también desde el aspecto de la economía. En mi caso, afortunadamente tengo mucho papel de reciclaje guardado gracias a las donaciones de amigos y familiares que tienen trabajos de oficina donde se maneja mucho papeleo al día, y en lugar de desecharlo, lo guardan para mí sabiendo que le daré un segundo uso a ese material. Pero actualmente, comprar papel para crear patrones no es nada económico, el papel esta costoso -como todo lo demás que ha subido de precio por la inflación global- y es menester que nuestros pasatiempos y hobbies sean sostenibles en el tiempo para no sufrir de frustraciones o trabas en el proceso creativo por falta de materiales.
In my case, fortunately I have a lot of recycled paper saved thanks to donations from friends and family who have office jobs where a lot of paperwork is handled every day, and instead of throwing it away, they save it for me knowing that I will have a second use for that material. But nowadays, buying paper to create patterns is not at all economical, paper is expensive -like everything else that has gone up in price due to global inflation- and it is necessary that our hobbies and pastimes are sustainable over time so as not to suffer from frustrations or obstacles in the creative process due to lack of materials.
✦ “I'm tired boss...” ✦
« Muéstrame cómo se ven unos patrones de papel usados, ¿enserio es tan malo? »
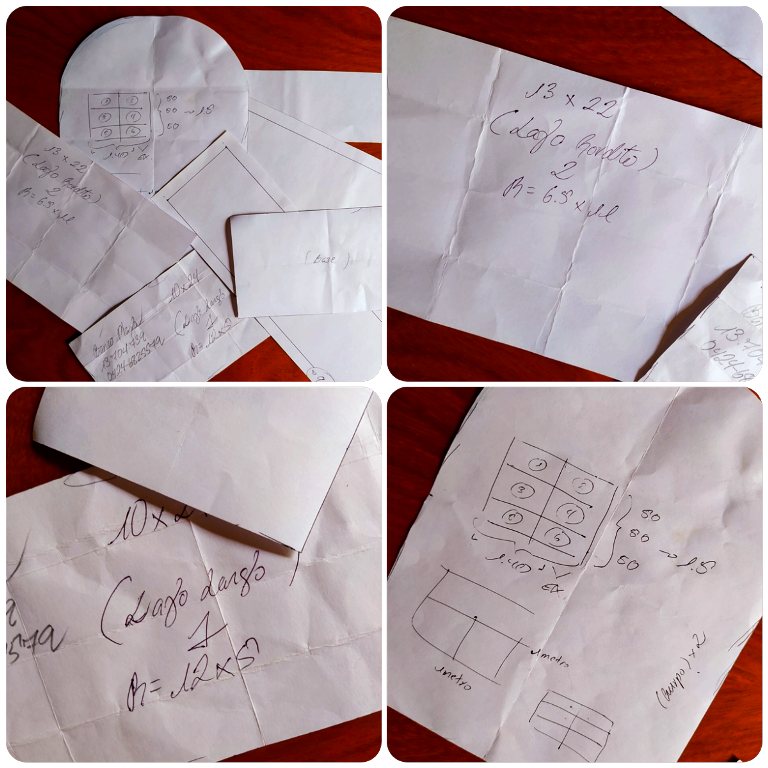
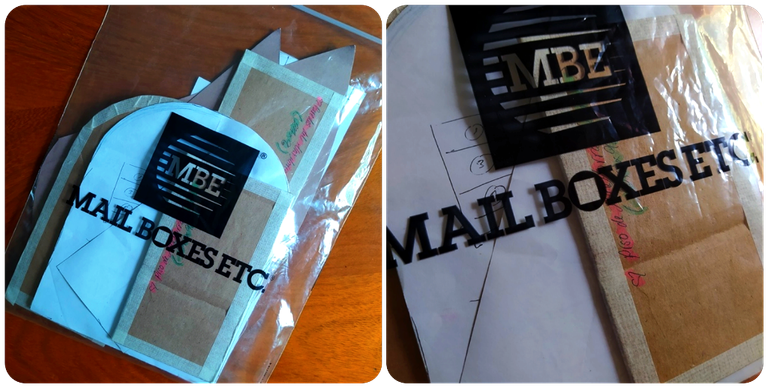
Mira estas fotos de mi mas reciente proyecto como una prueba de mis palabras. Esos patrones solo tuvieron 1 uso y mira lo maltratados que estan. Y eso que soy una persona bastante delicada y trato mi material con mucho respeto. Pero si quiero replicar ese morral, estos patrones ya no son tan efectivos. Aquí te propongo una alternativa paso a paso:« Show me what used paper patterns look like, is it really that bad? »
Check out these pictures of my most recent project as a proof of my words. Those patterns only had 1 use and look how battered they are. And that's because I'm a pretty delicate person and I treat my material with a lot of respect. But if I want to replicate that backpack, these patterns are no longer as effective. Here's a step-by-step alternative:
✦ Look at that difference! ✦
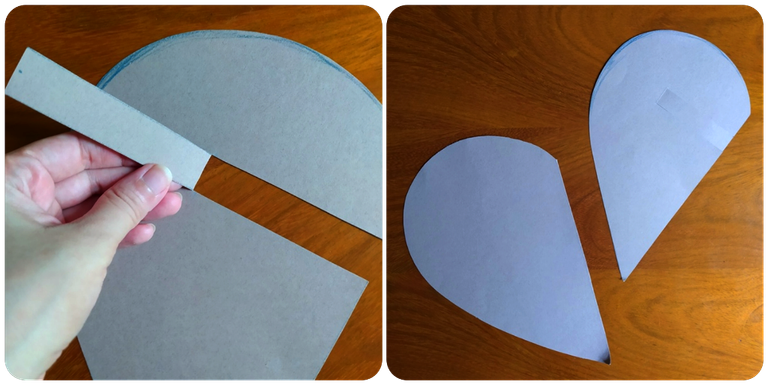
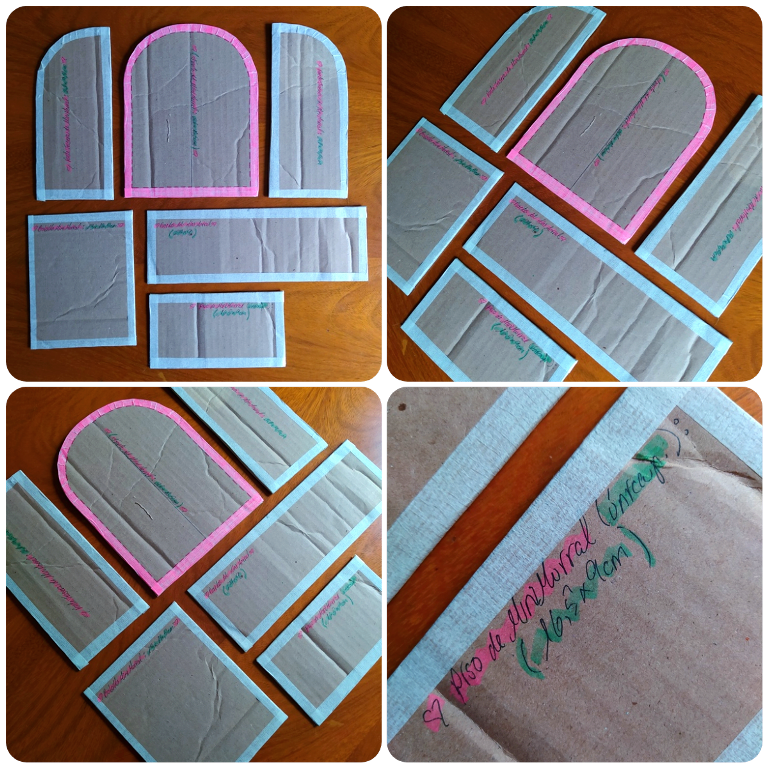
🔵 PASO 1 ~ Para la creación de estos patrones necesitarás primero crearlos en el papel de tu preferencia, luego, vas a calcar todo su borde sobre el cartón de reciclaje que hayas escogido. ¡Es muy importante incluir los centimetros de costura!.
🟡 STEP 1 ~ For the creation of these patterns you will need to first create them on the paper of your choice, then, you are going to trace their entire edge onto the recycled cardboard you have chosen. It is very important to include the centimeters of stitching!

✦ If the cut is uneven, this irregularity will be transferred to the fabric and will affect the edge stitching, which will not match. Remember, little mistakes add up and together they create big irregularities in the results or problems in the process ✦
🔵 PASO 2 ~ Luego, y esta es la parte más importante, debes cortar el cartón con mucho cuidado y cariño, procurando que los cortes sean lo más precisos y limpios posibles. Para eso ubica la regla de metal alineada con la guía que hayas dibujado y pasa con seguridad el cutter con una hojilla nueva o bien afilada.
🟡 STEP 2 ~ Next, and this is the most important part, you must cut the cardboard very carefully and lovingly, making sure that the cuts are as precise and clean as possible. To do this, place the metal ruler aligned with the guide you have drawn and safely pass the cutter with a new or sharp blade.
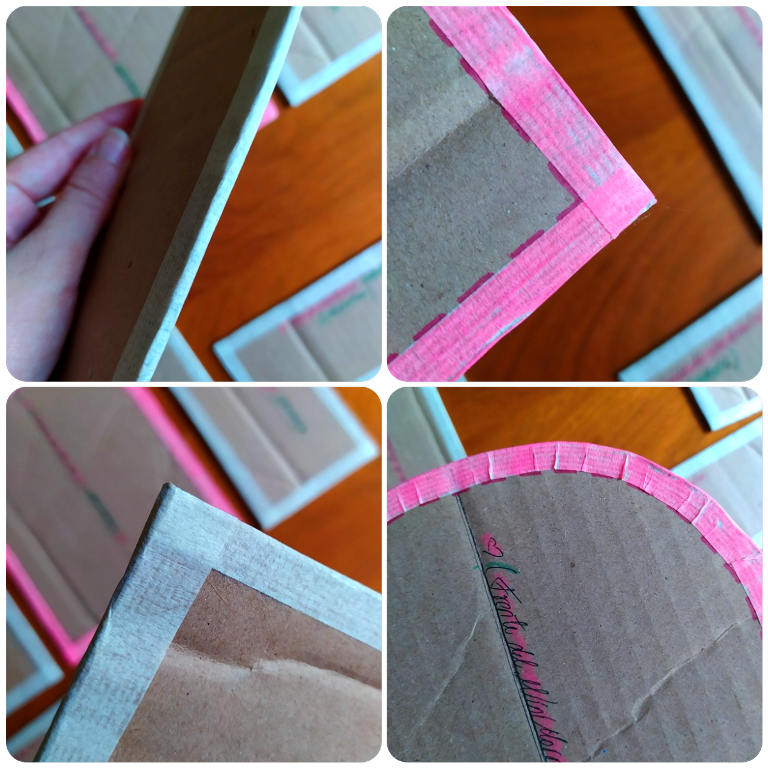
✦ You can add all the instructions you want and also paint with marker around the edges to accentuate the features or indications you want! ✦
🔵 PASO 3 ~ Con todas las piezas cortadas limpiamente, vas a forrar todos los bordes con cinta adhesiva o tirro. Para una mejor terminación puedes presionar el mango de una tijera grande contra los bordes para que la cinta se adhiera mejor. Luego puedes marcar con bolígrafo o marcador toda la información importante en los patrones: Nombre del proyecto al que pertenece la pieza, número, a qué parte del proyecto pertenece, sus medidas de alto y largo, y cuantas veces se replica.
🟡 STEP 3 ~ With all the pieces cut cleanly, you are going to line all the edges with tape or masking tape. For a better finish you can press the handle of a large scissors against the edges so the tape will adhere better. Then you can mark with a pen or marker all the important information on the patterns: Name of the project the piece belongs to, number, what part of the project it belongs to, its height and length measurements, and how many times it is replicated.
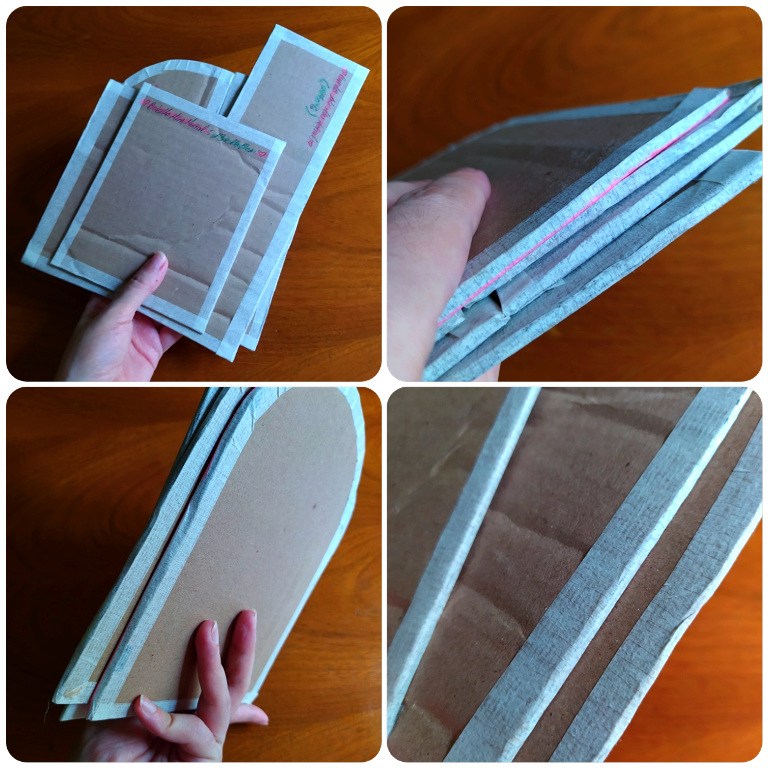
👏 ¡Ligero, resistente, compacto, y facil de almacenar! 👏
El resultado superará tus expectativas, porque estos patrones no se magullaran cuando pases por sus bordes lápices, bolígrafos, marcadores o tiza para tela.👏 Lightweight, strong, compact, and easy to store! 👏
The result will exceed your expectations, because these stencils will not bruise when you run pencils, pens, markers or fabric chalk along their edges.
✦ They are also better protected from moisture and paper-eating insects ✦
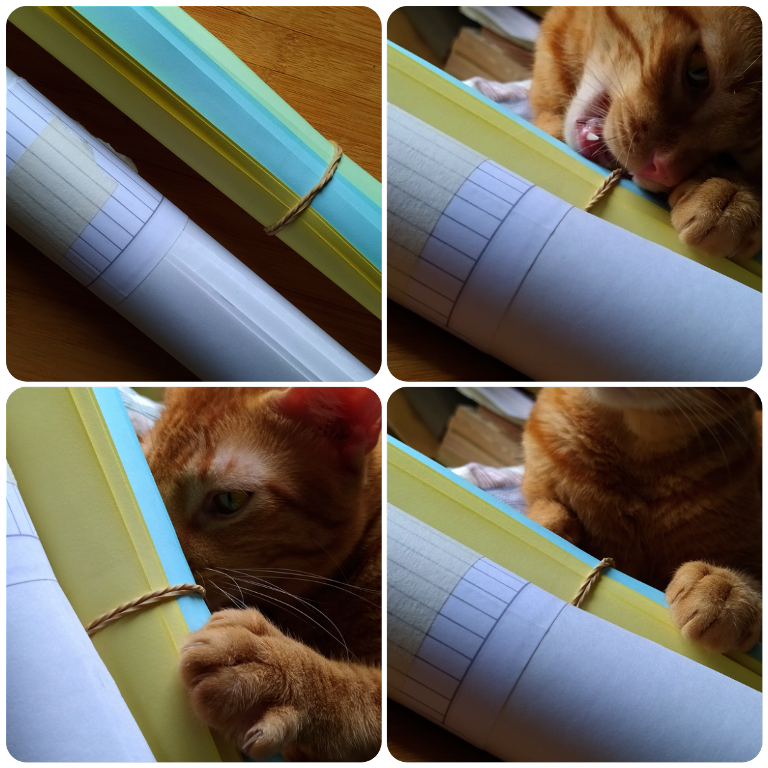
He comenzado a trasladar mis patrones de papel a esta modalidad, y las bolsitas que contienen cada juego de cartón caben muy bien en una caja de papelería regular, ¡hacen un archivo bastante lindo!, maybe traiga fotos en un futuro cuando la caja esté más llena.
I've started transferring my paper patterns to this modality, and the little bags containing each cardboard set fit nicely in a regular stationery box, they make quite a nice file, maybe bring photos in the future when the box is fuller.
✦ I added a blue satin ribbon as decoration and an advertising badge from my store as the center. Also an old Sailor Moon keychain on the zipper! ✦
« ¿Y entonces, las medidas de este lindo proyecto? »
Parte frontal: 21 x 165 cm - Parte trasera (en 2 secciones): 21 x 9.5 cm - Piso: 16.5 x 9 cm - Borde: 54 x 9 cm - Bolsillo frontal: 13 x 16.5 cm - Correas: 74 x 10 cm - Agarradera: 15 x 4 cm ✅« And then, the measurements of this cute project? »
Front: 21 x 165 cm - Back (in 2 sections): 21 x 9.5 cm - Floor: 16.5 x 9 cm - Border: 54 x 9 cm - Front pocket: 13 x 16.5 cm - Straps: 74 x 10 cm - Handle: 15 x 4 cm ✅
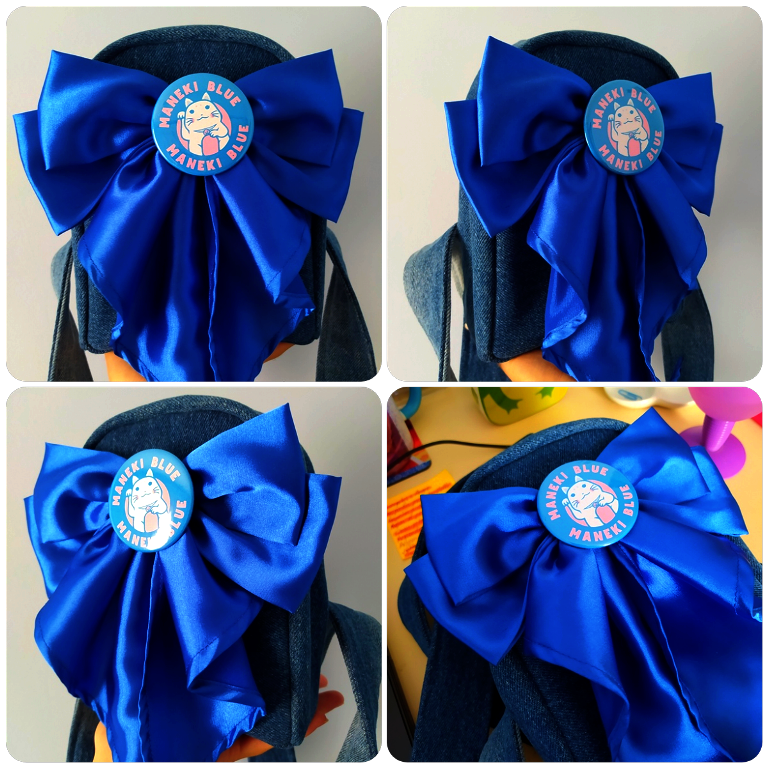
✦ In a previous post I had taken different pictures of this bag already finished because I couldn't stand the excitement hahaha I'm obsessed with the color blue and so happy to see that the projects are coming out beautiful and people are liking them! These pictures were taken this morning 🌤 😍 ✦
Gracias a estos nuevos patrones podre hacer réplicas de este mini morral 🥰 👏 Aunque he recibido recomendaciones de probar otros tipos de tela, especialmente estampadas y de color pastel, de texturas suaves y no tan rusticas. Lo estoy considerando.
Thanks to these new patterns I will be able to make replicas of this mini backpack 🥰 👏 Although I have received recommendations to try other types of fabric, especially patterned and pastel colored, soft textures and not so rustic. I am considering it.
🔹 R E S U M E N 🔹 Economizar de forma eficiente los instrumentos básicos de uso regular que necesitamos para realizar nuestros proyectos hace que ésta actividad se haga sostenible a lo largo del tiempo. Simplificar procesos con materiales cotidianos es una opción que no debe ser subestimada. Atrévete a darle una segunda oportunidad a los materiales mas simples, ¡permítete experimentar y sorpréndete con los resultados! (* · ∀ ·) 爻 (· ∀ · *)
🔸 S U M M A R Y 🔸 Efficiently organizing the basic tools of regular use that we need to carry out our projects makes this activity sustainable over time. Simplifying processes with everyday materials is an option that should not be underestimated. Dare to give a second chance to the simplest materials, allow yourself to experiment and be surprised with the results! (* · ∀ ·) 爻 (· ∀ · *)
~ You must login to the site first, then click on the text above ~


✨ 🍓 All texts and images by @Tesmoforia 🍓 ✨
📸 Tools: Xiaomi Redmi Note 8 📲 Snow 🎬 Remini 🌓 FotoJet 📐
🚨 ¡Please do not take, edit or republish my material without my permission! 🚨
💌 ¿Do you wish to contact me? Mino.Cosplay@Gmail.com 💌
🌙 Banner, signature and separators by Keili Lares