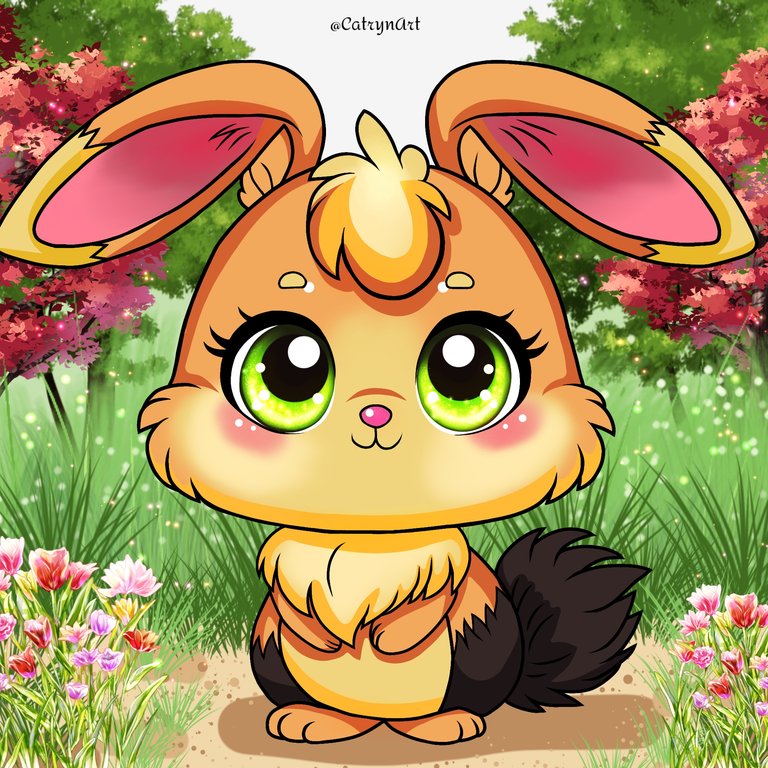
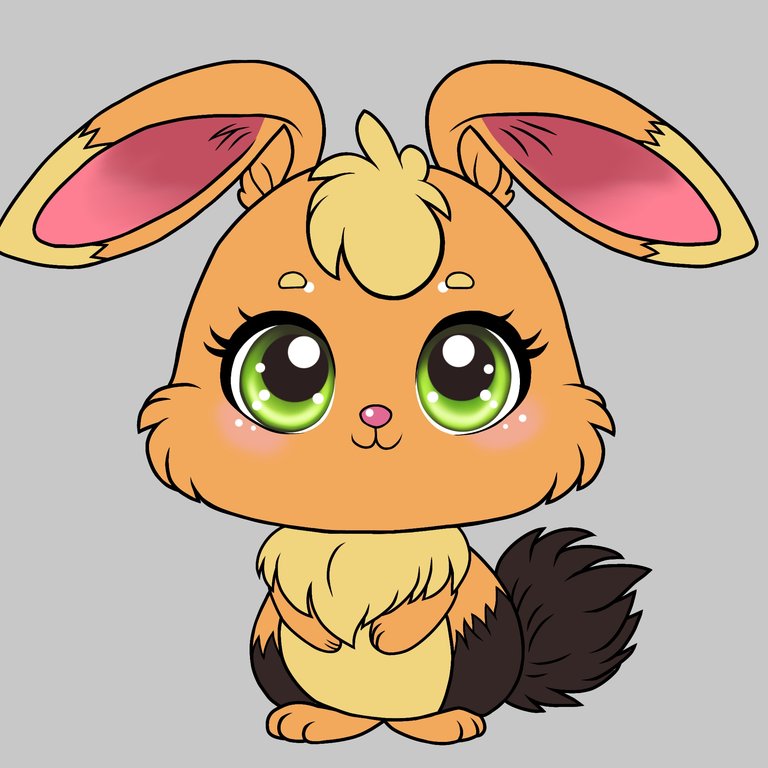
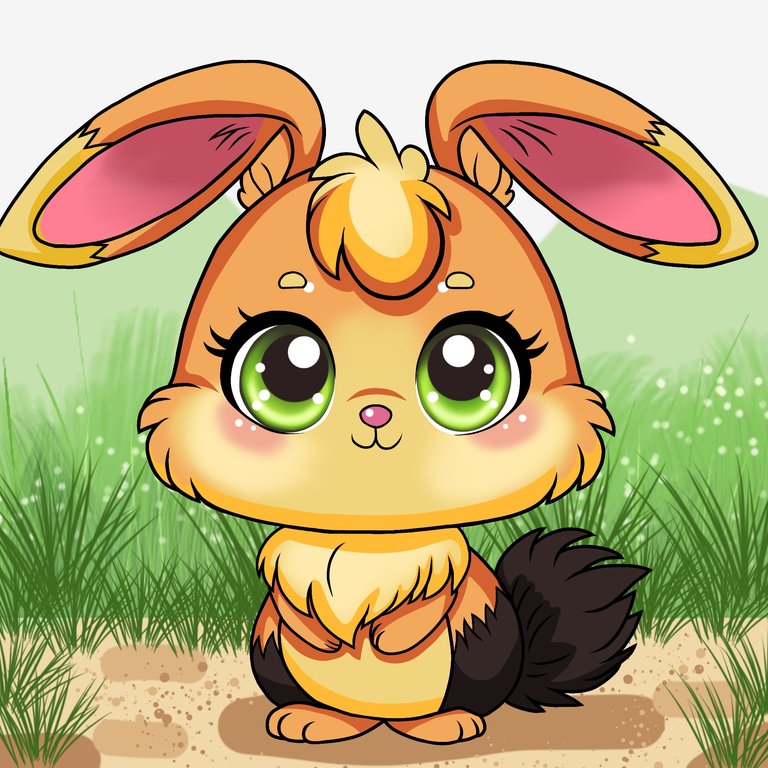
Hola un saludo a todos comunidad! Mis mejores deseos y espero se encuentren muy bien, quería seguir compartiendo más con ustedes en este fin de semana, y hoy estuve trabajando esta pieza que en ésta noche realice con una versión Chibi de la criatura Zappit de @Holozing, tomando todos sus colores y características que representan a la criatura base. Fue muy lindo hacerlo, me encanta mucho tomarme el tiempo en realizar el delineado y ya la otra fase de aplicación de los colores es mucho más fácil, anteriormente había realizado una versión surealista al estilo que me gusta y en esta ocasión quise presentarlo en éste estilo más tierno. Me ha gustado como resultó y espero les guste mucho.
Hello, greetings to all community! My best wishes and ssbut you will be very well, I wanted to continue sharing more with you this weekend, and today I was working on this piece that tonight I made with a Chibi version of the Zappit creature from @Holozing, taking all its colors and characteristics that represent the base creature. It was very nice to do it, I really love taking the time to make the outline and the other phase of applying the colors is much easier, previously I had made a surrealist version in the style that I like and on this occasion I wanted to present it in this style more level. I liked how it turned out and I hope you like it a lot.

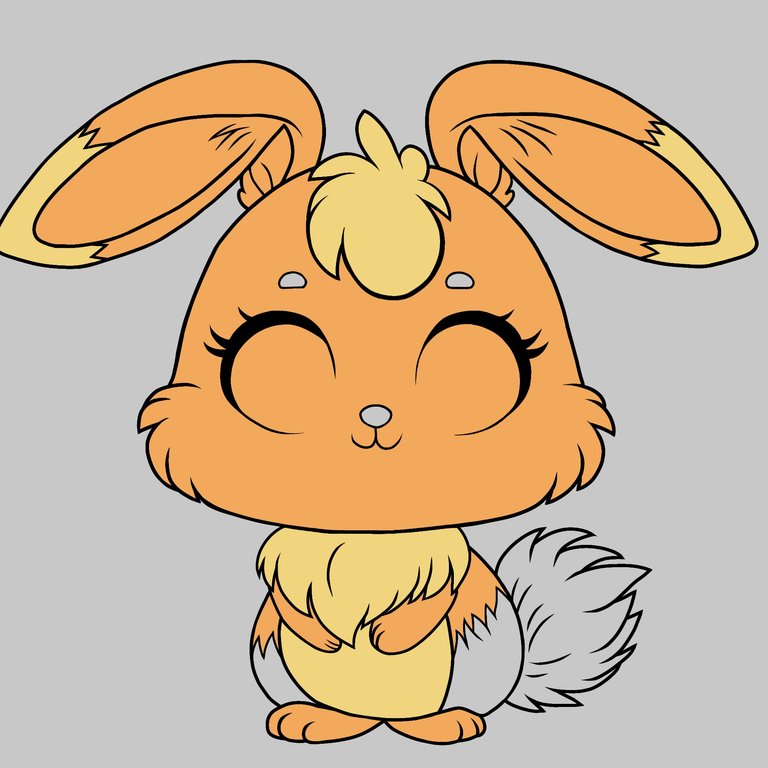
Link de la Imagen de Referencia/Reference Image Link

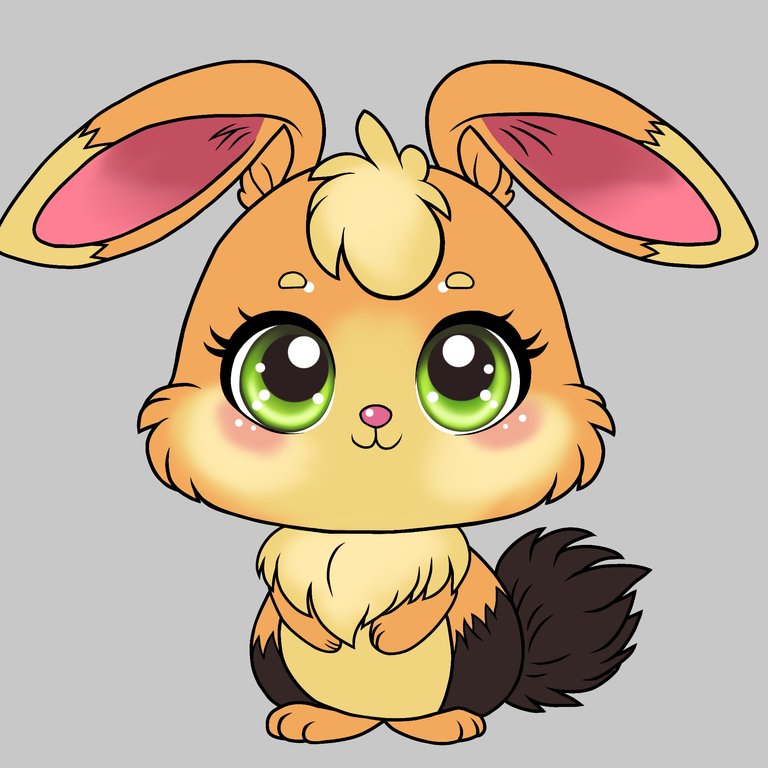
Etapas del Dibujo/Drawing Stages
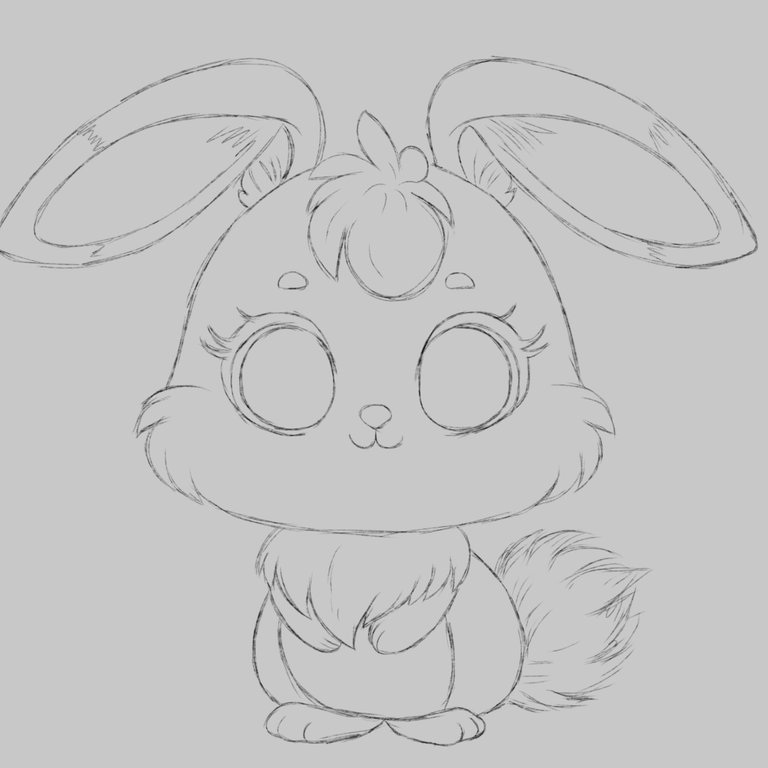
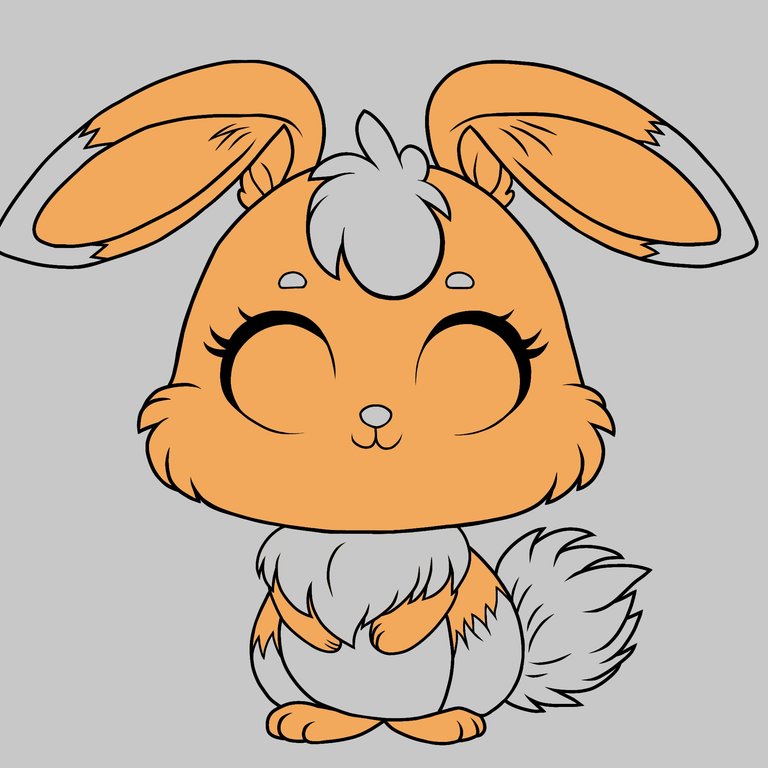
Después de realizar un boceto en limpio usando un pincel lápiz empecé con lo que es el sellando con el rotulado en limpio, y fui puliendo el delineado con el borrador usando también las reglas elípticas para las formas más circulares. Después, fui seleccionando los colores y empecé a aplicarlos en nuevas capas por color con la herramienta relleno que hace todo más rápido por sección. Usando después el rotulador y la regla elíptica para empezar a dar forma a los ojos.
After making a clean sketch using a pencil brush, I started sealing with the clean labeling, and I polished the outline with the eraser, also using the elliptical rulers for the more circular shapes. Afterwards, I selected the colors and began to apply them in new layers by color with the fill tool that makes everything faster by section. Then using the marker and the elliptical ruler to start shaping the eyes.
 |  |  |
 | 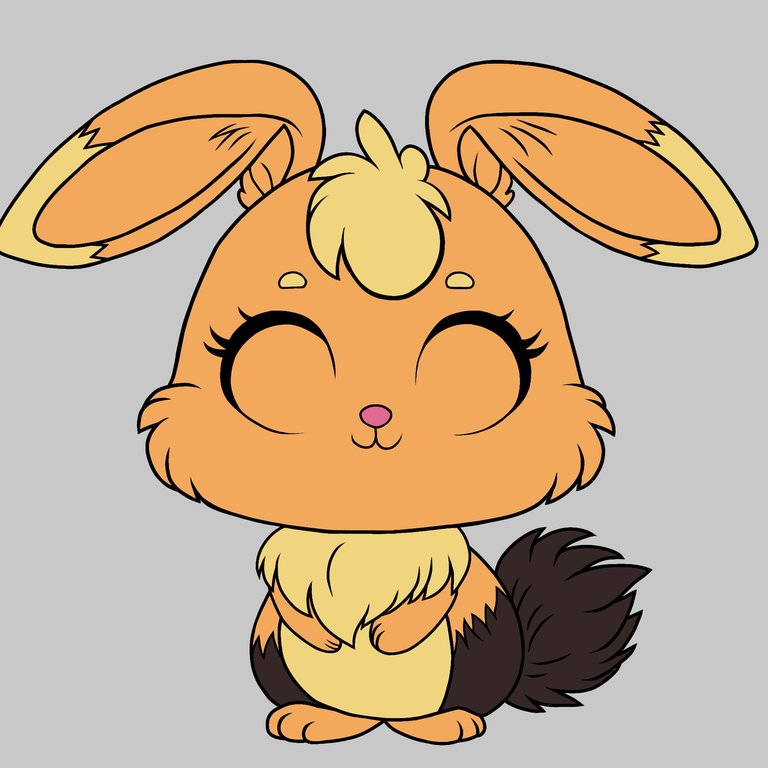 | 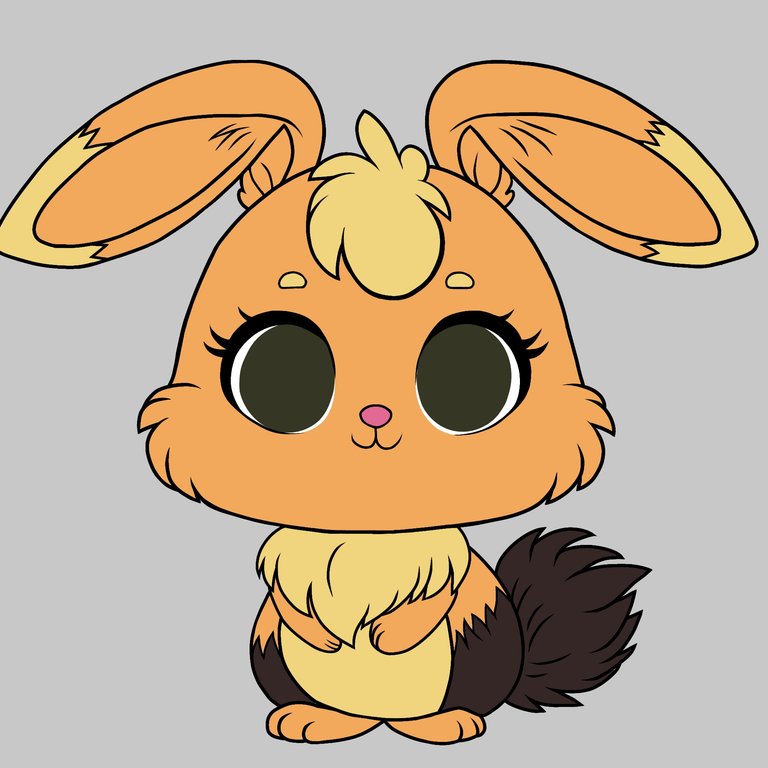 |
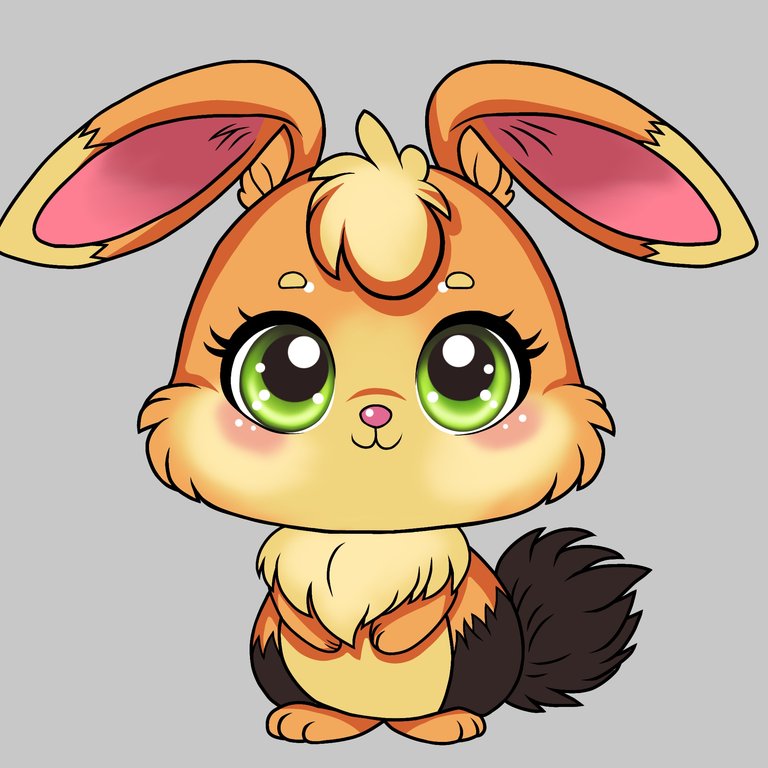
Fui agregando tonos de verde a los ojos y difuminando para después en una capa nueva agregar puntos de brillos con el rotulador, luego en otra capa nueva fui dando color a sus mejillas y orejas con tonos rosas. Usando también el rotulador para agregar iluminación que difumine para suavizar, y seguí en nuevas capas trabajando las sombras con el rotulado fuerte y empecé a definirlas un poco con el borrador, después con el mismo rotulador agregué unos tonos de fondo para empezar a trabajar el mismo usando para todo hasta ahora el mísmo método normal de mezcla.
I added shades of green to the eyes and blended them and then added glitter dots with the marker on a new layer, then on another new layer I colored her cheeks and ears with pink tones. Also using the marker to add lighting that I blur to soften, and I continued in new layers working the shadows with the strong marker and I began to define them a little with the eraser, then with the same marker I added some background tones to start working on it. using the same normal mixing method for everything so far.
 |  |  |
 |  | 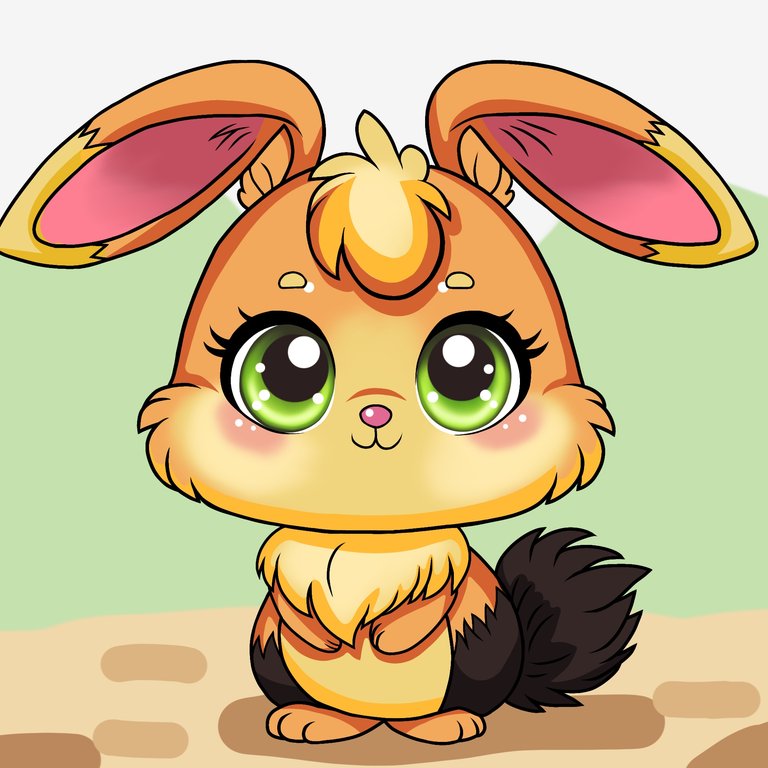 |
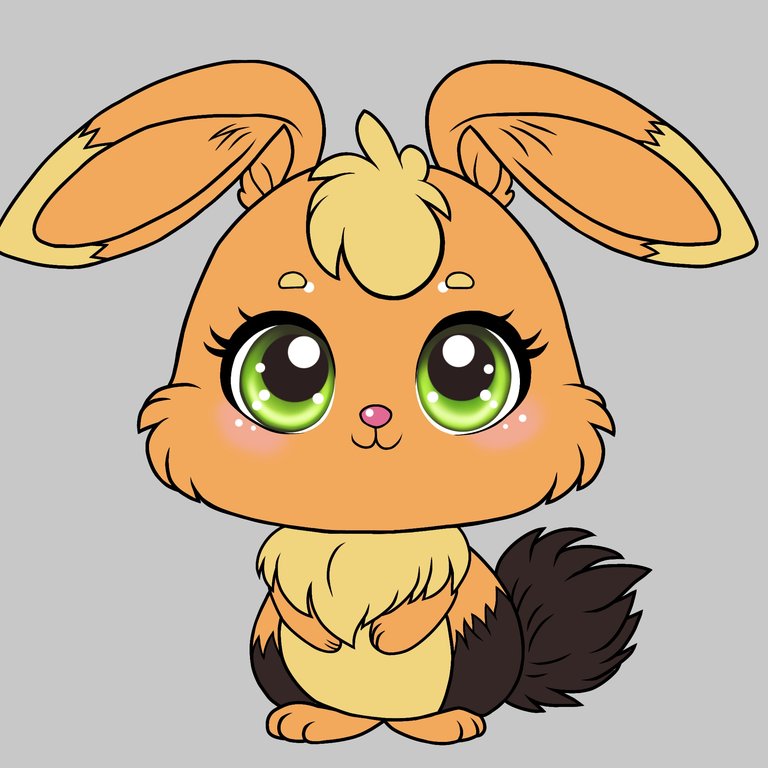
Para el fondo use predeterminados usando el difuminado gausseano para suavizar y también lograr lejanía, fui usando también pinceles de hierbas para dar un poco más de saturación a la hierba. Luego, use también una brocha de pulverizador para agregar un poco de textura al suelo, y en nuevas capas por debajo de estas empecé a agregar árboles que difumine con gausseano, tanto verde como un tono saturado para darle algo de calidez al escenario de la linda liebre, usando también flores predeterminadas que me parecieron muy lindas para éste estilo. Después, de terminar de formar el fondo, empecé abrir otros métodos de mezcla como lo es la superposición con una brocha suave y opacidad baja y también luz suave para saturar un poco más, y así darle profundidad. Y en una capa de brillo le di toques de brillo a los ojos y también a su entorno, terminando asi a éste pequeño Zappit.
For the background I used presets using Gaussian blur to soften and also achieve distance, I also used grass brushes to give a little more saturation to the grass. Then I also used a spray brush to add a little texture to the ground, and in new layers below these I started to add trees that I blurred with Gaussian, both green and a saturated tone to give some warmth to the scene of the pretty hare, also using default flowers that I thought were very pretty for this style. After finishing forming the background, I began to open other mixing methods such as overlaying with a soft brush and low opacity and also soft light to saturate a little more, and thus give it depth. And in a layer of glitter I added touches of glitter to the eyes and also to his surroundings, thus finishing this little Zappit.
 |  | |
Herramientas Usadas/Used Tools
- iPad Pro
- Apple Pencil
- Procreate
- Ibis Paint X

Redes Sociales/ Social Networks
Sigueme en/ Follow me in:
👉
👉
"Descubre quién eres, y hazlo a propósito"
"Find out who you are, and do it on purpose"