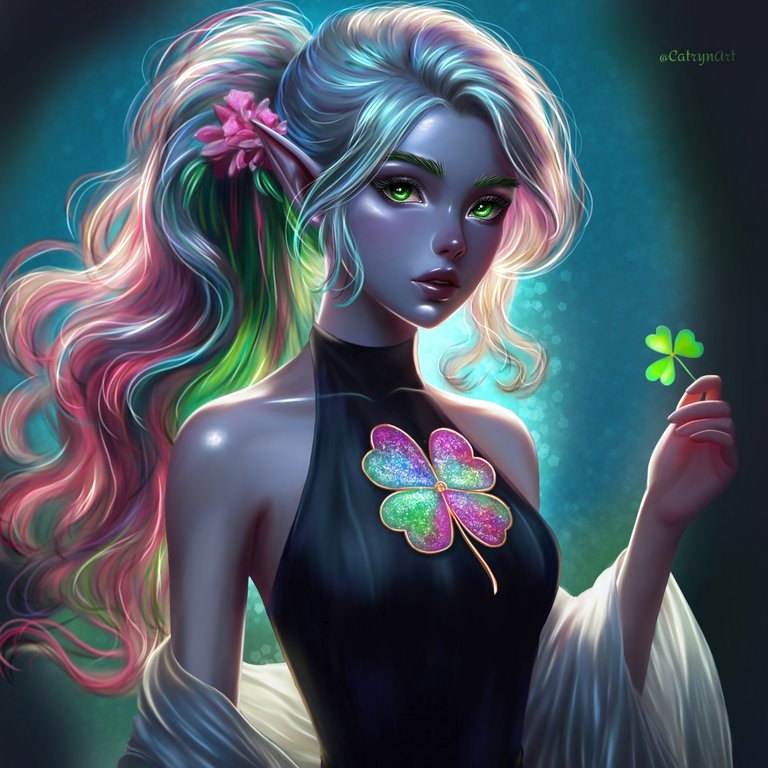
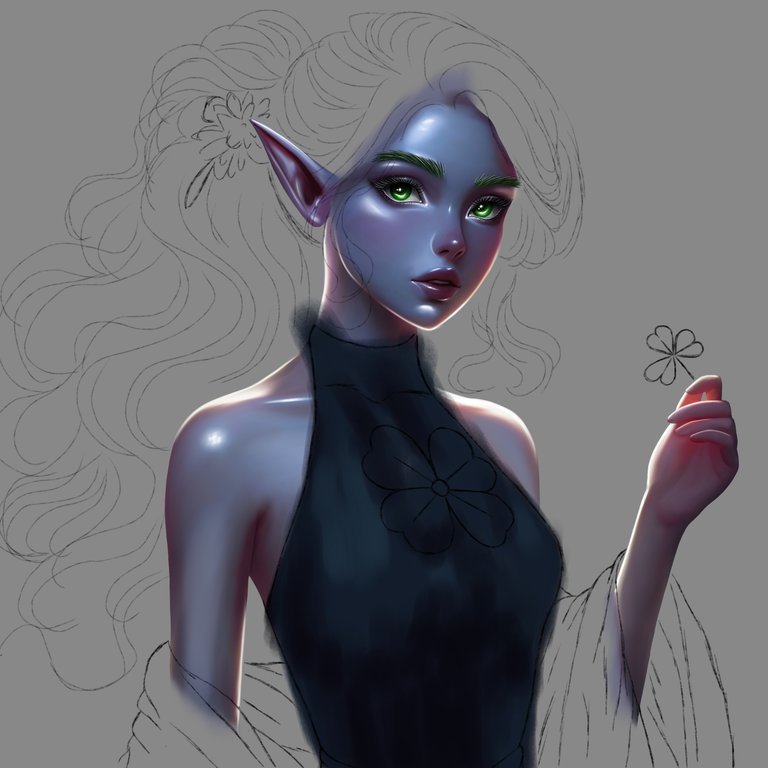
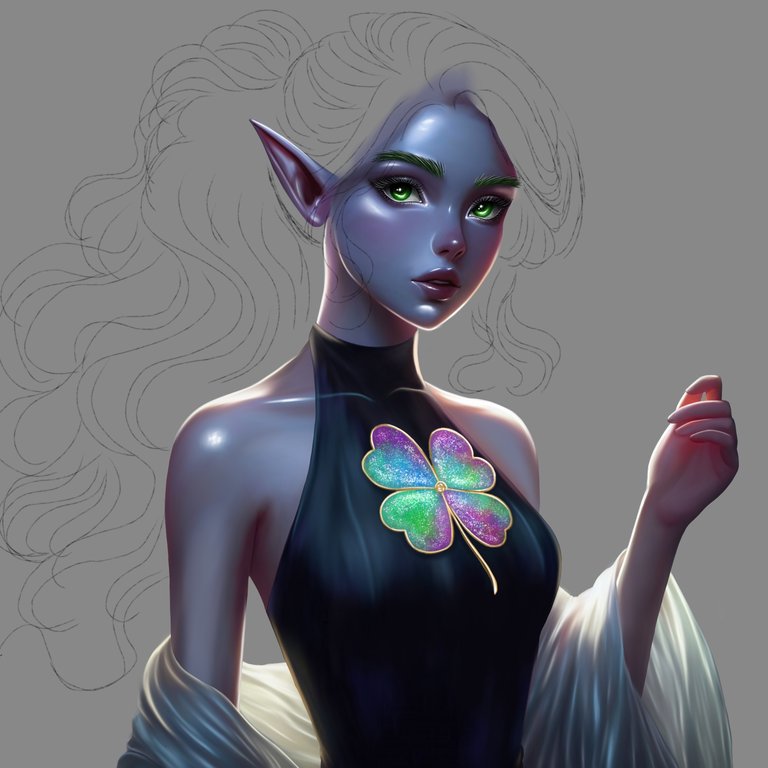
Hola buenas noches querida comunidad, espero se encuentren muy bien y que estén pasando un feliz fin de semana. Yo estuve todo el día haciendo este dibujo que comparto junto a ustedes y en esta noche pude terminar con esta pieza surealista de una aleatoriedad diferente sobre la healer forest, realmente cuando vi este post de @Acidyo me encanto mucho esta versión de healer forest por las diferentes tonalidades tornasol que posee. Quería verla con este estilo que me encanta hacer y porque le aporta un poco más de realismo al personaje, tenía pensado realizarle un fondo con vegetación pero he terminado el día demasiado exausta, así que agregué unos tonos fríos y oscuros para crear una fuente de luz desde atras, me gustó mucho como quedo y espero que les guste también.
Hello, good evening, dear community, I hope you are feeling very well and that you are having a happy weekend. I spent the whole day making this drawing that I share with you and tonight I was able to finish with this surrealist piece of a different randomness about the healer forest, really when I saw this post by @Acidyo I really loved this version of healer forest for the different litmus shades that it has. I wanted to see her with this style that I love to do and because it gives a little more realism to the character, I had planned to make a background with vegetation but the day ended up too austere, so I added some cold and dark tones to create a light source. From the back, I really liked how it turned out and I hope you like it too.
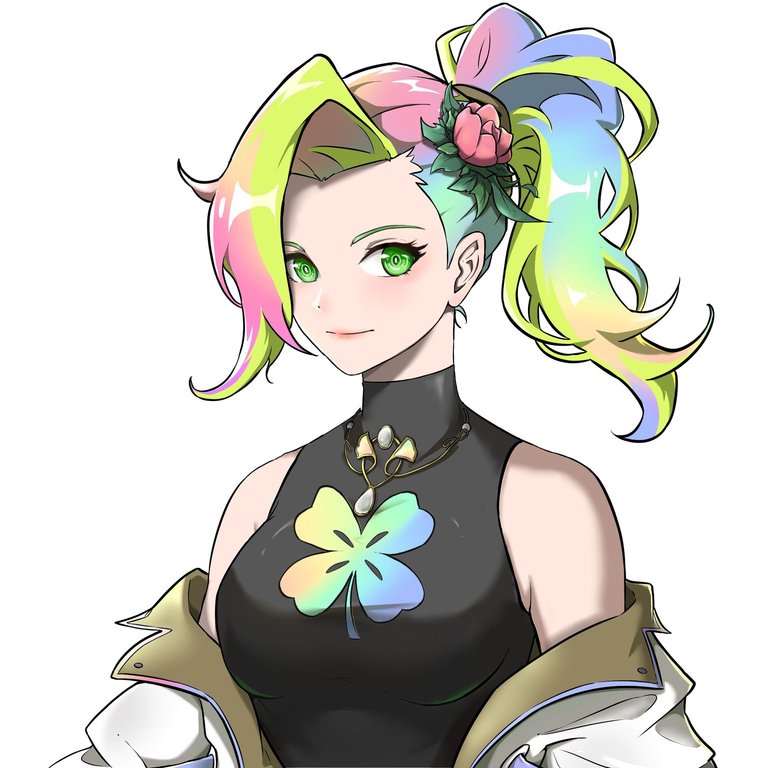
Link de la Imagen de Referencia/Reference Image Link

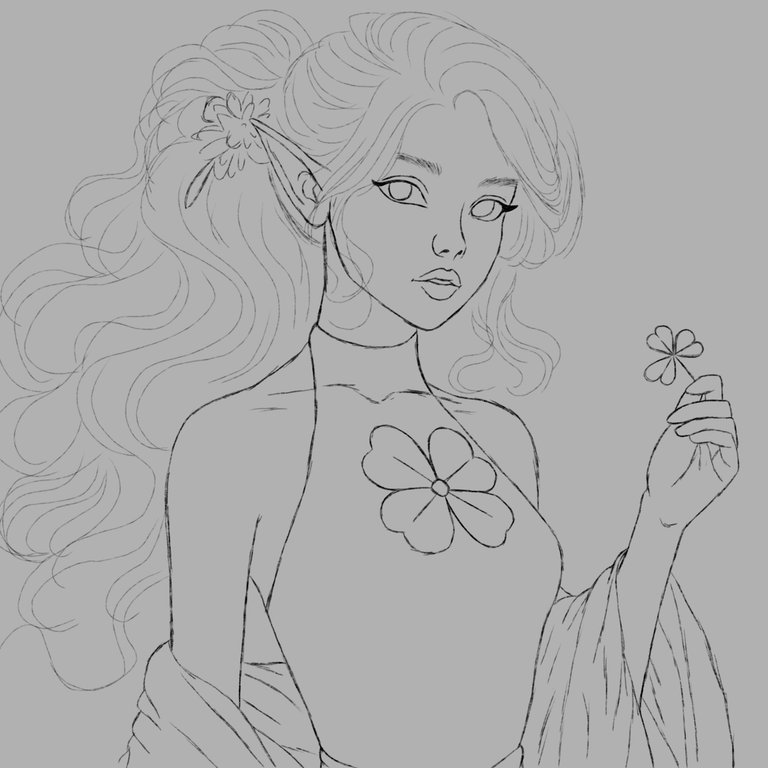
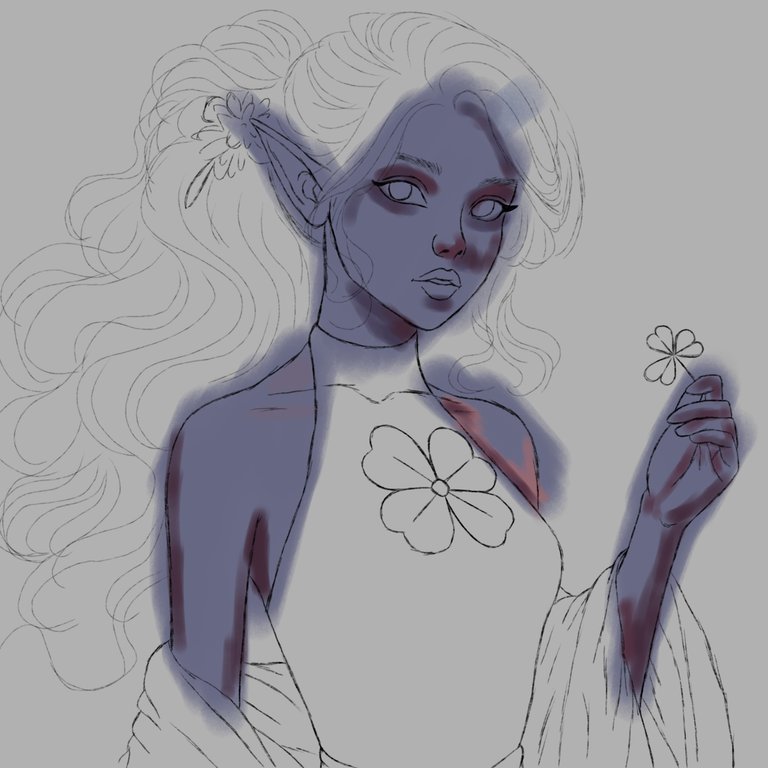
Etapas del Dibujo/Drawing Stages
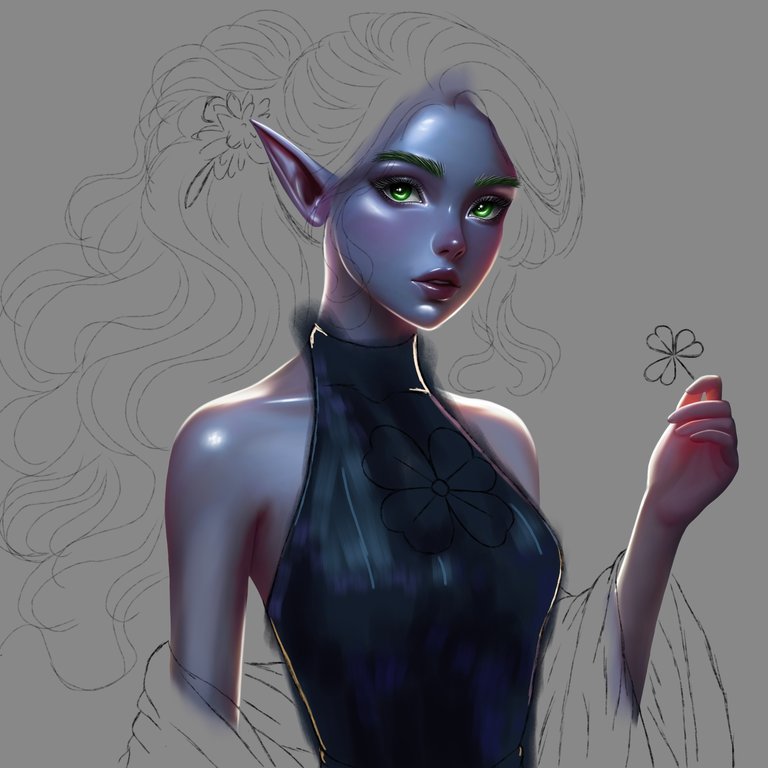
Me ha gustado ir trabajando desde el boceto con un fondo opaco así no canso tan rápido la vista, con el boceto en limpio listo empecé agregar una base fría y oscura para realzar la iluminación y los brillos, fui pincelando con sombras base y agregando tonos cálidos en algunos borde de su cuerpo, fui suavizando con difumino para mezclar y en nuevas capas fui pincelando tonos azules opacos no tan brillantes para agregar capas con iluminación más dura. Use método normal de mezcla, después seguí perfilando su rostro con más iluminación y comencé a trabajar en nuevas capas los ojos, empezando con el iris y luego en otras capas con la esclerótica utilizando tonos oscuros y ciertos puntos de iluminación los cuales difumine un poco, me llevo tiempo sus pestañas y cejas, cuando termine su piel y facciones en una nueva capa empecé agregar un tono base oscuro para su ropa.
I liked working from the sketch with an opaque background so I don't tire my eyes so quickly. With the clean sketch ready I started adding a cold and dark base to enhance the lighting and brightness. I brushed with base shadows and added warm tones. On some edges of his body, I softened with blur to mix and in new layers I brushed not so bright opaque blue tones to add layers with harsher lighting. I used the normal blending method, then I continued outlining her face with more lighting and began to work on new layers of the eyes, starting with the iris and then on other layers with the sclera using dark tones and certain points of lighting which I blurred a little, I took his eyelashes and eyebrows for a while, when I finished his skin and features in a new layer I started adding a dark base tone for his clothes.
 |  |  |
 |  |  |
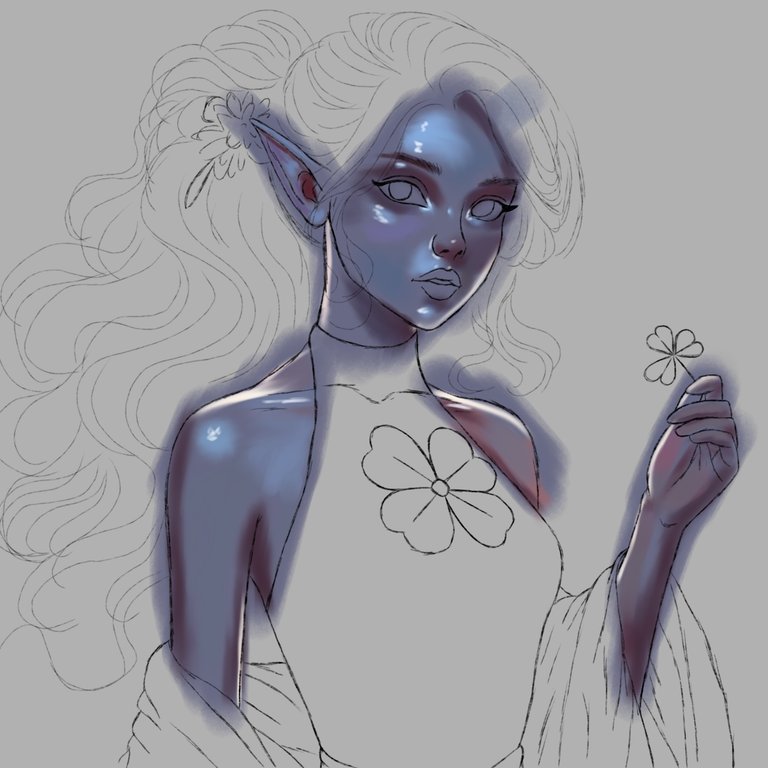
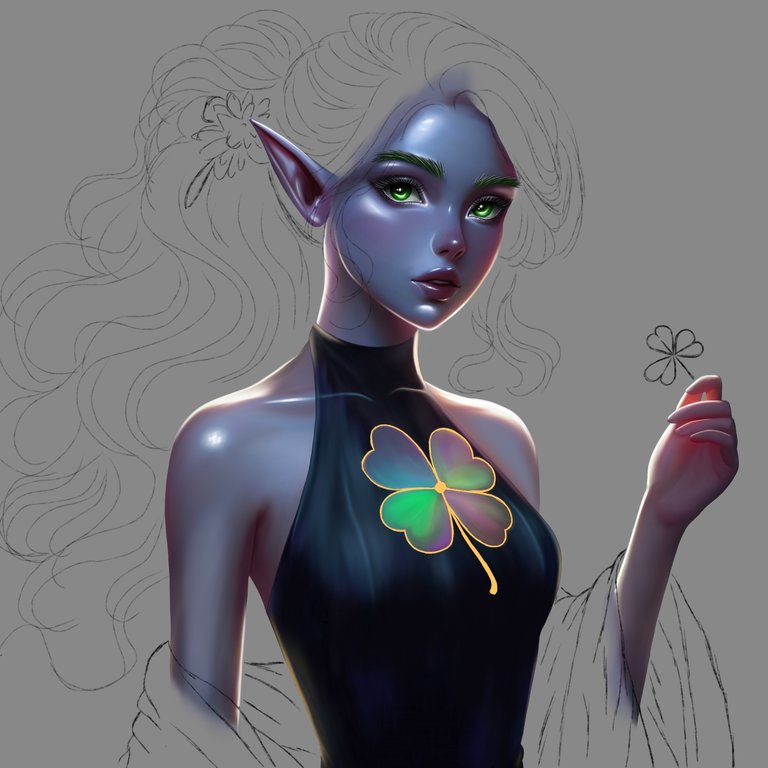
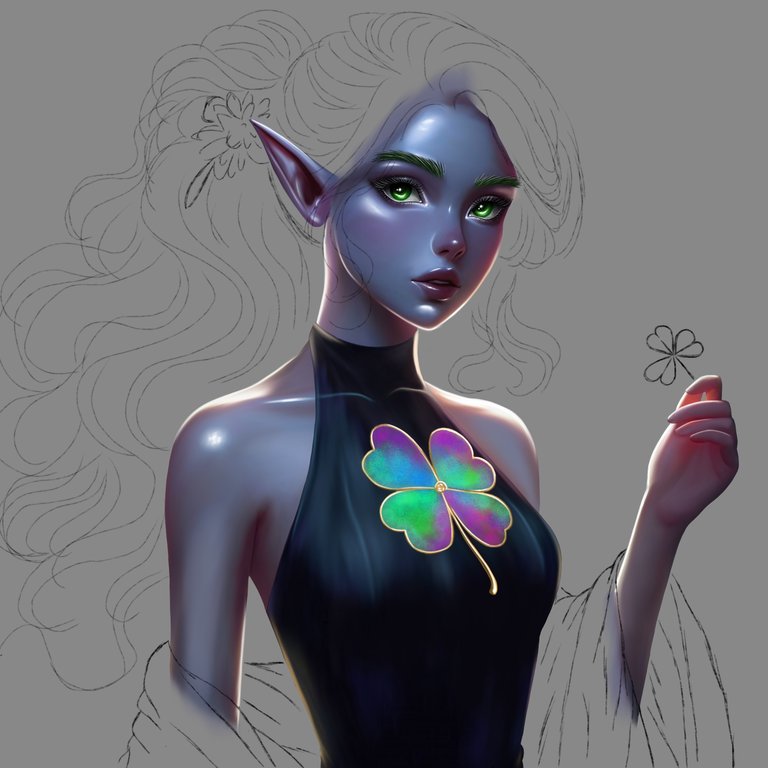
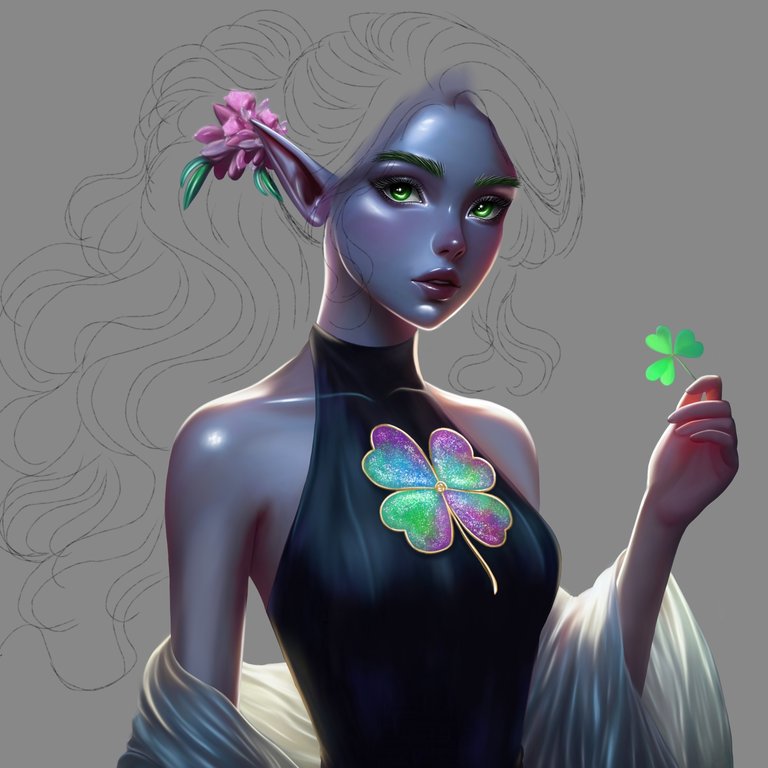
Seguí usando nuevas capas para trabajar su top con tonos azules con baja opacidad y fui mezclando, luego en otras capas fui trabajando su trébol tornasol agregando el pincel pulverizador y purpurina, esto le hizo dar un resultado muy brillante y tipo tornasol. Me encanto! Después seguí con su abrigo o sueter blanco, dándole un estilo delicado y bastante olgado. Fui usando varias capas para agregar pliegues sombreados con varios tonos y luego en otras para darle iluminación suave. Seguí con la flor en su cabellos en varias capas agregando tonos más oscuros abajo y luego me fui aclarando algunas partes de la flor con la ayuda también del difumino. A medida que iba limpiando con el borrador iba agarrando más forma y estilismo.
I continued using new layers to work on his top with blue tones with low opacity and I mixed, then in other layers I worked on his iridescent clover adding the spray brush and glitter, this gave it a very shiny and iridescent-type result. I loved! Then I continued with her white coat or sweater, giving it a delicate and quite loose style. I used several layers to add shadowed folds with various tones and then on others to give it soft lighting. I continued with the flower in her hair in several layers adding darker tones below and then I lightened some parts of the flower with the help of blending as well. As I cleaned with the eraser, I gained more shape and style.
 |  |  |
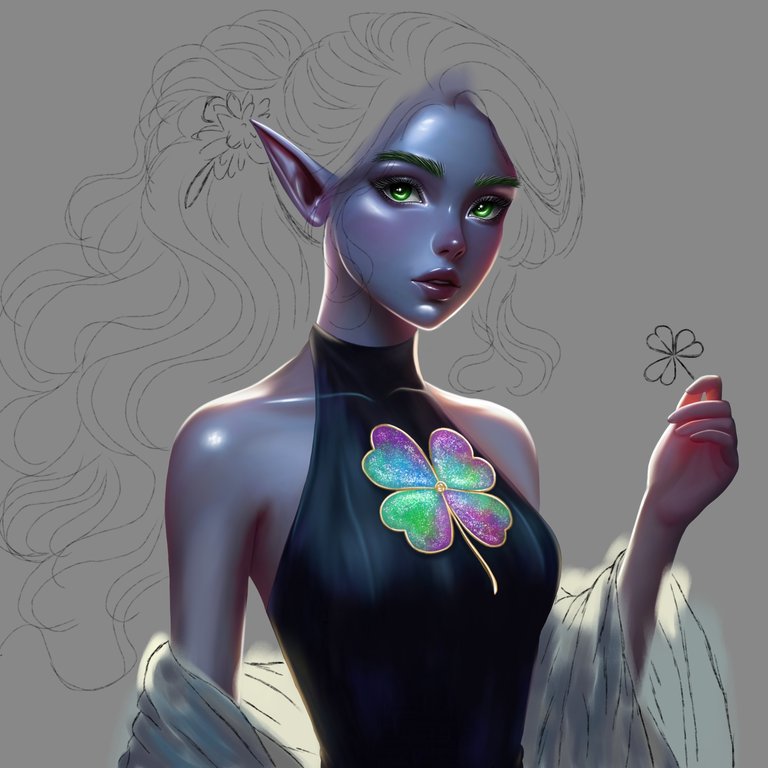 |  |  |
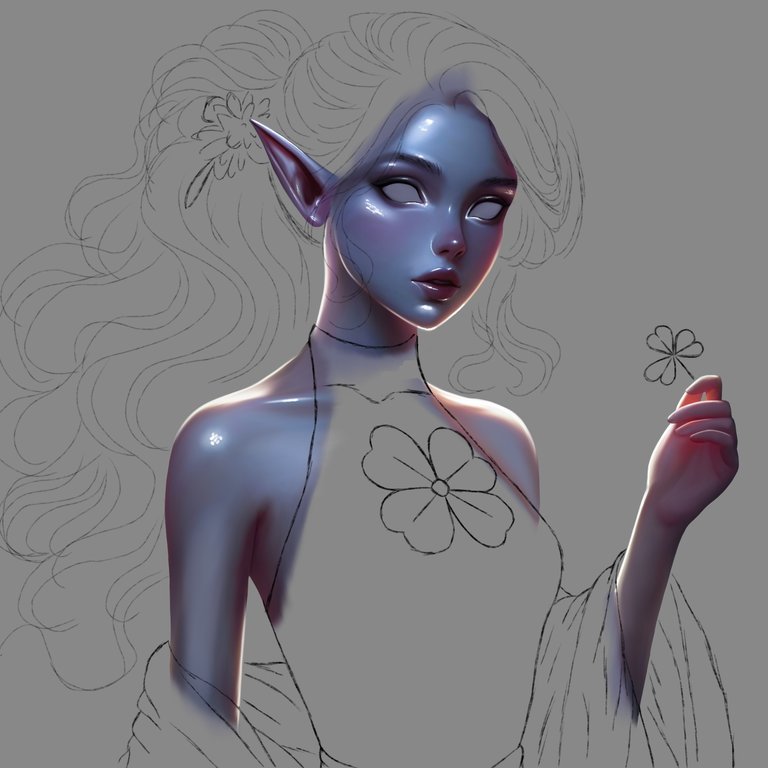
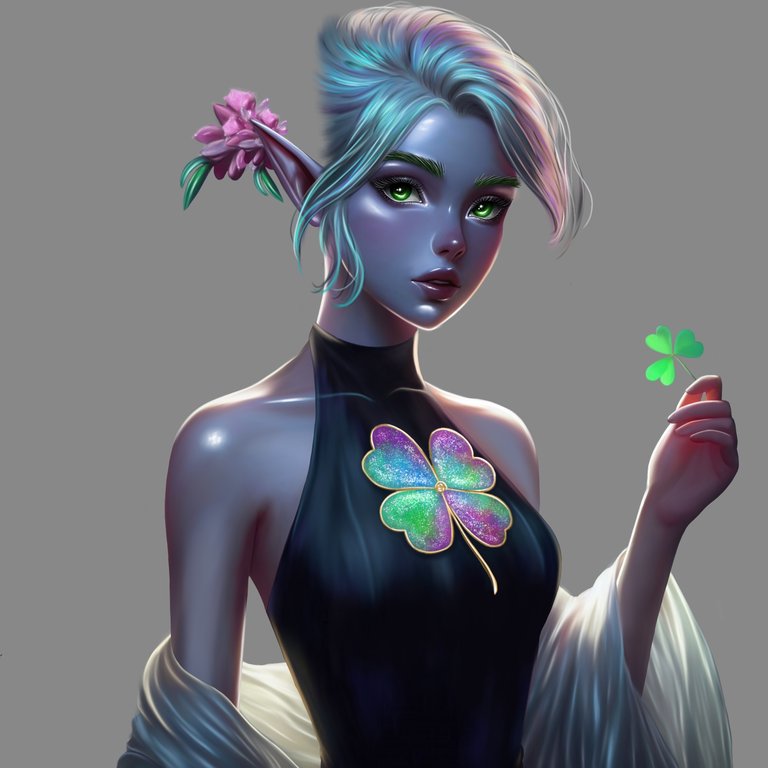
Su cabello lo trabaje en diferentes capas agregando varios tonos y difuminando para crear ese efecto tornasol, luego con la ayuda del pincel pelo fui elaborando más el cabello con un grosor media alto para cubrir más área, porque realmente lleva tiempo hacer un cabello más definido. Tengo que conseguí una brocha que haga ese trazo muy perfecto a un mechón de cabello. Bueno realmente fui trabajando así en su cabello, y después use capas en superposición para saturar suavemente algunas zonas y después agregué la capa de brillo, para realzar sus ojos tanto como la piel y la boca, usando una opacidad media baja para endurecer algunas zonas y con el brillo agregar puntos de brillo. Para su fondo pinceles tonos fríos con aerógrafo de partículas y agregué gausseano y luego conmina capa de brillo le di unas pinceladas de brillos con una opacidad baja, y con esto termine esta representación surealista. Espero les haya gustado amigos. ❤️
I worked on her hair in different layers adding various tones and blending to create that iridescent effect, then with the help of the hair brush I further elaborated the hair with a medium-high thickness to cover more area, because it really takes time to make hair more defined. I have to get a brush that makes that very perfect stroke on a strand of hair. Well I really worked like this on her hair, and then I used overlapping layers to gently saturate some areas and then I added the layer of glitter, to highlight her eyes as much as the skin and mouth, using a medium-low opacity to harden some areas and with glitter add glitter dots. For its background, I brushed cold tones with a particle airbrush and added Gaussian and then with a layer of glitter I gave it a few strokes of glitter with a low opacity, and with this I finished this surrealist representation. I hope you liked it friends. ❤️
 |  | |
Herramientas Usadas/Used Tools
- iPad Pro
- Apple Pencil
- Procreate
- Ibis Paint X

Redes Sociales/ Social Networks
Sigueme en/ Follow me in:
👉

👉

"Descubre quién eres, y hazlo a propósito"
"Find out who you are, and do it on purpose"