Hello everyone... 🐱
Hello to my dear Hivers and the dear community of Holozing, very pleased and excited to be here to show you a very simple work made with much love and especially for you.
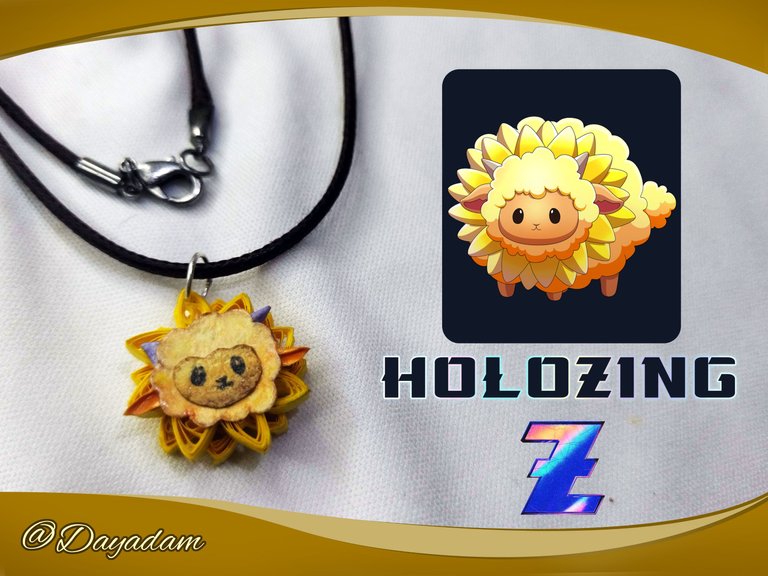
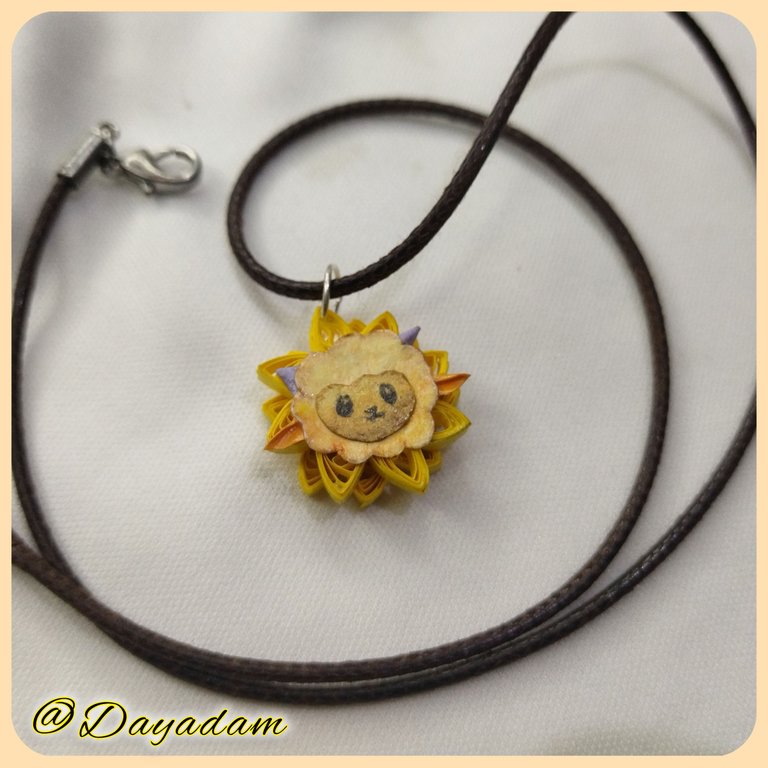
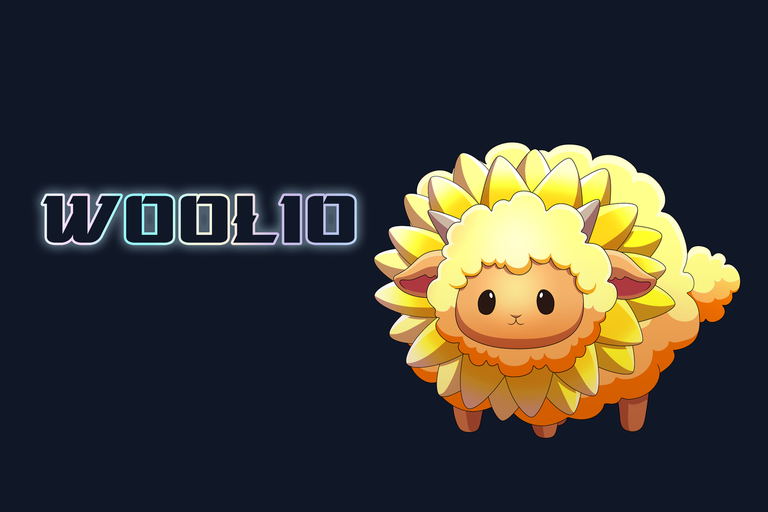
For today in this new update of rewards following with my art, I decided to make a small pendant for necklace in 2D in the quilling technique combined with cardboard, materializing the tender face of one of the last creatures presented for the project in its normal version as it is Woolio.
I attach images of my progress claiming the rewards for my delegation to Holozing which so far are 707.87HP, and I have an accumulated Stake of 8,613.941 tokens $ZING.
I hope you like my work, join me in this short creative process.
Let's begin:😃

Hola a Todos... 🐱
Hola a mis queridos Hivers y a la querida comunidad de Holozing, muy complacida y emocionada de encontrarme por acá para mostrarles un trabajo muy sencillo hecho con mucho amor y especialmente para ustedes.
Para hoy en esta nueva actualización de recompensas siguiendo con mi arte, decidí realizar un pequeño dije para collar en 2D en la tecnica de quilling combinada con cartonaje, materializando la tierna cara de una de las ultimas criaturas presentadas para el proyecto en su versión normal como lo es Woolio.
Les adjunto imágenes de lo que ha sido mi progreso reclamando las recompensas por mi delegación a Holozing que hasta ahora son 707.87HP, y llevo un acumulado en Stake de 8,613.941 tokens $ZING.
Espero sea de su agrado mi trabajo, acompáñenme en este corto proceso creativo.
Comencemos:😃


• Cintas de quilling de diversos colores.
• Aguja para quilling.
• Lápiz.
• Cartulina beige.
• Argolla de bisutería.
• Pega blanca extra fuerte (de carpintería).
• Tijera.
- Quilling ribbons of different colors.
- Quilling needle.
- Pencil.
- Beige cardboard.
- Jewelry ring.
- Extra strong white glue (carpentry glue).
- Scissors.


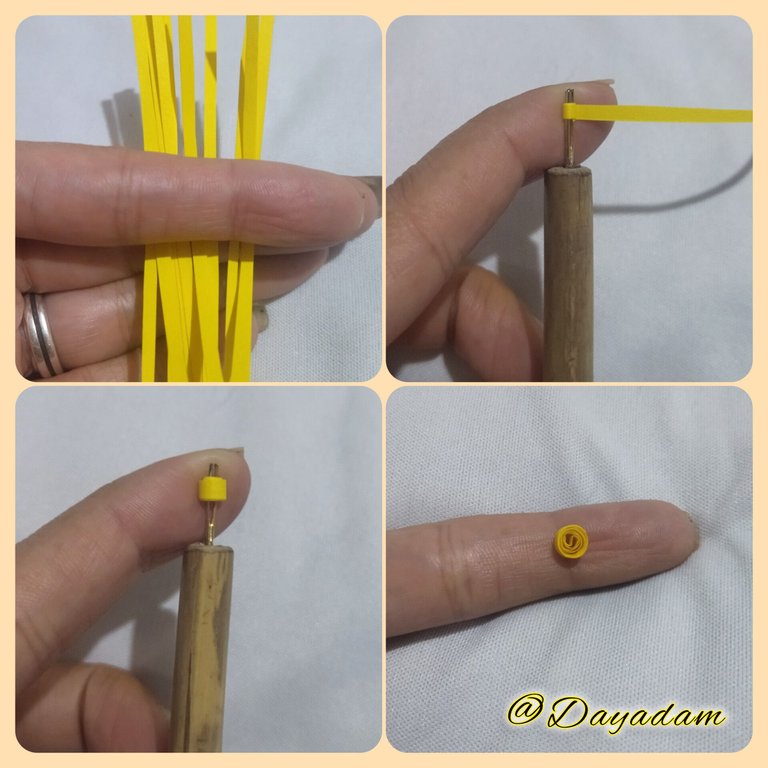
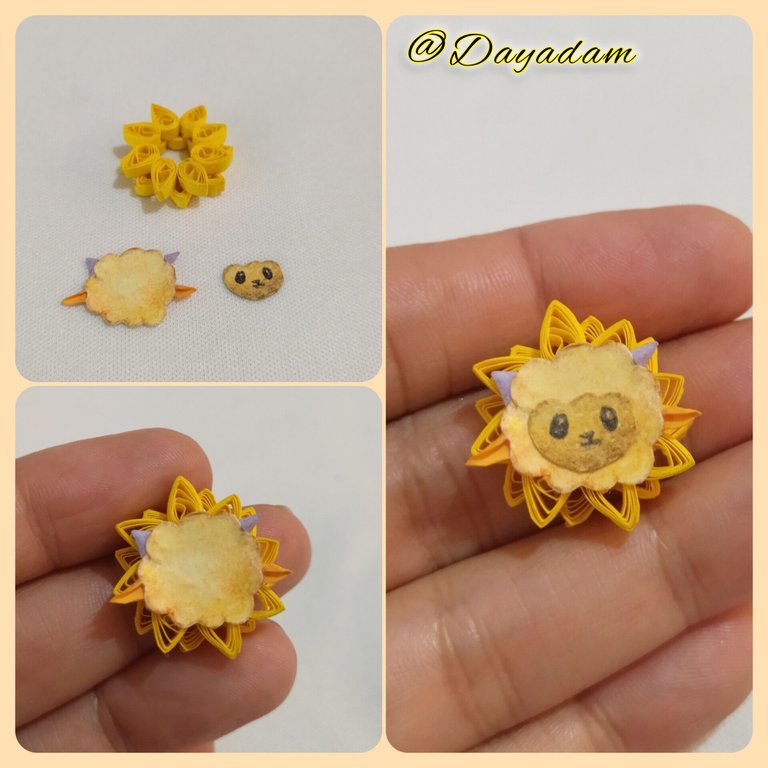
- We start taking yellow quilling ribbons of 3mm wide x 8cms long, with the help of the quilling needle we will roll up until we reach the end of the ribbon, we take it out of the needle, loosen it a little to obtain an open circle, we seal it with extra strong white glue. We will need 16 circles of the same size.
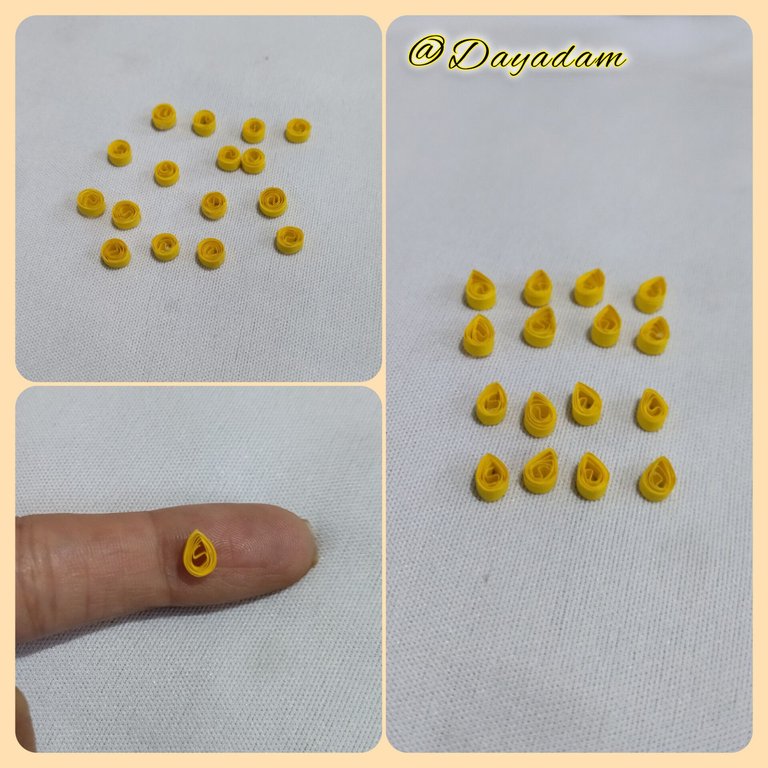
- Once the 16 circles are ready, we will mold them in the shape of leaves.
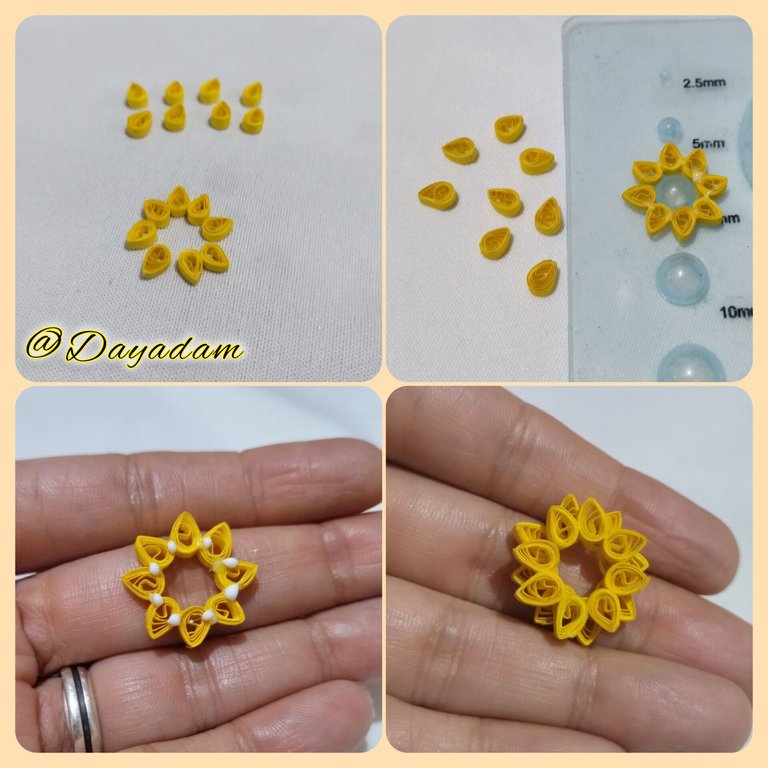
- We are going to glue in groups of 8 leaves to form a kind of flower, I helped myself with a template for circles so that they were harmonious, repeat the process with the other 8 circles.
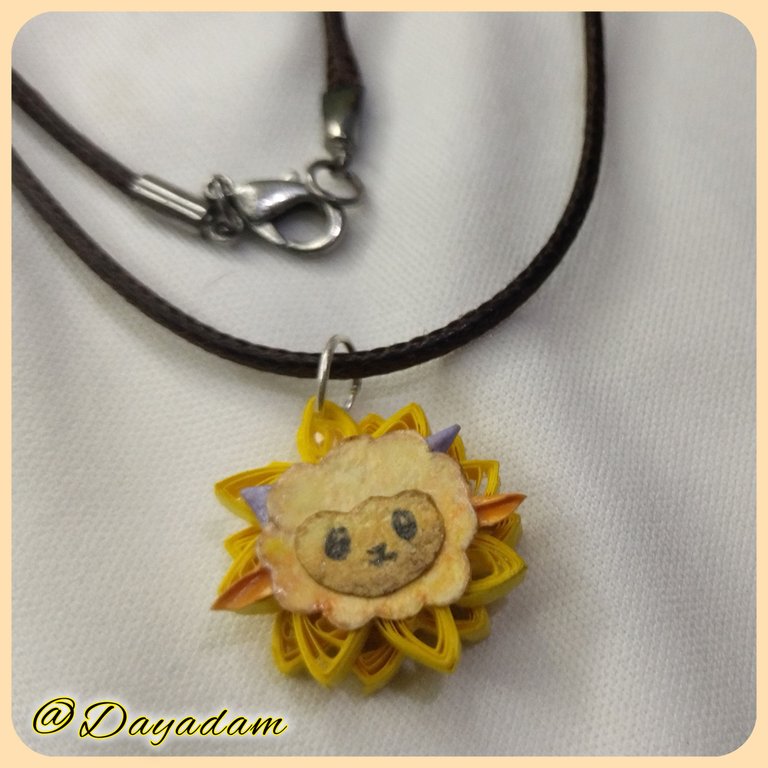
- We will glue the 2 pieces obtained one on top of the other, we must join them so that all the peaks are visible.

• Vamos a comenzar tomando cintas para quilling de color amarillas de 3mm de ancho x 8cms de largo, con la ayuda de la aguja para quilling enrollaremos hasta llegar al final de la cinta, sacamos de la aguja, soltamos un poco para obtener un circulo abierto, sellamos con pega blanca extra fuerte. Necesitaremos 16 círculos del mismo tamaño.
• Una vez listo los 16 círculos los moldearemos en forma de hojas.
• Vamos a pegar en grupos de 8 hojas para formar una especie de flor, me ayude con una platilla para círculos para que quedaran de manera armoniosa, repetimos el proceso con los otros 8 círculos.
• Pegaremos las 2 piezas obtenidas una encima de otra, debemos unirlos de manera que todos los picos se vean.
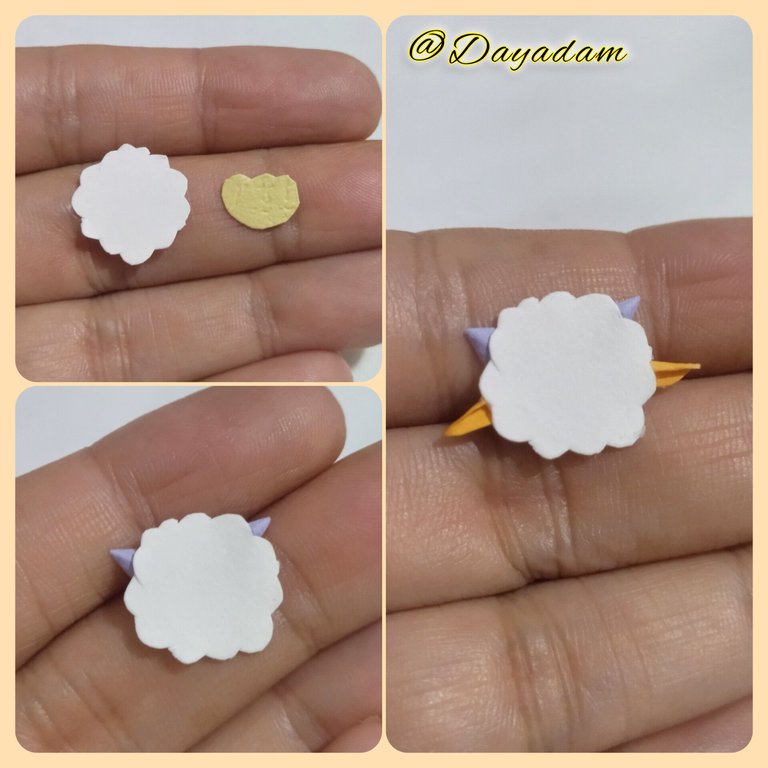
- To make the face we will take white cardboard and cut out the wool as a kind of cloud, with beige cardboard we will cut out the face.
- The little horns I made by cutting out very small triangles with purple quilling, and the ears I made with orange quilling, I glued them to the white cloud I made before.
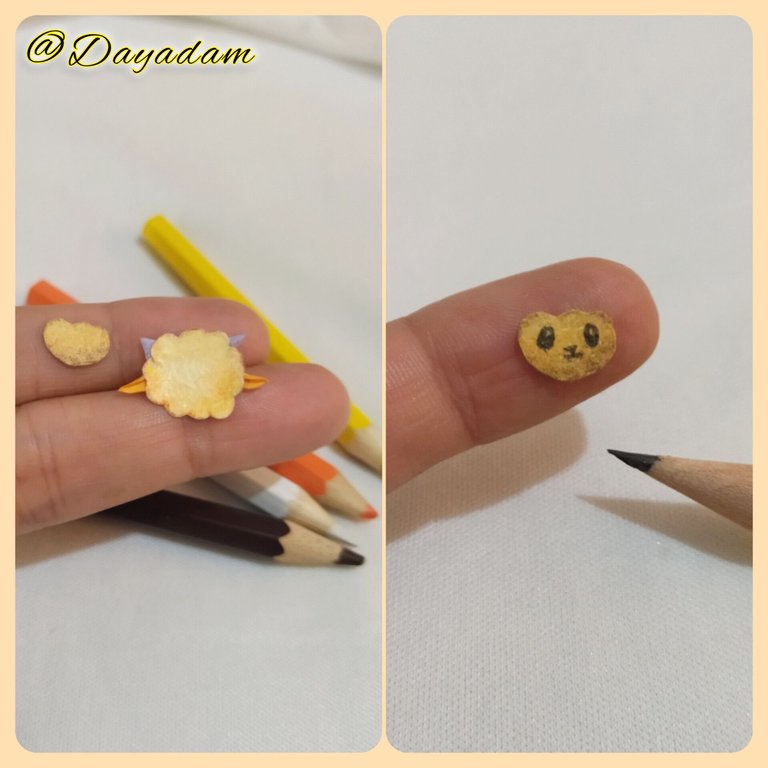
- With colors I applied some color to the pieces of the face, and with a pencil I made the eyes and the mouth.
- I took the 3 pieces and joined them with white glue, on the top I placed a costume jewelry ring.
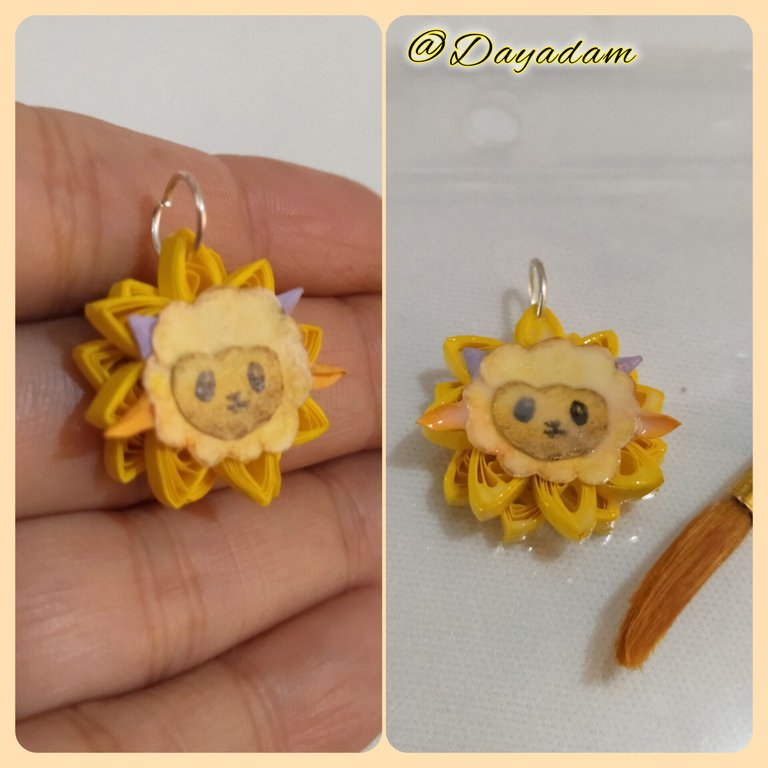
-To finish, to give protection, shine and plasticity to the pendant, I added several layers of extra strong white glue, letting it dry between one layer and another.
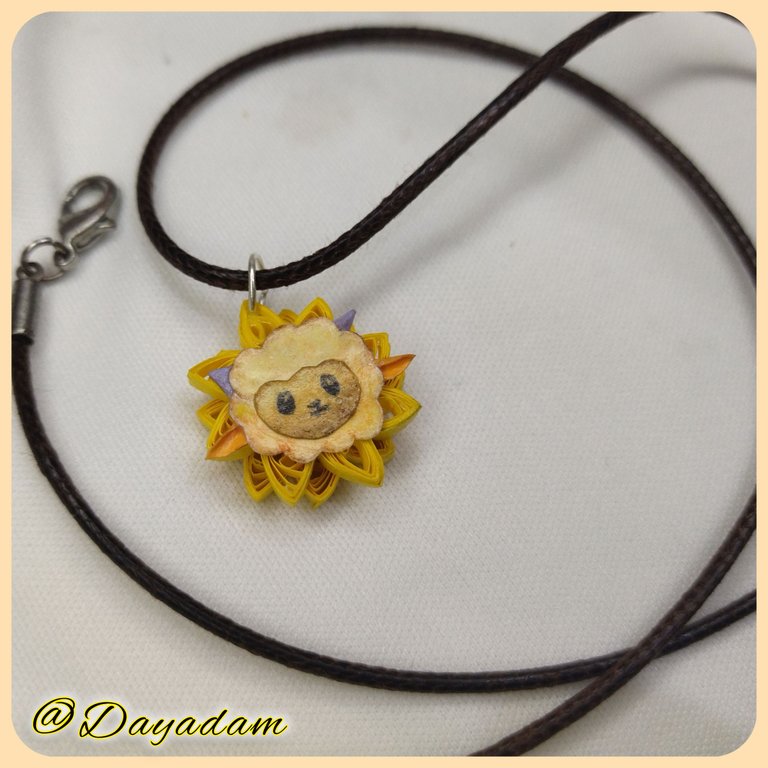
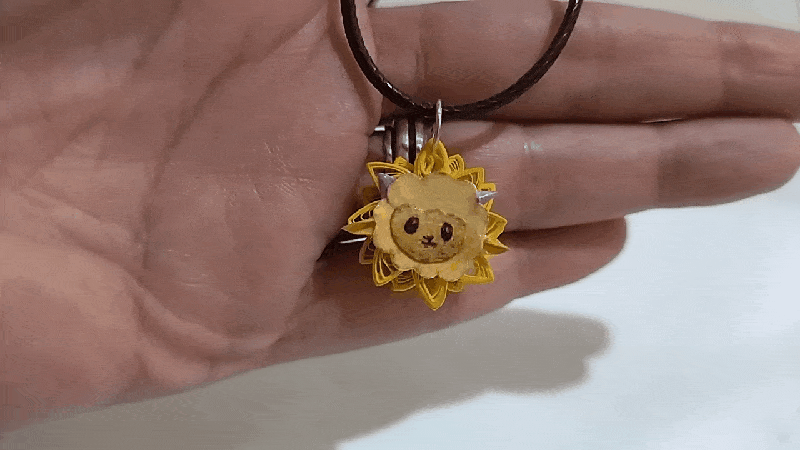
This way this little pendant for necklace that I made of the beautiful creature "Woolio " is ready.
• Para realizar la cara tomaremos cartulina de color blanca y recortaremos la lana como especie de una nube, con cartulina beige recortaremos la cara.
• Los pequeños cuernos los realice recortando unos muy pequeños triángulos con quilling color morado, y las orejas las realice con quilling color naranja, las pegue de la nube color blanco que hice con anterioridad.
• Con colores aplique un poco de color a las piezas de la cara, y con un lápiz realice los ojos y la boca.
• Tome las 3 piezas y las uní con pega blanca, en la parte de arriba le coloque una argolla de bisutería.
•Para finalizar, darle protección, brillo y plasticidad al dije, añadí varias capas de pega blanca extra fuerte, dejando secar entre una capa y otra.
De esta manera esta listo este pequeño dije para collar que realice de la bonita criatura "Woolio".

What did you think, did you like it?
I hope you did, I hope you liked my explanation, procedure and photos, I made them with love for you.
"Let out that muse that inspires you, and let your imagination fly".
Thank you all, see you next time.🐱

¿Qué les pareció, les gustó?
Espero que sí, que les haya gustado mi explicación, procedimiento y fotos, los hice con mucho cariño por y para ustedes.
"Deja salir esa musa que te inspira, y deja volar tu imaginación".
Gracias a todos, nos vemos en la próxima.🐱


