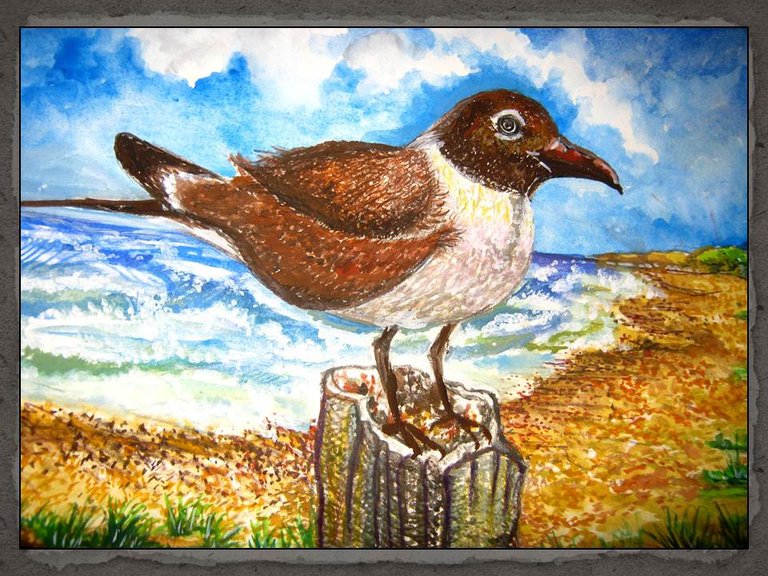
La gaviota sonriente.
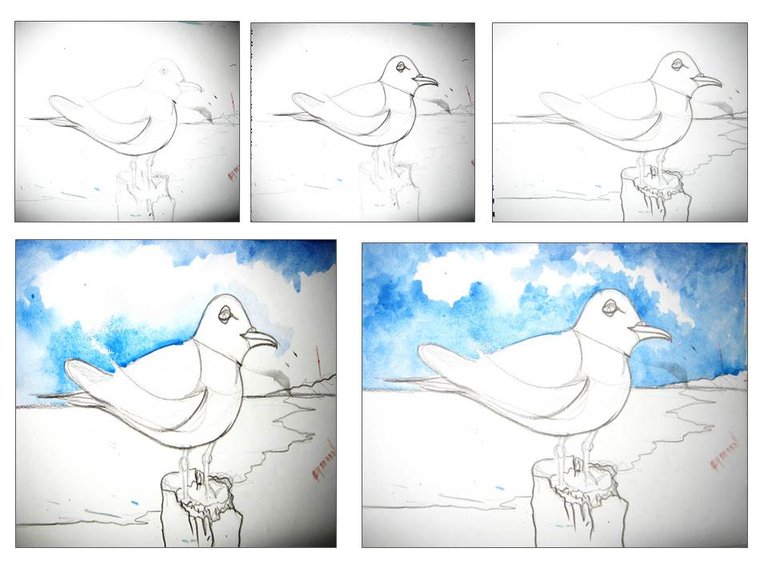
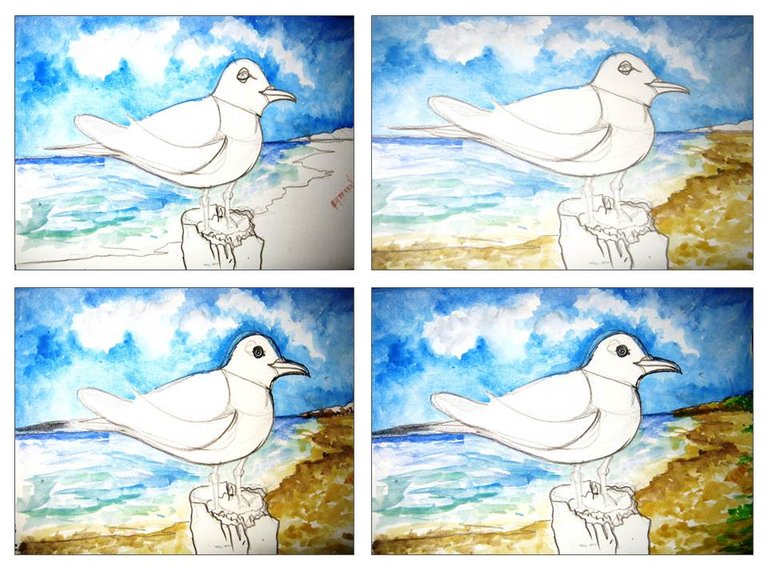
Inicio con la realización del boceto de mi personaje principal(La gaviota), la cual fue realizada con lápiz de grafito, remarcada después con lápiz de color gris oscuro, al terminar el boceto me dedique a darle color al cielo con colores azul claro y oscuro, encarcelándolos bajo la técnica de la aguada y en forma de manchas, como lo muestran las diapositivas.
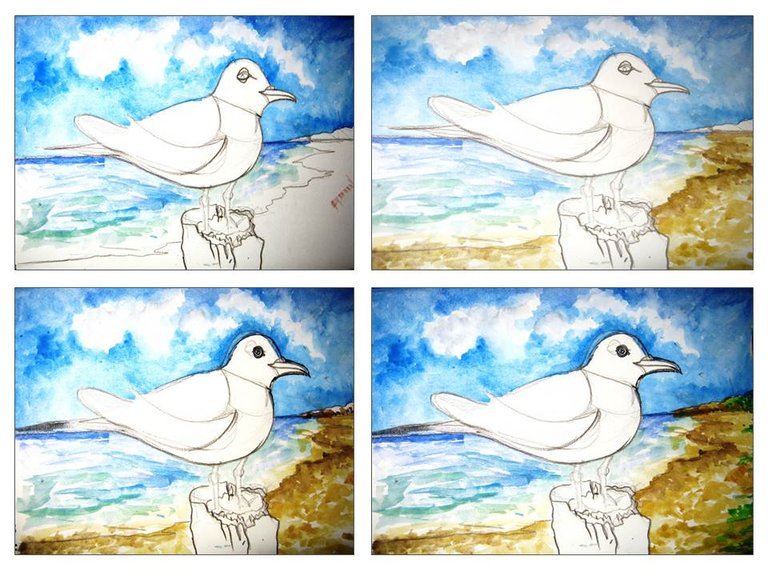
Terminada la parte del cielo, continué con la linea del horizonte del mar con una tonalidad fuerte de azul marino, tratando de dar movimiento al agua con las demás manchas en color agua marina y azules claros, pero dejando espacios en blanco para simular la espuma de las olas del mar, los colores ocre, amarillo y marrón en forma de manchas, van dando forma a la arena de la costa, que dan lugar al ambiente donde se encuentra la gaviota.
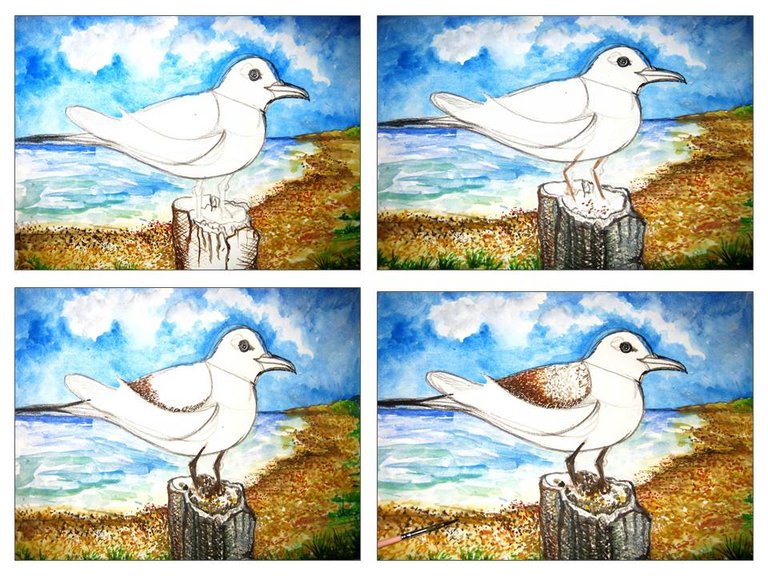
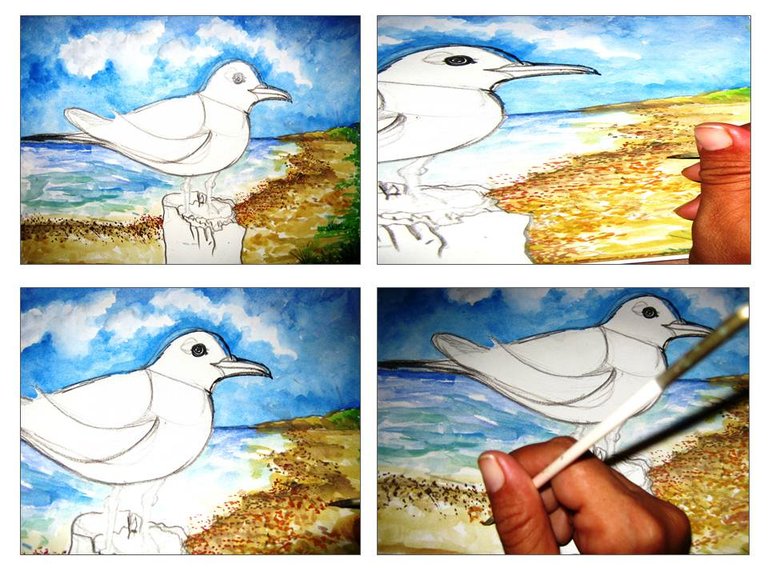
- Algo de verde, va a ir simulando la vegetación del lugar, ademas estoy dando mas textura a la arena de la playa, con puntos que realizo con mi pincel punta fina Nº 001, como lo muestra una de las imágenes, en donde con colores marrón, sepia , naranja y rojo, voy generando la textura de la arena de la playa.
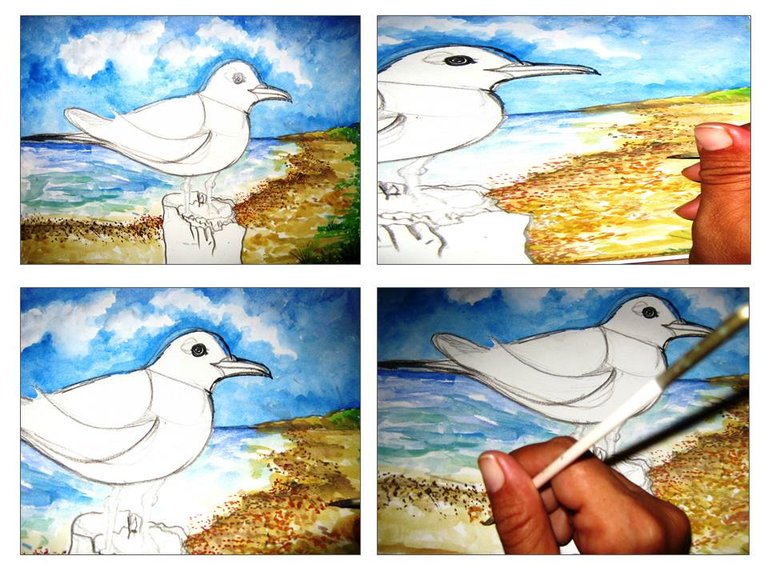
- Empiezo a dar color al tronco en donde poza la gaviota, utilizando de igual manera mi pincel punta fina, es mas si te detienes a observar bien las imágenes, logre trazar lineas muy delgadas en forma diagonal, curva y verticales que pudieran generar la textura del tronco, con colores, marrón, rojo ocre y sobre todo gris, ademas en este par al final, me dedico a dar color a la gaviota con colores, negros, marrones claros - oscuros y algo de rojo, pero expresados en el soporte con lineas menores de medio centímetro, con una yuxtaposicion que genere la percepsion visual de las plumas del ave.
- Observen como he ido avanzando en la realización de la ilustración, ya el ave esta casi lista, le pinte el pico con color rojo, marrón, negro y blanco...
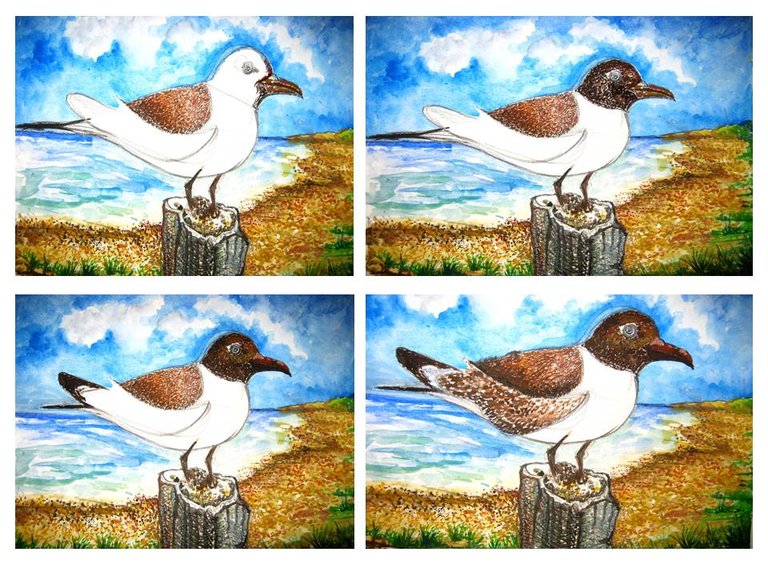
- Observen como esta quedando el ave, hasta logre pintar el plumaje del pecho con colores muy claros pero tomando en cuenta el mismo principio de la yuxtaposición del color para simular sus bellas plumas, trabaje un poco mas el movimiento del agua del mar, y remarque las linear del tronco en que el ave esta posando.
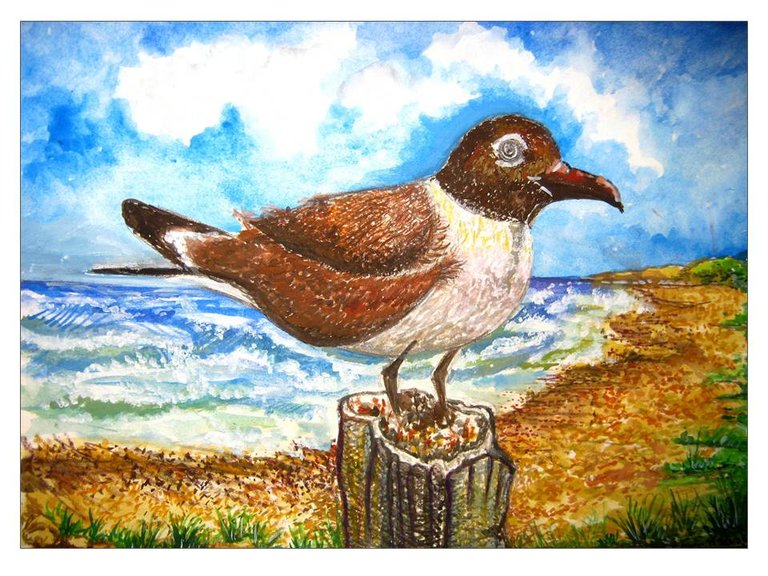
- El montaje de la ilustración lo hice con el programa digital de Power Point, para poder mostrarles la obra artística en acuarela titulada:
La gaviota sonriente.

Angélica García.

HELLO!, HELLO! and HELLO!
Very good morning friends of Hive, welcome everyone, Angélica García greets you, hoping you are very well and above all happy, it is a pleasure for me to bring you this new artistic publication.
ENJOY IT.
Identification sheet of the work. Title: The smiling seagull.Author: Angélica García.Technique: Graphite pencil, watercolor, colored pencils and white acrylic, on cardboard.Note: the sequence of photographs and images in this illustration were taken with the Canon digital camera, PowerShot A480, some details that were necessary to achieve what I wanted to present to you were made with the Adobe program Photoshop, and the slides were converted to jpg format with the Power Point program.
The smiling seagull.

My friends, the illustration procedure that I am going to show you, handles the elements of expression such as point, line, color, diversity of tones and visual texture, which together have given life to this painting done in watercolor as follows:
- I start with the sketch of my main character (The Seagull), which was made with graphite pencil, then highlighted with dark gray pencil. When I finished the sketch I dedicated myself to coloring the sky with light blue and dark, imprisoning them under the wash technique and in the form of stains, as shown in the slides.
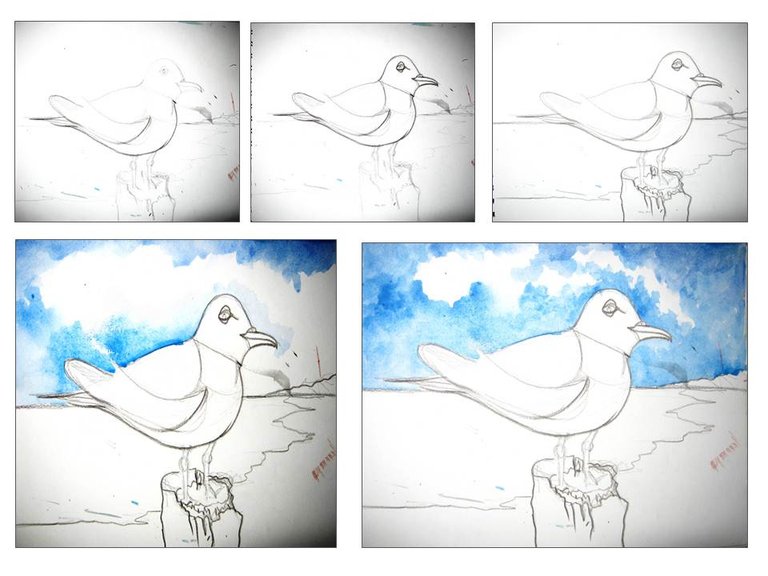
- Once the part of the sky was finished, I continued with the horizon line of the sea with a strong shade of navy blue, trying to give movement to the water with the other spots in seawater and light blue colors, but leaving white spaces to simulate foam of the waves of the sea, the ocher, yellow and brown colors in the form of spots, shape the sand of the coast, which give rise to the environment where the seagull is.
- Some green, it will simulate the vegetation of the place, I am also giving more texture to the beach sand, with points that I make with my fine tip brush No. 001, as shown in one of the images, where with colors brown, sepia, orange and red, I generate the texture of the beach sand.
- I begin to color the trunk where the seagull nests, using my fine tip brush in the same way. In fact, if you stop to look closely at the images, I was able to draw very thin lines diagonally, curved and vertically that could generate the texture. of the trunk, with colors, brown, ocher red and especially gray, also in this pair at the end, I dedicate myself to giving color to the seagull with colors, black, light-dark browns and some red, but expressed in the support with lines smaller than half a centimeter, with a juxtaposition that generates the visual perception of the bird's feathers.
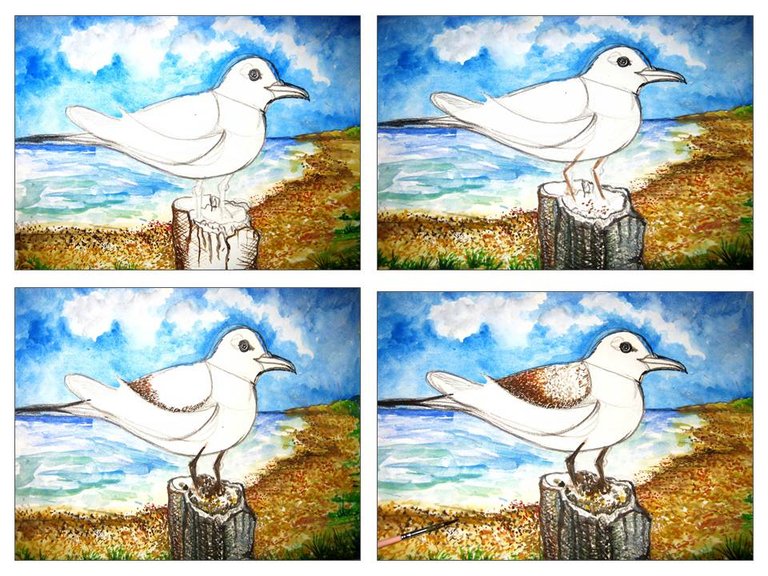
- Observe how I have been progressing in the realization of the illustration, the bird is almost ready, I painted its beak with red, brown, black and white...

- Observe how the bird is looking, I even managed to paint the plumage of the breast with very light colors but taking into account the same principle of color juxtaposition to simulate its beautiful feathers, work a little more on the movement of the sea water, and highlight the linear ones of the trunk on which the bird is perching.
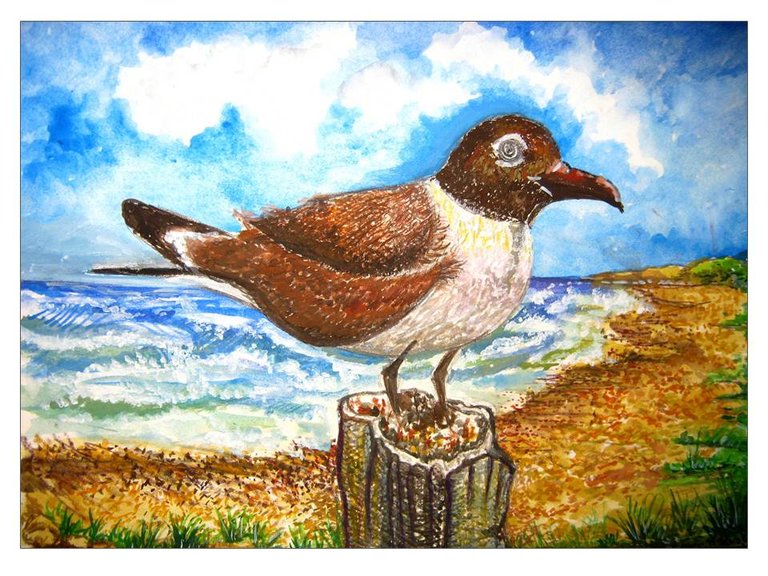
- I did the assembly of the illustration with the digital Power Point program, to be able to show you the artistic work in watercolor titled:
The smiling seagull.

Well friends, I hope you liked the watercolor painting, with the explanation given, because the art I practice is part of me, I adore nature to the fullest, and the perfection of the birds of the tropical environment that surrounds me.
I hope you have a happy day.
Thank you very much for your kind attention.
Sincerely:
Angélica García.

