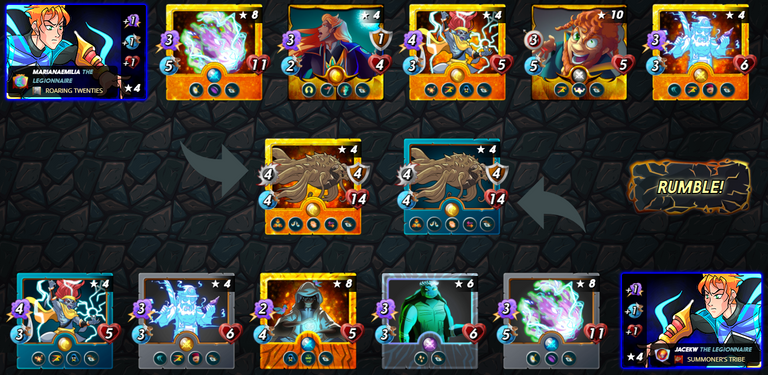
This episode's battle was opportune
While I did make a couple of mistakes setting up my team, if there is one true reason I've won this battle, it's because I didn't try healing my frontliner, The Kraken.
Click on the image below to watch the fight:

Card choices
In a battle like this, under the opportunity-for-all rule set, one might think healing The Kraken is a necessity.
However, when players can use max level cards, there isn't that much we can do to save our frontliner for long. Instead of patching things up, it's just as easy to outdamage enemy heals.
While my opponent chose two monsters focused on healing and anti-healing, I ignored this set up almost completely.
I did buy extra time with River Hellondale, but I'm not sure that was that best I could do - Axe Master and Captain's Ghost were better options.
I feel like I've been focusing too much on River Hellondale. That's getting in the way of my strategies.
Whenever a card becomes my favorite, I tend to spam it in battles. That's horrible. Maybe I'll be able to fix this terrible habit of mine soon enough.

Card positioning
Splash damage through Blast attacks are very common, yet I've ended up placing River Hellondale in position 3 despite the fact that this battle has the opportunity rule.
When my tank dies, the opponent's Ruler of the Seas or whatever other splash monster will immediately start attacking River Hellondale, because he's the one who has the lowest Hp.
Placing him at the last position, far in the backline, would have forced blast's splash damage on a single monster.
But then again, if I did that, enemy magic damage wouldn't bounce back to them when splashing on my Prismatic Energy, because River Hellondale wouldn't be next to it anymore.
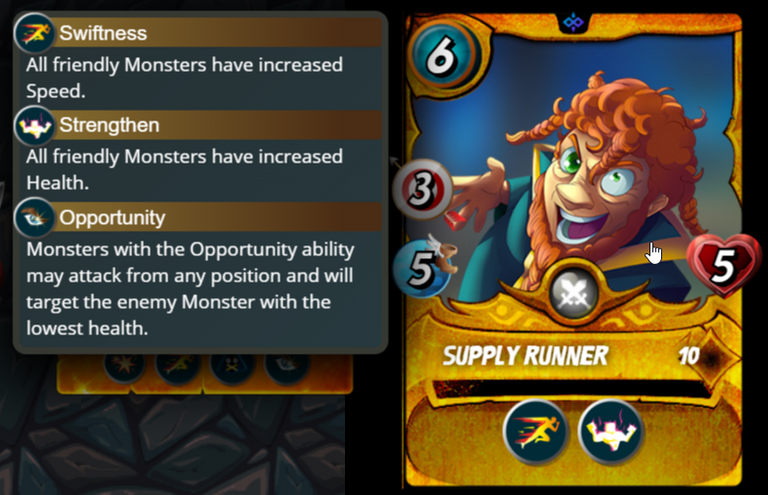
Even so, I should have at least swapped Ruler of the Seas with Supply Runner, so Ruler of the Seas would have stayed alive for longer.

My opponent's choices
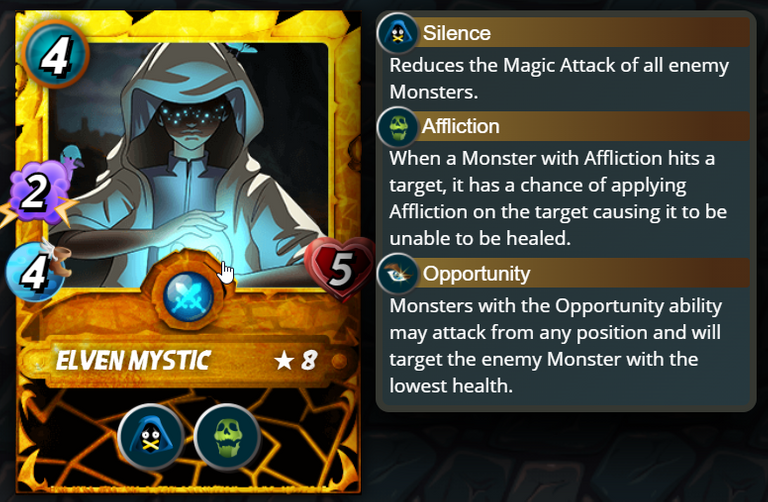
If Elven Mystic was replaced by something else on the opponent's team, I would likely have lost this battle.
This is frustrating. I need to remember to look at my cards after I set them up to check if they're really the most cost-efficient monsters I should be using.
The opportunity rule also helped me take out Ruler of the Seas quickly enough after their Kraken died, since I'd immediately focus on their squishies, ignoring their Prismatic Energy. And this was when not picking Heals helped me win the match.
See this amazing battle again: @marianaemilia versus @jacekw
See this post on Twitter
Join the fun now: Sign up here
Special thanks to @felipejoys for helping me analyze the battles.
Images: @splinterlands & cover image design by @legalizabrazil


Follow my Curation Trail on Hive Vote; @marianaemilia, join the widest and most profitable trail about Splinterlands and help reward the best content creators.
You can also delegate Hive Power and/or SPT to me and help even more!
Thank you very much!

