👉ITA Version👈 (ENG Ver below)
Quest’anno abbiamo adottato una gattina, ve l’ho già detto, e quando è venuto il momento di fare l’albero di Natale abbiamo cominciato a pensare che ce lo avrebbe distrutto.
Così con alcuni scampoli di lana lasciati dalla ex-tata dei miei figli che passava in casa mia praticamente tutto il giorno, ho deciso di rispolverare una mia conoscenza acquisita durante le scuole elementari: l’uncinetto.
Avrò visto 100 tutorial di youtube, ma alla fine sono riuscita a creare una pallina di polistirolo rivestita.
A mio figlio è piaciuta talmente tanto appendere la pallina fatta dalla mamma che ho deciso che l’anno prossimo, se ce la faccio, il nostro albero sarà decorato con palline fatte da noi.
Vi lascio il tutorial, se ce l’ho fatta io, ce la possono fare tutti.
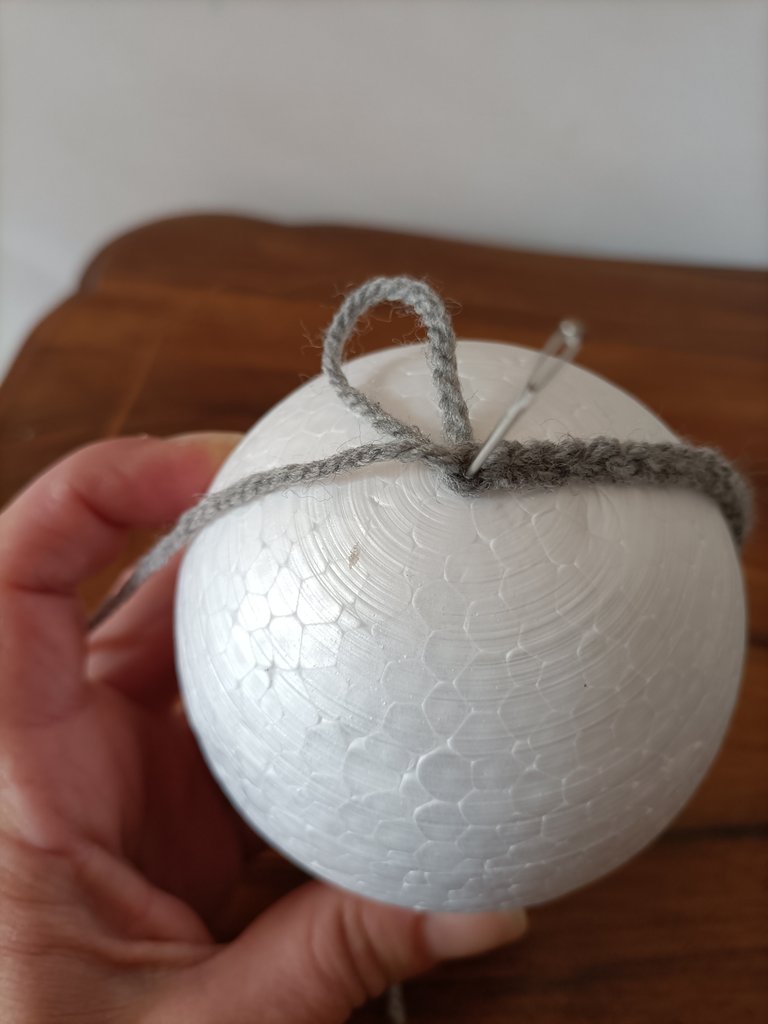
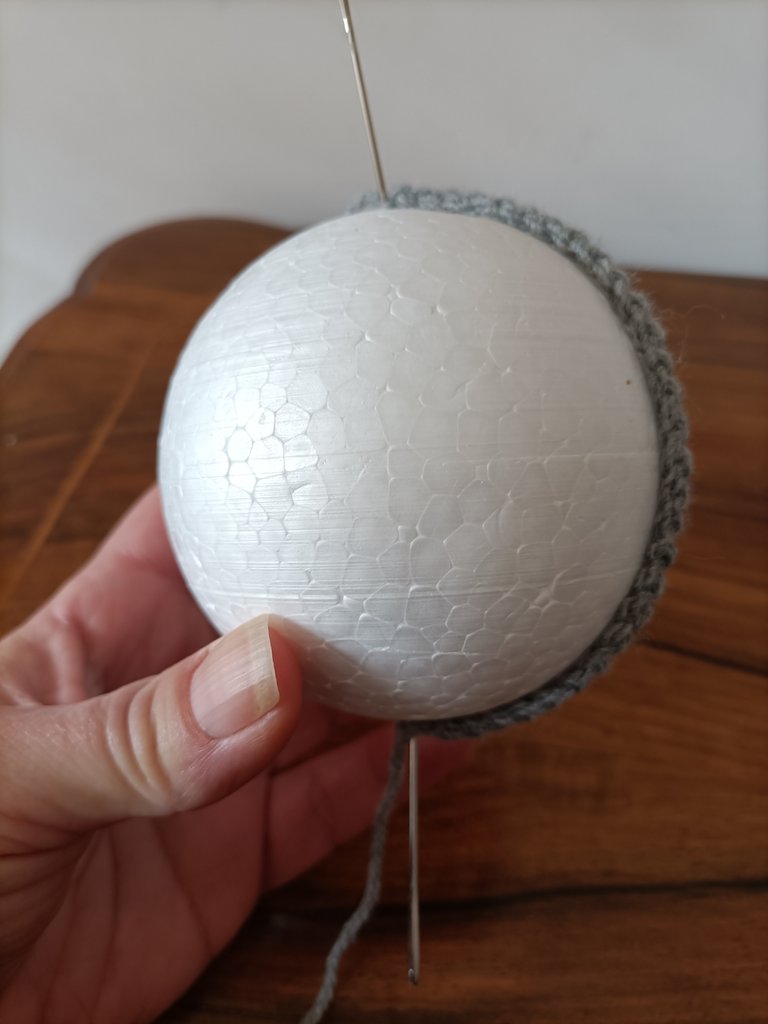
Si parte con un nodo semplice ed una catenella.
Non è importante il numero di catenelle, la cosa importante è che la catenella sia lunga come metà della circonferenza della palla.
Potete usare qualsiasi filato, meglio lana, e meglio lavorare morbidi che stretti, quindi usate pure un uncinetto più grande di quello consigliato, ad esempio questa lana riportava 2,5 – 3 ed io ho lavorato con il 3,5.
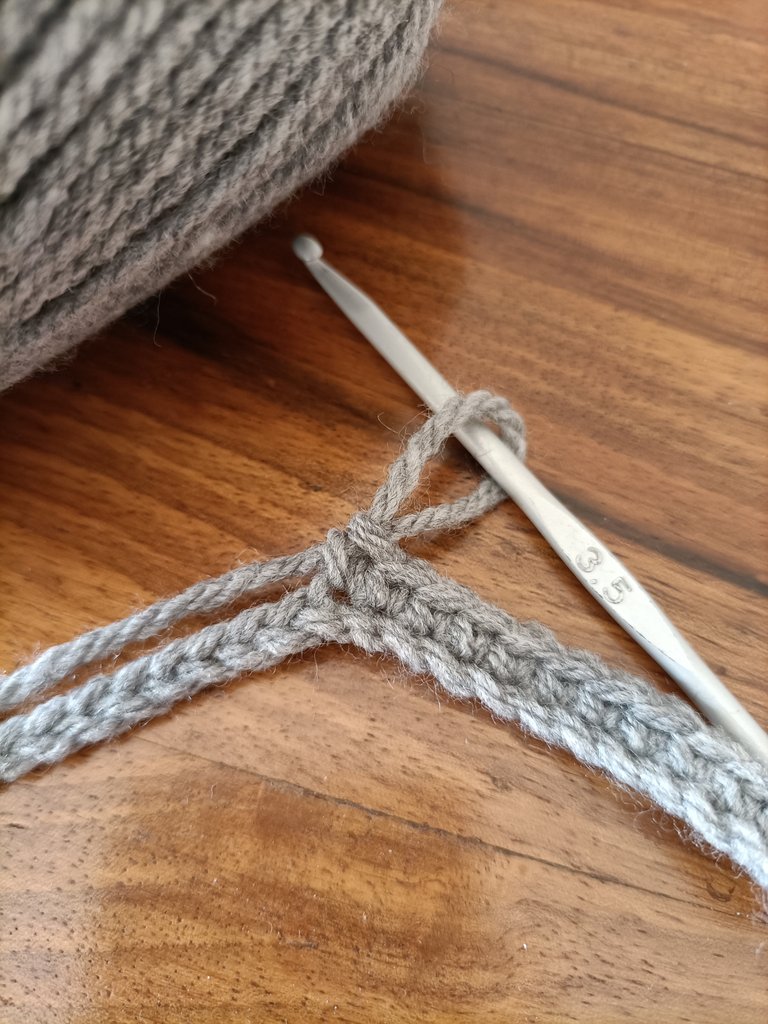
Dalla seconda catenella cominciate a lavorare un giro di maglie basse lavorando solo nella costa dietro, lavorate maglie basse su tutte le catenelle e alla fine fate una catenella e voltate il lavoro.
E ricominciate a lavorare maglie basse su tutte le maglie basse ricordandovi di lavorare solo la costa dietro e alla fine del giro fate una catenella, voltate il lavoro e continuate.
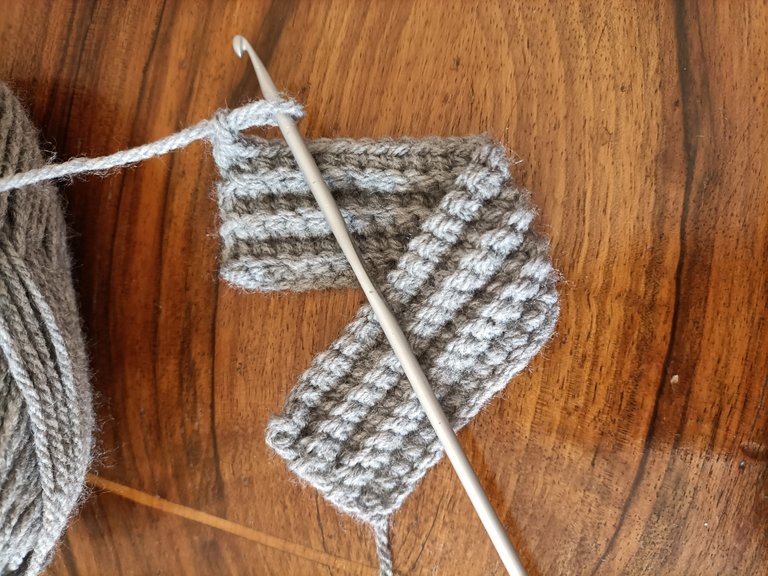
La maglia continuerà a crescere e come potete vedere, lavorando solo la costa dietro, la maglia non presenta un dritto e un rovescio e risulta piuttosto elastica.
Non è importante il numero di giri che fate, ma che alla fine la vostra maglia abbia una lunghezza tale da coprire tutta la pallina.
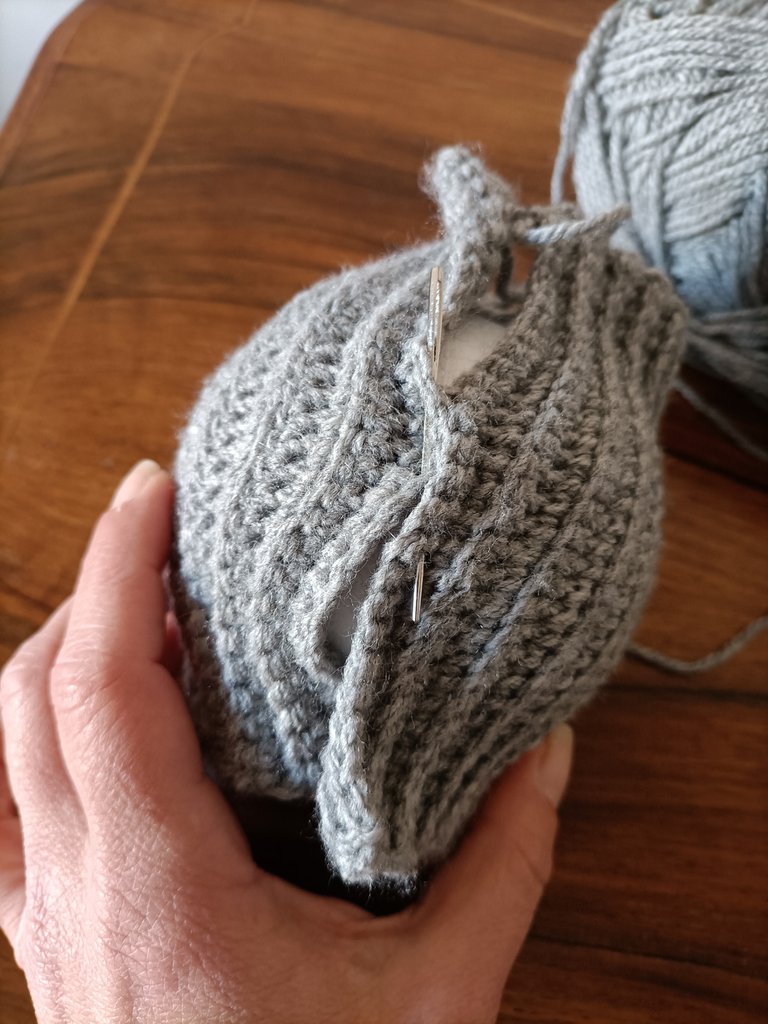
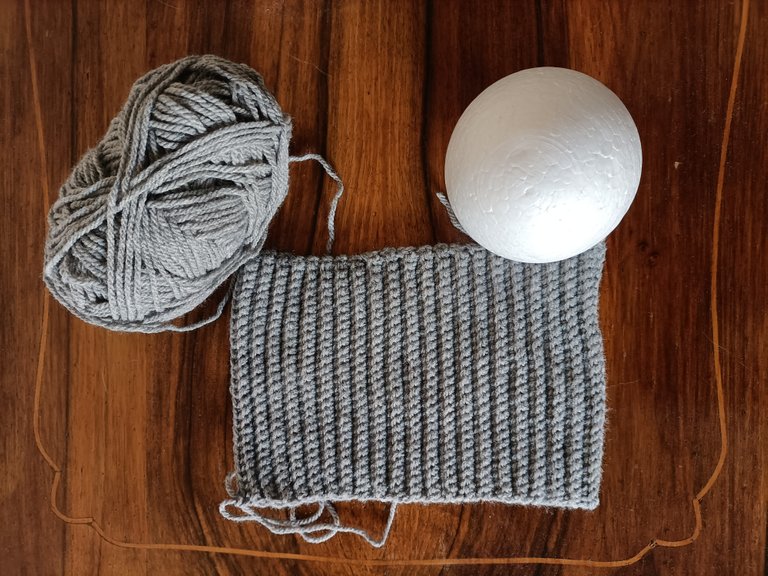
A questo punto cucite il sopra e il sotto della maglia ottenendo un tubolare e poi chiudete uno dei due lati del tubolare creando un impuntura e tirando ottenendo un cappellino.
Potete farlo sia con ago e filo che con l’uncinetto, come vi trovate più comodi.
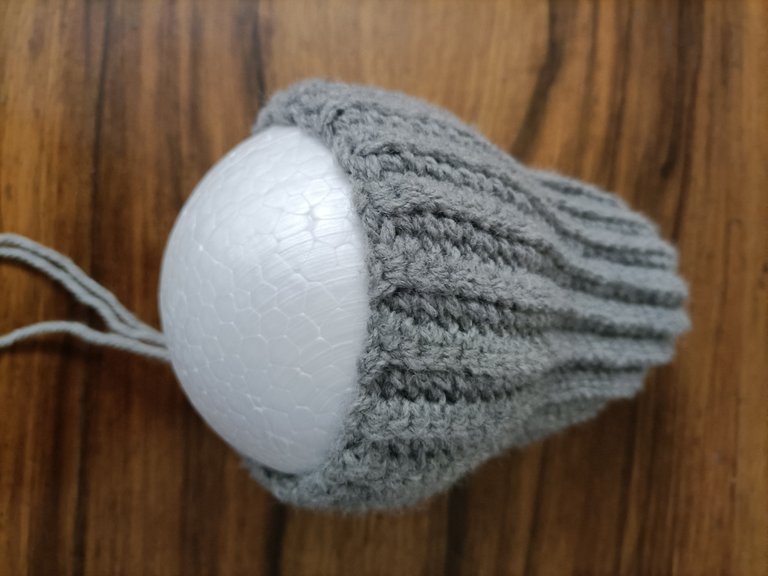
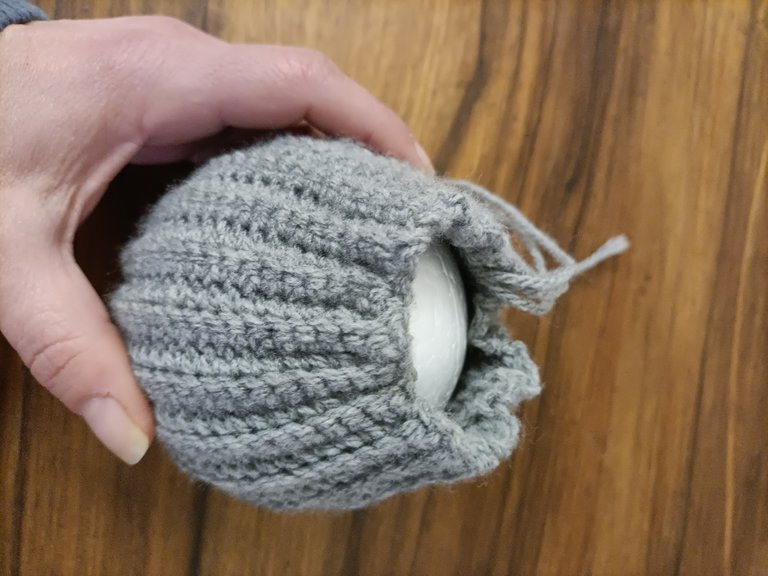
Girate la calzetta se non avete fatto una cucitura invisibile, infilate la pallina e chiudete anche l’ultimo lato.
Potete tagliare i fili in eccesso, infilarli all’interno, o lasciarli lunghi in modo tale che poi siano quelli per appendere la palla, a voi la scelta.
Potete anche cucirne altri se volete, io ne ho aggiunti.
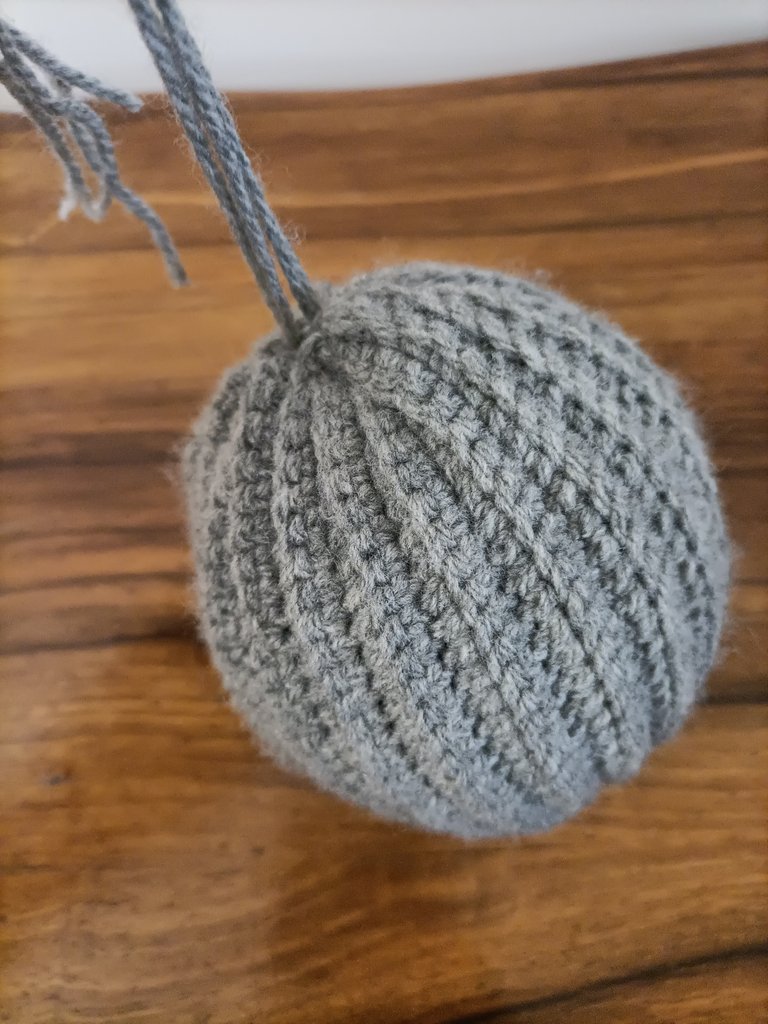
A questo punto la palla è ricoperta e potete decorarla come volete: fiocchi, piccole pigne secche magari dipinte oro o argento, rametti di vischio e chi più ha fantasia più ne metta.
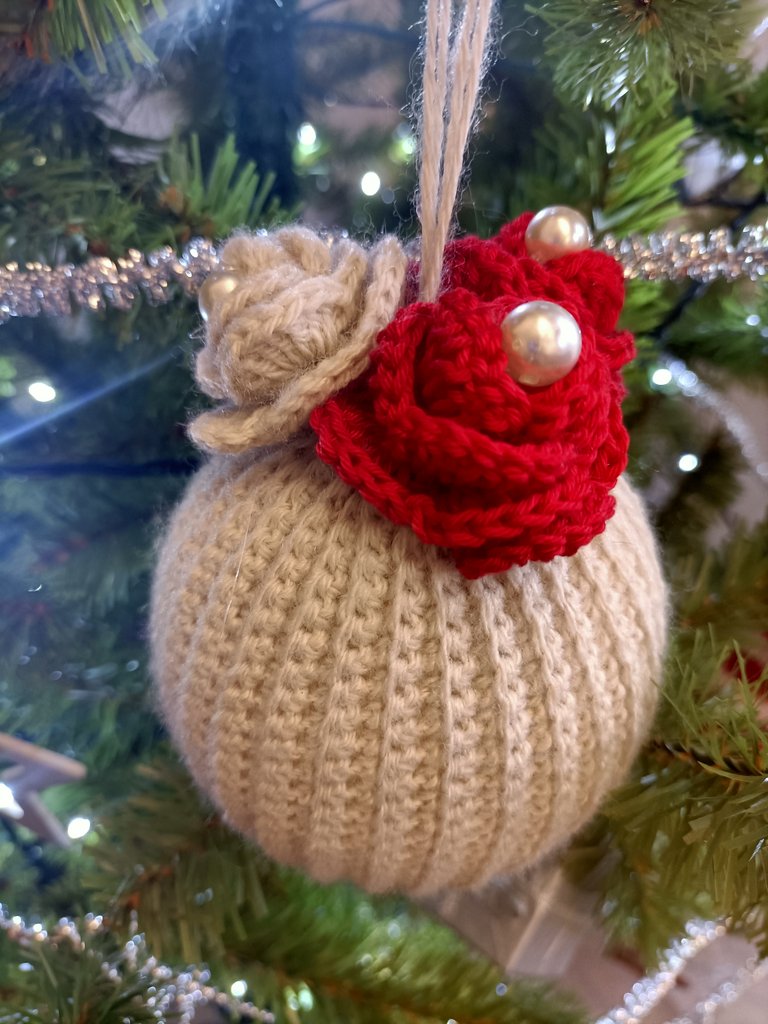
Io le ho decorate creando delle roselline anche queste super facili.
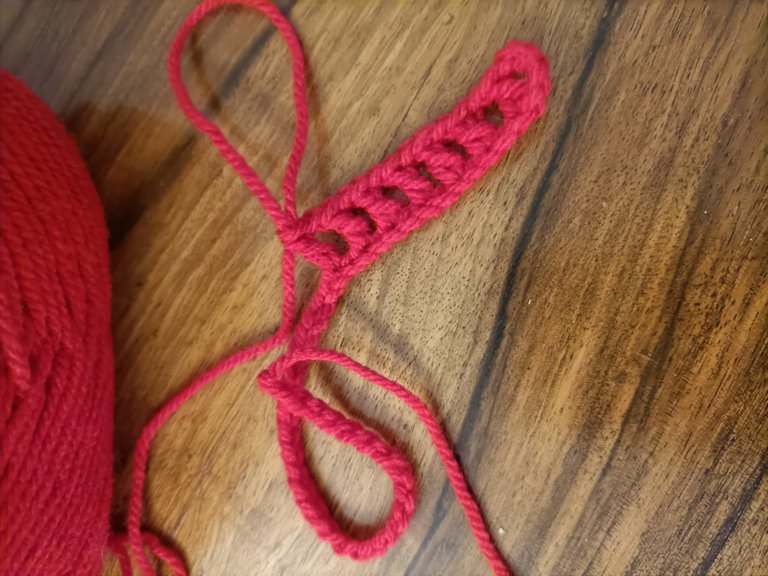
Fate 47 catenelle e partendo dalla quinta fate una maglia alta, poi una catenelle, saltate una maglia di base, fate un’altra maglia alta e così via fino alla fine.
Fate una catenella e voltate il lavoro.
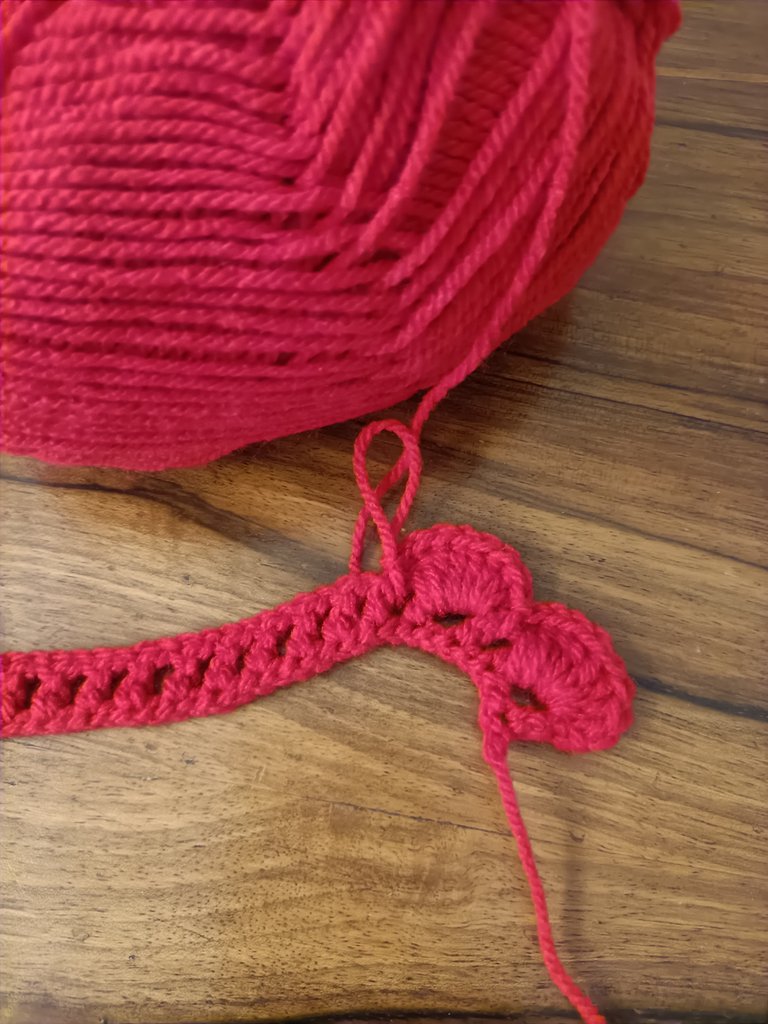
Nel primo archetto lavorate 8 maglie alte e nell’archetto successivo una maglia bassissima e ripetete (8 maglie alte nell’archetto successivo e una maglia bassissima in quello successivo) fino alla fine et voila.
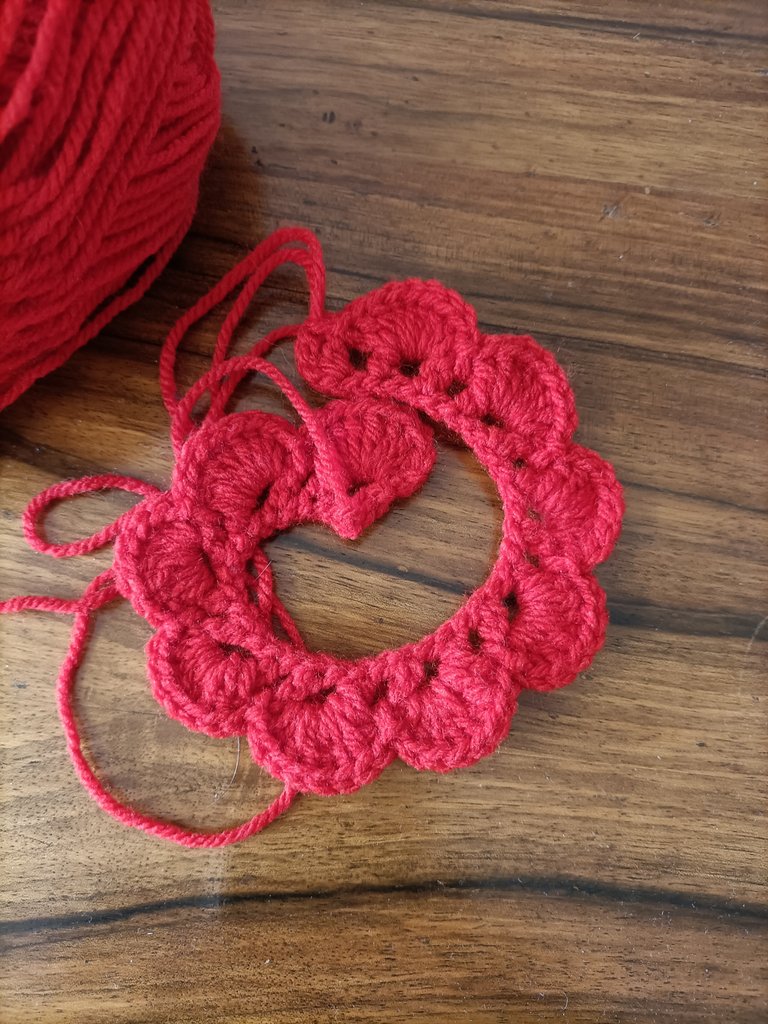
Arrotolate i petali così ottenuti a spirale fissandoli man mano con ago e filo oppure con la colla a caldo e il gioco è fatto.
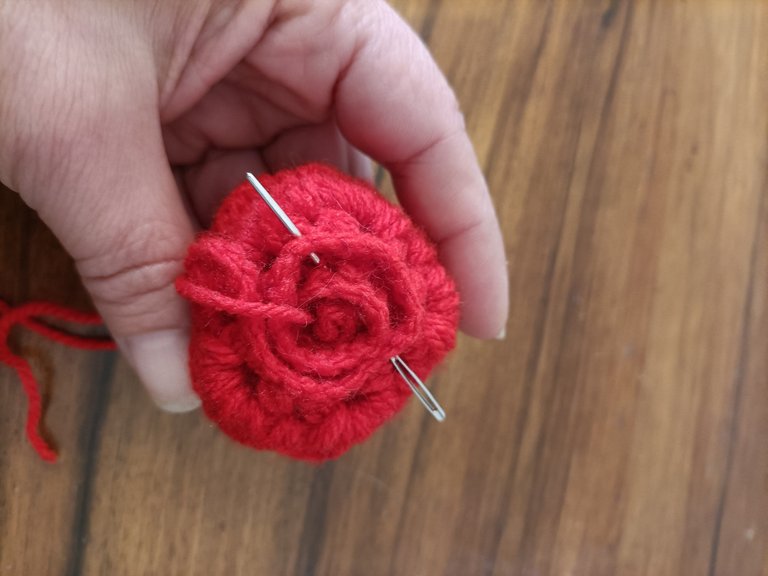
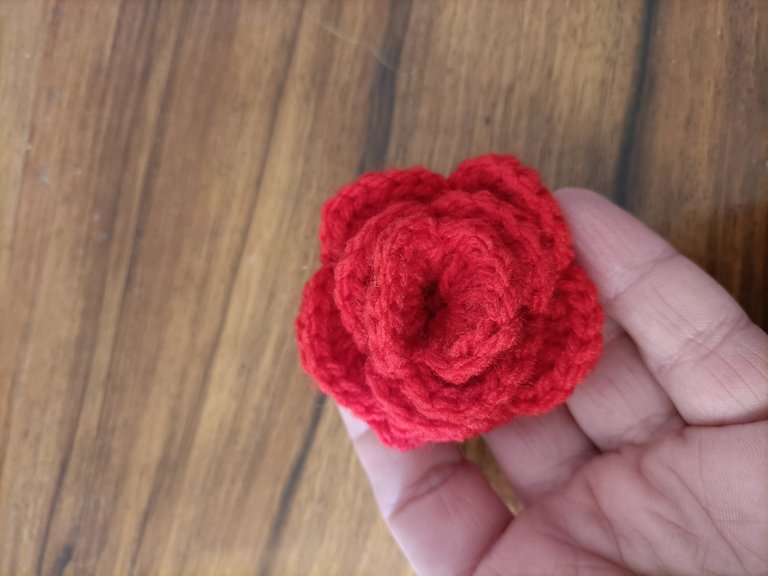
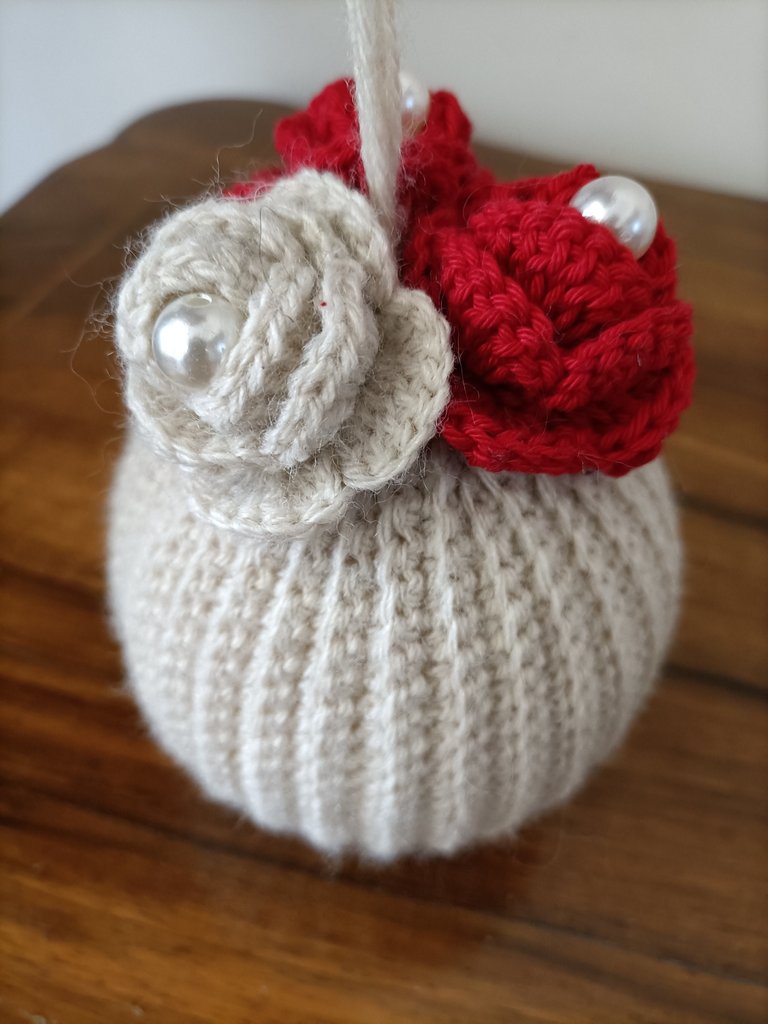
Non ho ancora finito di decorare questa pallina ma vi lascio la foto di quella fatta a Dicembre.
Per le rose potete usare un filato diverso, ad esempio cotone, e un uncinetto più piccolo.
Le rose verranno più piccine e di consistenza diversa rallegrando la pallina ancora di più.
Al centro ho applicato una perlina incollandola sempre con la colla a caldo.
Sto aspettando ancora lo schema dei cuori da parte di @madrunner che li aveva postati nel suo blog.
La lana rossa era stata acquistata per fare quelli, ma temo che dovrò cercare in youtube perché qua non arrivano 🤪
Vi auguro una piacevole serata e grazie per la lettura.
A presto 😊

👉ENG Version👈

This year we adopted a kitten, I have already told you, and when the time came to make the Christmas tree we began to think that she would destroy it.
So with some scraps of wool left by my children's ex-nanny who spent practically all day in my house, I decided to brush up on my knowledge acquired during elementary school: crochet.
I may have seen 100 youtube tutorials, but in the end I managed to make a coated Styrofoam ball.
My son loved hanging the ball made by his mother so much that I decided that next year, if I succeed, our tree will be decorated with balls made by us.
I leave you the tutorial, if I did it, everyone can do it.


It starts with a simple knot and a chain.
The number of chains is not important, the important thing is that the chain is as long as half the circumference of the ball.
You can use any yarn, better wool, and better to work soft than tight, so also use a larger hook than recommended, for example this wool reported 2.5 - 3 and I worked with 3.5.

From the second chain stitch start to work a round of single crochets working only in the back loop only, work single crochets on all the chains and at the end make a chain stitch and turn the work.
And start again to work single crochets on all single crochets remembering to work only the back loop only and at the end of the round make a chain stitch, turn the work and continue.

The knit will continue to grow and as you can see, by working only the back loop only, the shirt does not have a front and a back and is quite elastic.
It is not important the number of turns you make, but that in the end your knit is long enough to cover the whole ball.


At this point, sew the top and bottom of the knit to obtain a tubular and then close one of the two sides of the tubular creating a topstitch and pulling to obtain a hat.
You can do it both with needle and with crochet, as you find it easier.


Turn the hat if you did not made an invisible sewing, insert the ball and close the last side as well.
You can cut the excess threads, thread them inside, or leave them long so that they are then the ones to hang the ball, the choice is yours.
You can also sew more on top if you want, I've added some for example.

The ball is covered and you can decorate it as you like: bows, small dried pine cones perhaps painted gold or silver, sprigs of mistletoe etc etc.
I decorated it by creating these super easy roses too.
Make 47 chain stitches and starting from the fifth make a double crochet, then a chain stitch, skip a base stitch, make another double crochet and so on until the end.
Make a chain and turn the work.


In the first chain space work 8 double crochets and in the next one a slip stitch and repeat (8 double crochets in the next space and a slip stitch in the next one) until the end et voila.

Roll the petals obtained into a spiral fixing them gradually with needle and thread or with hot glue and that's it.


I have not finished decorating this ball yet but I leave you the photo of the one I made in December.
For the roses you can use a different yarn, such as cotton, and a smaller crochet hook.
The roses will be smaller and of different consistency, cheering up the ball even more.
In the center I applied a bead, always using hot glue.

I am still waiting for the pattern of the hearts from @madrunner who posted them on his blog and I asked for them.
The red wool was bought to make those hearts, I am hoping he will send them but I'm afraid I have to search youtube 🤪
Have a nice evening and thanks for reading.
See you soon 😊


