Previously, I’ve written a blog on how to create an inside map from a house and how to transfer players from another map. This was really a fun blog for me since sharing a little bit of knowledge in RPG Maker made me realize that others can do this as well. So, I said in the last part that I'd make a blog post regarding how to make a conversation between a player and an NPC. Thus, how you can make an item that the user will get and, of course, the first battle that our user will experience.
Making a conversation
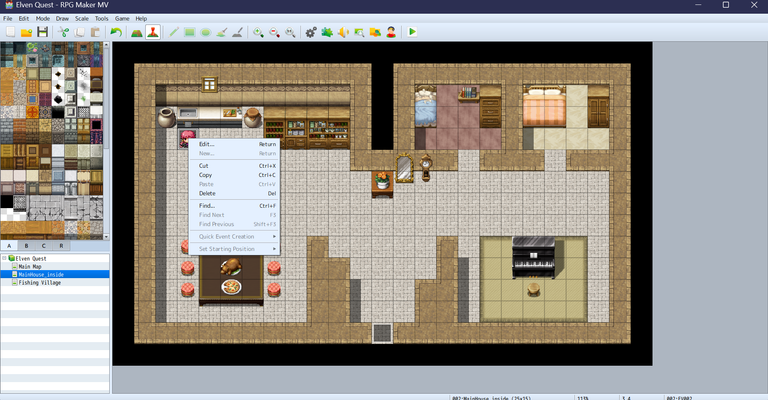
If you are making a conversation, you just have to go to the place where you want the conversation to happen. Select the tile, right-click, and click new. This allows you to go to another window.
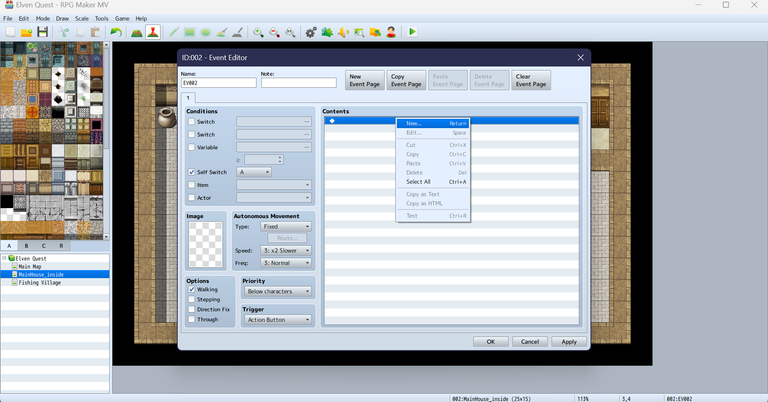
An event editor will show up. It will give you a full understanding of what to do in the event. But for now, right-click the event editor page. Then, select new.
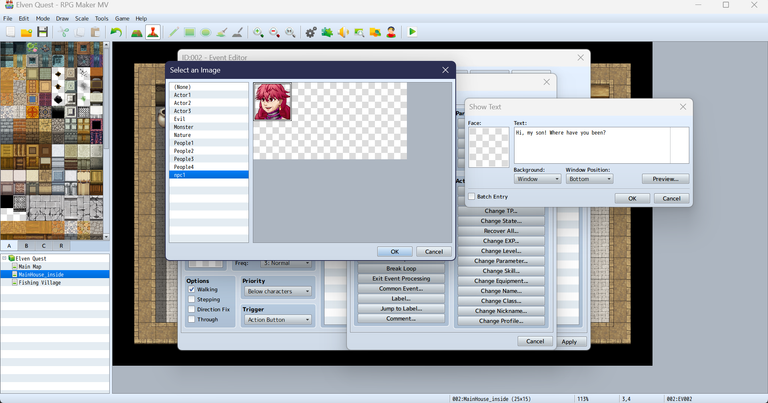
The show text window will appear, where you’ll write the script you want the NPC and player to talk about. It’s better for you to have your own storyline and script for each character so you don’t spend too much time thinking about what to write during a conversation in the text editor. Also, you can choose the face of the person who’ll say the dialogue.
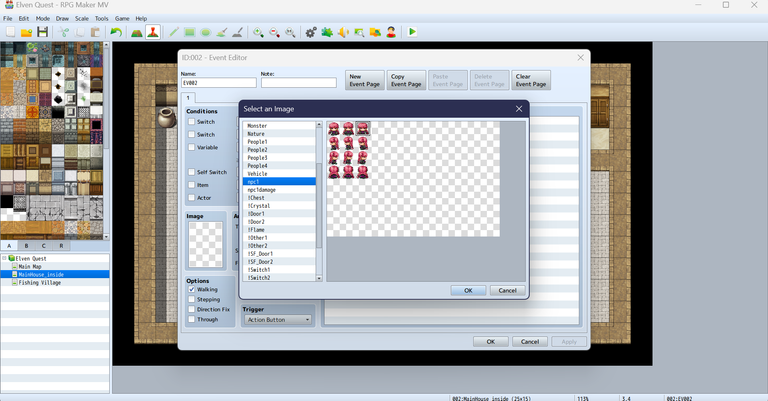
After that, you can see the word "image" in the left-side corner of the event editor. You can actually put an image there. The purpose of the image is so you can see from the map whose NPC will talk. If you don’t put an image, it will be hard for you and the player to know where to go and who to approach.
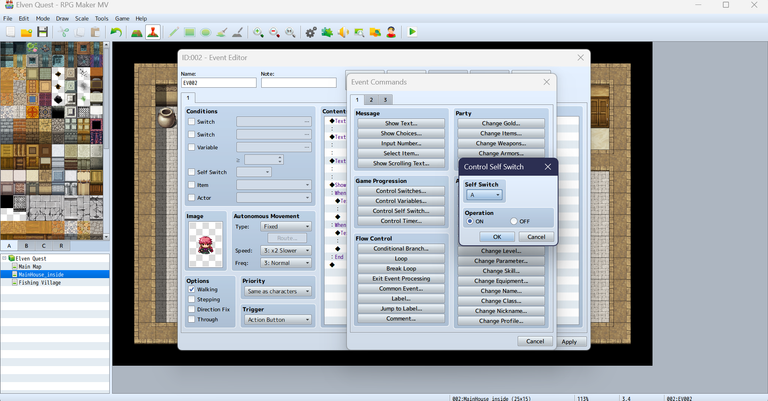
In this part, I have to add the control self-switch. Why? It is very important that the conversation not be continuous or repetitive. If you don’t add a control self-switch, whenever you approach the NPC, the same line will appear over and over again. You’ll place it at the end of the line.
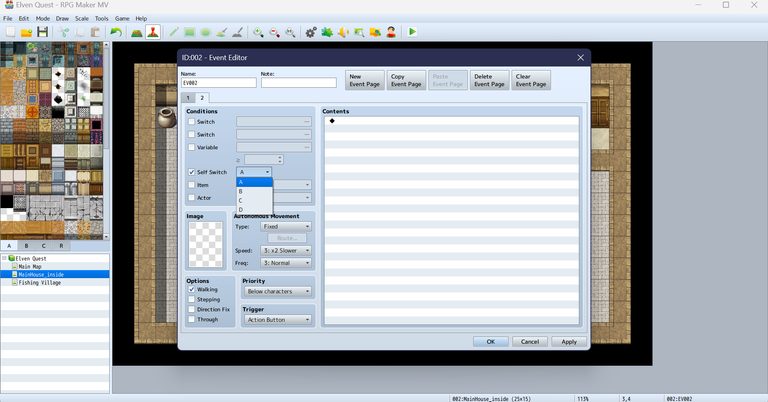
When you make your first control self-switch, make sure you add a new event page. It is because this serves as a blank page for the previous event page. On the left side, check the self-switch and choose the letter you used at the first self-switch on the previous page. If it’s not the right one, then it will have no effect.
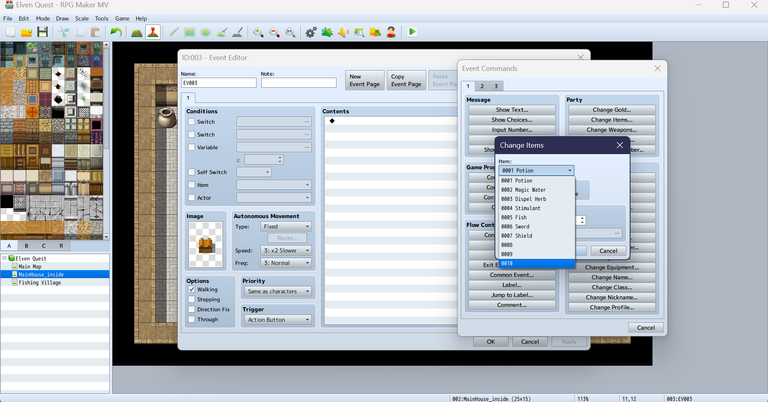
Since I’m going to make a chest for the tools that the player will get, I have to make a new event again. This time you’ll see that I placed a wooden chest as an image. Then, when I select the content for adding the items that the chest will have, it has nothing but the old ones. So, we have to create our own items. Making your own items is not difficult.
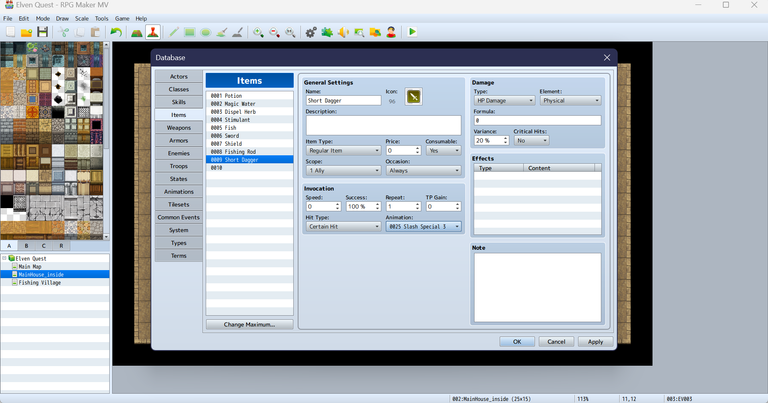
Making an item
From the database (setting icon), choose the items section. You will see the general settings, item type, invocation, damage, and effects of the item. You can change it however you like. I added new items like a fishing rod and a short dagger.
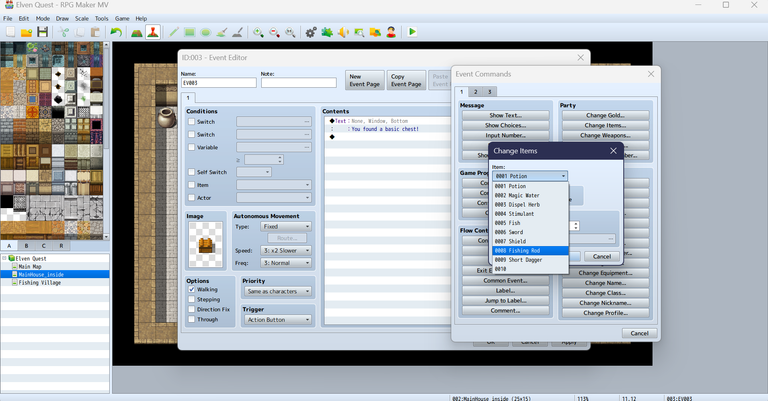
The next thing you will do is to go back to where the event for the wooden chest is. When I am making a chest, I make sure that there’s an intro script first, followed by the items and the script for the items. If you notice in the change items, the fishing rod and short dagger are already included. This means that we successfully entered our items in the database.
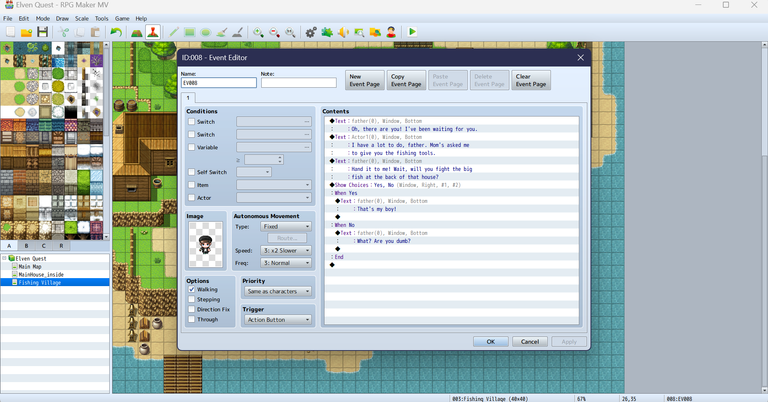
Now that we have finished the events in the main house map, we’re now going to the next map, which is the fishing village. I don’t have an idea where the father goes, so it’s best to assume that he was in the fishing area, which is the fishing village. The father, I made it via the character generator in the RPG Maker MV.
So, this is the short sample script I made for the father and our player. I had to ask the father to catch the player a big fish at the back of the map. I was supposed to give the tools to the father, but I made him catch the fish first. In my opinion, making a game is harder than making your own map because you have to get the user’s interest and make them play your game. As for mine, this was just my presentation on how to make a basic RPG game.
Making a battle
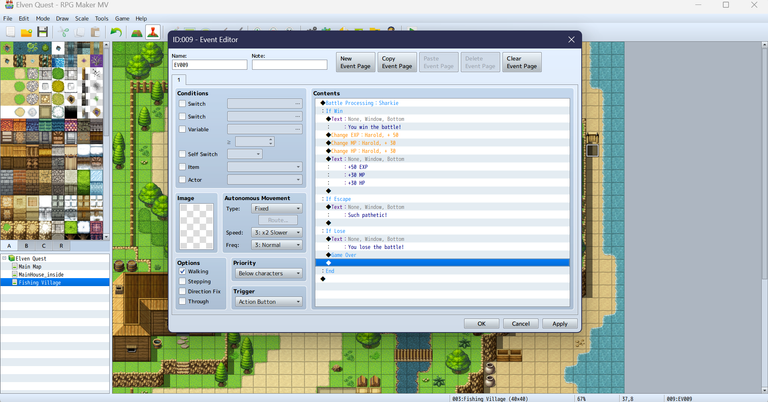
At last, I made an event for the first battle of our user. As I said, the father asked him to catch the big fish. You can’t technically catch a fish in the sea, but you can fight it. You’ll see in the image the content of the first battle. I’m not going to be technical so that you can understand it here. I just added some exp, mp, and hp as rewards.
In the video, you notice that the father is gone after the conversation; that’s because there’s no self-switch for him to stay and the battle is quite boring. Why? It is because there’s no animation, sound effects, background music, or troops of enemies yet. So, in the next blog, I’ll write about how you can make a pact of enemies against our player. Also, some interesting animations, skills, and weapons will be added as well. I hope you learn something new from this simple blog about RPG Maker MV.
Related blog!
- Introducing RPG Maker MV: Creating Your Own RPG Map
- RPG Maker MV: Creating an Inside Map and Player Transfer
All images and videos are taken from my RPG Maker MV app.

