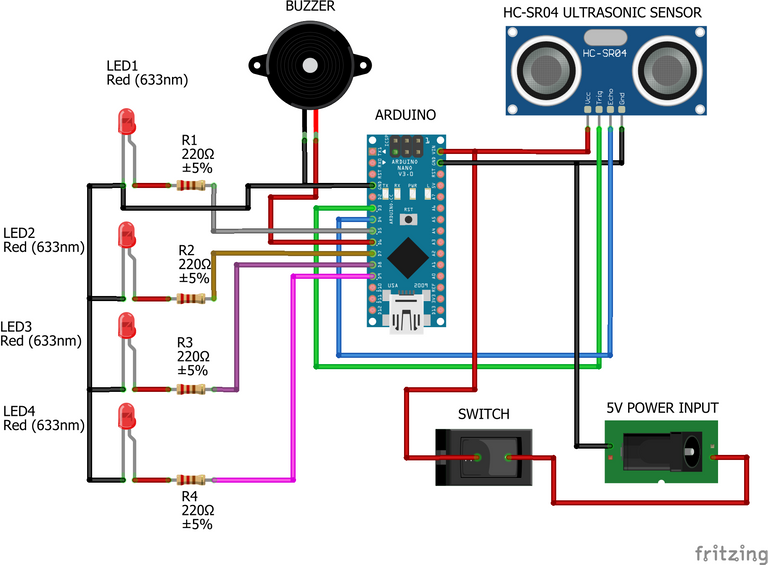
The need for adequate water or liquid levels monitoring system is very essential in other to prevent waste of water or liquid and also for certain decision making. During the period where water is to be effectively managed, the device would help in monitoring and notification of the level of water or amount of water present or left in the water tank or reservoir or bottles, and with that effective precautions or decisions can be taken. It is also highly utilized in food and drinks manufacturing industries to measure the level of liquid in bottles.
The following components are used in developing the hardware part of the device:
- Arduino Nano
- Ultrasonic Sensor
- Buzzer
- Resistor
- LED (Light Emitting Diode)
- Control Switch
- 5v Power Jack
- Connecting Wires
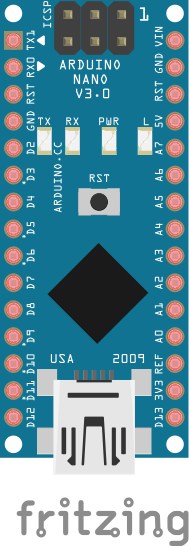
Arduino Nano is a microcontroller which works almost exactly as the Arduino Uno or Arduino Mega but has lesser memory and appears to be very much smaller in size compared to Arduino Uno and Arduino Mega.
It is used in this project as the brain where all other components attached to it receives and send instruction from and to it respectively. And it is where the codes written to control the device is been uploaded to.
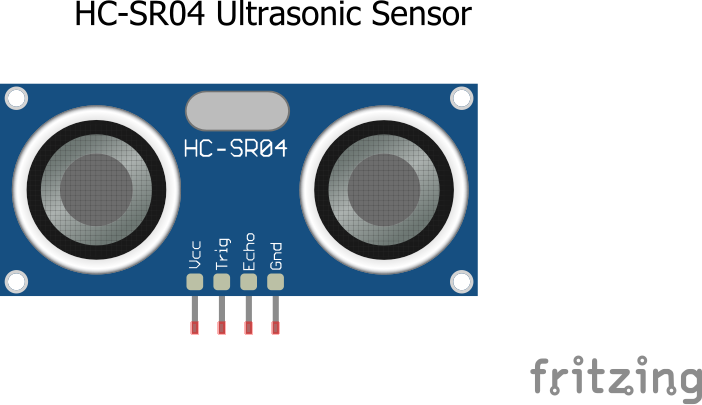
The ultrasonic sensor is a tranducers, that is it converts from one energy form to another, an ideal ultrasonic sensor converts ultrasonic sound waves into electrical signals.
It radiates sound waves and measures the distance at which the transmitted ultrasonic sound wave is be reflected then converts the reflected sound waves into electrical signal.
It is used where the need for measuring distances or proximity of objects or substances is required.
In this device it helps in measuring the different levels of liquid or water in the reservior, tank or bottle then sends the measured distance to the arduino nano microcontroller.
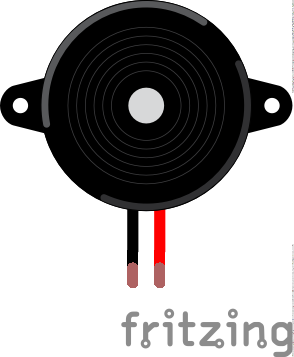
The Buzzer is an electronic component that converts electrical signal into sound signal. It is highly utilized in alarms, printers, and other electronic devices where the need for beep sounds is required or needed.
The buzzer help in giving beep sounds outputs as the water gets to different levels in the tank, bottle or reservior.
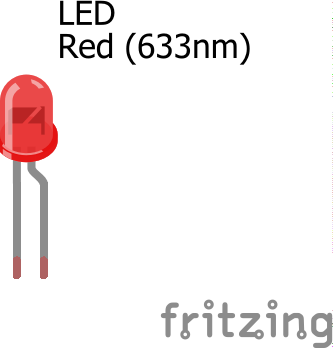
The LED (Light Emitting Diode) is a polarized two terminal electronic component that converts electrical energy into light energy, that is, it emitts light when an electrical energy is been applied to it terminals or when been biased.
The LED bulb helps in indicating the different levels the liquid or water is in the bottle, tank or reservoirs.
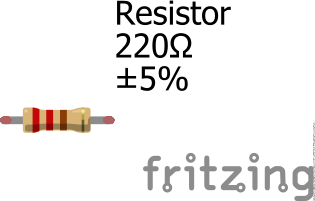
As it is known, a resistor is an electronic component that helps to reduce or limit the flow of electric current in an electric circuit or the amount of electric current that would flow to a certain electronic component in an electric circuit.
The resistor helps in limiting or reducing the about of electric current that flows into the LED (light emitting diode) the LED only requires 3.3v to power on but since that output from the Arduino Nano is 5v, then their is a need to reduce this voltage so that is doesn't go straight to the LED and cause it to damage.
Connecting the Arduino Nano with the Ultrasonic Sensor
| Arduino Nano | Ultrasonic Sensor |
|---|---|
| Vcc | Vcc |
| GND | GND |
| D7 | Echo |
| D8 | Trig |
Connecting the Arduino Nano with the Buzzer
| Arduino Nano | Buzzer |
|---|---|
| GND | GND |
| D6 | +VE |
Connecting the Arduino Nano with the LEDs
| LEDS | Arduino Nano |
|---|---|
| LED1 | D2 |
| LED2 | D3 |
| LED3 | D4 |
| LED4 | D5 |
| GND | GND |
The following components are used in developing the software part of the device:
- Arduino IDE (Integrated Development Environment)
- Embedded C/C++ Programming Language
- Frizting
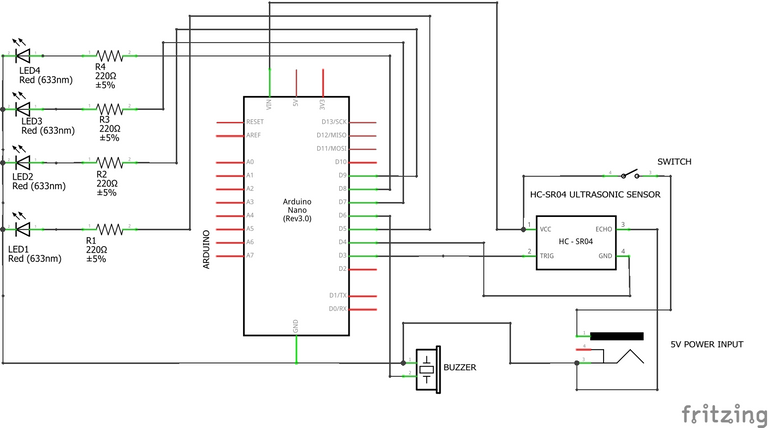
After successfully making the connections of the hardward components together following the instructions above, to program the devie the code below should be uploaded to the Arduino Nano microcontroller.
int trigger_pin = 8;
int echo_pin = 7;
int buzzer_pin = 6;
int led1 = 2;
int led2 = 3;
int led3 = 4;
int led4 = 5;
int time;
int distance;

void setup ( ) {
        Serial.begin (9600);
        pinMode (trigger_pin, OUTPUT);
        pinMode (echo_pin, INPUT);
        pinMode (buzzer_pin, OUTPUT);
        pinMode (led1, OUTPUT);
        pinMode (led2, OUTPUT);
        pinMode (led3, OUTPUT);
        pinMode (led4, OUTPUT);
}

void loop ( ) {
    digitalWrite (trigger_pin, HIGH);
    delayMicroseconds (10);
    digitalWrite (trigger_pin, LOW);
    time = pulseIn (echo_pin, HIGH);
    distance = (time * 0.034) / 2;
    if ((distance >= 15) && (distance <= 17))
        {
        Serial.println ("25% WATER LEVEL REACHED");
        Serial.print (" Water Height = ");
        Serial.println (distance);
        digitalWrite (led1, HIGH);
        digitalWrite (led2, LOW);
        digitalWrite (led3, LOW);
        digitalWrite (led4, LOW);
        digitalWrite (buzzer_pin, HIGH);
        delay(500);
        digitalWrite (buzzer_pin, LOW);
        delay(500);
        digitalWrite (buzzer_pin, HIGH);
        delay(500);
        digitalWrite (buzzer_pin, LOW);
        delay (500);
        digitalWrite (buzzer_pin, HIGH);
        delay(500);
        digitalWrite (buzzer_pin, LOW);
        delay (500);
        }

     else if ((distance >= 10) && (distance < 15))
        {
        Serial.println ("50% WATER LEVEL REACHED");
        Serial.print (" Water Height = ");
        Serial.println (distance);
        digitalWrite (buzzer_pin, HIGH);
        digitalWrite (led2, HIGH);
        digitalWrite (led1, HIGH);
        digitalWrite (led3, LOW);
        digitalWrite (led4, LOW);
        digitalWrite (buzzer_pin, HIGH);
        delay(350);
        digitalWrite (buzzer_pin, LOW);
        delay(350);
        digitalWrite (buzzer_pin, HIGH);
        delay(350);
        digitalWrite (buzzer_pin, LOW);
        delay (350);
        digitalWrite (buzzer_pin, HIGH);
        delay(350);
        digitalWrite (buzzer_pin, LOW);
        delay (350);
        digitalWrite (buzzer_pin, HIGH);
        delay(350);
        digitalWrite (buzzer_pin, LOW);
        delay (350);
        }

       else if ((distance >= 5) && (distance < 10))
        {
        Serial.println ("75% WATER LEVEL REACHED");
        Serial.print (" Water Height = ");
        Serial.println (distance);
        digitalWrite (buzzer_pin, HIGH);
        digitalWrite (led3, HIGH);
        digitalWrite (led2, HIGH);
        digitalWrite (led1, HIGH);
        digitalWrite (led4, LOW);
        digitalWrite (buzzer_pin, HIGH);
        delay(200);
        digitalWrite (buzzer_pin, LOW);
        delay(200);
        digitalWrite (buzzer_pin, HIGH);
        delay(200);
        digitalWrite (buzzer_pin, LOW);
        delay(200);
        digitalWrite (buzzer_pin, HIGH);
        delay(200);
        digitalWrite (buzzer_pin, LOW);
        delay(200);
        digitalWrite (buzzer_pin, HIGH);
        delay(200);
        digitalWrite (buzzer_pin, LOW);
        delay(200);
        digitalWrite (buzzer_pin, HIGH);
        delay(200);
        digitalWrite (buzzer_pin, LOW);
        delay(200);
        digitalWrite (buzzer_pin, HIGH);
        delay(200);
        digitalWrite (buzzer_pin, LOW);
        delay(200);
        }

        else if (distance < 5)
        {
        Serial.println ("10% WATER LEVEL REACHED");
        Serial.print (" Water Height = ");
        Serial.println (distance);
        digitalWrite (buzzer_pin, HIGH);
        digitalWrite (led4, HIGH);
        digitalWrite (led2, HIGH);
        digitalWrite (led3, HIGH);
        digitalWrite (led1, HIGH);
        digitalWrite (buzzer_pin, HIGH);
        delay(100);
        digitalWrite (buzzer_pin, LOW);
        delay(100);
        digitalWrite (buzzer_pin, HIGH);
        delay(100);
        digitalWrite (buzzer_pin, LOW);
        delay(100);
        digitalWrite (buzzer_pin, HIGH);
        delay(100);
        digitalWrite (buzzer_pin, LOW);
        delay(100);
        digitalWrite (buzzer_pin, HIGH);
        delay(100);
        digitalWrite (buzzer_pin, LOW);
        delay(100);
        digitalWrite (buzzer_pin, HIGH);
        delay(100);
        digitalWrite (buzzer_pin, LOW);
        delay(100);
        digitalWrite (buzzer_pin, HIGH);
        delay(100);
        digitalWrite (buzzer_pin, LOW);
        delay(100);
        }

    else {
        Serial.println ("WATER LEVEL IS CRITICALLY LOW");
        Serial.print (" Water Height = ");
        Serial.println (distance);
        digitalWrite (buzzer_pin, LOW);
        digitalWrite (led4, LOW);
        digitalWrite (led2, LOW);
        digitalWrite (led3, LOW);
        digitalWrite (led1, LOW);
        delay (500);
    } }
Thanks for reading and visiting my blog 🤝. Kindly support this post by reblogging, upvoting, and commenting, it would be highly appreciated.
Images used in this post were all designed by me using frizting, a circuit design and simulation software.
Posted with STEMGeeks


