@leofinance just announced the start of PolyCUB Airdrop. Here is the post Introducing the $1,000,000 POLYCUB Airdrop to CUB Stakers.
I received a comment on my reply to this post about how to buy CUB and participate in this Airdrop.
And so I thought of writing this step by step guide to help anyone looking to participate in this Airdrop but doesn't know how.
Airdrop Details
So 1 million dollars worth of POLYCUB are going to be airdropped to the CUB stakers in next 60 days. Based on the snapshot of the amount of CUB you have staked on every individual day. I.e the more CUB stake you hold, the more POLYCUB you'll get.
The POLYCUB airdrop is limited to the following farms and kingdoms at CubFinance namely -
- CUB Kindom
- CUB-BUSD Farm
- CUB-BNB Farm
Staking your CUB anywhere else than these specific kingdoms and farms of CubFinance defi platform, won't make you eligible for the airdrop.
So now let's dive into how you can participate as a total noob without any experience into dex and defi platforms.
Prerequisites
- A device with internet connection - obvious
- Metamask Wallet or any other blockchain wallet that supports Binance Smart Chain. Since the CubFinance is a defi platform on BSC netowork, you'll need a blockchain wallet that can interact with the same.
- Some funds in form of crypto at BSC network - remember you can not buy directly with coins like Bitcoin or Etherum since they are the cryptos based on their own respective blockchain networks. You can use a Binace Bridge to convert your ERC-20 or any other blockchain based tokens into their respective BEP-20 versions. Alternatively you can directly use any BEP-20 tokens like BUSD or BNB and send them to your Binance Smart Chain wallet on Metamask. (Caution - Directly sending any tokens other than BEP-20 to your BSC wallet can result in permanent loss of those tokens)
Creating a Metamask Wallet (Skip If You Already Have A BSC Wallet)
Metamask is a widely popular browser extension and mobile app that can house multiple blockchain wallets in a single interface.
You simply need to install the Metamask mobile app or browser extension and create a wallet if you don't already have one.
As soon as you'll install the browser extension or open the mobile app - the following window will appear with two options.
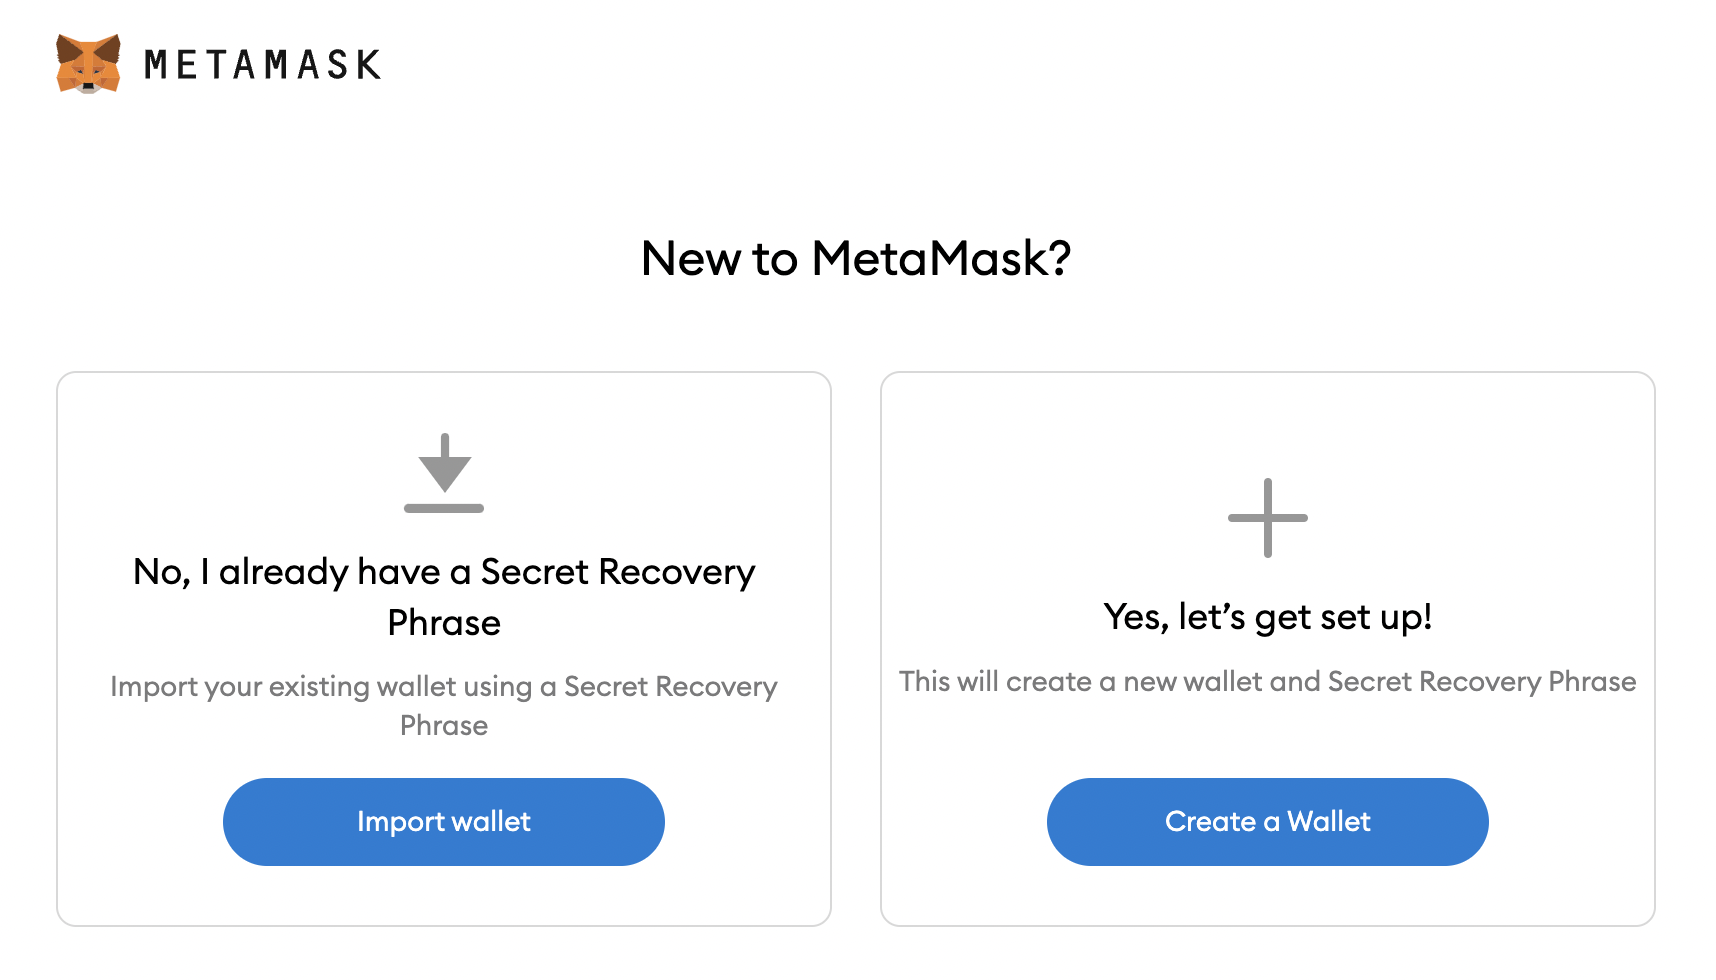
Since you are reading this means you do not have a wallet, so we'll proceed with the option 'Create a Wallet'.
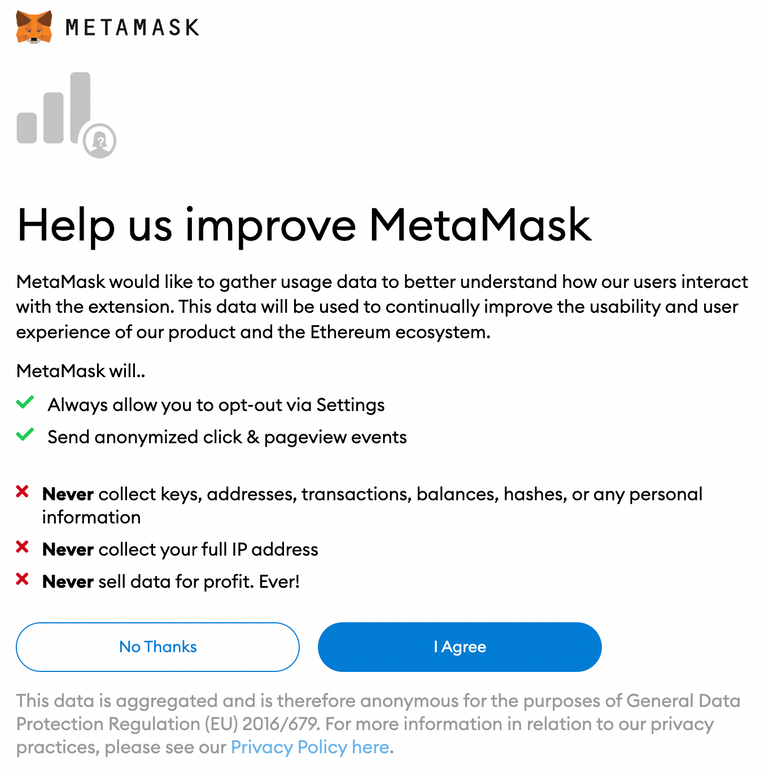
Metamask will than ask for your premission to collect some information. You proceed with any option here.
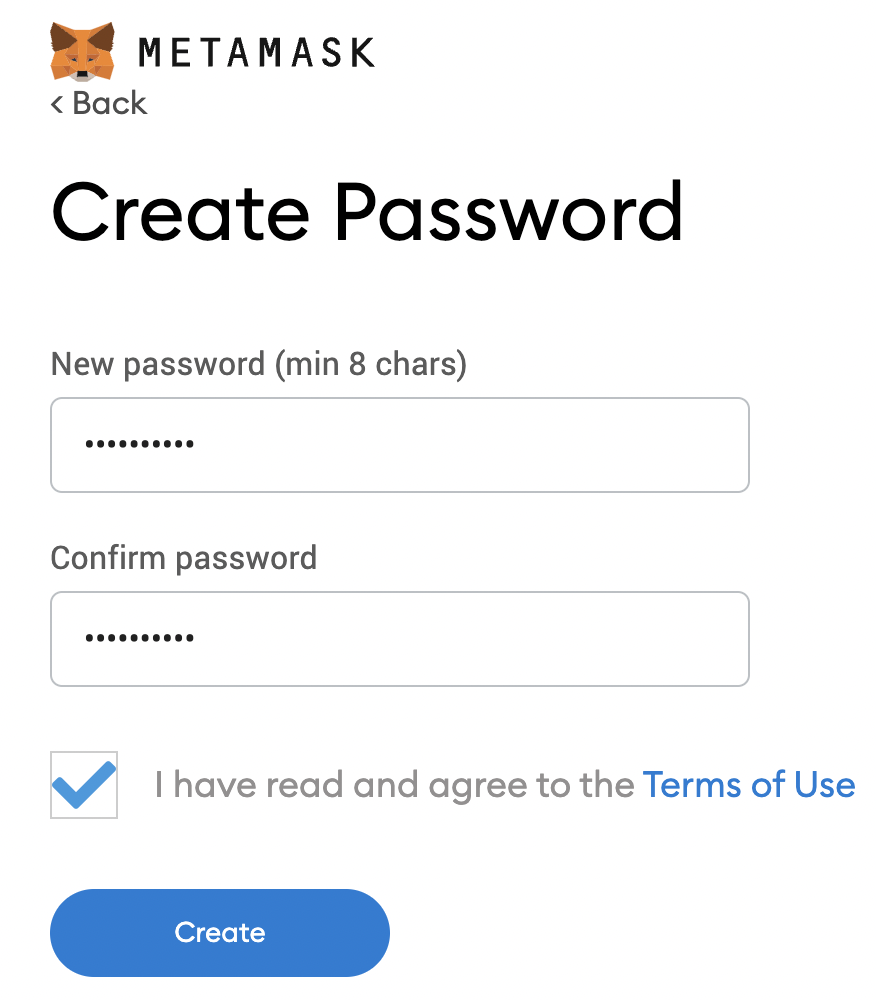
Next it will ask you to create a password. So fill in a password, check the box of 'terms of service' and click 'Create'.
Remember - this password you'll create here is only meant to be a password to access your wallet from the specific device you are creating your wallet. It is not the actual password of your wallet. Meaning you can't login to your wallet from any other device using this password.
You'll then be presented a short video and some information about what is about to come i.e Recovery Phrase and how senstive it is.
Continuing further you'll be presented with a recovery phrase. Now this is the main key/password/code or whatever you want to call it. Losing it will simply mean losing your wallet and all the funds in it won't ever be accessible. Do I need to tell what precautions you must take?
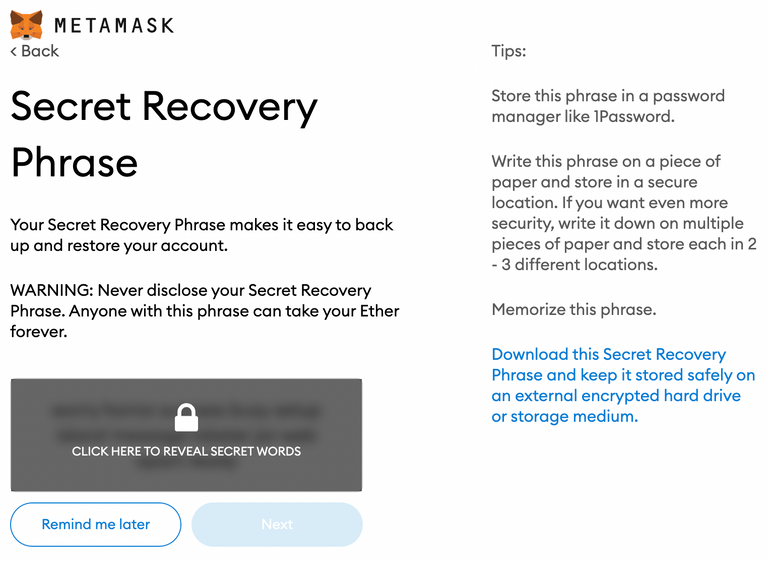
After storing your recovery phrase at a safe place, click 'Next'.
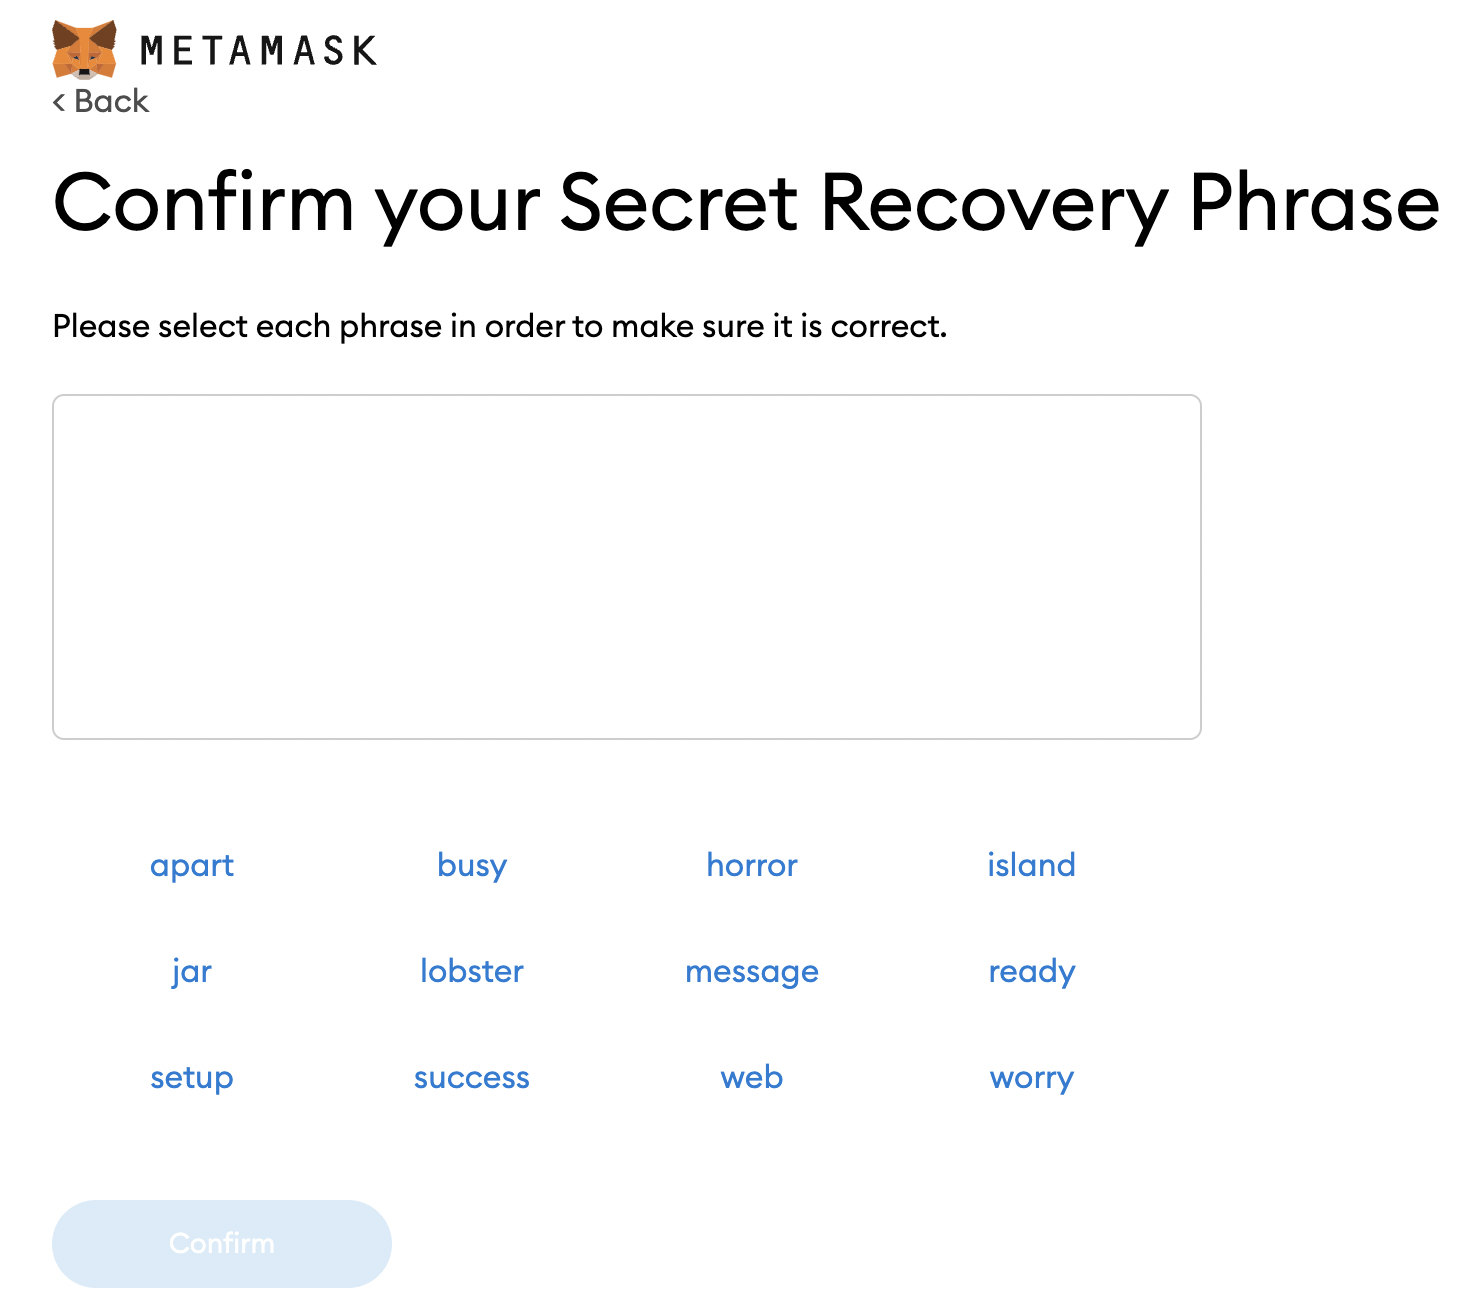
And the next step will ask you to confirm your 'Secret Recovery Phrase', so input your phrase in the right order and click 'Confirm'.
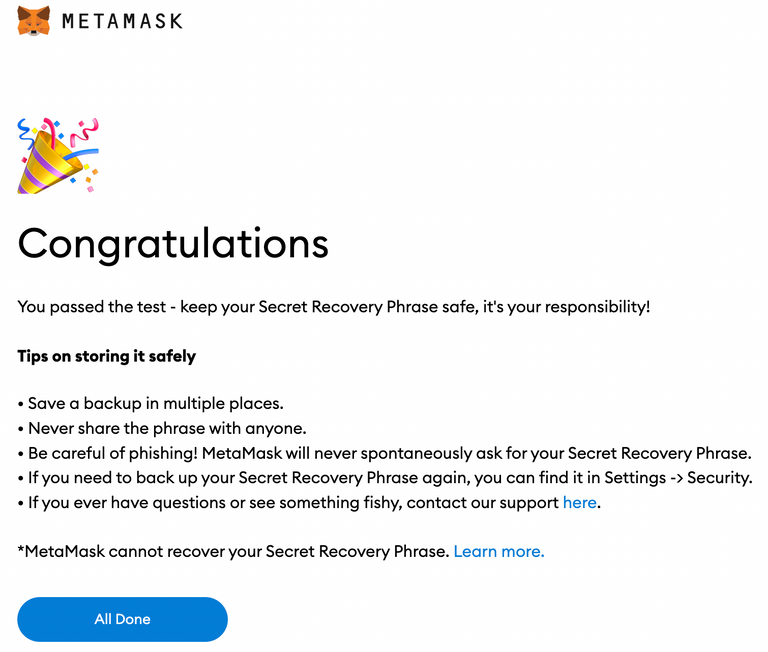
Click on 'All Done'.
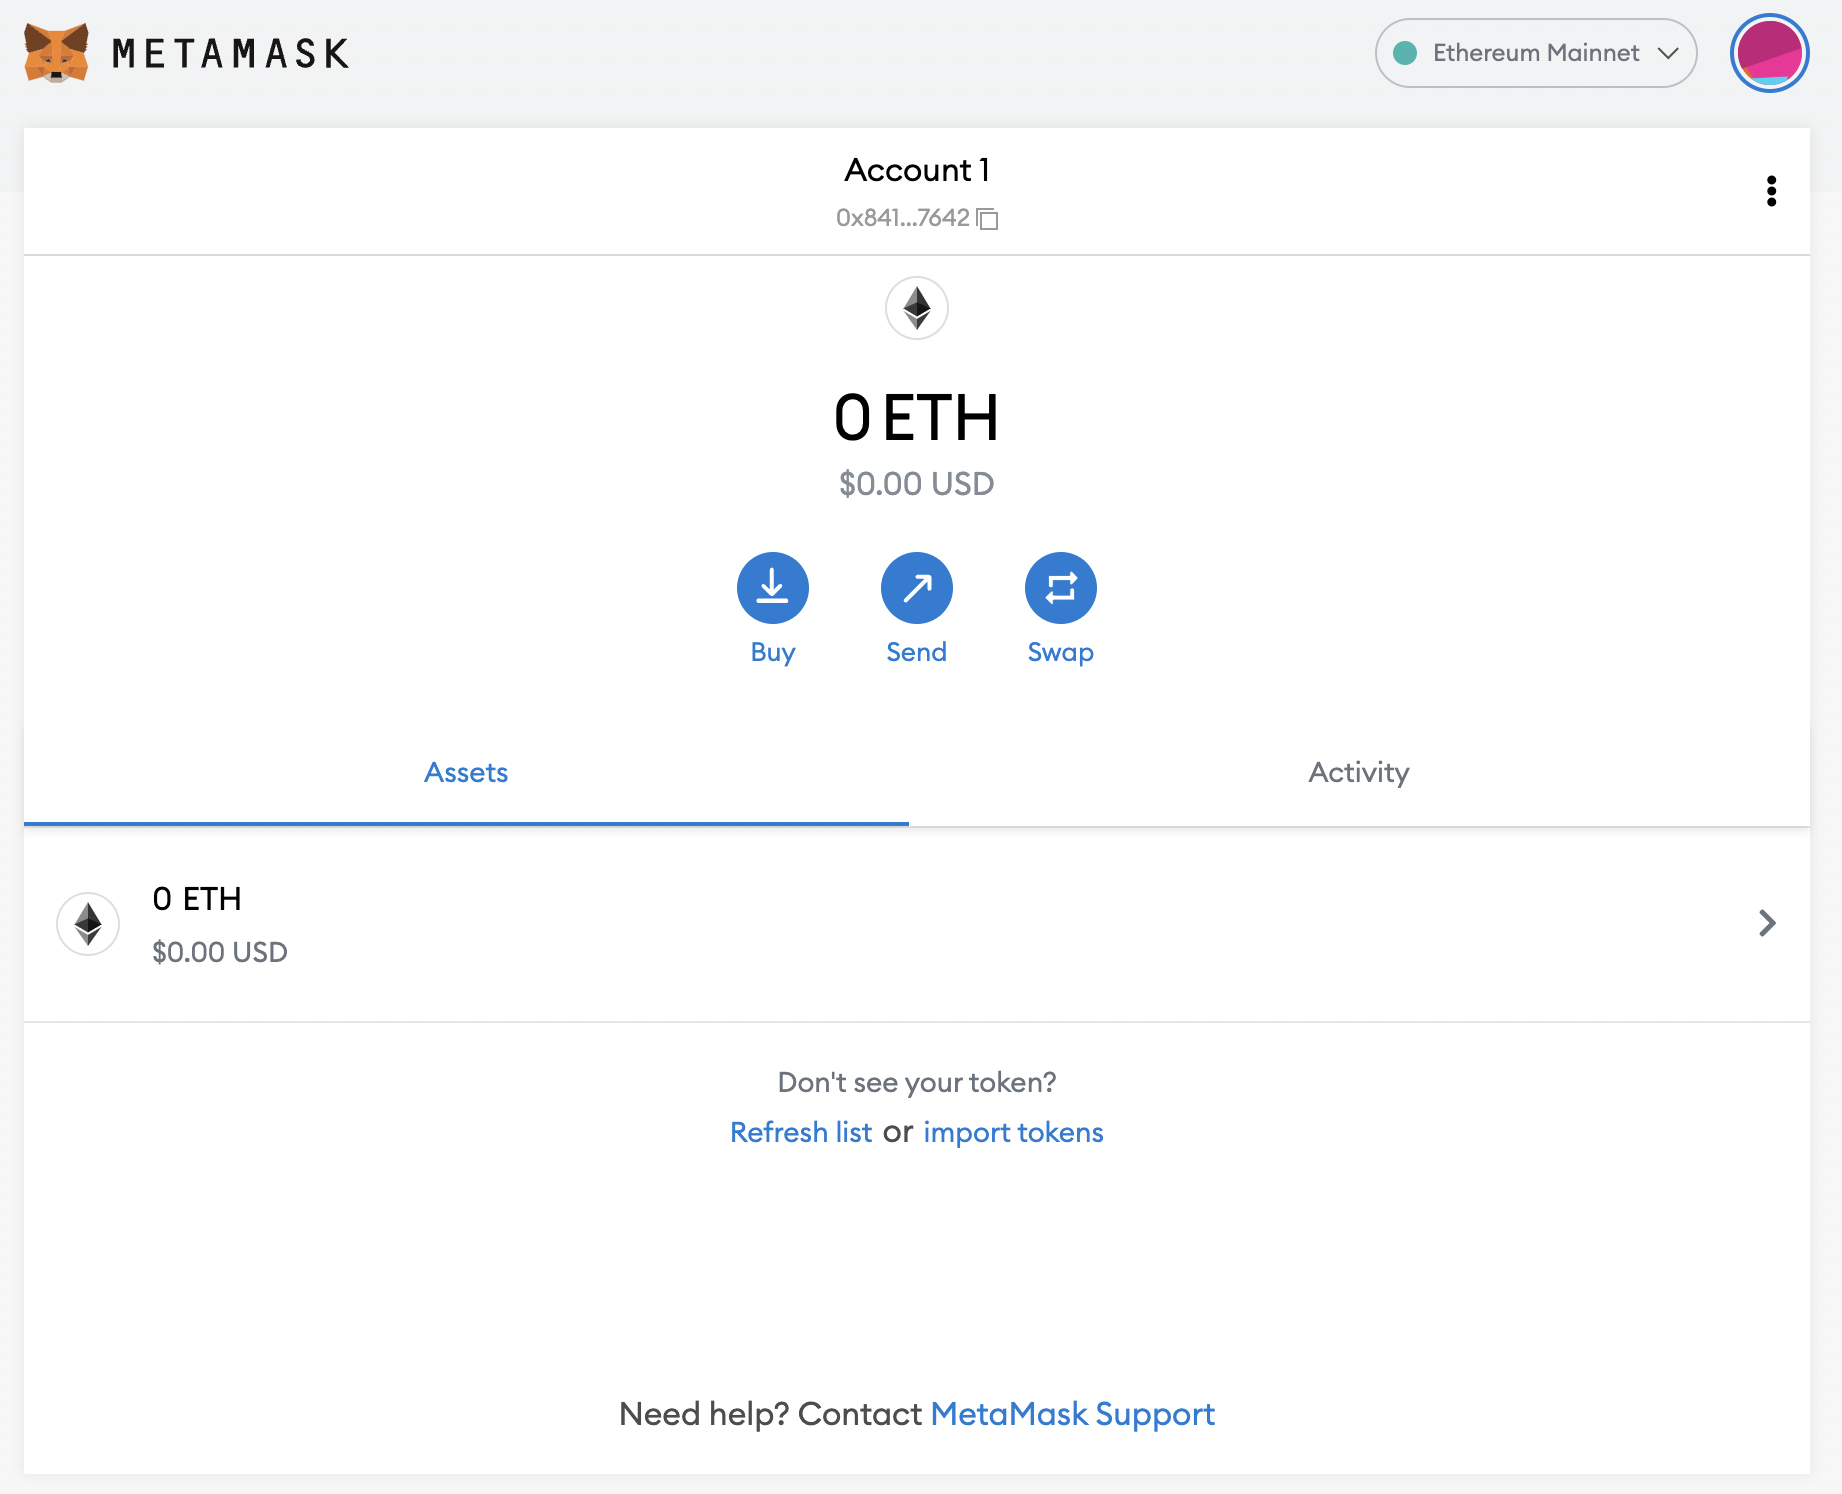
And bang, you'll be presented with your brand new Metamask wallet.
Adding The Support For BSC Network in Metamask
Metamask is a multi-chain wallet. And it comes with the Etherum network setuped by default but not the BSC network.
To interact with the platforms present on Binance Smart Chain or BSC you'll have to first add the support of BSC to the Metamask. Follow the following simple steps to do the same.
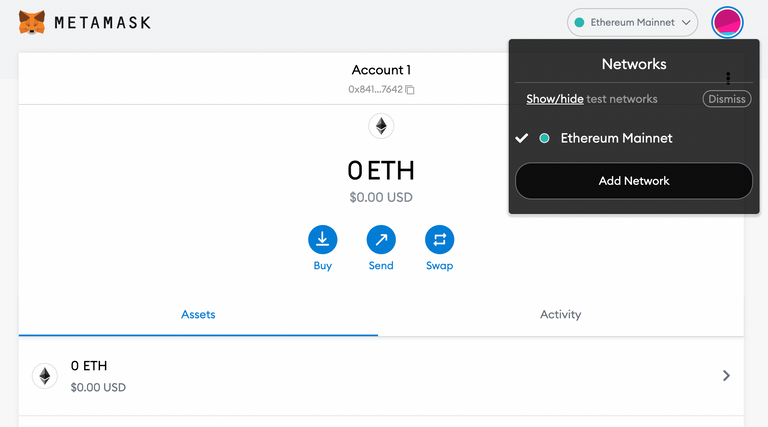
1.) Click on the 'Etherum Mainnet' at the top right of the wallet. A dialog box will appear. Then click on 'Add Network'.
The following window will appear
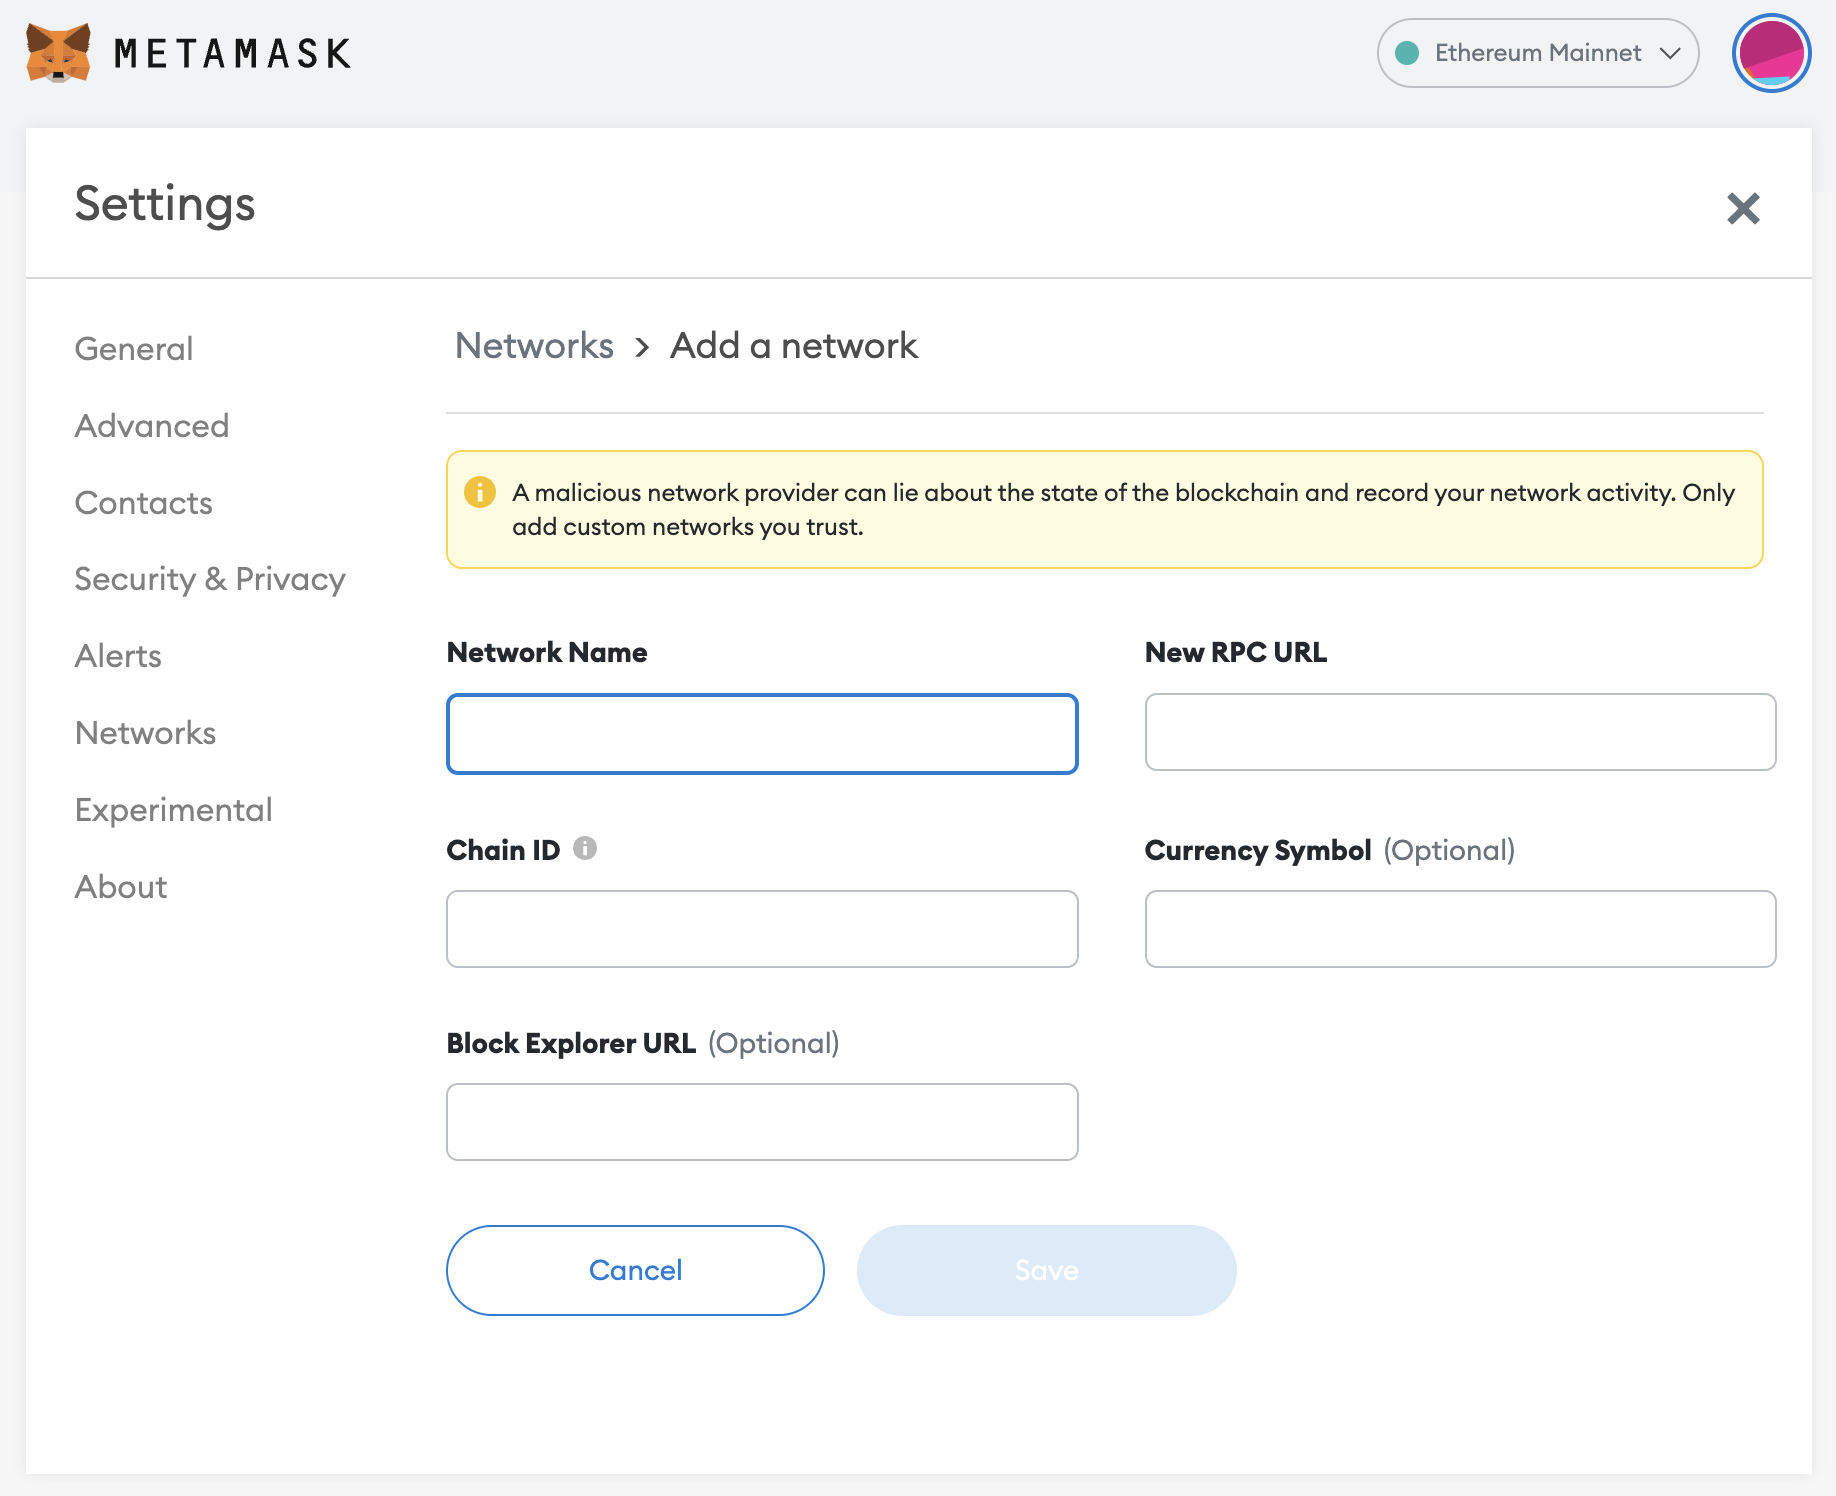
2.) Add the BSC Network details as provided below -
Network Name: Smart Chain
New RPC URL: https://bsc-dataseed.binance.org/
ChainID: 56
Symbol: BNB
Block Explorer URL: https://bscscan.com
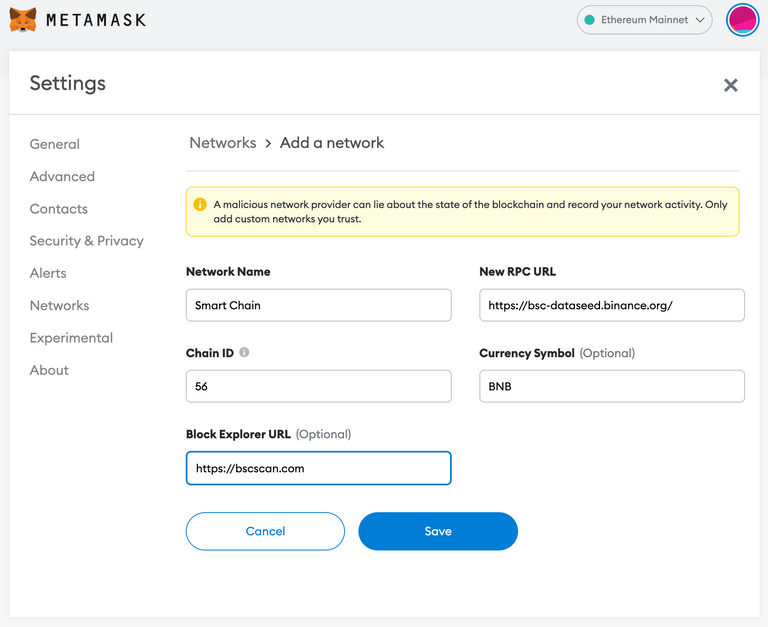
Then click 'Save'.
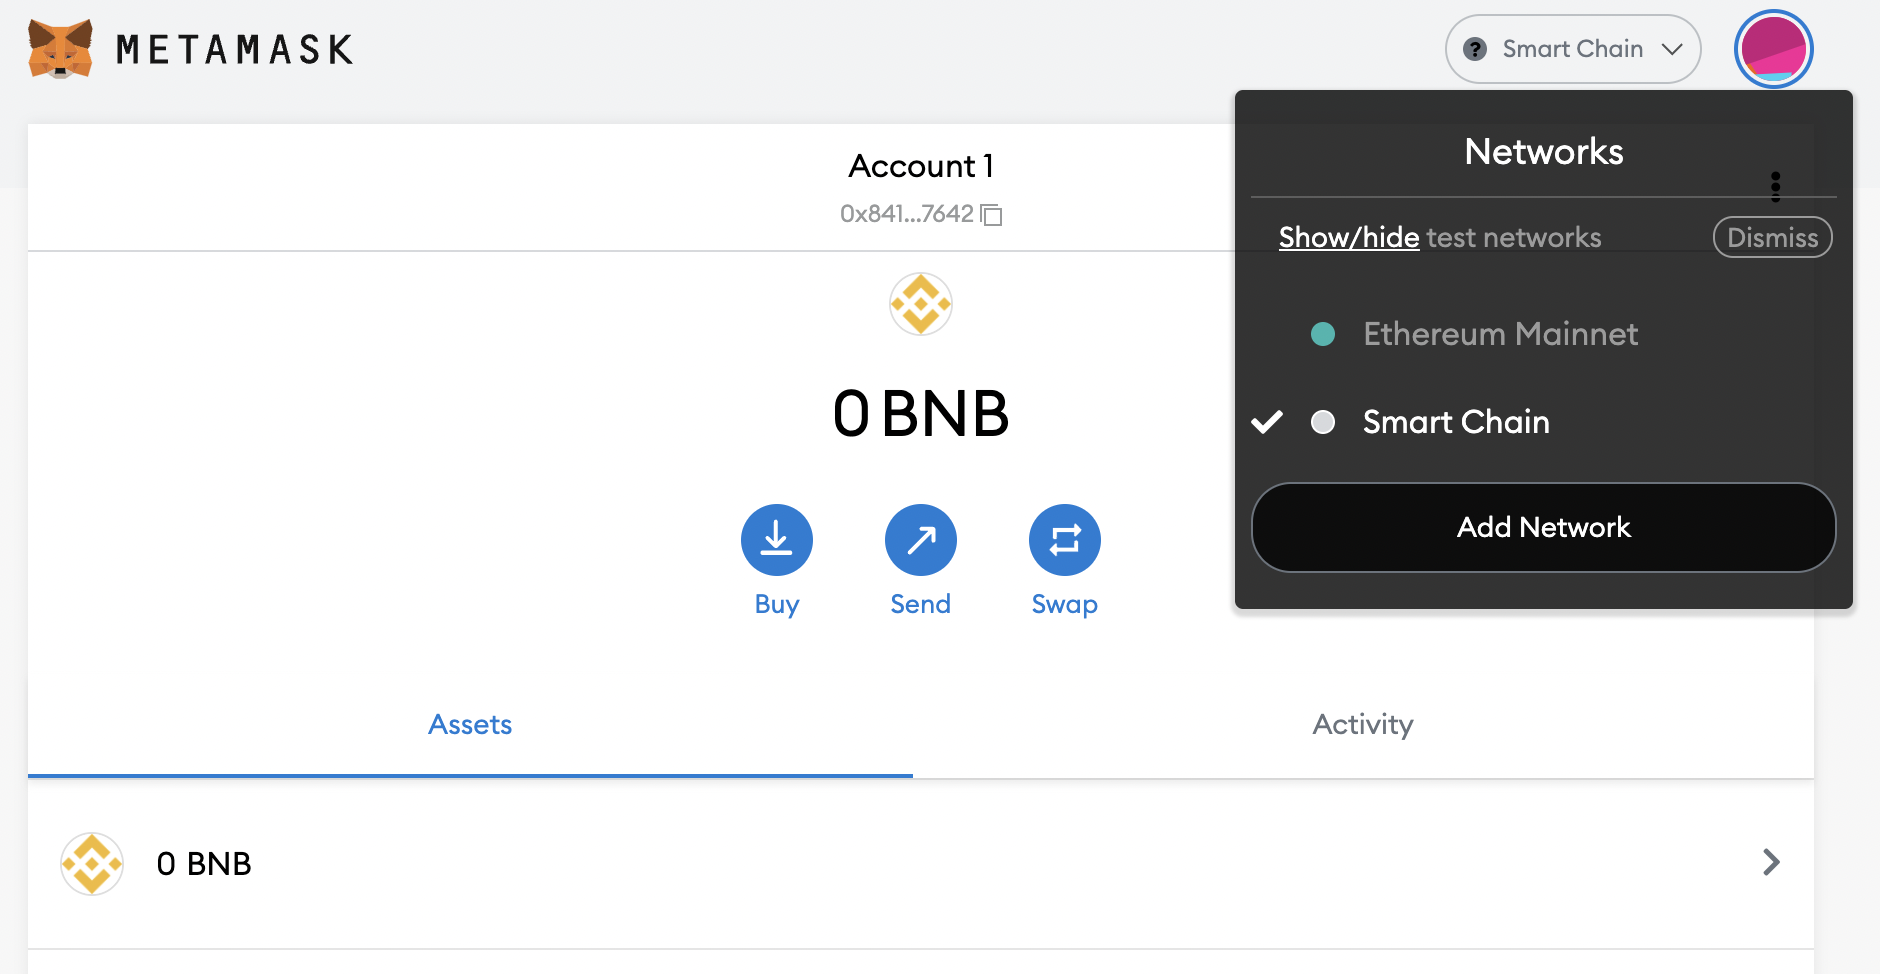
And that's it. A network with the name 'Smart Chain' will appear in the list of blockchian networks in Metamask. Select it, and you are good to go.
Adding Funds To Your BSC Metamask Wallet
The next step is adding funds that you can use to buy CUB at CubFinance.
You need to have BEP-20 tokens with you at some exchange to send them to your BSC wallet on Metamsk.
You can transfer funds from any centralized exchange. And any BEP-20 token. The primary assets used to trade on BSC network are BNB & BUSD. But I vouch for BNB as it is relatively cheaper to withdraw from most exchanges than BUSD.
So login to your centralised exchange and withdraw your preffered BSC token to your newly created BSC Metamask wallet.
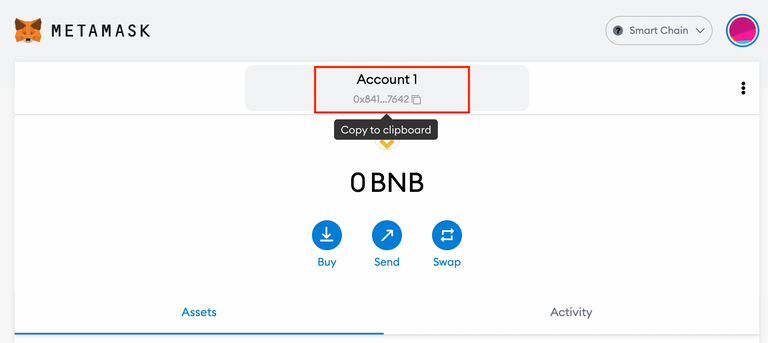
This is your public address (shown in the image below), you need to withdraw funds to this address. Copy and paste it into the 'Recieptent's Address' field when withdrawing from any exchange.
Buying CUB/CUB-BUSD/CUB-BNB
1.) Go to https://pancakeswap.finance/ through your browser on which you have installed the Metamask extension. Or use the inbuilt browser in Metamask app if you are operating from a smartphone.
2.) Click on connect wallet at the top right to connect your Metamask with the Pancakeswap
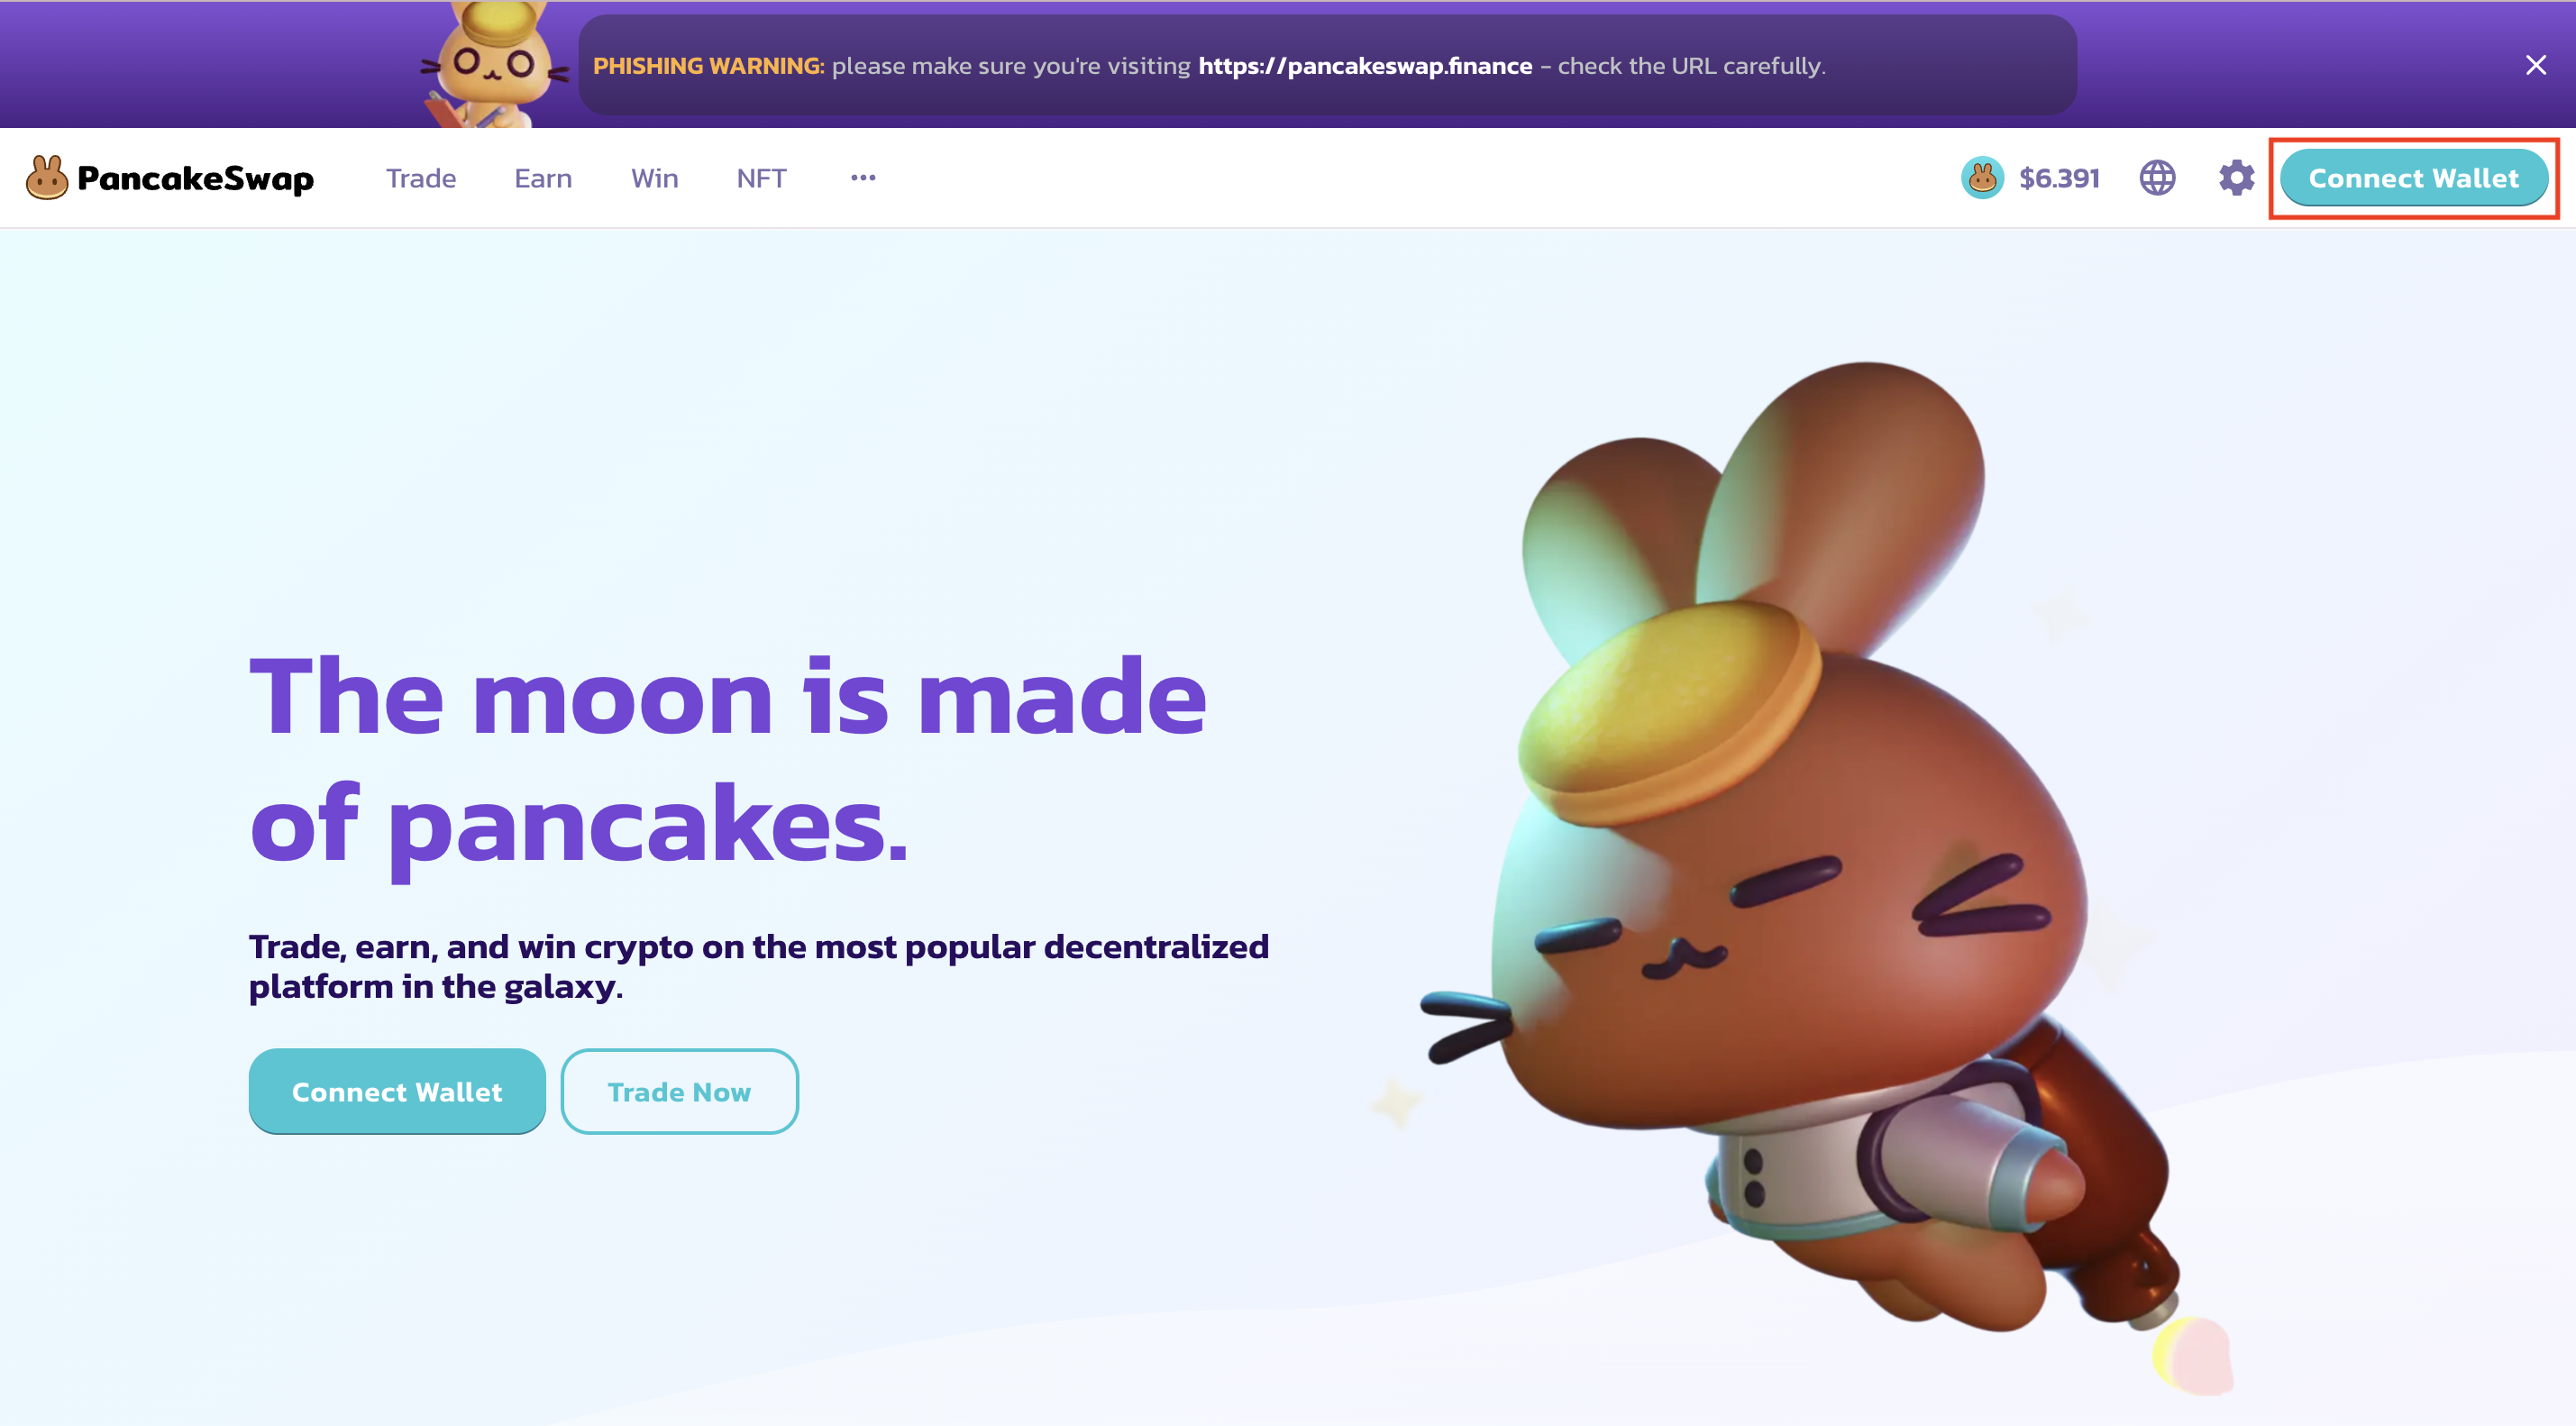
Approve the transaction and your wallet will be connected to this platform.

3.) Next we need to trade. But there is something you need to know before that.
To be eligible for the POLYCUB airdrop you need to stake one of these 3 tokens - CUB or CUB-BNB or CUB-BUSD.
CUB-BNB & CUB-BUSD are liquidity tokens, and to get them you'll have to combine CUB with either BNB or BUSD in 1:1 by value. Or you can simply buy CUB and stake it.
Also do remember that the amount of POLYCUB that would be airdropped is dependent on the staked CUB value only and not the additional BNB or BUSD value you'll stake if you choose the liquidity tokens. So it's all about the amount of CUB staked.
Now, to buy CUB, go to trade and select the option 'Exchange' the following 'Swap' window will appear.
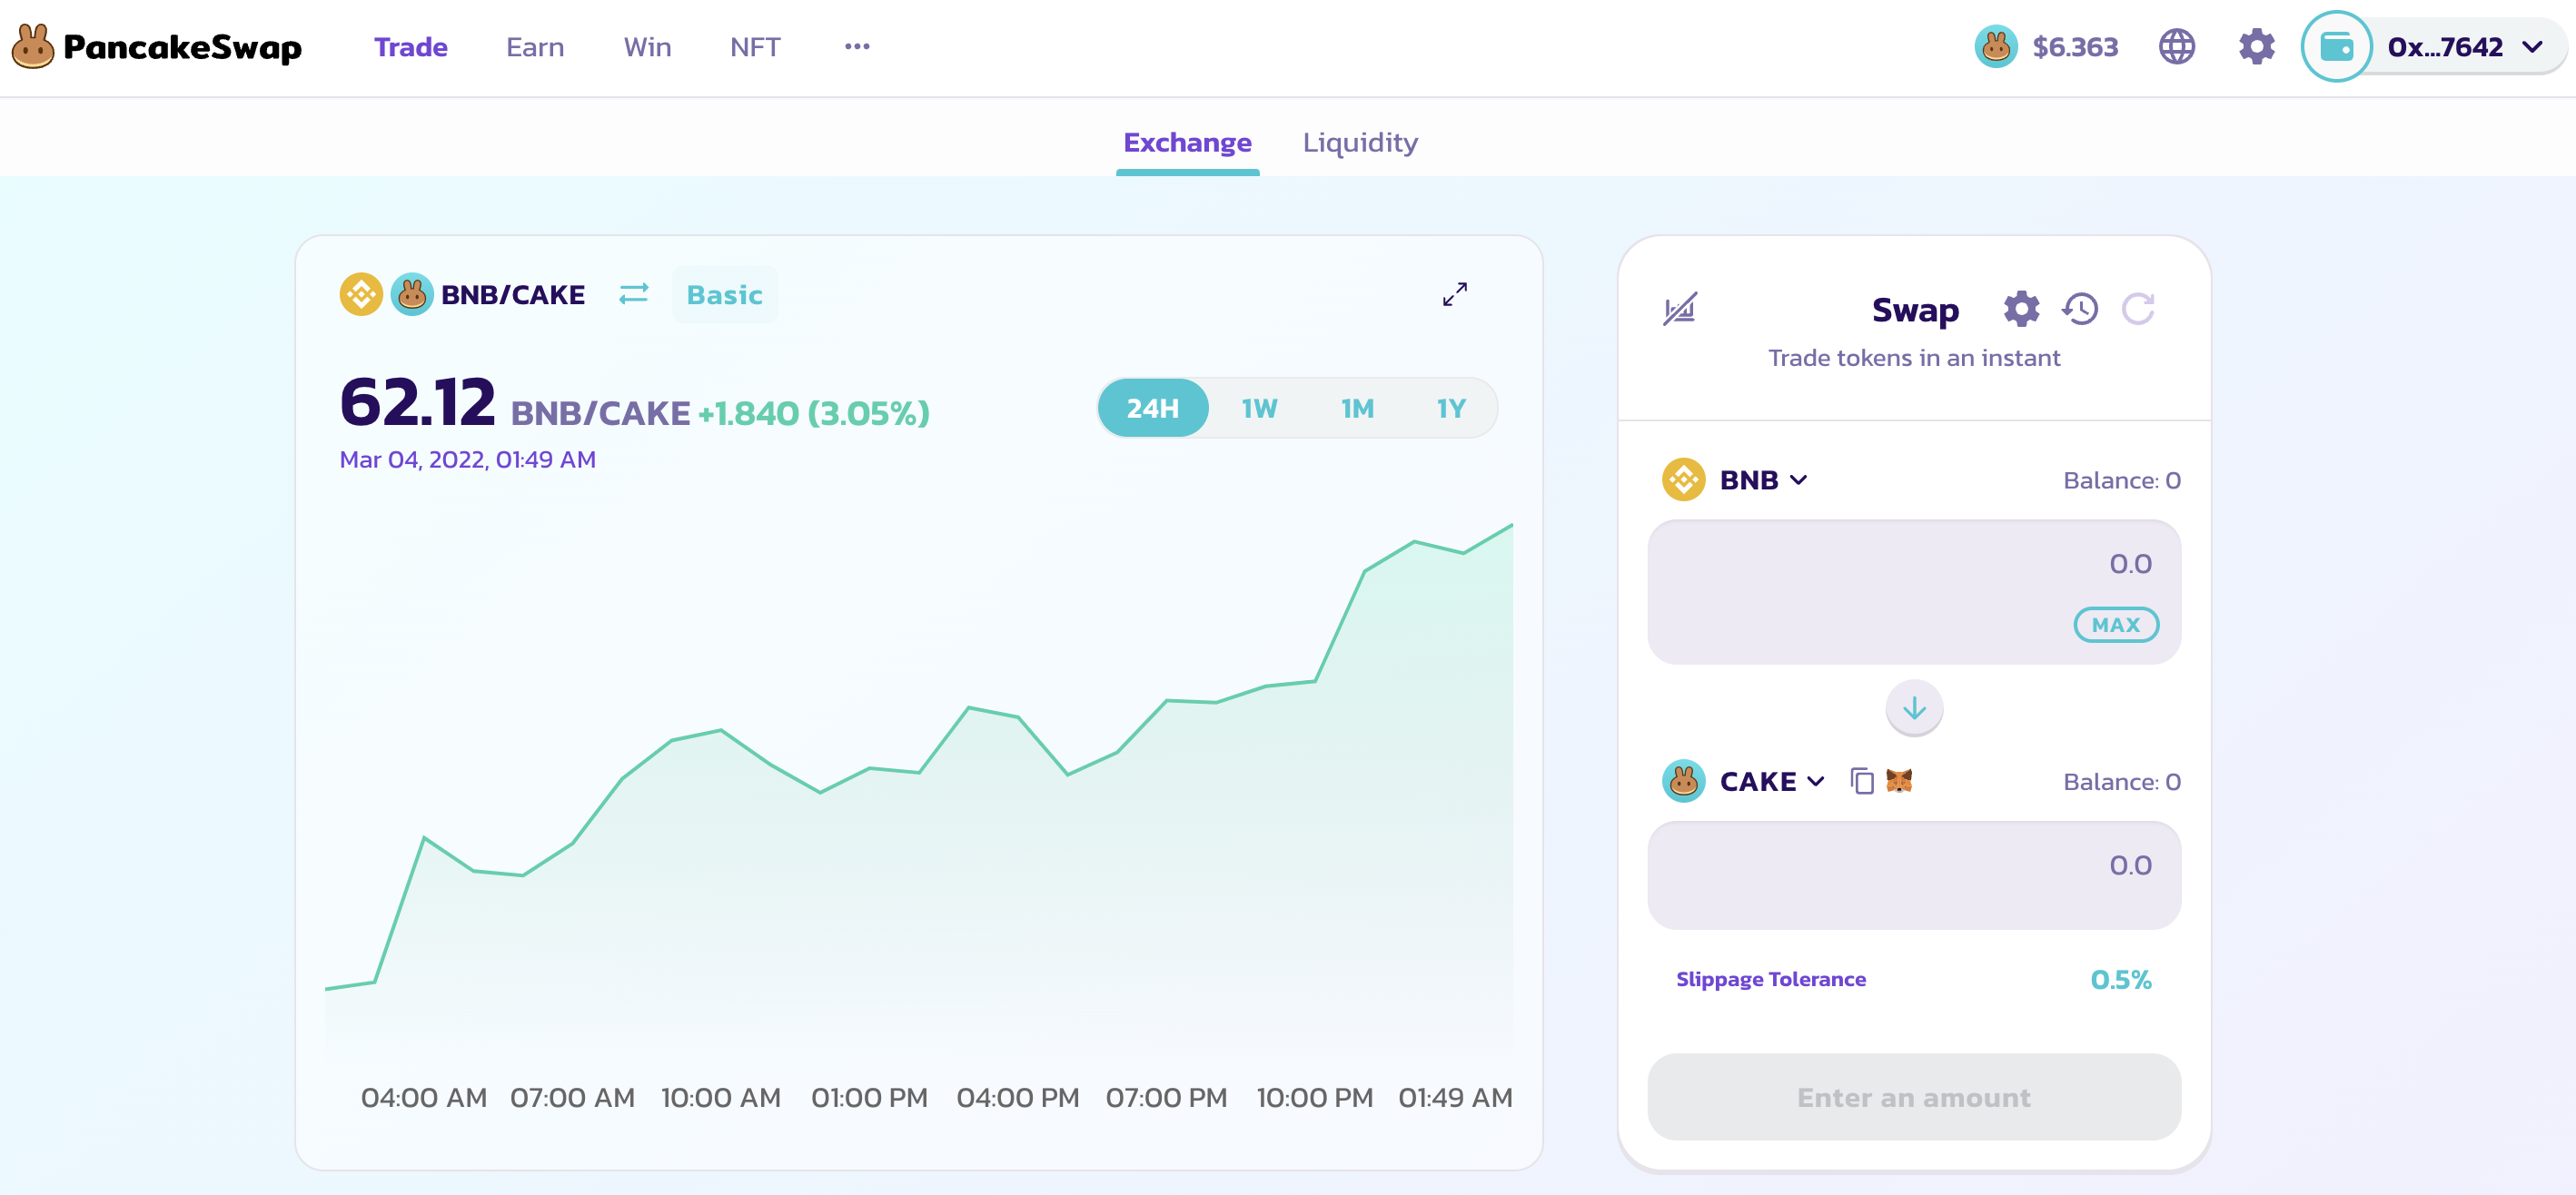
In the first field selct the token (that you transferred from exchange to your Metamask) and the amount of it you want to exchange.
In the second column, select the token you want to exchange/trade/swap it to i.e CUB.
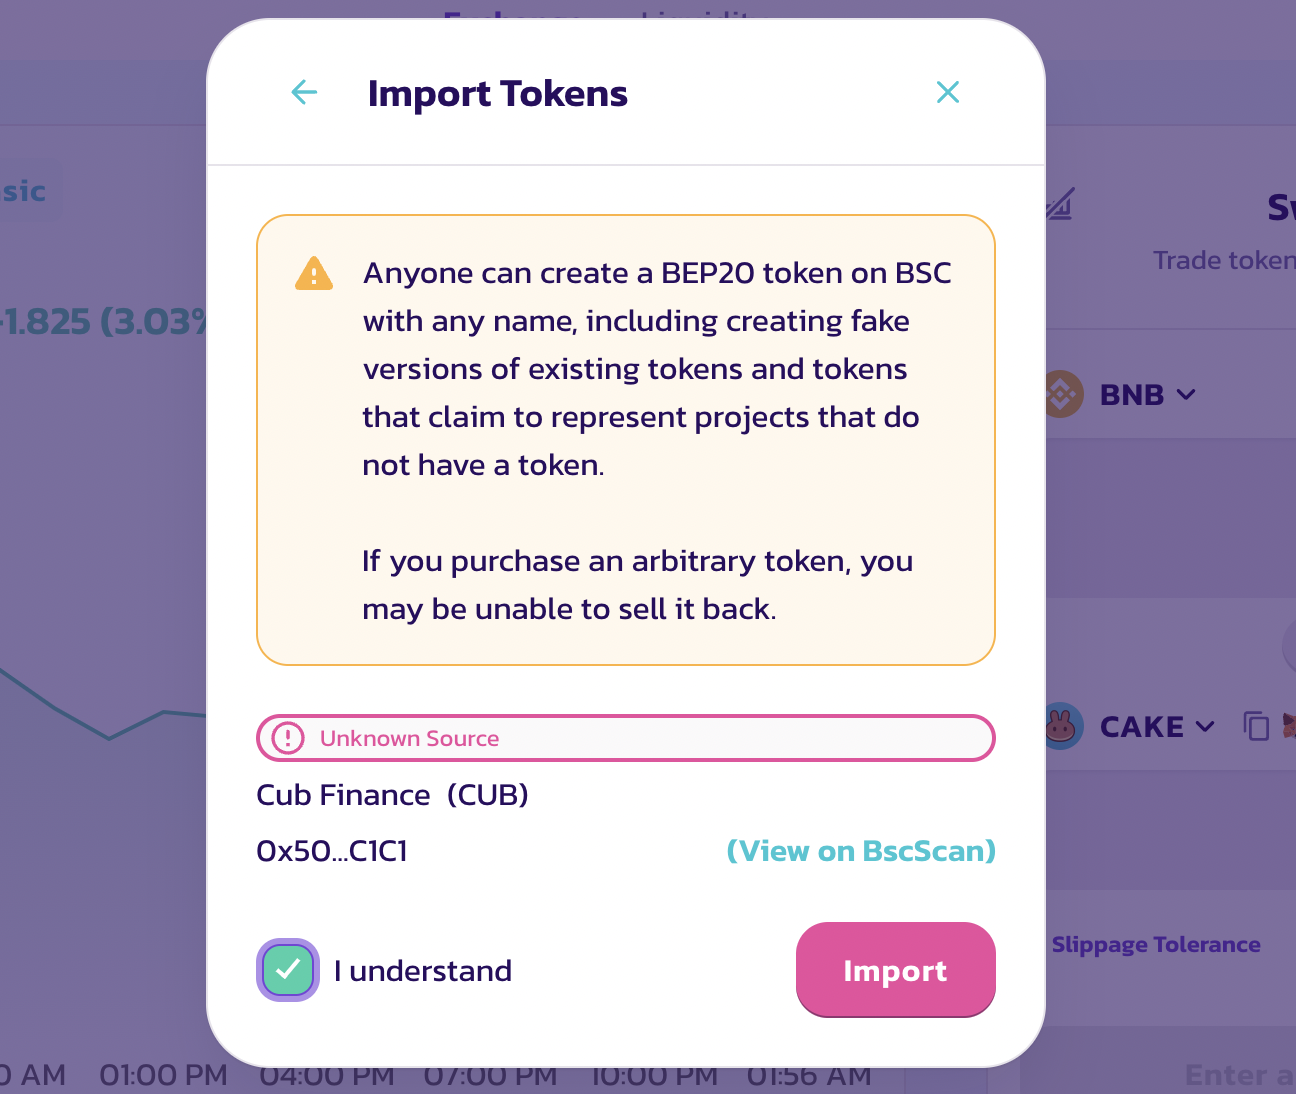
You won't find cub in the list so pate this contract adress (0x50d809c74e0b8e49e7b4c65bb3109abe3ff4c1c1) in the search bar and click on 'Import'.
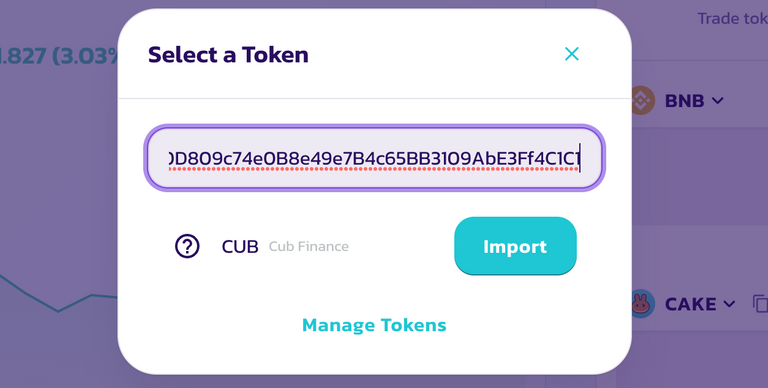
Finally check the 'I understand' box and click on 'Import' again.
Finally click on 'Swap' and then 'Confirm Swap'.
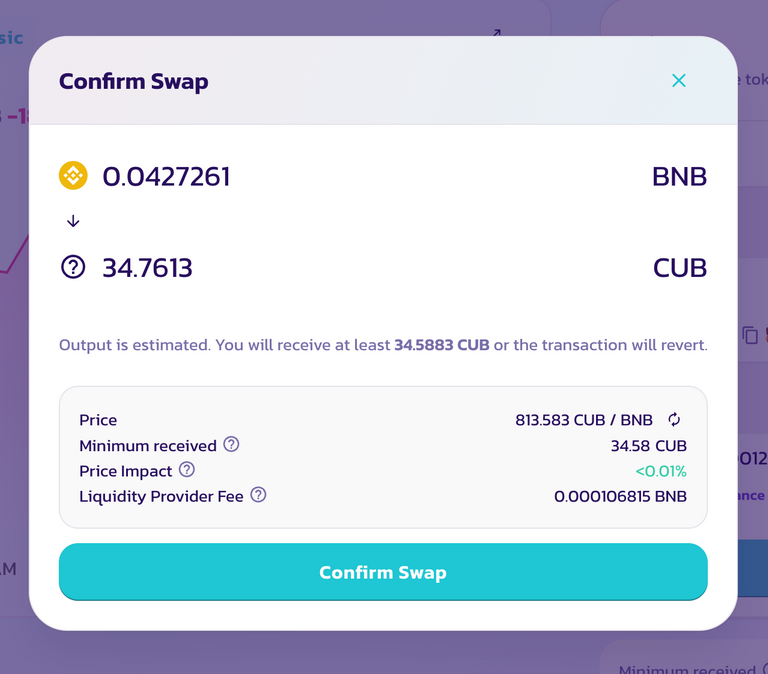
And your BNB/BUSD will be swapped for CUB and you'll get the respective amount of CUB in your Metamask.
Getting CUB-BNB/CUB-BUSD Liquidity Tokens
If you want to stake just CUB than that's it. But if you want to stake in liquidity farms than you'd need to perform a couple of more steps as follows.
First of all to get liquidity tokens you'd need equal value of both the assets in your Metamask wallet. For example $50 worth of CUB & $50 worth of BNB or BUSD.
After having the sufficient amount of assets you need to click on 'Trade' & then 'Liquidity' and then 'add liquidity'.
The following window will apppear.
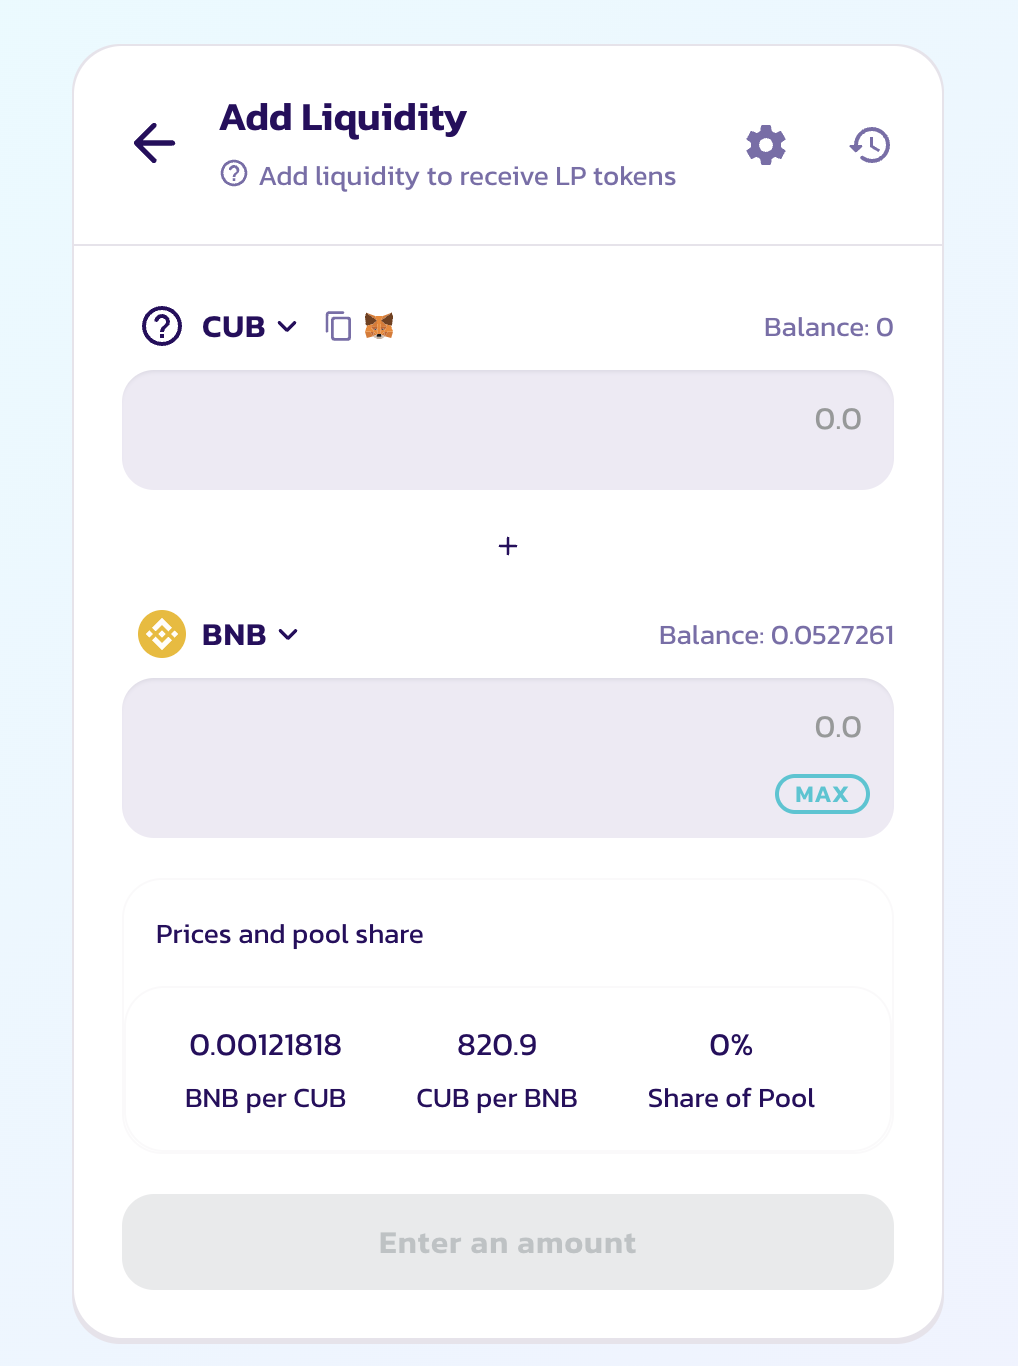
Select the assets you'd like to provide liquidity for. And then enter the amount of CUB, the respective amount of BNB/BUSD required to pair will automatically be calculated and reflected.
You might have to 'Enable CUB' first. Do that. And then click on 'SUpply' then 'Confirm Supply' to finally add liquidity and recieve liquidity tokens in your Metamask wallet.
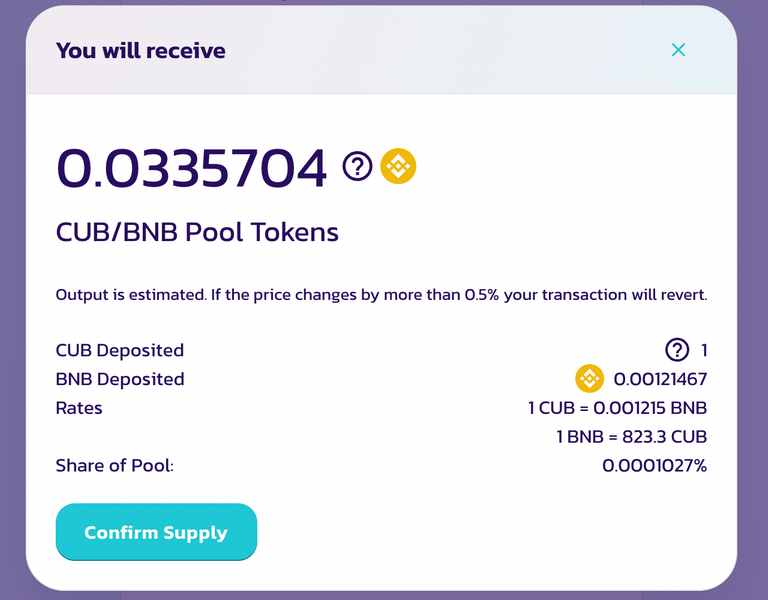
By Now, you will be having either CUB or CUB-BNB or CUB-BUSD in your Metamask ready to go in the respective kingdoms or farms at CubFinance.
Staking Tokens in CubFinace Kindoms or Farms
1.) Go to https://cubdefi.com/
2.) Connect your wallet to the platform by clicking at the button present on the top right.
3.) Select farms if you want to stake LP tokens, and Kigdoms if you want to stake just CUB

4.) Then select the respective CUB kingdom, or the LP farms from the list. And you'd have to enable them if you're using them for the first time. Since I am alredy staking in the CUB kingdom, it's not showing the option to enable the kingdom, but it will to you. Enabling just costs a transaction and nothing else.
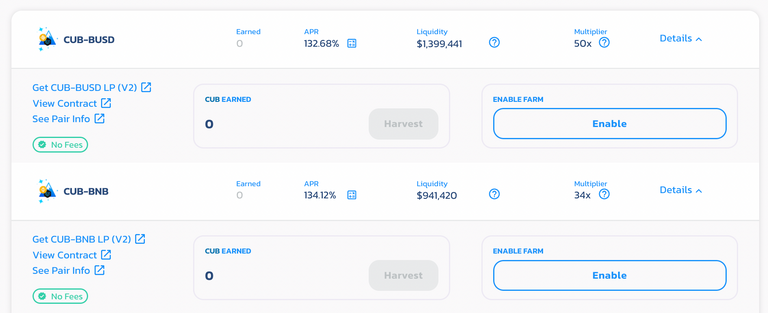
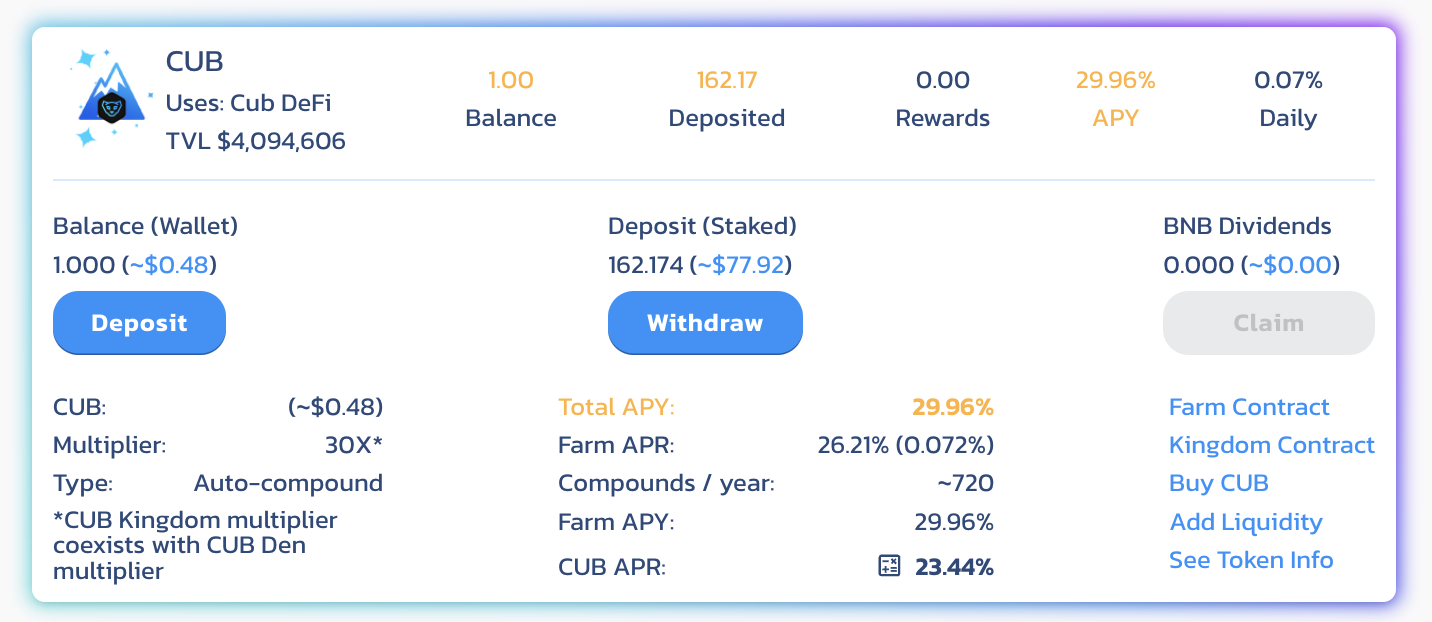
5.) After Enabling the process is simple - you can interact with the 'Deposit' option, specify an amount and confirm the transaction to stake your tokens.
And that's it.
After staking your tokens you can head over to the Airdop page to know your pending Airdrop amount and claim your POLYCUB tokens.
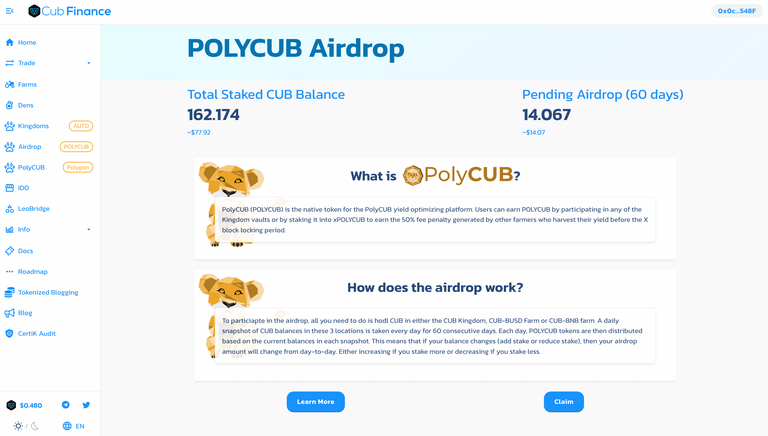
And that was all you need to know and do to participate in this airdrop.
Please upvote and reblog if you find this helpful. And do not hesitate to ask any questions in the comments below.
Disclaimer - All the images above are screenshots taken from the respective platforms.

LeoFinance is a blockchain-based Web3 community that builds innovative applications on the Hive, BSC, ETH and Polygon blockchains. Our flagship application: Leofinance.io allows users and creators to engage and share content on the blockchain while earning cryptocurrency rewards.


Posted Using LeoFinance Beta
 . Keep up the fantastic work

 . Keep up the fantastic work


