Hey so I'm back yet again for another Weekly sketch study and this week its a really great one because I'm sketching one of the hottest most iconic celebrity of all time and its Marilyn Monroe.
So every week i do a sketch study where i take pictures of the step by step. process and write down how i did , what i did, whaht pencils i used to create a certain effect? Basically i write down what i learnt and what mistakes i made so next time i can correct them. The whole series of these art blogs is that beginner artists can learn a little with me as we go along the process to becoming the best by practicing.
Anyway that was a bit about what the art blog is about but i was just too excited to try this reference out. After 3 months of training every week i attempted Marilyn Monroe finally and let me tell u uts not the easiest one. 
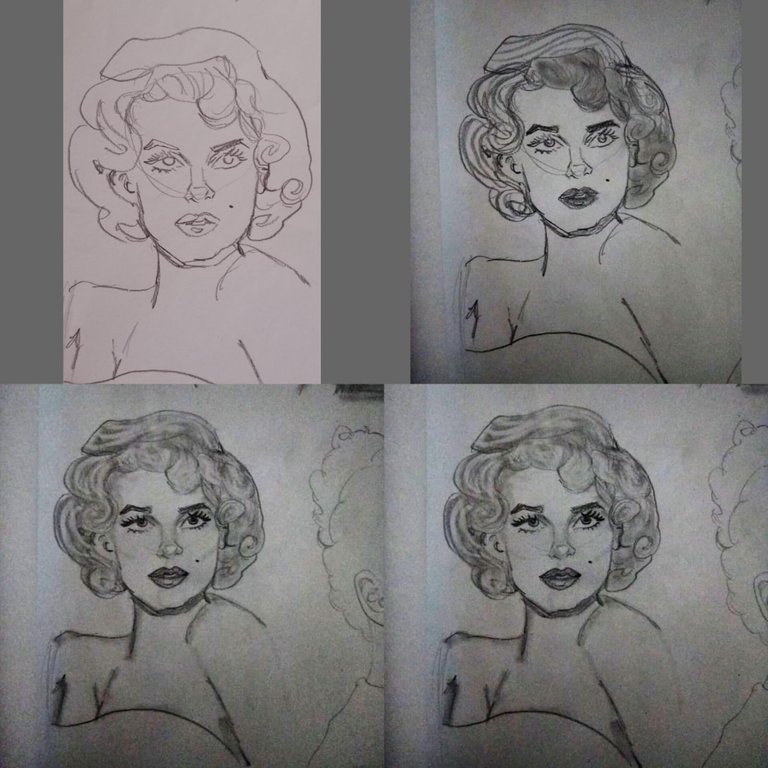
Step one is always sketching out by observing basic shapes . The best tips is to squint your eyes and draw the basic not so defined shapes first and gradually define them more and more by adding details like her hair strands look like a big S curve and the left shoulder resembles and L shape we just keep on drawing and detailing the sketch and making sure the proportions are correct like her eyebrows were little more parted than normal females of that era and the mole on her cheek how the bridge of her nose is a wider triangular shape and her lips being prominent as we are done with the initial sketch lets get to the shading of it.
now the sketch was finalized with a hard point pencil which is 2H pencil reason for that is the more hard the graphite or charcoal of a pencil is the less it smudges so the sketch lines need to be made fine with that pencil. Now to shade it up i will firstly see all the places where there is a darker color value or shadow. for an instance Marilyn's eyebrows were dark while her hair was blonde and her eyes lenses were also dark so was her lipstick. the profound feature in her hair wad her perfectly permed hair do so a lil shading there too i take my 4B pencil and start adding some darker values to these parts . Now her hair we will just section by section define where the hair is curling and where its pinned up . Now i took my blending stump #5 and started blending every part really subtly. as u can see i used the same stump and blended a lil left over graphite unde her eyes and to contour and define her nose and hair and under chin shadow also her cheekbones needed some definition too but just a lil subtle one i did that and added shadows like under her arm and chin behind her ear near her temples too. and here u can see how the picturr is becoming more realistic. Another tip us that her hair needed to be blonde so i took my Kneadable erasure and started erasing between each hair section leaving just a light gray line so this way her hair seemed lighter i also added a lil highlight by erasing on her button nose and the under lip.
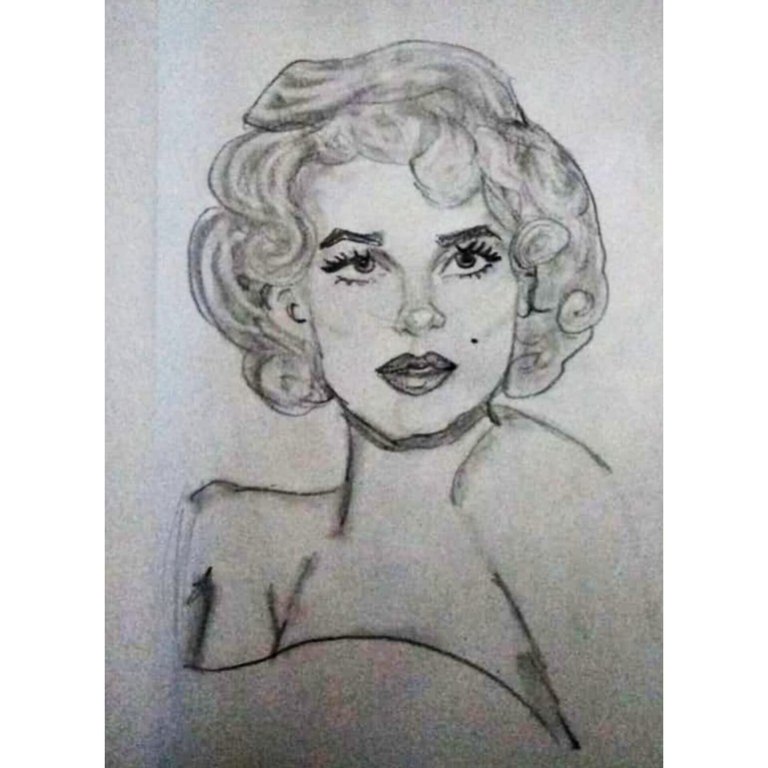
after brushing the extra graphite and erasure dust off here is the final result 
and this is how this portrait turned out. By Far this is the best Sketch that i have done and this one is my favorite off all.
comment down below if you liked this. That's it fot today
Thank you for your precious time and support❤
