Feliz y bendecido día tengan todos mis compañeros de Hive,les saludo con mucho cariño, deseándoles muchas bendiciones y que el Dios del cielo guíe siempre sus caminos.
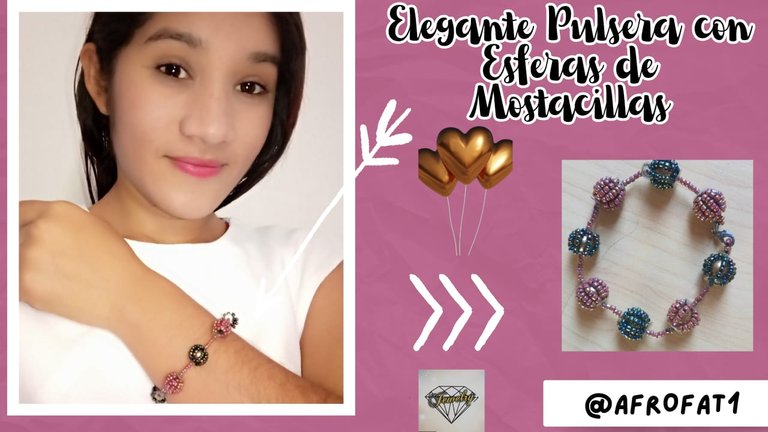
Agradecido con Dios por darme la oportunidad de compartir nuevamente con todos ustedes uno de mis bonitos diseños en esta hermosa comunidad de Jewelry, hoy he venido a mostrarles un bonito tutorial de una sencilla y elegante pulsera de perlas forradas en mostacillas, espero les guste y me acompañen a ver el proceso de creación de esta hermosa pulsera.
Materiales Utilizados
- Perlas de color marrón
- Mostacillas Negras Tornasol
- Mostacillas (Color) Metalizadas
- Letejuelas transparentes
- Hilo nylon Color Verde
- Tijeras
- Agujas para mostacillas #12

Paso a Paso
Paso a PasoPaso 1
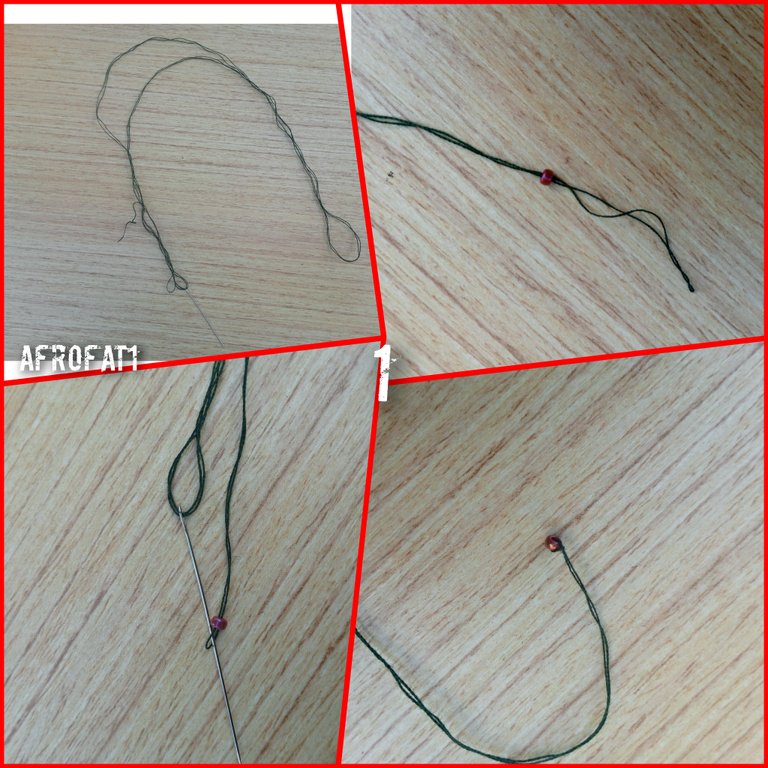
Lo primero que haremos sera tomar un aproximado de 2 metros y medio de nuestro hilo, vamos a introducir un extremo y luego el otro, buscando que al final nos queden un hilo doble.
Luego vamos a introducir una mostacilla fucsia metalizada, llevamos nuestra mostacilla al final y dejaremos algunos centímetros de hilo, para introducir la aguja por el centro del hilo y tirar de ella, este sería el resultado.
Paso 2
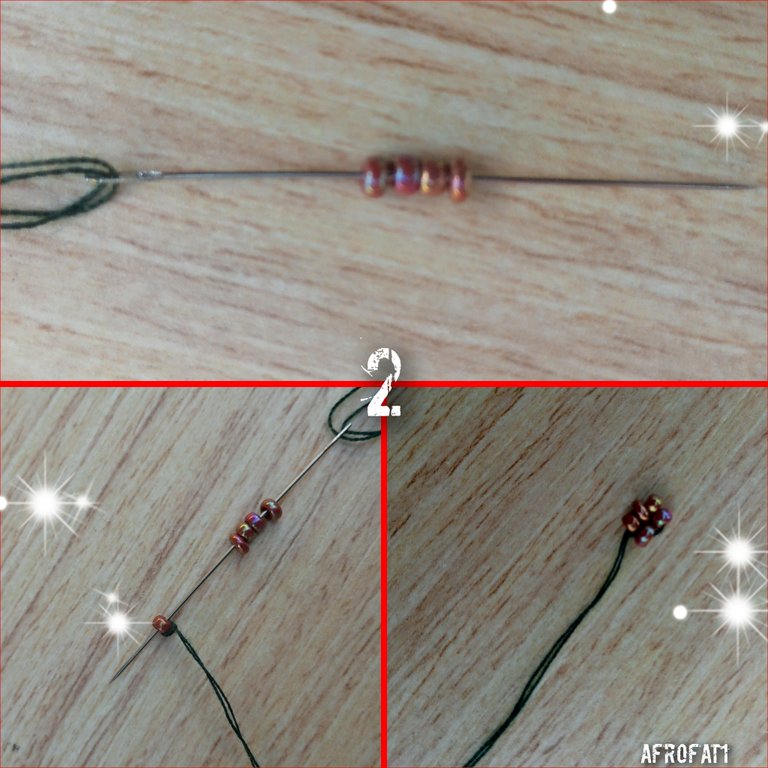
Luego vamos a introducir 4 mostacillas del mismo color, seguidamente introducimos nuestra aguja por la mostacilla para tirar nuevamente del nylon, nos quedaria un pequeño círculo de mostacillas, este servira para colocar nuestro trancadero.
Paso 3
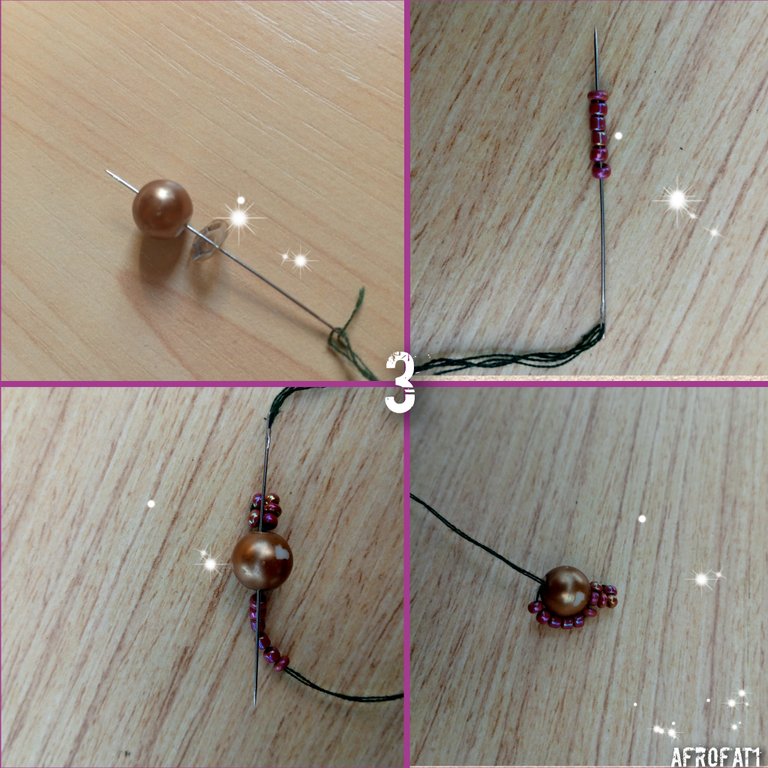
Tomaremos una lentejuela y luego una perla e introducimos nuestra ajuga con Nylon en ellas, tomando 6 mostacillas fucsia metalizada, vamos introducir la aguja de arriba hacia abajo y apretamos un poco el nylon, este será el resultado.
Paso 4
Ahora vamos a colocar seis mostacillas del mismo color y de arriba hacia abajo introducimos nuestra aguja, vamos a repetir este proceso 10 veces, hasta que la perla quede totalmente cubierta por las mostacillas, nos quedaria una esfera de mostacillas.

Paso 5
Seguidamente introducimos una lentejuela, luego vamos a introducir siete de mostacillas fucsia metalizadas y las llevaremos al final.

Paso 6
Nuevamente vamos a introducir una lentejuela y una perla de color marrón, ahora tomaremos seis mostacillas negras tornasol, de la misma manera vamos a introducir nuestra aguja de arriba hacia abajo y apretamos un poco el nylon.

Paso 7
Después vamos a tomar soy mostacilla del mismo color y haremos el mismo proceso, introducimos la aguja de arriba hacia abajo y tiramos del nylon, vamos a repetir este proceso hasta tener toda la perla cubierta.

Paso 8
Colocamos una lentejuela y seguidamente siete mostacillas de la fucsia metalizadas y nuevamente colocamos una lentejuela y luega una perla, vamos a introducir seis mostacilla fucsia metalizada, tomaremos la aguja e introducimos de arriba hacia abajo, y repetiremos este proceso hasta tener la perla cubierta en mostacillas.

Paso 9
Para este paso vamos a repetir el proceso hasta lograr tener el largo deseado.

Paso 10
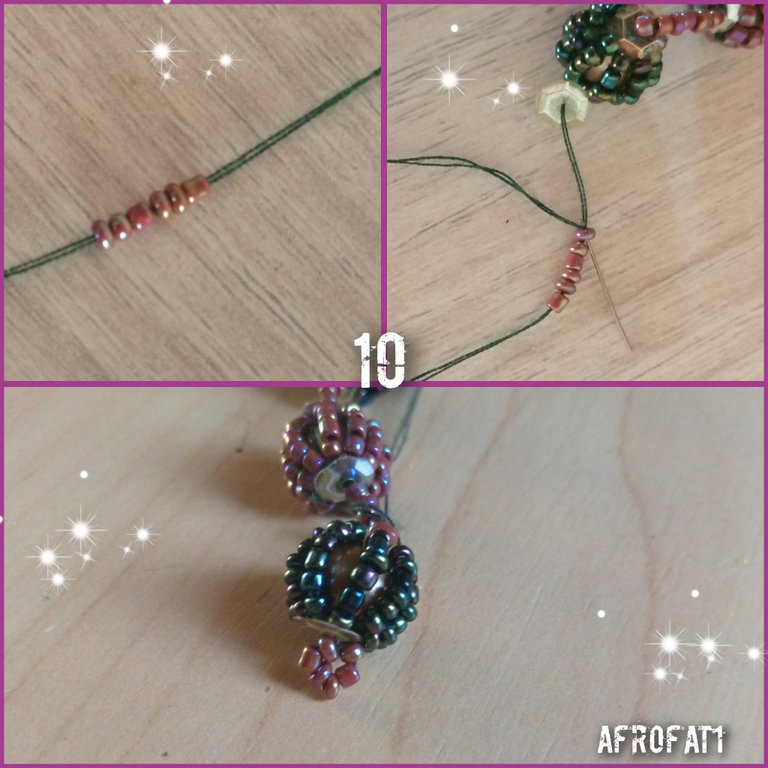
Al lograr obtener el lago que necesitamos, vamos a introducir una lentejuela, luego vamos a introducir 6 mostacillas fucsia metalizada, llevaremos las mostacillas al fina y vamos a introducir nuestra aguja por la última mostacilla, las cuales se veran de la sin manera.
Paso 11
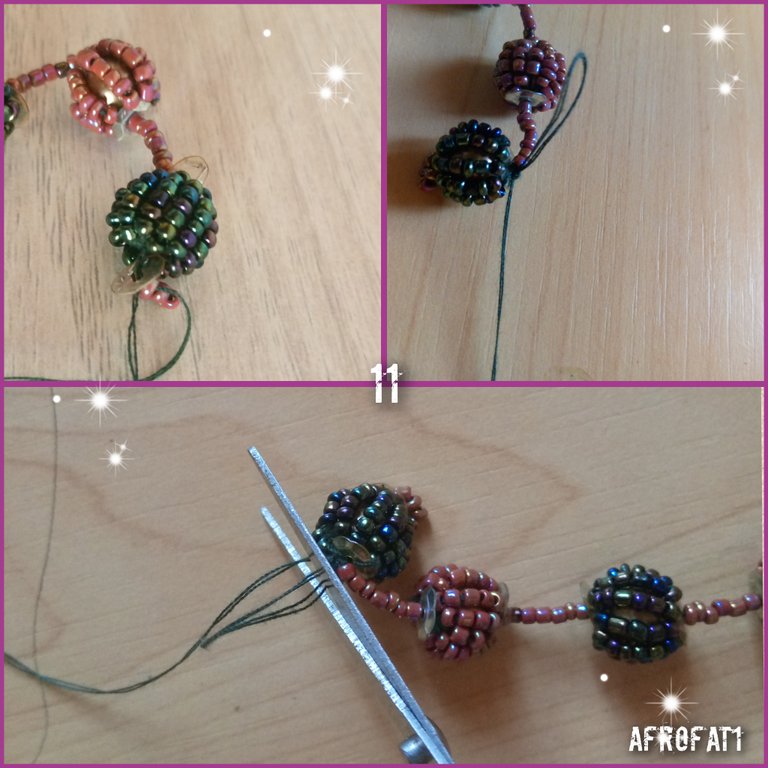
Después de esto vamos a introducir la aguja por el centro de nuestra esfera de mostacillas, para luego hacer varios nudos y con la ayuda de la tijera cortamos el nylon excedente.
Paso 12
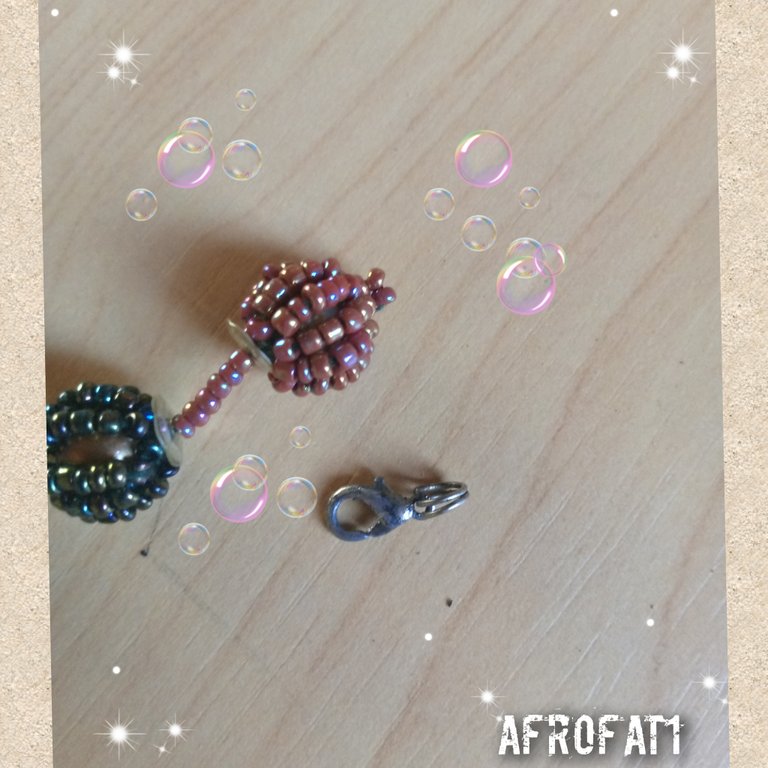
Para culminar el paso a paso vamos a colocar nuestro trancadero en uno de los extremos de nuestra elegante pulsera, la colocaremos en el primer aro de mostacillas qué hicimos.
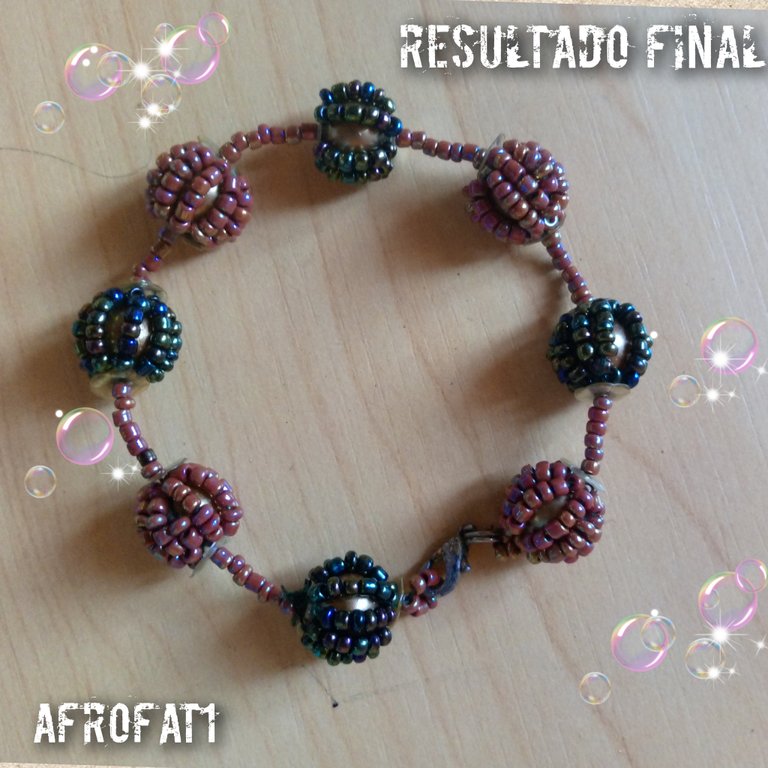
De esta manera estaría terminado nuestro delicado diseño, una pulsera muy facil de hacer, solo hay que dedicarse y en poco tiempo se termina.
Espero haya les haya servido de ayuda este bonito tutorial y pueda ser de provecho para todos ustedes, les deseo un feliz fin de semana y que el Dios del cielo los bendiga siempre, muchas Bendiciones en sus vidas
Las imágenes son de mi propiedad y fueron tomadas por mi teléfono tecno spark Go 2023.
Traductor Utilizado:Deepl traductor
Las imágenes son editadas mediante la aplicación editor de fotos canva

Happy and blessed day to all my fellow Hive members, I greet you with much affection, wishing you many blessings and may the God of heaven always guide your paths.
Thankful to God for giving me the opportunity to share again with you all one of my beautiful designs in this beautiful Jewelry community, today I have come to show you a nice tutorial of a simple and elegant bead bracelet lined in beads, I hope you like it and join me to see the process of creating this beautiful bracelet.
Materials Used
- Brown beads
- Black Tornasol beads
- Metallic (Color) beads
- Transparent sequins
- Green nylon thread
- Scissors
- Needles for beads #12

Step by Step
Step by StepStep 1
The first thing we will do will be to take an approximate 2 and a half meters of our thread, we will introduce one end and then the other, looking that at the end we have a double thread.
Then we are going to introduce a metallic fuchsia bead, we take our bead to the end and leave a few centimeters of thread, to introduce the needle through the center of the thread and pull it, this would be the result.

Step 2
Then we are going to introduce 4 beads of the same color, then we introduce our needle through the beads to pull again the nylon, we would have a small circle of beads, this will serve to place our locking ring.

step 3
We will take a sequin and then a pearl and introduce our ajuga with Nylon in them, taking 6 metallic fuchsia beads, we will introduce the needle from top to bottom and tighten the nylon a little, this will be the result.

step 4
Now we are going to place six beads of the same color and from top to bottom we introduce our needle, we are going to repeat this process 10 times, until the pearl is totally covered by the beads, we would have a sphere of beads.

step 5
Next we introduce a sequin, then we are going to introduce seven fuchsia metallic beads and we will bring them to the end.
Step 6
Again we are going to introduce a sequin and a brown pearl, now we will take six black litmus beads, in the same way we are going to introduce our needle from top to bottom and tighten the nylon a little bit.

step 7
Next we are going to take I am bead of the same color and we are going to do the same process, we introduce the needle from top to bottom and pull the nylon, we are going to repeat this process until we have the whole bead covered.

step 8
We place a sequin and then seven metallic fuchsia beads and again we place a sequin and then a pearl, we will introduce six metallic fuchsia beads, we will take the needle and introduce from top to bottom, and we will repeat this process until we have the pearl covered in beads.

step 9
For this step we will repeat the process until we have the desired length.

Step 10
When we get the length we need, we are going to introduce a sequin, then we are going to introduce 6 metallic fuchsia beads, we will take the beads to the end and we are going to introduce our needle through the last bead, which will look like this.

Step 11
After this we are going to introduce the needle through the center of our beads sphere, then make several knots and with the help of the scissors we cut the excess nylon.
step 12
To finish the step by step we are going to place our trancadero in one of the ends of our elegant bracelet, we will place it in the first ring of beads that we made.
In this way our delicate design would be finished, a very easy to make bracelet, you just have to dedicate yourself and in a short time it will be finished.
I hope this beautiful tutorial has been helpful and can be of benefit to all of you, I wish you a happy weekend and may the God of heaven bless you always, many blessings in your lives

Images are my property and were taken by my tecno spark Go 2023 phone.
Translator Used:Deepl translator
Images are edited using canva photo editor application.
