div class="text-justify">
Un saludo cariñosos🦋! a los hivers creadores de #jewelry, esta extraordinaria comunidad que muestra, gran cantidad de talentosos artesanos dedicados a darle un toque especial a los accesorios.
Vuelvo otra vez por aquí con mucho entusiasmo,a mostrarle una inspiración que conseguí en la web, un accesorio para el cabello, que por primera vez voy a elaborar en esta grandiosa comunidad.
La alegría de ser niños se ve reflejada en este accesorio donde los colores son los protagonistas.
El diseño me pareció espectacular para no pasar desapercibido y mostrar la alegría que nos regala los más chiquitos de la casa.
Este accesorio va para las niñas esas princesas, hermosas y coquetas con una personalidad bastante peculiar.
Espero que al igual que yo disfruten del proceso para elaborar este hermoso accesorio para el cabello.
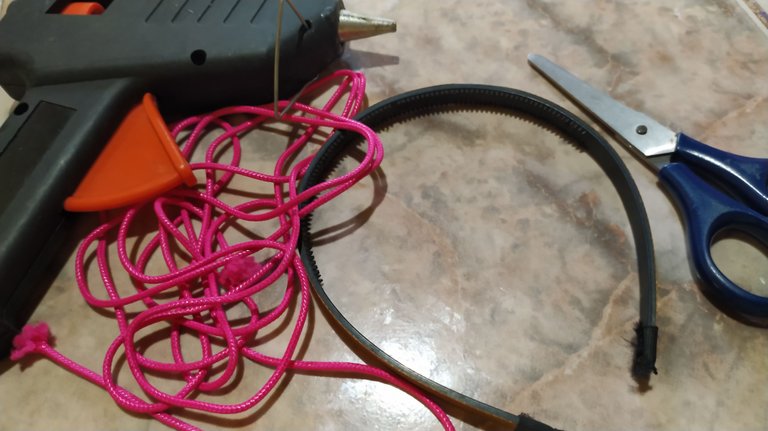
Para lograr lleva acabo esta creación, necesité los siguientes materiales:
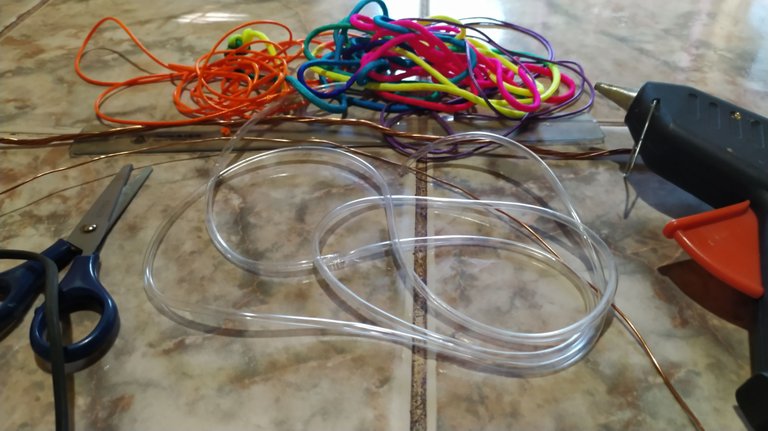
- 1 1/2 mts. de Cordón multicolor.
- 1 1/2 mts, de Cordón color Rosado intenso.
- Dos botones grandes para el centro.
- Alambre de cobre o alambre galvanizado de 50 cm.
- Un Cintillo .
- 39 cm de manguera transparente.
- Silicón líquido y caliente.
- Regla.
- Tijeras.
Para darle forma a mi creación, seguí los siguientes pasos:
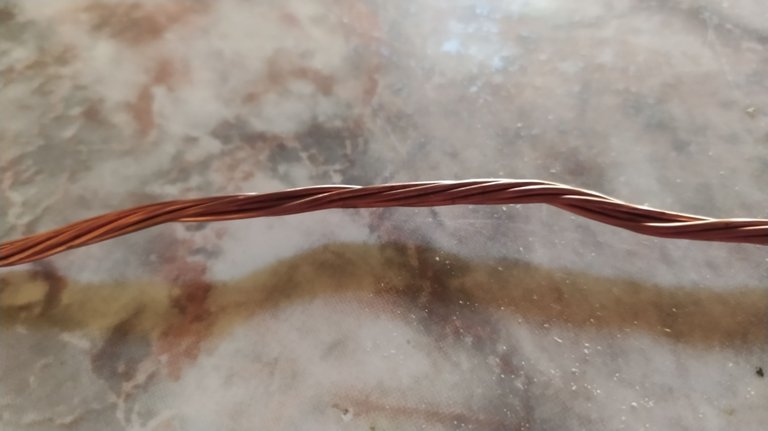
- Tomé una hebra de el alambre de cobre, porque todo junto era muy grueso .
- Medí y corté la manguera que necesitaba, cuidando de que fuese lo justo.
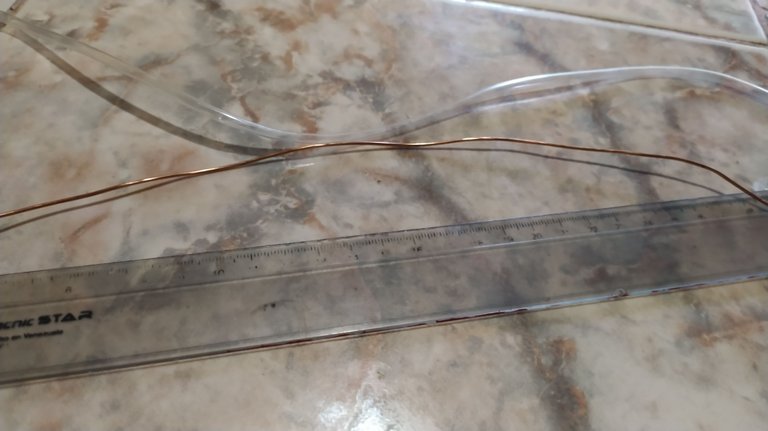
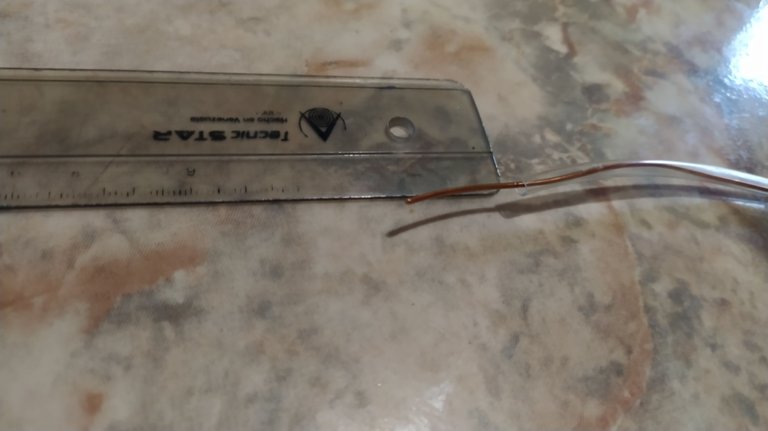
- Metí el alambre por dentro de la manguera, con dos centímetros de más a cada lado de la manguera, con ayuda de la pinza, corté el excedente .

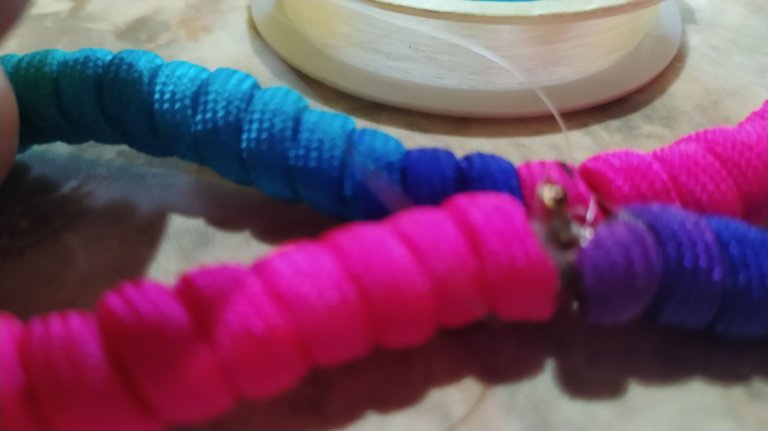
- En este paso comienza el color en esta creación, se coloca en la punta de la manguera, un punto de silicón caliente y se introduce el cordón colorido, manteniendo los 2 cm. de alambre.
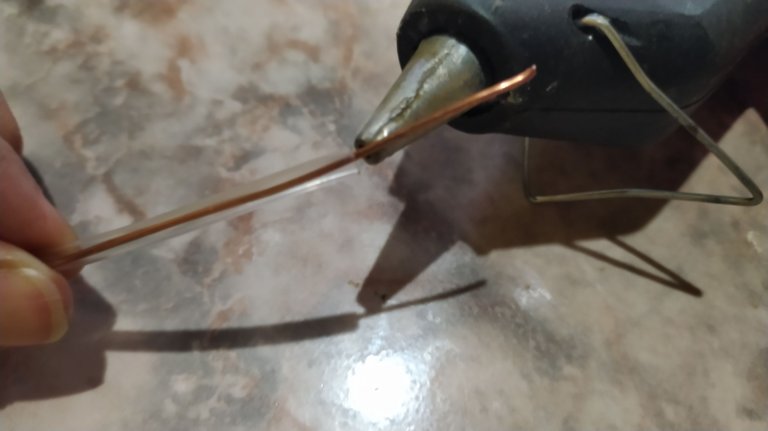

- Coloqué un poco de silicón por fuera, para asegurar la primera parte del cordón.
- Aquí comencé a enrollar bien junto, todo el cordón , hasta la siguiente punta .
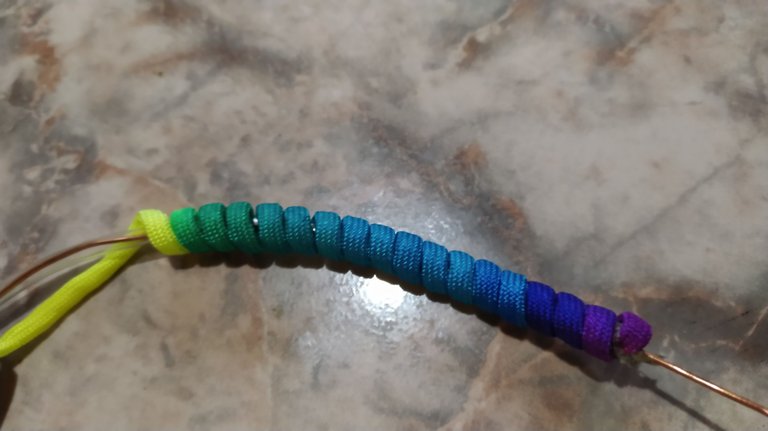
- En este paso pegué la punta, con silicón, justo dentro de la manguera.
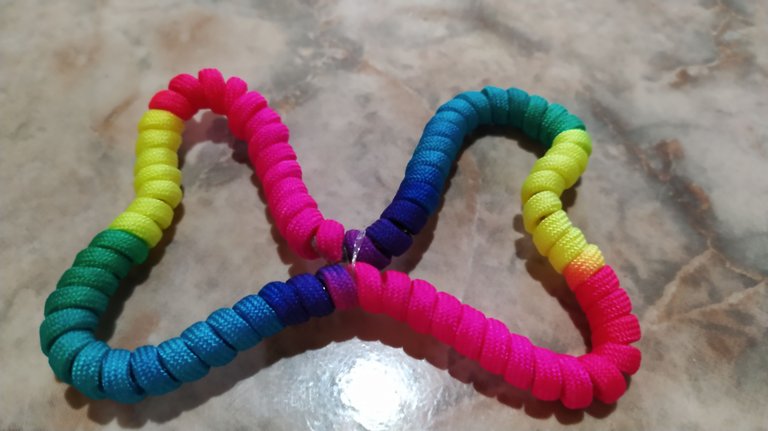
- Marqué el centro de mi pieza, con un lapicero.
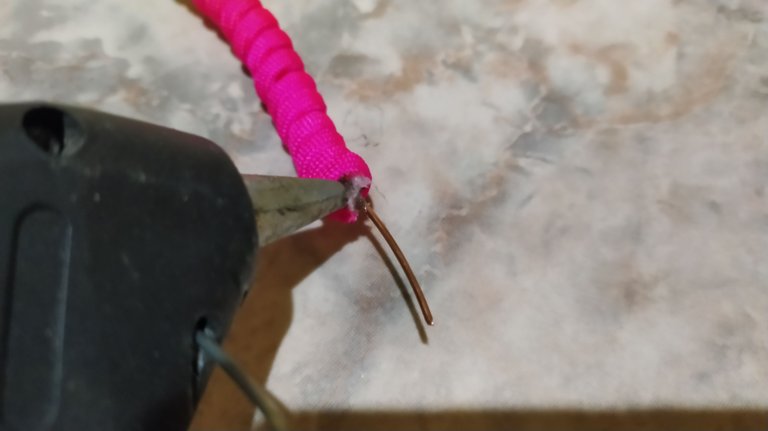
- Uni con ayuda de la pinza, las puntas del alambre, hasta quedar bien apretado, corté el excedente.
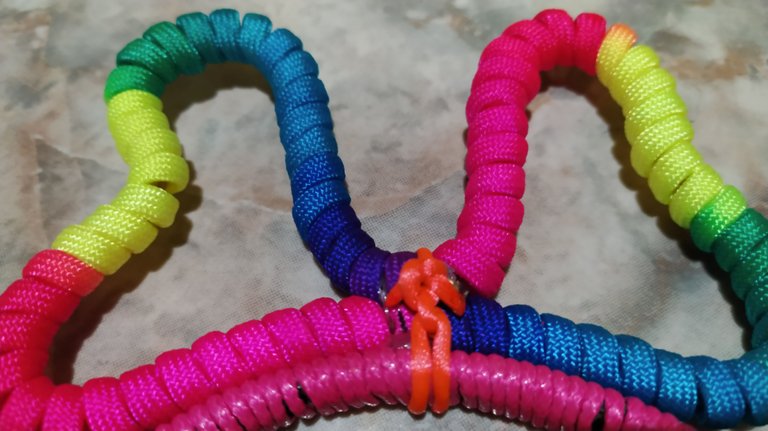
- Acerqué el centro marcado y la unión de los alambres, con ayuda de hilo naylon los fijé, amarrando fuerte.
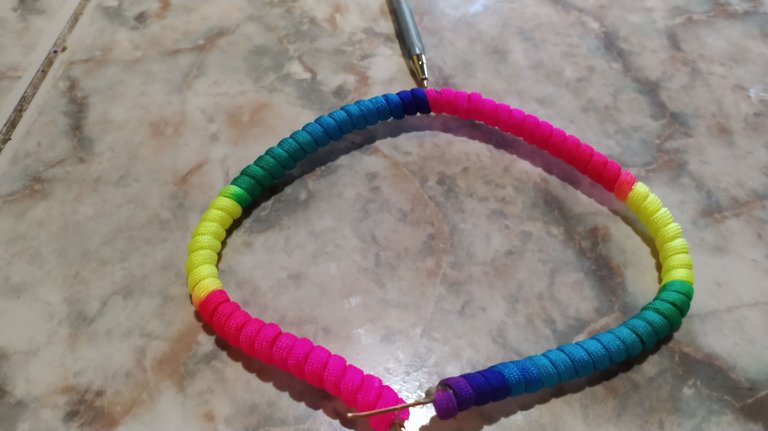
- Le dí forma de corazón a ambos lados del lazo.
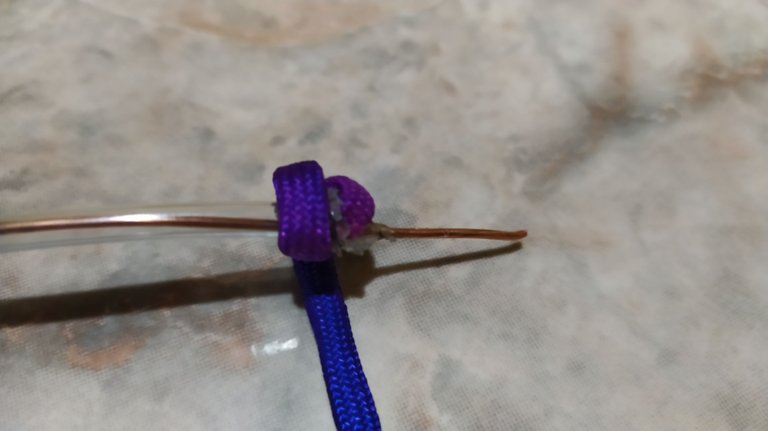
- Llegó el turno de decorar el Cintillo y lo hice fijando un poco de la punta hacía dentro, coloqué un poco más silicón y comencé a enrollar con el cordón rosado fuerte.

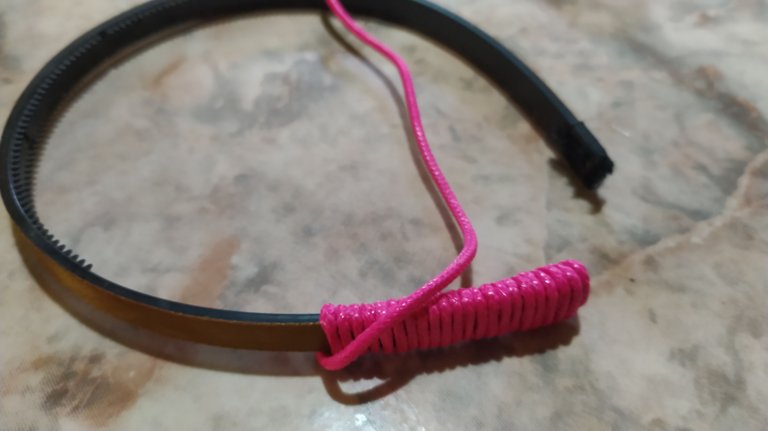
- Fijé con silicón el lazo en medio del cintillo.
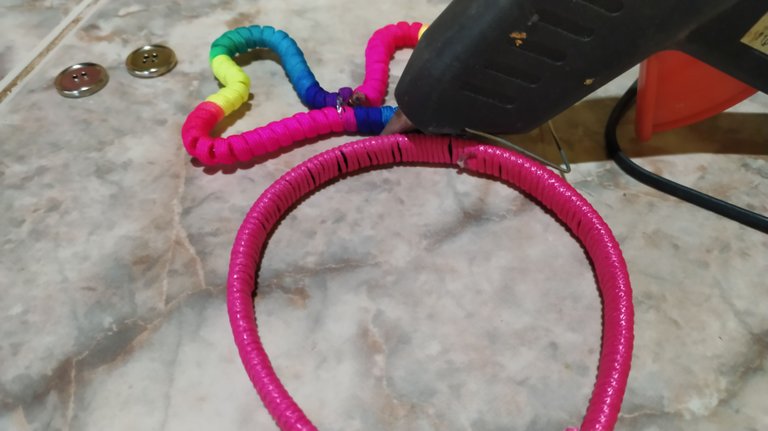
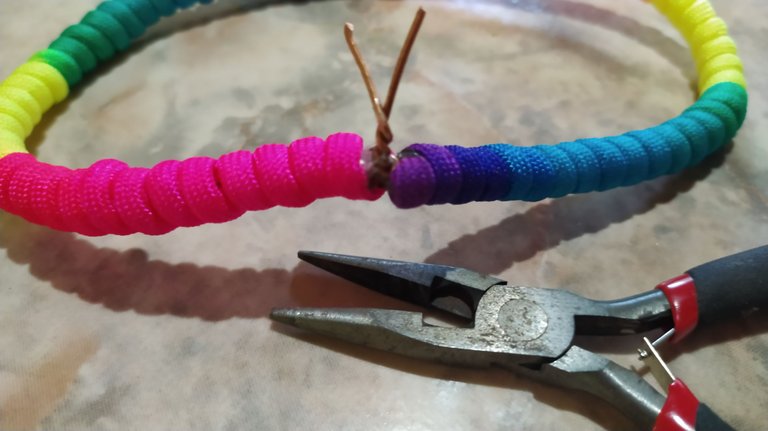
- Con ayuda de otro cordón, fijé justo en el centro con un nudo, el lazo para evitar que se despegue y asegurarlo muy bien.
- En este paso, pegué los botones hacia ambos lados del lazo.
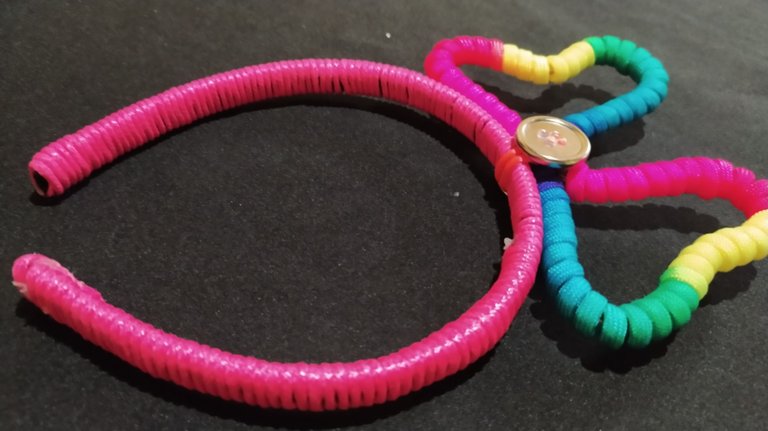
Listo! .
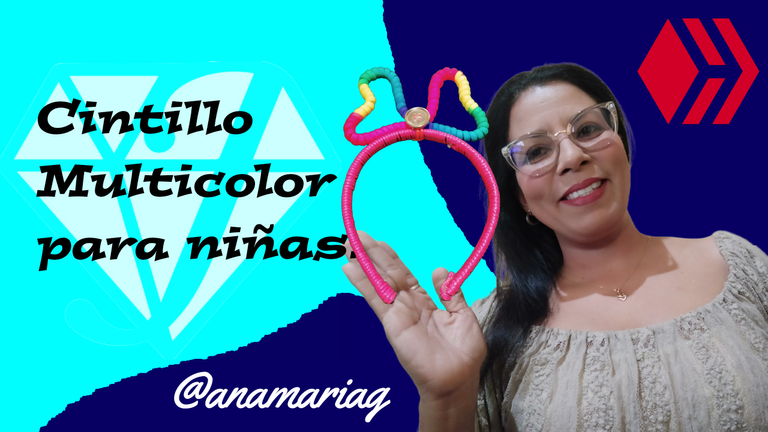
Mi cintillo de lazo multicolor quedó hermoso.
Como vez , es de muy fácil elaboración y empleé muy poco tiempo.
Recuerda que esto fue una inspiración y con mi creatividad le di , un toque personal, para verme reflejada en esta creación.
Las cosas hechas a manos, salen del corazón de su creador hacia las manos de quien va a recibir esta obra de arte y poseen un toque de originalidad.
Anímate a crear y comparte con nosotros tus proyectos.
Un Mega Abrazo 🤗, con mucho cariño🥰 .

Multicolor headband for girls
A warm greeting🦋! to the hivers creators of #jewelry, this extraordinary community that shows a lot of talented artisans dedicated to give a special touch to accessories.
I'm back here again with a lot of enthusiasm, to show you an inspiration I got on the web, a hair accessory, which for the first time I'm going to elaborate in this great community.
The joy of being children is reflected in this accessory where the colors are the protagonists.
The design seemed to me spectacular to not go unnoticed and show the joy that gives us the little girls of the house.
This accessory is for little princesses, pretty and flirty girls with a very peculiar personality.
I hope you enjoy as much as I did the process of making this beautiful hair accessory.
To achieve this creation, I needed the following materials:
- 1 1/2 mts. of multicolored cord.
- 1 1/2 mts. of hot pink cord.
- Two large buttons for the center.
- Copper wire or 50 cm. galvanized wire.
- One ribbon.
- 39 cm. of transparent hose.
- Hot and liquid silicone.
- Ruler.
- Scissors.
To shape my creation, I followed the following steps:
- I took a strand of the copper wire, because all together it was very thick .
- I measured and cut the hose I needed, making sure it was just enough.
- I put the wire inside the hose, with two centimeters more on each side of the hose, with the help of the pliers, I cut the excess.
- In this step begins the color in this creation, place a dot of hot silicone on the end of the hose and introduce the colored cord, keeping the 2 cm. of wire.
- I placed a little silicone on the outside, to secure the first part of the cord.
- Here I began to wind the whole cord tightly together, until the next end of the cord.
- In this step I glued the tip with silicone just inside the hose.
- I marked the center of my piece with a pencil.
- With the help of the pliers, I joined the ends of the wire until it was tight, and cut the excess.
- I brought the marked center and the union of the wires close together, with the help of naylon thread I fixed them, tying them tightly.
- I gave a heart shape to both sides of the ribbon.
- It was to decorate the headband and I did it by fixing a little bit of the tip inwards, I put a little more silicone and began to wind it with the strong pink cord.
- I attached the bow in the middle of the headband with silicone.
- With the help of another string, I tied the bow in the center with a knot to prevent it from coming off and to secure it very well.
- In this step, I glued the buttons to both sides of the bow.
That's it!.
My multicolored ribbon headband turned out beautifully.
As you can see, it is very easy to make and I used very little time.
Remember that this was an inspiration and with my creativity I gave it a personal touch, to see myself reflected in this creation.
Handmade things come from the heart of their creator to the hands of those who will receive this work of art and will have a touch of originality.
We encourage you to create and share with us your projects.
A Mega Hug 🤗, with much affection🥰 .
Translated
Fotografías y texto propiedad de la autora.
Separadores libres, Pixabay
Banner y edición de fotos CC Express.