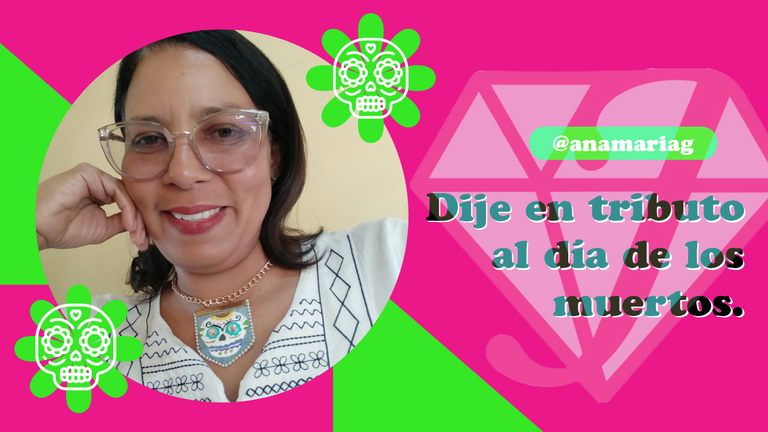
Un saludo cariñosos🦋! a los hivers creadores de #jewelry, esta extraordinaria comunidad que muestra, gran cantidad de talentosos artesanos dedicados a darle un toque especial a los accesorios.
Muchas tradiciones son partes de este fin y comienzo del mes, está vez quise darle un tributo a esos seres queridos que están en el plano espiritual.
Lo quise hacer a través de estas hermosas imágenes, de origen mexicano, pero que ilustran con gran ingenio y hermosura el significado de la muerte.
Es sabido de todos los adornos que se colocan para darle ese tributo a los seres queridos y desde hace días se me ocurrió hacer un dije en forma de banderín .
Por aquí quiero compartir con ustedes esta hermosa creación, pintada a mano con un toque de brillo, para dar elegancia a este accesorio.
Les muestro la lista de materiales, que utilicé para este dije :
- Un trozo de jean .
- 40 cm de cadena color dorada
- 20 cm de perla corrida tornasol.
- Dos aplicaciones tornasol.
- Dos cierres tipo cartera de 2 cm color dorado.
- 4 aros pequeños color dorado.
- Un broche tipo langosta de color dorado.
- Un terminal de cadena en forma de cruz .
- Un trozo de cuero negro.
- Pinturas para telas color: blanco, dorada azul oscuro, morada, azul aguamarina, verde, amarillo y gris.
- Pincel plano #2.
- Pincel lainer.
- Silicón líquido.
- Tijera.
- Pinza.
Para lograr realizar este diseño, seguí los siguientes pasos:
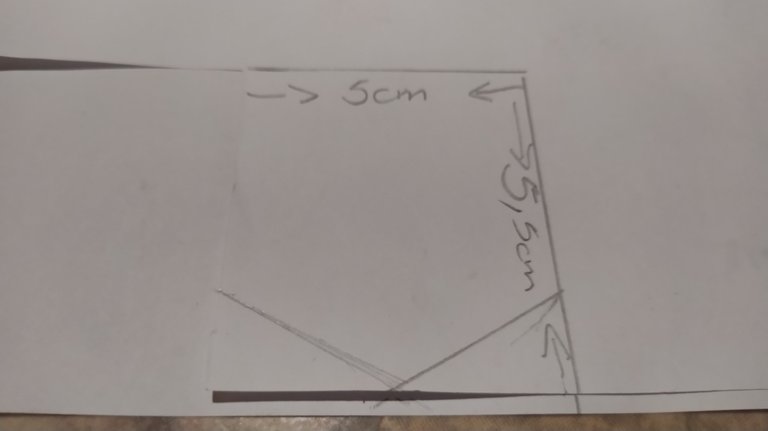
- Tomé la medida y corte el patrón de el tamaño del banderín.
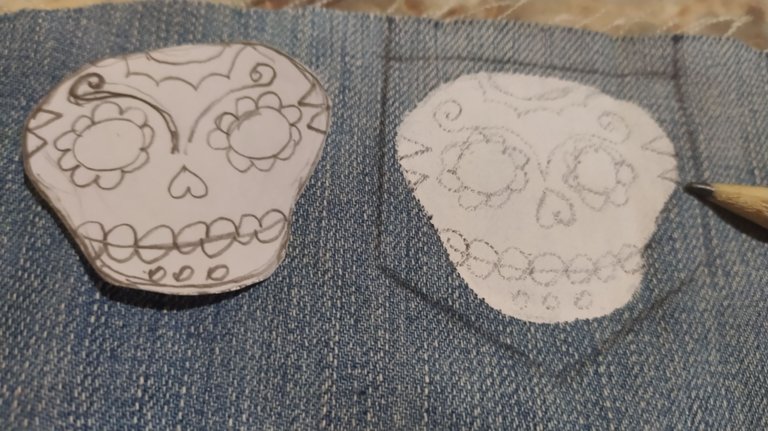
- Diseñé mi forma de calavera junto a sus decoraciones, que pueden ser muy variada .
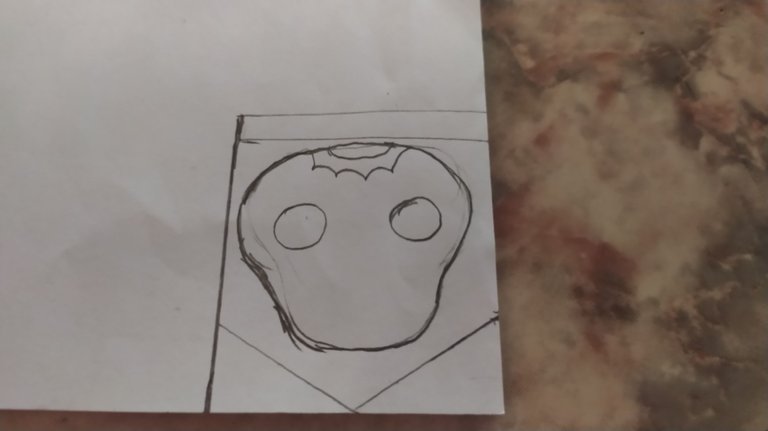
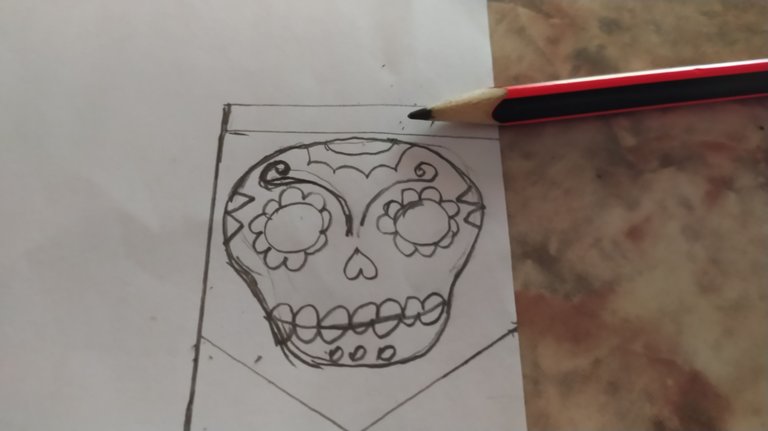
- Ahora llegó el turno de marcarlo sobre la tela, así que primero hice el banderín.
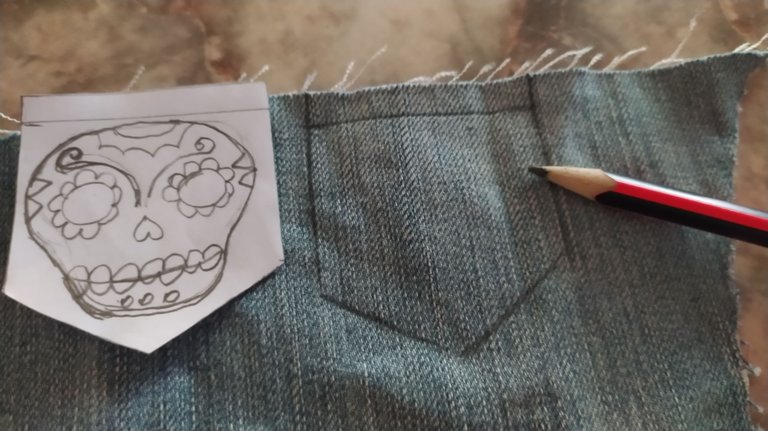
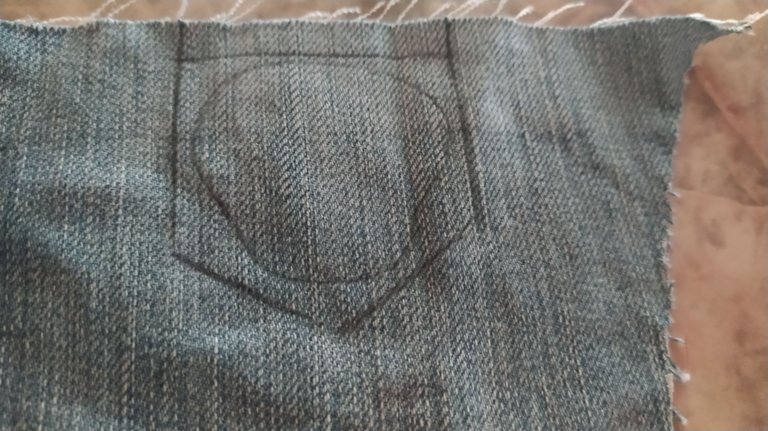
- En este paso marqué el contorno de el cráneo.
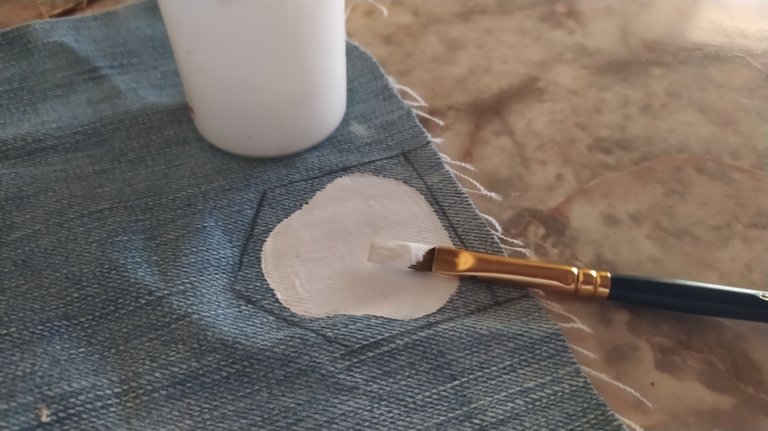
- Con la ayuda de el pincel plano, pinte el interior de el cráneo con el color blanco, le coloque dos manos de pintura.
- Ahora si, llegó el momento de pasar mi diseño del día de los muertos a la figura del cráneo .
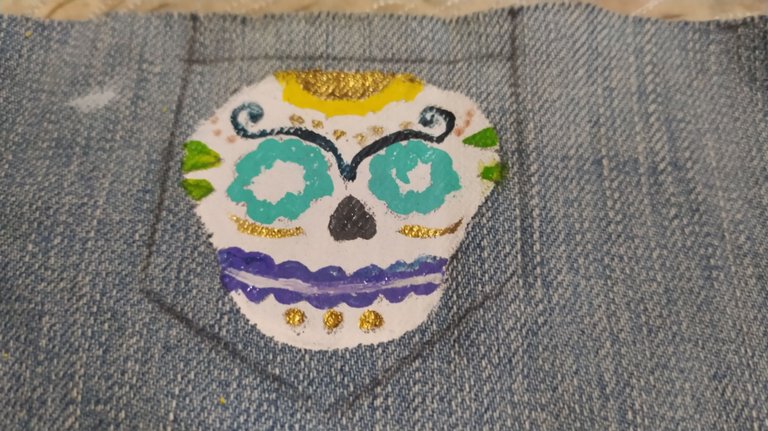
- Pinté cada detalle con el pincel lainer, por lo pequeño de cada espacio.
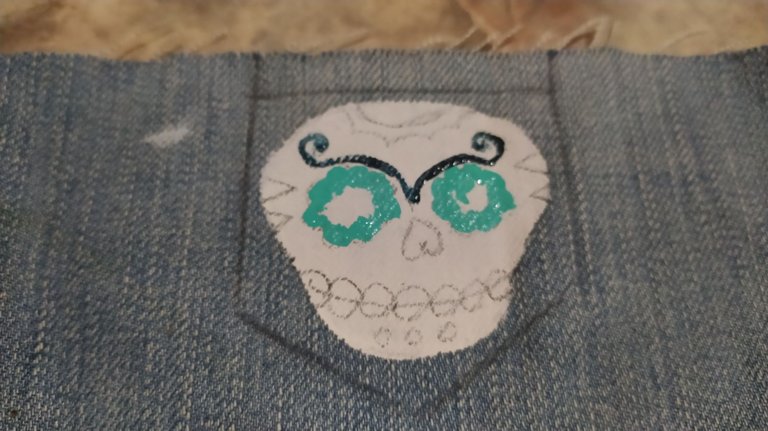
- Dejé secar un poco entre uno y otro color.
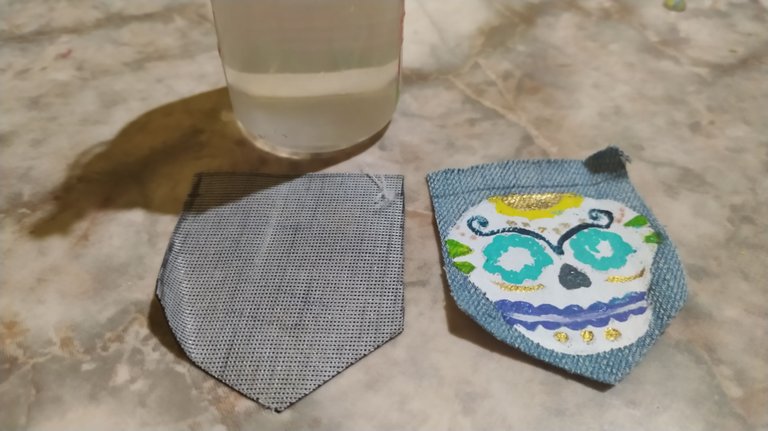
- Continué pegando con silicón líquido, el cuero negro para darle dureza a la pieza, luego dejé parejo ambas partes con ayuda de la tijera.
- Pegué los ojos de mi creación, con silicón líquido, con sólo un poco, cuidando no manchar la pieza .
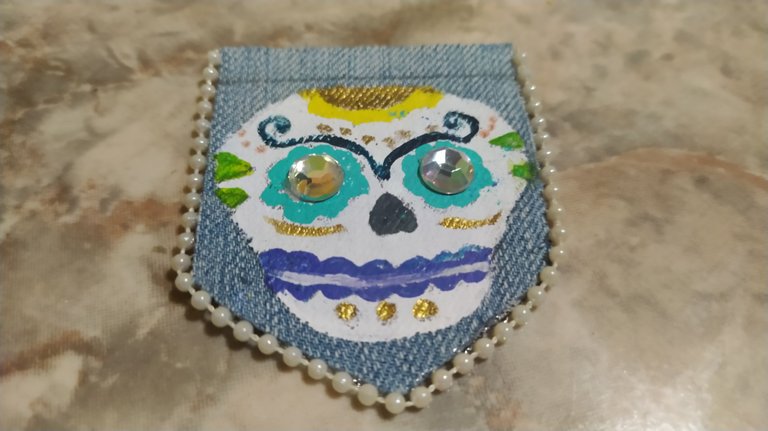
- Aquí pegué con silicón líquido, la perla corrida, de un extremo al otro.
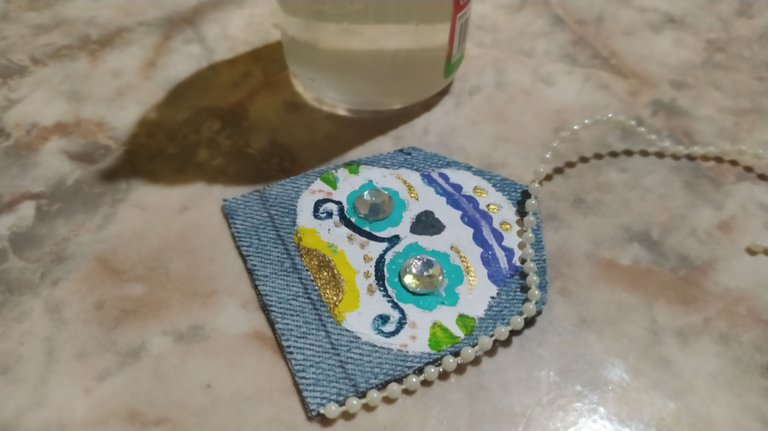
- Coloqué los dos cierres de cartera, en la parte superior.
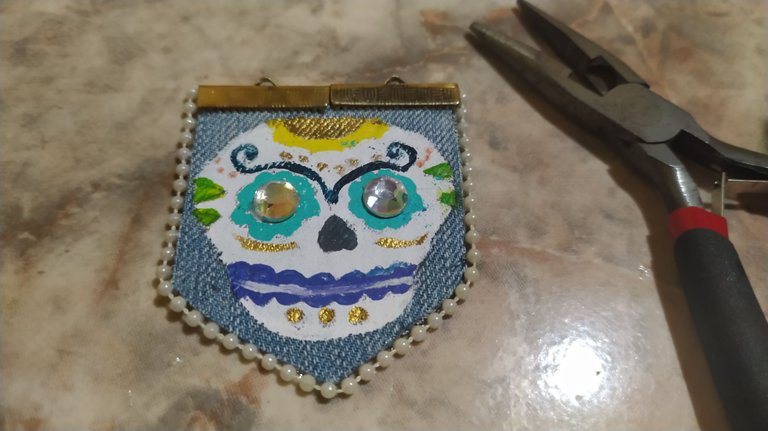
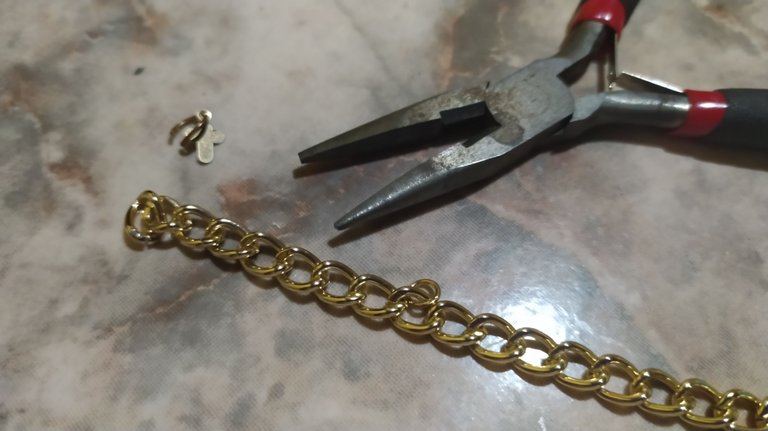
- Luego me correspondió colocarle, un aro y el broche tipo langosta en un extremo.
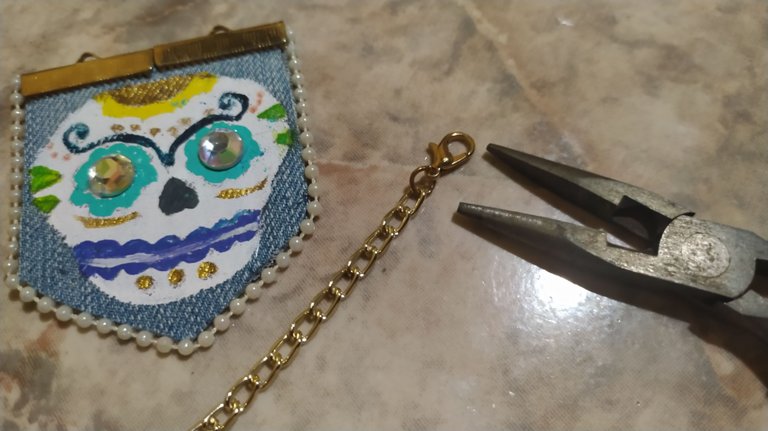
- Para el otro extremo coloqué un aro, acompañado de un terminal de cadena en forma de cruz, ideal para la inspiración de esta creación.
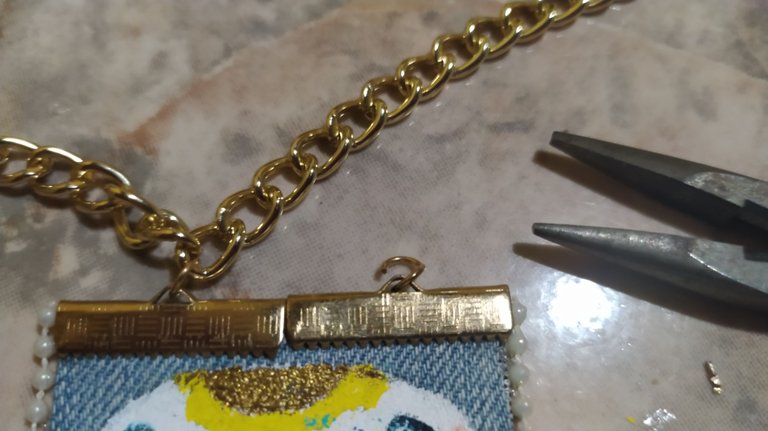
- Al dije le coloque dos aros, uno en cada agujero de el cierre, para darle ese aire de banderín, pegado a la cadena dorada.
Listo! .
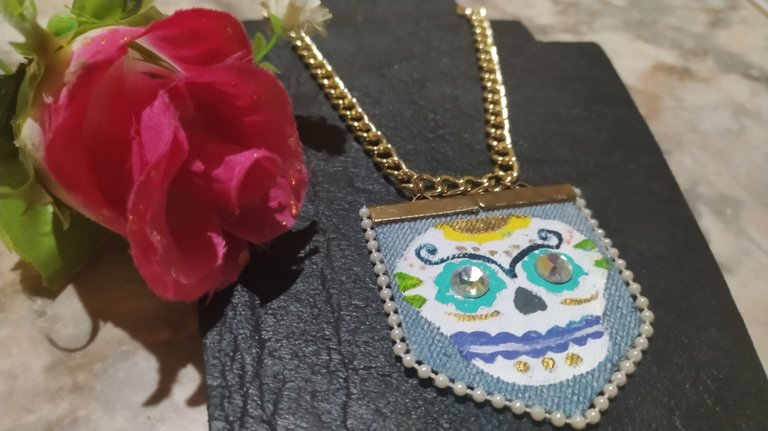
Mi dije tributo al día de los muertos, quedó hermoso.
Como vez , mis tutoriales de accesorios son de muy fácil elaboración y este tiene también esas características hermosas pero sencillas.
Recuerda siempre darle ese toque personal a tus accesorios, para verte reflejada en ellos y puedan contar quien eres.
Ten en cuenta que los accesorios hechos a manos, salen del corazón de su creador hacia las manos de quien la va a recibir y poseen un toque de originalidad.
Anímate a crear y comparte con nosotros tus proyectos.
Un Mega Abrazo 🤗, con mucho cariño🥰 .


I said in tribute to the day of the dead.
Warm greetings🦋! to the hivers creators of #jewelry, this extraordinary community that shows, lots of talented artisans dedicated to give a special touch to accessories.
Many traditions are part of this end and beginning of the month, this time I wanted to give a tribute to those loved ones who are in the spiritual plane.
I wanted to do it through these beautiful images, of Mexican origin, but that illustrate with great ingenuity and beauty the meaning of death.
It is known of all the ornaments that are placed to give that tribute to loved ones and since a few days ago it occurred to me to make a pendant in the form of a pennant.
Here I want to share with you this beautiful creation, hand painted with a touch of glitter, to give elegance to this accessory.
Below is the list of materials I used for this charm:
- A piece of jeanI said in tribute to the day of the dead.
- 40 cm of gold-colored chain
- 20 cm of iridescent pearl.
- Two litmus applications.
- Two 2 cm golden purse clasps.
- 4 small gold-colored rings.
- One gold-colored lobster clasp.
- A cross-shaped chain terminal.
- A piece of black leather.
- Fabric paints: white, gold, dark blue, purple, aquamarine blue, green, yellow and gray.
- Flat brush no. 2.
- Liner brush.
- Liquid silicone.
- Scissors.
- Tweezers.
To make this design, follow these steps:
- I took the measurement and cut the pattern to the size of the pennant.

- I designed the shape of my skull along with its embellishments, which can be very varied.


- Now it was time to mark it on the fabric, so first I made the pennant.

- In this step I marked the outline of the skull.

- With the help of the flat brush, I painted the inside of the skull with the white color, I applied two coats of paint.

- Now it was time to transfer my Day of the Dead design to the skull figure.

- I painted every detail with the eyeliner brush, due to the smallness of each space.

- I let it dry a little between each color.

- I continued gluing with liquid silicone, the black leather to give hardness to the piece, then I left both parts even with the help of the scissors.

- I glued the eyes of my creation with liquid silicone, just a little, being careful not to stain the piece.

- Here I glued with liquid silicone the pearl from one end to the other.

- I placed the two purse clasps at the top.

- Then I placed a ring and the lobster clasp on one end.

- For the other end I placed a ring, accompanied by a chain terminal in the shape of a cross, ideal for the inspiration of this creation.

- To the pendant I placed two rings, one in each hole of the clasp, to give it that pennant look, attached to the golden chain.

Done! .

My tribute to the Day of the Dead charm is beautiful.
As you can see, my accessory tutorials are very easy to make and this one also has those beautiful but simple characteristics.
Always remember to give that personal touch to your accessories, so you can see yourself reflected in them and they can tell who you are.
Keep in mind that handmade accessories come from the heart of their creator to the hands of the person who will receive them and have a touch of originality.
Come on and share with us your projects.
A big hug with love🤗 .

Translated
Fotografías y texto propiedad de la autora.
Separadores libres, Pixabay
Banner y edición de fotos CC Express.
