Hello everyone... ✝️
Hello to my dear Hivers and the beloved community of artists #Jewelry, as always very pleased and excited to be here again, showing you my work made with love and especially for you.
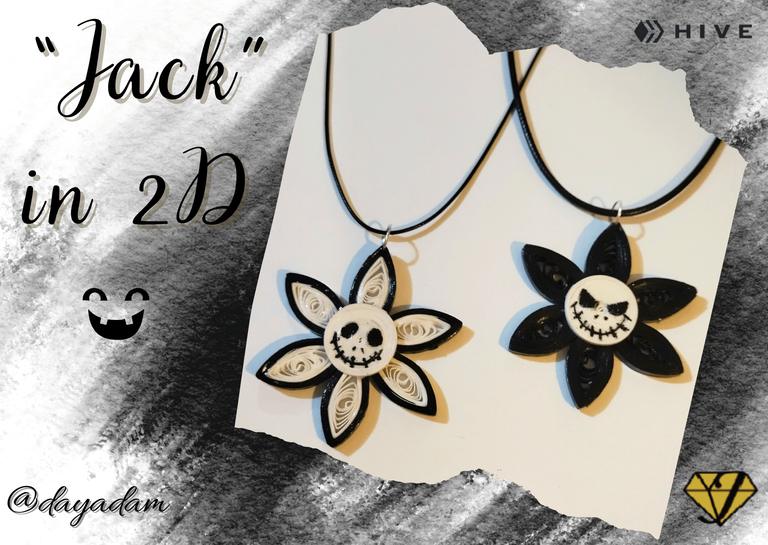
Although some of the most emblematic things of the month of Halloween are the bats, the typical white ghosts or pumpkins with scary faces, there is a character that is equally well known and used for different types of decorations during this month, it is "Jack Skellintong".
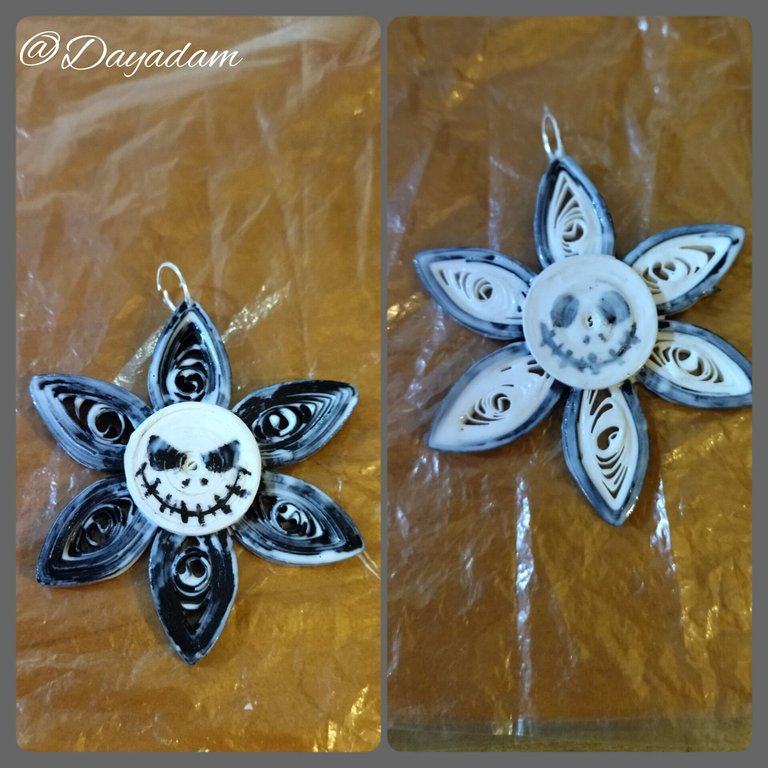
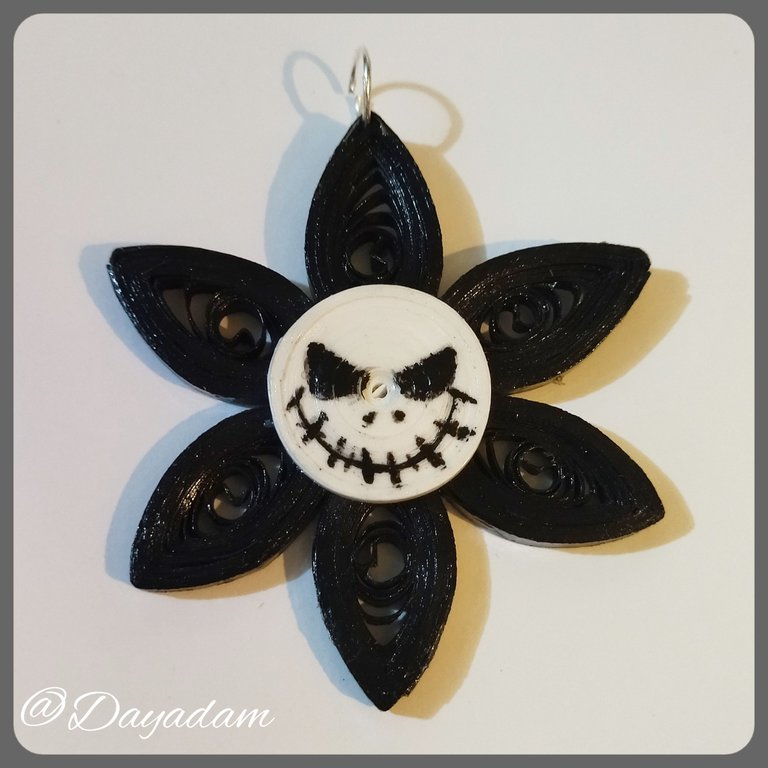
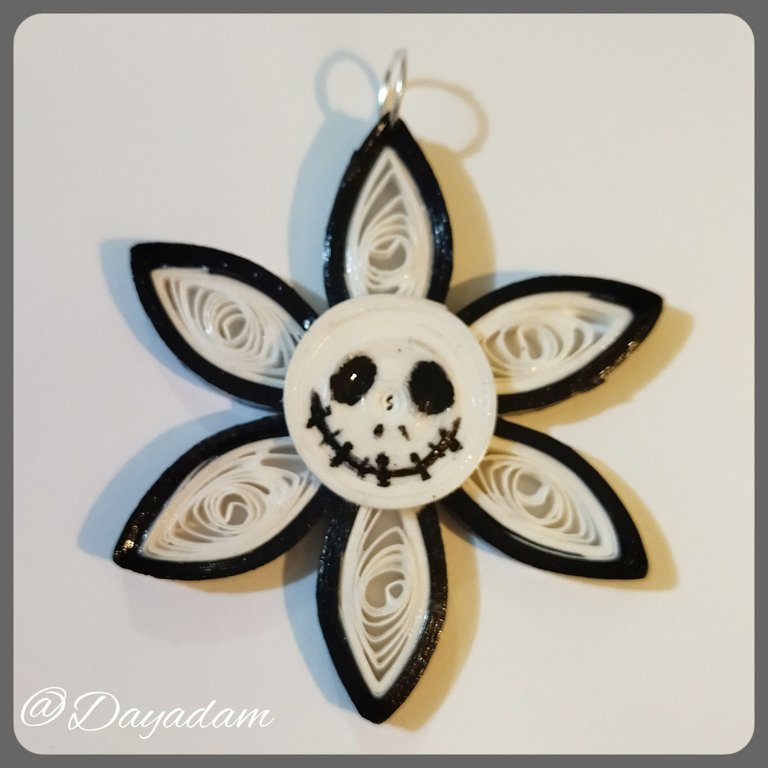
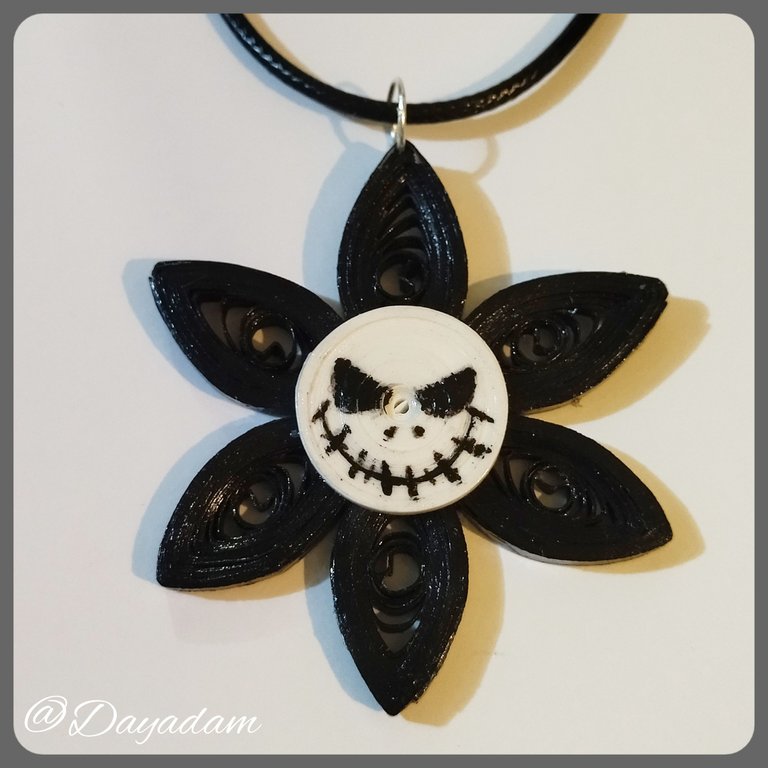
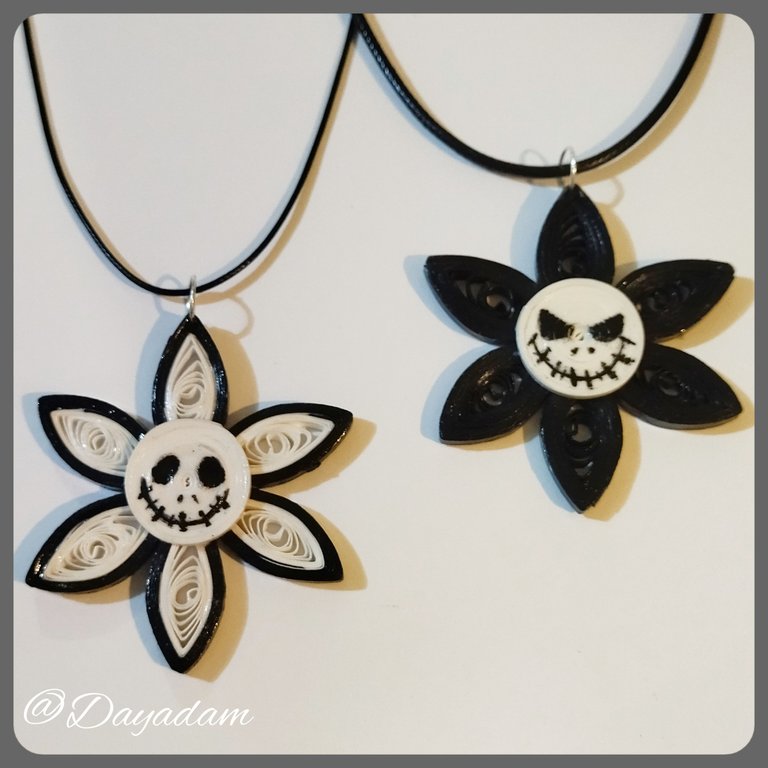
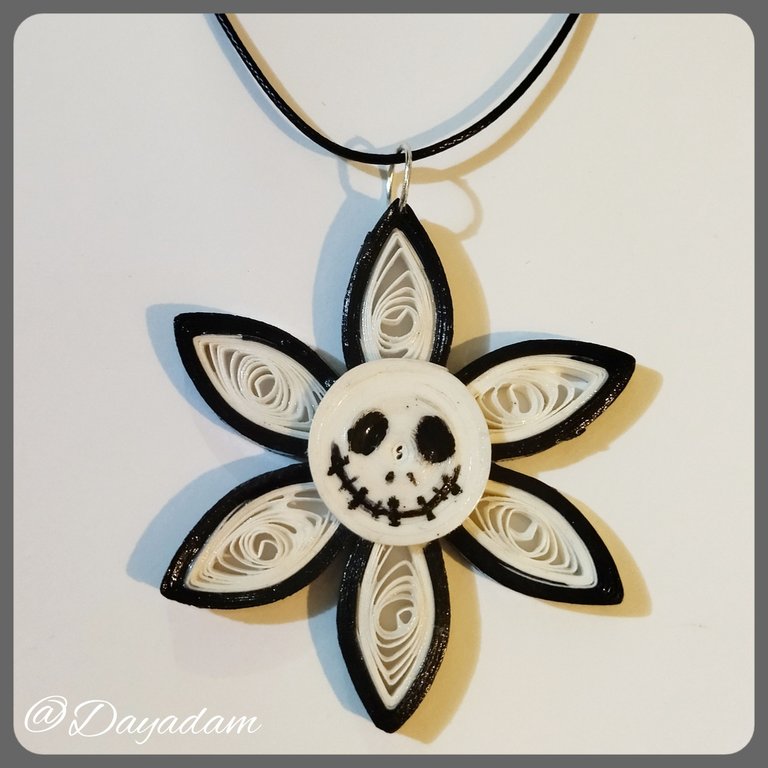
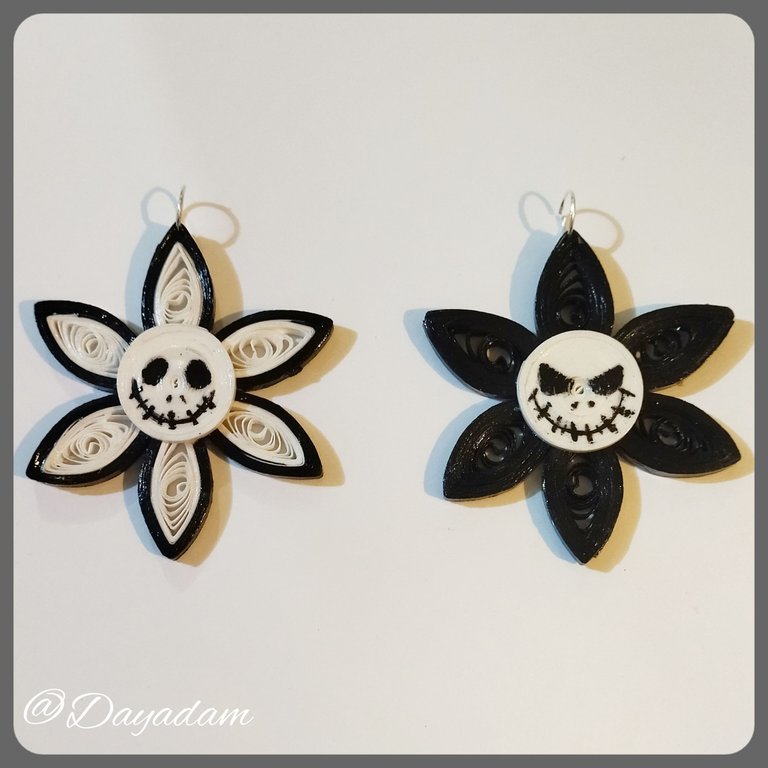
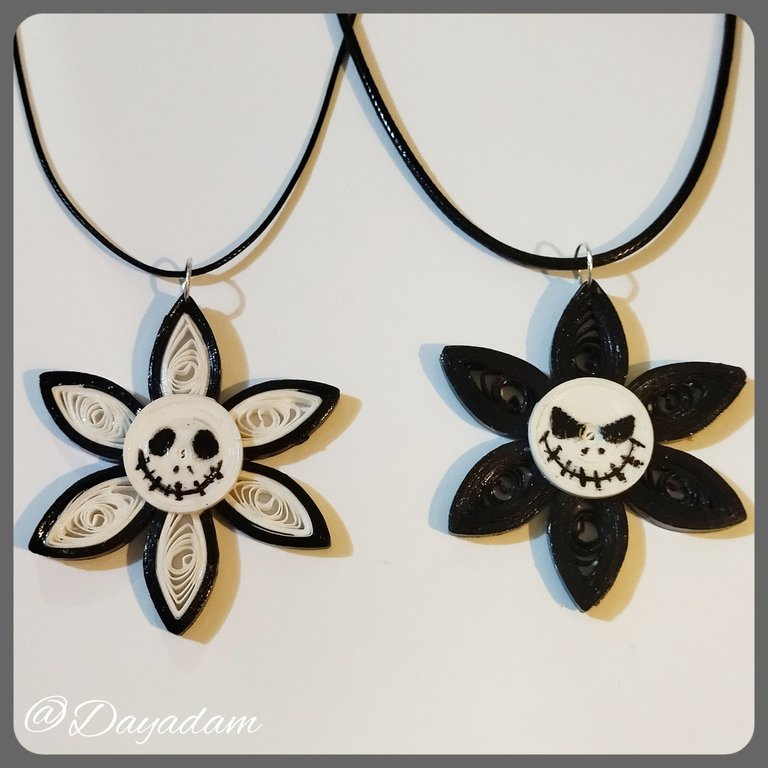
He is the protagonist of a movie called "Jack's Strange World". He is a thin, skeletal character with a distinctive face that looks great for this month's decorations. That's why I was inspired by him to make this pair of charms in the quilling technique, in the shape of a 2D flower, in which I recreated Jack's face in the center of it.
Hoping that you like it, and are encouraged to carry it out, without further ado I leave here my creative process.
Let's get started:😃

Hola a Todos... ✝️
Hola a mis queridos Hivers y a la querida comunidad de artistas #Jewelry, como siempre muy complacida y emocionada de encontrarme por acá nuevamente, mostrándole mi trabajo hecho con mucho amor y especialmente para ustedes.
Aunque unas de las cosas más emblemáticas del mes de Halloween son los murciélagos, los típicos fantasmas blancos o las calabazas con caras tenebrosas, existe un personaje que es igualmente conocido y usado para distintos tipos de decoraciones durante este mes, se trata de "Jack Skellintong".
Es el protagonista de una película llamada "El extraño mundo de Jack". Es un personaje delgado, esquelético y con un rostro característico que luce muy bien para las decoraciones de este mes. Por eso me inspiré en él para hacer este par de dijesen la técnica de quilling, con forma de flor en 2D, en el cual recree la cara del Jack en el centro del mismo.
Esperando que sea de su agrado, y se animen a llevarlo a cabo, sin más preámbulos les dejo por acá mi proceso creativo.
Comencemos:😃

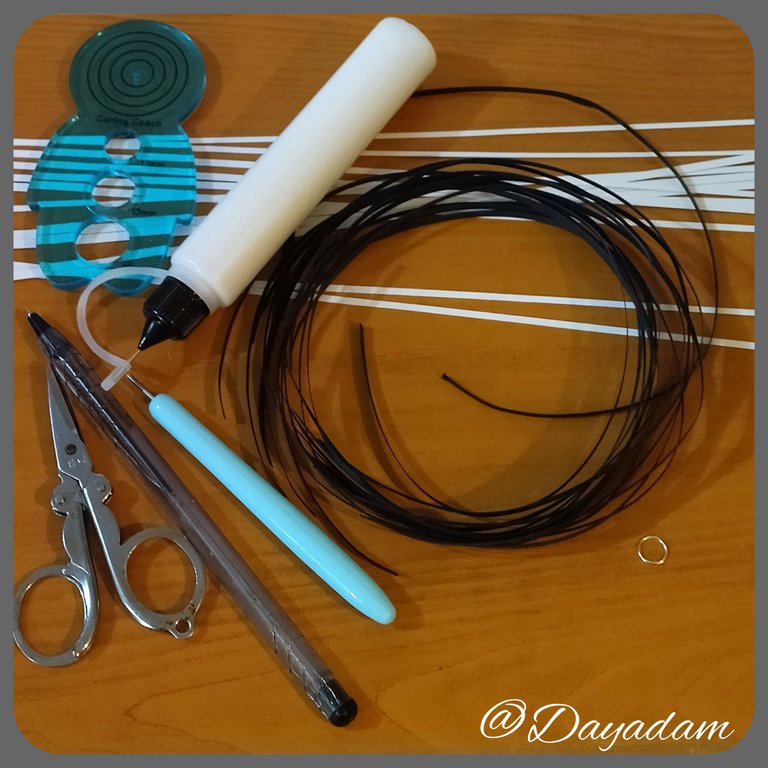
• Cintas de quilling de diversas medidas de ancho, blancas y negras.
• Aguja para quilling.
• Regla con diversas medidas de circunferencia.
• Pega blanca extra fuerte (de carpintería).
• Argolla de bisutería mediana.
• Pintura al frio color negro.
• Pincel pinta fina.
• Tijera.
• Pincel.
• Collar de tu preferencia.
- Quilling ribbons of different widths, white and black.
- Quilling needle.
- Ruler with different circumference measures.
- Extra strong white glue (carpentry glue).
- Medium size jewelry ring.
- Cold paint black color.
- Fine paint brush.
- Scissors.
- Paintbrush.
- Necklace of your preference.

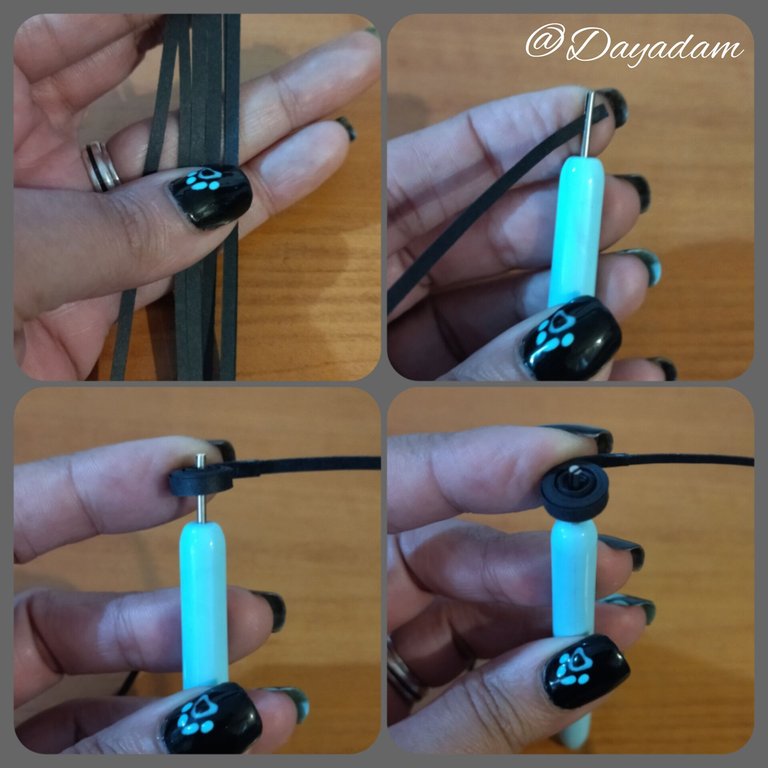
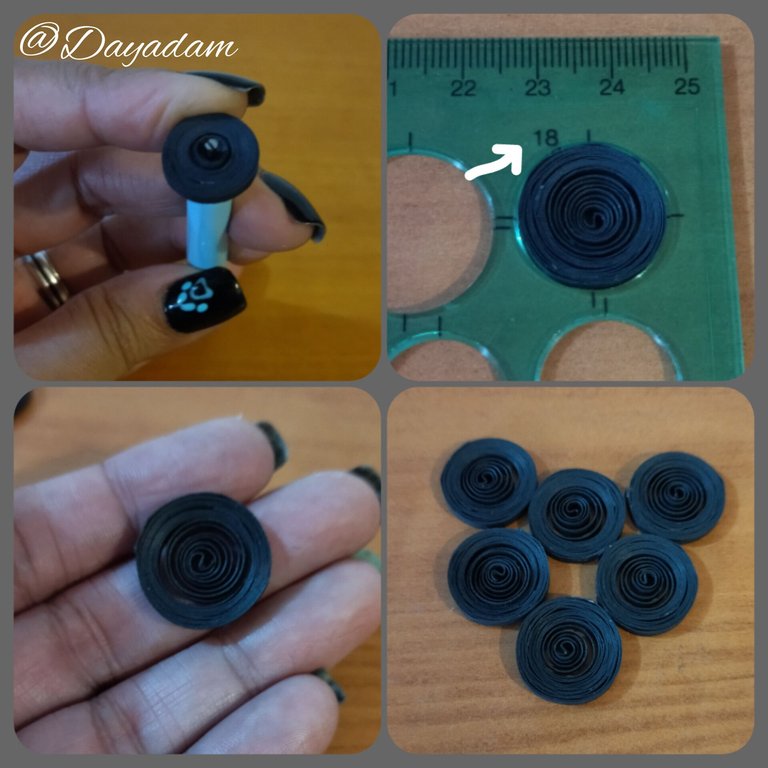
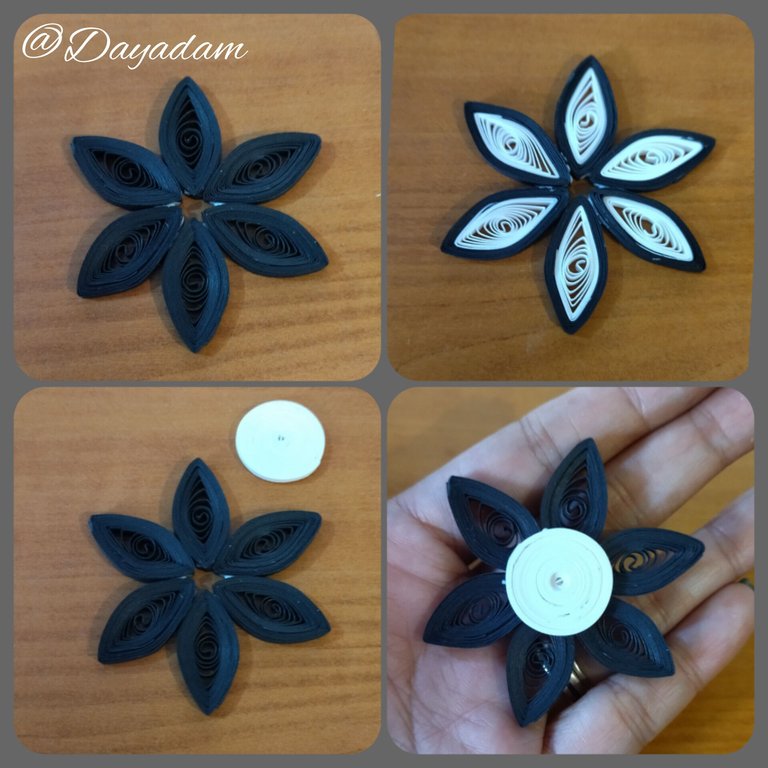
- We start by taking a black quilling strip of 3mm wide x 60cms long, with the quilling needle we proceed to roll up to the end with the same, we take out the needle and we will measure on a ruler with different circumference measures in the circle number 18, we take out the ruler and we will seal with extra strong white glue, we will get a semi-open circle. Like this we will need 6. You can also do it combining black and white ribbons, you can decide the measures of the same.
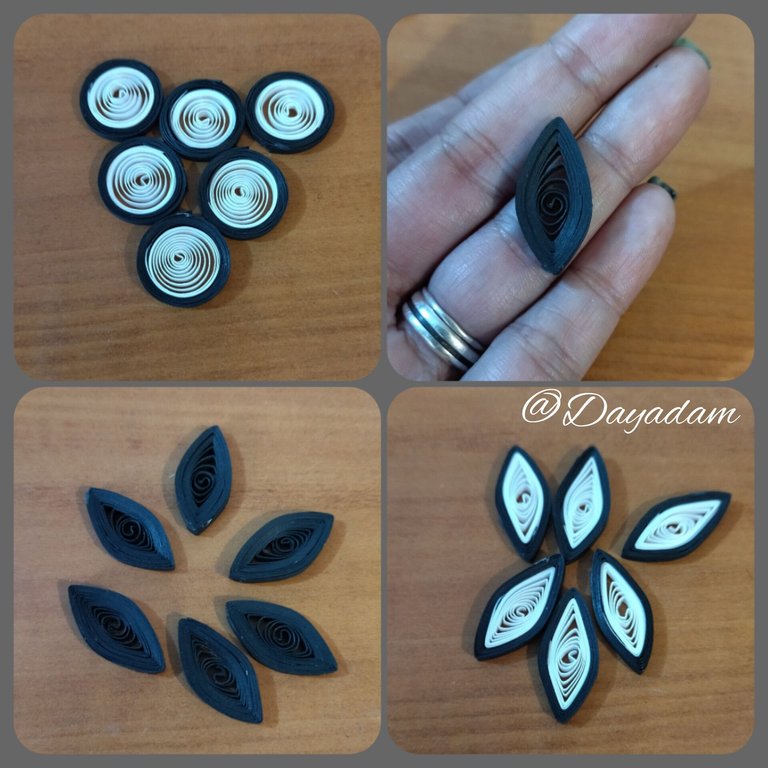
- Once the 6 circles are ready, we will proceed to mold them in the shape of a rhombus, pinching each of their tips with our fingers (reserve).

• Comenzamos tomando una tira para quilling de color negro de 3mm de ancho x 60cms de largo, con la aguja para quilling procedemos a enrollar hasta finalizar con la misma, sacamos de la aguja y vamos a medir en una regla con diferentes medidas de circunferencia en el círculo número 18, sacamos de la regla y vamos a sellar con pega blanca extra fuerte, obtendremos un circulo semi abierto. Como este vamos a necesitar 6. También puedes hacerlo combinando cintas de color blanco y negra, tú mismo puedes decidir las medidas de las mismas.
• Listos los 6 círculos vamos a proceder a moldear en forma de rombo, pellizcando cada una de sus puntas con los dedos, (reservamos).
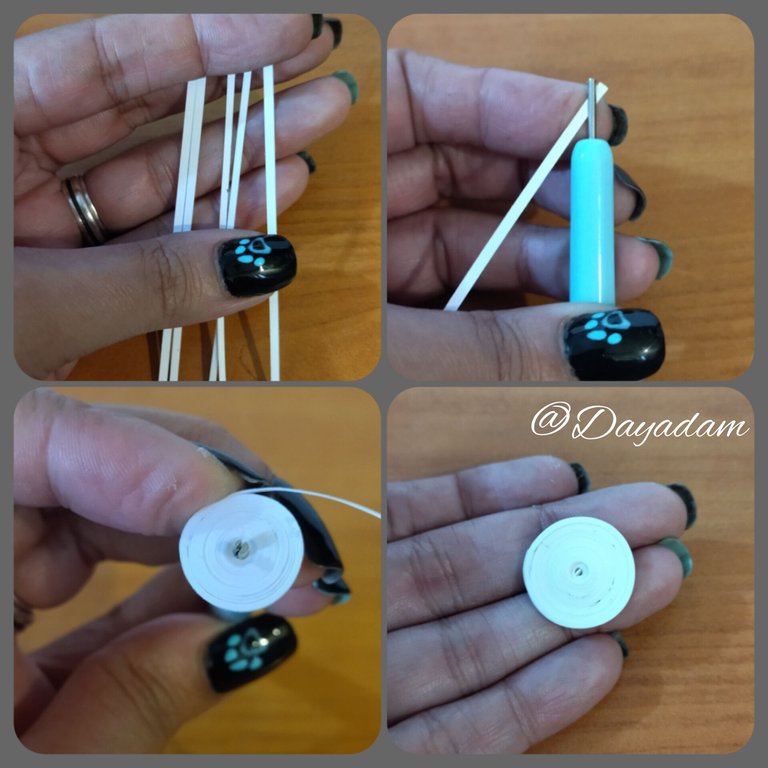
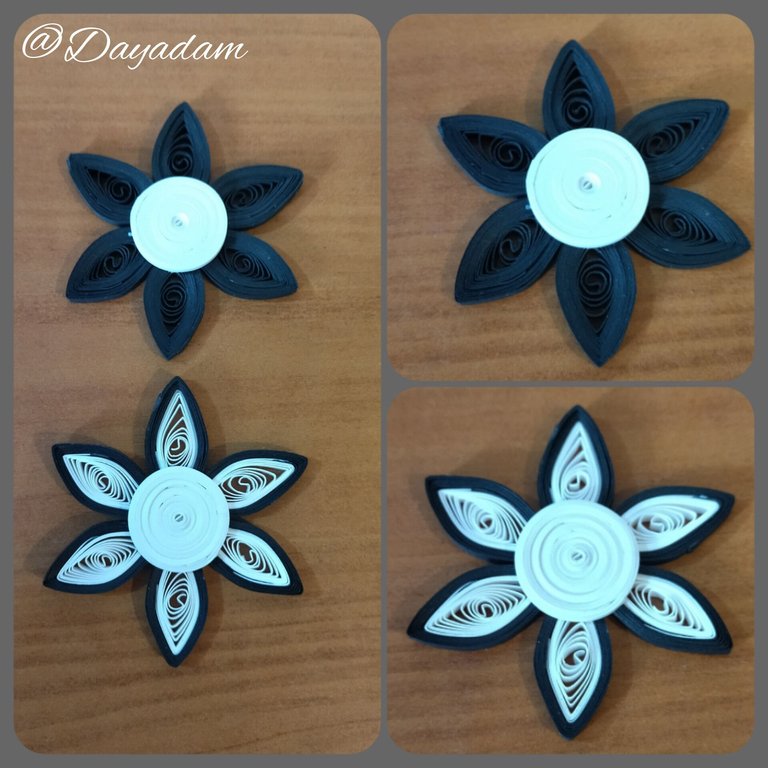
- To make the central part we will take a strip of 1mm wide x 150cms long, we roll with the quilling needle until we reach the end of the tape, we seal with glue, to obtain a closed circle.
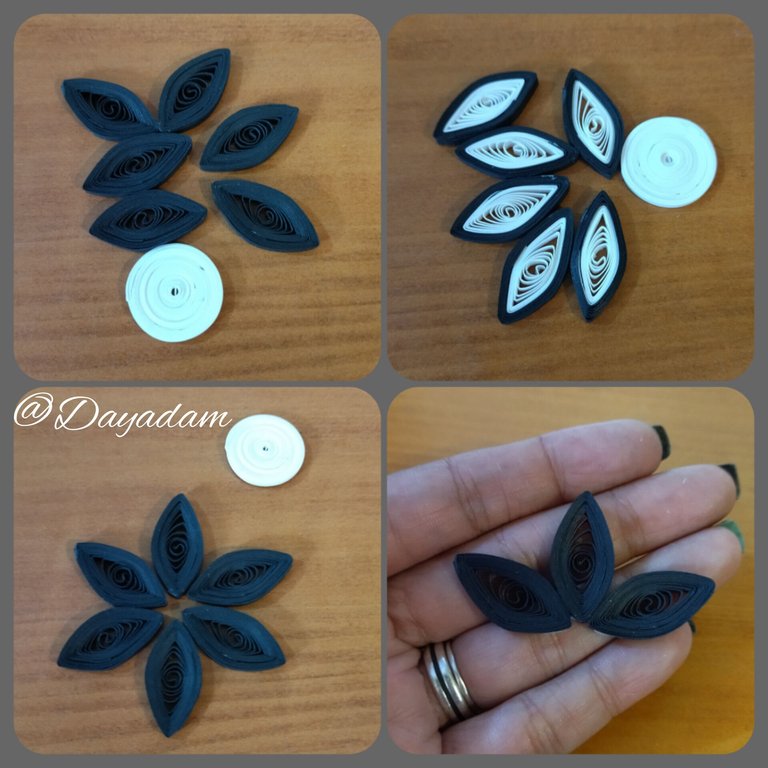
- We are going to form the flower, we will take the 6 petals and we will join one by one in a harmonic way, I made 2 groups of 3 petals and then I joined both, at the end we will glue the white closed circle that we made previously in the middle of the flower, this will be the face of the Jack.

• Para hacer la parte central tomaremos una tira de 1mm de ancho x 150cms de largo, enrollamos con la aguja para quilling hasta llegar al final de la cinta, sellamos con pega, para obtener un círculo cerrado.
• Vamos a formar la flor, tomaremos los 6 pétalos y uniremos uno a uno de manera armónica, realicé 2 grupos de 3 pétalos y luego uní ambos, al finalizar pegaremos el círculo cerrado blanco que elaboramos con anterioridad en el medio de la flor esta será la cara del Jack.
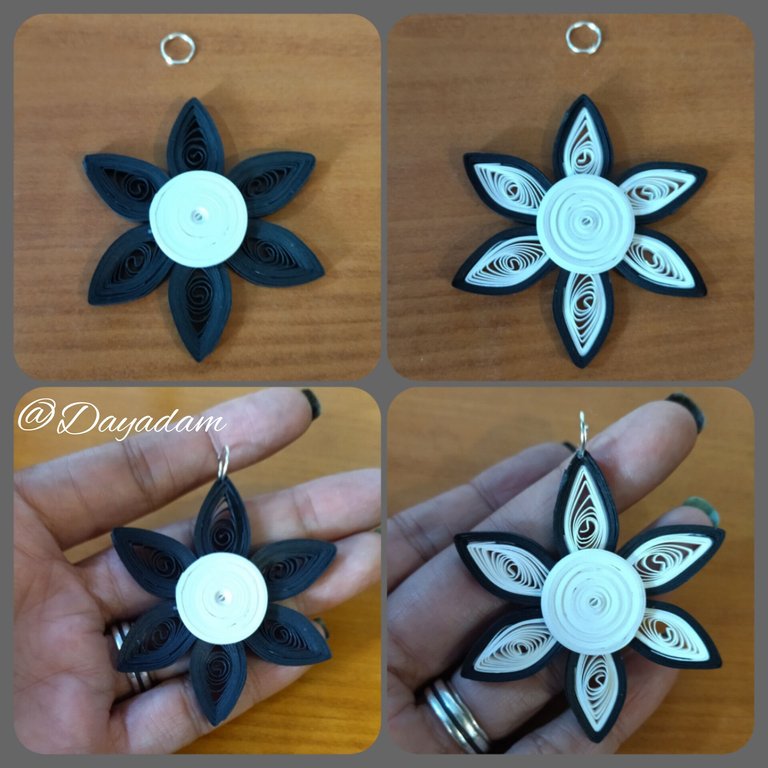
At the top of the flower we will incorporate a medium size costume jewelry ring, to be able to use the pendant with the necklace of our preference.
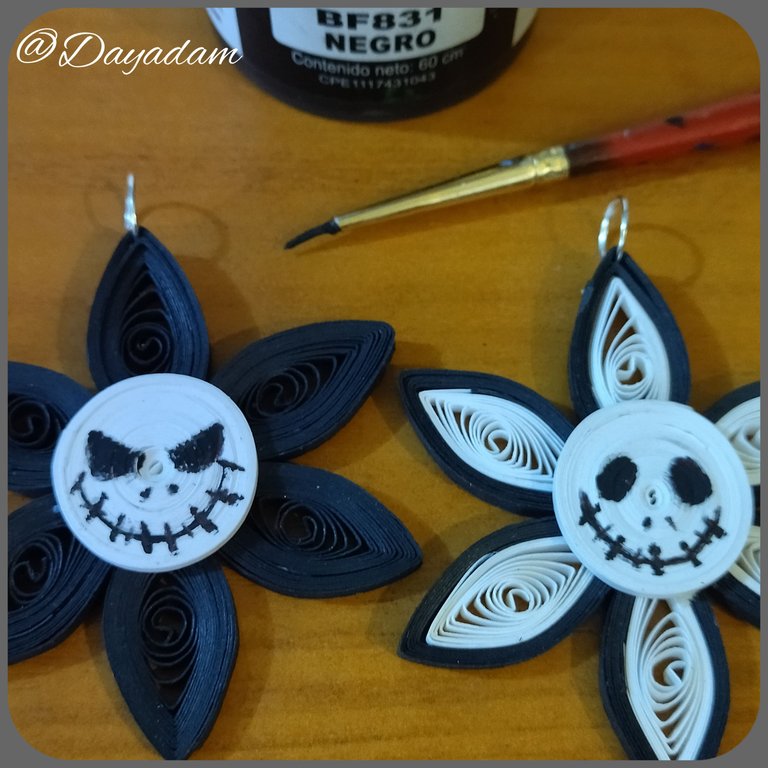
We are going to paint Jack's face with the help of a fine tip brush and black cold paint, we will make eyes, nose and mouth in the way you prefer.
Finally we are going to place the liquid protection (plasticized), with a brush we apply several layers of extra strong white glue letting it dry between one layer and another.
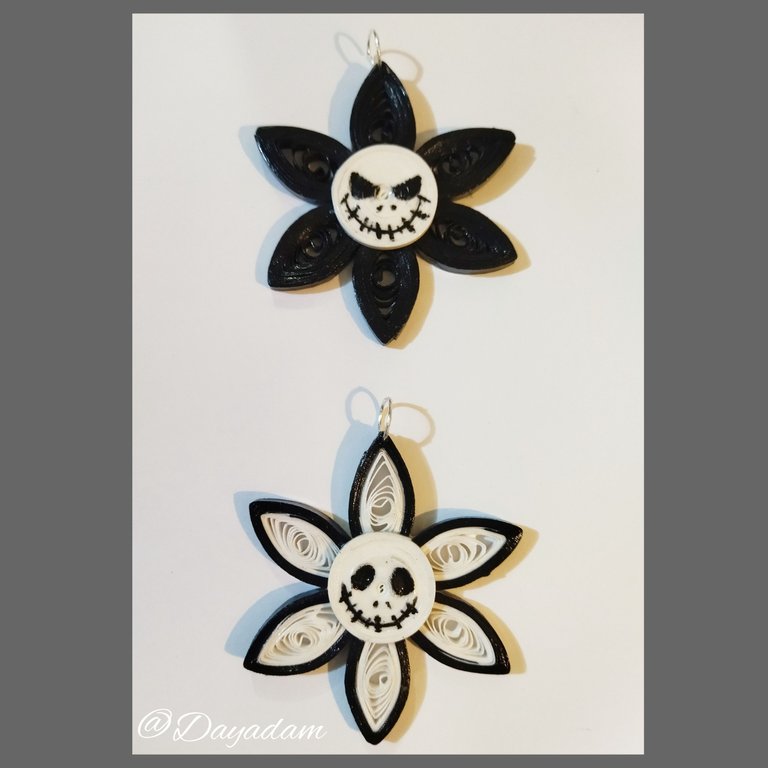
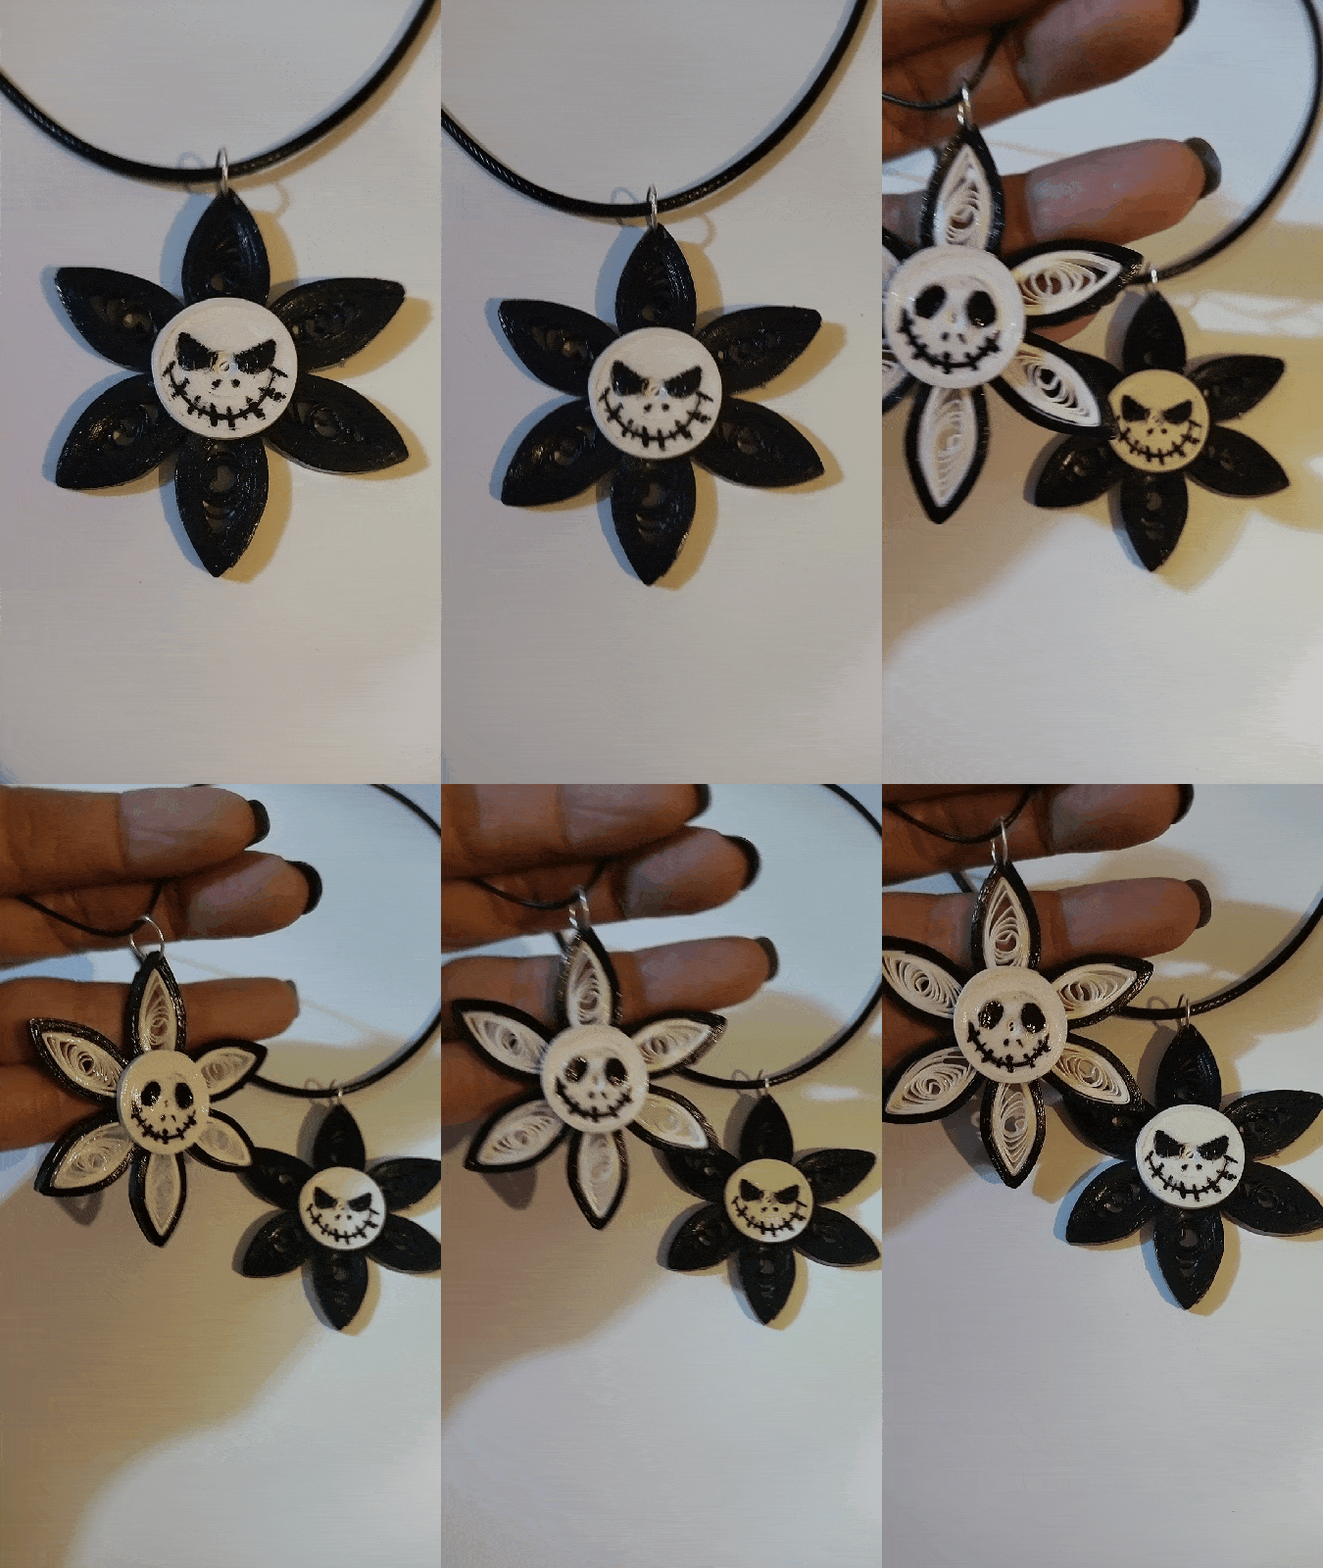
In this way we have these two models of charms in the shape of a 2D flower with Jack's face, to wear with the necklace of our preference.

• En la parte de arriba de la flor incorporaremos una argolla mediana de bisutería, para poder usar el dije con el collar de nuestra preferencia.
• Vamos a pintar la cara de Jack con la ayuda de un pincel punta fina y pintura al frio color negro, hacemos ojos, nariz y boca de la forma que más prefieras.
• Por ultimo vamos a colocar la protección liquida (plastificado), con un pincel aplicamos arias capas de pega blanca extra fuerte dejando secar entre una capa y otra.
De esta manera tenemos estos dos modelos de dijes en forma de Flor en 2D con la cara de Jack, para lucir con el collar de nuestra preferencia.

What did you think, did you like it?
I hope you did, I hope you liked my explanation, procedure and photos, I made them with love for you.
"Let out that muse that inspires you, and let your imagination fly".
Thank you all, see you next time.

¿Qué les pareció, les gustó?
Espero que sí, que les haya gustado mi explicación, procedimiento y fotos, los hice con mucho cariño por y para ustedes.
"Deja salir esa musa que te inspira, y deja volar tu imaginación".
Gracias a todos, nos vemos en la próxima.

Todas las fotos usadas en este post son de mi autoría y han sido sacadas en mi celular personal un Redmi 9T y editadas en Canva y en Inshot Banner y separador hecho por mí en Canva Traducido con la ayuda de DeepL


