Hello everyone... 🐱🐾💕
Hello to my dear Hiver and the dear community of #Jewelry, first of all a very special greeting full of blessings to the creators, administrators, moderators and of course to those who make life in this beautiful community. I am very pleased to be here to show you some accessories in blue jeans.
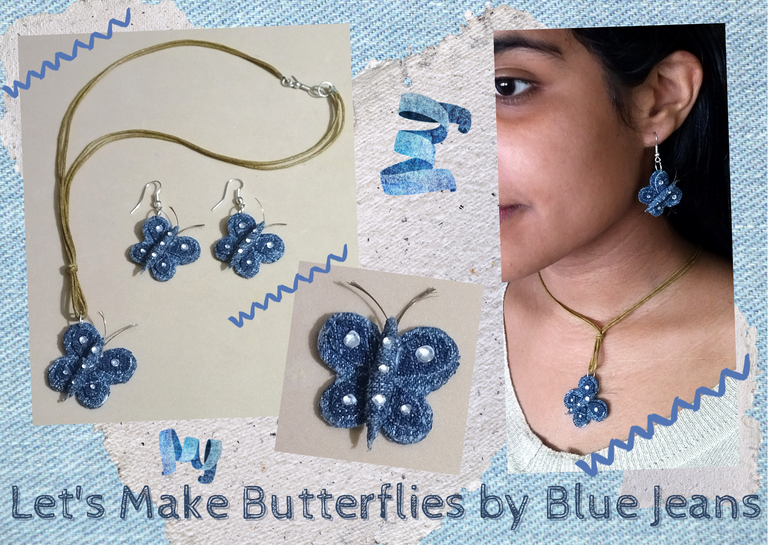
For today I bring you some Butterfly charms made in blue jeans. I hope you like them, here is the procedure.
Let's get started:😃

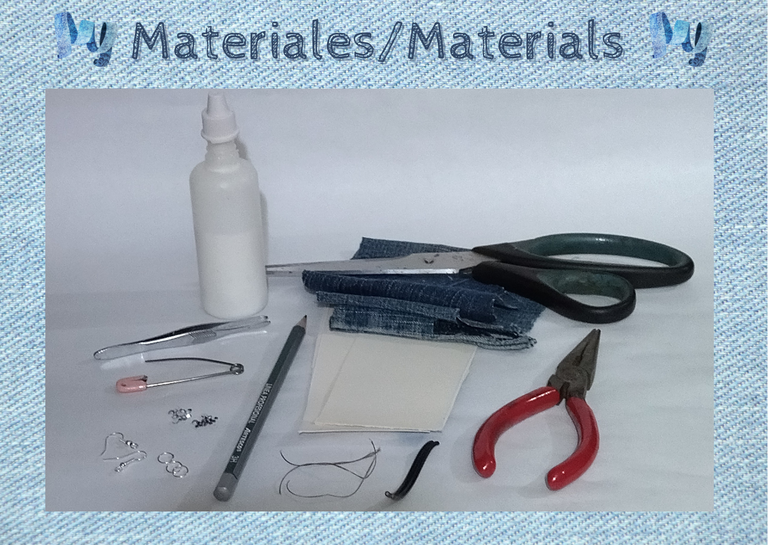
- Blue jeans fabric.
- Cardboard.
- Pencil.
- Scissors.
- White glue.
- Thin wire.
- Thick pin.
- Small and medium-sized costume jewelry crystals.
- Fine tip tweezers.
- Medium size costume jewelry earrings.
- Base for hanging tendrils (hooks).
- Fine-nosed pliers.

Hola a todos... 🐱🐾💕
Hola a mis queridos Hiver y a la querida comunidad de #Jewelry, ante todo un saludo muy especial lleno de bendiciones para los creadores, administradores, moderadores y por supuesto para los que hacen vida en esta bonita comunidad. Me encuentro muy complacida de encontrarme por acá para mostrarles unos accesorios en blue jeans.
Para hoy les traigo unos dijes de Mariposas elaborados en blue jeans.
Esperando que sean de su agrado, por acá les dejo el procedimiento.
Comencemos:😃

• Tela de blue jeans.
• Cartón.
• Lápiz.
• Tijera.
• Pega blanca.
• Alambre fino.
• Alfiler grueso.
• Cristales pequeños y medianos de bisutería.
• Pinza punta fina.
• Argollas medianas de bisutería.
• Base para zarcillos colgante (anzuelos).
• Alicate punta fina.

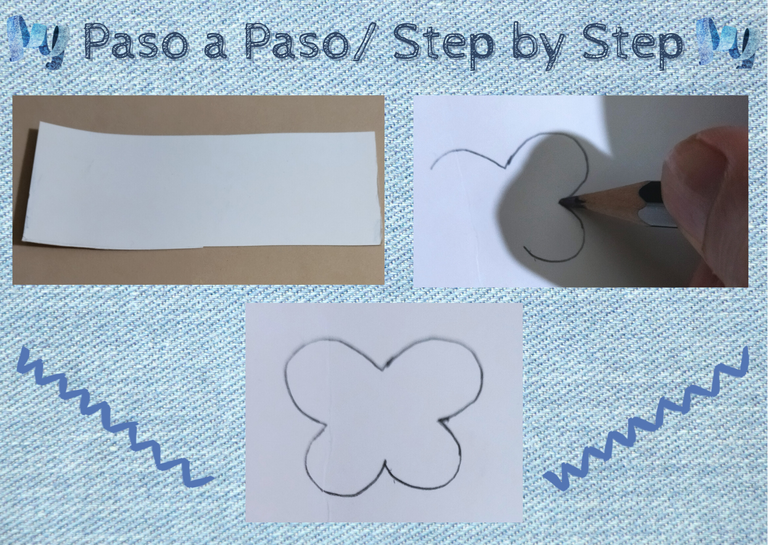
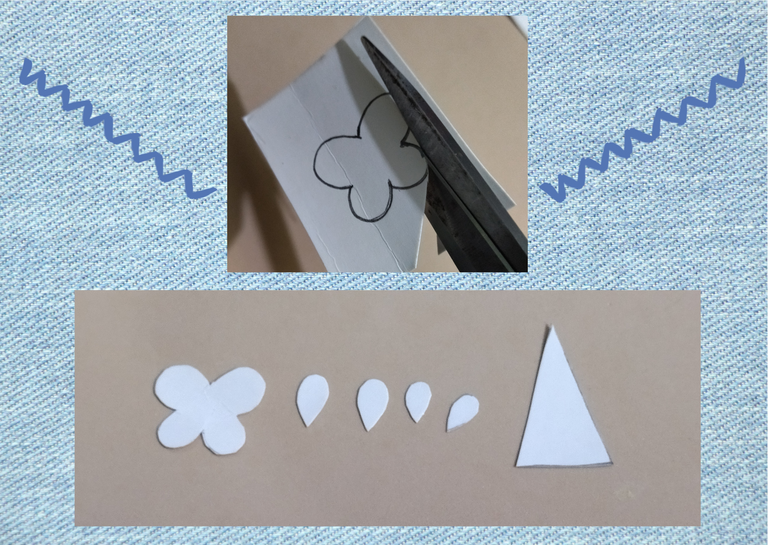
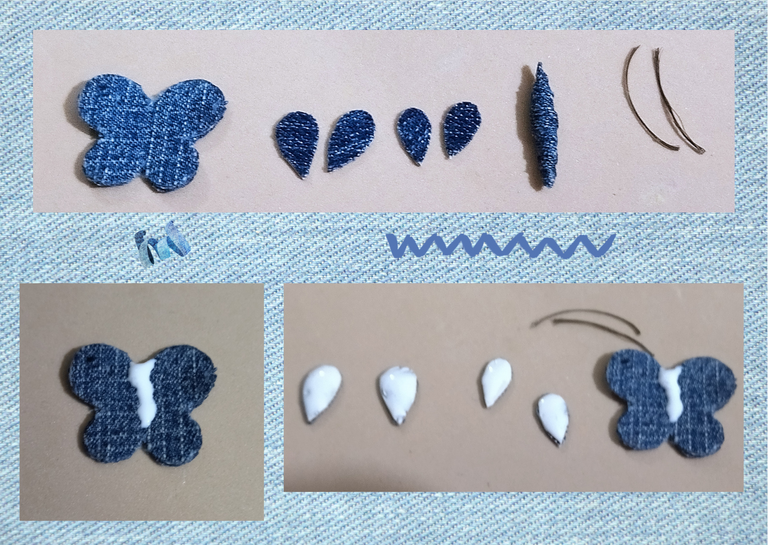
- To begin we are going to take some pieces of thin cardboard that I took from a box I had, this we are going to use to make some templates to make our charms, I decided to make templates so that my piece will be firmer.
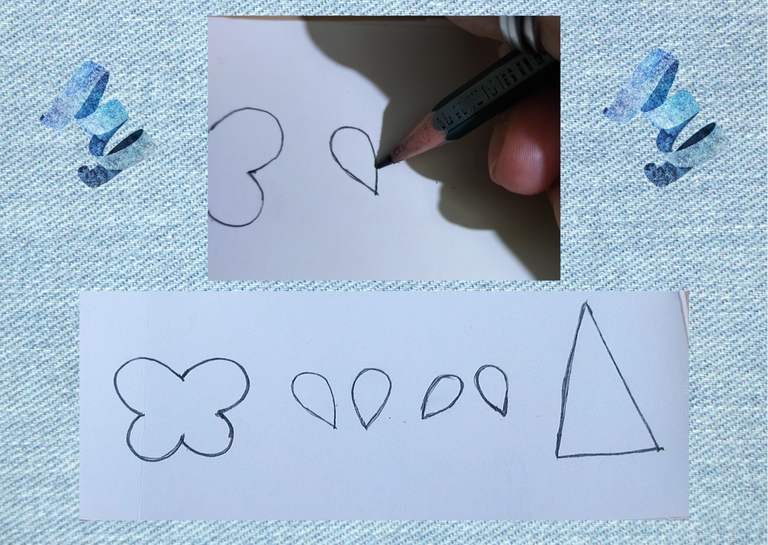
- We take a pencil, and we will draw several templates, we will draw the silhouette of a butterfly, we will draw 4 wings, two large, and two smaller ones, these we will make a little smaller than the main template which is the silhouette of the butterfly, in the images you will see more clearly the explanation that I am giving you.
- We are also going to draw a triangle, this more than a template, it will be a pattern to draw the cut that we will use to make the body of the butterfly. I am not going to give you any measurements since you can make the templates in the size you prefer, depending on how you want your butterflies to look like.
- In the images I will only leave you the templates that we will need for the elaboration of each piece (1), the more pieces we want to make, we will repeat the amount of templates that are necessary. In the case of the triangle, it is enough to make just one, since as I mentioned before it is a pattern to make a cut, we can save it to make the others we need.
- Now we have the pattern of our templates, with a scissors we are going to cut them all out.

• Para comenzar vamos a tomar algunos trozos de cartón delgado que tome de una caja de tapabocas que tenía, este lo vamos a utilizar para realizar unas plantillas para elaborar nuestros dijes, decidí realizar plantillas para que mi pieza quede más firme.
• Tomamos un lápiz, y vamos dibujar varias plantillas, dibujaremos la silueta de una mariposa, así mismo dibujaremos 4 alas, dos grandes, y dos más pequeñas, estas las vamos a realizar un poco más pequeñas que la plantilla principal que es la silueta de la mariposa, en las imágenes se darán cuenta más claramente de la explicación que les voy dando.
• También vamos a dibujar un triángulo, este más que una plantilla, será un patrón para sacar el corte que utilizaremos para realizar el cuerpo de la mariposa. No les voy a dejar medidas ya que pueden realizar las plantillas del tamaño que más prefieran, según como desean que queden sus mariposas.
• En las imágenes solo les dejare las plantillas que necesitaremos para la elaboración de cada pieza (1), mientras más piezas queramos realizar, repetiremos la cantidad de plantillas que sean necesarias. En el caso del triángulo nos basta con hacer solo uno, ya que como les mencione con anterioridad es un patrón para sacar un corte, podemos guardarlo para sacar los demás que necesitemos.
• Ya tenemos el patrón de nuestras plantillas, con una tijera vamos a recortarlos todos.
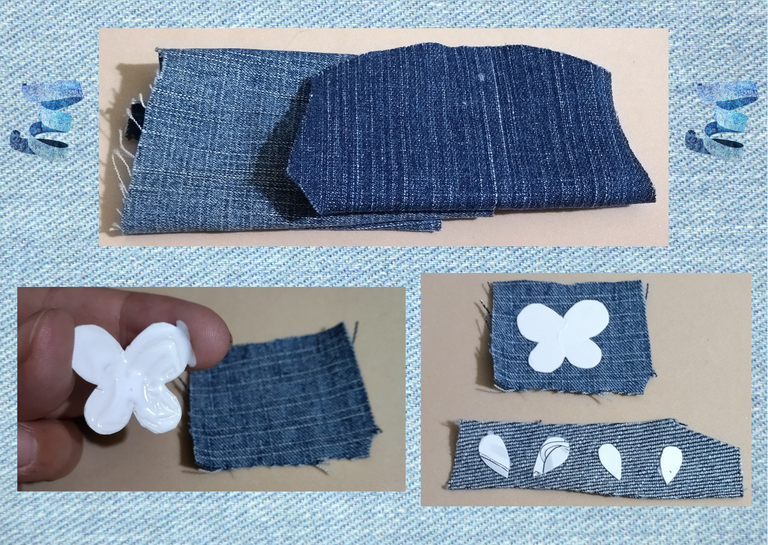
- Now we have the templates cut out, we will take the Jean fabric, and proceed to glue the templates on the fabric, (only the silhouette of the butterfly and the 4 wings), we will do it on the back side of the fabric, we will do this with white glue, in my case I use carpentry glue which is the strongest, this way we will prevent them from peeling off. I glued the silhouette of the butterfly on a slightly lighter jean fabric (I would have liked it to be even lighter to make it stand out more hahaha), the wings on a slightly darker one I had.
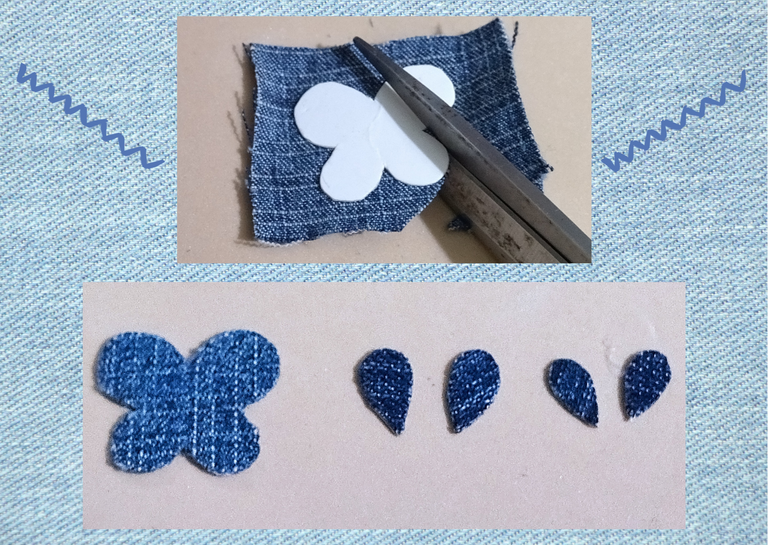
- Once the templates are glued on the fabric, now with the scissors we proceed to cut them out just as we did when we drew them on the cardboard.
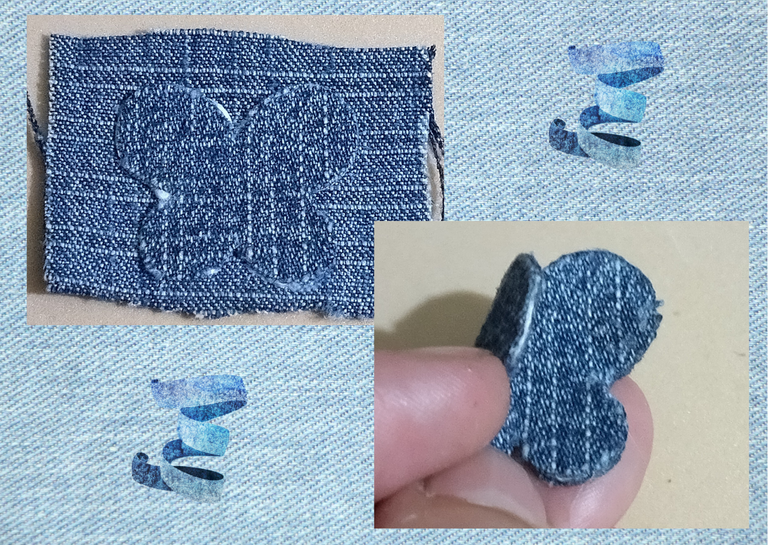
- The silhouette of the butterfly we are going to glue it again on the back of a piece of blue jean so that it is lined on both sides (we cut it out), with the wings it is not necessary to do it.

• Ya tenemos las platillas recortadas, tomaremos la tela de Jean, y procederemos a pegar las plantillas en la tela, (solo la silueta de la mariposa y las 4 alas), lo haremos en la parte revés de la tela, esto lo haremos con cola blanca, en mi caso uso pega de carpintería que es la más fuerte, de esta manera evitaremos que se despeguen. La silueta de la mariposa la pegue en una tela de jean un poco clara, (me hubiese gustado que fuera aún más clara para que resaltara más jajajaja), las alas en una un poco más oscura que tenía.
• Pegadas las plantillas en la tela, ahora con la tijera procedemos a recortarlas tal cual como lo hicimos cuando las dibujamos en el cartón.
• La silueta de la mariposa vamos a pegarla nuevamente en la parte trasera de un trozo de blue jean para que quede forrada por ambas caras (recortamos), con las alas no es necesario hacerlo.
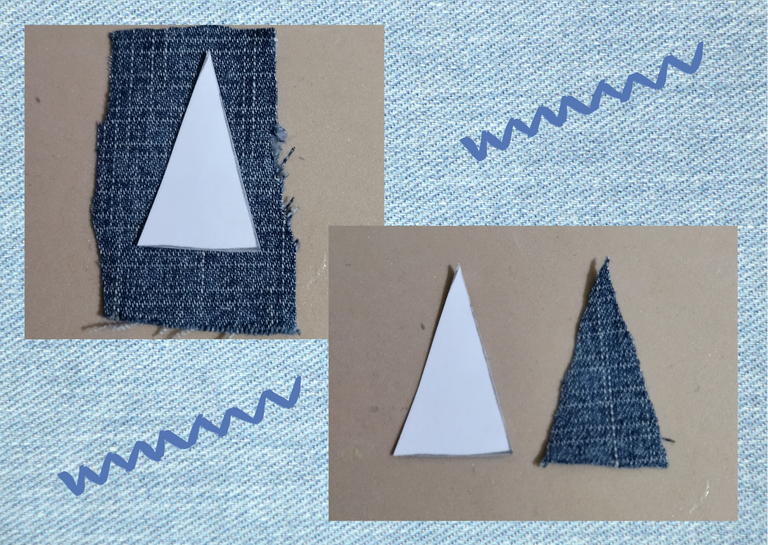
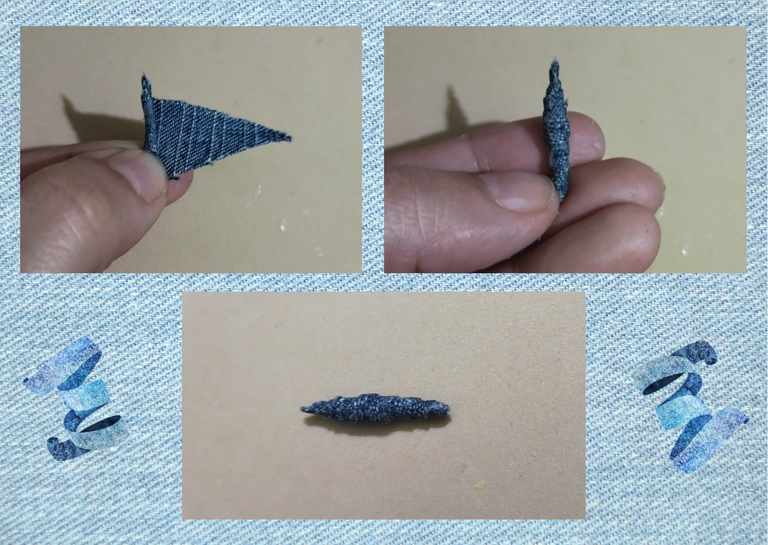
- Now we go with the body of the butterfly, we take the pattern that we cut in the shape of a triangle, and we make a cut in a piece of blue jean fabric, we will repeat according to the pieces we want to make. Once cut we are going to roll the piece of fabric starting with the widest part, when we reach the end we seal it with glue.

• Ahora vamos con el cuerpo de la mariposa, tomamos el patrón que cortamos en forma de triángulo, y realizamos un corte en un trozo de tela de blue jean, repetiremos según las piezas que queramos hacer. Una vez cortado vamos a enrollar el trozo de tela comenzando por la parte más ancha, al llegar al final sellamos con pega.
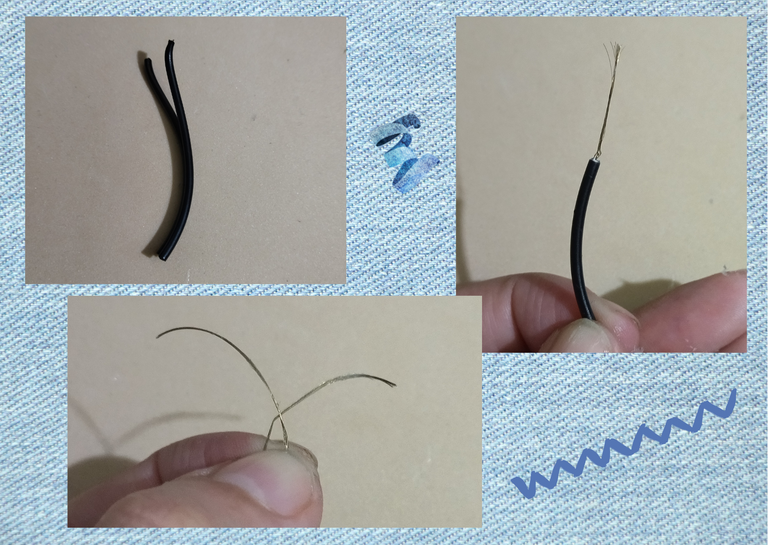
- Now let's go with the antennas of the butterfly, take a leftover wire I had and carefully cut the plastic to remove the wire inside, that wire will mold it to our liking to form the antennas of the butterfly.
- Now we have our pieces ready, before joining them we will take the silhouette of the butterfly and open a small hole with the thick pin I suggested, we will do this to be able to put the ring at the end of the piece, I do it previously to avoid damaging the pendant once it is ready.

• Ahora vamos con las antenas de la mariposa, tome un sobrante de cable que tenía y corte con mucho cuidado el plástico para sacarle el alambre que tiene dentro, ese alambre lo moldearemos a nuestro gusto para formar las antenas de la mariposa.
• Ya tenemos nuestras piezas listas, antes de unirlas tomaremos la silueta de la mariposa y abriremos un pequeño hoyo con el alfiler grueso que le sugerí, esto lo haremos para poder meter la argolla al finalizar la pieza, lo hago previamente para evitar dañar el dije una vez esté listo.
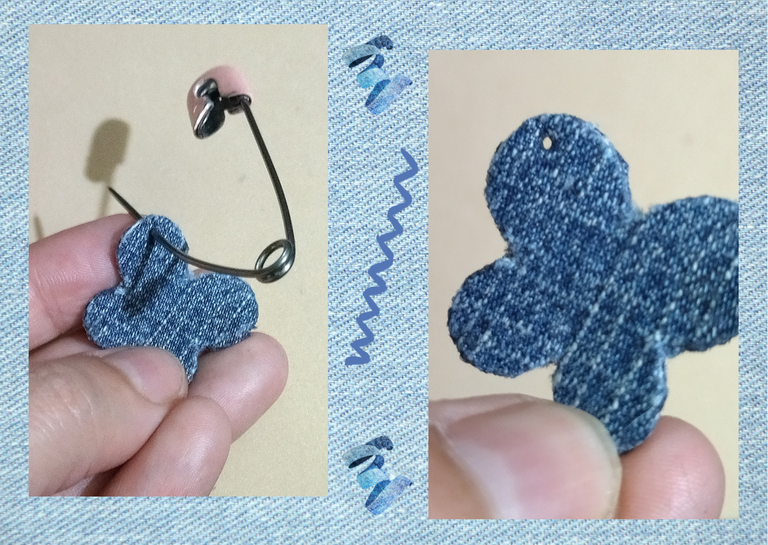
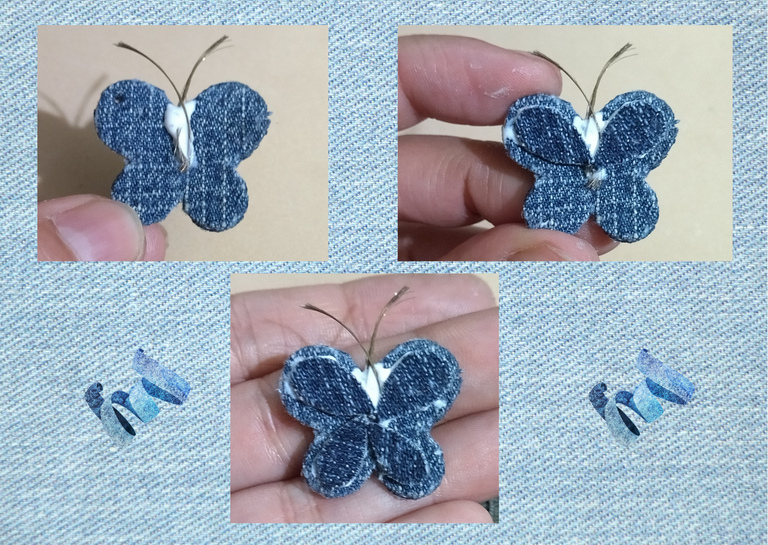
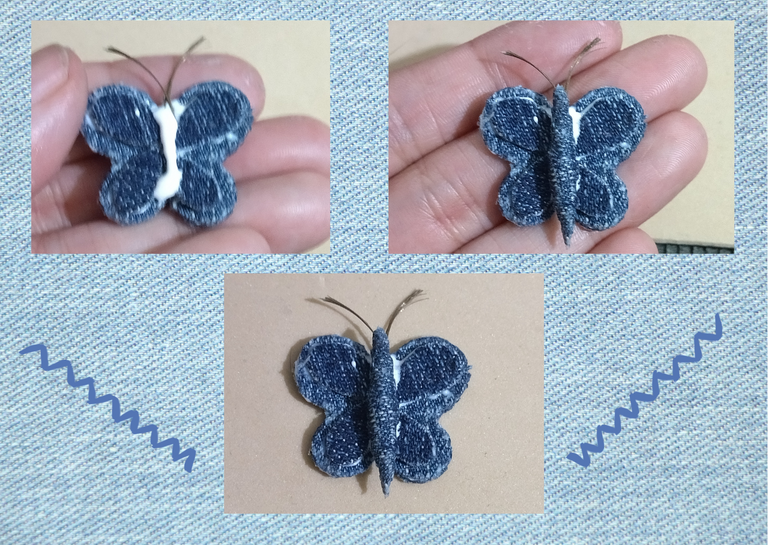
- Now let's put the pieces together, place glue in the center of the butterfly silhouette to place the antennae first so they will be attached to the wings and the body that we will glue later. Put glue on the back of the wings so that when we place the antennae we place the wings immediately, when we finish we will place glue in the central part and we will place the body. Let dry well and then glue the remaining details, and finish our work.

• Ahora vamos a unir las piezas, coloquemos pega en el centro de la silueta de la mariposa para colocar primero las antenas, de esa manera van a quedar sujetas con las alas y el cuerpo que pegaremos posteriormente. Pongamos pega en la parte trasera de las alas para de esta manera al colocar las antenas coloquemos de inmediato las alas, al culminar colocaremos pega en la parte central y colocaremos el cuerpo. Dejamos secar bien para luego pegar los detalles restantes, y culminar nuestro trabajo.
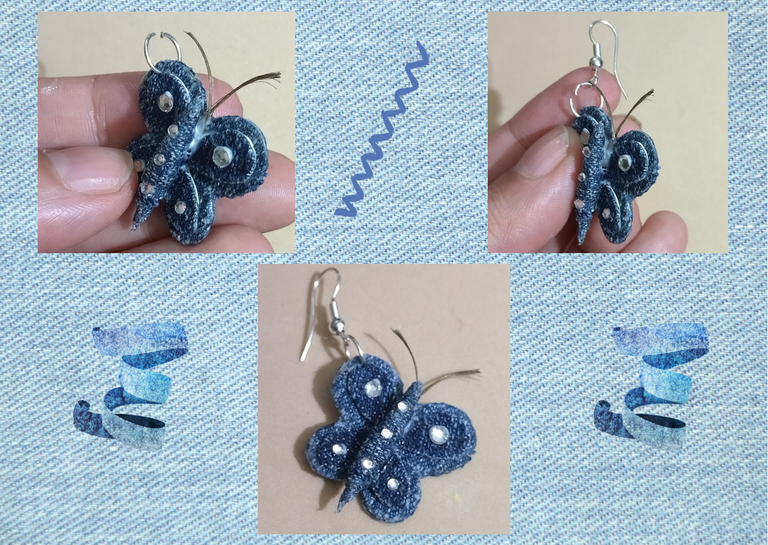
- Now we will place the last details to complete our set, we are going to place some costume jewelry crystals in different points, you can add them where you prefer, you can also place in substitution of the crystals some pearls if you like, just decorate letting your imagination fly.
- Finally we are going to place the ring to the piece of the pendant for the necklace, and the ring plus the hook to the pieces that I made for some hanging earrings.
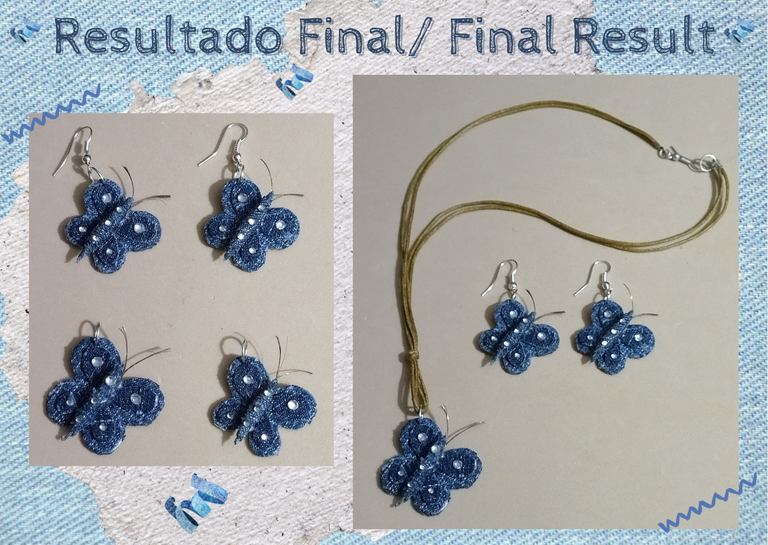
This way we already have the pieces of the set ready to be mounted on the necklace of your choice and ready to use.

• Ahora colocaremos los últimos detalles para culminar nuestro conjunto, vamos a colocar unos cristales de bisutería en diferentes puntos, los puedes agregar donde más lo prefieras, también puedes colocar en sustitución de los cristales algunas perlas si es de tu gusto, solo adorna dejando volar tu imaginación.
• Por ultimo vamos a colocar la argolla a la pieza del dije para collar, y la argolla más el anzuelo a las piezas que realice para unos zarcillos colgantes.
De esta manera ya tenemos las piezas del conjunto listas para montar en el collar de tu preferencia y para su uso.
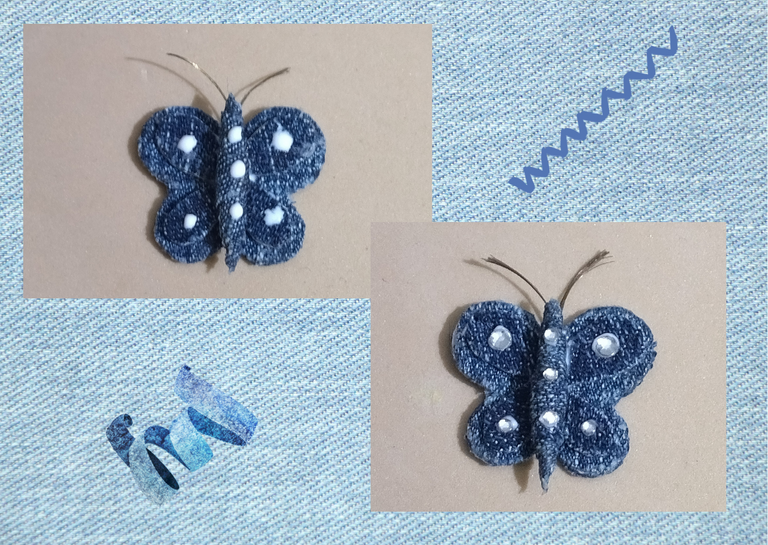

As you can see I made a butterfly of the same size as the one I put on the earrings, and another one a little bit bigger to use as a necklace charm, this way we can vary.
As always I emphasize you can make the pieces combining the sizes as you prefer.

Como podrás apreciar realice una mariposa del mismo tamaño de la que le coloque a los zarcillos, y otra un poco más grande para utilizar como dije de collar, de esta manera podemos variar.
Como siempre recalco puedes realizar las piezas combinando los tamaños como lo prefieras.
What did you think, did you like it?
I hope you did, I hope you liked my explanation, procedure and photos, I made them with love for you.
"Let out that muse that inspires you, and let your imagination fly".
Thank you all, see you next time. 🐾🐱💕

¿Que les pareció, les gustó?
Espero que sí, que les haya gustado mi explicación, procedimiento y fotos, los hice con mucho cariño por y para ustedes.
"Deja salir esa musa que te inspira, y deja volar tu imaginación".
Gracias a todos, nos vemos en la próxima. 🐾🐱💕

Todas las fotos usadas en este post son de mi autoría y han sido sacadas en mi celular personal un Redmi 9T y editadas Canva Banner hecho por mí en Paint Tool Sai Traducido con la ayuda de DeepL


