Hello everyone... 🐱🐾💕
Hello to my dear Hiver and the dear community of #Jewelry, first of all a very special greeting full of blessings for those who make life in this beautiful community. I am very pleased to be here to show you a new work full of love, and especially for you.
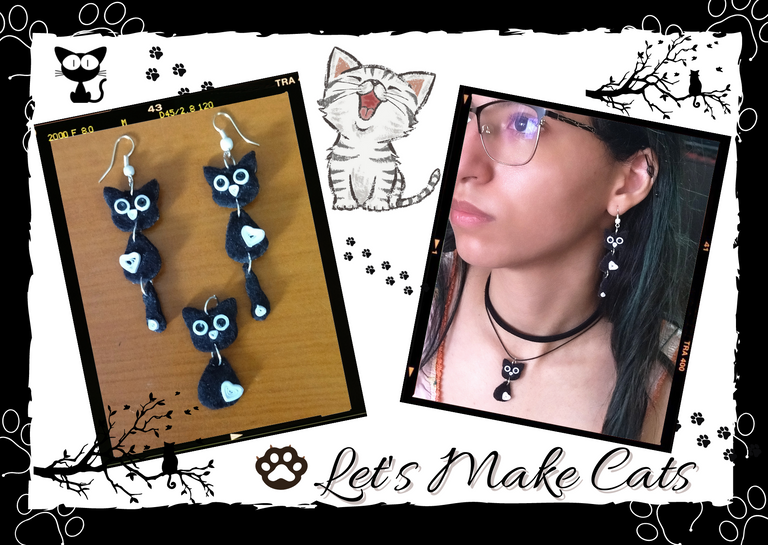
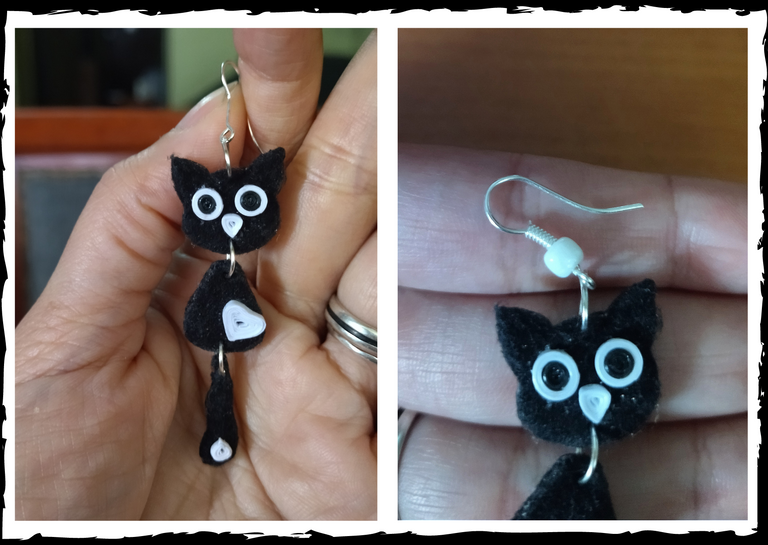
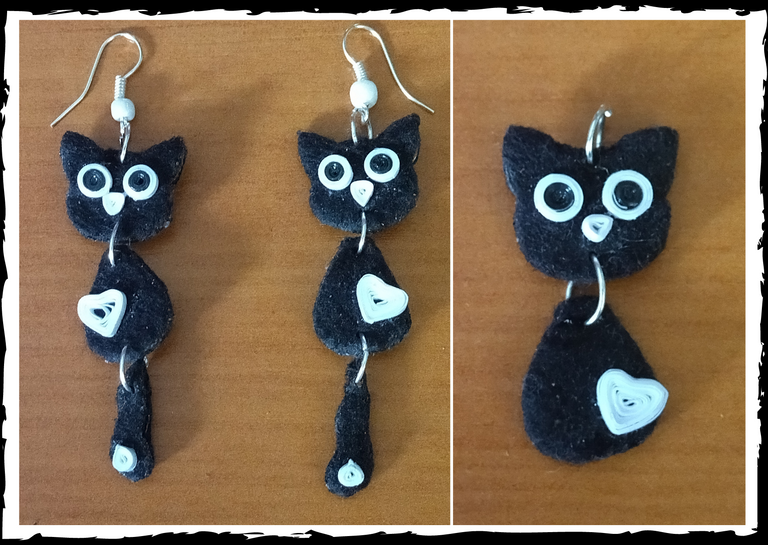
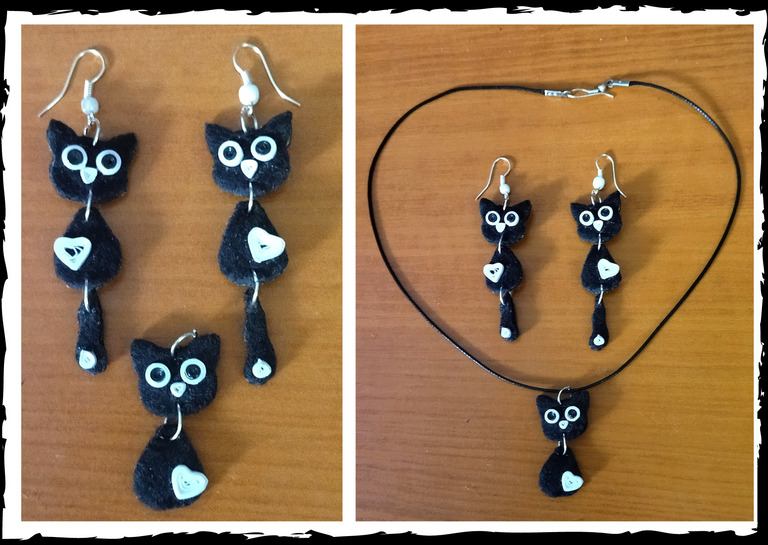
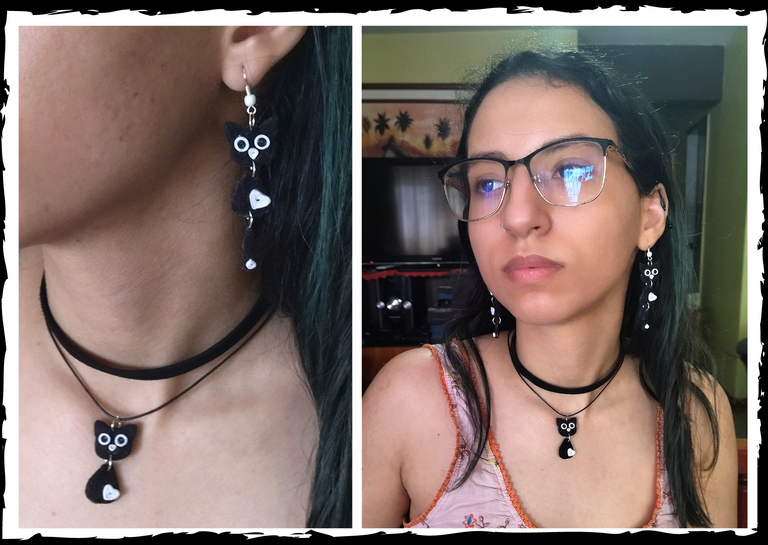
For today as a faithful lover of the beautiful michis, I bring you a hanging kitty charm made of fabric with cardboard, decorated with details made in the paper quilling technique, which can be used as you like, for a hanging earrings, necklace charm, for a cell phone, keychain, etc, it's just a matter of taste and let your imagination fly.
Let's get started: 😃

Hola a todos... 🐱🐾💕
Hola a mis queridos Hiver y a la querida comunidad de #Jewelry, ante todo un saludo muy especial lleno de bendiciones para los que hacen vida en esta bonita comunidad. Me encuentro muy complacida de encontrarme por acá para mostrarles un nuevo trabajo lleno de amor, y especialmente para ustedes.
Para el día de hoy como fiel amante de los hermosos michis, les traigo un dije de gatito colgante realizado en tela con cartón, decorado con detalles realizados en la técnica de paper quilling, el cual pueden utilizar como sea su gusto, para unos zarcillos colgantes, dije de collar, para un para celular, llavero, etc, solo es cuestión de gustos y de dejar volar tu imaginación.
Comencemos:😃

• Cintas de quilling de 1mm de ancho blancas y negras.
• Trozo de cartón fino.
• Alfiler punta gruesa.
• Tela color negro (manta polar), o la de tu preferencia.
• Regla con diversas medidas de circunferencia.
• Lápiz o bolígrafo.
• Aguja con ranura para enrollar quilling.
• Pega blanca extra fuerte (carpintería).
• Tijera.
• Alicate punta fina.
• Argollas medianas de bisutería.
• Base para zarcillos colgantes (anzuelos).
• Perlas blancas.
• Pincel.
- 1mm wide black and white quilling ribbons.
- Piece of thin cardboard.
- Thick pin.
- Black fabric (polar blanket), or the one of your preference.
- Ruler with different circumference measurements.
- Pencil or pen.
- Needle with a slot to roll quilling.
- Extra strong white glue (carpentry).
- Scissors.
- Fine-nosed pliers.
- Medium size costume jewelry earrings.
- Base for hanging tendrils (hooks).
- White beads.
- Brush.

I am going to show you how to make a complete piece, you will make the amount, depending on the pendants you want to make.
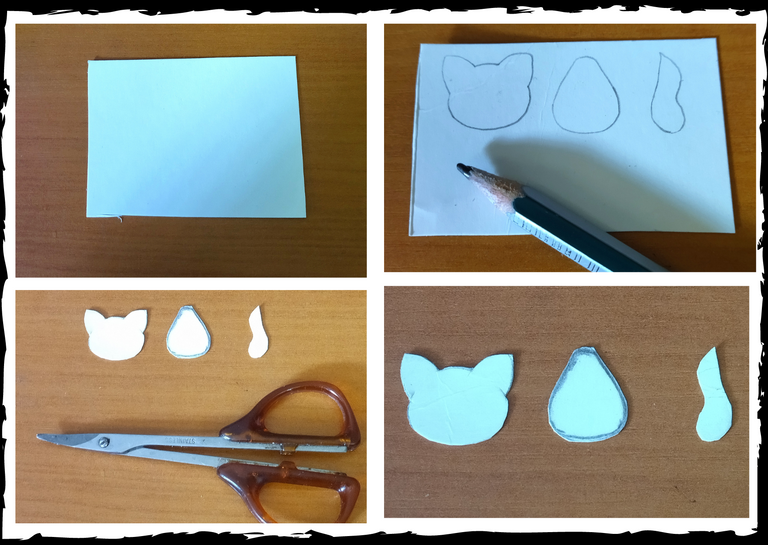
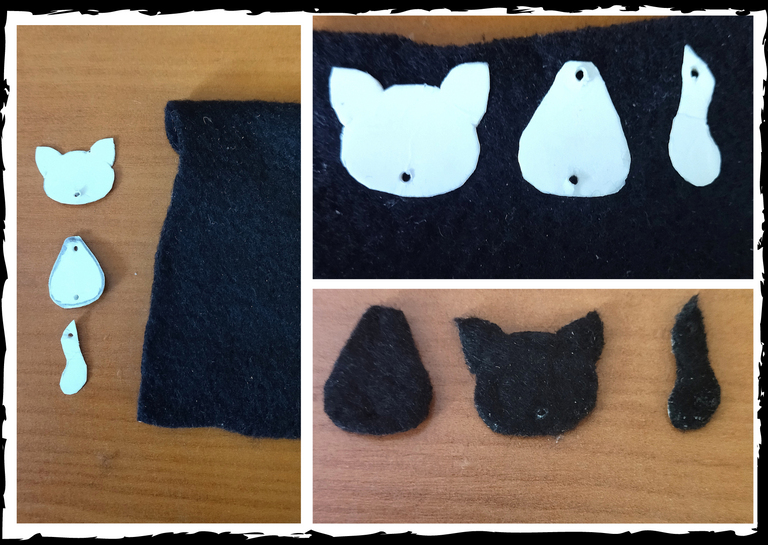
- Let's start by taking a piece of thin cardboard, no matter what color it is, with it we will make a pattern that we will draw with a pencil with the pieces that we will make, in my case the pendant will have 3 pieces, the head of the kitten, the body and the tail, they will be the base of our pendant. I attach the image and you will make it in the size of your preference. Once the pieces are drawn, we cut them out.
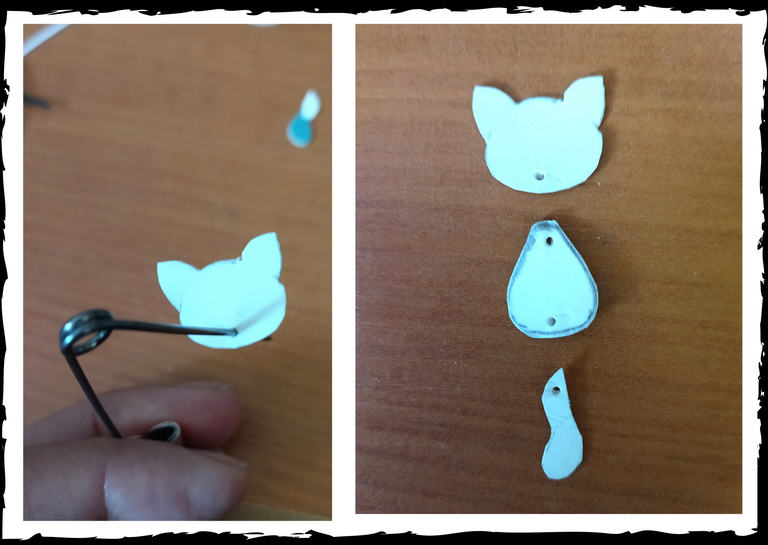
- Cut out the patterns or bases for our pendant, with a thick pin we are going to make a hole in different parts, in the head will be at the top and bottom, in the body at the top and bottom and in the tail at the top, I do this at once so as not to break the cardboard or the piece when adding the fabric and make the holes, in this way put the fabric will be easier to insert the pin.
- Let's take a piece of fabric, I used a black polar blanket, we are going to glue with extra strong white glue the cardboard on the fabric, once dry, cut it out. We will do it on the reverse side also so that our pieces are lined on both sides with fabric, cut and reserve the pieces.

Les voy a mostrar cómo realizar una pieza completa, ustedes harán la cantidad, según los colgantes que deseen realizar.
• Vamos a comenzar tomando un trozo de cartón fino, no importa del color que sea, con el vamos a realizar un patrón que dibujaremos con un lápiz con las piezas que vamos a realizar, en mi caso el colgante tendrá 3 piezas, la cabeza del gatito, el cuerpo y la cola, ellas serán la base de nuestro colgante. Le anexo la imagen y ustedes lo harán del tamaño de su preferencia. Dibujadas las piezas recortamos.
• Recortados los patrones o bases para nuestro colgante, con un alfiler punta gruesa le vamos a hacer un hoyo en diversas partes, en la cabeza será en la parte de arriba y abajo, en el cuerpo arriba y abajo y en la cola en la parte de arriba, esto lo hago de una vez para que no se rompa el cartón o la pieza al añadirle la tela y hacer los hoyos, de esta manera puesta la tela será más fácil introducir el alfiler.
• Tomemos un trozo de tela, yo utilice manta polar negra, vamos a pegar con pega blanca extra fuerte los cartones en la tela, una vez secos, recortamos. Lo haremos por el lado inverso también para que nuestras piezas queden forradas por ambos lados con la tela, recortamos y reservamos las piezas.
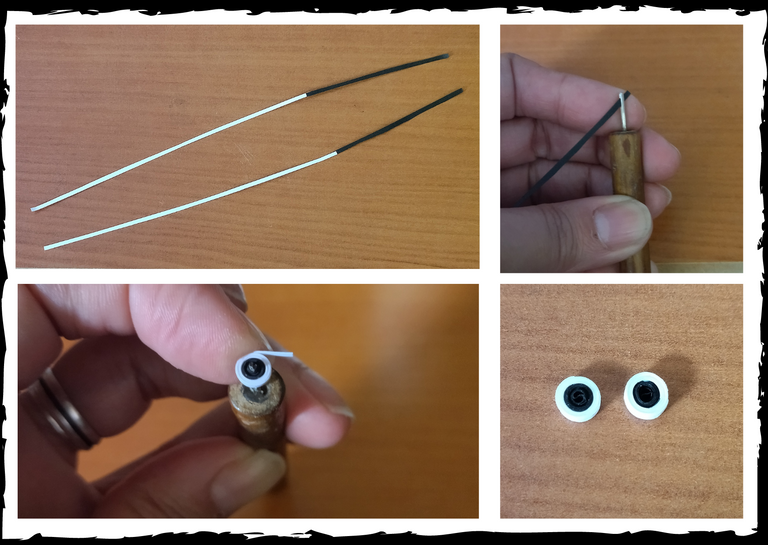
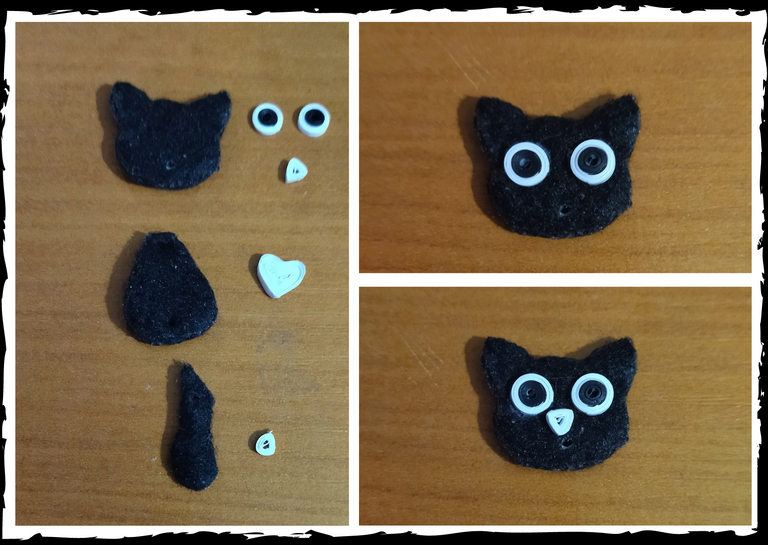
- Let's go with the details that we will add to the pieces, let's make the eyes of the kitten, take a piece of white quilling tape 1mm wide x 10cms long and another piece of black quilling tape 1mm wide x 5cms long, we join both tapes forming one, with the quilling needle we roll starting with the black part until the end of the tape, we will obtain a closed circle, repeat the same process according to the number of pendants that we are going to make, for each one there will be two eyes.
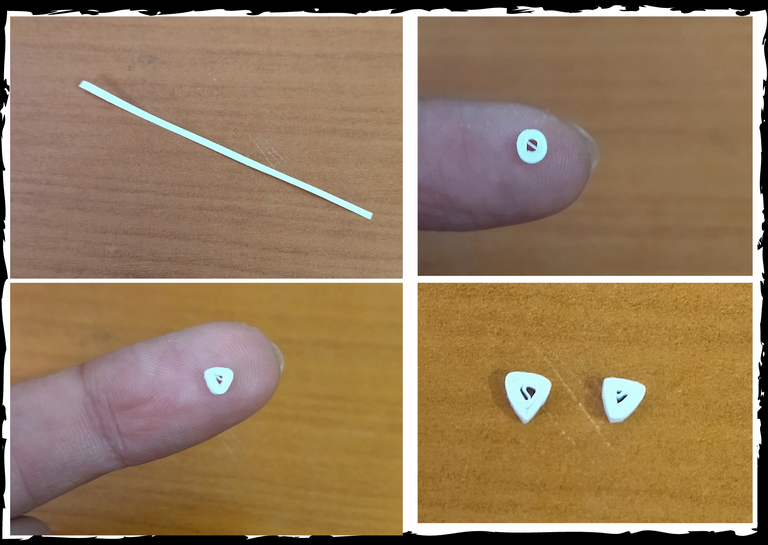
- Let's go with the nose, we take a piece of white quilling ribbon 1mm wide x 6cms long, we roll it with the needle, we will obtain a small circle to which we will give a triangle shape, each pendant will need 1 piece like this.
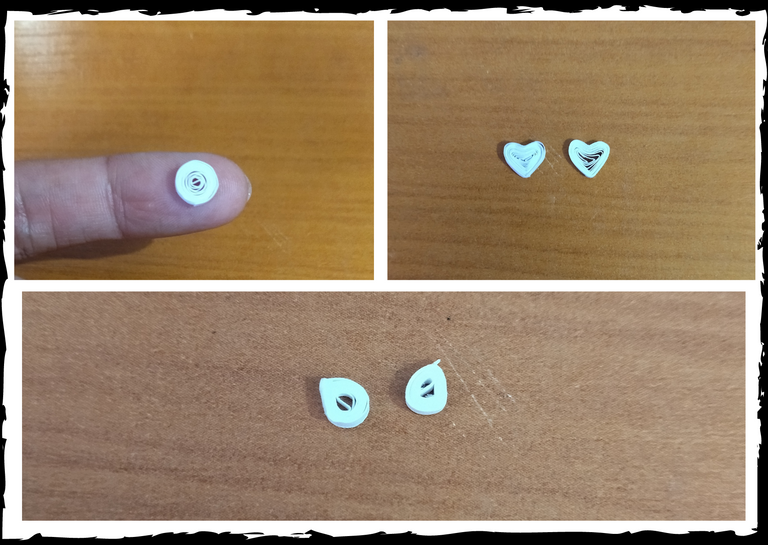
- Now let's take a piece of ribbon 1mm wide x 20cms long white color, we roll it in the quilling needle, try not to tighten so much, we will obtain a closed circle and we will give it the shape of a heart, we reserve it since we will use it to decorate.
- Finally with regard to the accessories with quilling we will take a piece of white ribbon 1mm wide x 6cms long, and with the needle we roll it to obtain a small closed circle, we can give it any shape, we reserve.

• Vamos con los detalles que le añadiremos a las piezas, hagamos los ojos del gatito, tomemos un trozo de cinta de quilling blanca de 1mm de ancho x 10cms de largo y otro trozo de cinta de quilling negro de 1mm de ancho x 5cms de largo, unimos ambas cintas formando una sola, con la aguja de quilling enrollamos empezando por la parte negra hasta llegar al final de la cinta, obtendremos un círculo cerrado, repetiremos el mismo proceso según la cantidad de colgantes que vayamos a realizar, para cada uno serán dos ojos.
• Vamos con la nariz, tomamos un trozo de cinta de quilling color blanco de 1mm de ancho x 6cms de largo, enrollamos con la aguja, obtendremos un pequeñito circulo al que le daremos forma de triángulo, cada colgante necesitara 1 pieza como esta.
• Ahora tomemos un trozo de cinta de 1mm de ancho x 20cms de largo color blanco, enrollamos en la aguja para quilling, tratamos de no apretar tanto, obtendremos un círculo cerrado y le daremos forma de un corazón, reservamos ya que usaremos para adornar.
• Por ultimo en lo que respecta a los accesorios con quilling tomaremos un trozo de cinta blanca de 1mm de ancho x 6cms de largo, y con la aguja enrollamos para obtener un pequeño círculo cerrado, podemos darle cualquier forma, reservamos.
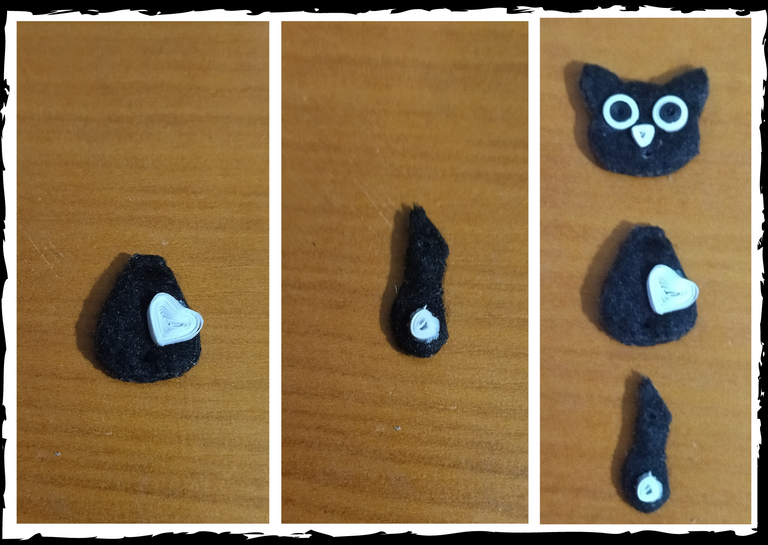
- We already have the bases and ornaments of our pendant ready, let's decorate. We start by gluing the eyes to the kitten, we continue with the nose, these pieces will go on the head, then we will place the heart on the body, and finally the small circle on the tail, in the images you will see how they are placed.
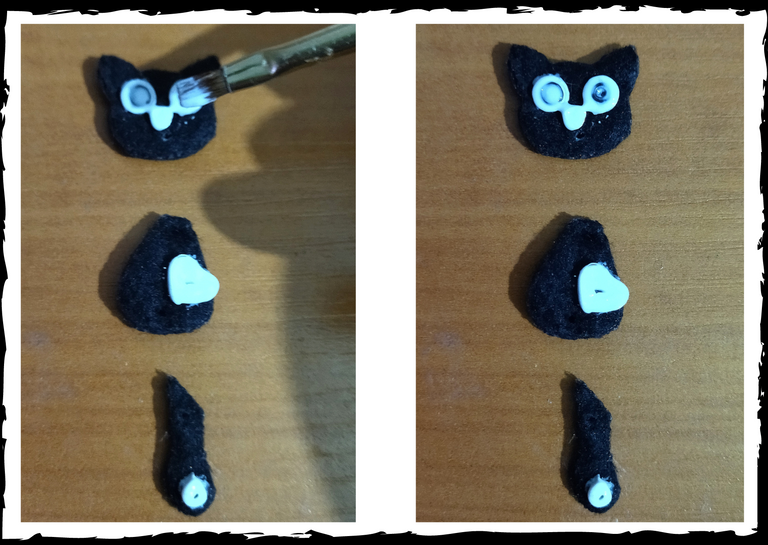
- With a brush we are going to put extra strong glue to all the pieces made with quilling, to give it a better finish and protection.
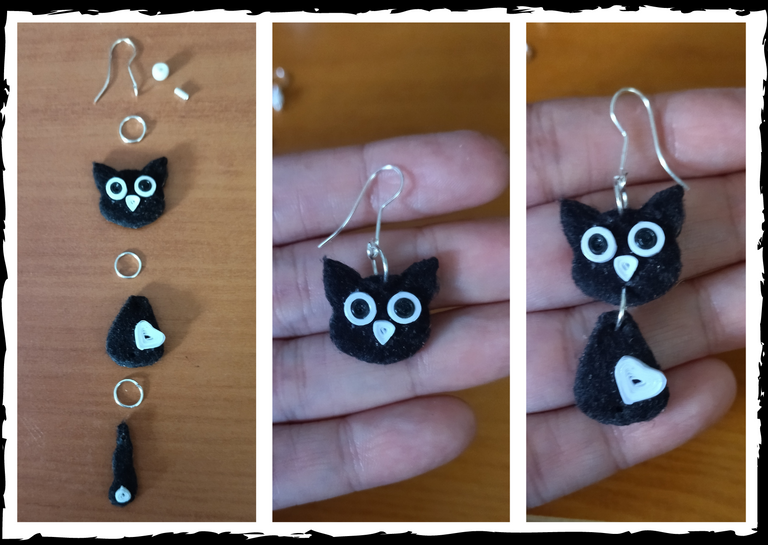
- To finish we assemble the hanging earrings, in the holes previously made, we will place the medium size costume jewelry rings, in the head we will place one in the upper part where we will put the base for the hanging tendrils (hook), then in the lower part of the head we will place another medium size ring, there we will connect in the same ring the part of above of the body in the part of under of the body will go the remaining ring in which we will put the tail of the cat, and finally you will be able to observe that to the hook I place a white pearl to him to decorate and to be seen more showy.
In this way we will have ready our pretty tendrils or pendant earrings of kitten. Additionally, I made one with only two pieces. I omitted the tail so that it would not be so long, and we can use it as a pendant for a necklace, if you like it long you can place its tail.

• Ya tenemos las bases y adornos de nuestro colgante listos, vamos a decorar. Comenzamos pegando los ojos al gatito, seguimos con su nariz esas piezas irán en la cabeza, luego vamos a colocar el corazón en el cuerpo, y por último el pequeño círculo en la cola, en las imágenes verán cómo van colocadas.
• Con un pincel vamos a ponerle pega extra fuerte a todas las piezas elaboradas con quilling, para darle mejor acabado y protección.
• Para finalizar armamos los pendientes colgantes, en los agujeros que previamente les había realizado, irán las argollas medianas de bisutería, en la cabeza colocaremos una en parte de arriba que donde pondremos la base para zarcillos colgante (anzuelo), luego en la parte de abajo de la cabeza ira otra argolla mediana, allí conectaremos en la misma argolla la parte de arriba del cuerpo en la parte de bajo del cuerpo ira la argolla restante en la cual meteremos la colita del gato, y por ultimo podrán observar que a el anzuelo le coloque una perla blanca para decorar y se vea más vistoso.
De esta manera tendremos listos nuestros bonitos zarcillos o pendiente colgantes de gatito. Adicionalmente elabore uno son solo dos piezas. Omití la cola para que no quedara tan largo, y lo podemos usar como un dije para collar, si te gusta largo le puedes colocar su colita.

What did you think, did you like it?
I hope you did, I hope you liked my explanation, procedure and photos, I made them with love for you.
"Let out that muse that inspires you, and let your imagination fly".
Thank you all, see you next time. 🐾🐱💕

¿Que les pareció, les gustó?
Espero que sí, que les haya gustado mi explicación, procedimiento y fotos, los hice con mucho cariño por y para ustedes.
"Deja salir esa musa que te inspira, y deja volar tu imaginación".
Gracias a todos, nos vemos en la próxima. 🐾🐱💕

Todas las fotos usadas en este post son de mi autoría y han sido sacadas en mi celular personal un Redmi 9T y editadas Canva Banner y separador hecho por mí en Canva Traducido con la ayuda de DeepL

