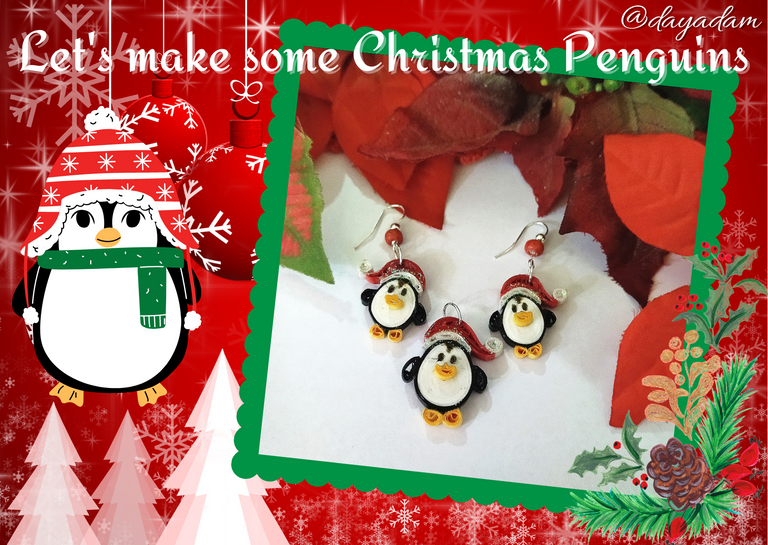
Hello everyone... 🎄🎅✨
Hello to my dear Hiver and the dear community of artists #Jewerlry, as always very pleased and excited to be here again, showing you my work made with love and especially for you.
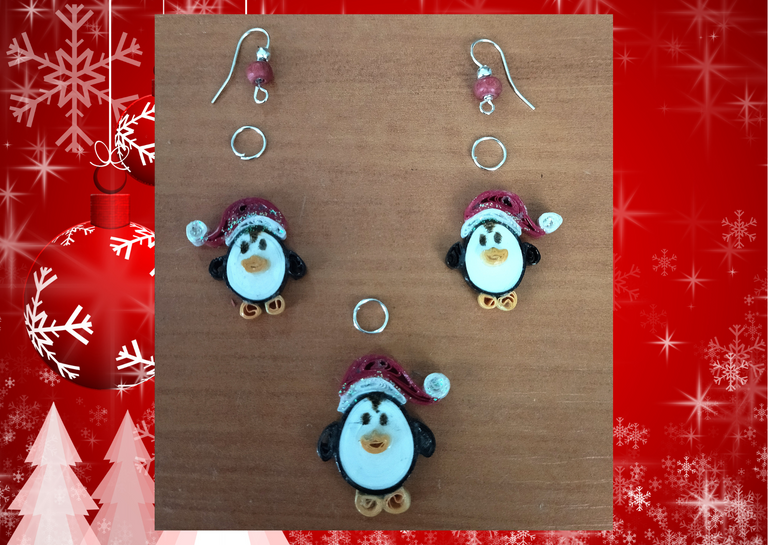
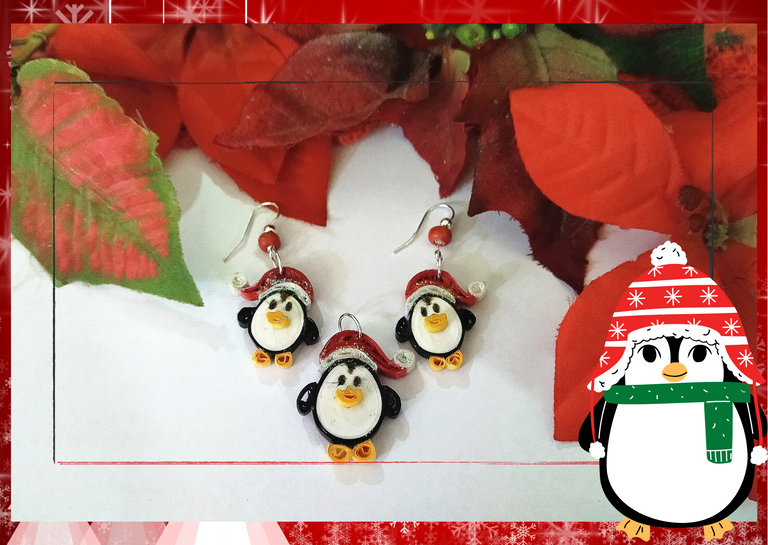
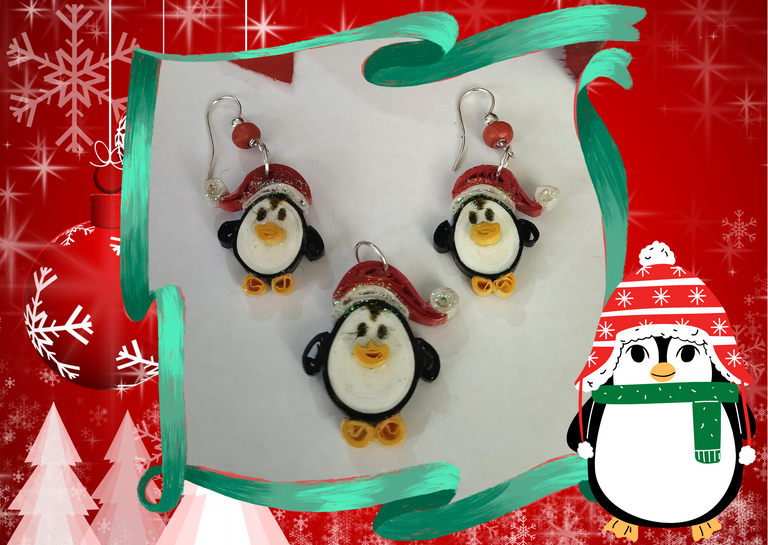
For today I bring you some dangling earrings and a pendant for necklace of Christmas penguins, made in the technique of quilling of very simple elaboration, which we can give multiple uses, as decoration for a gift bag, box or simply an accessory to wear it as I apply it today. Let's continue making those details for this beautiful time as it is Christmas, to give to that special person, or also for sale.
Hoping it will be to your liking:
Let's get started:😃

Hola a todos... 🎄🎅✨
Hola a mis queridos Hiver y a la querida comunidad de artistas #Jewerlry, como siempre muy complacida y emocionada de encontrarme por acá nuevamente, mostrándole mi trabajo hecho con mucho amor y especialmente para ustedes.
Para el día de hoy les traigo unos pendientes colgantes y un dije para collar de unos pingüinos navideños, elaborados en la técnica de quilling de muy sencilla elaboración, el cual podemos darle múltiples usos, como decoración para una bolsa de regalo, caja o un simplemente un accesorio para lucirlo como lo aplique hoy día. Sigamos haciendo esos detalles para esta época tan hermosa como lo es la navidad, para obsequiar a esa persona especial, o también para la venta.
Esperando sea de su agrado:
Comencemos:😃

• Cintas de quilling de 3mm de ancho blancas, negras, rojas y naranjas.
• Aguja para quilling.
• Pega blanca extra fuerte (de carpintería).
• Gel escarchado.
• Tijera.
• Regla con diversas medidas de circunferencia.
• Marcador negro punta fina.
• Base para zarcillos colgantes (anzuelos).
• Perlas de madera rojas.
• Argollas medianas de bisutería.
• Pincel.
• Alicate punta fina.
• Collar de tu preferencia.
- 3mm wide quilling ribbons in white, black, red and orange.
- Quilling needle.
- Extra strong white glue (woodworking glue).
- Frosted gel.
- Scissors.
- Ruler with different circumference measurements.
- Black fine tip marker.
- Base for hanging tendrils (hooks).
- Red wooden beads.
- Medium-sized costume jewelry earrings.
- Paintbrush.
- Fine point pliers.
- Necklace of your choice.

I am going to show you how to make a single pendant. You will make the quantity according to the set and accessories you wish to make. In my case I will make a pair of dangling earrings and a necklace charm.
For the penguin's body:🐧
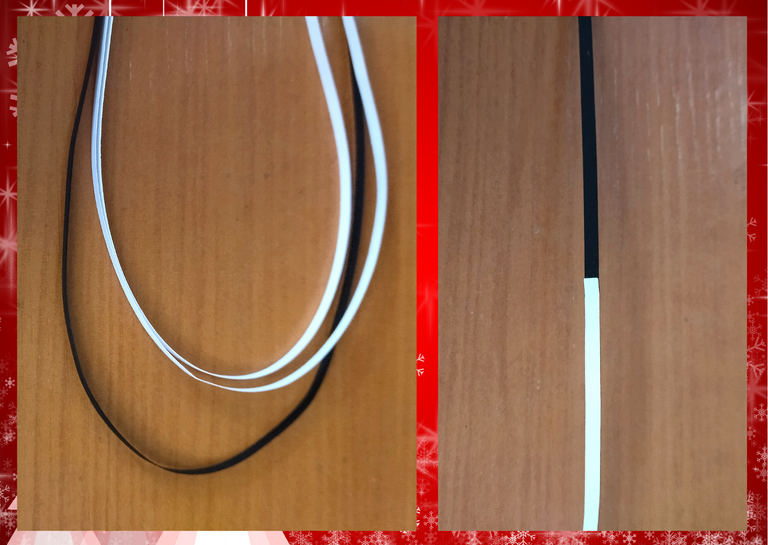
- We are going to start by taking a piece of white quilling ribbon 3mm wide x 150cms long and a piece of black ribbon 3mm wide x 25cms long, we are going to join together to form a single ribbon.
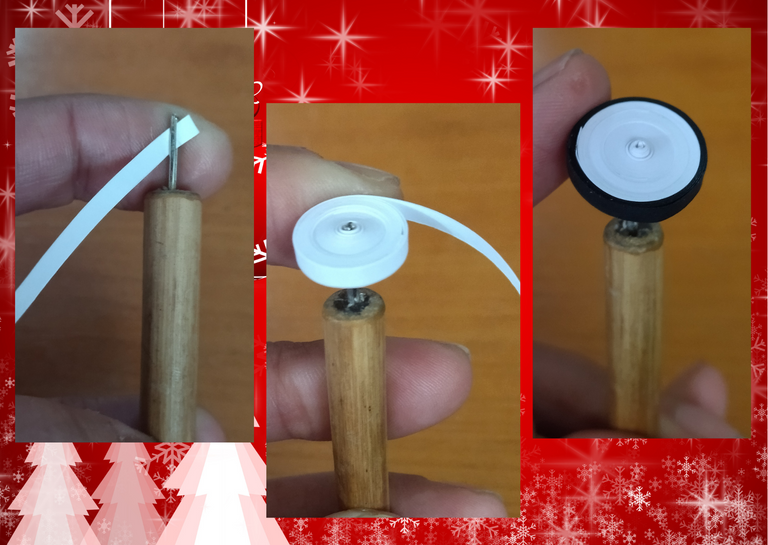
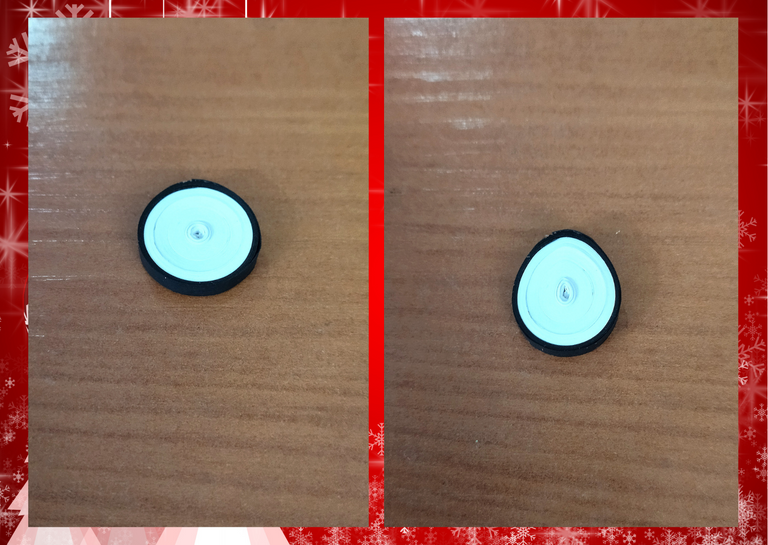
- With the quilling needle we begin to roll up the white part until the end with the black part, we seal with a point of white carpentry glue, to obtain a closed circle, this circle we will press it by the sides to give it an oval shape, (we reserve).
If you want to dispel any doubts regarding the technique or step by step, which will be used in this post, you can visit the following link, below:

Les voy a mostrar la elaboración de un solo dije. Ustedes la harán la cantidad según el conjunto y accesorios que deseen hacer. En mi caso realizare un par de zarcillos colgantes y un dije para collar.
Para el cuerpo del pingüino:🐧
• Vamos a comenzar tomando un trozo de cinta de quilling blanca de 3mm de ancho x 150cms de largo y un trozo de cinta negra de 3mm de ancho x 25cms de largo, vamos a unir para formar una sola cinta.
• Con la aguja para quilling comenzamos a enrollar por la parte blanca hasta finalizar con la parte negra, sellamos con un punto de pega blanca de carpintería, para obtener un círculo cerrado, este círculo lo presionaremos por los lados para darle forma de ovalo, (reservamos).
Si quieres disipar alguna duda con respecto a la técnica o paso a paso, que va a ser usado en este post, puedes visitar el siguiente link, por acá abajo te lo dejo:
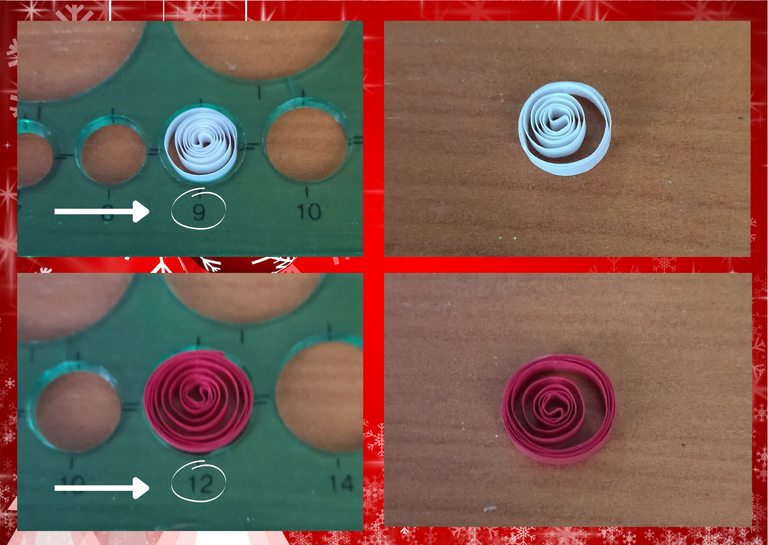
- We take a piece of white quilling ribbon 3mm wide x 14cms long, we will roll it with the quilling needle and we will measure on the ruler with circumference measures in the number 9 to form an open circle.
- We will need another red open circle, this one we will make with a piece of red ribbon 3mm wide x 28cms long, we will roll it with the needle, but this time we will measure in the circle of the ruler number 12.
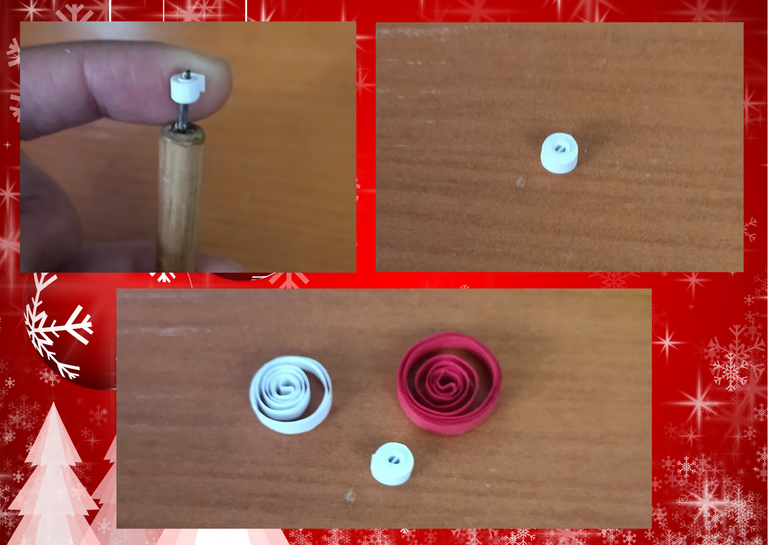
- Now we will take a white quilling ribbon 3mm wide x 7cms long, we will roll it with the needle and form a small closed circle.
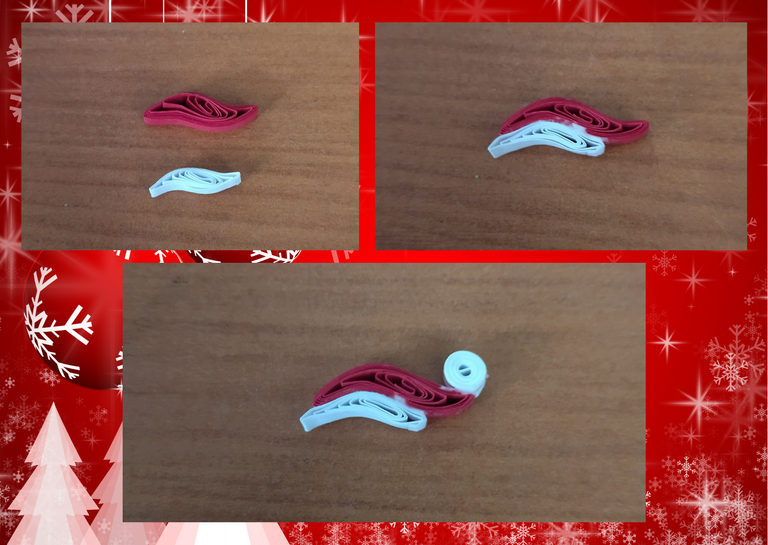
- Once these three circles are ready we are going to make the hat, we will take the white open circle and flatten it with our fingers, we will do the same with the red open circle, these two flattened pieces we will join them with glue finishing molding with our fingers to form the hat, in the tip of it we will glue the other small closed circle that we have available. Don't worry if the hat deforms a little, it will take its final shape when we join it to the base of the pendant, which in this case is the body.

• Tomamos un trozo de cinta para quilling color blanco de 3mm de ancho x 14cms de largo, vamos a enrollar con la aguja para quilling y mediremos en la regla con medidas de circunferencia en el número 9 para formar un circulo abierto.
• Vamos a necesitar otro circulo abierto color rojo, este lo realizaremos con un trozo de cinta color rojo de 3mm de ancho por 28cms de largo, enrollaremos con la aguja, pero esta vez mediremos en el círculo de la regla número 12.
• Ahora tomaremos una cinta para quilling color blanca de 3mm de ancho x 7cms de largo, enrollaremos con la aguja y formaremos un pequeño círculo cerrado.
• Listos estos tres círculos vamos a elaborar el gorro, tomaremos el circulo abierto blanco y aplanemos con los dedos, haremos lo mismo con el circulo abierto rojo, esas dos piezas aplanadas las uniremos con pega terminando de moldear con los dedos para formar el gorro, en la punta del mismo vamos a pegar el otro pequeño círculo cerrado que tenemos disponible. No se preocupen si el gorro se deforma un poco, este tomara su forma final cuando unamos a la base del dije que en este caso es el cuerpo.
Penguin arms🐧
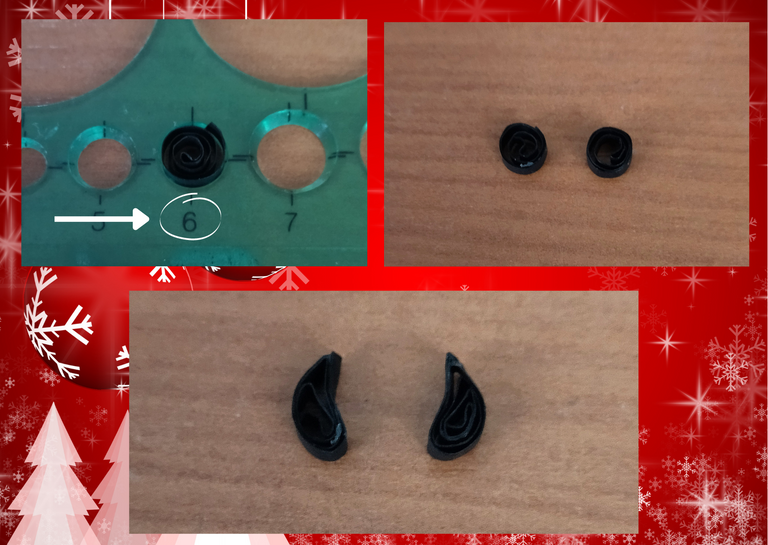
- We will take two pieces of black quilling tape 3mm wide x 6cms long, we will roll with the quilling needle and measure on the ruler in the number 6, to form an open circle, this circle we will mold it in the shape of a leaf.
Nose and feet of the penguin.🐧
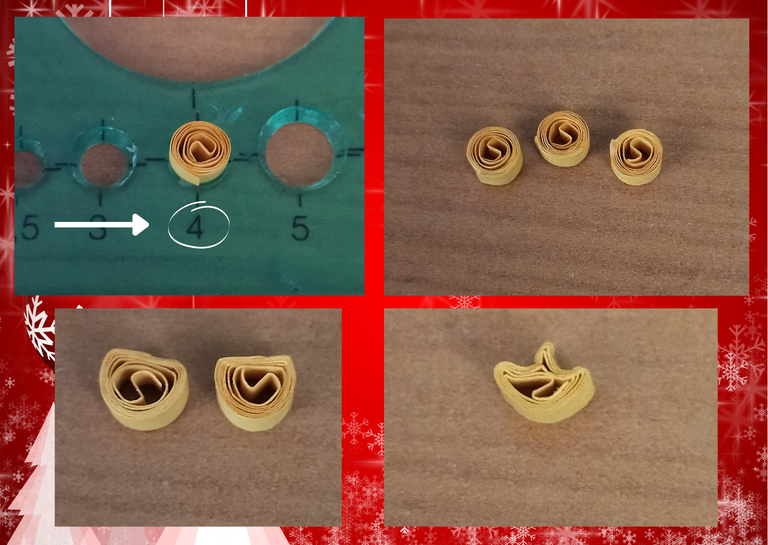
- We are going to take 3 pieces of orange quilling tape 3mm wide x 6cms long, with it we will proceed to make 3 open circles which we will measure on the ruler, in the measure number 6.
- Once the 3 circles are ready, we will take two of them and we will shape them by flattening the top part, these will be their shoes, and the remaining circle we will shape by pinching the top part on each side and in the center, this will be the penguin's nose, in the images you will see better the shape you should give to the pieces.

Brazos del pingüino.🐧
• Tomaremos dos trozos de cinta para quilling color negro de 3mm de ancho x 6cms de largo, enrollaremos con la aguja para quilling y mediremos en la regla en el número 6, para formar un circulo abierto, ese círculo lo vamos a moldear en forma de hoja.
Nariz y pies del pingüino🐧
• Vamos a tomar 3 trozos de cinta para quilling color naranja de 3mm de ancho x 6cms de largo, con ella procederemos a realizar 3 círculos abiertos los cuales mediremos en la regla, en la medida número 6.
• Listos los 3 círculos tomaremos dos de ellos y le daremos forma aplanando la parte de arriba, estos serán sus zapatos, y el circulo restante lo moldearemos pellizcando la parte de arriba en cada lado y en el centro, esa será la nariz del pingüino, en las imágenes verán mejor la forma que deben darle a las piezas.
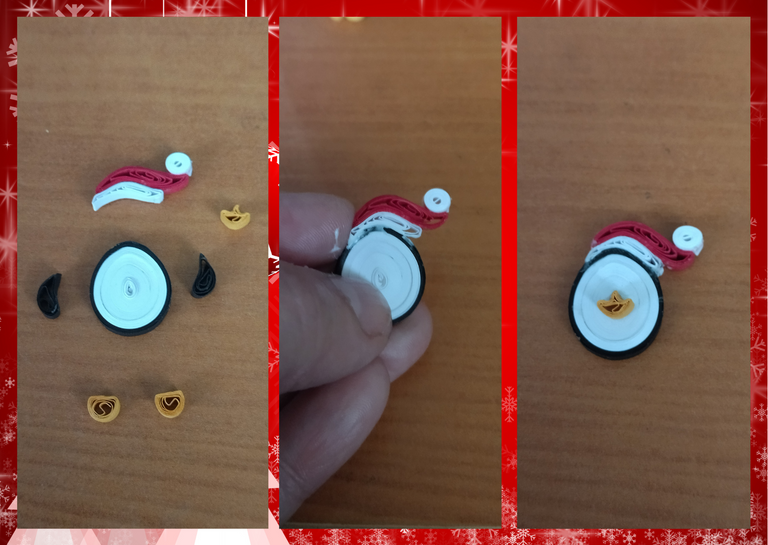
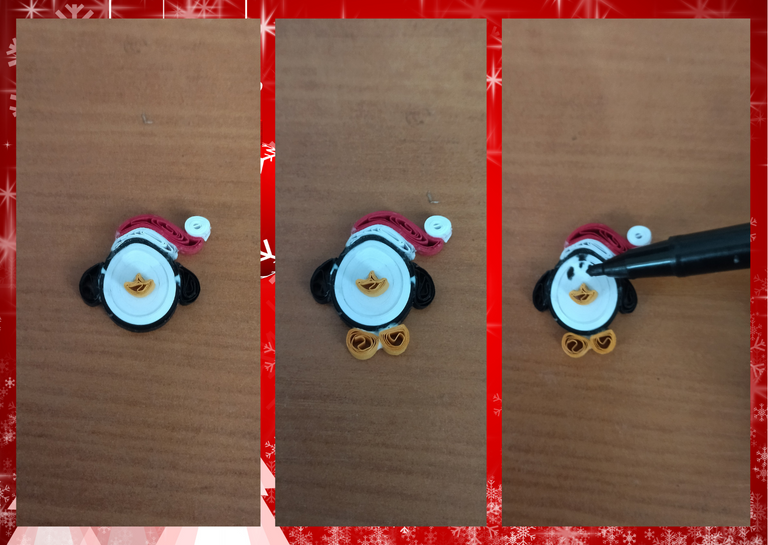
- Now that we have all our pieces ready we are going to join them to form our penguin, we start by gluing the Christmas hat on the top of the piece with white carpentry glue, we must press for a while with our fingers to mold and adhere fully so that it does not deform, then we go with the nose that we will paste in the central part of the piece, we continue with the arms on the sides, and finally the feet at the bottom.
- Put all the pieces together and take the black fine tip marker with which we will paint the penguin's eyes and under the hat we will make a kind of triangle so that it resembles the shape they have on their face.
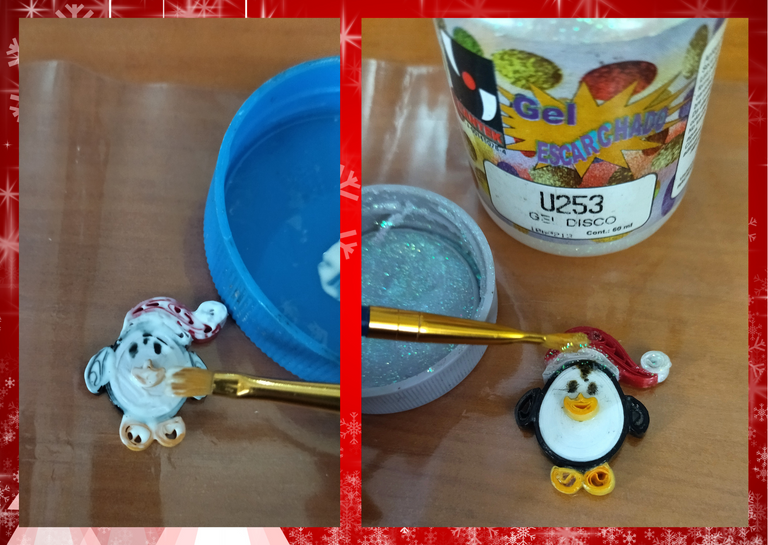
- We are going to place its plasticized or liquid protection, with a brush we add several layers of extra strong white glue carpentry letting dry between one and another, when drying the piece optionally to give shine to the penguin, I added a little frosted gel to the cap, you can add it if you decide, or leave it natural.
As I told you at the beginning I wanted to make a pair of hanging tendrils and a necklace charm, so I made three pieces, two smaller ones and one a little bit bigger, you can always play with the sizes.
- To finish the two smaller pieces we are going to place a medium size costume jewelry ring and the bases for hanging tendrils (hooks), to which I placed a medium size red wooden pearl to decorate. To the biggest piece, which would be the pendant for the necklace, we simply put a medium size ring and place it on the necklace of our preference.
This way we have our Christmas penguins ready to wear and show off this Christmas.🐧🎄🎅✨

• Ya tenemos todas nuestras piezas listas vamos a unirlas para formar nuestro pingüino, comenzamos pegando el gorrito de navidad en la parte de arriba de la pieza con pega blanca de carpintería, debemos presionar un rato con los dedos para moldear y que se adhiera totalmente para que no se deforme, luego vamos con la nariz que pegaremos en la parte central de la pieza, seguimos con los brazos a los lados, y por último los pies en la parte de abajo.
• Unidas todas las piezas tomaremos el marcador negro punta fina con el cual pintaremos los ojitos del pingüino y debajo del gorrito haremos una especie de triangulo para que se asemeje a la forma que ellos tienen en su cara.
• Vamos a colocarle su plastificado o protección liquida, con un pincel añadimos varias capas de pega blanca extra fuerte de carpintería dejando secar entre una y otra, al secar la pieza de manera opcional para darle brillo al pingüino, le agregue un poco de gel escarchado al gorro, ustedes se lo pueden agregar si lo deciden, o dejarlo natural.
Como les dije en un inicio quise realizar un par de zarcillos colgantes y dije para collar por lo que realicé tres piezas, dos más pequeñas y una un poco más grande, ustedes siempre pueden jugar con los tamaños.
• Para finalizar a las dos piezas más pequeñas le vamos a colocar una argolla de bisutería mediana y las bases para zarcillos colgantes (anzuelos), a las que le coloque para decorar una perla roja de madera mediana. A la pieza más grande que sería el dije para collar simplemente le colocamos una argolla mediana y colocamos en el collar de nuestra preferencia.
De esta manera tenemos listo nuestros pingüinos navideños listos para usar y lucir en estas navidades🐧🎄🎅✨

What did you think, did you like it?
I hope you did, I hope you liked my explanation, procedure and photos, I made them with love for you.
"Let out that muse that inspires you, and let your imagination fly".
Thank you all, see you next time. 🐾🐱💕

¿Que les pareció, les gustó?
Espero que sí, que les haya gustado mi explicación, procedimiento y fotos, los hice con mucho cariño por y para ustedes.
"Deja salir esa musa que te inspira, y deja volar tu imaginación".
Gracias a todos, nos vemos en la próxima. 🐾🐱💕
Los invito que apoyen a "La Colmena", dale tu voto ✨
 Vote la-colmena for witness By @ylich
Todas las fotos usadas en este post son de mi autoría y han sido sacadas en mi celular personal un Redmi 9T y editadas Canva Banner y separador hecho por mí en Canva Traducido con la ayuda de DeepL

