Hello everyone... ✨
Hello to my dear Hivers and to the dear community of artists of #Jewelry, I'm here to show you a new work.
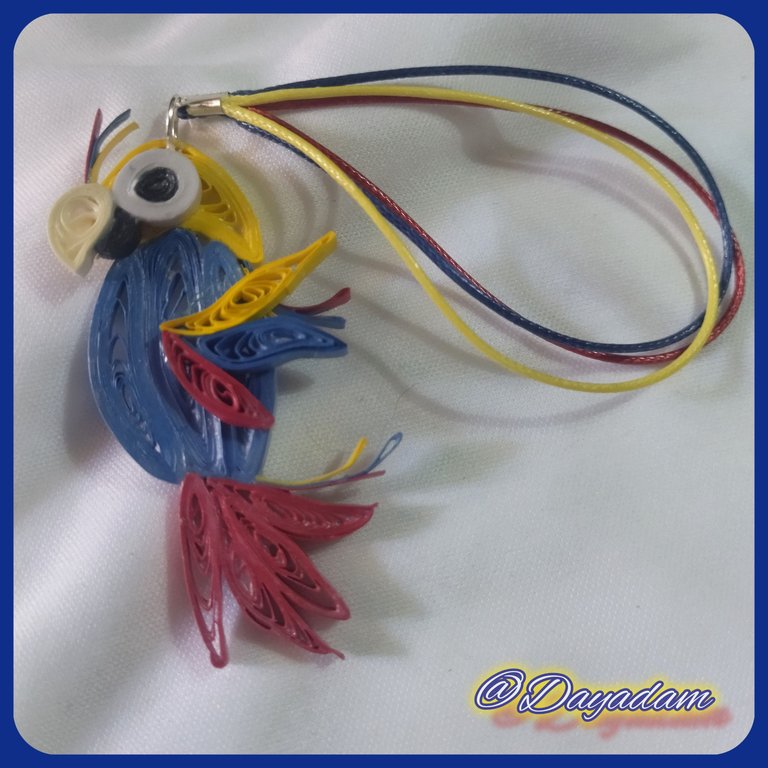
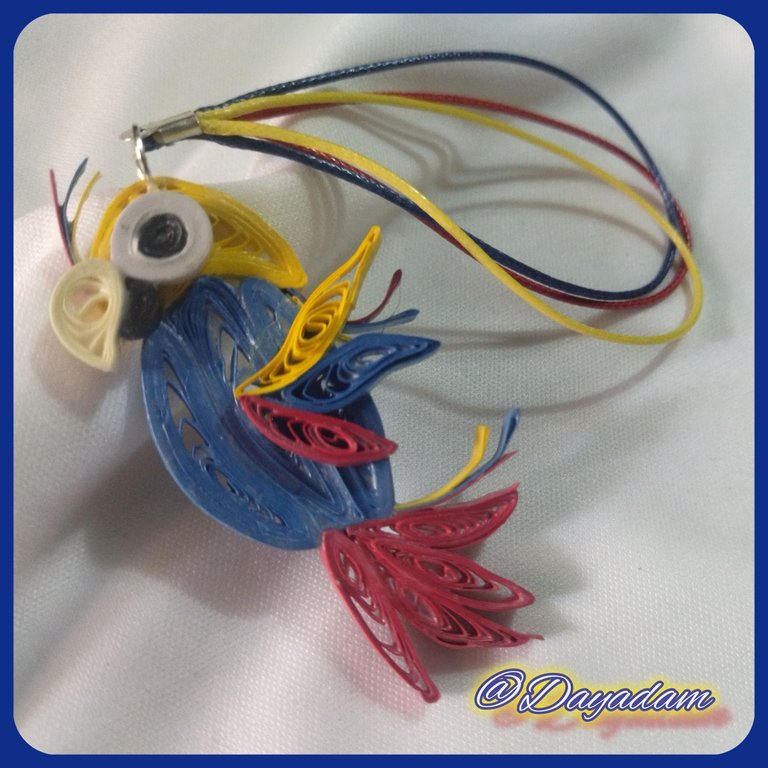
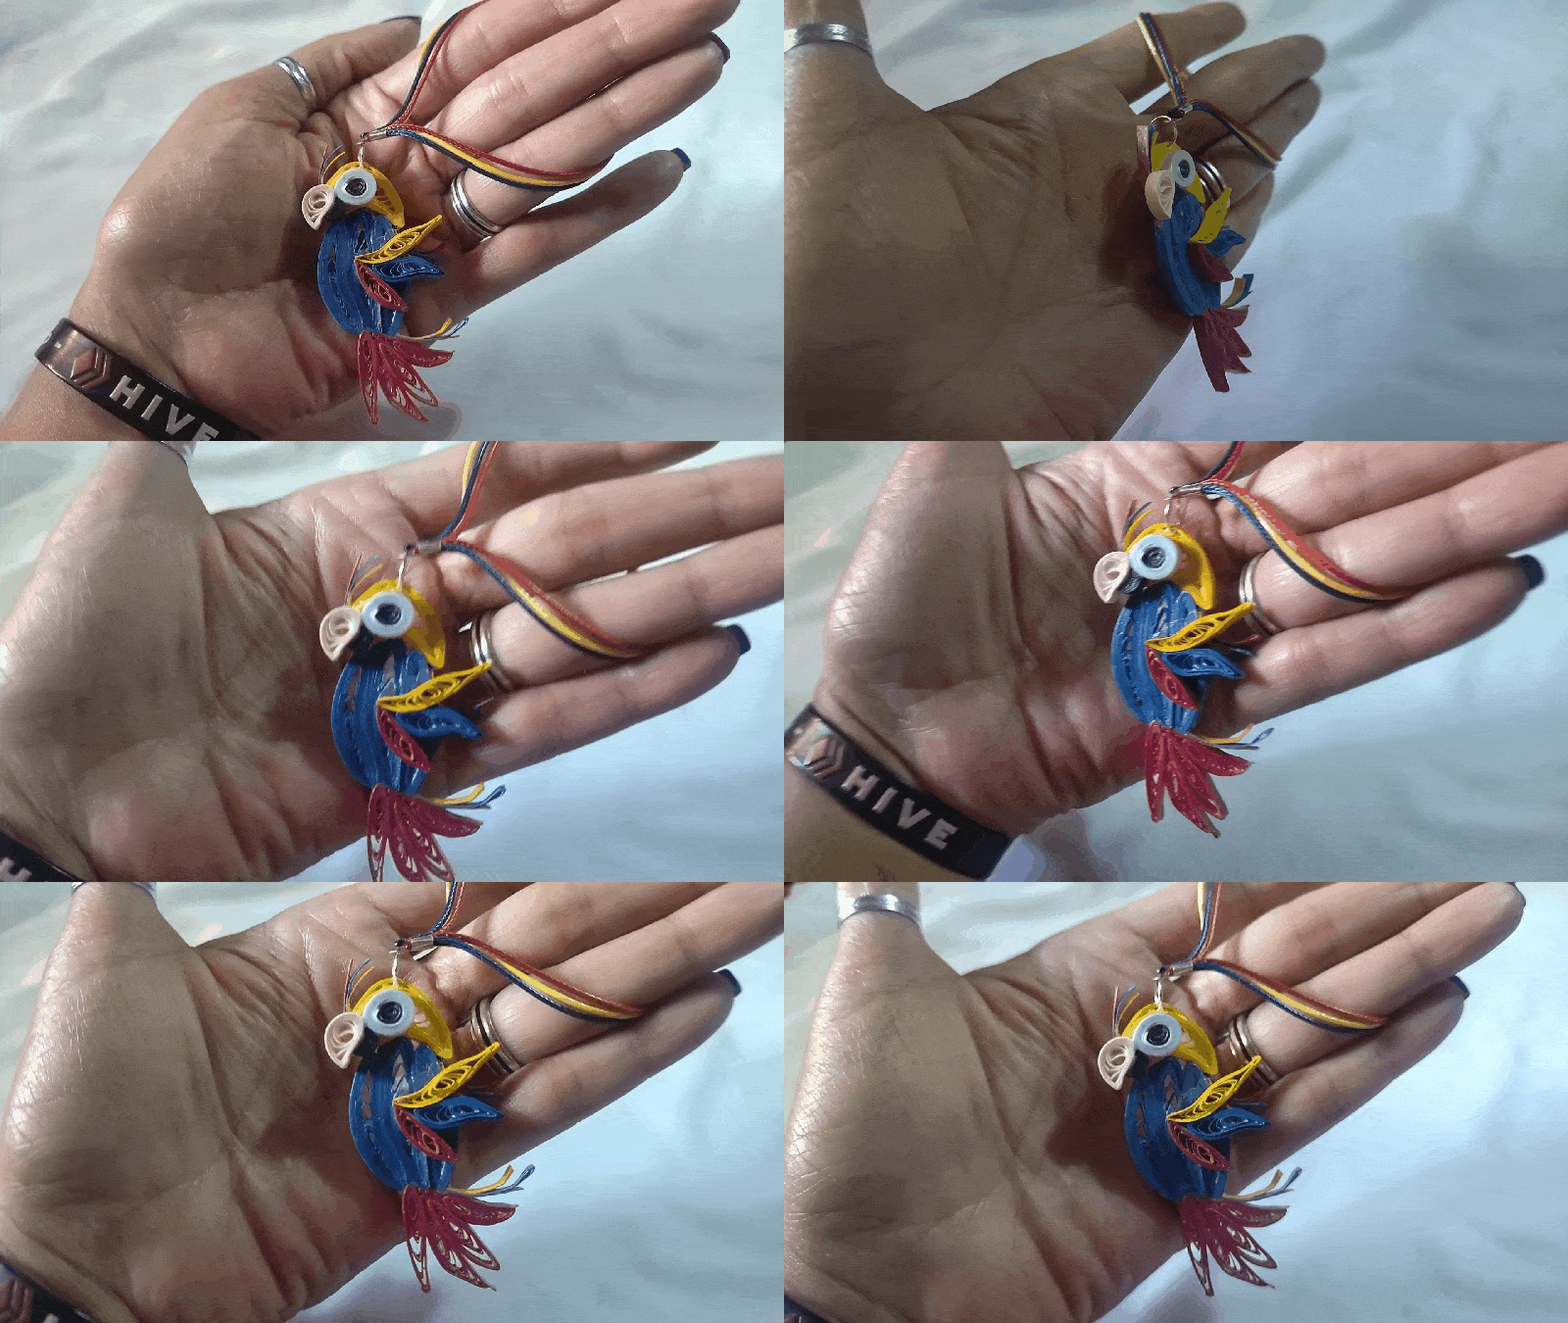
Today I bring you a small pendant in the shape of a "Macaw" with the tricolor of my national flag, in the area where I usually live every day I can appreciate the sound of them, and observe how they stand on the roofs and windows of buildings asking for food to people, this inspired me to make this work in the technique of quilling.
I hope you like the work, join me in this creative process.
Let's get started:😃

Hola a Todos... ✨
Hola a mis queridos Hivers y a la querida comunidad de artistas de #Jewelry, estoy por aquí para mostrarles un nuevo trabajo.
Para hoy les traigo un pequeño colgante en forma de "Guacamaya" con el tricolor de mi bandera nacional, en la zona donde vivo usualmente dia a dia puedo apreciar el sonido de las mismas, y observar como se paran en los techos y ventanales de los edificios pidiendo comida a las personas, esto me inspiro a realizar este trabajo en la tecnica de quilling.
Espero sea de su agrado el trabajo, acompáñenme en este proceso creativo.
Comencemos:😃

• Cintas de quilling de diversos colores.
• Aguja para quilling.
• Pega blanca extra fuerte (de carpintería).
• Argolla de bisutería mediana.
• Hilo piel de serpiente fino amarillo, azul y rojo..
• Tapa nudo.
• Pincel.
• Pinza punta fina.
• Alicate punta fina.
- Quilling ribbons of different colors.
- Quilling needle.
- Extra strong white glue (carpentry glue).
- Medium size costume jewelry ring.
- Thin yellow, blue and red snakeskin thread.
- Knot cover.
- Brush.
- Fine tip tweezers.
- Fine nose pliers.

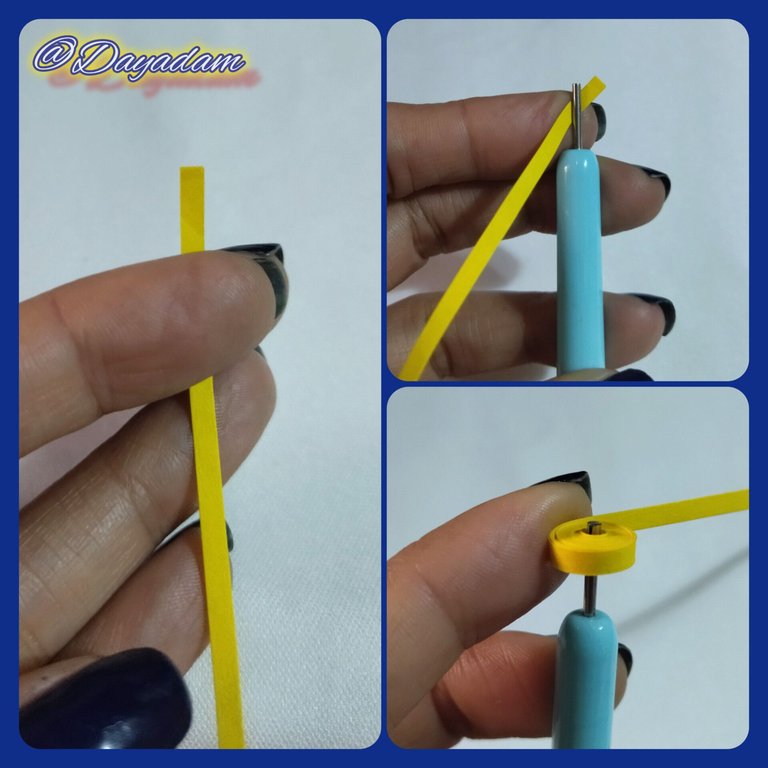
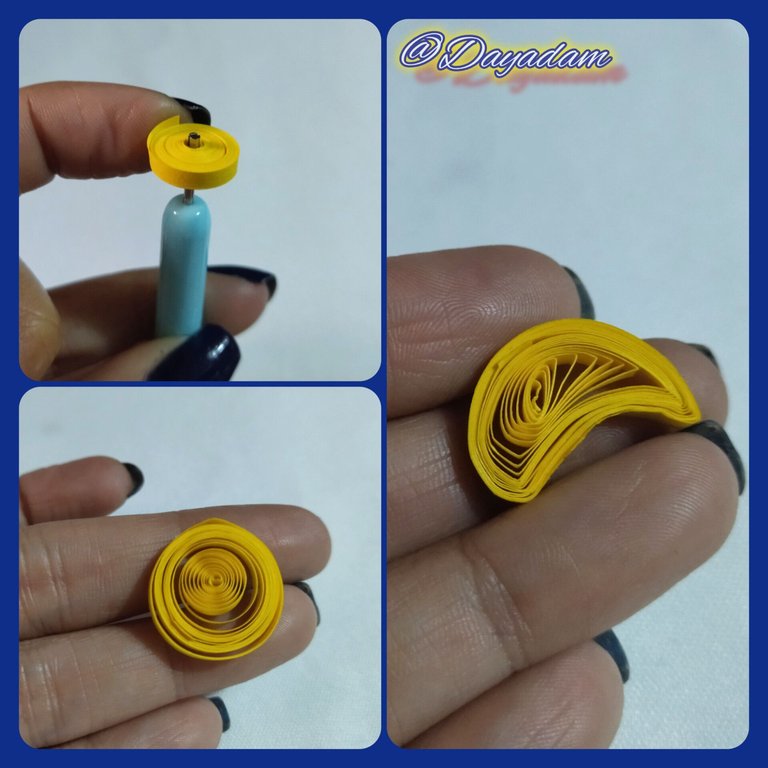
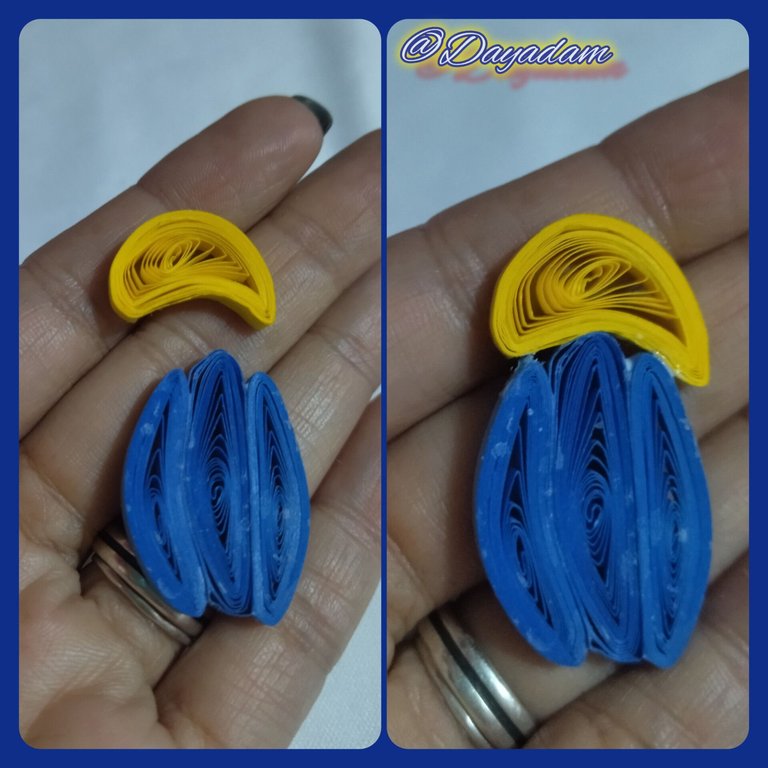
- We start by taking a 3mm wide yellow quilling tape, with the quilling needle we are going to roll until we reach the end of the tape, take it out of the needle, loosen it a little and seal it with extra strong white glue. We are going to obtain an open circle, we will mold it in the shape of a half moon.
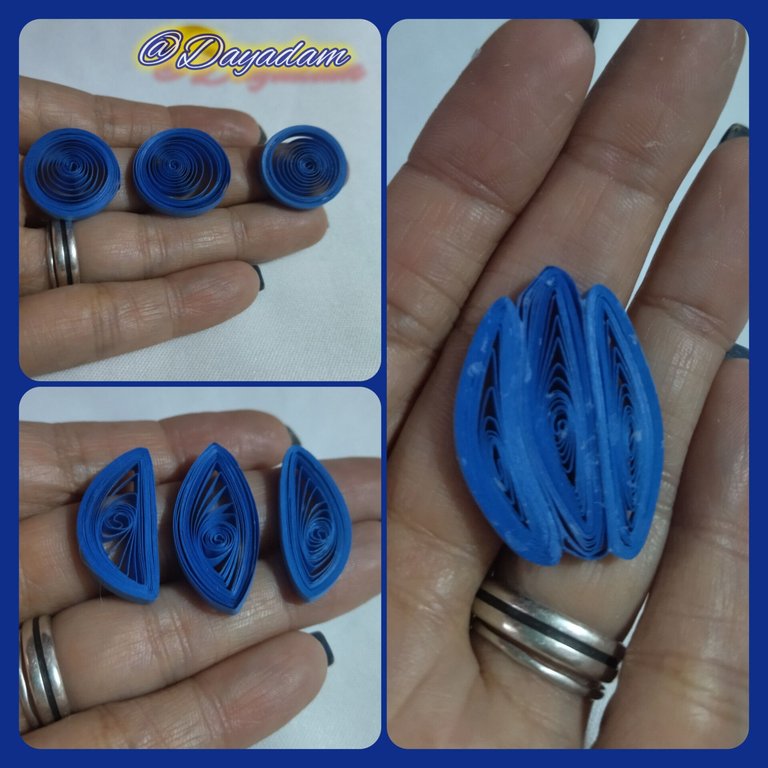
- We will repeat the process with blue ribbons of 3mm wide, of this color we will need 3 open circles of a slightly larger size.
- Ready circles I proceeded to mold them as you can see in the images, then we will join the trio, to form the body of the macaw, we will glue this piece of the previous one to have the head and body together. .
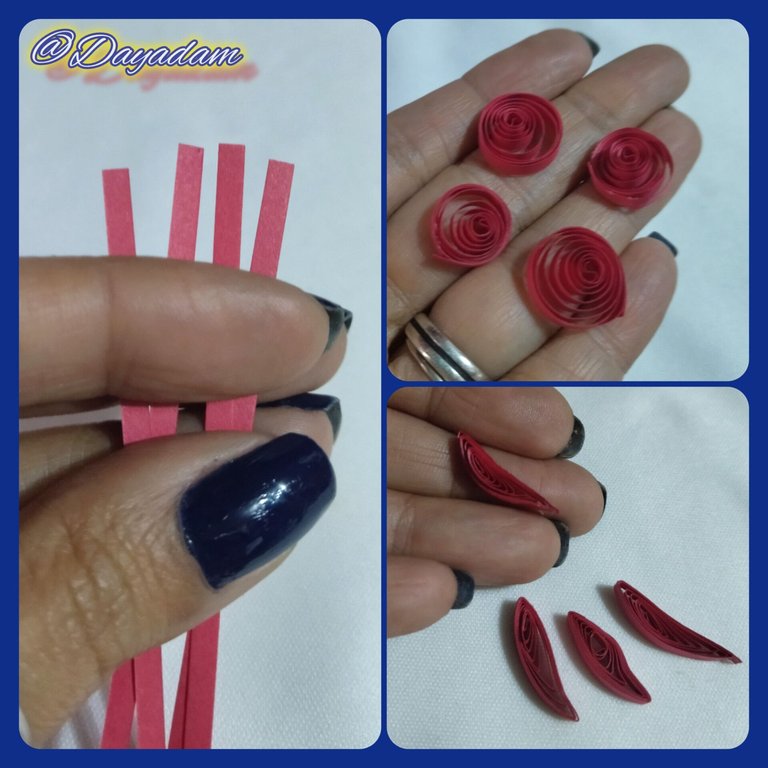
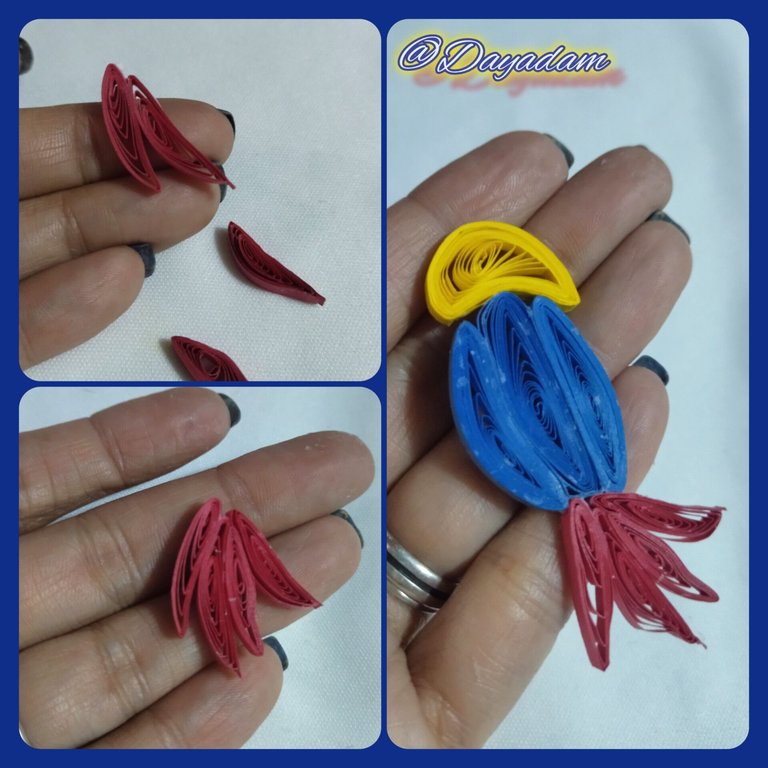
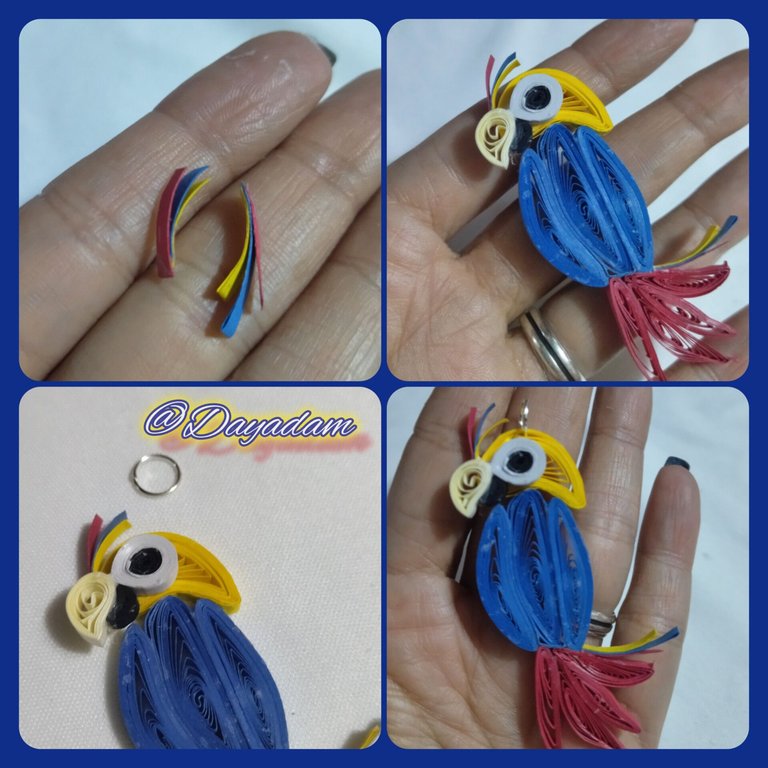
- For the tail feathers I made 3 red open circles, with 3mm wide red ribbons, molded them, joined the 4 and glued them to the bottom of the body.

• Comenzamos tomando cinta para quilling de color amarillo de 3mm de ancho, con la aguja para quilling vamos a enrollar hasta llegar al final de la cinta, sacamos de la aguja soltamos un poco y sellamos con pega blanca extra fuerte. Vamos a obtener un círculo abierto, este lo moldearemos en forma de una media luna.
• Vamos a repetir el proceso con cintas azules de 3mm de ancho, de este color necesitaremos 3 círculos abiertos de un tamaño un poco mas grande.
• Listos círculos procedí a moldearlos tal como pueden ver en las imágenes, luego uniremos el trío, para formar el cuerpo de la guacamaya, pegaremos esta pieza de la anterior para tener la cabeza y cuerpo unidos. .
• Para las plumas de la cola realice 3 círculos abiertos de color rojo, con cintas de 3mm de ancho color rojo, las moldee, uni las 4 y pegue a la parte de abajo del cuerpo.
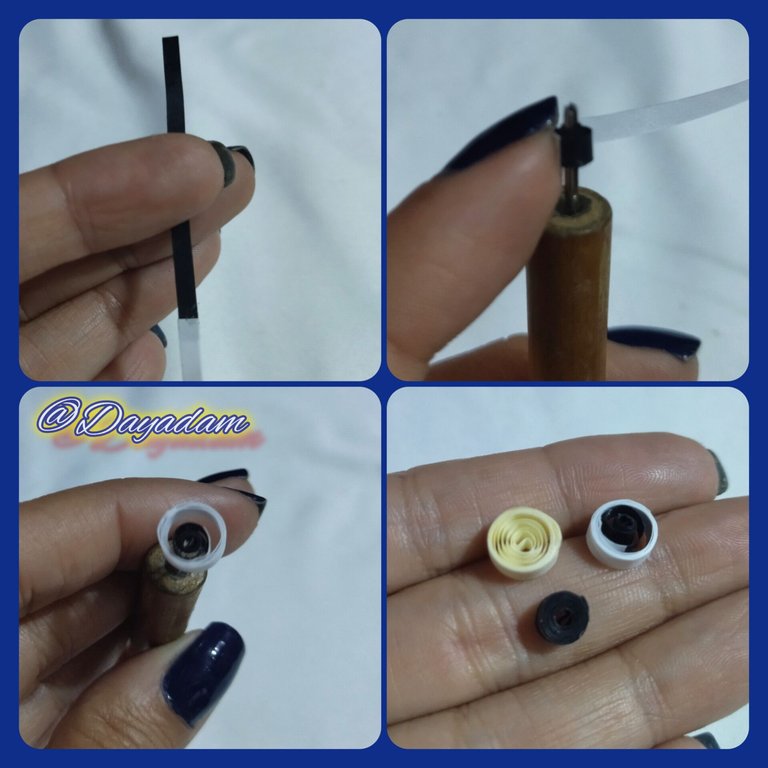
- To make the eye, combine a 3mm wide piece of black and white ribbon, glue them together to form a single ribbon, roll up starting with the black ribbon and ending with the white ribbon.
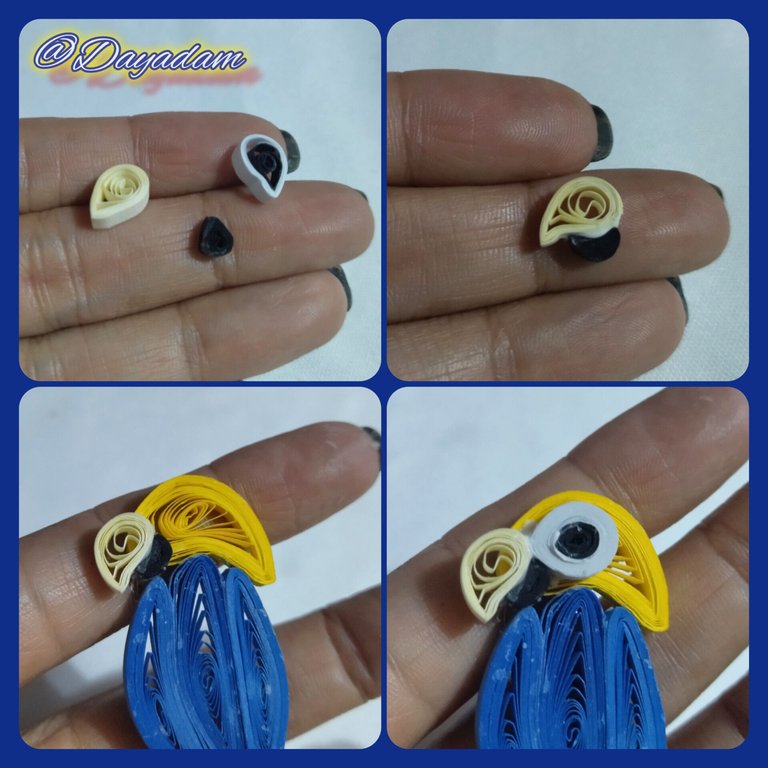
- With 3mm wide beige tape make another open circle of the same size as the eye, and with black tape a smaller open circle, mold and join both to form the beak.
- I proceeded to glue the beak and the eye of the head of the macaw, I also took some pieces of 3mm wide yellow, blue and red tape and made some details, to glue them in some points of the macaw.
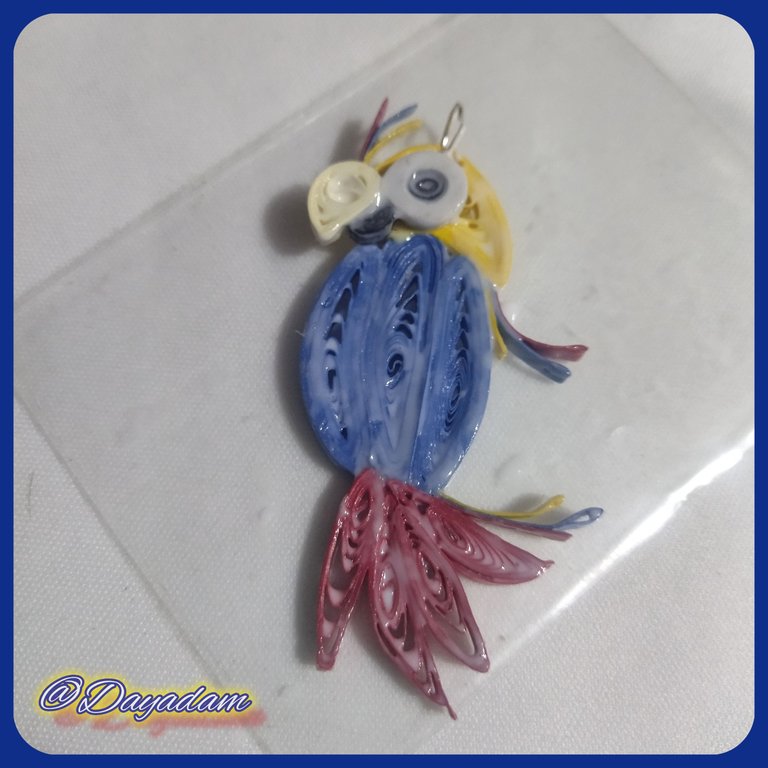
- Take a medium size jewelry ring and place it on the top of the bird and then to protect it, apply several layers of extra strong white glue, letting it dry between one layer and another, this to give plasticity, shine to the piece and harden completely.
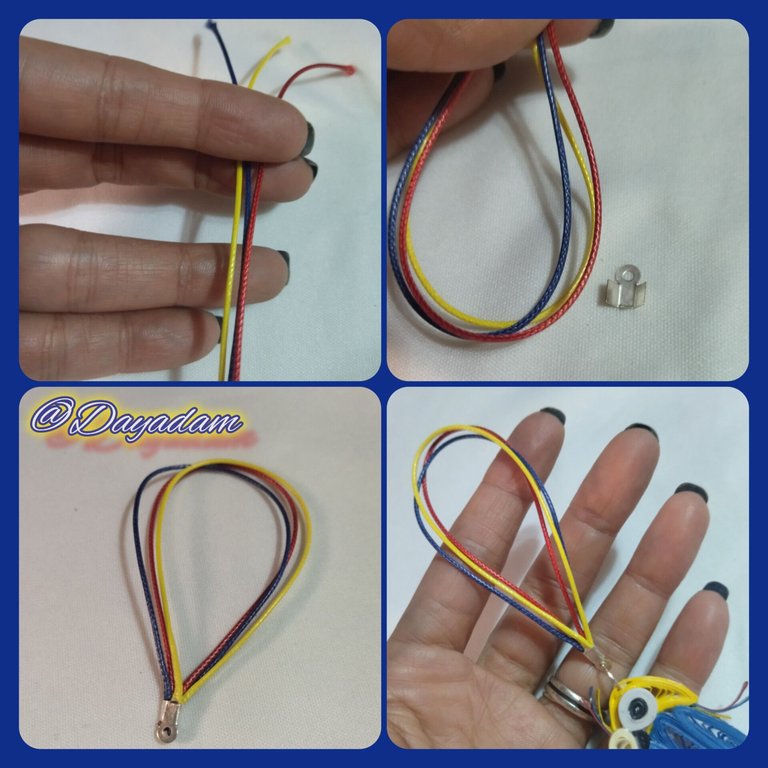
- Take 3 pieces of thin yellow, blue and red snakeskin thread, fold them and place a “tapanudos” on their ends to make a hanging rope, hook the macaw to it.
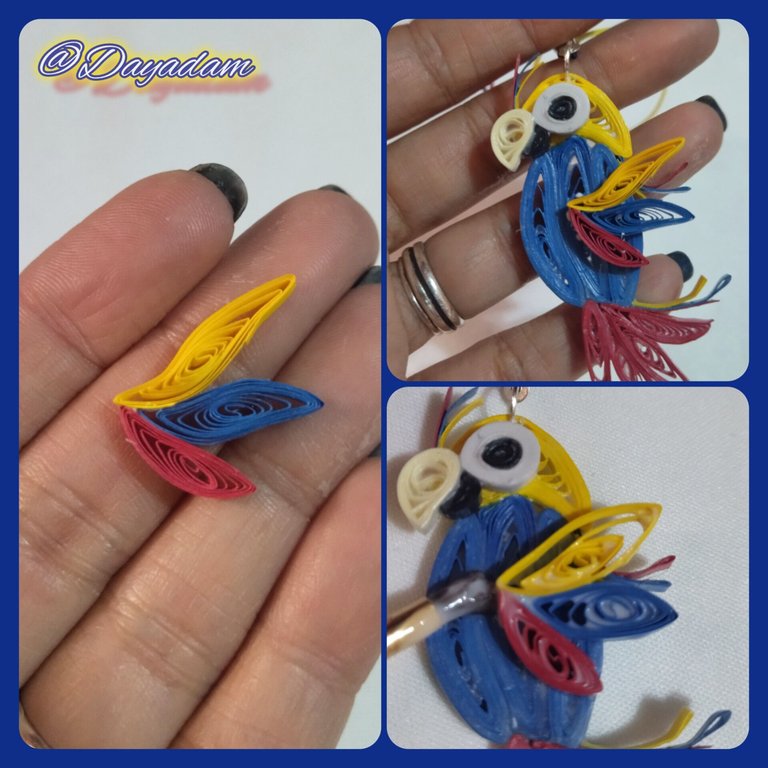
- At this point when I was finishing the pendant, I felt that something was missing and decided to make a wing to place it on the body, I made 3 circles, one yellow, one blue and one red, which I molded and joined, glued them in the middle of the body and applied several layers of extra strong glue that I let dry between one layer and another.
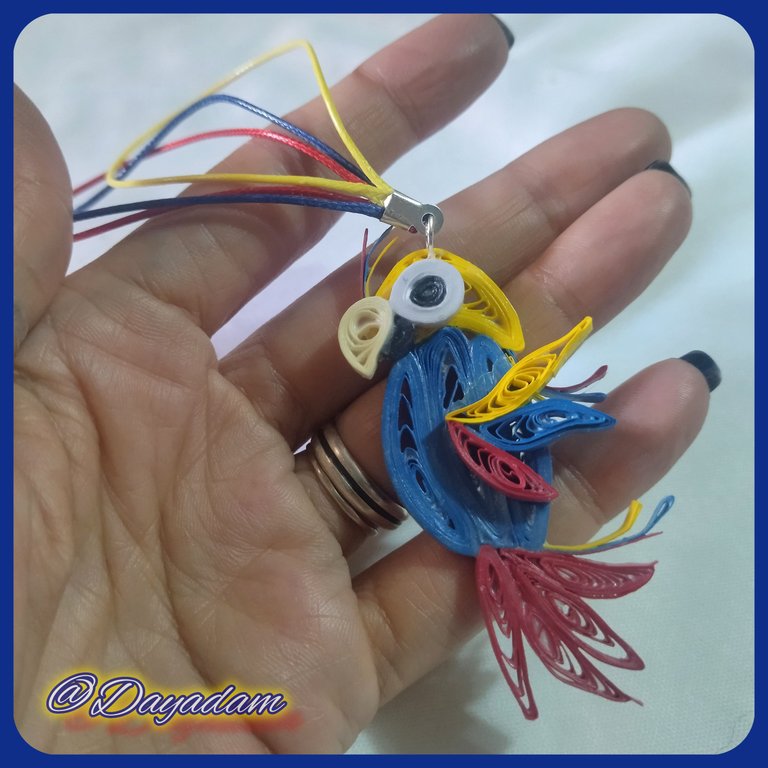
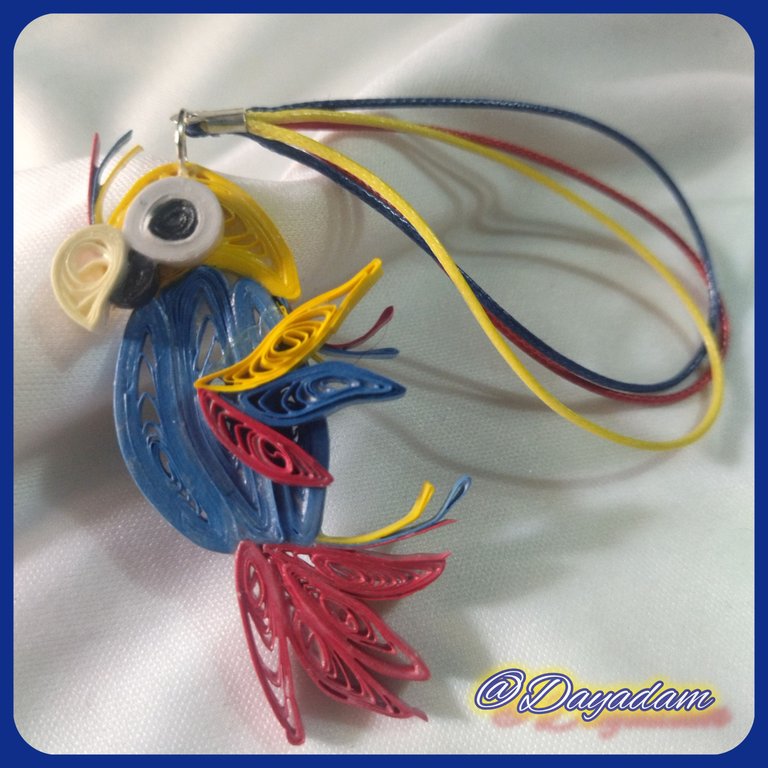
This way we have this pendant of a Macaw which I made with my beautiful tricolor of the bandeau.

• Para realizar el ojo, combine un trozo de cinta negro y blanco de 3mm de ancho, los uni con pega para formar una sola cinta, enrolle comenzando por la cinta negra hasta finalizar con la blanca.
• Con cinta de 3mm de ancho color beige realice otro circulo abierto del mismo tamaño que el del ojo, y con cinta negra un circulo abierto mas pequeño, moldee y uni ambos para formar el pico.
• Procedí a pegar el pico y el ojo de la cabeza de la guacamaya, también tome algunos trozos de cinta de 3mm de ancho amarillo, azul y rojo y realice algunos detalles, para pegarlos en algunos puntos de la guacamaya.
• Tome una argolla mediana e bisutería, y la coloque en la parte de arriba del ave y luego para proteger aplique varias capas de pega blanca extra fuerte, dejando secar entre una capa y otra, esto para darle plasticidad, brillo a la pieza y endurecer por completo.
• Tome 3 trozos de hilo piel de serpiente fino amarillo, azul y rojo, los cuales doble y coloque un tapanudos en sus puntas para realizar una cuerda colgante, enganche la guacamaya de ella.
• En este punto cuando daba por terminado el colgante, sentí que algo le faltaba y decidí hacerle un ala para colocarla en el cuerpo, realice 3 círculos uno amarillo, uno azul y uno rojo, los cuales moldee y uni, los pegue en medio del cuerpo y aplique varias capas de pega extra fuerte que deje secar entre una capa y otra.
De esta manera tenemos este colgante de una Guacamaya la cual elabore con mi bello tricolor de la bandera de mi Venezuela, en la técnica de quilling.


What did you think, did you like it?
I hope you did, I hope you liked my explanation, procedure and photos, I made them with love for you.
"Let out that muse that inspires you, and let your imagination fly".
Thank you all, see you next time...

¿Que les pareció, les gustó?
Espero que sí, que les haya gustado mi explicación, procedimiento y fotos, los hice con mucho cariño por y para ustedes.
"Deja salir esa musa que te inspira, y deja volar tu imaginación".
Gracias a todos, nos vemos en la próxima.

Todas las fotos usadas en este post son de mi autoría y han sido sacadas en mi celular personal un Redmi 9T y editadas en Canva y en Inshot Banner y separador hecho por mí en Canva Traducido con la ayuda de DeepL

,

