Hello everyone... 💙
Hello to my dear Hivers and the beloved community of artists #Jewelry, as always very pleased and excited to be here again, showing you my work made with love and especially for you.
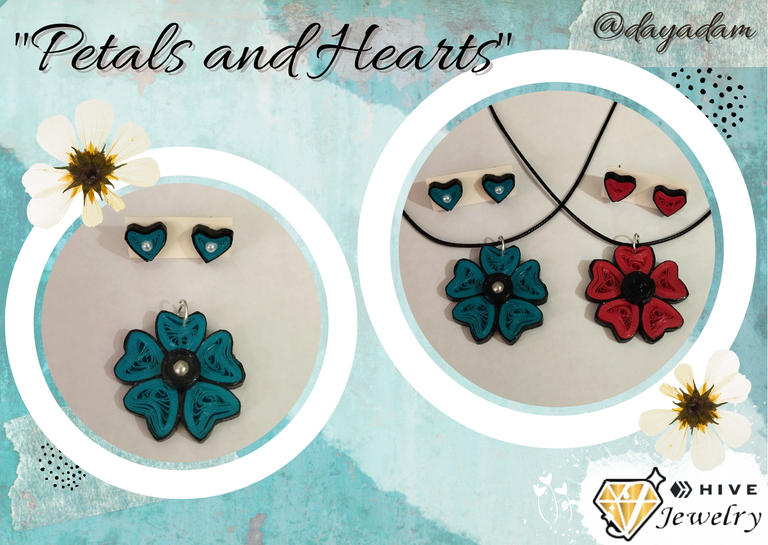
I have mentioned on several occasions that I really like flowers and that I was going to continue with the theme, since there is so much to do to show, and that is why today I wanted to bring you a simple but striking model of a flower-shaped charm with heart petals in the quilling technique, so you can have one more set of accessory to use with the oufits of your choice.
As the technique is so versatile, we can apply any number of moldings or figures to the pieces we make, and that's why I tell you that you will always see me with this floral theme that I love so much.
So friends without further ado, I will start my creative process, hoping you like it.
Let's get started:😃

Hola a todos... 💙
Hola a mis queridos Hivers y a la querida comunidad de artistas #Jewelry, como siempre muy complacida y emocionada de encontrarme por acá nuevamente, mostrándole mi trabajo hecho con mucho amor y especialmente para ustedes.
Les he mencionado en varias oportunidades que me gustan mucho las flores y que de manera constante iba a seguir con la temática, ya que hay muchísimo que hacer para mostrar, y es por esto que hoy les quise traer un modelito sencillo pero llamativo de un dije en forma de flor con pétalos de corazón en la técnica de quilling, para que puedan tener un juego de accesorio más para usar con el oufits de su preferencia.
Como la técnica es tan versátil, podemos aplicar cualquier cantidad de moldeados o figuras a las piezas que realizamos, y por ello les digo que siempre me verán con esta temática floral que tanto me gusta.
Entonces amigos sin más preámbulos, iniciare mi proceso creativo, esperando que les guste.
Comencemos:😃

- Quilling ribbons 3mm wide blue and black.
- Quilling needle.
- Ruler with different circumference measures.
- Extra strong white glue (carpentry glue).
- Scissors.
- Medium size costume jewelry ring.
- White costume jewelry bead.
- Paintbrush.
- Fine-nosed pliers.
- Fine tip tweezers.
• Cintas de quilling de 3mm de ancho azul, y negro.
• Aguja para quilling.
• Regla con diversas medidas de circunferencia.
• Pega blanca extra fuerte (de carpintería).
• Tijera.
• Argolla mediana de bisutería.
• Perla blanca de bisutería.
• Pincel.
• Alicate punta fina.
• Pinza punta fina.

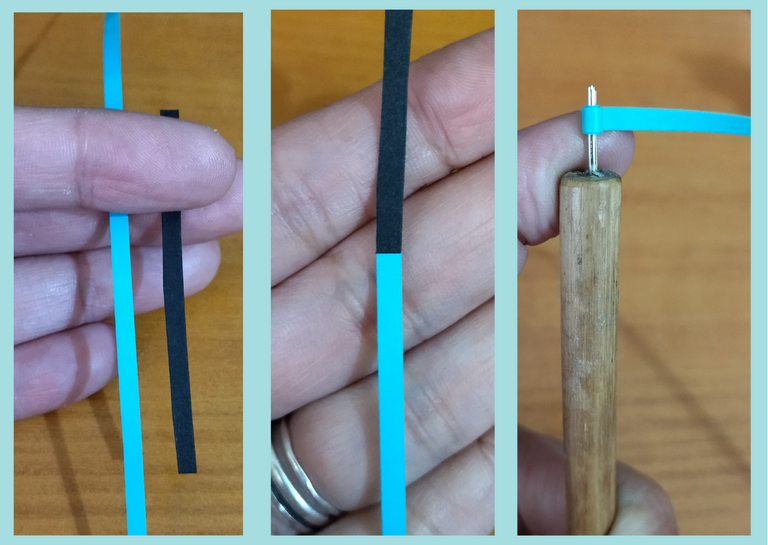
- Let's start by taking blue quilling tape 3mm wide x 50cms long and another piece of black color 3mm wide x 6cms long, we will join both pieces to form a single ribbon.
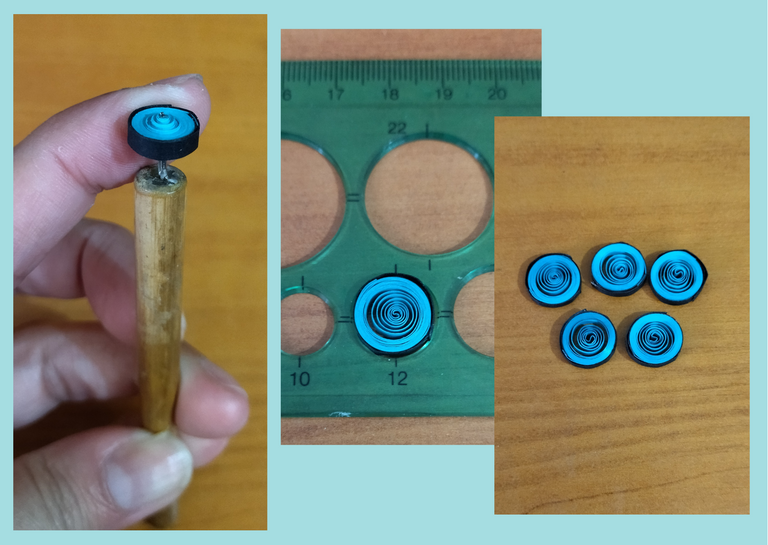
- With the help of the quilling needle we will roll the ribbon, take it out of the needle, and measure it on the ruler with different circumference measures in the circle number 12, take it out of the ruler and seal it with extra strong white glue to obtain an open circle. As this circle we will need five for each flower we want to make.
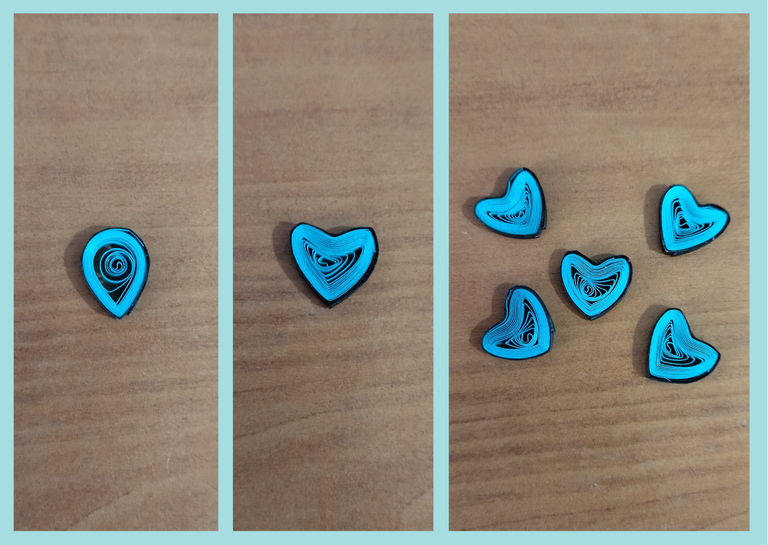
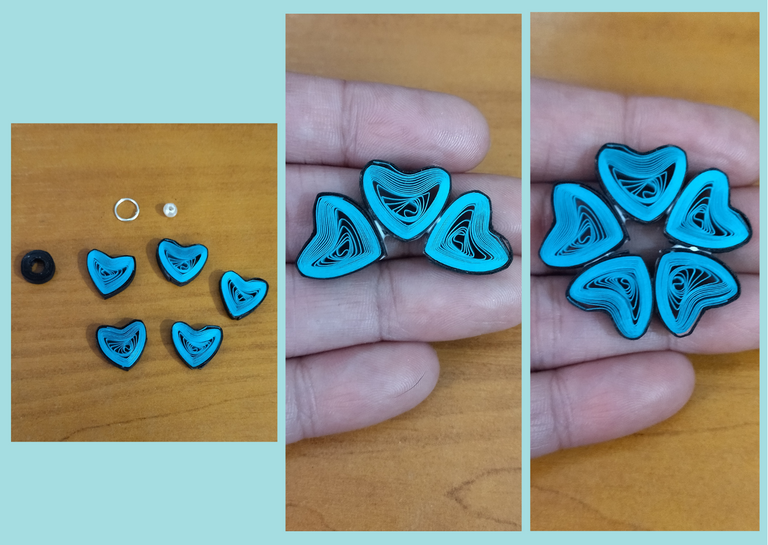
- We are going to mold our 5 circles, pinching one of its tips as if we were going to make a drop, and then in the middle we go down with a toothpick or simply with the fingernail to give it a kind of heart shape.

• Vamos a comenzar tomando cinta para quilling color azul de 3mm de ancho x 50cms de largo y otro trozo color negro de 3mm de ancho x 6cms de largo, vamos a unir ambos trozos para formar una sola cinta.
• Con la ayuda de la aguja para quilling enrollaremos la cinta sacamos de la aguja, y lo mediremos en la regla con diversas medidas de circunferencia en el círculo número 12, sacamos de la regla y sellamos con pega blanca extra fuerte para obtener un circulo abierto. Como este círculo necesitaremos cinco por cada flor que queramos realizar.
• Vamos a moldear nuestros 5 círculos, pellizcando una de sus puntas como si fuéramos a realizar una gota, y luego en el medio bajamos con un palillo o simplemente con la uña para darle una especie de forma de corazón.
- We join the five petals harmoniously with a touch of extra strong white glue, and set aside.
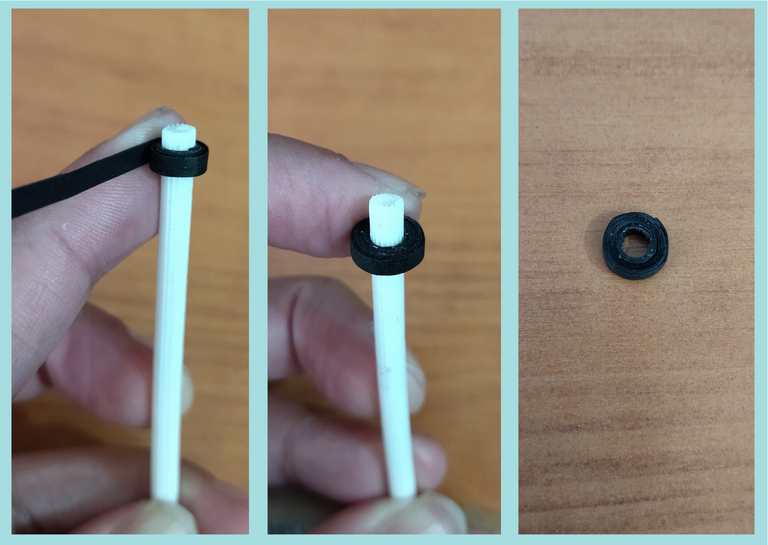
- We are going to take a piece of black ribbon 3mm wide x 12cms long and wrap it around a stick or brush, we finish with all the ribbon, seal with glue and remove it.
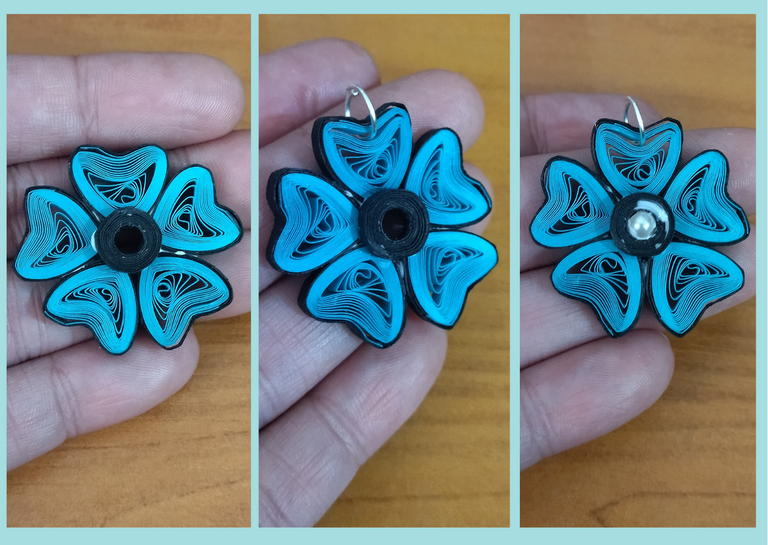
- Ready the pieces we are going to assemble and decorate our flower with heart-shaped petals. We will join the 5 petals harmoniously applying a little extra strong white glue, then we will place the hollow black piece that we made in the middle and we will place a small white pearl to decorate it, we will place a medium size costume jewelry ring at the top to be able to place the pendant on a necklace.

• Unimos los cinco pétales de manera armónica con un toque de pega blanca extra fuerte, y reservamos.
• Vamos a tomar un trozo de cinta negra de 3mm de ancho x 12cms de largo y lo enrollaremos alrededor de un palito o pincel, terminamos con toda la cinta, sellamos con pega y sacamos del mismo.
• Listas las piezas vamos a armar y decorar nuestra flor con pétalos en forma de corazón. Uniremos los 5 pétalos de manera armónica aplicando un poco de pega blanca extra fuerte, luego colocaremos la pieza negra hueca que realizamos en el medio y colocamos para decorar una pequeña perla blanca, colocamos en la parte de arriba una argolla de bisutería mediana para poder colocar el dije en un collar.
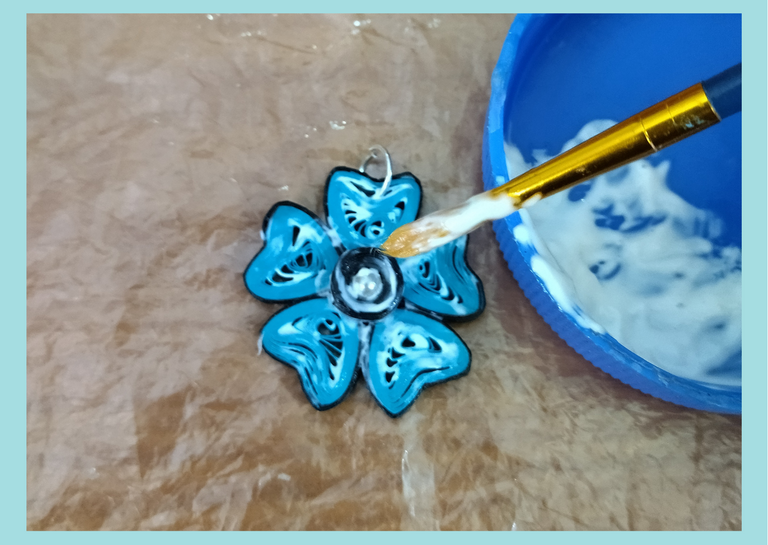
- Finally we will place its liquid protection (plasticized), applying several layers of extra strong white carpentry glue, letting it dry between one layer and another, we let it dry very well.
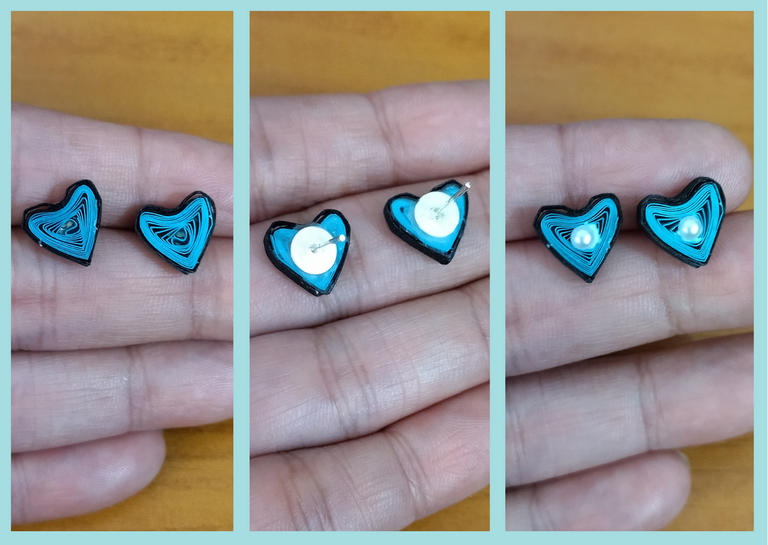
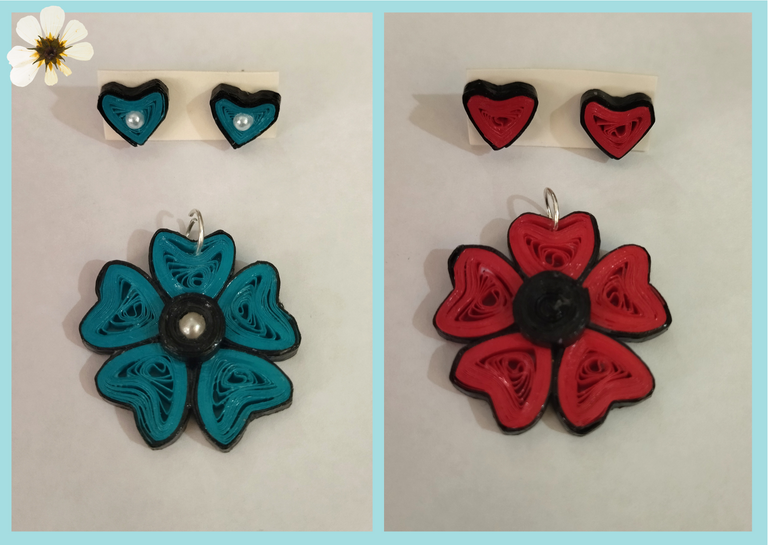
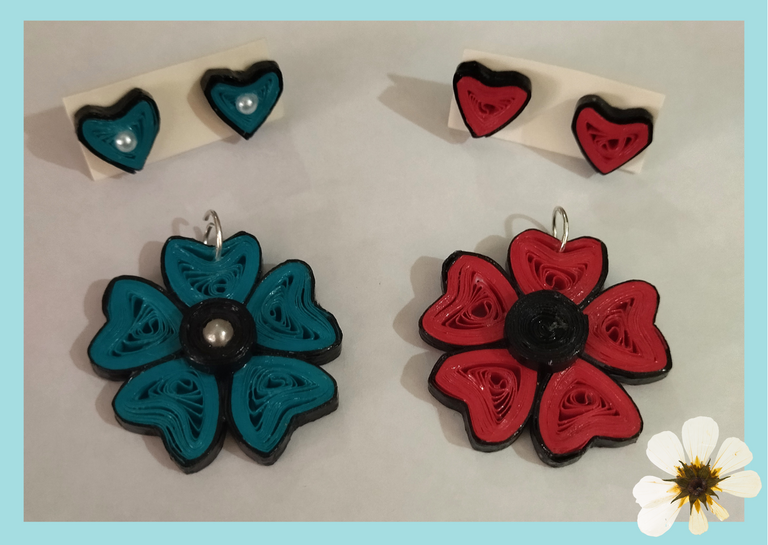
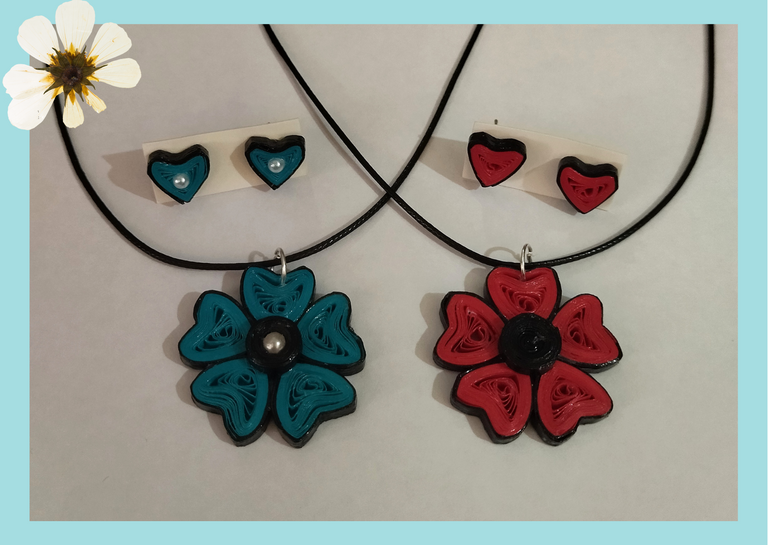
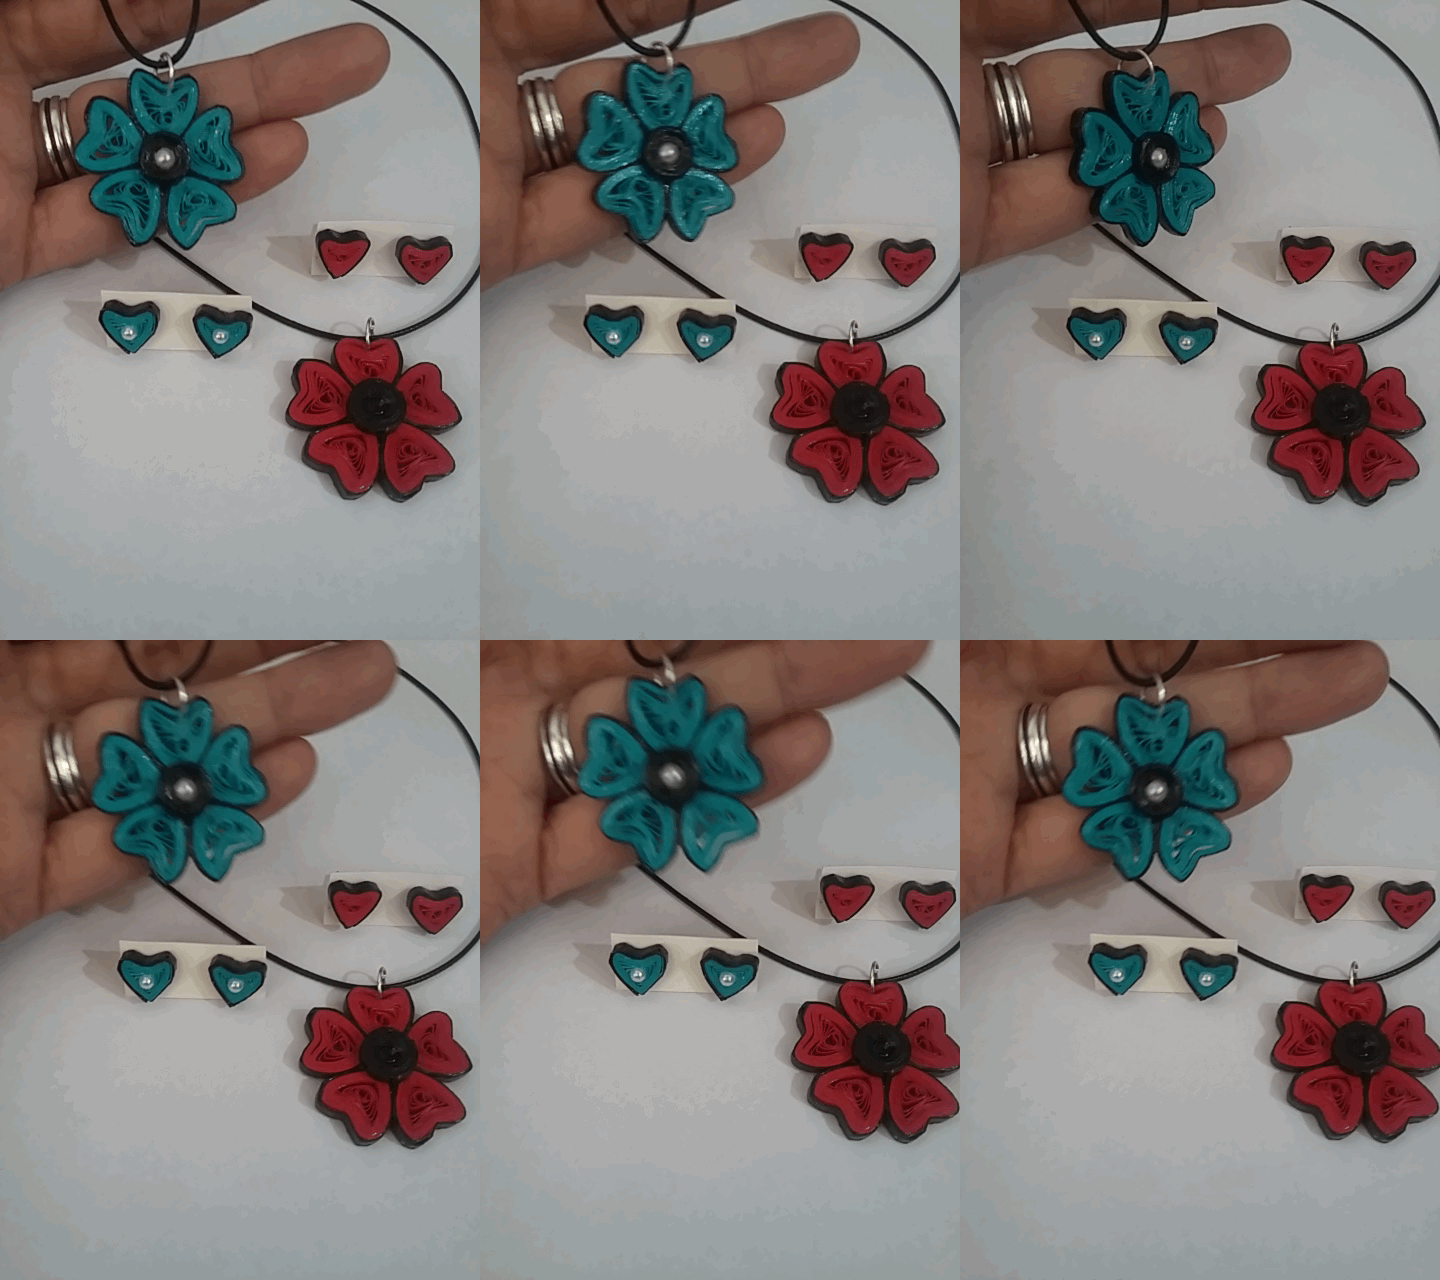
As you can see, to complement the pendant I made two small petals separately, to which I placed a fixed base for tendrils and as decoration I placed a small pearl in the middle, this for the blue and black pendant.
I made another set of red and black color, the central piece was not hollow, I simply made a closed circle in black color, and I did not place any other decoration, I also made the tendrils with only one petal, and I also wanted to leave it natural without any decoration, all this is optional and you decide how to decorate, and what to add to your pieces to look as you wish.

• Por ultimo colocaremos su protección liquida (plastificado), aplicando varias capas de pega blanca extra fuerte de carpintería, dejando secar entre una capa y otra, dejamos secar muy bien.
Como podrán observar para complementar el dije realice dos pequeños pétalos por separado, a los cuales le coloque una base fija para zarcillos y como decoración le coloque una pequeña perla en el medio, esto para el dije azul y negro.
Realice otro conjunto de color rojo y negro, la pieza central no la realice hueca, sino que simplemente hice un círculo cerrado color negro, y no le coloque mas decoración, así mismo hice los zarcillos con tan solo un pétalo, y también quise dejarlo natural sin ninguna decoración, todo esto es opcional y ustedes deciden como decorar, y que añadir a sus piezas para que luzcan como más lo deseen.

What did you think, did you like it?
I hope you did, I hope you liked my explanation, procedure and photos, I made them with love for you.
"Let out that muse that inspires you, and let your imagination fly".
Thank you all, see you next time. 💙

¿Que les pareció, les gustó?
Espero que sí, que les haya gustado mi explicación, procedimiento y fotos, los hice con mucho cariño por y para ustedes.
"Deja salir esa musa que te inspira, y deja volar tu imaginación".
Gracias a todos, nos vemos en la próxima. 💙

Todas las fotos usadas en este post son de mi autoría y han sido sacadas en mi celular personal un Redmi 9T y editadas Canva Banner y separador hecho por mí en Canva Traducido con la ayuda de DeepL


