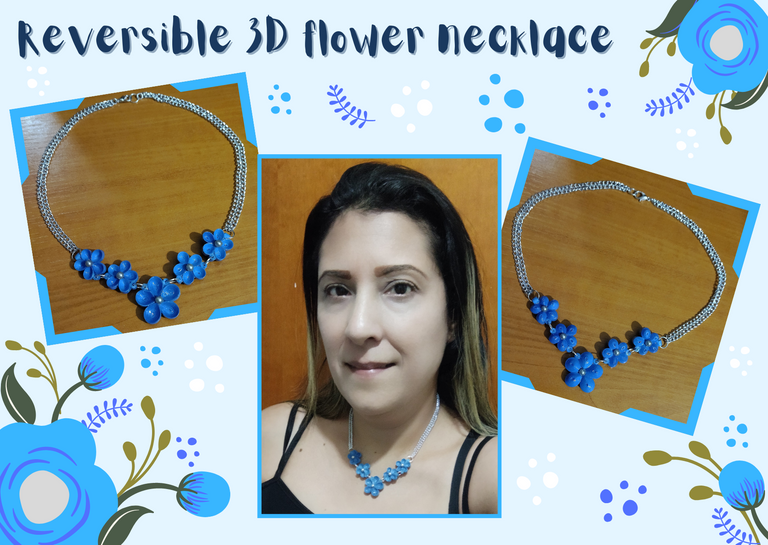
Hello everyone...🐱🐾💕
Hello to my dear Hiver and the dear community of #Jewelry, first of all a very special greeting full of blessings for the creators, and of course for those who make life in this beautiful community. I am very pleased to be here to participate in the contest "Contest Creating With Love", and show you a new work especially for you.
I invite to participate in the contest to: @janettbrito76 @irenenavarroart @brittandjosie ✨
Today I bring you a necklace with 5 petals flowers, made with the paper quilling technique, and the best thing is that you can use this necklace on any side you want because the flowers have a different effect on both sides, they look very pretty and striking on the side you choose. We hope you like them:
Let's get started:😃

- 3mm wide quilling ribbons, dark blue color.
- Quilling needle.
- Scissors.
- White glue.
- Medium pearls, silver color, (or the color of your choice).
- Fine tip tweezers.
- Small and medium size costume jewelry rings.
- Silver plated costume jewelry chain.
- Parrot's beak lock.
- Fine nose pliers.
- Artistic resin.
- Solvent X.
- Glass bottle.
- Brush.

I am going to share and show you the procedure to make a flower, you are going to repeat according to the amount of flowers you want to make. In my case I am going to make 5 flowers, one big one that will be located in the central part of the necklace, and 4 smaller ones, two of them on each side of the flower located in the central part.
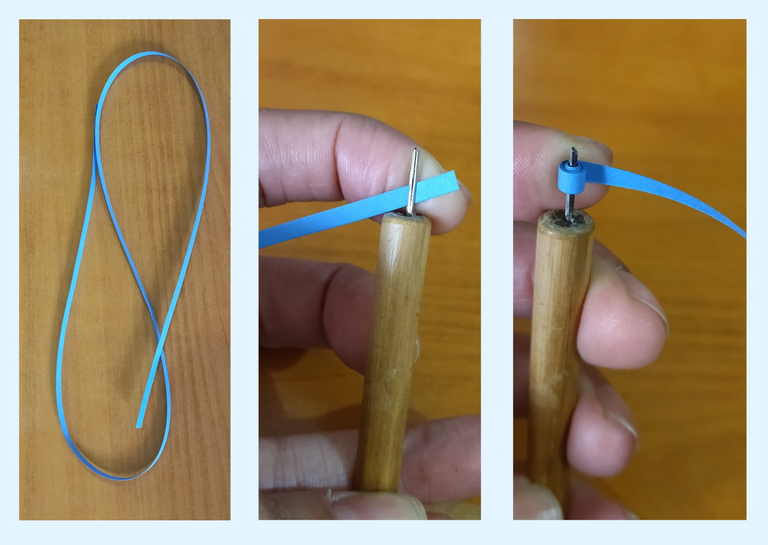
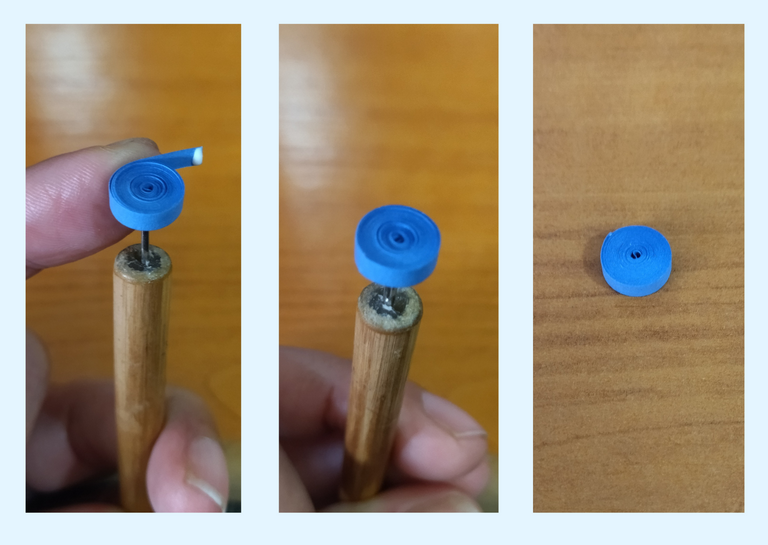
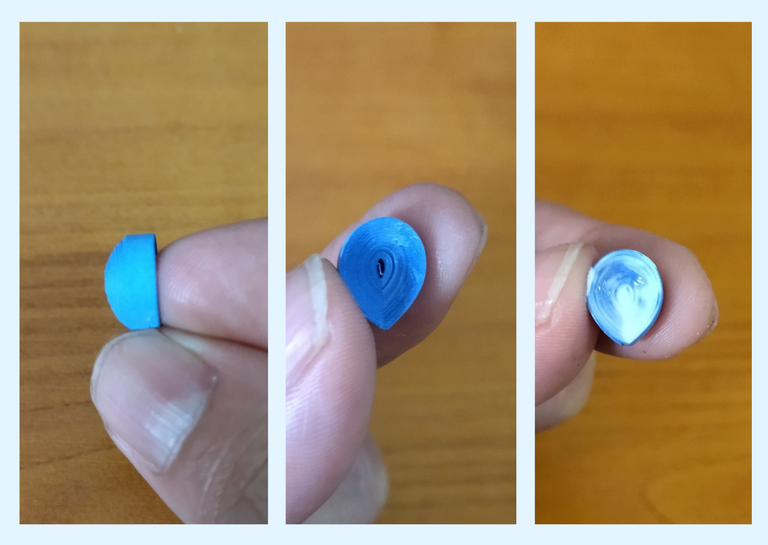
- To make the central flower we are going to start by taking a dark blue quilling ribbon, 3mm wide x 50cms long, with the quilling needle we are going to roll up to the end with all the ribbon to form a closed circle, seal with white glue, take it out of the needle.

Hola a todos... 🐱🐾💕
Hola a mis queridos Hiver y a la querida comunidad de #Jewelry, ante todo un saludo muy especial lleno de bendiciones para los creadores, y por supuesto para los que hacen vida en esta bonita comunidad. Me encuentro muy complacida de encontrarme por acá para participar en el concurso “Creando con Amor”, y mostrarles un nuevo trabajo especialmente para ustedes.
Invito a participar en el concurso a:
@janettbrito76 @irenenavarroart @brittandjosie ✨
Para hoy les traigo un collar con unas flores de 5 pétalos, realizados en la técnica de paper quilling. ¿Y que es lo mejor?, que este collar podrás usarlo por el lado que desees ya que las flores tienen un efecto diferente por ambas caras, lucen muy bonitas y llamativas por el lado que escojas. Deseando que sean de su agrado:
Comencemos:😃

• Cintas de quilling de 3mm de ancho, color azul oscuro.
• Aguja para quilling.
• Tijera.
• Pega blanca.
• Perlas medianas, color plateadas, (o del color de tu preferencia).
• Pinza punta fina.
• Argollas pequeñas y medianas de bisutería.
• Cadena plateada de bisutería.
• Trancadero pico de loro.
• Alicate punta fina.
• Resina artística.
• Solvente X.
• Frasco de vidrio.
• Pincel.

Les voy a compartir y mostrar el procedimiento para elaborar una flor, ustedes van a repetir según la cantidad de flores que deseen realizar. En mi caso voy a elaborar 5 flores, una grande que ve a estar ubicada en la parte central del collar, y 4 más pequeñas de las cuales van dos en cada lado de la flor ubicada en la parte central.
• Para realizar la flor central vamos a comenzar tomando una cinta de quilling color azul oscuro, de 3mm de ancho x 50cms de largo, con la aguja para quilling vamos a enrollar hasta finalizar con toda la cinta hasta formar un círculo cerrado, sellamos con pega blanca, sacamos de la aguja.
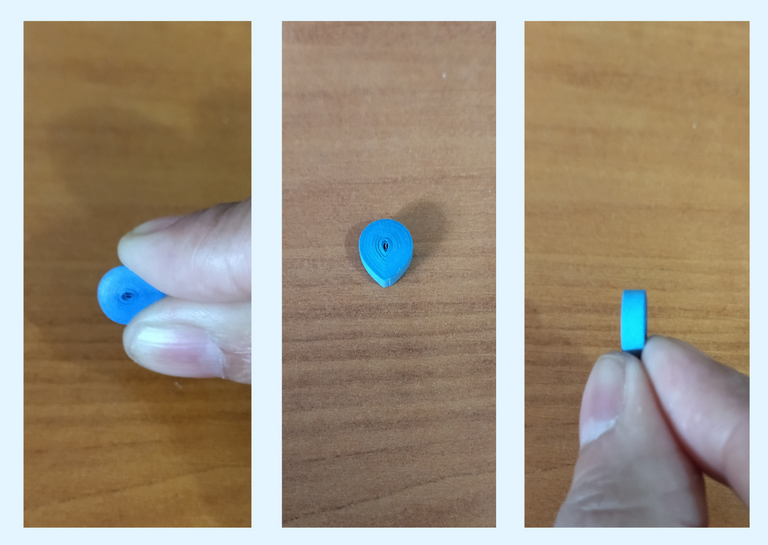
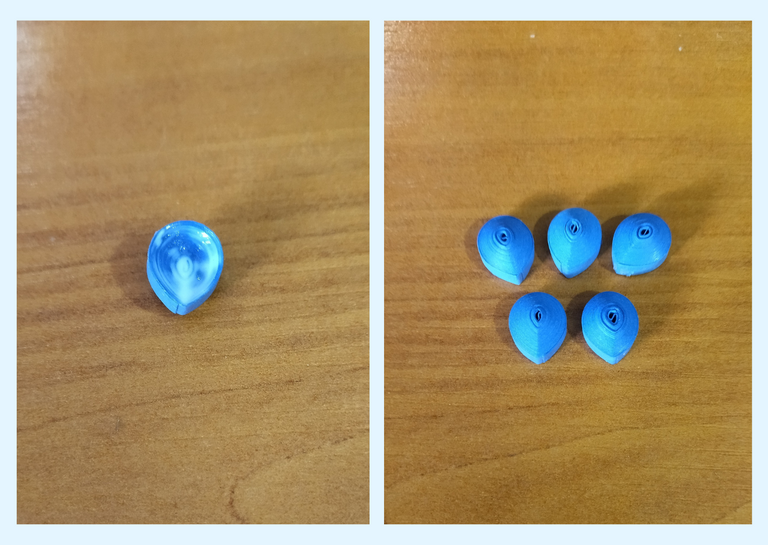
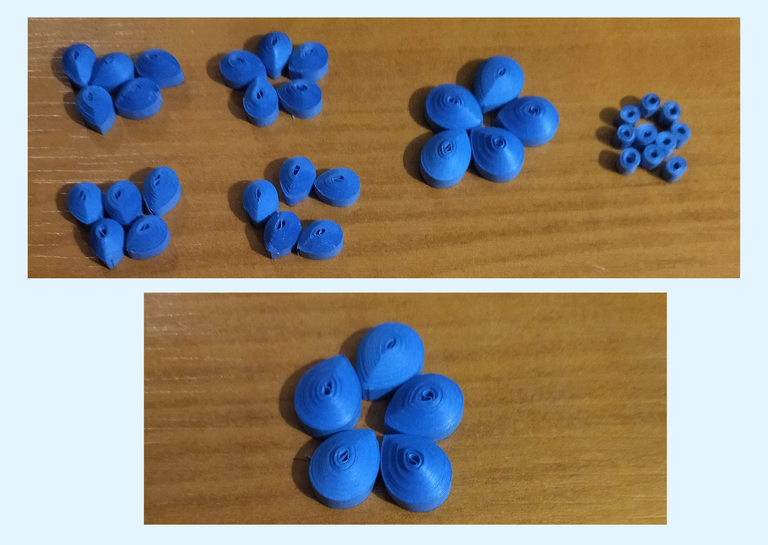
- Once we have our circle closed, we are going to give it a drop shape by pinching the tip of the circle to get the petal, and at the back we are going to push out a little to simulate a 3D effect, we put a little glue on the back so that it does not move. From this piece, which as I said will be the petals, we will need 5 to form our flower.
- To make the smaller flowers that will go on the sides of the central flower, we will take 3mm wide x 25cms long dark blue ribbon and we will do all the previous steps. As these pieces we will need 20.
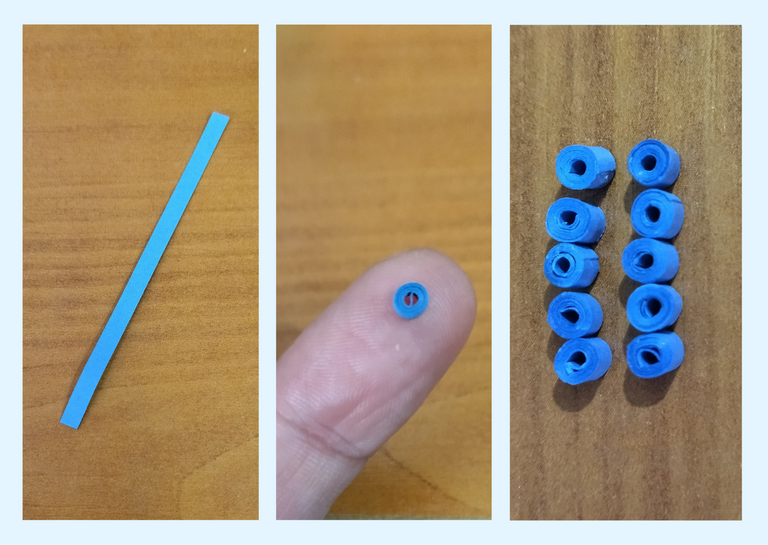
- Now we are going to take a piece of ribbon 3mm wide x 6cms long, of dark blue quilling, we roll it with the quilling needle until we finish with the ribbon with which we will obtain a very small closed circle, we seal it with glue, of this small piece we are going to need 10. This circle we are going to use it to stick it to the flowers to be able to put the rings and in this way to unite the flowers to assemble our necklace. Later I will show you what we are going to do.

• Una vez que tenemos nuestro círculo cerrado, vamos a darle forma de gota pellizcando la punta del circulo para obtener el pétalo, y por la parte trasera vamos a empujar un poco hacia afuera para simular un efecto 3D, ponemos un poco de pega en la parte de atrás para que no se mueva. De esta pieza que como les dije serán los pétalos, necesitaremos 5 para formar nuestra flor.
• Para realizar las flores más pequeñas que irán a los lados de la flor central, tomaremos cinta de 3mm de ancho x 25cms de largo color azul oscuro y realizaremos todos los pasos anteriores. Como estas piezas vamos a necesitar 20.
• Ahora vamos a tomar un trozo de cinta de 3mm de ancho x 6cms de largo, de quilling color azul oscuro, enrollamos con la aguja para quilling hasta terminar con la cinta con lo que obtendremos un círculo cerrado muy pequeño, sellamos con pega, de esta pequeña pieza vamos a necesitar 10. Este círculo lo vamos a utilizar para pegarlo a las flores para poder meter las argollas y de esta manera unir las flores para armar nuestro collar. Más adelante les mostrare lo que vamos a hacer.
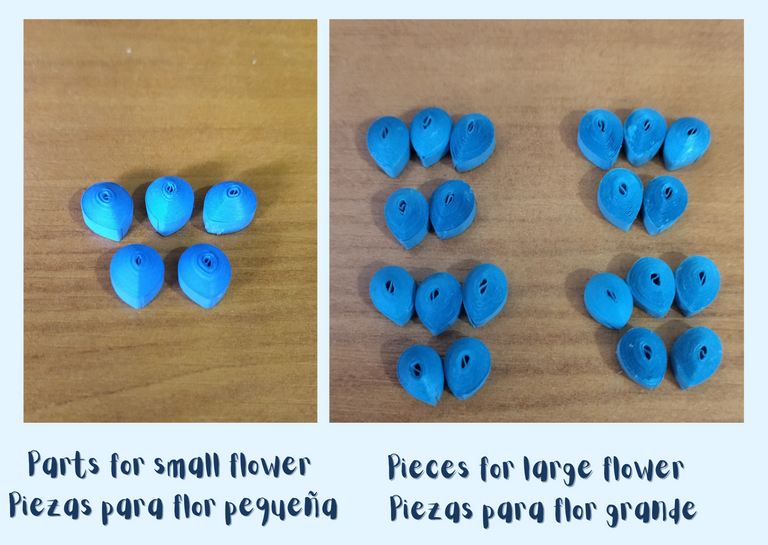
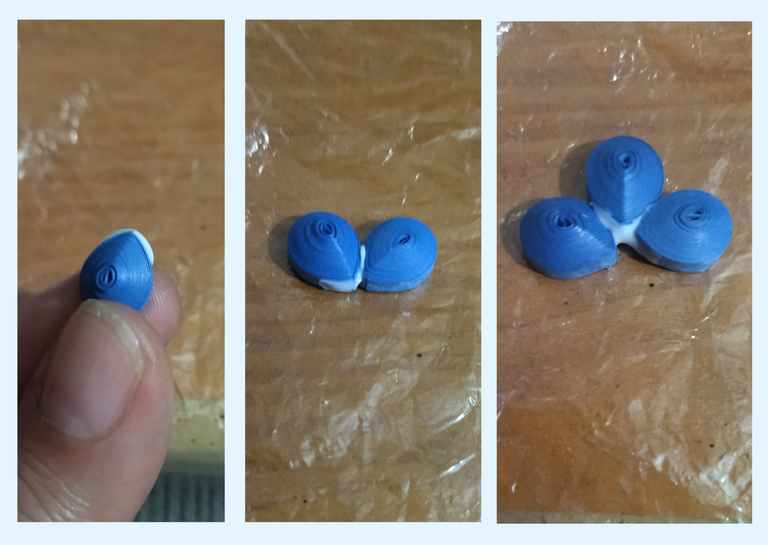
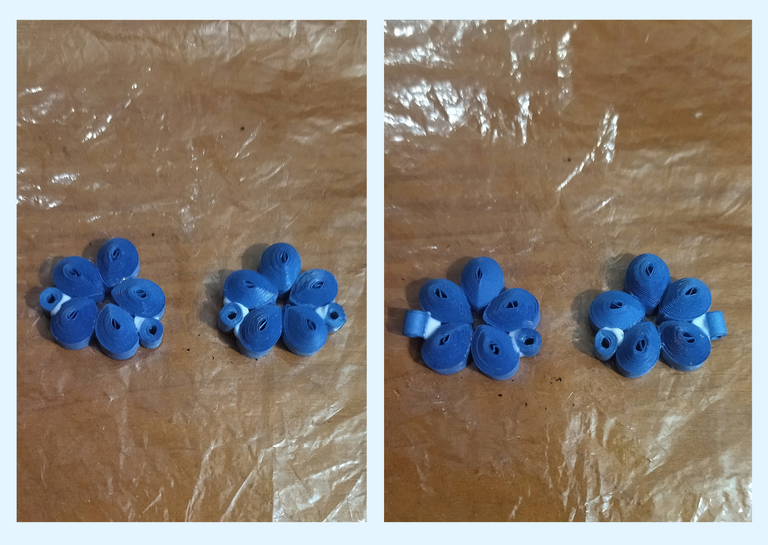
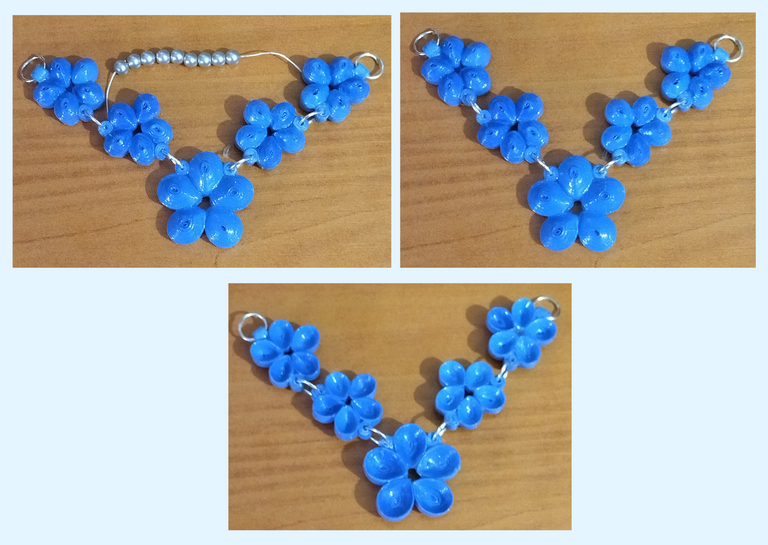
- Now that we have all our pieces ready, let's put them together. We will start assembling the big flower. We take the 5 pieces and with white glue we are going to join them one by one in a harmonic way. From the small pieces we are going to place two vertically, one on each side of the first petal (with the holes facing upwards), we reserve.
- Let's go with the small flowers, to join them we will follow the same procedure as before.

• Ya tenemos todas nuestras piezas listas, vamos a unirlas. Comenzaremos armando la flor grande. Tomamos las 5 piezas y con pega blanca vamos uniendo una a una de manera armónica. De las piezas pequeñas vamos a colocar dos de manera vertical, en el primer pétalo una a cada lado, (que queden los agujeros hacia arriba), reservamos.
• Vamos con las flores pequeñas, para unirlas seguiremos el mismo procedimiento anterior.
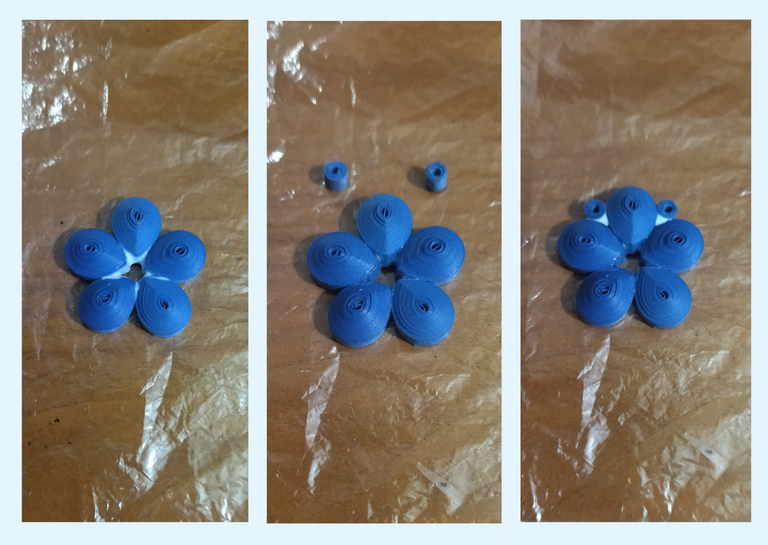
- Now I am going to explain the way in which you are going to place the small pieces to the small flowers, to the two that are going to be next to the large central flower, we are going to place one piece on each side vertically under the third petal.
- To the remaining small flowers we are going to place the small pieces on the same petals as the previous ones, with the difference that one will be placed vertically and the other horizontally, the one that will be vertical will be on the side where we are going to join with the small flower, therefore, the one that will be horizontal will be where we are not going to place any more flowers.
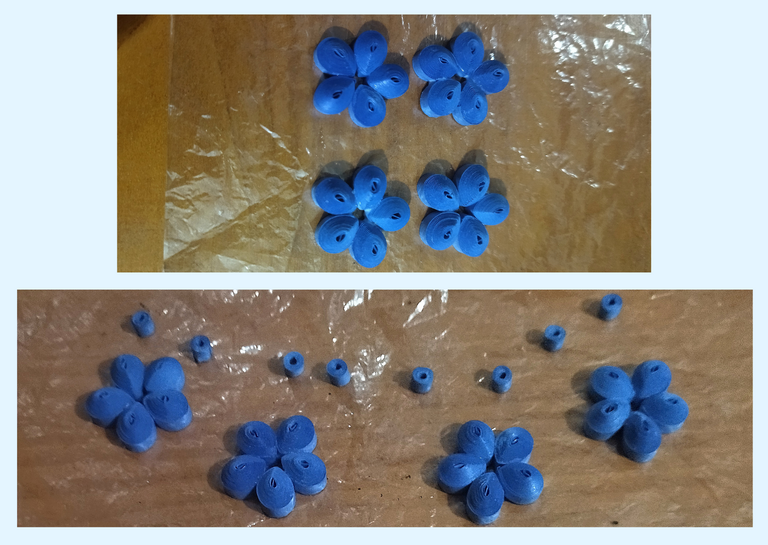
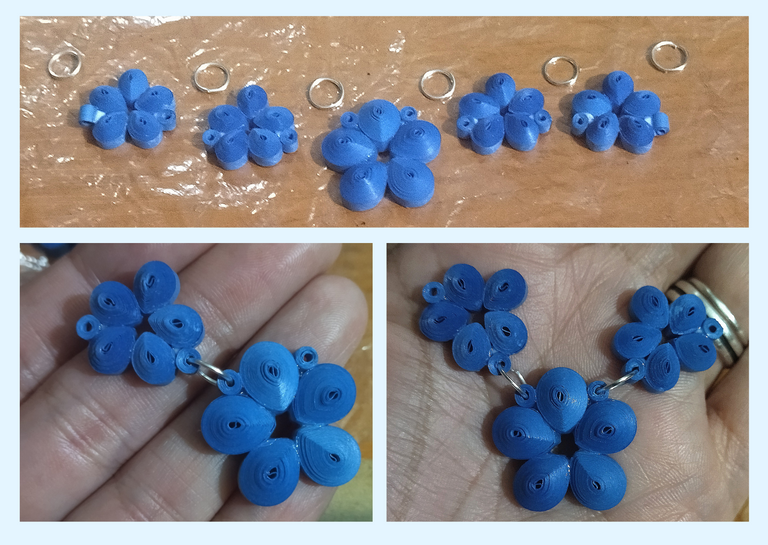
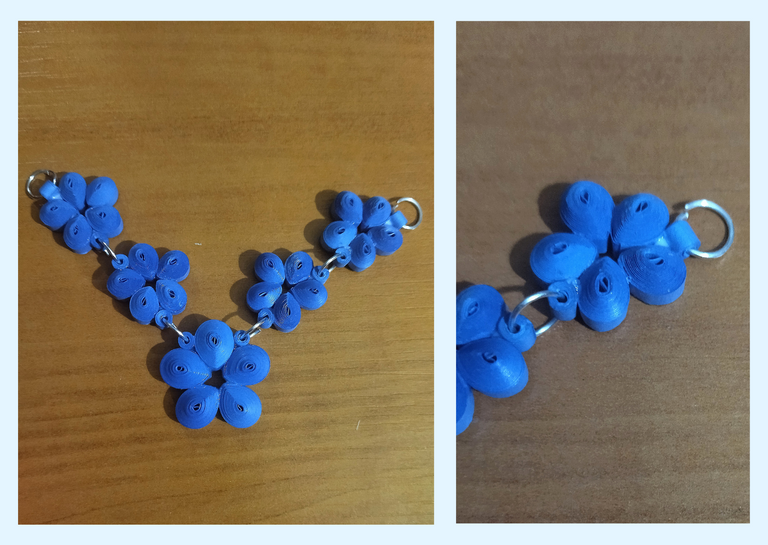
- We are going to join the flowers by placing the medium size bijouterie rings, I will do this before placing the liquid protection (plasticized), to avoid that the holes where we must place the rings are covered. We will place the rings in the following way, we will take a single ring and put it through the holes of the pieces that I placed on the flower, as shown in the photo, we will finish by placing a ring also on the piece that we placed horizontally.

• Ahora les voy a explicar la manera en la que van a colocar las piezas pequeñas a las flores pequeñas, a las dos que van a estar al lado de la flor grande central, les vamos a colocar una pieza de cada lado de manera vertical debajo del tercer pétalo.
• A las flores pequeñas restantes les vamos a colocar las piezas pequeñas, en los mismos pétalos que las anteriores, con la diferencia que uno lo vamos a colocar en vertical y otro en horizontal, el que ira en vertical será del lado en que vamos a unir con la flor pequeña, por consiguiente, la que va en horizontal será donde ya no vamos a colocar más flores.
• Vamos a unir las flores colocándole las argollas medianas de bisutería, esto lo hare antes de colocar la protección liquida (plastificado), para evitar que los huequitos donde debemos colocar las argollas se tapen. Vamos a colocar las argollas de la siguiente manera, tomaremos una sola argolla y la metemos por los agujeros de las piezas que le coloque a la flor, tal como lo indica la foto, terminaremos colocando una argolla también a la pieza que colocamos en horizontal.
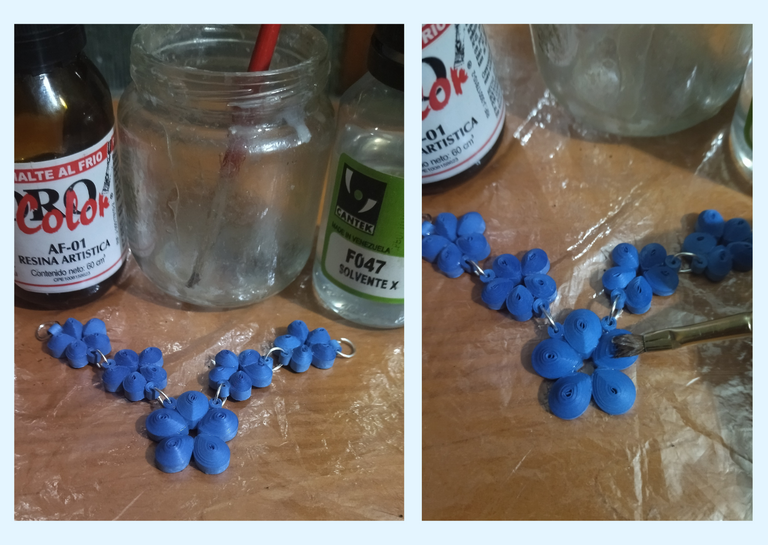
- Let's place the liquid protection (plasticized), in the glass jar we pour one part of artistic resin, solvent X, stir and with a brush we add it to the pieces on both sides, let it dry and repeat the procedure.
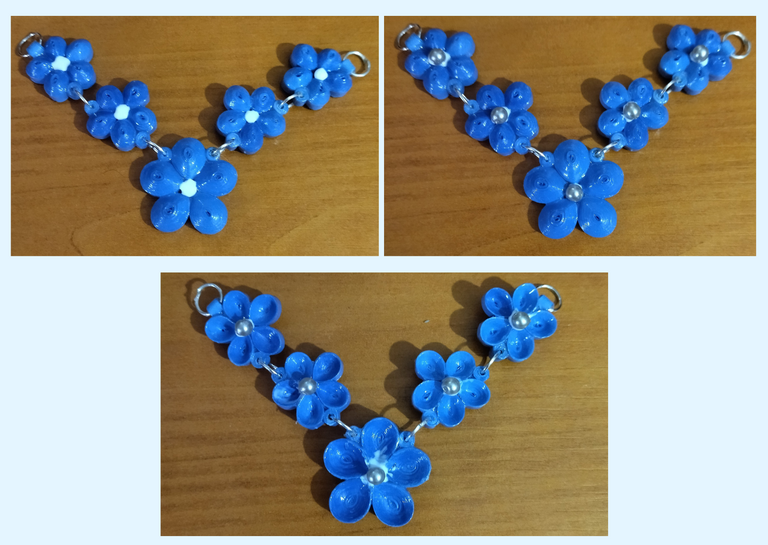
- Let's decorate the flowers of the necklace, we take the silver pearls and with extra strong white glue we will place them in the center of each flower, and the best thing is that we will place them on both sides of the flower to be able to use our necklace in a reversible way.
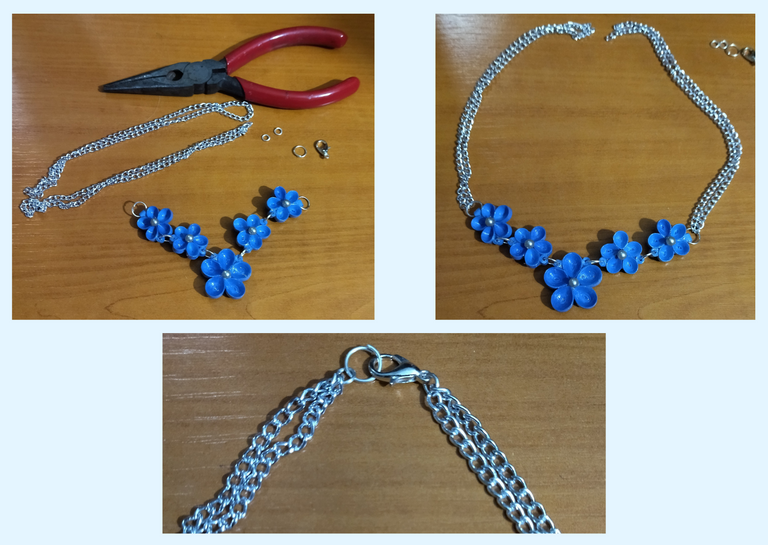
- To finish we will assemble the necklace and place the last accessories. We will take a piece of silver plated chain I used 30cms long and fold it in half to place it double, we will place its ring at each end of the chain and finally its parrot beak clasp.
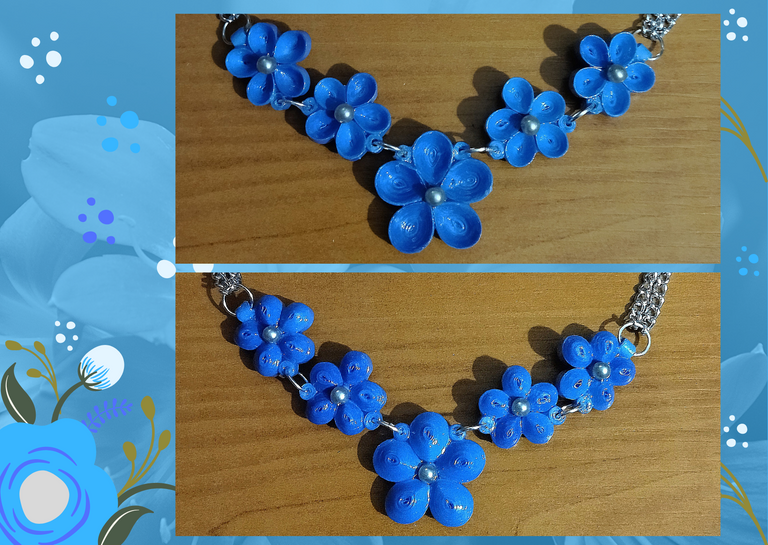
This way we will have ready to use this 3D reversible necklace.💕

• Coloquemos la protección liquida (plastificado), en el frasco de vidrio vertemos una parte de resina artística, solvente X, revolvemos y con un pincel añadimos a las piezas por ambos lados, dejamos secar y repetimos el procedimiento.
• Adornemos las flores del collar, tomamos las perlas plateadas y con pega blanca extra fuerte vamos a colocar en el centro de cada flor, y que es lo mejor, que vamos a colocar por ambos lados de la flor para poder utilizar nuestro collar de manera reversible.
• Para finalizar armaremos el collar y colocaremos los últimos accesorios. Tomaremos un trozo de cadena plateada yo use 30cms de largo y lo doble a la mitad para colocarlo doble, le colocamos su argolla en cada extremo final de la cadena y por ultimo su trancadero pico de loro.
De esta manera tendremos listo para su uso este collar reversible en 3D.💕

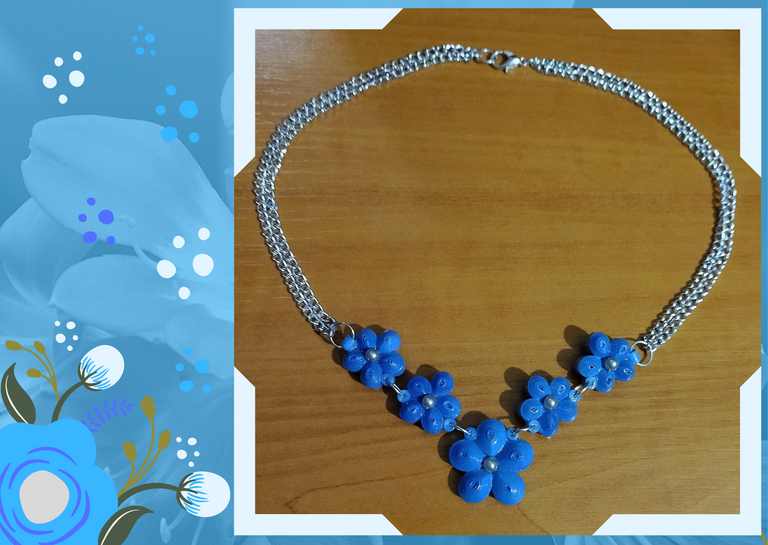
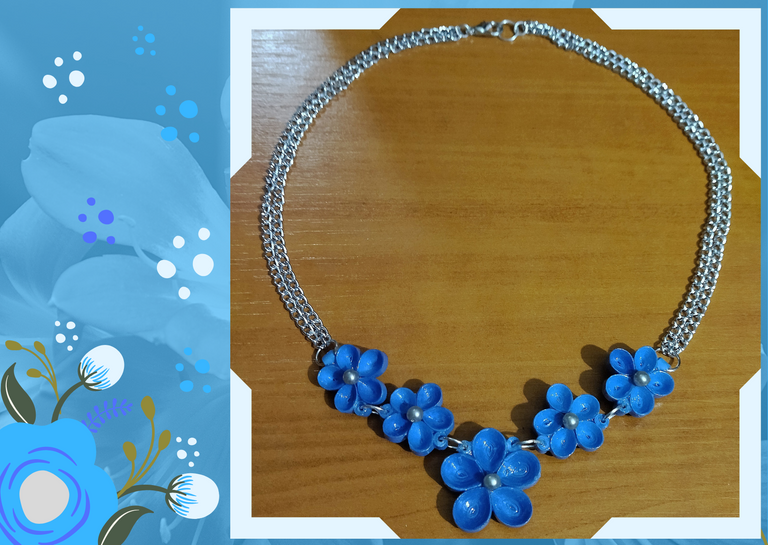
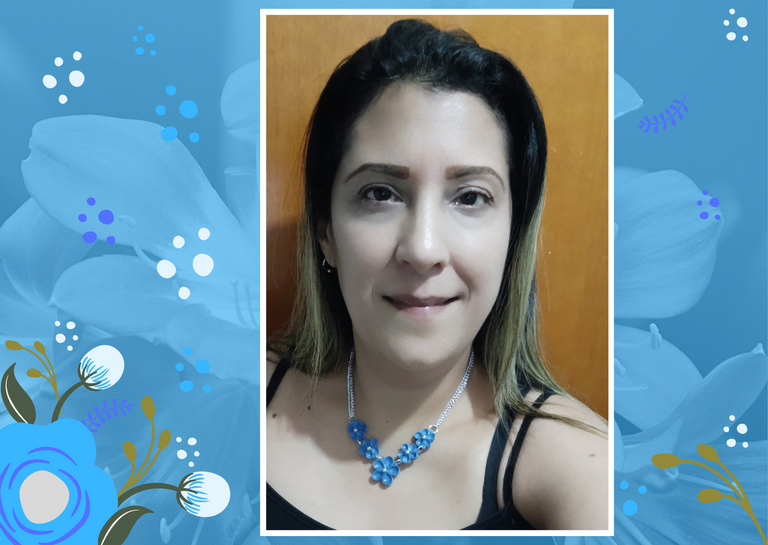
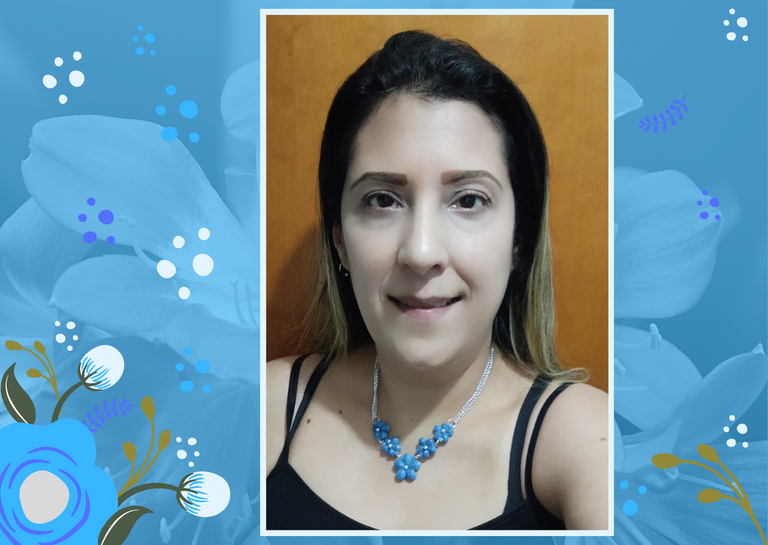
It is laborious to perform this type of work, as we must do piece by piece, mold them trying to be identical, join them, decorate them, protect them with artistic resin, mirror shine and other special products that are liquid plastic or very resistant glue, so that our creations are not damaged, this is one of the most important parts for your work to last even if it is paper, I have pieces of years and remain intact and I have never had complaints from people who have bought me, this work especially have been many pieces that I have worked but it has been worth it. It is my passion to make this kind of art and much more when the final result is truly satisfactory. When things are done with love everything is possible, and this is especially for you.
Both sides look very nice, I focus in the step by step to show you the pieces by the parts that protrude outwards, but in my case I confess that I love more for my personal use for the part where the flowers have their 3D hollow effect.
And which one did you like the most?
What did you think, did you like it?
I hope you did, I hope you liked my explanation, procedure and photos, I made them with love for you.
"Let out that muse that inspires you, and let your imagination fly".
Thank you all, see you next time. 🐾🐱💕

Es laborioso realizar este tipo de trabajo, ya que debemos hacer pieza por pieza, moldearlas tratando que queden idénticas, unirlas, adornarlas, protegerlas con su resina artística, brillo espejo entre otros productos especiales que son plástico líquido o pegamentos bien resistente, para que nuestras creaciones no se dañen, está es una de las partes más importantes para que tú trabajo duré aunque sea papel, tengo piezas de años y siguen intactas y nunca he tenido quejas de las personas que me han comprado, este trabajo en especial han sido bastantes piezas que he trabajado pero ha valido la pena. Es mi pasión realizar este tipo de arte y muchísimo más cuando el resultado final es verdaderamente satisfactorio. Cuando se hacen las cosas con amor todo se puede, y esto es especialmente para ustedes.
Ambos lados lucen muy bonitos, yo me enfoque en el paso a paso en mostrarles las piezas por las partes que sobresalen hacia afuera, pero en mi caso les confieso que me encanto más para mi uso personal por la parte en que las flores tienen su efecto 3D hueco.
¿Y a ustedes cual les gusto más?
¿Que les pareció, les gustó?
Espero que sí, que les haya gustado mi explicación, procedimiento y fotos, los hice con mucho cariño por y para ustedes.
"Deja salir esa musa que te inspira, y deja volar tu imaginación".
Gracias a todos, nos vemos en la próxima. 🐾🐱💕

Todas las fotos usadas en este post son de mi autoría y han sido sacadas en mi celular personal un Redmi 9T y editadas Canva Banner y separador hecho por mí en Canva Traducido con la ayuda de DeepL


