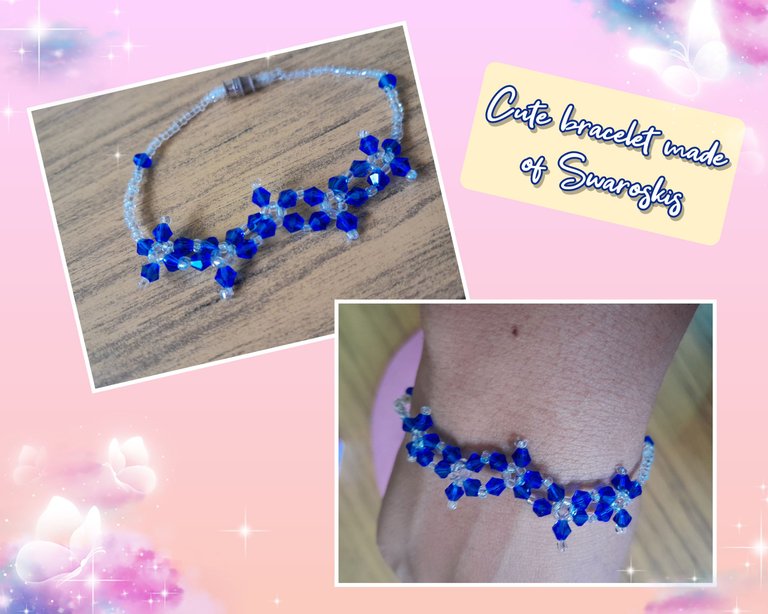
Hola amigos de Jewelry 💎, un cordial saludo para esta linda comunidad llena de creatividad y talento, les deseoun feliz día.
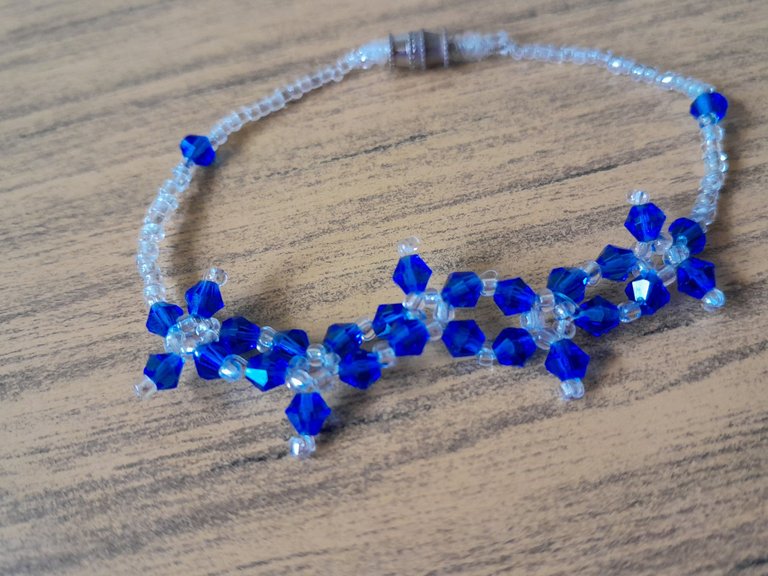
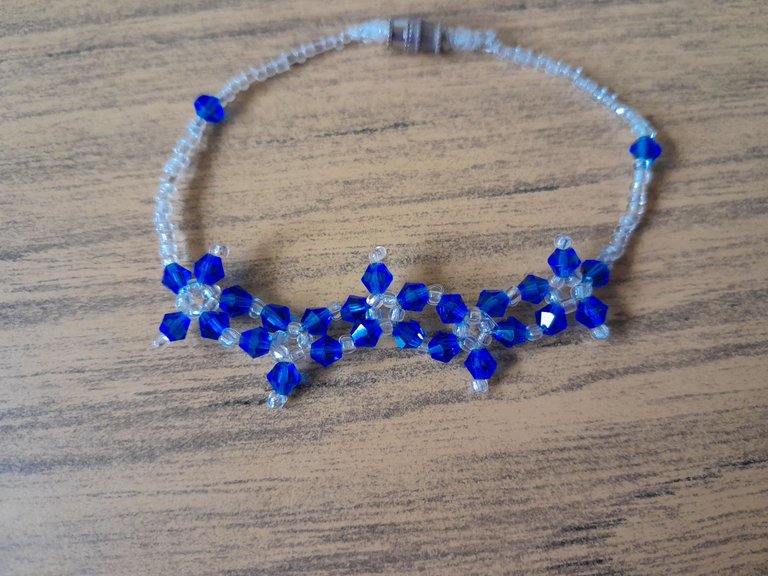
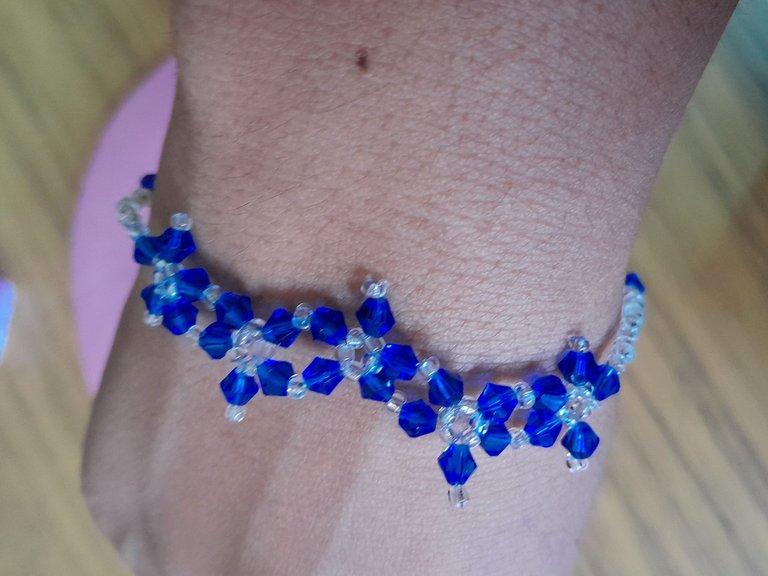
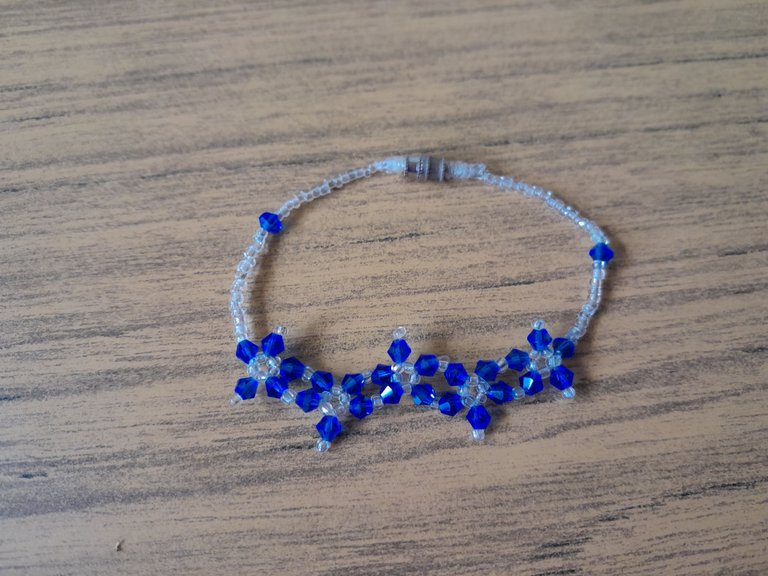
Me complace compartir con ustedes este nuevo proyecto, un lindo brazalete de Swaroskis azules y mostacillas transparentes, cuenta con un diseño central que parecieran estrellas entrelazadas, este trabajo ha sido uno de mis preferidos, me encanta el color y comoresalta, se ve delicado y sencillo, cuando comencé hacer bisutería en mi adolescencia, el swaroski era uno de mis materiales preferidos, pero debido al costo no lo uso tan frecuente en mis elaboraciones, pero siempre será especial para mí, adoro como quedan los accesorios con estas piedras.
Hello friends of Jewelry 💎, a warm greeting to this beautiful community full of creativity and talent, I wish you a happy day.
I am pleased to share with you this new project, a nice bracelet of blue Swaroskis and transparent beads, has a central design that look like intertwined stars, this work has been one of my favorites, I love the colour and comoresalta, looks delicate and simple, when I started making jewelry in my teens, the swaroski was one of my favorite materials, but because of the cost I do not use it so often in my elaborations, but will always be special to me, I love how the accessories are with these stones.

Materiales| Materials
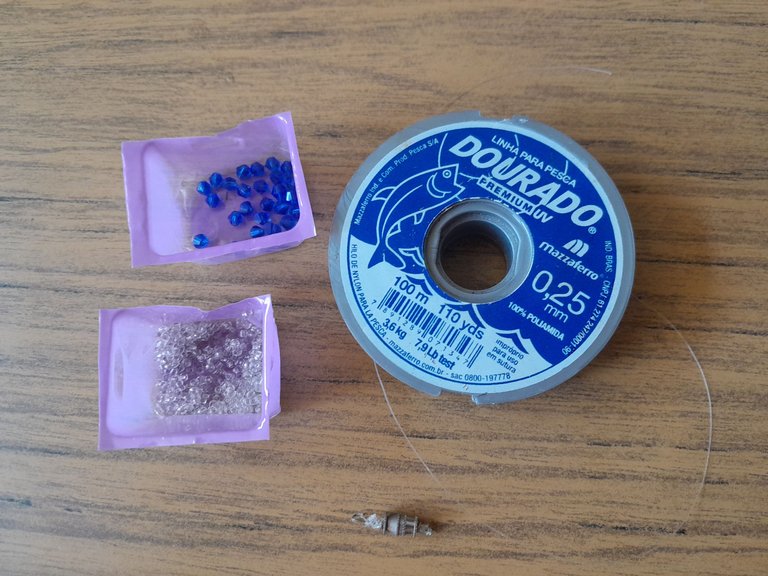
Para este proyecto necesitaremos los siguientes materiales:
25 swaroski azul rey.
Mostacillas transparentes.
Nailon número 0.25.
Cerrador.
For this project we will need the following materials:
25 swaroski azul rey.
Mostacillas transparentes.
Nailon número 0.25.
Cerrador.

Paso 1| Step 1
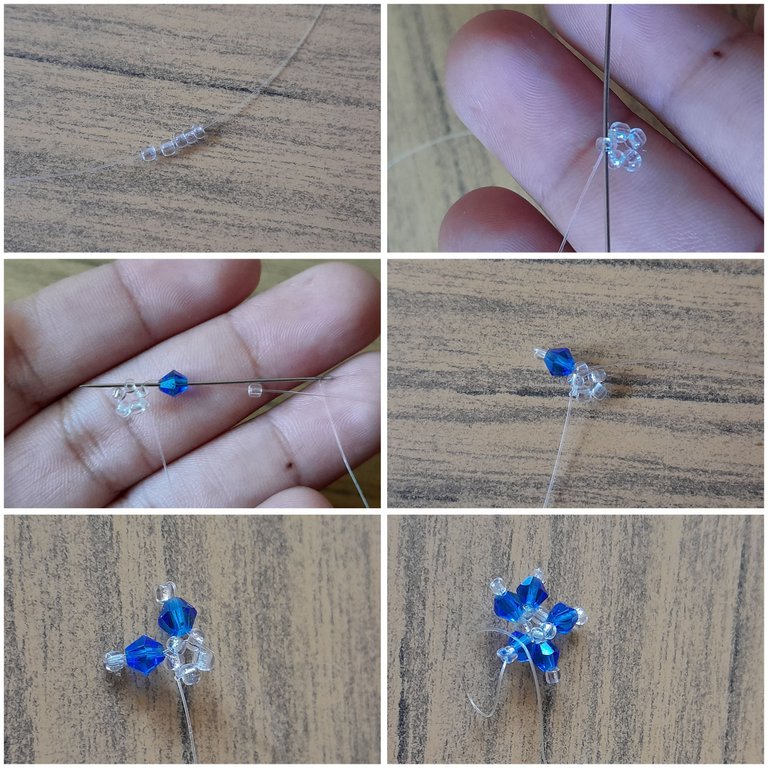
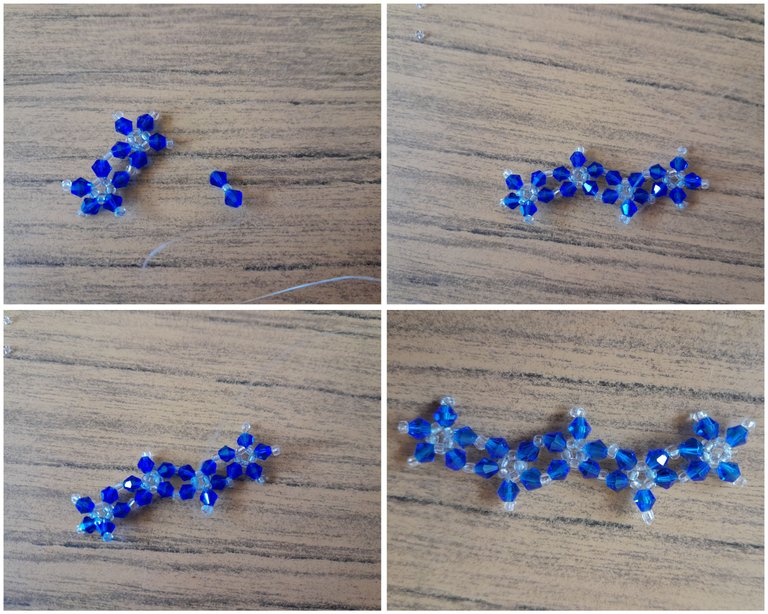
Para este proyecto usaremos 50 centímetros de nailon, comenzaremos introduciendo cinco mostacillas transparentes, luego amarramos los dos extremos del nailon, formando un círculo, cortamos la parte más corta del nailon, con ayuda de una aguja, vamos a pasar el nailon por la mostacilla que está al lado del nudo, de esta manera la esconderemos dentro de la mostacilla.
Ahora vamos a introducir un swaroski y una mostacilla, devolvemos el nailon por el swaroski y pasamos por la siguiente mostacilla, volvemos a pasar un swaroski, una mostacilla y repetimos el proceso anterior, lo hacemos hasta completar las cinco puntas.
For this project we will use 50 centimetres of nylon, we will start by inserting five transparent beads, then we tie the two ends of the nylon, forming a circle, we cut the shortest part of the nylon, with the help of a needle, we will pass the nylon through the bead that is next to the knot, in this way we will hide it inside the bead.
Now we are going to introduce a swaroski and a bead, we return the nylon through the swaroski and we pass it through the next bead, we pass again a swaroski, a bead and we repeat the previous process, we do it until we complete the five ends.

Paso 2| Step 2
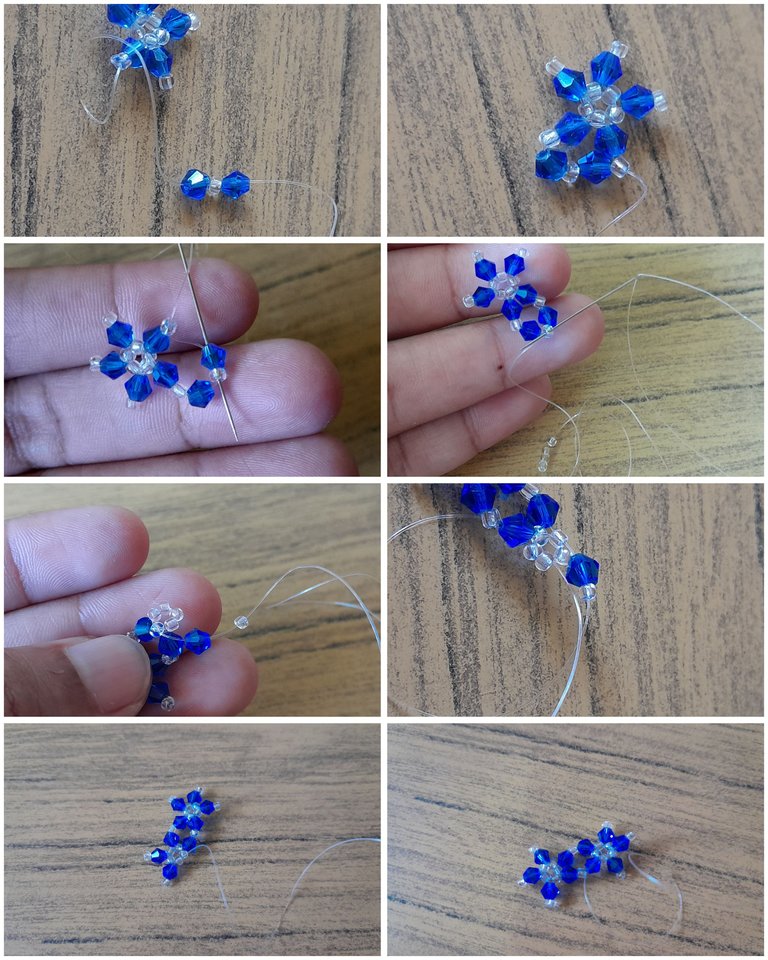
Pasamos el nailon por una de las puntas hasta la mostacilla, introducimos un swaroski, una mostacilla y otro swaroski, pasamos el nailon por la mostacilla de la otra punta, luego introducimos cinco mostacillas y cruzamos por la mostacilla que está en el centro de los dos swaroskis, subimos por el swaroski hasta llegar a la mostacilla de la otra estrella y bajamos nuevamente por el swaroski, llevamos al centro y cruzamos por la mostacilla siguiente, al igual que el paso anterior vamos a introducir un swaroski, una mostacilla y bajamos el nailon por el swaroski y así sucesivamente hasta tener todas las puntas.
We pass the nylon through one of the ends up to the bead, we introduce a swaroski, a bead and another swaroski, we pass the nylon through the bead of the other end, then we introduce five beads and we cross through the bead that is in the centre of the two swaroskis, we go up the swaroski until we reach the bead of the other star and we go down again through the swaroski, we take it to the centre and we cross through the next bead, the same as the previous step we are going to introduce a swaroski, a bead and we go down the nylon through the swaroski and so on until we have all the points.

Paso 3| Step 3
Introducimos un swaroski, una mostacilla y otro swaroski, pasamos por la mostacilla de la otra punta y repetimos el proceso de los pasos anteriores hasta completar una secuencia de cinco, mi objetivo era hacerla completamente de estrellas, pero no tenía los swaroski completos, asi que opté por una decoración central, que igualmente queda muy linda.
We introduce a swaroski, a bead and another swaroski, we pass through the bead at the other end and repeat the process of the previous steps until completing a sequence of five, my goal was to make it completely of stars, but I didn't have the complete swaroski, so I opted for a central decoration, which is still very nice.

Paso 4| Step 4
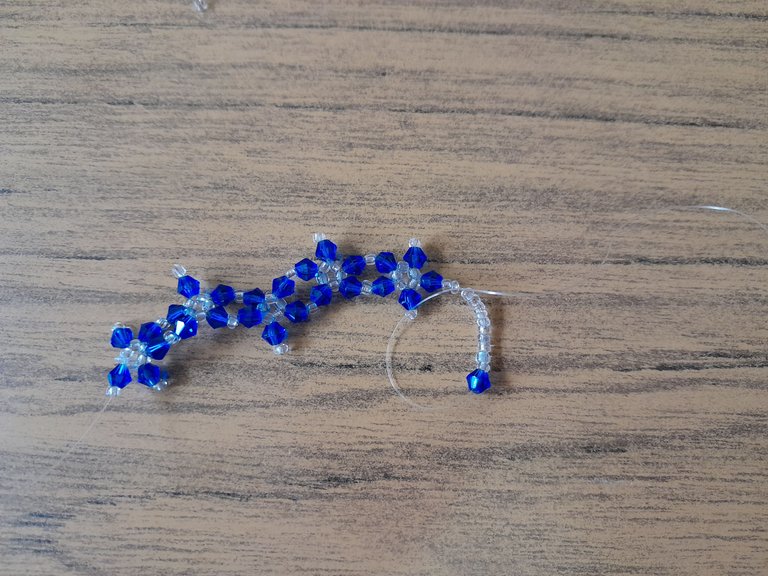
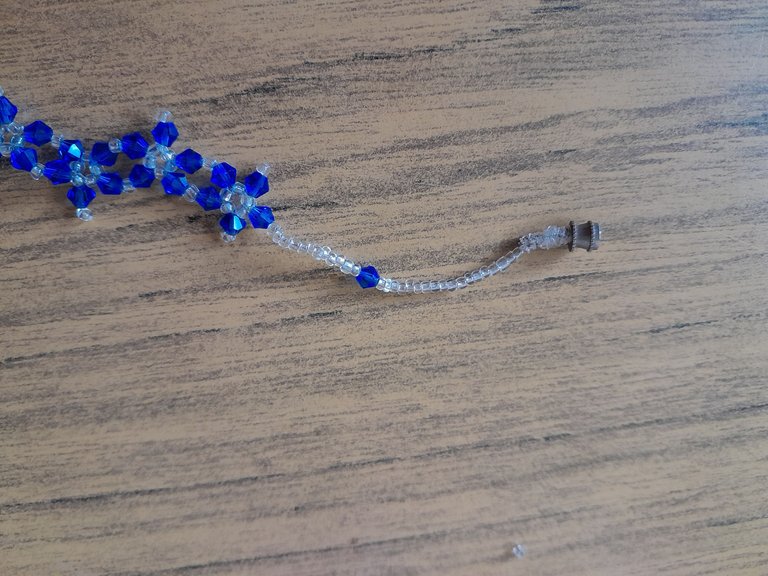
Una vez que ya tenemos listo el centro, es hora de completar la pulsera, vamos a introducir quince mostacillas, un swaroski y finalizamos con dieciocho mostacillas, introducimos el trancador, amarramos bien, cortamos y quemamos la punta, repetimos el mismo procedimiento del otro lado de la pulsera y ya la tenemos lista, espero les haya gustado.
Once we have the centre ready, it is time to complete the bracelet, we are going to introduce fifteen beads, a swaroski and finish with eighteen beads, introduce the clasp, tie well, cut and burn the tip, repeat the same procedure on the other side of the bracelet and we have it ready, I hope you liked it.

Muchas gracias por este lindo espacio, espero les haya gustado mi elaboración de hoy, mis mejores deseos, nos vemos pronto, saludos ☺️.
Thank you very much for this nice space, I hope you liked my elaboration today, best wishes, see you soon, greetings ☺️.
Fotos propias tomadas con mi teléfono Samsung A13, 50 mp. Edición de portada con Picsart collage en Gridart. Contenido exclusivo para hive.
Traducción -->deepl
Own photos taken with my Samsung A13 phone, 50 mp. Cover editing with Picsart collage in Gridart.
Exclusive content for hive.
Translation -->deepl

Nos vemos pronto‼️
See you soon‼️

