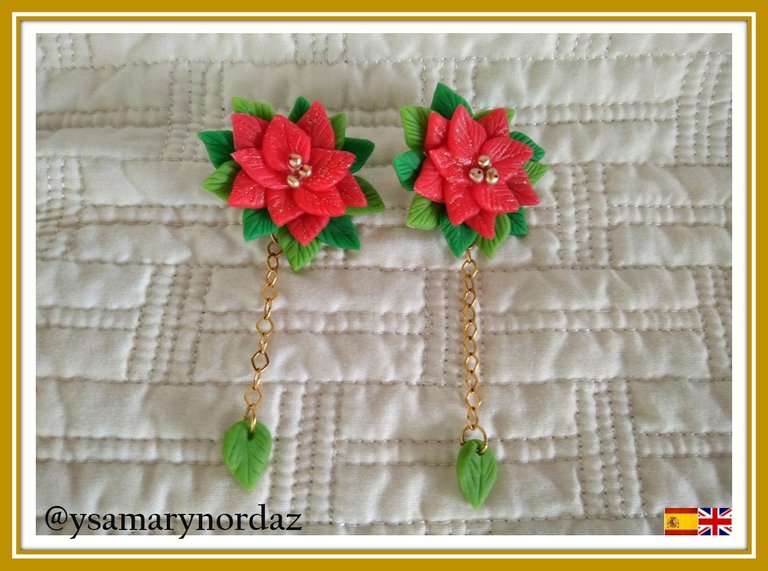
Hola a toda la comunidad de #jewelry. La época de navidad es uno de los momentos más propicio para las celebraciones; visitas de familiares o amigos, brindis y fiestas. En el lugar donde trabajo estaremos celebrando la navidad, por lo tanto, elegí crear una pieza de bisutería elaborada en masa flexible. La flor de navidad o llamada también flor de pascua es una flor hermosa de color rojo intenso y sus hojas verdes, dos de los colores representativos de la navidad. A continuación, les presento el siguiente paso a paso. ¡Vamos a comenzar!
Hello to the entire #jewelry community. The Christmas season is one of the most propitious moments for celebrations; visits from family or friends, toasts and parties. In the place where I work, we will be celebrating Christmas, therefore, I chose to create a piece of jewelry made of flexible mass. The Christmas flower or also called the Easter flower is a beautiful flower with an intense red color and its green leaves, two of the representative colors of Christmas. Then I present the next step by step. Let's get started!

Materiales:
•Masa flexible: verde claro, verde oscuro y rojo
•Crema humectante
•Cortador en forma de hoja pequeño
•Rodillo
•Esteca de cuchilla
•Pintura escarchada
•Pincel
•Pinza
•Tenaza
•Cadena (10cm)
•6 piedritas doradas
•2 base de zarcillo
•4 anillos dorados
•Pistola y barra de silicon
Materials:
•Flexible clay: light green, dark green and red
•Moisturizing lotion
•Leaf cutter
•Roller
•Pottery clay cutter
•Frosty paint
•Brush
•Pliers
•Pincer
•Golden chain (10cm)
•6 golden stones
•2 ball post earrings
•4 jump rings
•Gun and silicone glue
Paso 1
Limpia la superficie donde trabajarás la masa y unta un poco de crema humectante en ella, de esta manera la masa no se pegará. Igualmente, te recomiendo colocar en tus manos para que sea más fácil el amasado.
Step 1
Clean the surface where you will work the dough and spread a little moisturizer on it, this way the dough will not stick. Likewise, I recommend placing it in your hands to make it easier to knead.

Paso 2
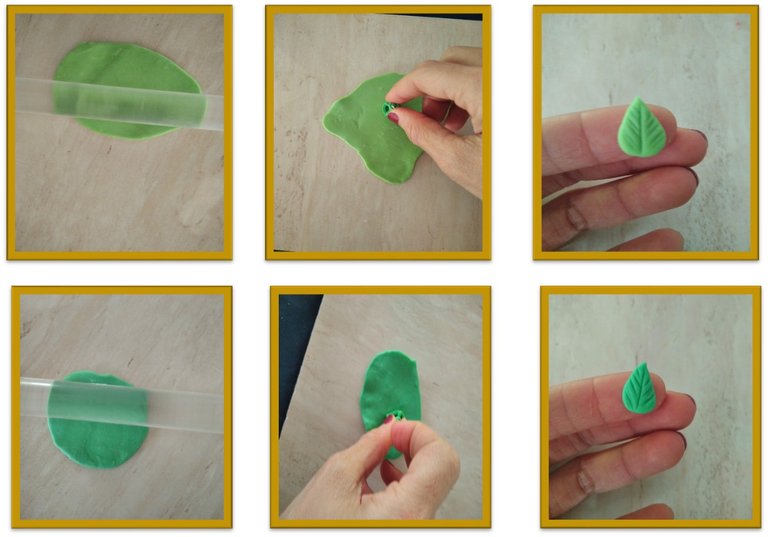
Toma la masa de color rojo y colócala sobre la superficie, con la ayuda del rodillo extiéndela. Una vez extendida, coloca el cortador en forma de hoja (en este caso nos servirá para realizar los pétalos), sobre la masa para así cortar 10 pétalos. Luego, con la ayuda de la esteca de cuchilla ve marca las nervaduras de los mismos.
Step 2
Take the red dough and place it on the surface, with the help of the rolling pin, spread it out. Once extended, place the leaf-shaped cutter (in this case it will help us to make the petals), on the dough to cut 10 petals. Then, with the help of the pottery clay cutter, mark the ribs of the same.

Paso 3
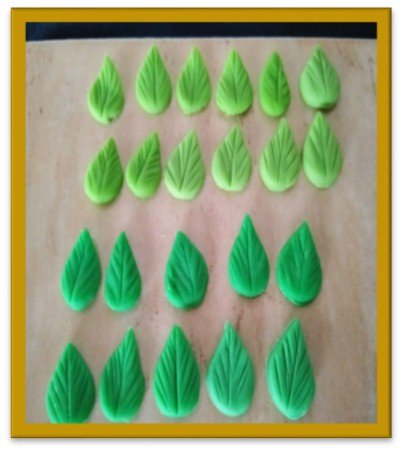
Para realizar las hojas, realiza el mismo procedimiento del paso 2 con las masas color verde claro (12 hojas) y con el color verde oscuro (10 hojas).
Step 3
To make the leaves, follow the same procedure in step 2 with the light green (12 leaves) and dark green (10 leaves) masses.
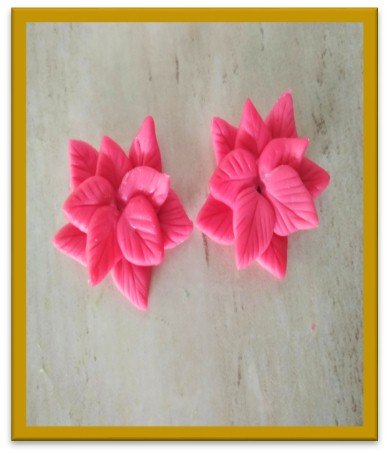
Paso 4
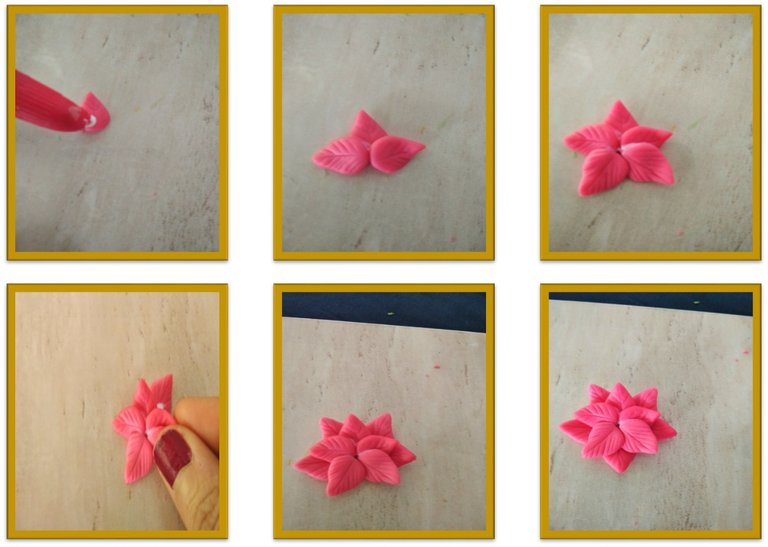
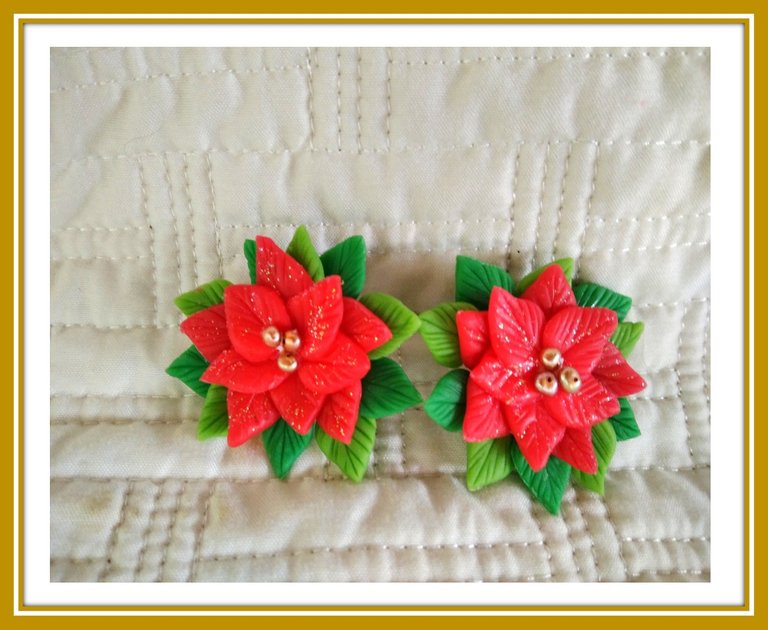
Es hora de armar la flor, comienza pegando con pega blanca cinco pétalos. Luego, ve colocando los otros cinco pétalos a su alrededor.
Step 4
It's time to assemble the flower, start by gluing five petals with white glue. Then, go placing the other five petals around it.
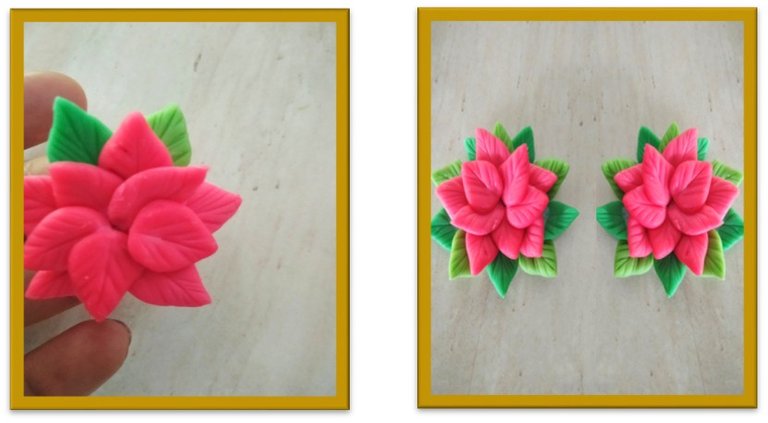
Paso 5
Una vez los pétalos estén pegados, coloca las hojas alternando una de color verde oscuro y otra de verde claro alrededor de los pétalos.
Step 5
Once the petals are attached, place the alternating dark green and light green leaves around the petals.
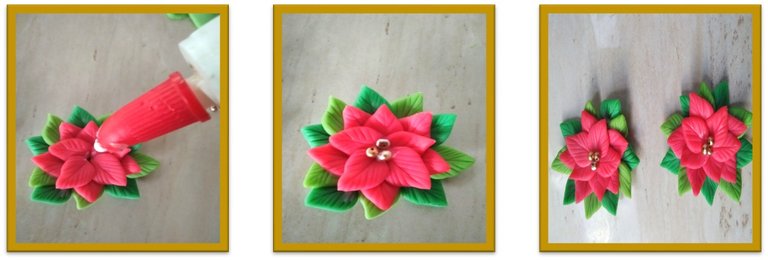
Paso 6
Pega en el centro de la flor tres piedritas color dorado.
Step 6
Glue three golden colored stones in the center of the flower.
Paso 7
Para que la flor se vea aún más bonita, aplica con el pincel el gel escarchado sobre los pétalos de la flor.
Step 7
To make the flower look even prettier, brush the frosty gel onto the flower petals.

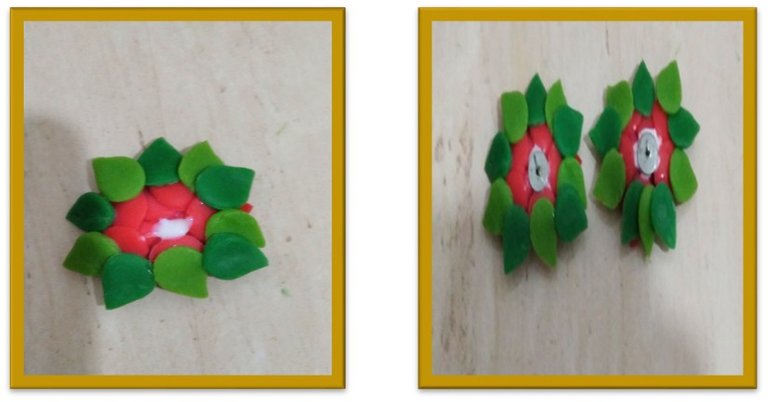
Paso 8
Una vez seco el gel escarchado pega en la parte de atrás de la flor la base de zarcillo.
Step 8
Once the frosty gel is dry, stick the ball post earrings to the back of the flower.
Paso 9
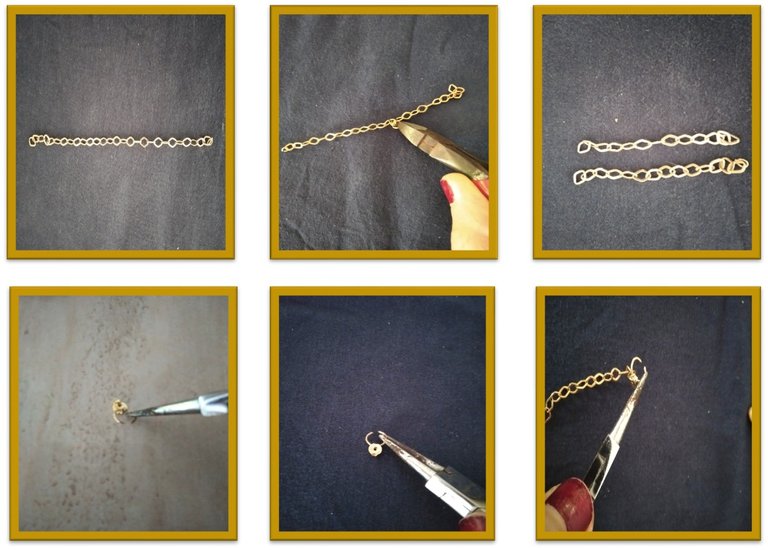
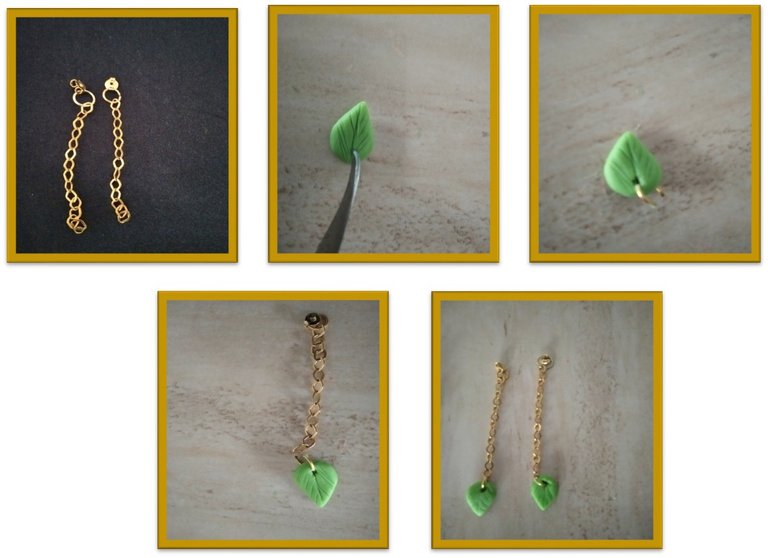
Toma la cadena y córtala por la mitad con la tenaza. Luego coloca el aro dorado al sujetador del zarcillo. Seguidamente, introdúcelo a la cadena y con ayuda de la pinza cierra el aro. Toma una hoja y con la ayuda del chuchillo de esteca ábrele un orificio e introdúcele el aro dorado. Luego con ayuda de la pinza colócalo en la otra punta de la cadena.
Step 9
Take the chain and cut it in half with the pincer. Then attach the gold jump ring to the earring clip. Next, introduce it to the chain and with the help of the pliers close the ring. Take a leaf and with the help of the pottery clay cutter open a hole in it and insert the golden ring. Then, with the help of the pliers, place it on the other end of the chain.
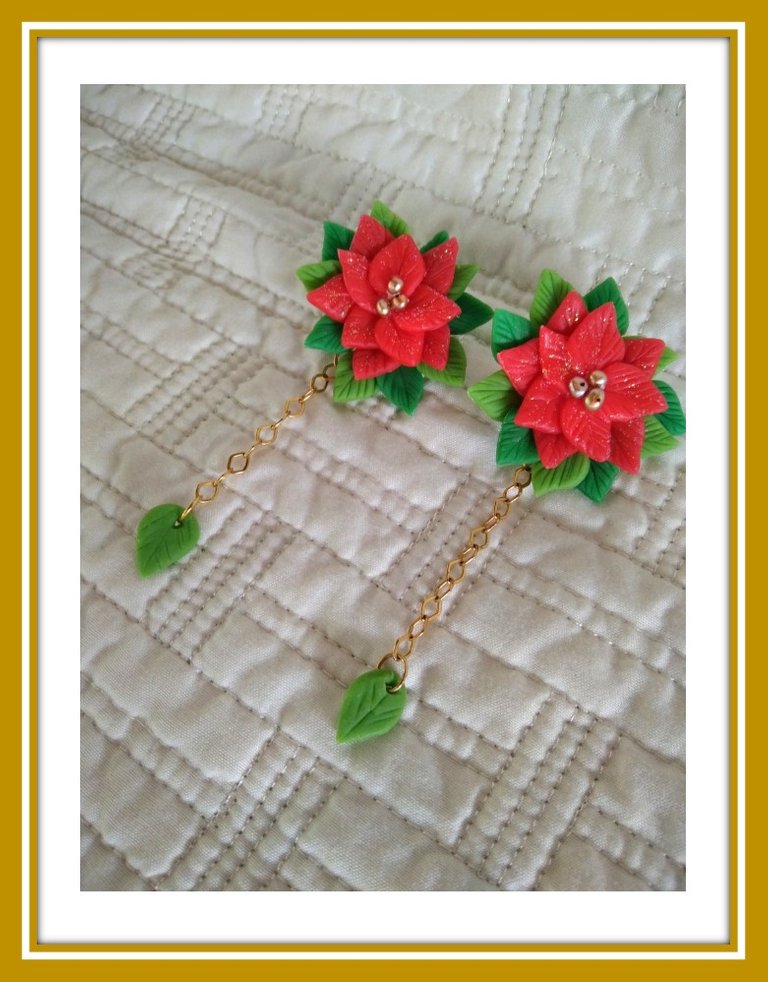
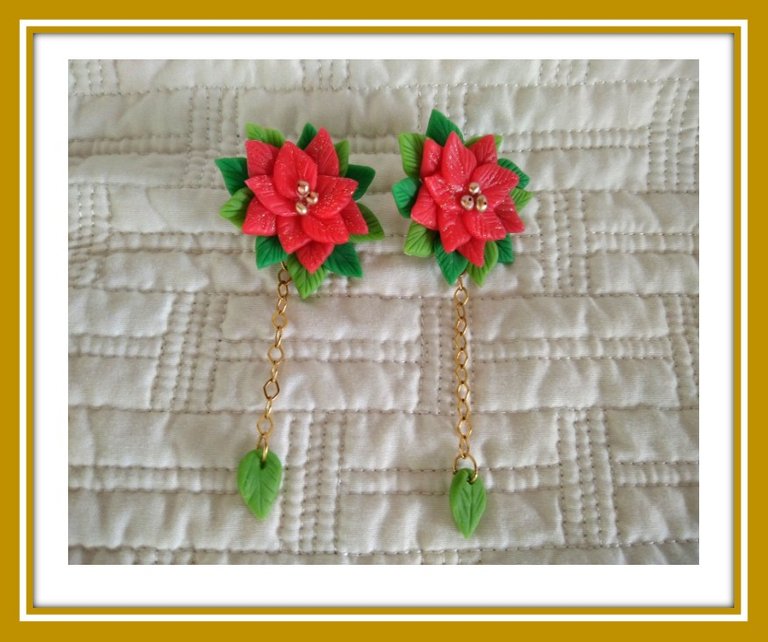
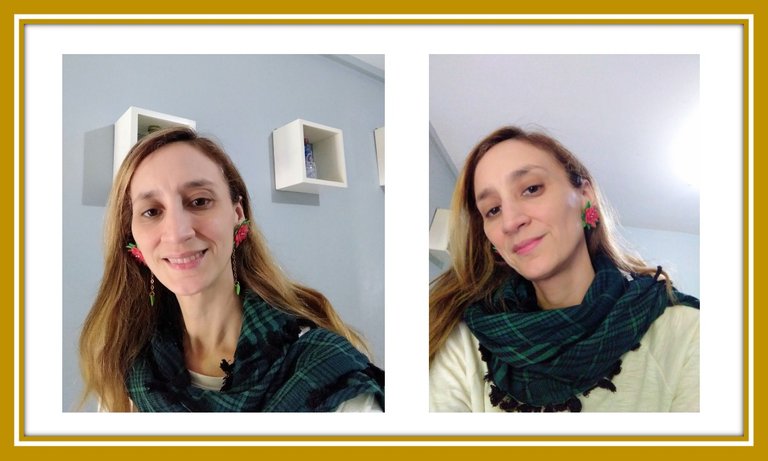
Los zarcillos están terminados, me ha encantado como se ven. Particularmente me gusta mucho usar zarcillos largos considero se ven muy elegantes. Como han podido ver a través de las imágenes tienes la opción de usar estos zarcillos con la cadena y sin ella. La masa flexible te permite crear hermosas piezas sin tener que invertir mucho en materiales, la misma es una masa muy fácil de trabajar y utilizando los moldes puedes realizar diferentes accesorios. Espero les haya gustado este paso a paso y se animen a realizarlo. ¡Hasta una próxima oportunidad!
The earrings are finished, I loved how they look. I particularly like to wear long earrings; I think they look very elegant. As you have been able to see through the images, you have the option of using these earrings with or without the chain. The flexible dough allows you to create beautiful pieces without having to invest a lot in materials, it is a very easy dough to work with and using the molds you can make different accessories. I hope you liked this step by step and are encouraged to do it. See you soon!
Las fotografías fueron tomadas por mí con mi teléfono celular Redmi Note 8.
Utilicé el programa Microsoft Power point
Traducción: Google Translation
The images were taken by me with my Redmi Note 8 cell phone.
Translation: Google Translation
I used the program Microsoft Power point

