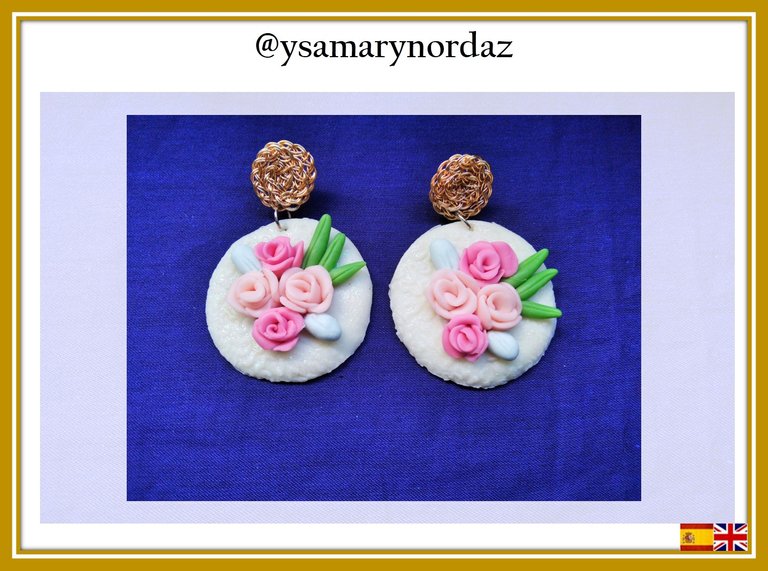
Hola a toda la comunidad de #jewelry. El día de hoy quiero mostrarles un paso a paso de unos zarcillos hechos con masa flexible y adornados con flores. Para realizar el mismo utilizaré un rodillo de textura así este accesorio lucirá más elegante y delicado. Las flores a simple vista quizás parezcan complicadas realizarlas, pero son muy sencillas de modelar. A continuación, les presento el siguiente paso a paso. ¡Vamos a comenzar!
Hello to the entire #jewelry community. Today I want to show you a step by step of some tendrils made with flexible clay and decorated with flowers. To do the same I will use a texture roller so this accessory will look more elegant and delicate. The flowers at first glance may seem complicated to make, but they are very easy to model. Then I present the next step by step. Let's get started!

Materiales:
•Masa flexible colores: blanco, rosado, fucsia, azul claro y verde
•Rodillo
•Rodillo de textura
•Crema humectante
•Pega blanca
•Cortador redondo
•Pincel
•Gel escarchado
•2 pendientes de zarcillos
•Esteca de cuchilla
•Pinza
Materials:
• Flexible clay colors: white, pink, fuchsia, light blue and green
•Roller
• Texture roller
•Moisturizing lotion
• White glue
•Round cutter
•Brush
• Frosty gel
• 2 base earrings
• Pottery clay cutter
•Plier
Paso 1
Limpia la superficie donde trabajarás la masa y unta un poco de crema humectante en ella, de esta manera la masa no se pegará. Igualmente, te recomiendo colocar en tus manos para que sea más fácil el amasado.
Step 1
Clean the surface where you will work the dough and spread a little moisturizer on it, this way the dough will not stick. Likewise, I recommend placing it in your hands to make it easier to knead.

Paso 2
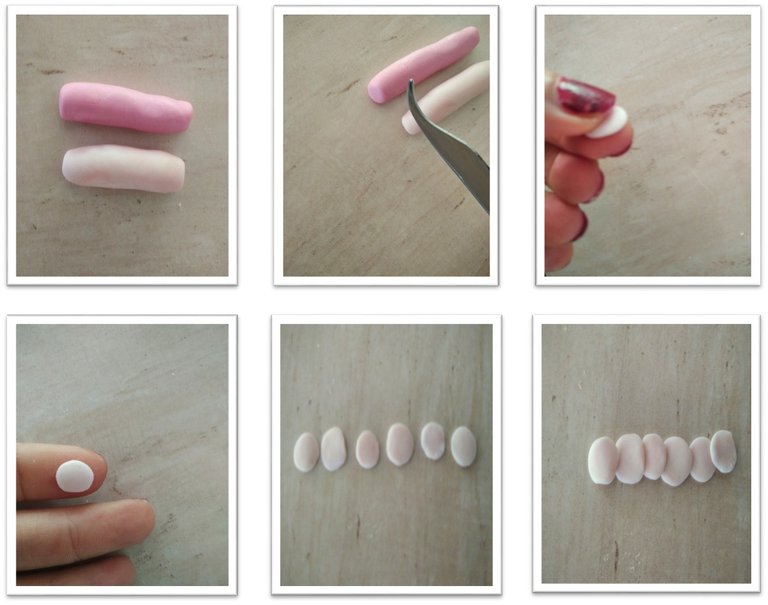
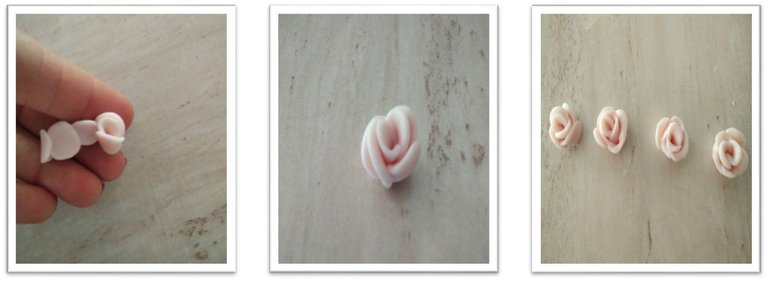
Para realizar las flores. Primero toma las masas color rosado y fucsia y, forma un cilindro. Luego con la ayuda de la esteca corta pequeños pedacitos de la masa rosada y forma una bolita luego aplánala con las yemas de tus dedos hasta formar un círculo. Repite este procedimiento hasta tener 6 de ellos. Una vez tengas los 6 círculos, únelos por sus bordes. Ahora ve enrollando hasta formar la flor. Repite este procedimiento hasta tener en total 4 flores.
Step 2
To make the flowers. First take the pink and fuchsia clay and form a cylinder. Then with the help of the pottery clay cutter cut small pieces of the pink clay and form a ball then flatten it with your fingertips to form a circle. Repeat this procedure until you have 6 of them. Once you have the 6 circles, join them by their edges. Now go rolling up to form the flower. Repeat this procedure until you have a total of 4 flowers.
Paso 3
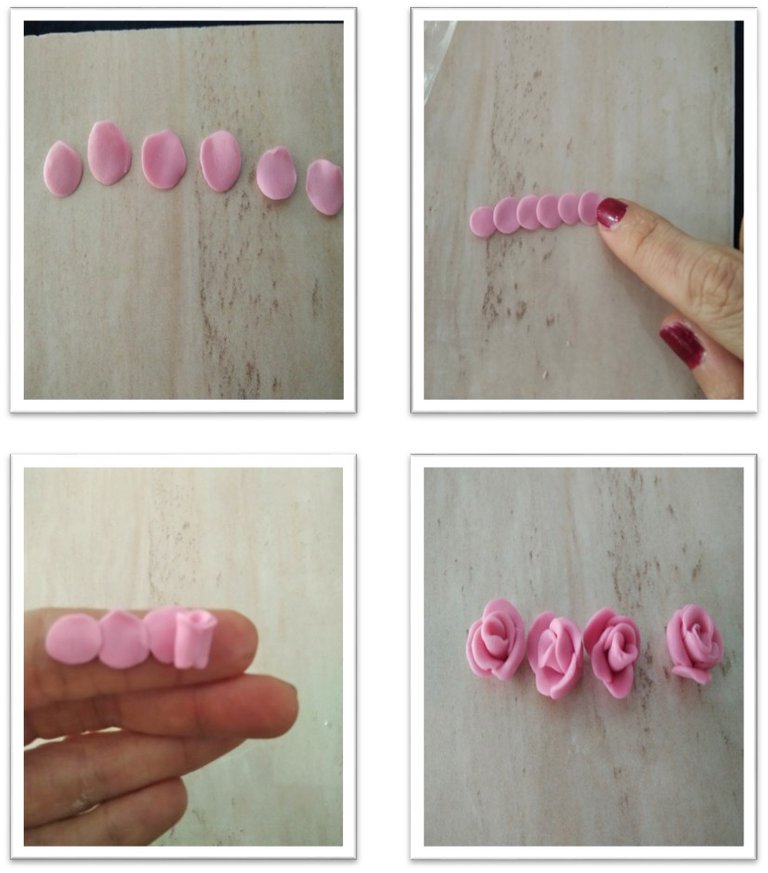
Realiza el mismo procedimiento hecho en el paso 1, pero esta vez con la masa color fucsia y, forma 4 flores.
Step 3
Carry out the same procedure as in step 1, but this time with the fuchsia-colored clay and form 4 flowers.
Paso 4
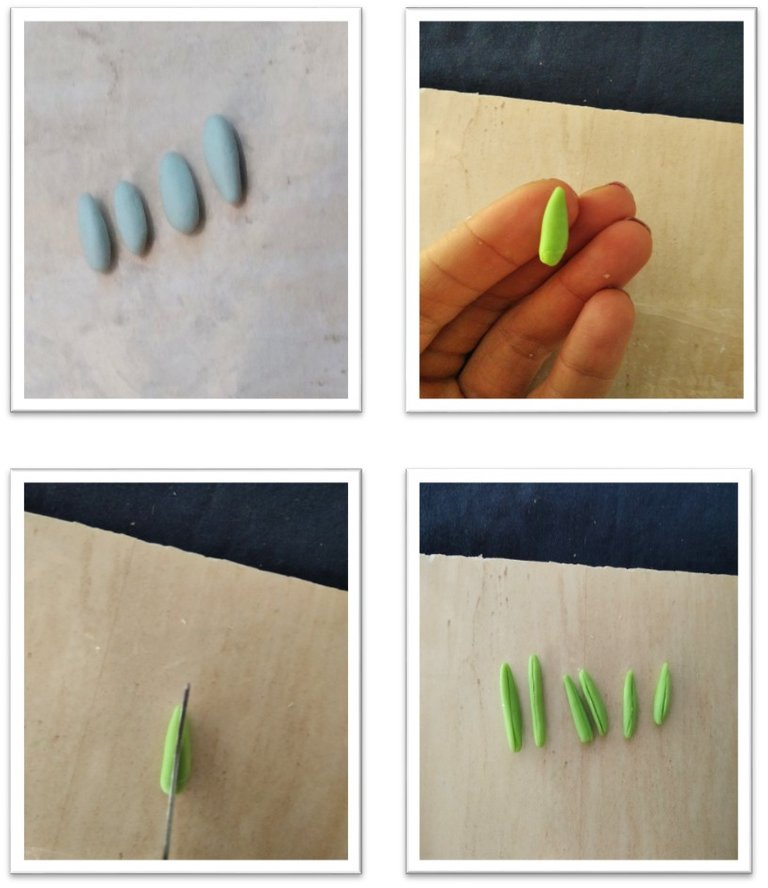
Forma 4 especie de capullo de masa color azul. Luego, forma 6 ramitas de masa color verde y, con la ayuda de la esteca, márcales una línea por el centro.
Step 4
It forms 4 species of cocoon of blue clay. Then, form 6 twigs of green clay and, with the help of the pottery clay cutter, mark a line down the center.
Paso 5
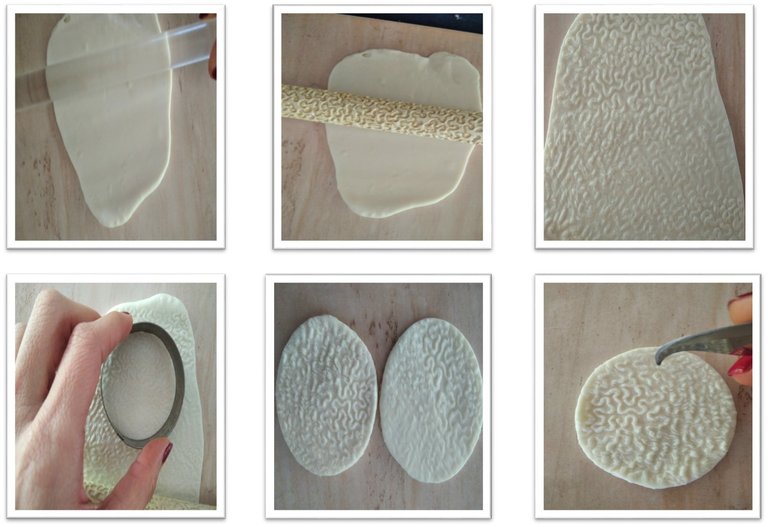
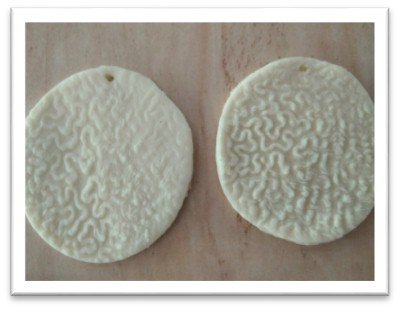
Toma la masa de color blanco y colócala sobre la superficie, con la ayuda del rodillo extiéndela. Una vez extendida, vuelve a pasar el rodillo, pero esta vez utiliza el de textura. Luego, coloca el cortador en forma de círculo sobre la masa para así cortar 2. Por último, con la punta de la esteca abre un orificio en la parte superior del mismo.
Step 5
Take the white clay and place it on the surface, with the help of the rolling pin, spread it out. Once extended, pass the roller again, but this time use the texture roller. Then, place the cutter in the shape of a circle on the dough to cut 2. Finally, with the tip of the pottery clay cutter, open a hole in the upper part of it.
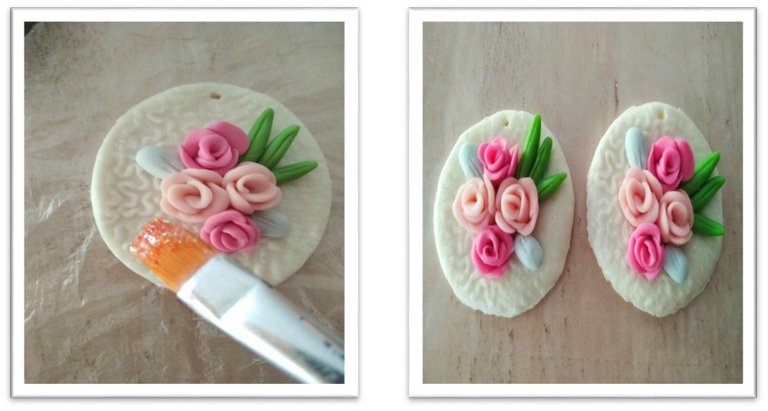
Paso 6
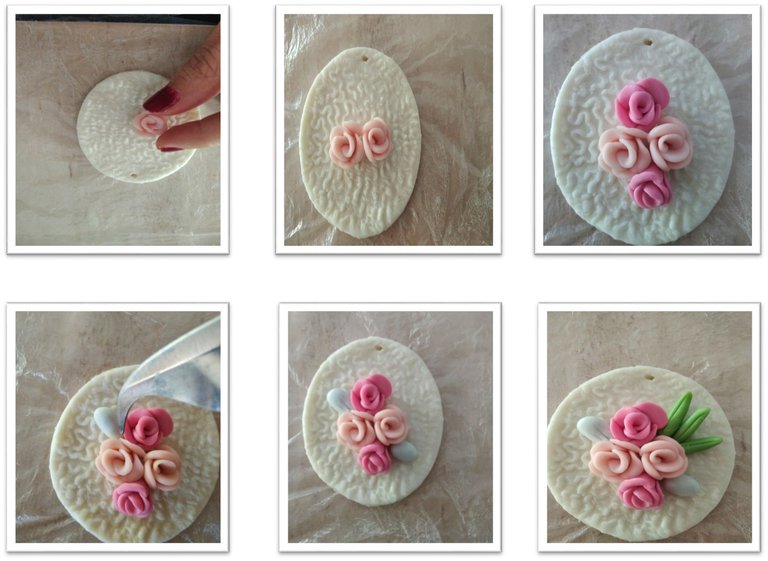
Para decorar los zarcillos, primero he puesto un plástico sobre la cerámica para mayor facilidad a la hora de despegar las piezas. Pega en el centro las 2 flores rosadas. Luego coloca las flores fucsias una en la parte superior y una en la parte inferior de las flores rosadas. Ahora pega por los lados los capullos azules y márcales unas pequeñas líneas con la esteca. Por último, pega las tres ramitas verdes, por un lado.
Step 6
To decorate the tendrils, I have first put a piece of plastic over the ceramic to make it easier to remove the pieces. Glue the 2 pink flowers in the center. Then place the fuchsia flowers one on top and one on the bottom of the pink flowers. Now glue the blue buds on the sides and mark some small lines with the stek. Finally, glue the three green twigs on one side.
Paso 7
Aplica un poco de gel escarchado sobre la masa blanca.
Step 7
Apply some frosty gel on the white clay.
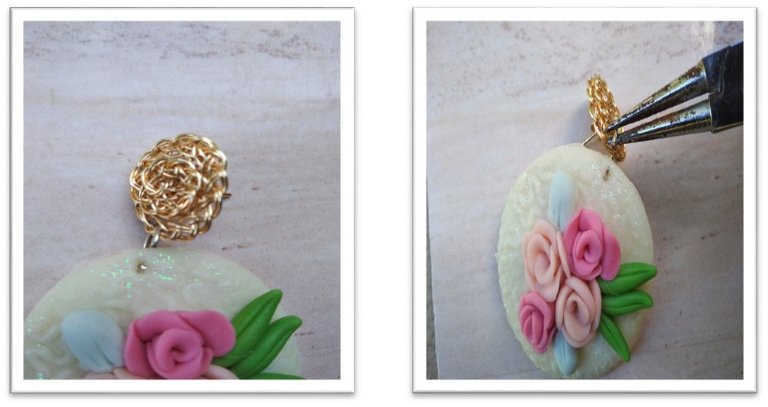
Paso 8
Para colocar los pendientes del zarcillo. Introduce el anillo por el orificio y, con ayuda de la pinza ciérralo.
Step 8
To place the base earrings. Insert the ring through the hole and, with the help of the plier, close it.
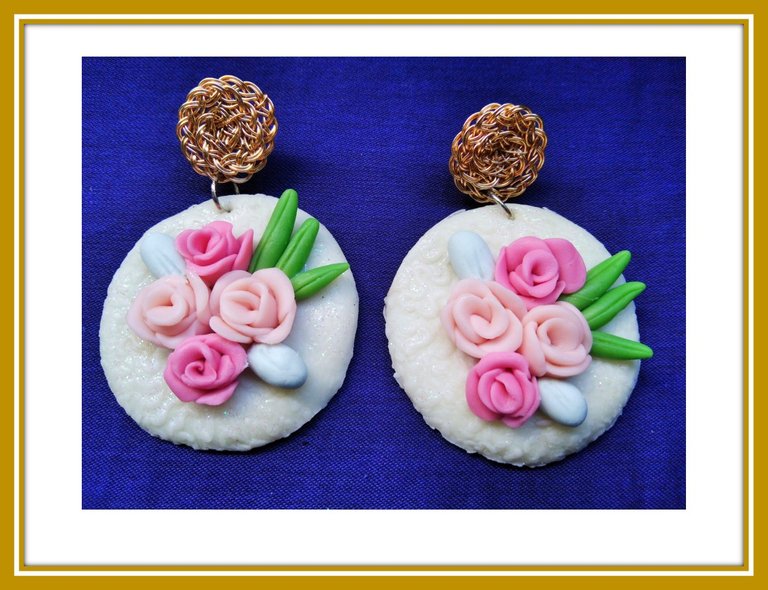
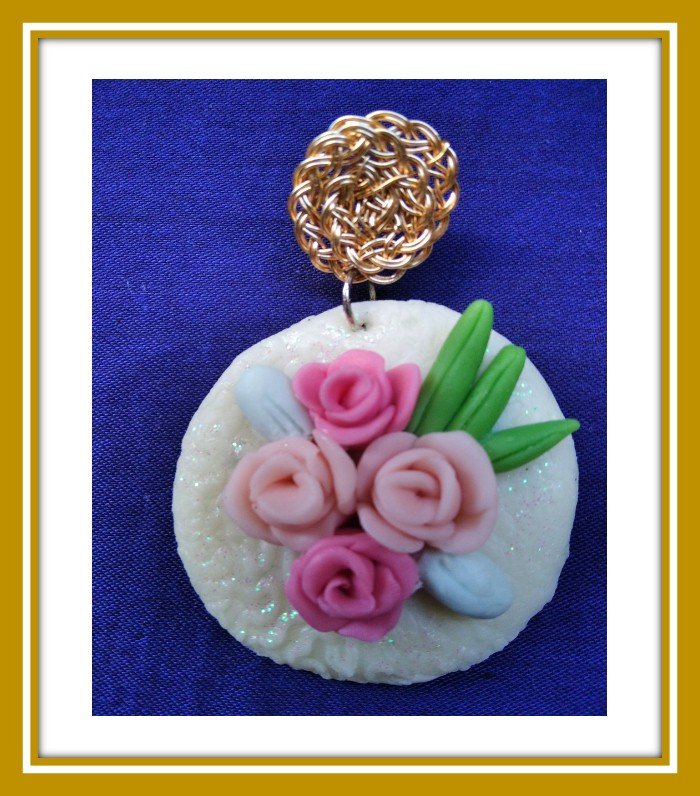
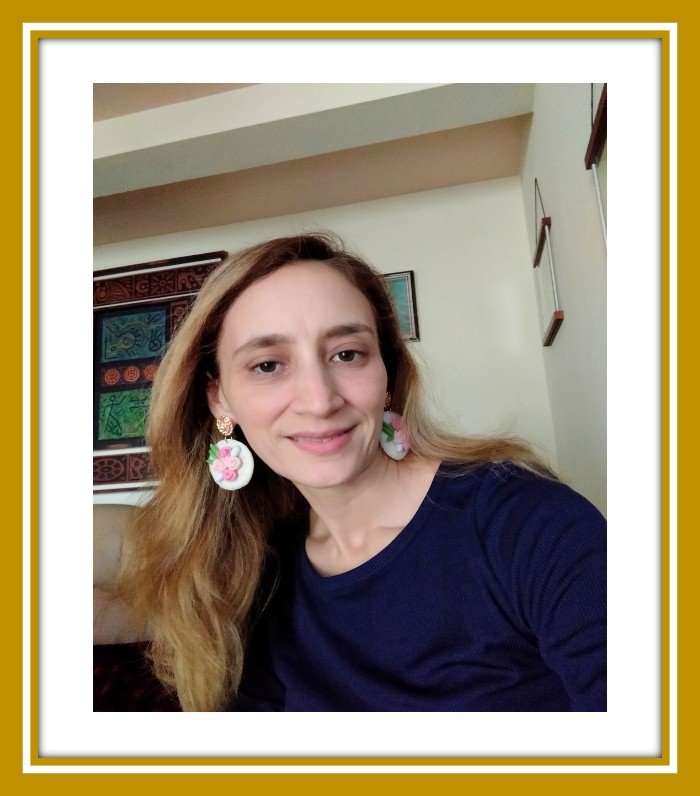
Los zarcillos están listos, el resultado final me ha gustado mucho la combinación de los colores y la masa con textura hace que estos zarcillos luzcan delicados, los mismos no son pesados y se pueden llevar muy bien. Las flores son un accesorio que siempre están en tendencia y a mi, particularmente me encanta. Espero les haya gustado este paso a paso y se animen a realizarlo. ¡Hasta una próxima oportunidad!
The earrings are ready, the final result I really liked the combination of colors and the textured mass makes these earrings look delicate, they are not heavy and can be worn very well. Flowers are an accessory that is always in trend and I particularly love it. I hope you liked this step by step and are encouraged to do it. See you soon!
Las fotografías fueron tomadas por mí con mi teléfono celular Redmi Note 8.
Utilicé el programa Microsoft Power point
Traducción: Google Translation
The images were taken by me with my Redmi Note 8 cell phone.
Translation: Google Translation
I used the program Microsoft Power point


