Hi fellow Hiveians,
Today I wanted to share some pictures of a little bit of DIY fun that I had fixing our toilet!

DIY Runny Toilet Repair
Fixing things has been something that I enjoy doing for quite a while, certainly since I've been an adult and was in and past college. I always liked toying with my car or truck, changing things and just doing overall maintenance and repairs. Being a homeowner, this has allowed me to do these types of things but at the same time, save a little bit of money in the process!
When a toilet is constantly running, it can be both annoying as well as kind of expensive to let it go! In a lot of places around the world, running water to a house costs money and the more you use, the more it costs. When we noticed our toilet was running recently, I knew that I needed to get in there in fairly quick time so that we don't waste a lot of money but it also doesn't end up being an annoying problem that's around for a while.
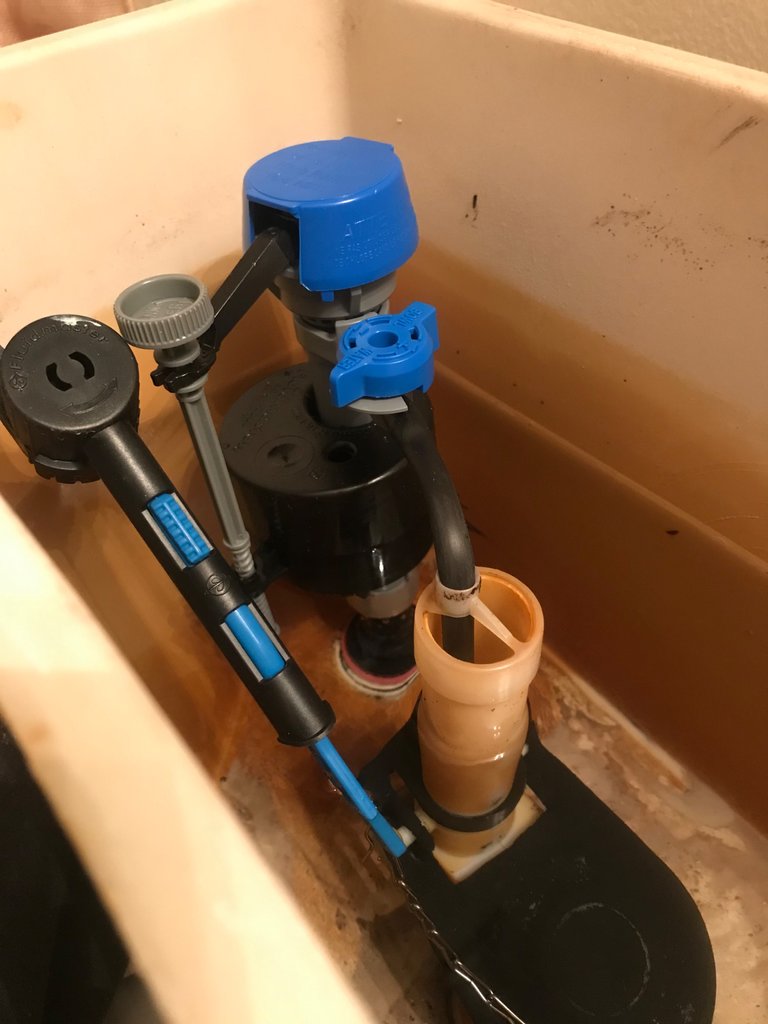
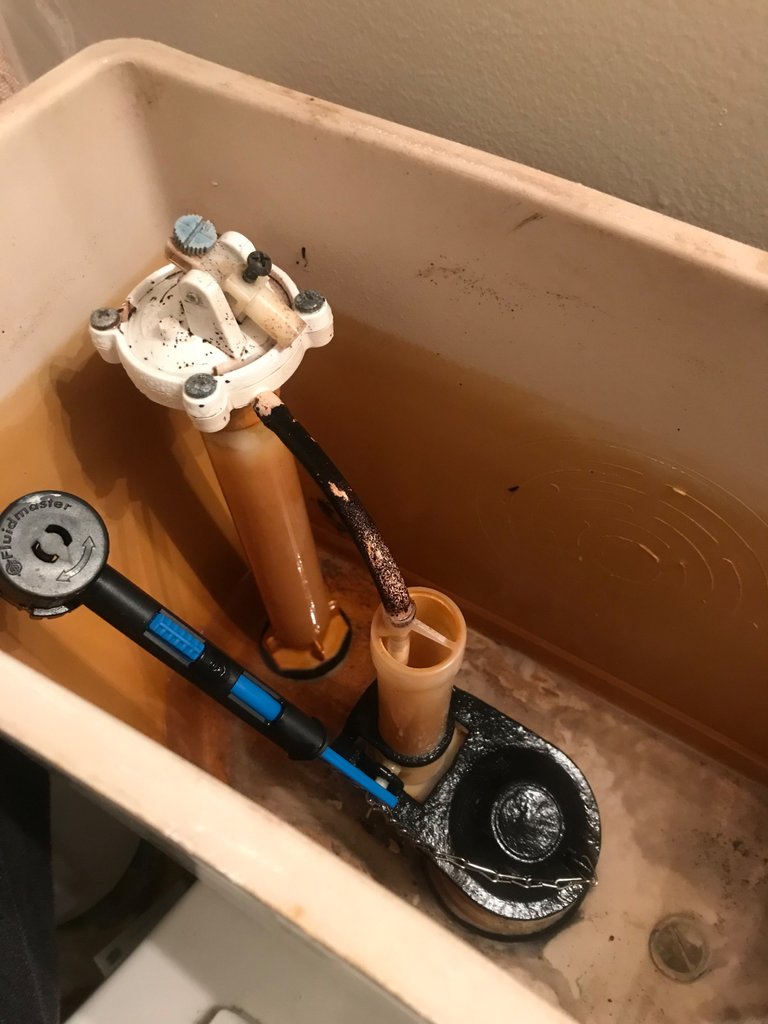
Often times what causes a toilet to constantly run are one of two things. The filler valve is not working properly anymore, either it's old and corroded or it doesn't have the spring or other capabilities working anymore and it is time to replace it. Thankfully they are pretty inexpensive, only around 15-20$ and saves a lot of headaches doing it! The other possibility is the drainage flap that opens up when you flush the toilet. Those can also get corroded but they can also get material stuck in them which causes them to slowly run. In this case, it was the filler valve that was busted on ours so we swapped it out!
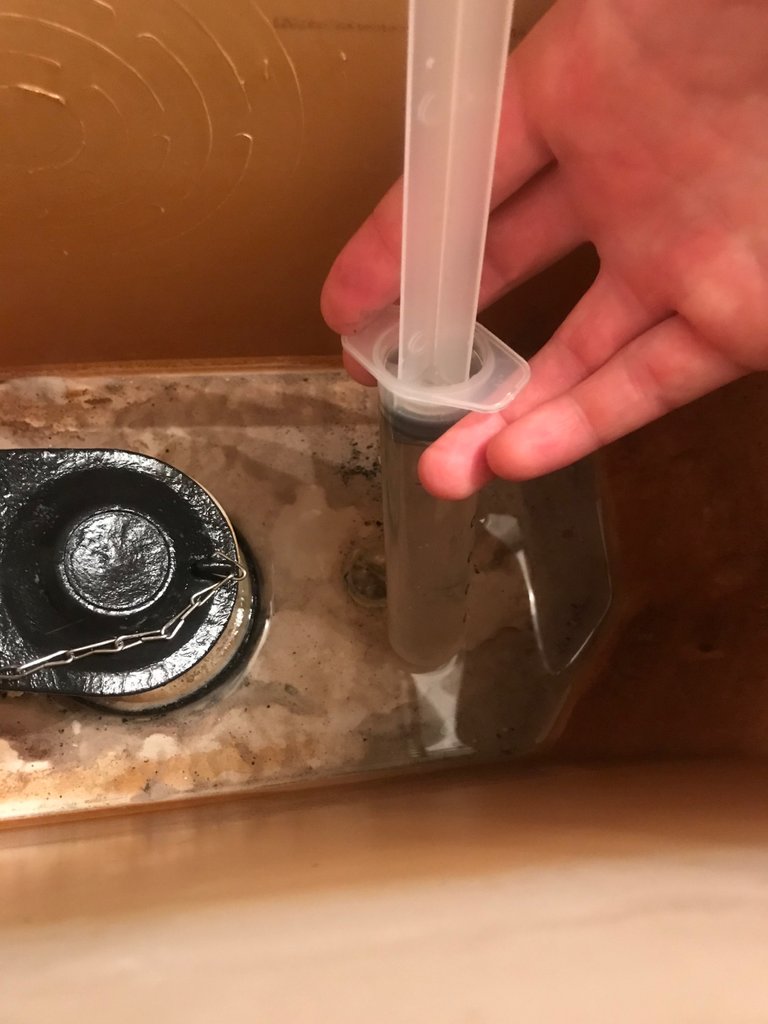
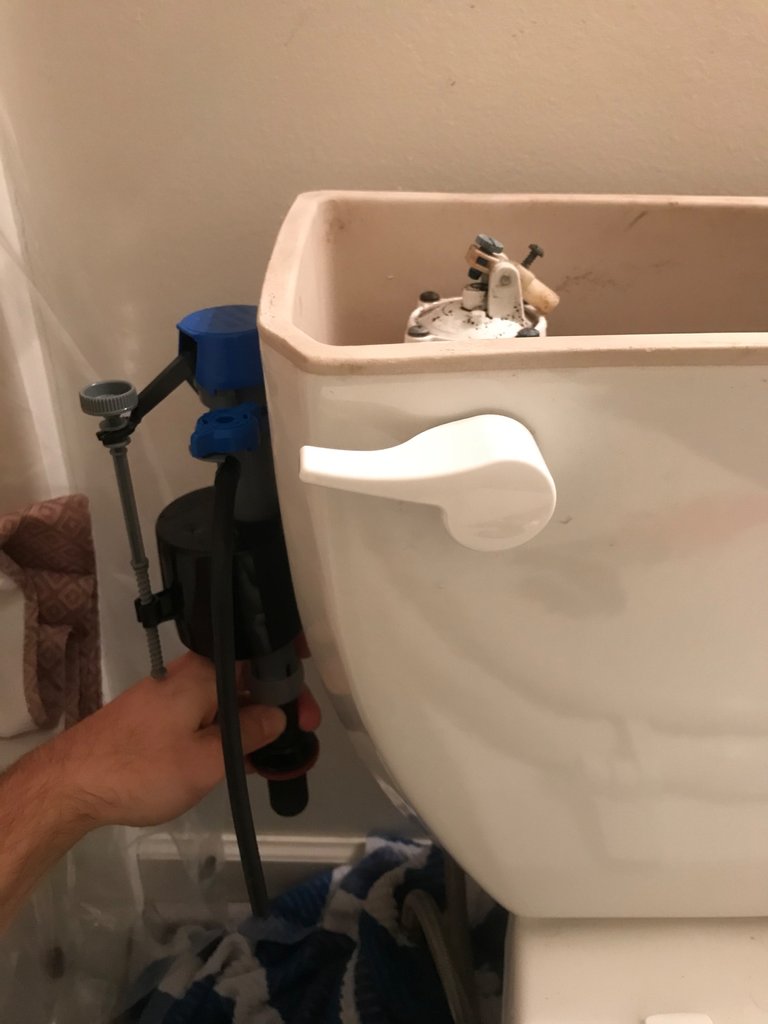
When you're doing most things to repair or make changes to a toilet, the important thing is to drain all the water! The first step, quite obviously, is to turn the water off at the valve next to the toilet!
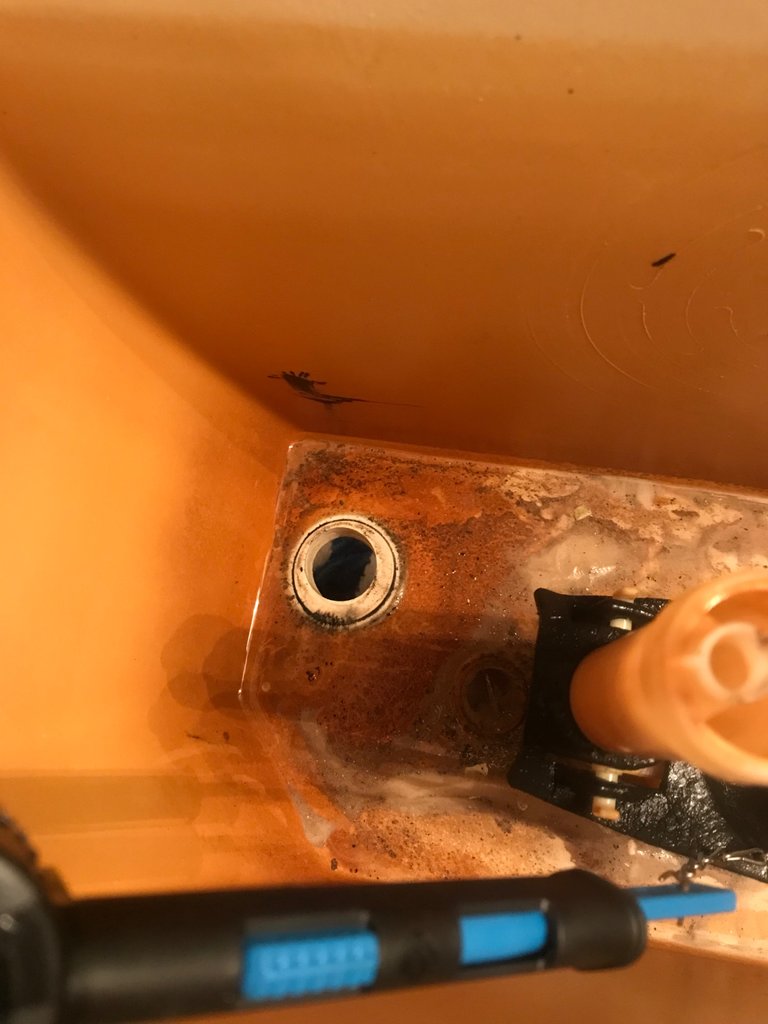
For this little repair job, I drained most of the water with a cup but the last little bits on the bottom here I had used a syringe from years past, I forget why we ended up getting or needing these but I've got a few of them left that I use specifically for these types of things. When I'm done with it, I toss it in the tool box and it gets used every so often and eventually thrown away when it just falls apart! Draining the water with them isn't the fastest process but it's easy and it gets the job done the way you'd like it to.
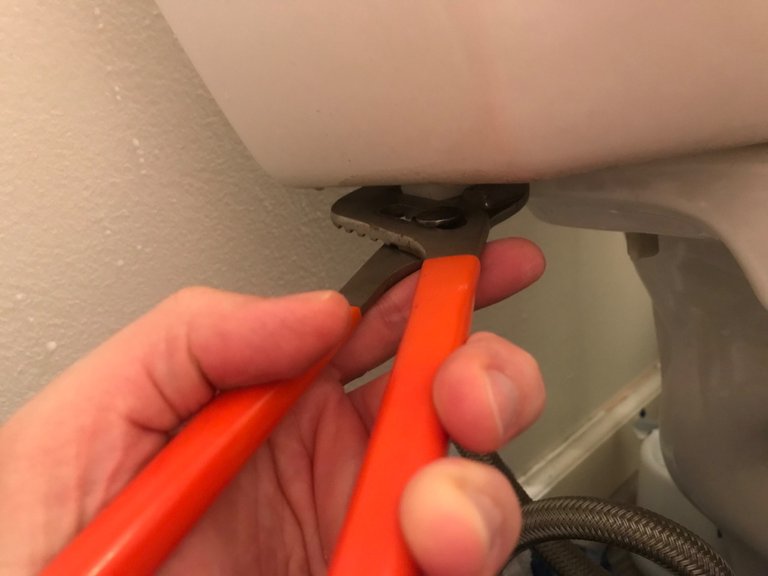
Once you've got the water drained, then you can work on dismantling the bits of the toilet here so you can get the filler device out and get it replaced. This is really the only place in this job where you really need a tool of some kind. I use an adjustable pair of pliers like this one here because it makes the job easier and you have lots of options with just one pair. Makes quick work of loosening the old nut!
Once you have the nut off, you can grab the new filler valve and it helps to measure it up when it's not in the toilet, comparing it to the old one. It's not required to do this but you can adjust the thing easier when it's outside of the toilet and you don't have to put it in and take it out a few times. I put it side by side, roughly, to the old one and adjusted it so that it would be roughly the same place. Worked pretty well!
Now that the height is taken care of, it's time to pop out the old one! You might have to wiggle it a few times, depending on how old and corroded the thing is. We had to do a little bit of movement to get this one out but once you do, it breaks the seal that it had and you are able to pull it right up. This is also where you really find out if all the water is out lol any water that is left over leaks out so it's a good idea to have a towel underneath the hole so that it catches any.
Time to put the new one in! Thankfully these are pretty much "universal" and you will be able to get one that fits almost any toilet, except some crazy ass weird ones. This makes it easier because you don't have to go back and forth in different places to make sure you get the right one for your setup.
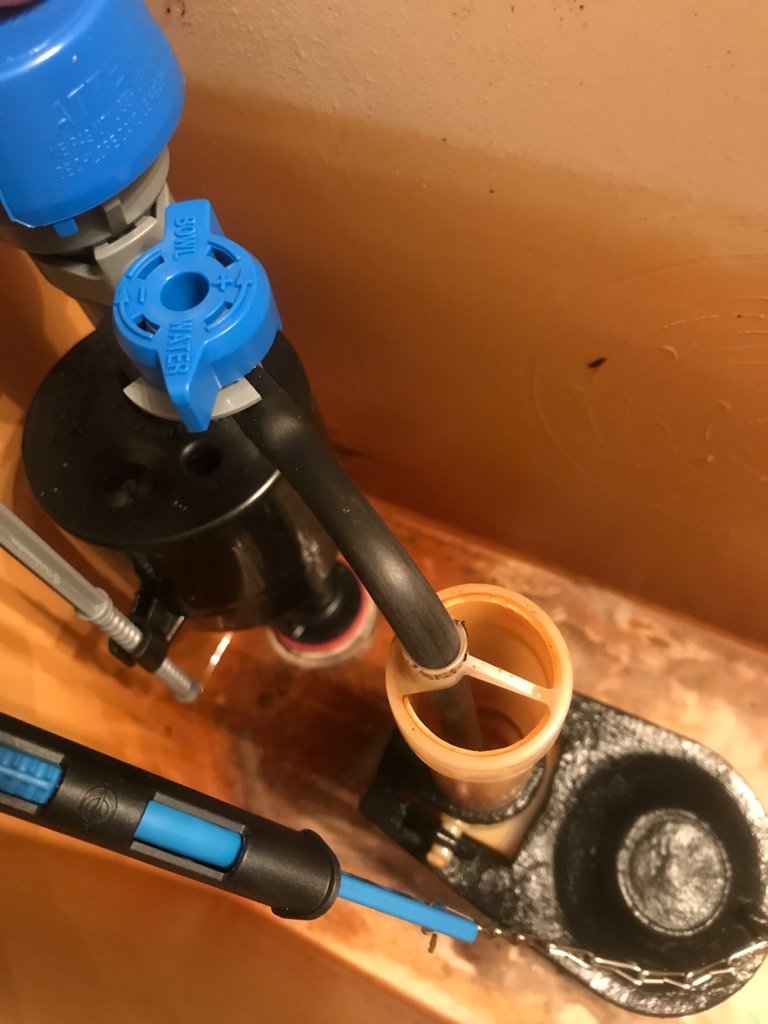
An important step here is to adjust the toilet bowl filling hose. This little fella comes incredibly long in case you need to position the filler valve and the drain plug in different parts of the toilet which is pretty helpful. You just take the hose here and roughly measure it out, where you need it to go and extend it down a few inches. Once you get a rough estimate of how long you want it to be, cut off the excess at the end and you have the hose cleaned up. I suppose you don't have to trim it, but for me I wanted it to be a little bit of a cleaner job. I didn't know if the hose being too far down on the toilet bowl fill tube would cause problems so I opted to give it a trim and only be down the pipe about 2.5 inches. It came like 6 inches into it, which was too much.
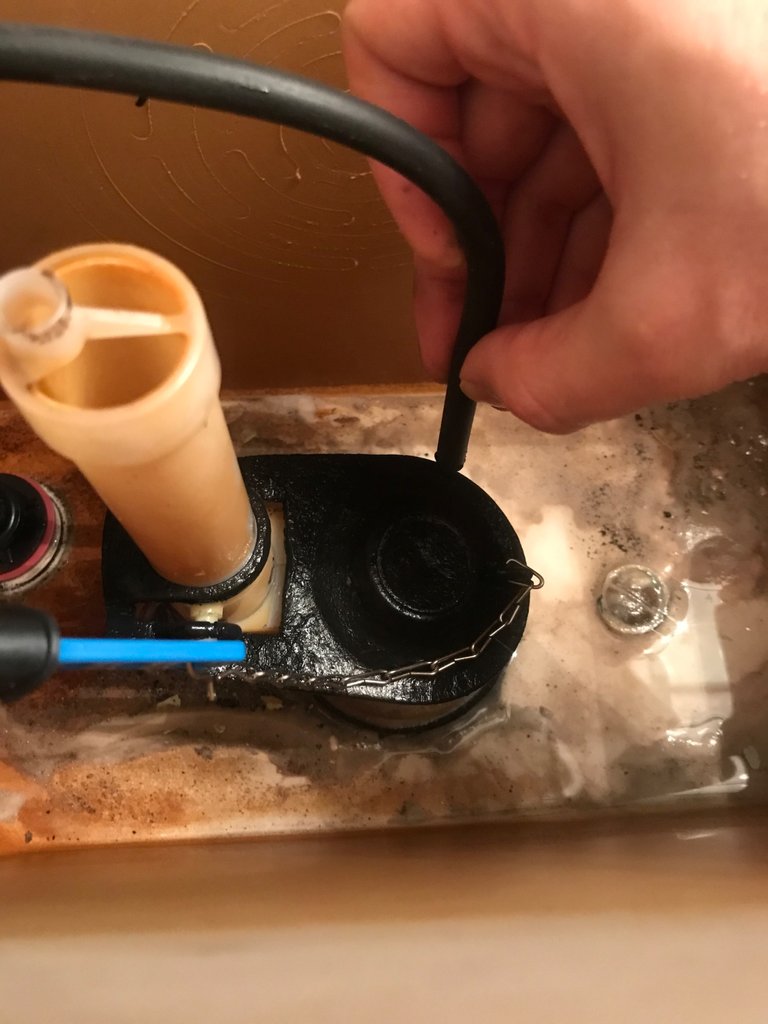
Once you have the device in place, it's time to seal the thing to the toilet! There are two nuts you need to screw into place, one that holds the device to the toilet and the other one that marries the device to the water hose. This makes it a nice tight seal and prevents any leakage issues. Once it's back in place, turn the water back on and give it a few flushes to adjust the water level and you're good!

-CmplXty. Real human written content, never AI.
Do you want to get paid, in crypto, for searching the internet? Try using and signing up for Presearch to earn some great crypto! I've currently got 2,900 PRE tokens, with a market value of $180.27. It doesn't sound like a lot but when you search using sites like Google you get paid $0! Join Presearch to break Google's stranglehold on the internet searches. If you'd like to sign up, use my referral link below and spread the word!
https://www.presearch.org/signup?rid=513043


