Hello everyone... 🎄🎅✨
Hello to my dear Hivers and the community of DIYHub, as always very pleased and excited to be here again, showing you my work made with love and especially for you.
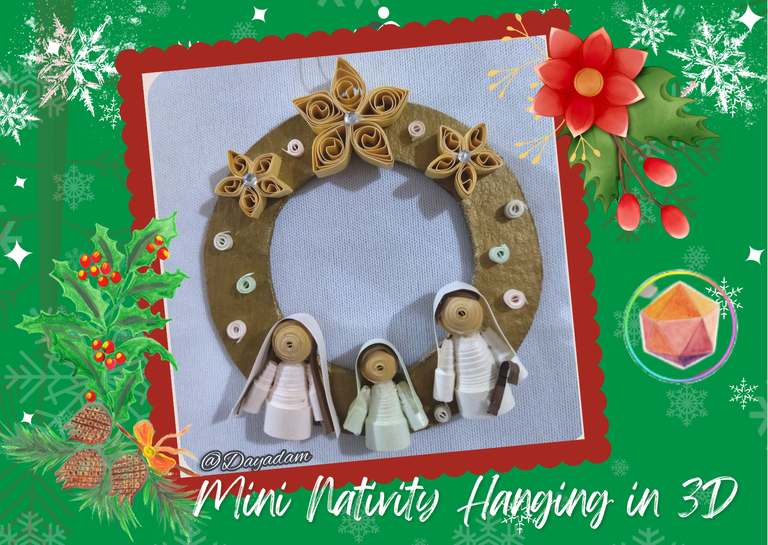
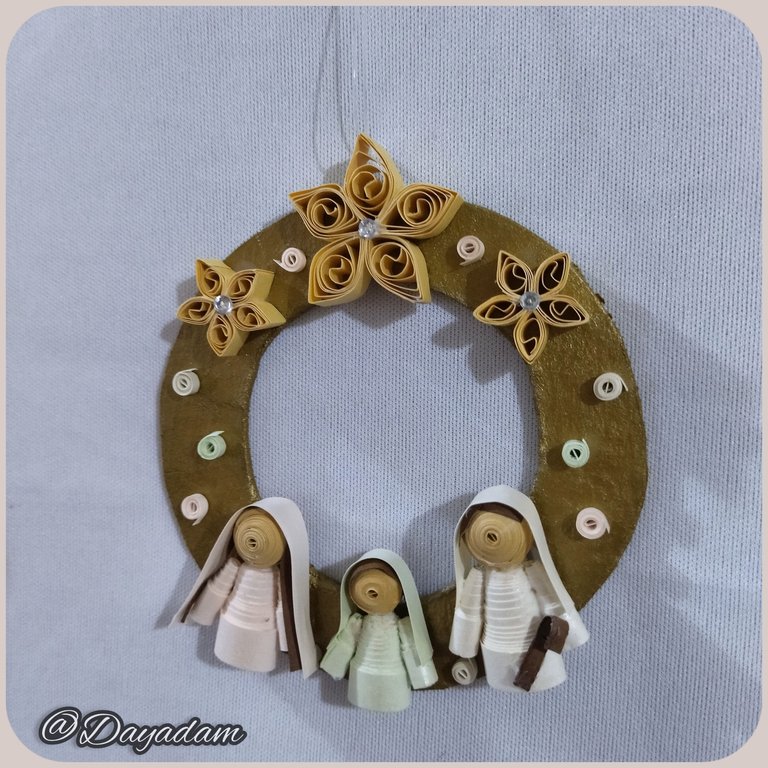
For today I join the Christmas Contest promoted by the friend @tibfox, and I bring you a small hanging nativity in the form of 3D wreath in the technique of quilling and cartonnage, ideal for decorating any space in your home.
Hoping you like it, I leave you my creative process:
Let's start:😃

Hola a Todos... 🎄🎅✨
Hola a mis queridos Hivers y a la comunidad de DIYHub, como siempre muy complacida y emocionada de encontrarme por acá nuevamente, mostrándole mi trabajo hecho con mucho amor y especialmente para ustedes.
Para hoy me sumo al Concurso de Navidad promovido por el amigo @tibfox, y les traigo un pequeño nacimiento colgante en forma de corona en 3D en la técnica de quilling y cartonaje, ideal para decorar cualquier espacio de tu hogar.
Esperando que sea de su agrado, les dejo mi proceso creativo:
Comencemos:😃

• Cintas de quilling de diversos mm de ancho.
• Cartón grueso 1 en kilo.
• Tapas plásticas circulares de diversas medidas o tamaños.
• Lija fina.
• Cutter.
• Cutting mat
• Nylon.
• Aguja para quilling.
• Moldes para círculos.
• Pega blanca extra fuerte (de carpintería).
• Pintura metálica bronce.
• Tijera.
• Pincel.
- Quilling ribbons of various mm width.
- Thick cardboard 1 in kilo.
- Circular plastic lids of various sizes and dimensions.
- Fine sandpaper.
- Cutter.
- Cutting mat
- Nylon.
- Needle for quilling.
- Molds for circles.
- Extra strong white glue (carpentry glue).
- Bronze metallic paint.
- Scissors.
- Brush.

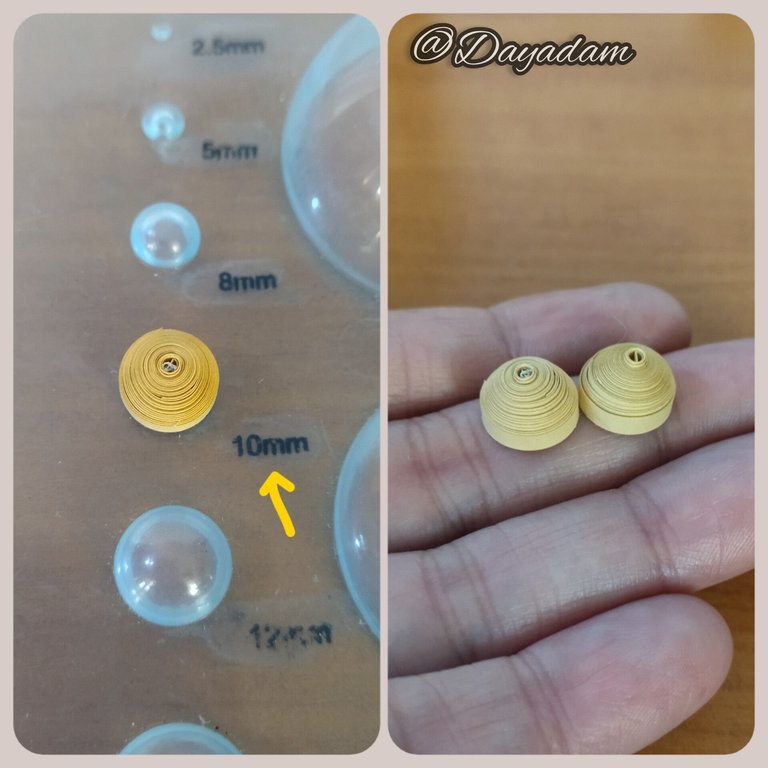
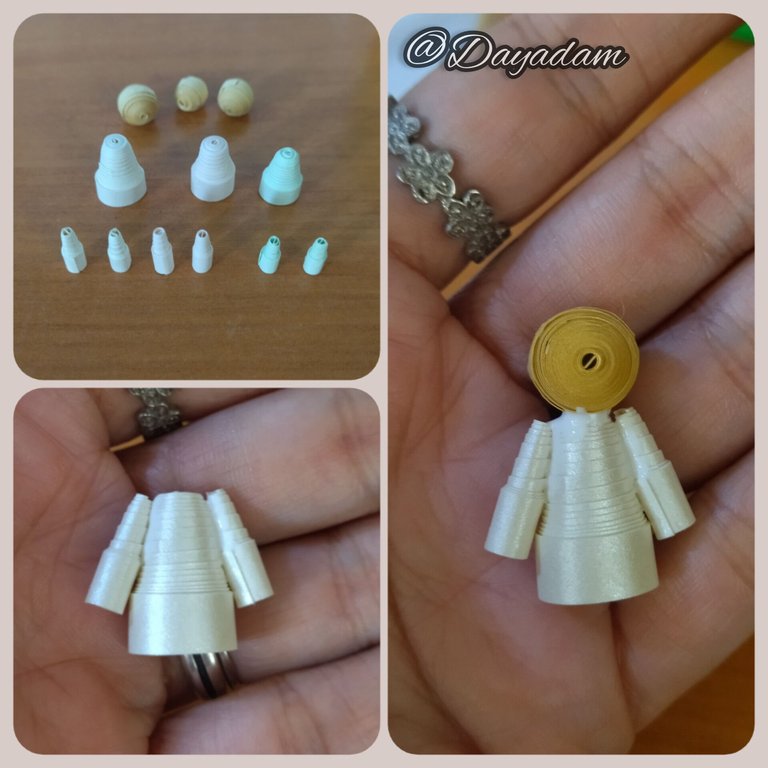
My work will consist of 3 characters, Mary, Joseph and the baby Jesus, I will explain only one since basically they will be made under the same parameters, only varying the size and colors.
- We start taking skin color quilling tape, with it we will make 2 closed circles, which we will mold in a template for circles, in its inner part we will apply a little glue to prevent the pieces from deforming, and finally we will join both with a piece of tape that we will pass around. As you can see I just made the circles in different sizes, depending on the character I want to make.
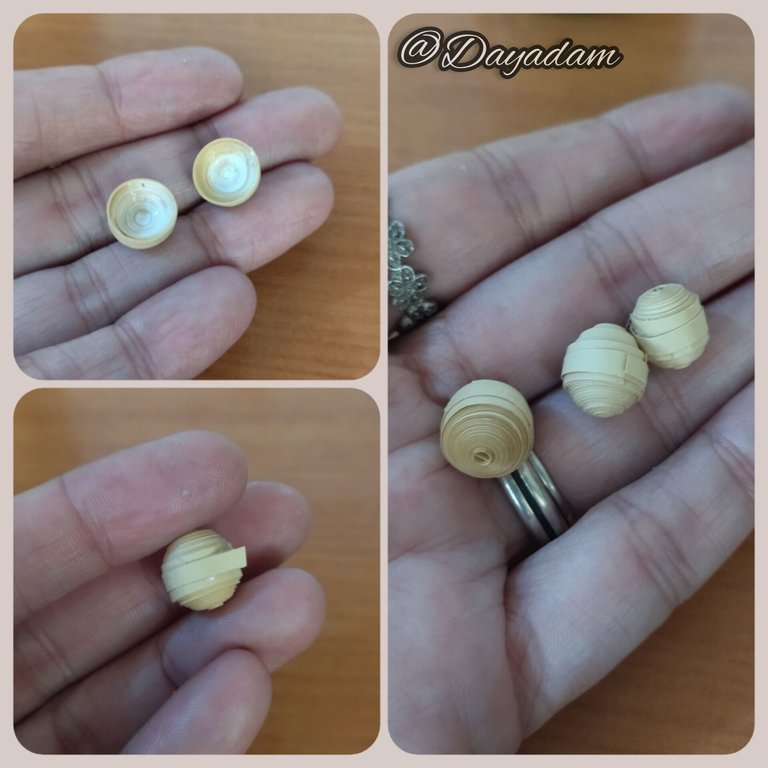
- Let's go with the body: we take a 6mm wide quilling tape (the color of your choice), with the quilling needle we roll it in its entirety, seal it with extra white glue and take it out of the needle. To form the body, we take a pencil or pen and that closed circle we will push it out forming a kind of cone, we add a little glue inside it to prevent it from moving, we flatten the piece a little with our fingers.
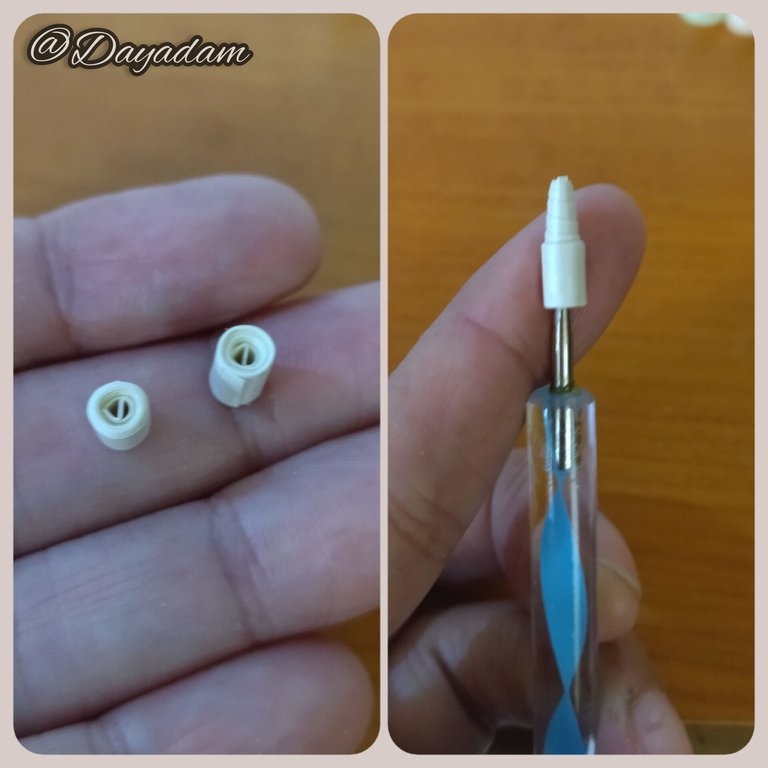
- Let's go with the arms: We take two pieces of quilling tape, we roll it with the quilling needle, when we reach the end we take it out and seal it with glue. To give shape we will carry out the same process as with the body, but with the difference that this time we will do it with a height stick, at the end we apply glue inside and outside of both pieces, so that it does not move and remains firm.

Mi trabajo constara de 3 personajes, María, José y el niño Jesús, explicare solo uno ya que básicamente se harán bajo los mismos parámetros, solo variando el tamaño y los colores.
• Comenzamos tomando cinta para quilling color piel, con ella haremos 2 círculos cerrados, los cuales moldearemos en una plantilla para círculos, en su parte interna aplicaremos un poco de pega para evitar que las piezas se deformen, y por ultimo uniremos ambos con un trozo de cinta que pasaremos alrededor. Como podrán observar solo hice los círculos de diversos tamaños, dependiendo del personaje que deseo hacer.
• Vamos con el cuerpo: tomamos una cinta para quilling de 6mm de ancho,(el color de tu preferencia), con la aguja para quilling enrollamos en su totalidad, sellamos con pega extra blanca y sacamos de la aguja, Para formar el cuerpo, tomamos un lápiz o bolígrafo y ese círculo cerrado lo vamos a empujar hacia afuera formando una especie de cono, agregamos un poco de pega dentro del mismo para evitar que se mueva, aplanamos un poco con los dedos la pieza.
• Vamos con los brazos: Tomamos dos trozos de cinta de quilling, enrollamos con la aguja para quilling, al llegar al final sacamos y sellamos con pega. Para darle forma vamos a llevar a cabo el mismo proceso que con el cuerpo, pero con la diferencia que esta vez lo haremos con un palito de altura, al finalizar aplicamos pega por dentro y fuera de ambas piezas, para que la misma no se mueva y quede firme.


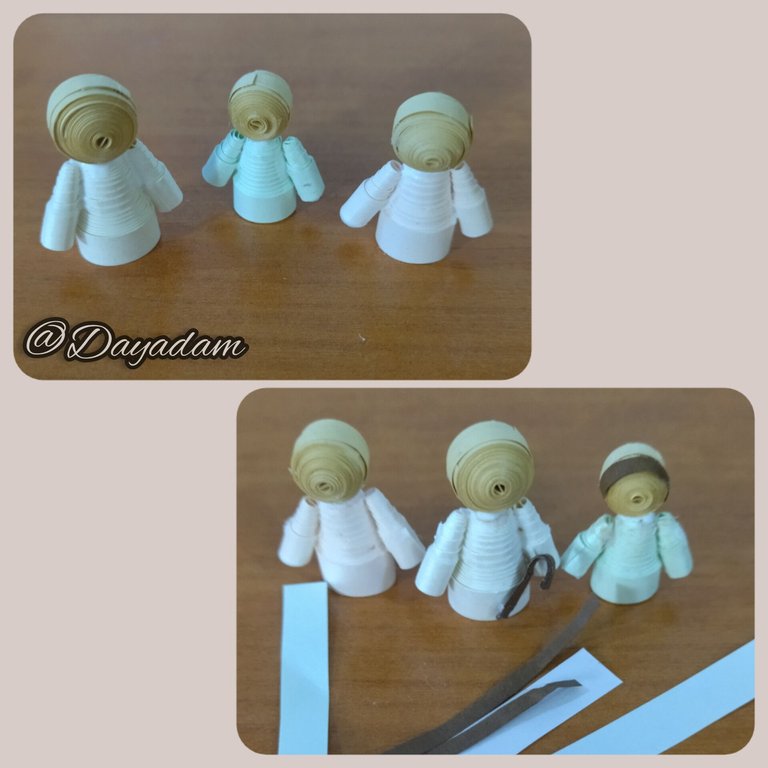
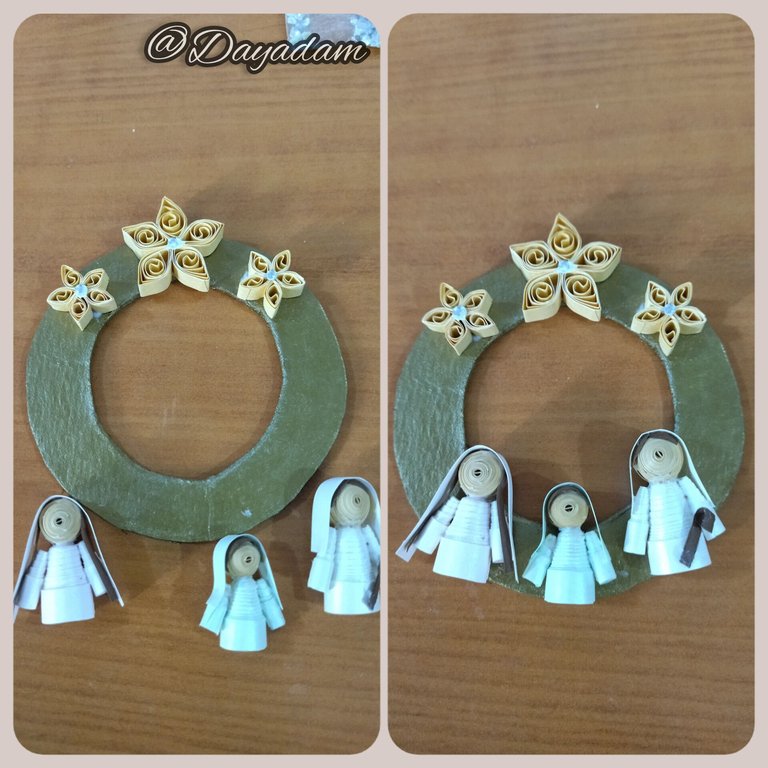
- We will join the pieces that we already have ready. With some ribbons and appliqués I made the hair, blanket and other decorations.
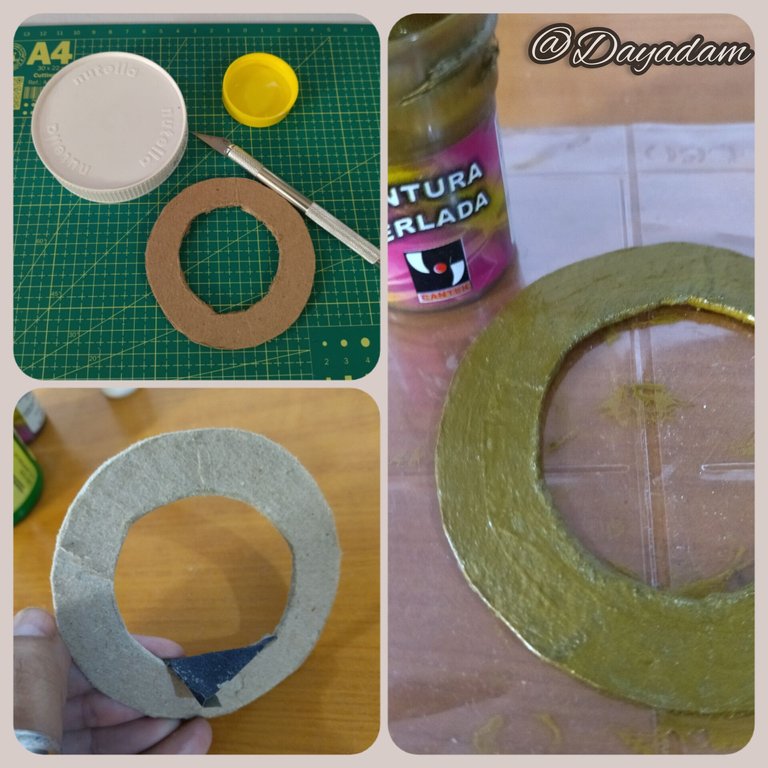
- Take a piece of thick cardboard 1 in kilo, with some caps that I had available draw a mold, cut with the help of a cutter on a cutting mat, which is a special board to make cuts without risk of tearing the work area, once cut the circle I removed a little imperfections with fine sandpaper, and paint it with a pearl paint with bronze tone. Let it dry very well.
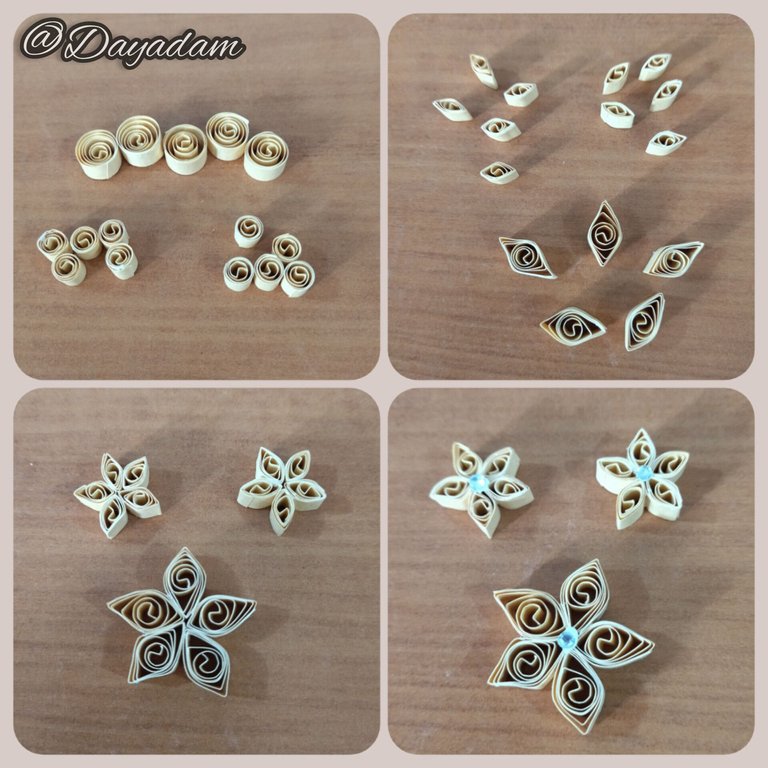
- We take 5 pieces of gold colored ribbon 6mm wide with the help of the quilling needle we will make 5 open circles, mold them in diamond shape, and join them harmoniously to form a star, I made 2 more a little smaller. In the center I put a crystal.
• Vamos a unir las piezas que ya tenemos listas. Con algunas cintas y apliques realice el pelo, manta y otras decoraciones.
• Tome un trozo de cartón grueso 1 en kilo, con unas tapas que tenia disponible dibuje un molde, corte con la ayuda de un cutter en un cutting mat, que es una tabla especial para realizar cortes sin riesgo a rasgar el área de trabajo, una vez cortado el circulo le saque un poco las imperfecciones con una lija fina, y lo pinte con una pintura perlada con tonalidad bronce. Deje secar muy bien.
• Tomamos 5 trozos de cinta color dorado de 6mm de ancho con la ayuda de la aguja para quilling haremos 5 círculos abiertos, los moldearemos en forma de diamante, y los uniremos de manera armónica para formar una estrella, hice 2 mas un poco mas pequeñas. En el centro le coloque un cristal.
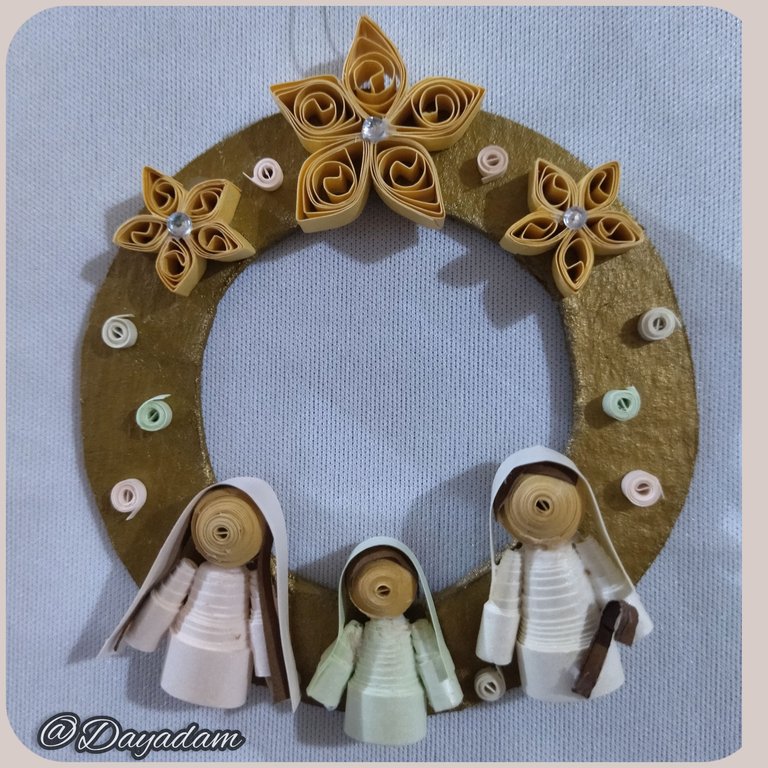
- At this point I will glue the pieces I have made to the base.
- With some pieces of ribbons I made some small closed circles which I glued in some points of the wreath.
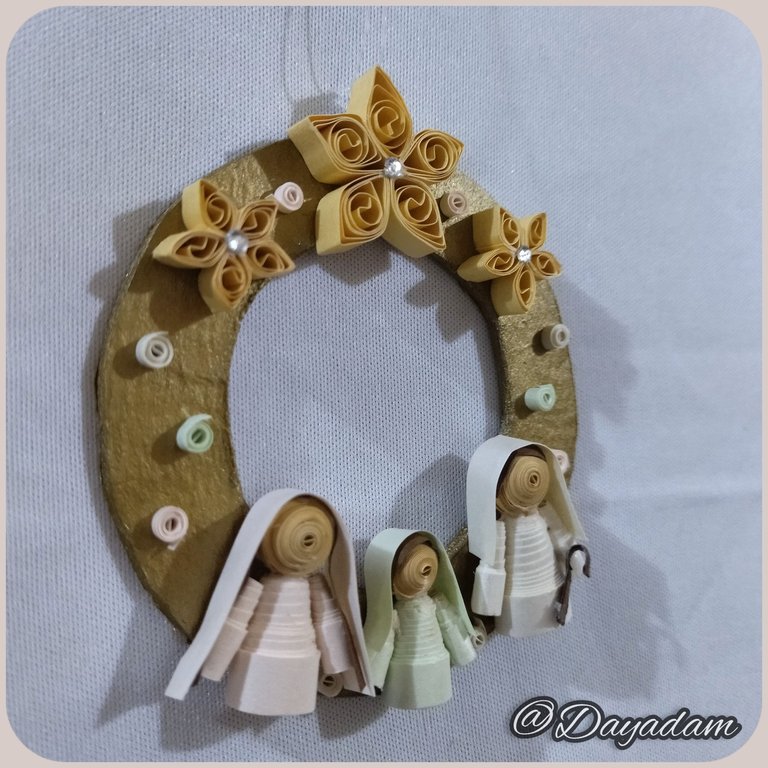
- Finally take a piece of nylon and place it on the top of the star, so you can hang the nativity in the place of your choice.
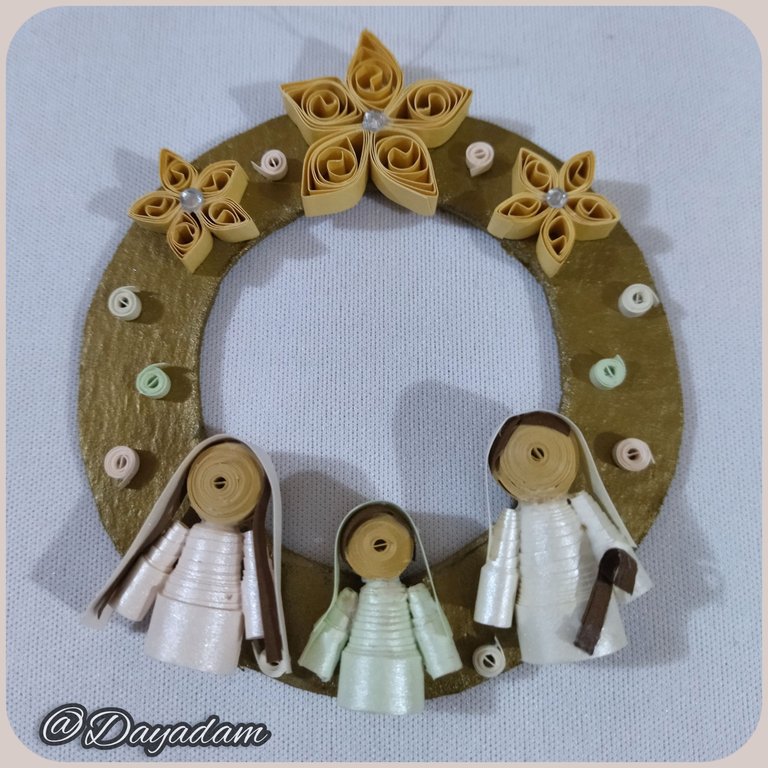
This way we have ready this small hanging nativity for you to decorate the space you want to decorate.
• En este punto pegare a la base las piezas que tengo hechas.
• Con algunos trozos de cintas realice unos pequeños círculos cerrados los cuales pegue en algunos puntos de la corona.
• Para finalizar tome un trozo de nylon y lo coloque en la parte de arriba de la estrella, para poder colgar el nacimiento en el sitio de mi preferencia.
De esta manera tenemos listo este pequeño nacimiento colgante para que adornes el espacio que más desees.


What did you think, did you like it?
I hope you did, I hope you liked my explanation, procedure and photos, I made them with love for you.
"Let out that muse that inspires you, and let your imagination fly".
Thank you all, see you next time 🎄🎅✨.
¿Que les pareció, les gustó?
Espero que sí, que les haya gustado mi explicación, procedimiento y fotos, los hice con mucho cariño por y para ustedes.
"Deja salir esa musa que te inspira, y deja volar tu imaginación".
Gracias a todos, nos vemos en la próxima.🎄🎅✨
Todas las fotos usadas en este post son de mi autoría y han sido sacadas en mi celular personal un Redmi 9T, editadas en InShot y Canva Banner y separador hecho por mí en Canva Traducido con la ayuda de DeepL

